Logs
Gainsight NXT
This article explains how admins can manually execute a job in Adoption Explorer, and the other available options in the Logs page.
This article is the seventh item in a series of Adoption Explorer configuration articles. Gainsight recommends you to refer to the initial articles of the series and then start with this article.
Overview
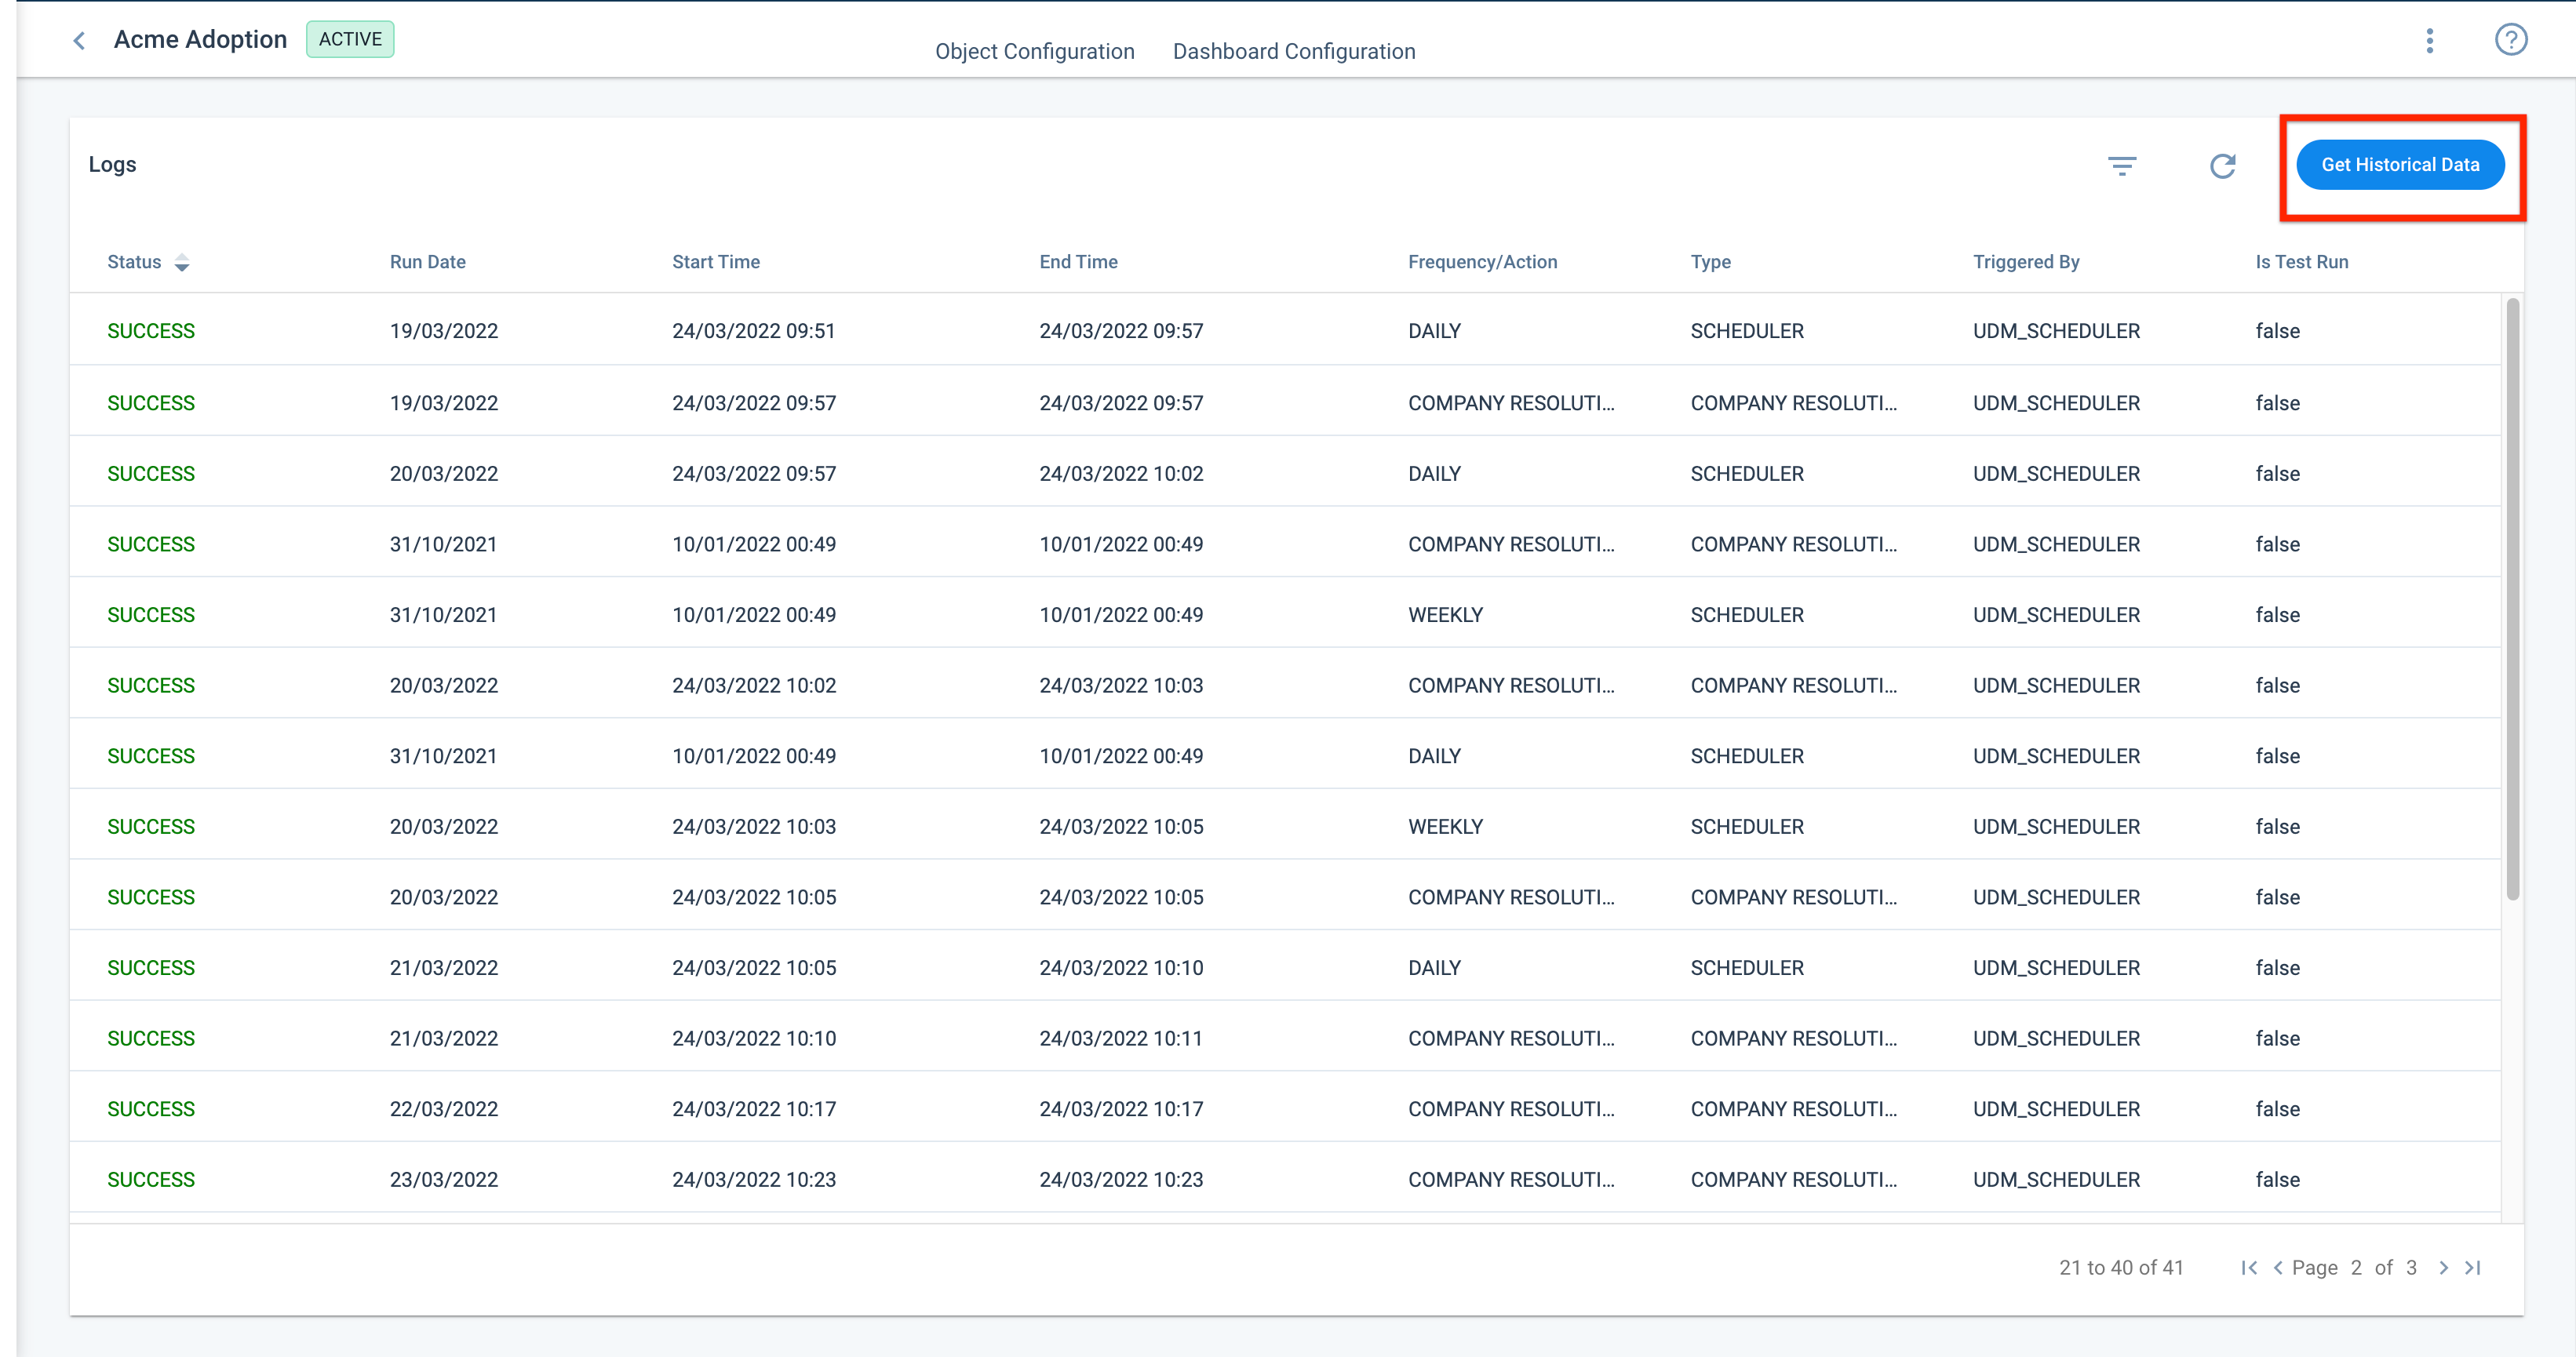
This article explains how admins can manually execute a job in Adoption Explorer, and the options in the Logs page. You can navigate to the Logs section in a project via Adoption Explorer > Administration. Hover to the required project and select View Logs from the three-vertical dots menu.
Prerequisite
To execute a job in an Adoption Explorer project, ensure that the status of the project you want to run is Active.
Options in Logs page
In the Logs page of a project, you can perform the following actions:
- Get Historical Data
- Refresh Logs
- View and manage logs
- Sorting and filtering
- Pagination tool
Get Historical Data
A project in Adoption Explorer can be scheduled automatically and manually. For more information on how to schedule a project to run automatically (either Daily/Weekly), refer to the Setup Source Connection article from the Additional Resources section of this article.
The Get Historical Data option allows you to execute a job manually to the source level and derived measure level and additionally also perform Test Run, which helps you validate if the settings and source connections are working correctly. Test Run does not load any data into the objects.
Note: To Run/Schedule a project in Adoption Explorer, ensure that the status of the project is Active.

You can use the Get Historical Data option for any of the following purposes:
- You can schedule a project on the historical data. For example, you can compare the Product Usage Data of the current year with the Previous Year and generate the report from the Previous Year. However, for historical data older than 45 days, the daily jobs are not executed, the application schedules weekly jobs only if the weekly sources are configured.
- You can run it on a selected source, instead of running the entire project. For example, you may want to run on a new source that is added to the existing project.
- You can also select a single source object and can run on the specifically selected derived measures. For example, you can run it on a new derived measure in the existing source.
To manually run the project:
- Navigate to Adoption Explorer > Administration.
- Click on the required project.
- Click the three-vertical dots icon on the top-right corner and select View Logs.
- In the Logs page, click Get Historical Data. The Get Historical Data slide-out panel appears.
- In the Get Historical Data from section, select the required source from the following, for which you want to view historical data:
Notes:
- If you want to run a job for a particular date, you can just enter the required date in the Start Date field, and can leave the End Date field blank.
- Daily jobs or Weekly jobs in a project are run based on the Run day.
- For example, if you set the Company Information to Weekly, and select a weekday (Ex: Dec 1st ‘18) to run the project, only the daily jobs of the project would run, and the weekly jobs of the project would not.
- However, if you select weekend (Ex: Dec 2nd ‘18) as the run day, then not only the daily jobs of Dec 2nd ‘18, but also weekly aggregation for the week ending Dec 2nd’18 would run. The Company Information object also functions in a similar manner.
- If the selected data sources in a project are configured with Google Analytics (GA), you will not be able to run a project for the previous 3 days, since data will not be available as the usage data from GA will be ingested into the Adoption Explorer objects in 72 hours.
- For example, for 15th Jan’18, you can run for 12th Jan’18 and for the days backdated from 12th Jan’18. For more information on schedule frequency, refer to the Schedule Frequency section from the Additional Resources section of this article.
All Objects
To fetch the historical data of all objects:
- In the Get Historical Data from section, select All Objects.
- Enter the required date range in the Start Date and End Date fields.
- In the Send Job Notifications to field, enter the email address(es) to which the job notification email should be sent.
- Select the Run Snapshot checkbox if you want to execute the snapshot field in historical jobs.
- Select the Test Run checkbox to test the job. Test Run allows you to check if all the settings, source connections, etc. are working correctly. Test Run does not load any data into the objects.
- Click Run to execute the job on the selected source.
Selective Objects
To fetch the historical data for a specific object:
- In the Get Historical Data from section, select Selective Objects.
- From the Object Name dropdown, select the required object.
- Choose whether you want to view historical data of Sources or Derived Fields.
- Based on the selection, choose the required Sources or Derived Fields from their respective dropdown.
- Enter the required date range in the Start Date and End Date fields.
- In the Send Job Notifications to field, enter the email address(es) to which the job notification email should be sent.
- Select the Test Run checkbox to test the job. Test Run allows you to check if all the settings, source connections, etc. are working correctly. Test Run does not load any data into the objects.
- Click Run to execute the job on the selected source.
Gainsight PX
The Gainsight PX option helps you trigger backfill/historical data from PX. For more information on how to trigger Backfill from Gainsight PX, refer to the Backfill Data when the PX Product Tree is Modified article from the Additional Resources section of this article.
Note: This feature can be used a maximum of four times a month.
To fetch the historical data from Gainsight PX:
- In the Get Historical Data from section, select Gainsight PX.
- Choose if you want to enter the number of days (Backfill Days), or specify a date range (Custom Date Range) to fetch data.
Note: A maximum of 180 days of historical data can be pulled into Gainsight CS.
- Backfill Days: Enter the number of days in the Backfill From field. The Start Date and End Date gets auto-filled based on the number of Backfill days.
- Custom Date Range: Enter the required date range in the Start Date and End Date fields.
- In the Send Job Notifications to field, enter the email address(es) to which the job notification email should be sent.
- Select whether the job must be run automatically or manually after the backfill is completed.
- Click Run to execute the job on the selected source.
Logs - List View
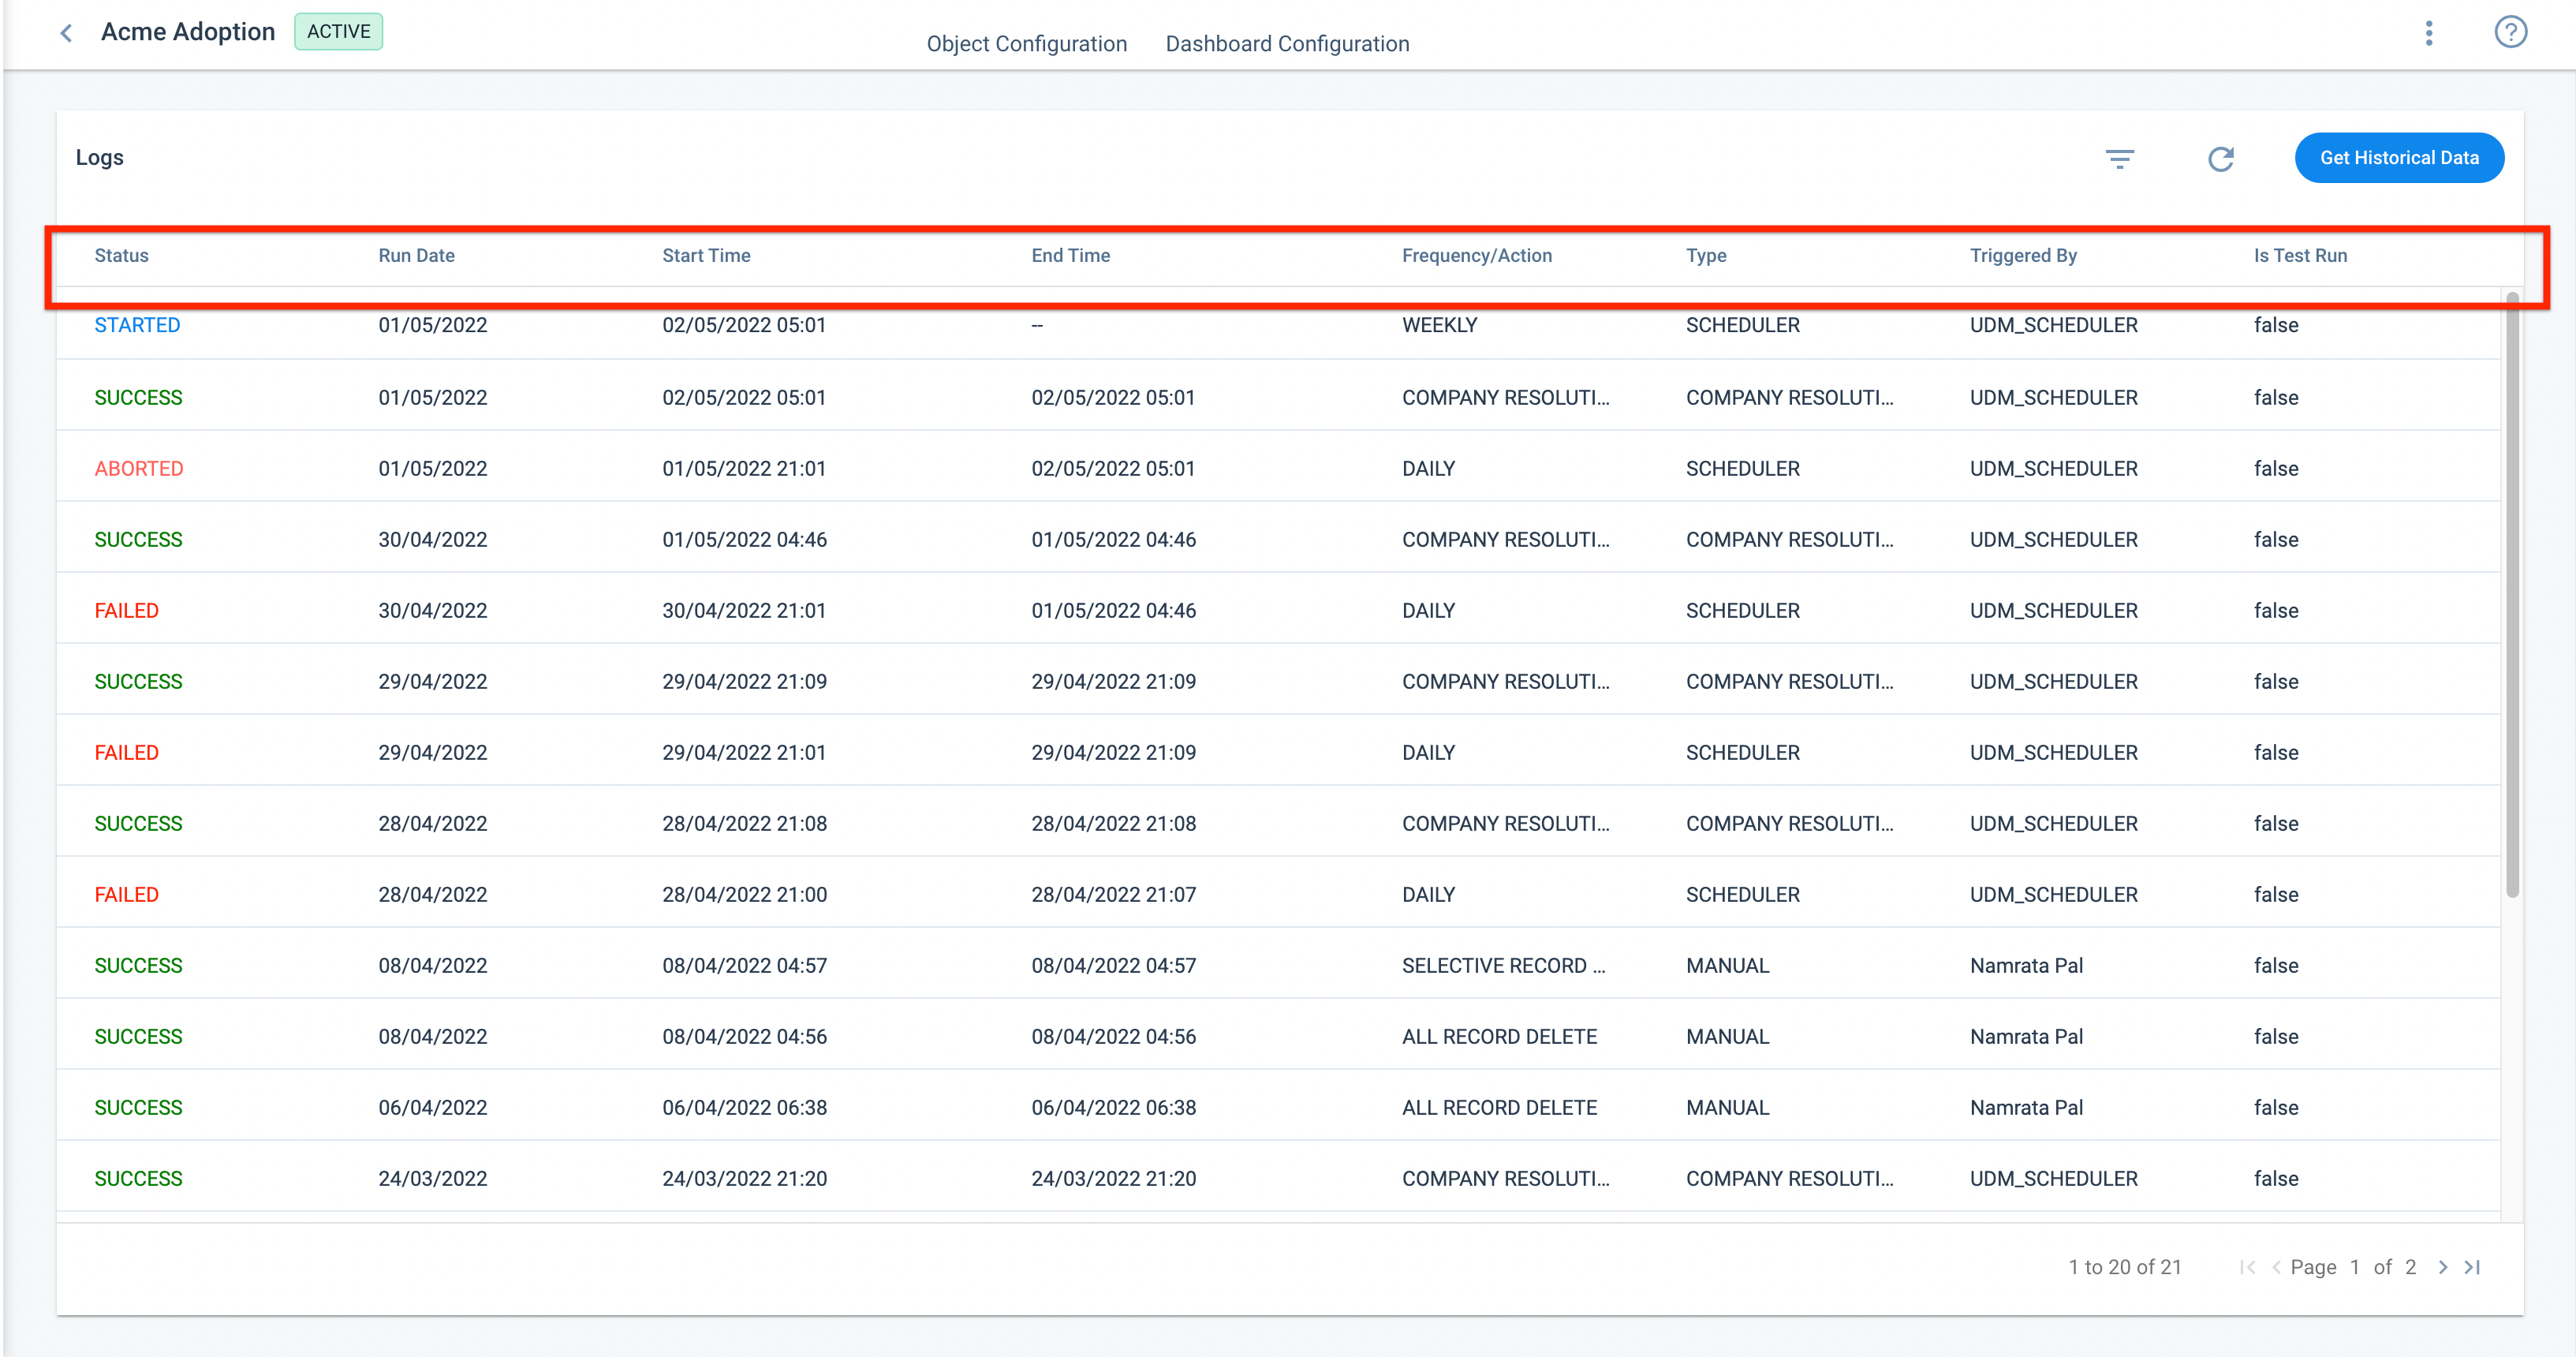
Once you run a job, the status of the job is shown in the first column of the Logs page. If a job was recently updated to run, we recommend you to click the Refresh Logs icon.
The Logs page displays the following information:
|
Status |
SCHEDULED |
There are other job executions in-progress. |
|
STARTED |
The job has started execution. |
|
|
SKIPPED |
Displayed when you execute a job older than 45 days. This means, daily jobs older than the last 45 days will not be executed, the system will schedule only weekly jobs for the skipped date range, only if the weekly sources are present. |
|
|
SUCCESS |
The job was successfully executed. |
|
|
PARTIAL SUCCESS |
There is invalid data in the source records. |
|
|
FAILURE |
The job failed to execute. |
|
|
ABORTED |
Displayed for jobs where the execution was stopped. To learn more about how to abort a job, refer to the Abort Job section of this article. |
|
|
Run Date |
Date at which the job is executed. If you have selected a Date Range from one week to another week, the Adoption Explorer will automatically run for all the weekly schedules in the project. |
|
|
Start Time |
Time at which the job execution starts. |
|
|
End Time |
Time at which the job execution ends. |
|
|
Frequency/Action |
Displays whether the job is run Daily or Weekly. |
|
|
Type |
The schedule type can either be SCHEDULER or MANUAL or TEST RUN. If the job execution is Automatic, you will see the type as SCHEDULER and if the execution is manual, you will see MANUAL or MANUAL, TEST (if you have selected the Test Run option in Run Now). |
|
|
Triggered By |
Indicates the user who ran the particular job. In case the job was manually triggered, this displays the user’s details. If the job was part of a scheduled run, it would display the scheduler’s name. |
|
|
Is Test Run |
Displays whether or not a test run was executed. |
|

View Job Details
To view the details of the job:
- Click a job from the Logs list view.
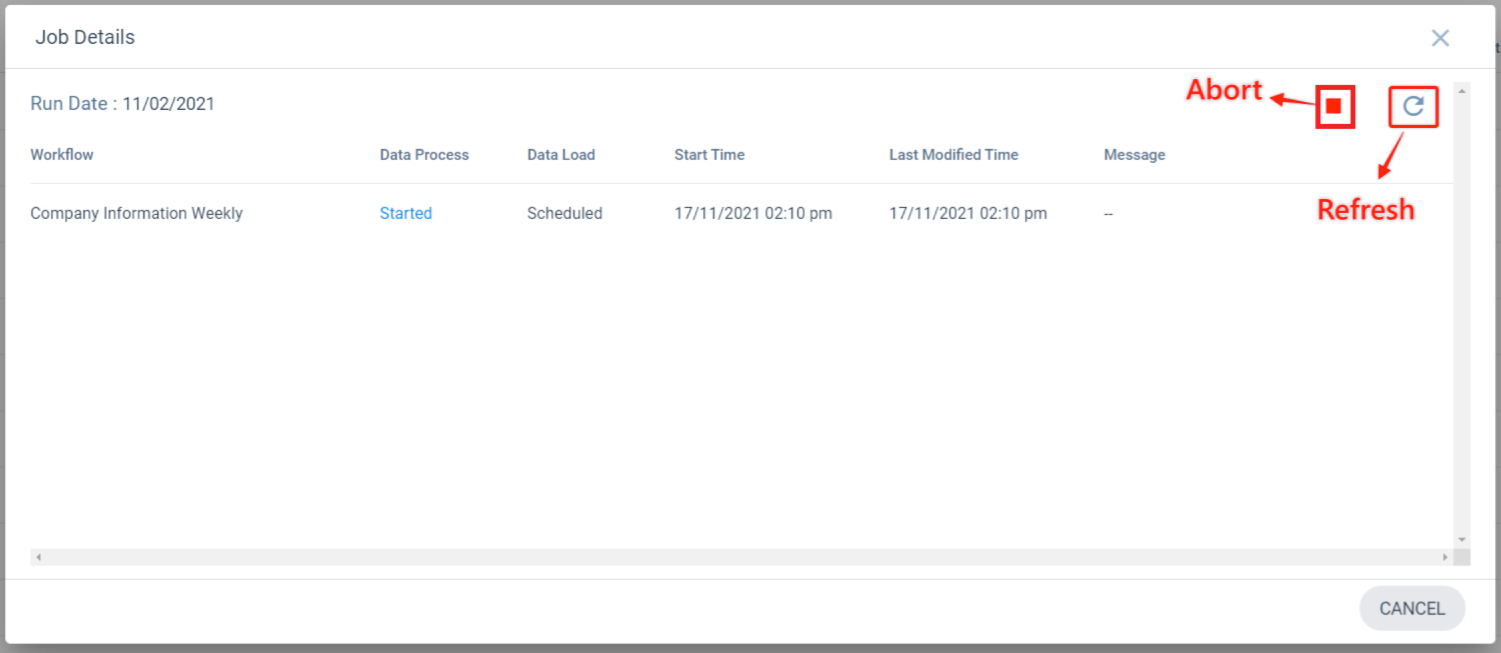
- In the Job Details window, click the workflow to see the list of objects/sources on which the job was run.
- Click the info icon for the object/derived field, to see the detailed information of the job.
- Data Process: This is the stage where the data from source files are picked, extracted for specific data, formats and are applied with the appropriate functions etc. Once the extraction and transformation begins, you will see the status as STARTED, and once the job is complete, you will see the status as SUCCESS.
- Data Load: This is the stage where the data extracted from the previous step is loaded into the Adoption Explorer objects. Until the extraction and transformation step is complete, you will see the status here as QUEUED, and once the data load begins, you will see the status as STARTED, and once the job is complete, you will see the status as SUCCESS.
Note: If the job is in progress, you can click the Refresh Job Details icon to refresh the job status.
Once the Data Process, and Data Load tasks are successful, you will see the options for previewing and downloading the data.
- Preview: Preview the results in a new window. You can see the number of records displayed on this page.
- Download: Download the results of the selected object/derived field.
If the execution of the Data Load task is Partially Success, you can Preview and/or Download the invalid reasons.
Abort Job
You can also abort a job when the job run is in progress using the Abort Job option on the Job Details popup. The Abort Job option is enabled for any job scheduled for a run. You can use this option when the job is initiated unintentionally or if the job is not configured as required.

Filters
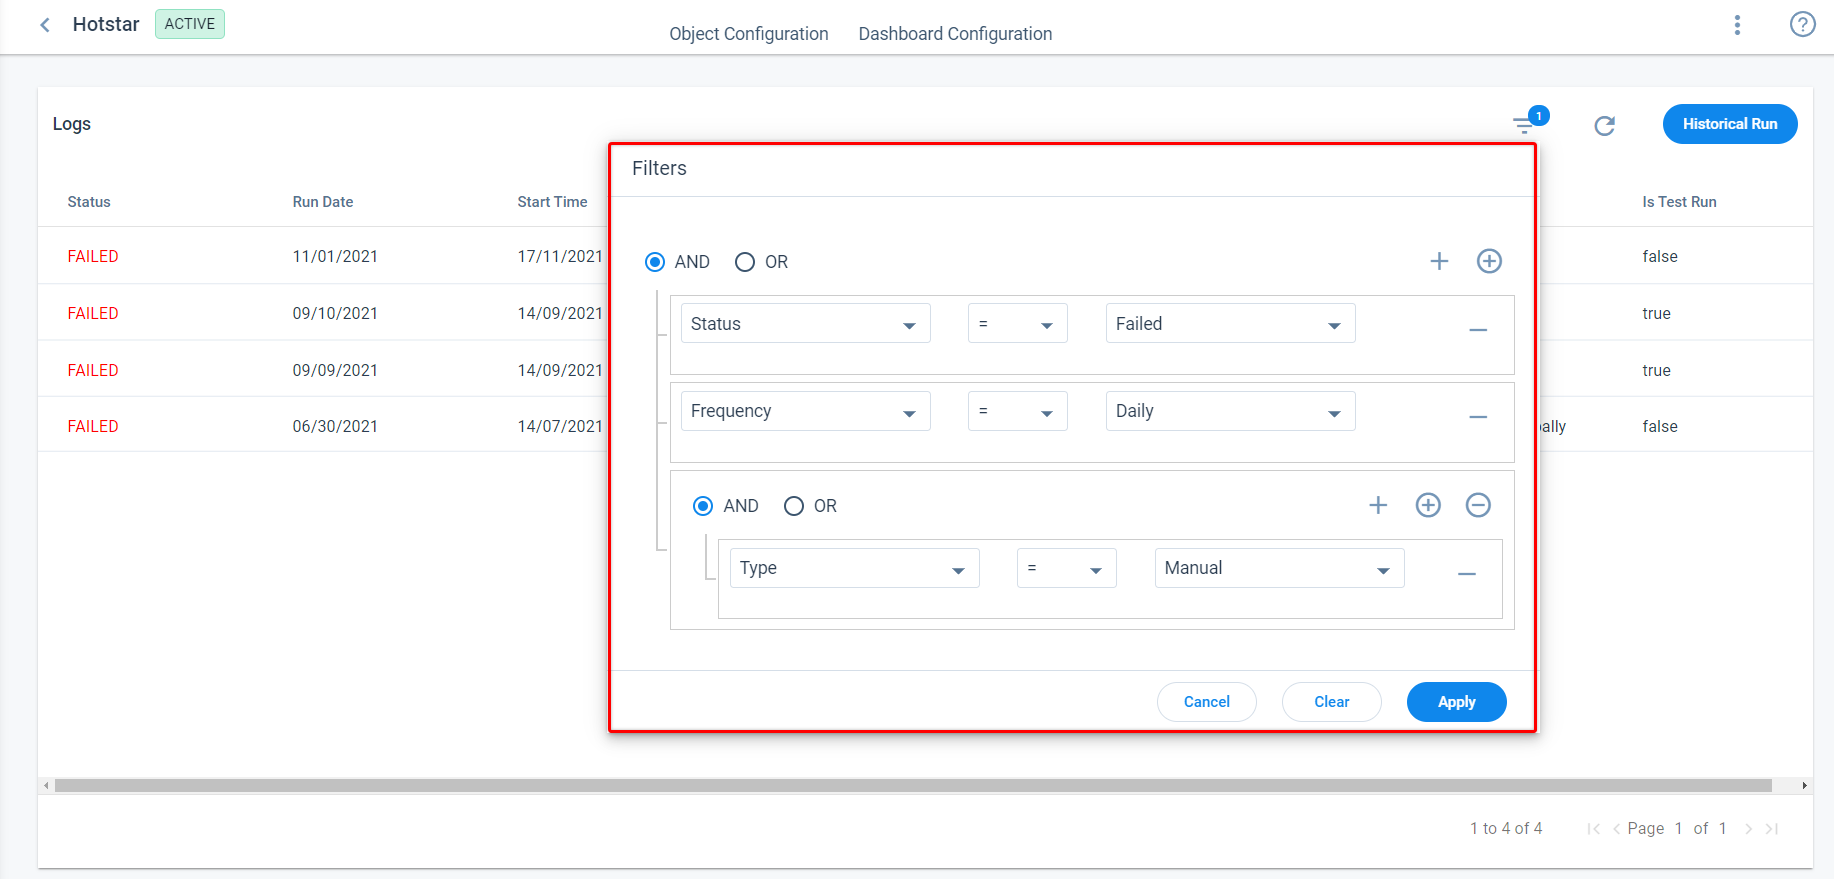
Filtering the logs helps you easily track and view the status of the job executions for a project. You can configure filters using the AND and OR logic by applying the appropriate operator and value combination for the fields.
You can filter the logs based on the following criteria:
- Status
- Run Date
- Start Time
- End Time
- Frequency
- Type

Pagination Tool
If you have run too many jobs, you can use the pagination tool to navigate through different pages and view multiple jobs based on your filter selection.
Fetch Adoption Explorer Logs Using REST APIs
Gainsight allows admins to fetch Adoption Explorer Project execution status, using Rest APIs. With the Adoption Explorer REST APIs, admins can access and check the status of the Project Logs from the external systems. These APIs allow admins to fetch the Project Log details upto Job and Sub Job levels. Admins can also fetch the data process/load information of a job, sub job and Company data resolution details with csv links.
Example Business Use Case: All the teams who benefit from accessing Adoption Explorer do not always use Gainsight. Such customers expect a better Gainsight integration with the systems of their choice. In such scenarios, Adoption ExplorerAPIs allow customers to access and check the job statuses from their external systems. Customers who have the development resources can use these APIs to build tighter and more customized integrations between Gainsight and other systems they use.
For more information on how to fetch AE Logs via APIs, refer to the Adoption Explorer APIs article from the Additional Resources section of this article.