Create and Manage a Learning Path
Northpass learning paths offer customized certification programs with courses, quizzes, Instructor-Led Trainings, and exams to enhance digital education. Integrating certificates motivates learners to achieve their educational goals.
Overview
A Learning Path is a curated lesson plan designed to guide users through a customized set of content. It streamlines the learning process by assigning a single path to a group or individual users, making it easier to manage and increase course completion rates. Additionally, you can use custom communications as a drip campaign to enhance engagement with the linked content.
Learning Paths
Access and visibility of Paths Tab for learners
Starting now, all Northpass customers have access to learning paths. However, we understand that creating a comprehensive program can take time. You might want to control when learners see the Paths tab in your academy. Go to the Learning Paths section in the admin panel and click the gear icon on the right side of the header. Toggle the setting to "no" to hide the Paths catalog for learners. When your content is ready, you can easily toggle the path visibility back to "yes".

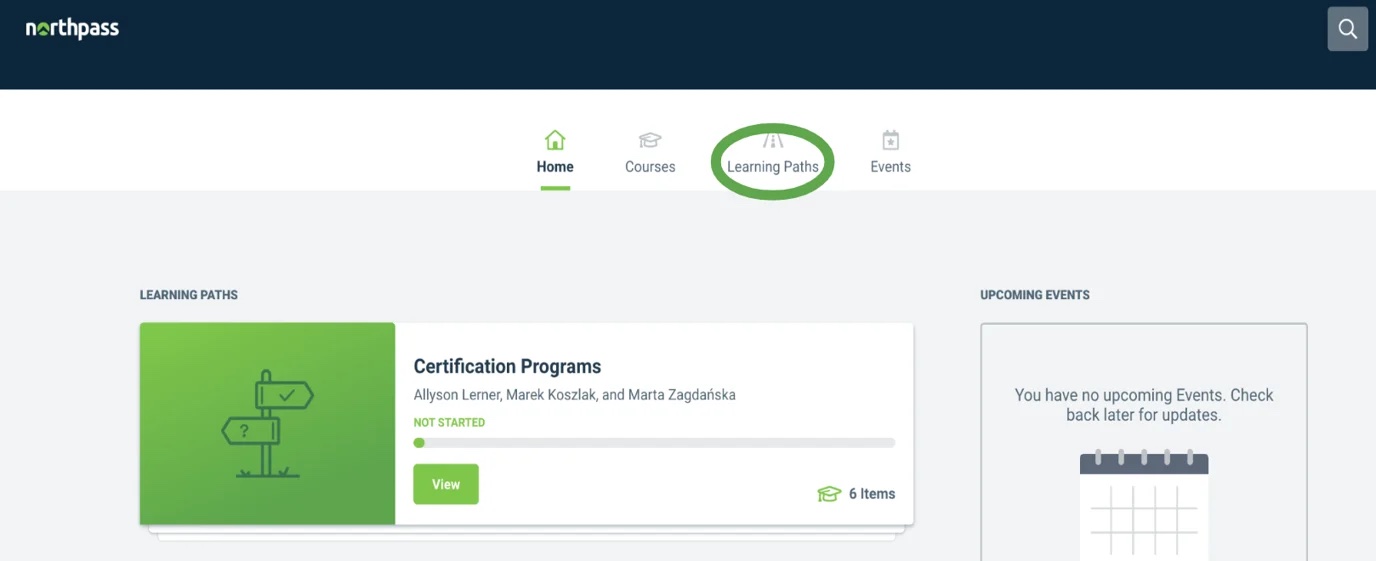
This is what an academy with the Learning Paths Tab enabled for learners looks like.

Here's an example from an academy with the Paths Catalog disabled.

Create a Learning Path
To create a learning path, go to the learning path page and click the "Create Learning Path" button. Name your learning path and confirm its creation.

Summary Tab
Add a Description and Cover Image
In the Summary tab, add a description of the learning path to inform learners about its content. Select a cover image that will help learners recognize the program quickly.

Structure Tab
Add Content
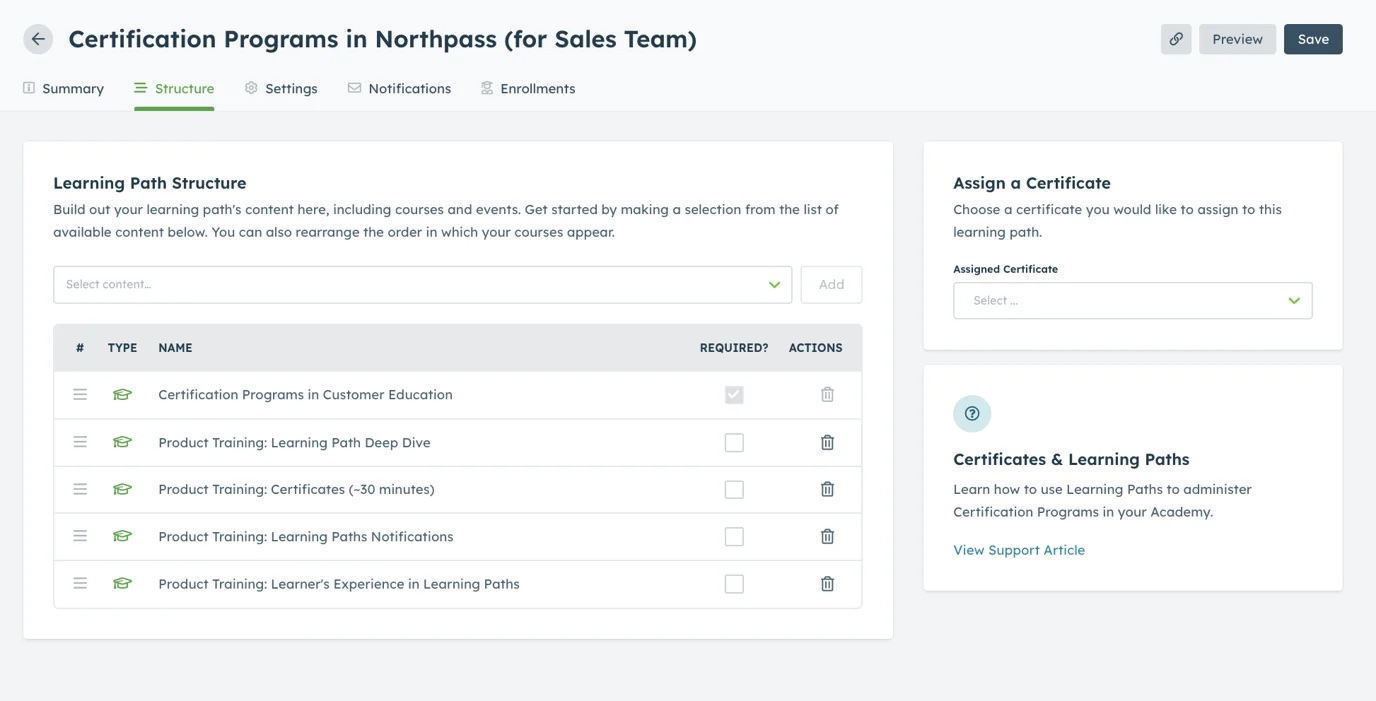
In the Structure tab, add courses and Instructor-Led Trainings to your program. Use drag and drop to set the right order of items in the learning path. By default, all items are set as required, but you can mark courses or Instructor-Led Trainings as optional. Use free-form learning paths in the Settings tab to build a collection of items that learners can access in any order they choose.

Note: Mark Instructor-Led Trainings as optional to avoid learners getting stuck. Instructor-Led Training attendance needs to be manually confirmed either by the admin or the learner.
Note: If you mark the item as optional, your learners will not see the progress (even though they completed the course or Instructor-Led Training). Our Platform treats optional items as a non-mandatory Path that your learners may or may not take.
Manage path content over time
Once learners are enrolled in a path, any content changes will be seamlessly reflected. If the path has already been completed, learners will receive a notification encouraging them to explore the new content when they revisit the learning path. For paths that are still in progress, learners will see the new, uncompleted content right on the cover page. To learn more about the learners' experience with paths, check out this article.
Assign the certificate to a learning path
Head to the learning structure tab and choose the certificate that will be associated with the learning path. Once learners successfully complete the path, this certificate will be issued to them. It's as simple as that!
Tip: By incorporating certificates into your learning paths, you can inspire and motivate your learners to keep progressing and achieve their goals. Don't underestimate the power of recognition and rewards in driving engagement and success! Read more about Northpass certificate engine.
Settings Tab
Set Navigation
In the Settings tab, choose between linear and free-form learning paths. Linear learning paths allow you to fully control the order of content being consumed by learners, while freeform learning paths enable learners to navigate between items in any order they choose.


Set enrollments rules
In the "Who Can Enroll?" section of the Settings tab, choose whether learners can self-enroll or must be assigned by an admin. You can even limit self-enrollment to specific learners if necessary. By enabling the self-enroll option, you make the learning path visible and accessible to all learners in the academy.
Add Categories and Instructors
Organize your learning paths by assigning categories to make it easier for learners to find relevant content quickly. Northpass categories are explained here. Instructors can also be assigned and will show up on the learning path cover page.
Notifications Tab
Create a new notification for your learning path
Head over to the learning path for which you schedule notification. Select the Notification tab and click the Create Notification button. Give your notification a unique name and schedule it to be sent after enrollment or completion.

Schedule notification to be sent
Set the timing for any number of minutes, hours, or days. Make sure to include a welcoming title and a proper salutation to your email. Then craft your message content to engage and motivate learners. Make sure to toggle the message status "on" if you want learners to receive the email.
.jpg?revision=1)
Manage existing notifications
The Notifications tab in the learning path section gives you an overview of all the notifications you've created for the given program. Easily edit existing notifications by clicking on the pencil icon.
Tip: Send enrollment reminder notifications for your Learning Paths. Create a new notification and schedule it to be sent a few days after assigning learners to your education program. This simple step will keep learners engaged.
Customize a template for learning path notification
In the Communications tab, under the Administer section, you can customize the learning path notification template. Simply edit the Custom Learning Path Notification to create attractive and engaging emails related to paths. Additionally, use the Content tab to customize columns, headings, fonts, buttons, and even include images or graphics for a personalized learning experience.
Note: Please be aware that the customization capability of the base template in Communications varies depending on your feature package.
Tip: When customizing the learning path notification template, customers can now include a call-to-action button to direct learners to the appropriate path. This CTA is include in the Default Template. If a customer doesn't see the CTA, they can either restore the default template, or insert their own custom button with the liquid variable as the URL.
Enrollments Tab
Enroll Learners or Groups
Navigate to Enrollments Tab to assign individual learners or entire groups to or learning paths. In just one step, you have the control to determine who gains access to specific content. Read more about enrollments tab.
Check individual learner progress
Navigate to the learning path enrollments and use the search function to find a specific learner. Check their progress towards completing the content, including the date they enrolled, their last activity, and progress data. If needed, reach out to the learner for support.
Note: Learning paths enrollment tab has now replaced the Dashboard in the Analytics section.