Import Historical Enrollment Data into Salesforce
This article provides Customer Education admins with instructions for exporting and importing historical enrollment data between Gainsight Customer Education (CE) and Salesforce.
Overview
By default, the Gainsight Customer Education (CE)–Salesforce integration only syncs enrollment data generated after installation. You can export and manually import historical data if needed. This process is optional and does not affect ongoing data sync behavior.
IMPORTANT: Enrollment records are linked to contacts by email address. During import, Salesforce attempts to match each enrollment to an existing Contact using the learner’s email.
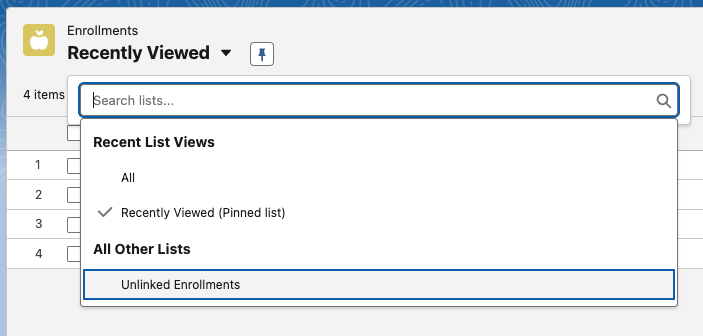
If no matching contact is found, the enrollment record is still created in Salesforce as an Unlinked Enrollment. This behavior is expected and does not indicate an import failure.
You can view these records using the Unlinked Enrollments list view on the Enrollments object:
To include historical enrollment data in Salesforce, start by exporting it from Gainsight Customer Education (CE).
Export Historical Enrollment Data from Gainsight CE
To export historical enrolmment data:
- Log in to https://app.northpass.com/login as Customer Education administrator.
- Click the Apps tab and select Integrations.
- Select Salesforce from the list.
- Scroll down to Data Export and click Email CSV.
If successful, you receive an email at the address associated with your account containing a link to download a ZIP file. The ZIP file includes a CSV containing all historical enrollment data. This CSV is used during the Salesforce import process.

Import Historical Enrollment Data into Salesforce
You can import the exported CSV file into Salesforce using either of the following tools:
- Data Import Wizard (supports up to 50,000 records per import)
- Data Loader (recommended for larger datasets)
Split the CSV file into smaller chunks or use Salesforce’s Data Loader.
To import using the Data Import Wizard, choose one of the following methods to open it:
- Option 1: In the Salesforce Setup, search for and select Data Import Wizard in the Quick Find Box
- Option 2: In the Enrollments tab list view, click Import
After accessing the Data Import Wizard, complete the import by following these steps:
- Click the Launch Wizard button.
- Select the Custom Objects tab and click the Enrollments custom object.
- Choose Add new and update existing records.
- For Match by field, select External id (External ID)..
- Click CSV, then click Choose File, select the CSV file, and click Next.
Note: The CSV file used here should be the CSV obtained from your data export. - Ensure field mapping is accurate:
- Column headers in the CSV must exactly match the field names in Salesforce for automatic mapping.
- If they do not match, you must map fields manually.
- Click Next.
- Click Start Import.
After the import completes, Salesforce displays the number of records created or updated.