Archived Cockpit List View
Cockpit [old version] documents will be archived soon...Documents related to the old Cockpit feature will be archived soon and will no longer be available as all the customers now have Cockpit Horizon Experience in their orgs. Learn about the improved version of Cockpit on Horizon Experience through documents which can be accessed from here.
Gainsight NXT
Overview
This article explains you about the Cockpit List view and the various elements present on the list view.
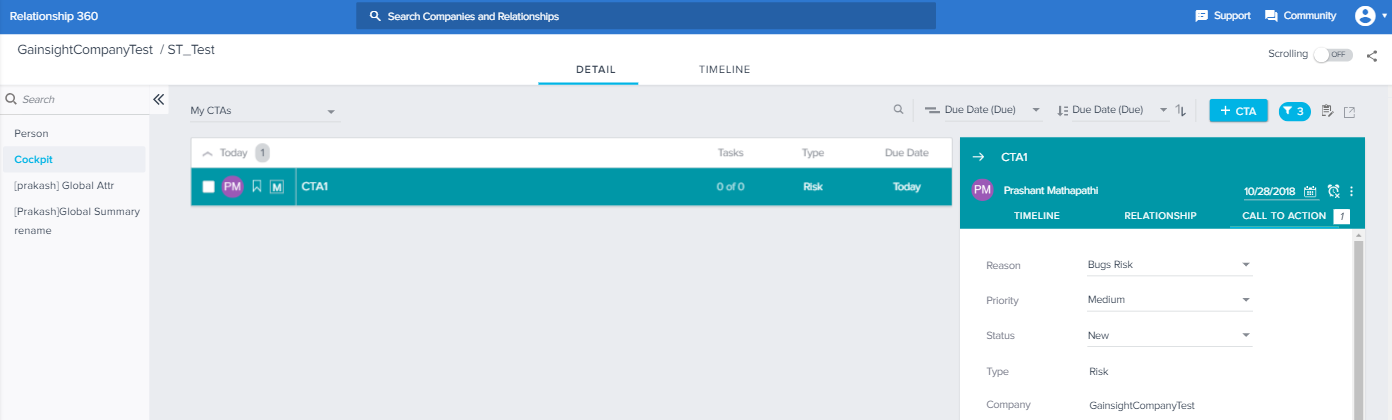
When you navigate to Cockpit from the left pane, you can see the list of CTAs. This is CTA List view. The List view provides the primary workspace for CSMs to manage their Calls to Action (CTAs) and Tasks. Alternatively, if Cockpit is configured as a separate section in C360, CSMs can work on individual customer's CTAs and tasks there.
Cockpit Display Options
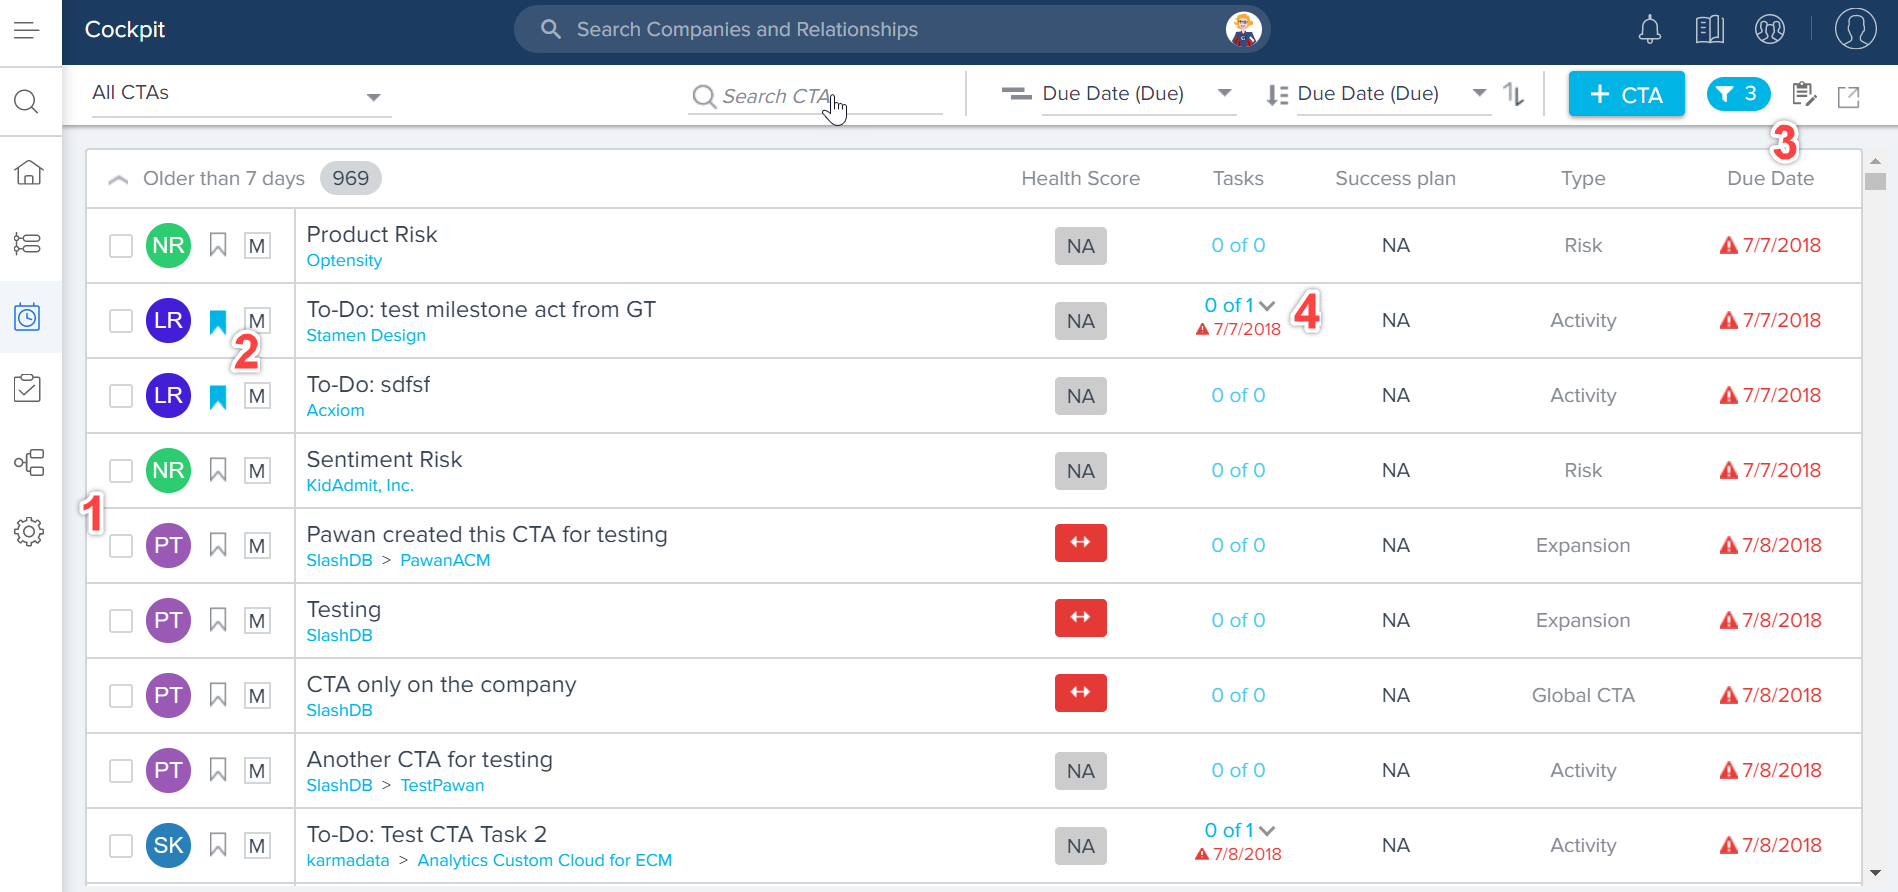
Cockpit List view provides you with drop-down menus, search boxes, filtering options and other useful tools. You can use these options to view only a specific list of CTAs, group and sort the CTAs, create new CTAs, export CTAs and so on.

The options present in Cockpit List view are:
- CTA Views (drop-down menu)
- Search CTA (search bar)
- Group by (drop-down menu)
- Sort by (drop-down menu)
- Add CTA (button)
- Filters (button)
- Activity drafts (drop-down menu)
- Export CTAs option (drop-down menu)
CTA Views
You can use this option to view only a particular set of CTAs. This option provides you with three default views. The CTAs are displayed based on the view selected. The available views are:
- All CTAs: Consists of all CTAs.
- My CTAs: Consists of CTAs assigned to the logged in user.
- Closed CTAs: Consists of CTAs whose Status is Closed.
Note: Admins can make changes to these default views. These views are also listed in the Custom Views section in the Call To Action (CTA) page. For more information, refer to the Edit Default Cockpit Views article.
- Custom: When you apply Filters and/or add columns, you see the Custom view, customized as per the filters applied and columns selected.
Note: Admin configured Custom Views are also displayed in the CTA views list in the Cockpit page for CSMs. For more information on how Admin can configure custom views, refer to the Custom Views article.
Search CTA
You can use the Search CTA search box to quickly find the required CTA. You can type the name of the CTA or Company name in the search box. All CTAs matching your name are displayed.
Note: It is recommended that you set the View to All CTAs before using this option.
Group By
Options include:
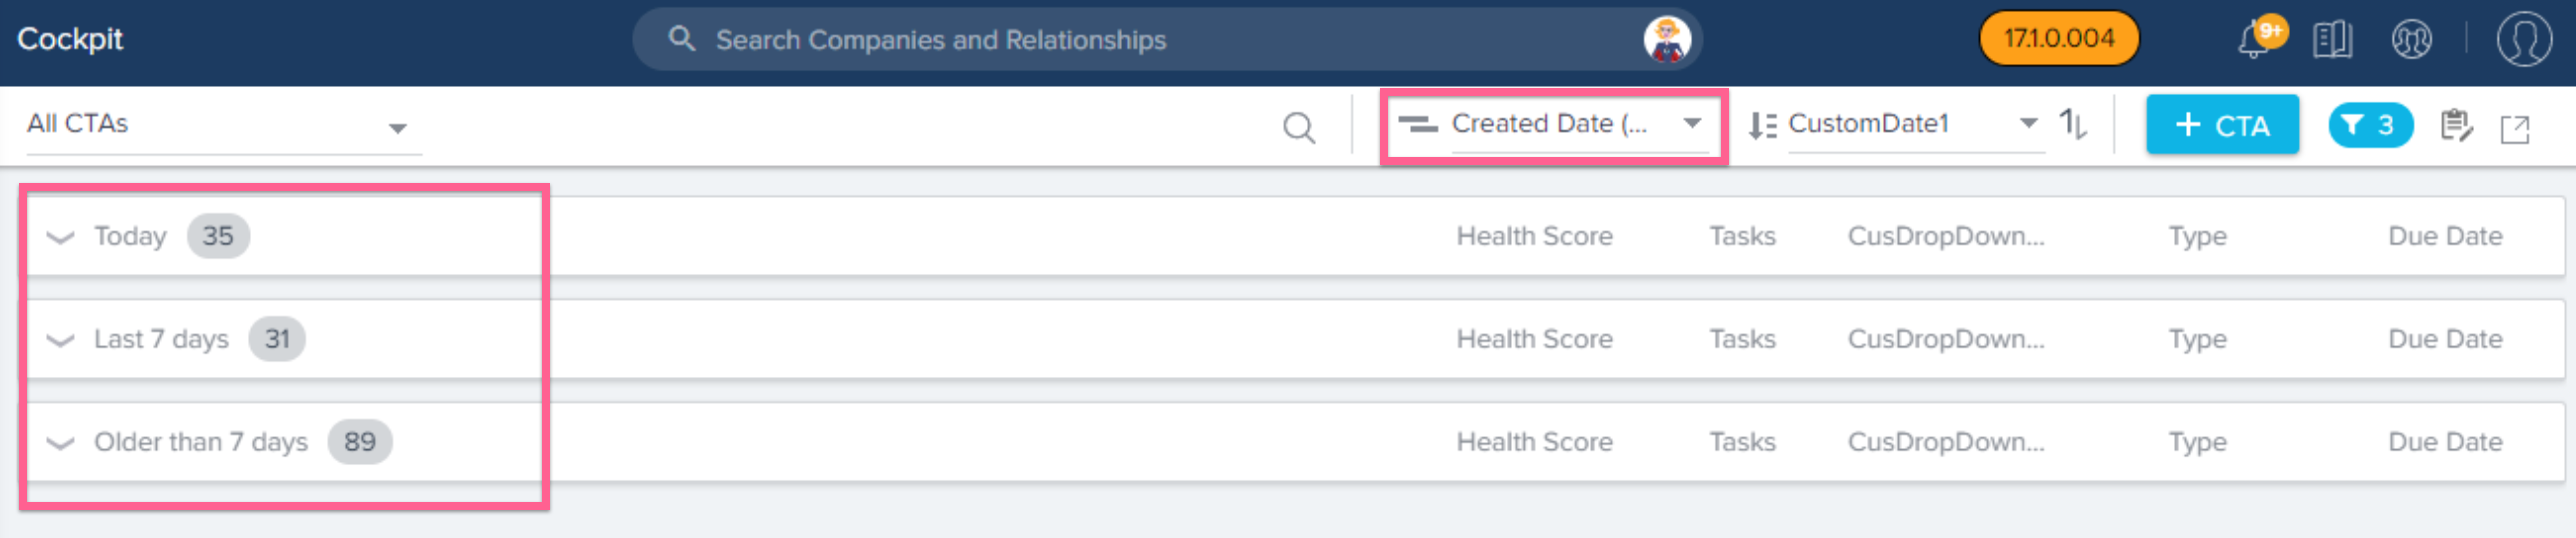
- Created Date (New): This option allows you to Group CTAs under three categories, based on the dates on which they were created. The categories are:
- Today: This category contains list of CTAs which were created today.
- Last 7 Days: This category contains list of CTAs which were created from past week, considering yesterday as start of week. For instance, consider today’s date to be 30 July. This list contains CTAs created from 29 July to 23 July.
- Older than 7 days: This category contains list of CTAs which were created more than 7 days ago. For instance, consider today’s date to be 30 July. This list contains CTAs created on 22 July and prior to it.
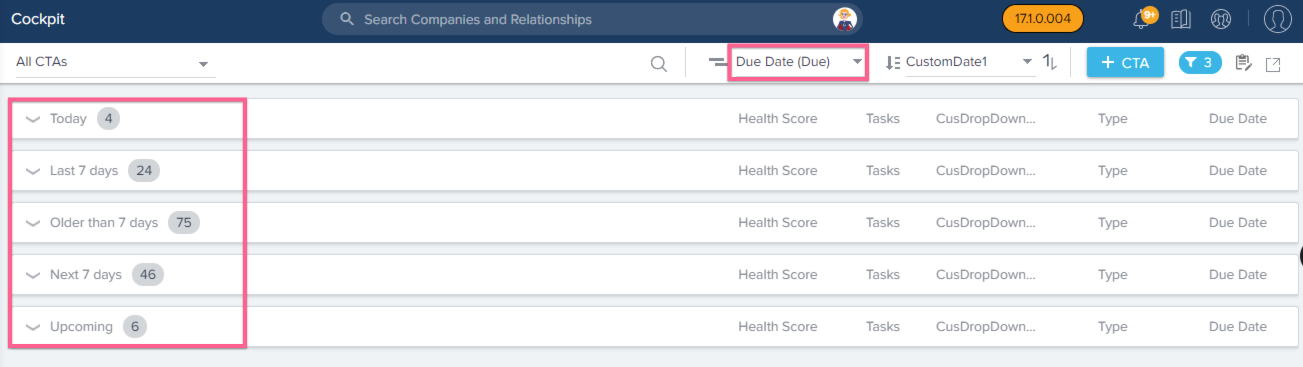
- Due Date (Due): This option allows you to Group CTAs under four categories, based on the due dates. The categories are:
- Today: This category contains list of CTAs which are due today.
- Last 7 Days: This category contains list of CTAs which had a due date in the past week, considering yesterday as start of week. For instance, consider today’s date to be 30 July. This list contains CTAs with due dates from 29 July to 23 July.
- Older than 7 days: This category contains list of CTAs which had a due date prior to the past week. For instance, consider today’s date to be 30 July. This list contains CTAs whose due date was on 22 July and prior to it.
- Next 7 days: This category contains list of CTAs which had a due date for the next week, considering tomorrow as start of week.
- Upcoming: This category contains list of CTAs which are future due.
Notes:
- CTAs which are overdue (older than 7 days or last 7 days) tasks will show up in the overdue group even if the CTA itself is not overdue.
- When grouped by Due Date, closed CTAs are not displayed even though they are filtered.
- Company: This option groups the CTAs based on the company for which they have been created.
- Type: This option groups CTAs based on their types. The categories for this option are based on the CTA types available in your organization.
- Status: This option groups CTAs based on their Status. The categories for this option are based on the CTA Status available in your organization.
- Priority: This option groups CTAs based on their priorities. The categories for this options are based on the CTA priorities available in your organization.
- Reason: This option groups CTAs based on the reason for which they were created.
- Source: This option groups CTAs based on the source of their creation. The available categories are Rules, Manual, and Journey Orchestrator.
- Relationship: This option allows for CTAs with the same Relationship type to be grouped together. You can use this option when you have CTAs created or triggered for Relationships.
- All: This option shows all CTAs. When you use this option, all the CTAs are displayed without any grouping. The CTAs are displayed based on the option selected in the Sort By field.
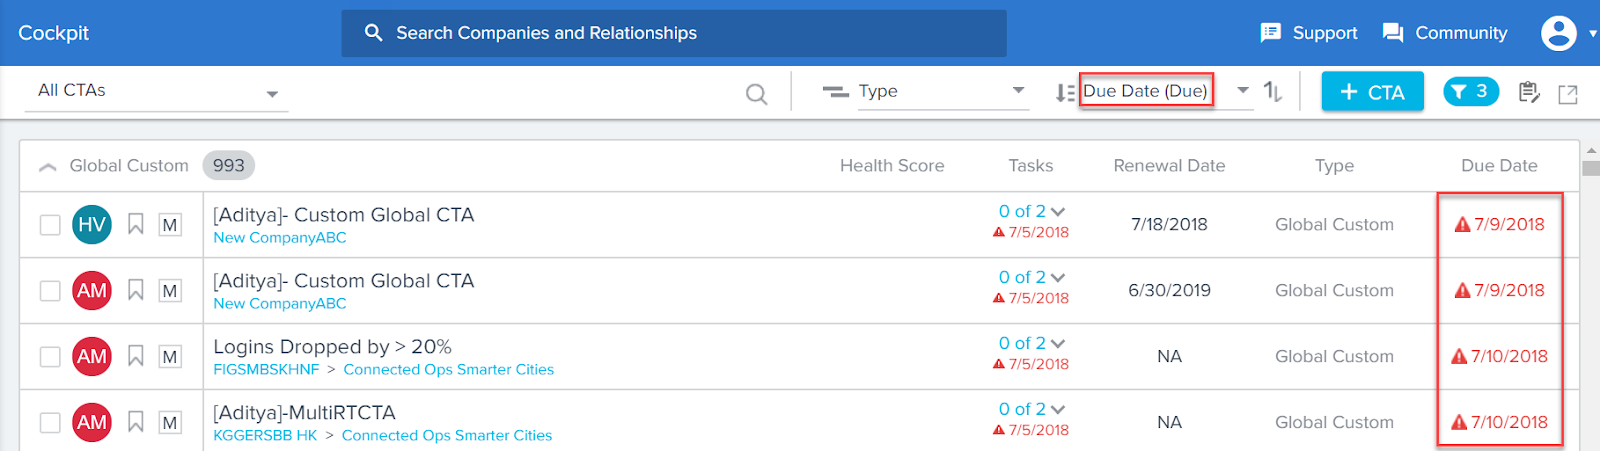
Sort By
This option arranges CTAs based on the factor selected. You can arrange CTAs based on five factors. They are:
- Due Date (Due): This factor sorts CTAs in order of increasing due dates.
- Age: This factor sorts CTAs in order of their creation. CTAs created today appear on top, followed by CTAs created yesterday and so on.
- Priority: This factor sorts CTAs based on their Priority field’s values.
- Name: This factor sorts their CTAs by the Name of the CTA. If required, CSMs can modify the order from ascending to descending.
- Company: This factor sorts CTAs based on the company for which the CTA was created.
- Renewal Date: This factor sorts CTAs based on the renewal dates of the companies for which the CTA was created.
Notes:
- Health Score is displayed only when Scorecards is enabled.
- Fields configured for list view configuration are displayed here.
Add CTA
This option (button) allows you to create a CTA, manually. Manually created CTAs are grouped under the Manual category, when you apply the Source option in the Group by field. To learn more about adding CTAs manually, refer to the Create Manual Calls to Action (CTAs) & Tasks article.
Filters and List View Columns
Click the Filter icon on the right. You can see two tabs:
- Filters
- Columns
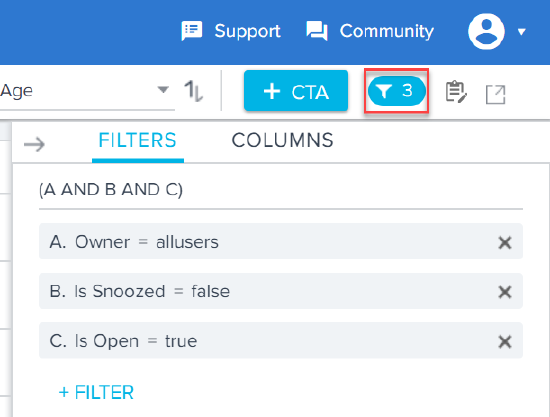
FILTERS
Filters allow you to filter CTAs based on your requirement. You can view only those CTAs specific to your current requirements. By default three filters are applied. They are:
- Owner: This filter is set to logged in user by default. As a result, you can view CTAs which are assigned to the logged in user. You can change it to All Users or Other User.
- Is Snoozed: This filter is set to false by default. As a result, you cannot view the snoozed CTAs. You can set this filter to True to view the Snoozed CTAs.
- Is Open: This filter is set to true by default. As a result, you can see only Open CTAs. You can set it to False to view the Closed CTAs.
To remove an existing filter, click the corresponding X symbol.
To add more filters:
- Click + Filter.
- Select the required field in the Select a Field field.
- Select the required operator in the second field.
- Type/select an acceptable value in the third field.
- Click APPLY, to view the filtered list of CTAs. This view is not saved. It loses its scope once the session is over. To save the filtered view, click SAVE AS NEW. You can provide a name to the view.
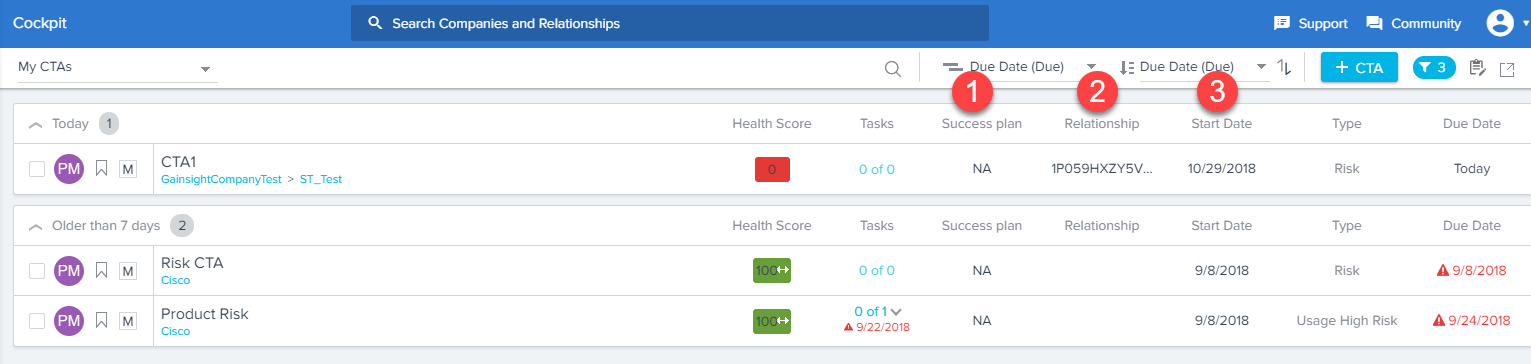
Add Additional Fields to Cockpit List view
You can add additional fields to the Cockpit List view from the List View Field Configuration section, in the Administration > Call To Action (CTA) page. You can add up to six additional fields which can be viewed from the Cockpit List view. To learn more about adding fields as Columns, refer to the Create Custom Views in Cockpit article.
Note: Even if you add six fields to be viewed, the number of fields displayed in the Cockpit Listview depends on your browser resolution. Click Browser Resolutions to learn how the view varies based on various browser resolutions.
Activity Drafts
This option shows all the activity drafts which were started but not logged in CTA detail view > Timeline tab. Users can open an activity draft, edit, and log into CTA detail view > Timeline from here. When you hover on a draft activity, you can see the edit and delete icons for that activity. Use the edit button to edit the draft activity and the delete button to delete the activity.
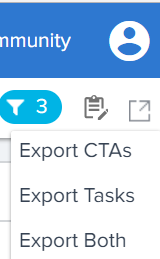
Export
Click the export icon in the far right to:
- Export CTAs
- Export Tasks
- Export Both
When you export the CTAs, all the CTAs displayed after applying filter are exported. The CTAs which were not included in the Cockpit List view due to not matching filter criteria, are not exported. To export all the CTAs, do not apply any filter. Files will be exported as comma separated values (.csv). When the export is completed, the logged in user receives an email. The CSV file is present as an attachment in this email.
Additional List View Options
From the Cockpit list view, you can also:
- Select the Mark with Default Closed Status Check box, for a CTA or its associated tasks, to mark them as closed.
- Click the Important flag to mark CTA as important items. Important flags are marked in blue.
- See which CTAs are overdue. If the CTA is not overdue, but an associated task is, there will be a special icon to show that the CTA is trending toward overdue.
- Click the # of Tasks to see associated tasks and mark tasks as complete. If you click on a task name, you will see task detail view.
Task Syncing
Gainsight NXT in Salesforce CRMContent in this section supports Gainsight NXT accessing through Salesforce Login. To learn more about Gainsight NXT in Salesforce, click here.
- Click here to expand for more information on how to manually sync tasks to Salesforce
- Users can manually sync tasks to Salesforce using the Sync to Salesforce option in Cockpit. Navigate to Cockpit > List View and expand the task list for a CTA. You can click the Sync to Salesforce or Desync from Salesforce option as needed for individual tasks.
Browser Resolutions
The number of columns you see in the Cockpit, C360 /R360 > Cockpit list view varies according to your browser resolution.
When your browser resolution criteria matches with the number of columns added, you can see all the columns in the Cockpit list view. When your browser resolution criteria doesn’t match with the number of columns added, the columns added first will appear in the Cockpit list view.
Resolution Criteria for Cockpit list view
Listed below are the browser resolutions required for List View Columns in Cockpit tab.
| Resolution | List Columns | List Columns (When a CTA detail view is open) |
|---|---|---|
| 1024 & 1260 (iPads) | 1 | 0 |
| 1261-1439 | 1 | 0 |
| 1440-1500 | 2 | 0 |
| 1501-1599 | 2 | 0 |
| 1600-1799 | 3 | 1 |
| 1800-1919 | 4 | 1 |
| 1920 | 5 | 2 |
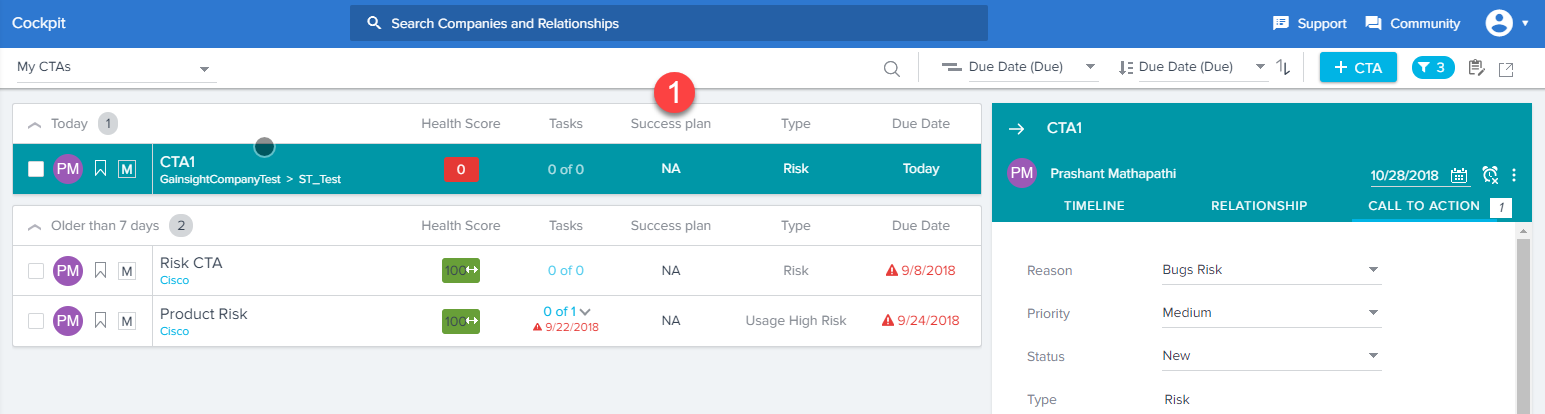
For example, if you have added 6 additional fields in the List View Field Configuration section and your browser resolution is 1600, you can only see 3 off the 6 fields in the Cockpit List view, and 1 of the 6 fields when a CTA detail view is open.
Resolution Criteria for C360 and R360 > Cockpit list view
Listed below are the browser resolutions required for List View Columns in C360 and R360 > Cockpit pages.
| Resolution | List Columns | List Columns (When a CTA detail view is open) |
|---|---|---|
| 1024 & 1260 (iPads) | 1 | 0 |
| 1261-1439 | 1 | 0 |
| 1440-1500 | 2 | 0 |
| 1501-1599 | 2 | 0 |
| 1600-1799 | 3 | 0 |
| 1800-1919 | 4 | 0 |
| 1920 | 5 | 0 |
For example, if you have added 6 additional fields in the List View Field Configuration section and your browser resolution is 1920, you can only see 5 off the 6 fields in the Cockpit section of C360/R360 page, and none of the 6 fields when a CTA detail view is open in C360/R360.