Microsoft Team Meetings Transcripts
This article helps admins how to integrate Microsoft Teams with Staircase AI to capture and analyze transcripts from customer-facing meetings.
Overview
Integrating Microsoft Teams with Staircase AI enables automatic synchronization of your meeting transcripts for powerful analysis and summarization. This integration lets you harness AI-driven insights from your recorded and transcripted Microsoft Teams calls, turning conversations into actionable summaries, revealing sentiment indicators, and surfacing key discussion points.
Prerequisites
Before configuring the integration, ensure:
- You are a Staircase AI admin.
- You are a Microsoft Workspace admin.
Configure Microsoft Teams Integration
Follow these steps to configure the Microsoft Teams integration:
- Log in to Staircase.ai.
- Navigate to Settings > Integrations and select the Microsoft Teams card.
- Click Connect. The Microsoft authorization screen appears.
Note: Only Microsoft Admins can authorize this integration.

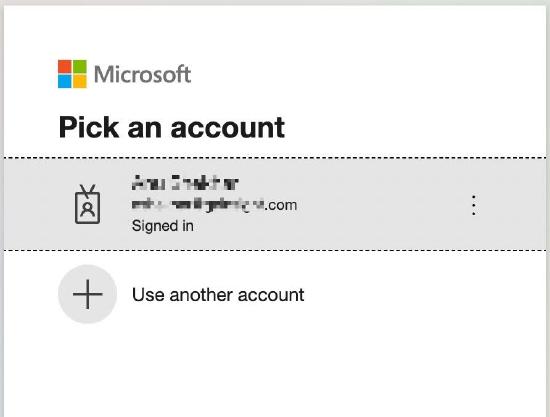
- Pick one of given Microsoft accounts or use another account on the Microsoft login page.
- Review the list of permissions and click Accept. You are redirected to Staircase AI.
Note: Staircase AI for MS Teams asks for the following permissions, as also shown in the image below:- Sign in and read user profile
- Read online meeting artifacts
- Read online meeting details
- Read all transcripts of online meetings
- Read all users’ full profiles

- Copy the application ID from the card. In addition to the permissions granted above, the admin should create and configure a new application access policy using the PowerShell scripts. For more information on how to install the PowerShell on Windows, Linux, and macOS, refer to the instructions here.
- Install the required Microsoft Teams module. For more information on how to install the Microsoft Teams module, refer to the instructions here.
- Create a new application access policy. For more information on how to create a new application access policy, refer to the instructions here.
Example: New-CsApplicationAccessPolicy -Identity {IDENTITY} -AppIds "{APP_ID}" -Description "{DESCRIPTION}"- IDENTITY. Unique identifier assigned to the policy when it was created. E.g. Staircase-AI-for-Teams.
- APP_ID. A list of application (client) IDs. Use the application ID you copied from the MS Teams integration card.
- DESCRIPTION. Specifies the description of the policy. Example. App access policy for Staircase AI for Teams.
- Grant the policy to users. For more information on how to grant policy to users, refer to the instructions here. To grant permissions, assign the application access policy you created.
Note: The recommended approach is to assign the policy to a security group or Microsoft 365 group. This lets you manage access centrally by adding or removing users from the group, instead of assigning policies individually. Add users who require guaranteed access to meetings—such as meeting organizers—to this group.
Assigning Policy to a Group (Recommended Method):
Use the New-CsGroupPolicyAssignment cmdlet in PowerShell. Make sure you have the Object ID of the group you want to target.
PowerShell:
New-CsGroupPolicyAssignment -GroupId {GROUP_ID} -PolicyType ApplicationAccessPolicy -PolicyName {POLICY_NAME}
- -GroupId {GROUP_ID}: Replace {GROUP_ID} with the Object ID of the Azure AD group (Security Group, Microsoft 365 Group, or Distribution List) that should receive the policy.
- -PolicyType ApplicationAccessPolicy: Specifies the type of policy being assigned.
- -PolicyName {POLICY_NAME}: Replace {POLICY_NAME} with the name of the policy you created (e.g., Staircase-AI-for-Teams).
Users must be direct members of the assigned group. Nested or child groups are not supported for Teams policy assignment.
For more details, refer to the New-CsGroupPolicyAssignment documentation.
Assigning Policy to an Individual User (Use Only When Necessary):
While managing access via groups is strongly recommended for scalability and ease of administration, there might be rare situations where you need to assign the policy directly to a specific user who isn't part of the designated group. If you must assign the policy individually (which is not the preferred method), use the Grant-CsApplicationAccessPolicy cmdlet:
PowerShell:
- Grant-CsApplicationAccessPolicy -PolicyName {POLICY_NAME} -Identity "{USER_OBJECT_ID}"
- -PolicyName {POLICY_NAME}: Replace {POLICY_NAME} with the name of the policy (e.g., Staircase-AI-for-Teams).
- -Identity "{USER_OBJECT_ID}": Replace {USER_OBJECT_ID} with the Object ID of the specific user account requiring access (e.g., de80cb39-fb45-448a-8715-b237a595733f).
See the Grant-CsApplicationAccessPolicy documentation for further information on individual assignments.
Troubleshooting User Access to the Staircase MS Teams App
You can validate if the user has access to the Staircase MS Teams app. Below are the troubleshooting steps to check if a user was added to the Staircase MS Teams app:
- Check if the user has an MS Teams license by using the following powershell command-
```powershell
Get-MgUserLicenseDetail -UserId 'user@example.com' | Format-List``` - Verify if the CS policy is assigned by using the following powershell command-
```powershell
Get-CsUserPolicyAssignment -Identity "<user@email.com>" -PolicyType ApplicationAccessPolicy```
If this returns empty, check whether the user is a direct member of the group or only a member using a nested group. - Check if the policy is created on the right user group-
```powershell
Get-CsGroupPolicyAssignment -GroupId "<YOUR_GROUP_ID>" -PolicyType ApplicationAccessPolicy``` - Confirm that the policy was created for the correct App ID (MS Teams)-
```powershell
Get-CsApplicationAccessPolicy -Identity "<MS_Teams_Application_policy>"```