PX Release Notes December 2019
Version 2.28.0, December 10, 2019
List of Features
| Features | Destination |
|---|---|
| Engagements | https://app.gainsightpx.com/engagement |
| Analytics | https://app.gainsightpx.com/analytics |
| Knowledge Center Bot | https://app.gainsightpx.com/settings/subscription |
| Integrations | https://app.gainsightpx.com/settings/subscription |
Enhancements
Engagements
Engagements are the communications that are executed through product (in-app) or emails for a specific audience at a specific time. These communications can be interactive in nature which helps you to share information, receive feedback, and engage customers with your product. The overall goal of using engagements is to increase your customer's product usage.
-
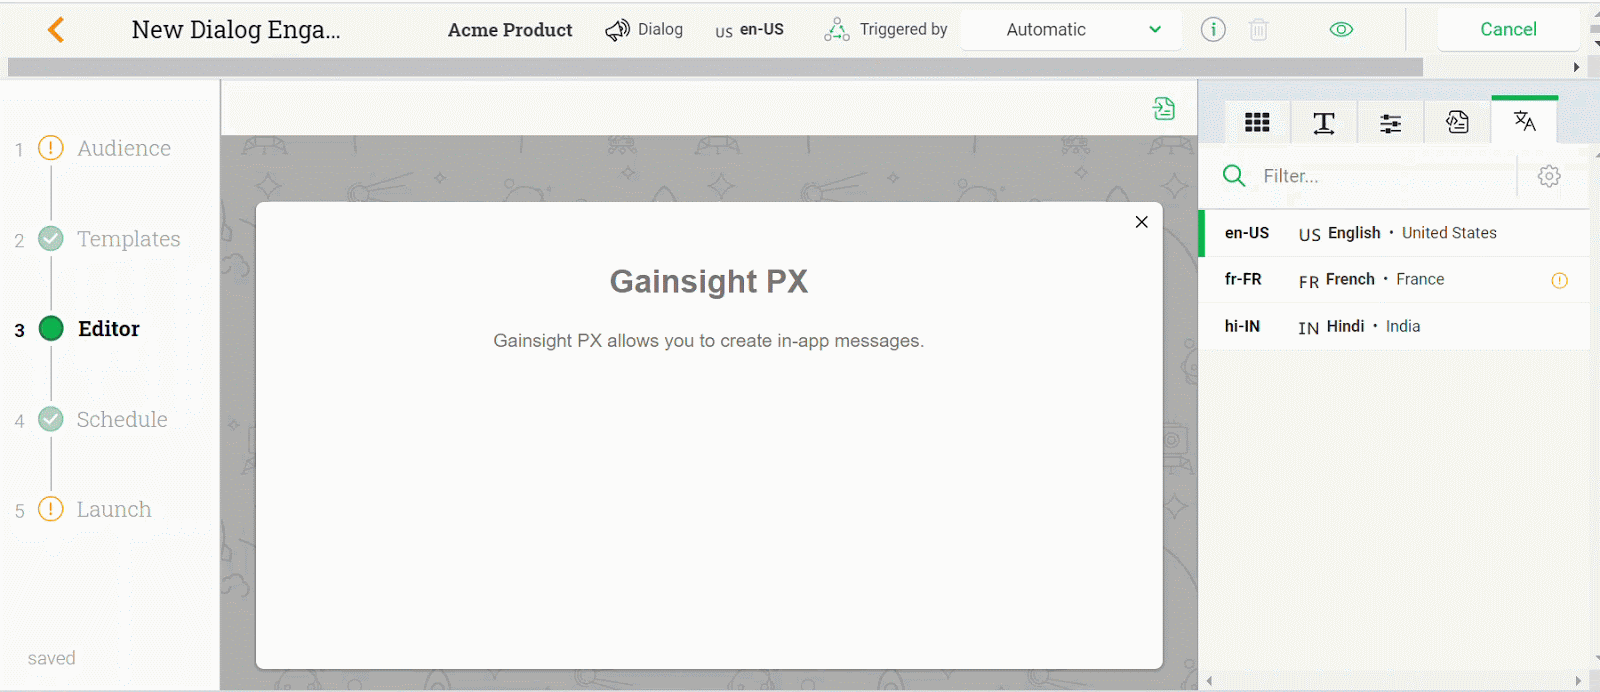
Localize and Translate Engagements: Gainsight PX now supports localization and translation of engagements. You can use this feature to set a default language and translate the engagement content into multiple languages, from the default language. If you have customers in different parts of the world, you can now use this feature to display engagements to your customers in their local language. Gainsight PX supports translation to 107 languages.
To facilitate this enhancement, a new page called Localization Settings is added to the Settings section.
Also, a new translation section is added to engagements.
Business Use case:
Consider that you are a US based company and have customers in the US, Germany, and India. You can use this feature and create a single engagement. You can configure localization on your engagement, so that your US customers view the engagement in English, Indian customers in Hindi, and German customers in German language.
IMPORTANT:
- Gainsight PX only supports you in creating multiple versions of your engagement in different languages, but does not translate content itself.
- Currently, you can translate your content to only those languages which are written from left to right (Arabic, Urdu, etc., is not supported).
- This feature is not applicable to Email engagements.
Key terms
It is essential to understand the following terms before deep-diving into the localization feature.
- Admin: Gainsight PX admin who performs all of the configurations.
- User: Gainsight PX user who creates engagements. In some cases, a single person can be the admin and user.
- End User: Your customers who use your product. Engagements are triggered by Admins or Users for End Users.
- Identify Call: Identify call is a PX API. This API is sent to PX every time a user logs in to your application. The identify call has various User attributes like Name, ID, etc.which help PX identify the user uniquely.
- Local Language: The regional language of the end user. PX provides you two options to set an end user’s local language.
- Default Language: This language is your local language and does not require any translation. It is applicable to your product. Default language refers to your local language and not end user’s local language. The engagement content is always presented in the English language, irrespective of the default language.
- Selected Language(s): A set of languages that you can select from the pool of 107 available languages. Engagement can be translated into only these selected languages.
- Language Code: A unique code that identifies each language.
- XLIFF: XLIFF stands for XML Localization Interchange File Format. This type of file is used in translations. Click here to learn more about XLIFF files. You need to have some technical knowledge to create XLIFF files.
Configure Localization
This section explains the various configurations to be performed by an Admin for Users to effectively use this feature.
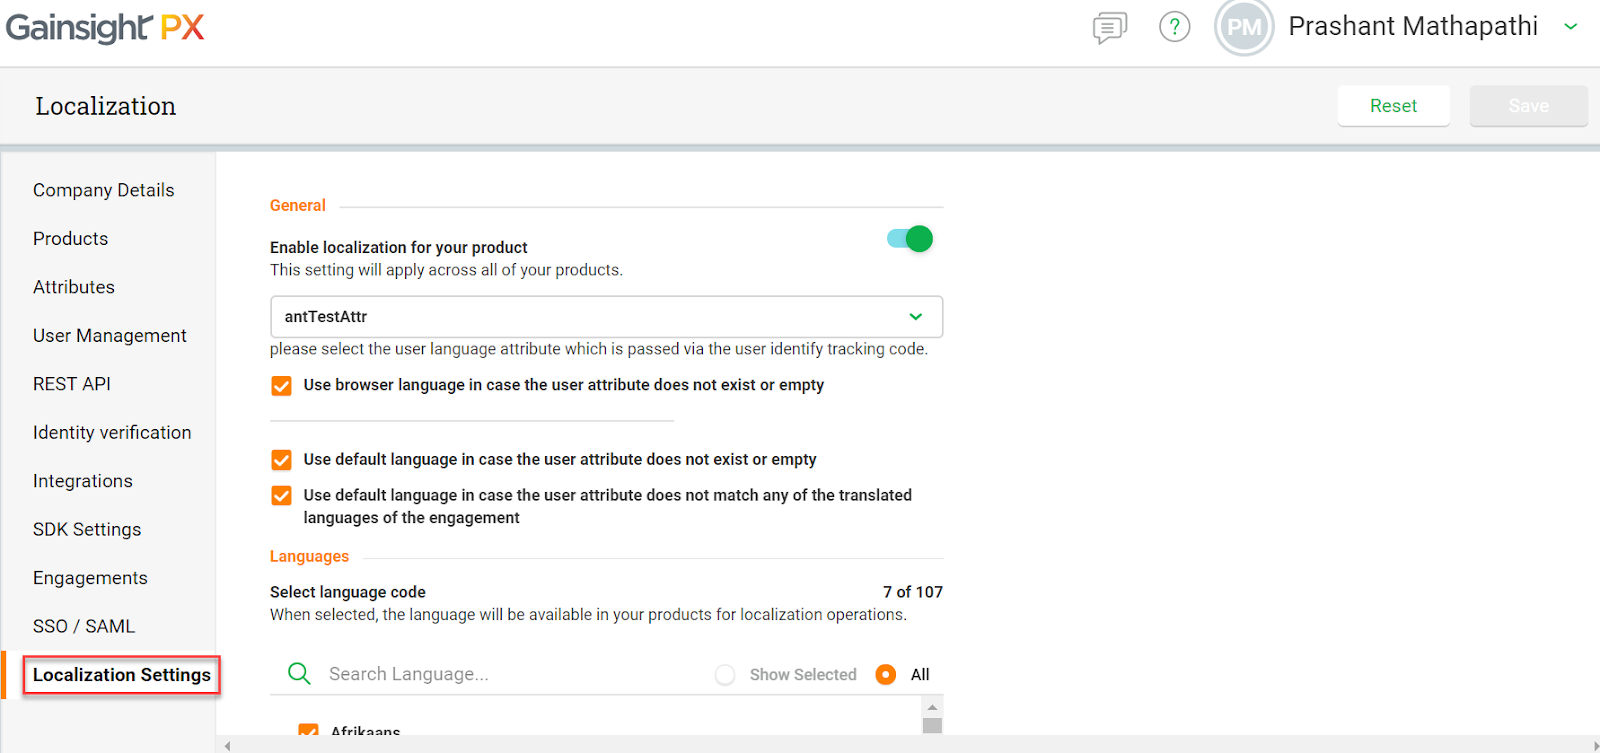
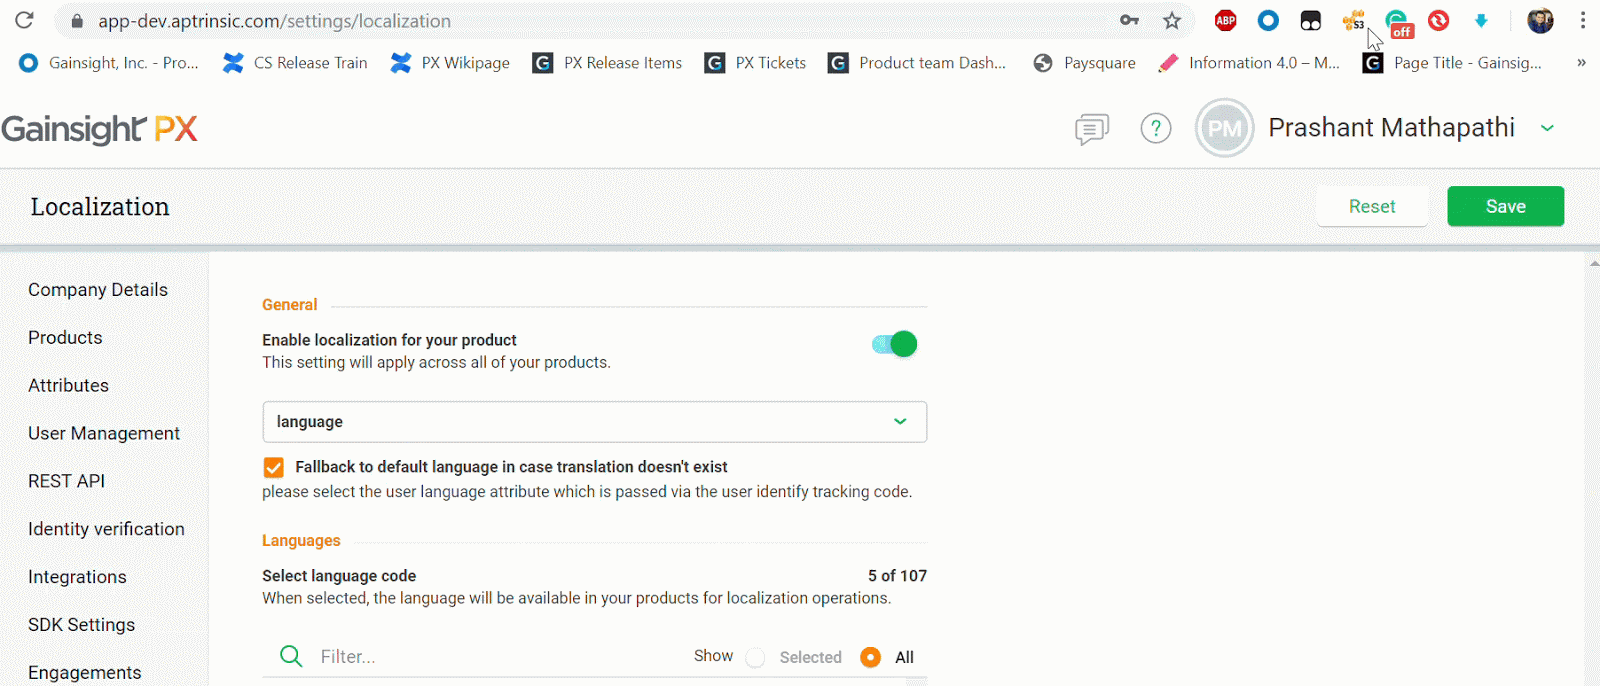
- Enable the Feature: Turn on the toggle switch to enable this feature.
- Select the Local Language: Gainsight PX provides you two ways to identify an end user’s local language.
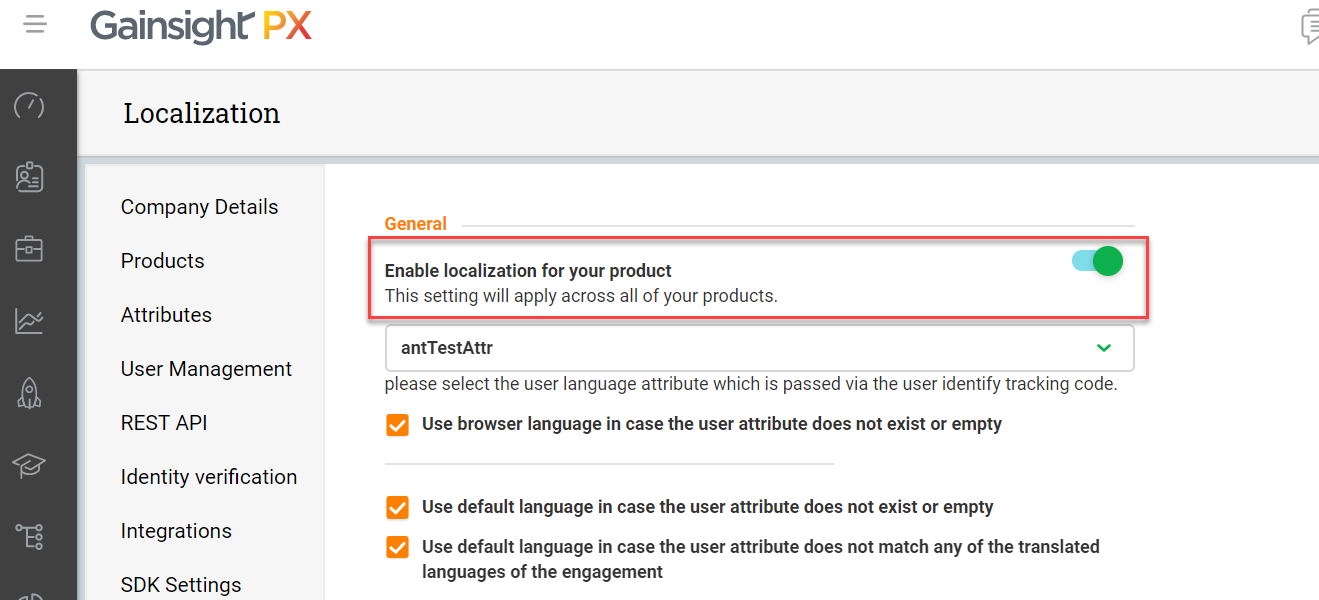
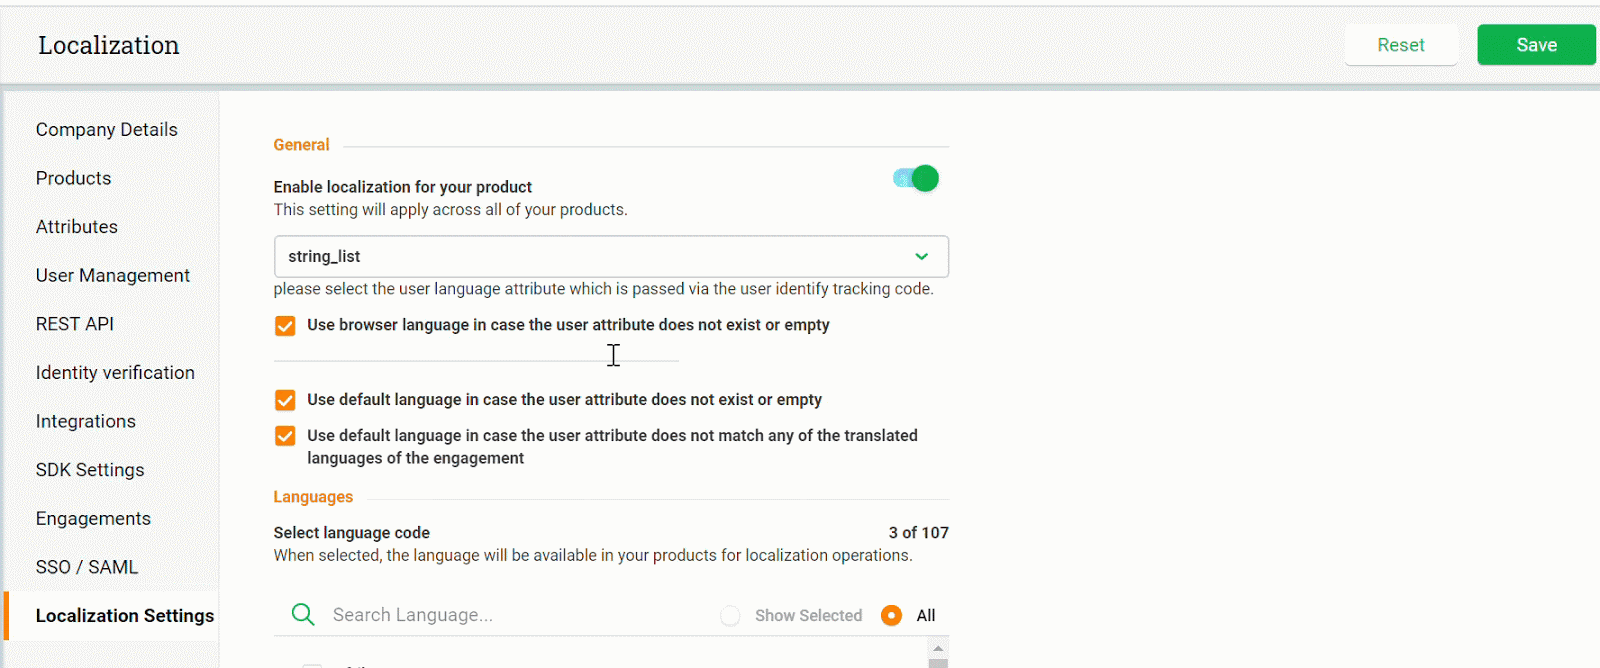
- Select the Local Language from Custom Attribute: You can create a custom attribute on the User object. This custom attribute must be configured such that it holds language codes of various languages. The value of this custom attribute is sent in the identify call when a user logs in to your application. This helps PX identify the user’s local language.
In the following image, the Language field is the custom attribute. This attribute holds language codes. You can select a language code for each user in this field (attribute).
- Select the Local Language from Custom Attribute: You can create a custom attribute on the User object. This custom attribute must be configured such that it holds language codes of various languages. The value of this custom attribute is sent in the identify call when a user logs in to your application. This helps PX identify the user’s local language.
- Select the Local Language From End User’s Browser: If you do not select any value in the above drop-down menu, no custom attribute is sent to PX in the identify call. In such cases, the language configured in the end user’s browser is considered to be the local language.
In the following image, English is set as the browser language of the end user. If no custom attributes are set, PX considers English to be the local language for this end user.
Note:
- If an end user has set multiple languages in their browser, the first language is considered to be the local language.
- If there is a mismatch between language sent in the identify call and the language set in the browser, the identify call takes precedence. For example, if you have set the custom attribute to English language for an end user, but the end user has set French language in their browser, English is set as the local language because the identify call takes precedence.
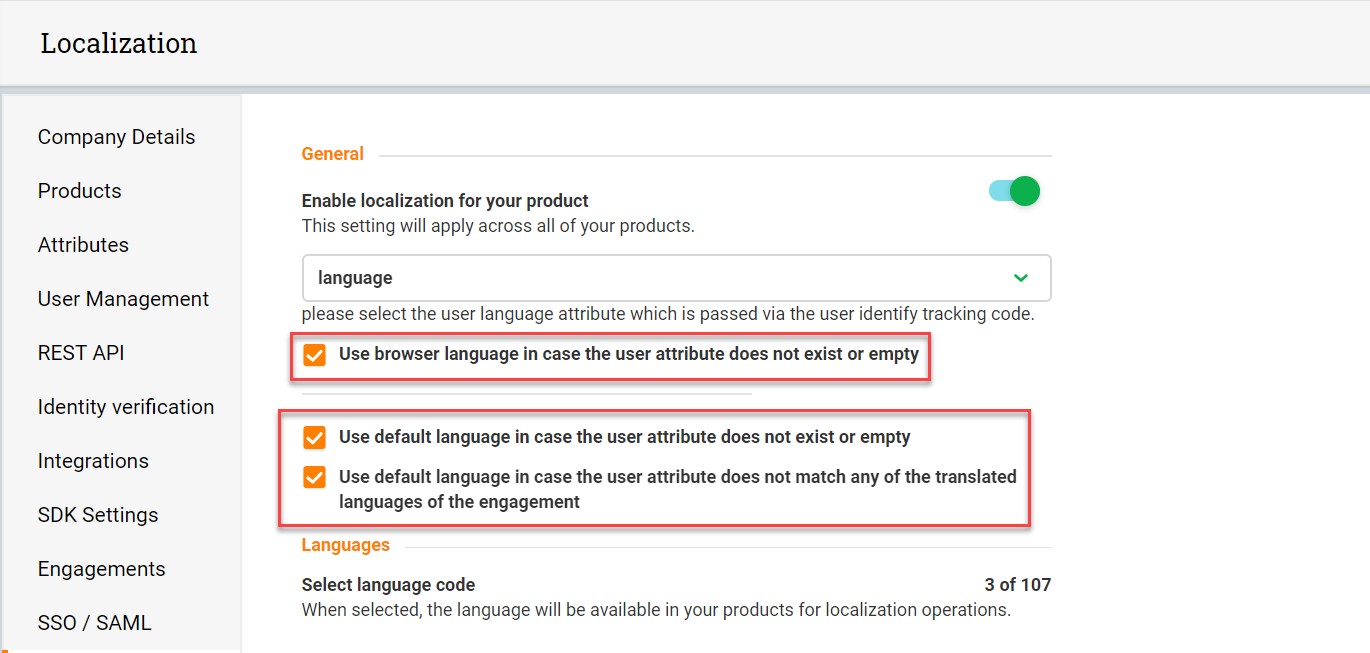
- Set Browser Language as the Fallback Language: You can select the Use browser language in case the user attribute does not exist or empty check box to ensure that PX uses the end-user’s browser language as the local language if:
- No attribute is selected in the custom attribute drop-down menu.
- Custom attribute was not sent in the Identify call.
- The value passed by the custom attribute does not match any of the translations but it does match the browser language.
For example, if English is the browser language of the end-user and if no value is selected in the custom attribute drop-down menu, the engagement is translated to English.
-
Set Default Language as the Fallback Language: You can select the Use default language in case the user attribute does not exist or empty check box to ensure that PX uses the default language as end user’s local language, if:
- No attribute is selected in the custom attribute drop-down menu.
- Custom attribute was not sent in the Identify call.
- The language sent does not match any of the translated language.
IMPORTANT: If you select the Use browser language in case the user attribute does not exist or empty check box and also the Use default language in case the user attribute does not exist or empty check box, the browser language is selected as the end user’s local language.
- Set Default Language as Fallback Language for Languages Without Translation: You can select the Use default language in case the user attribute does not match any of the translated languages of the engagement check box to ensure that PX uses the default language as end user’s local language, if none of the translated languages match the language that was sent in the custom attribute.
For example, if English is your default language and you translate your engagement to French and Chinese as the languages. If Hebrew language is a custom attribute, then the engagement is not displayed if this check box is not selected. If this check box is selected, the engagement is displayed in English (default language).
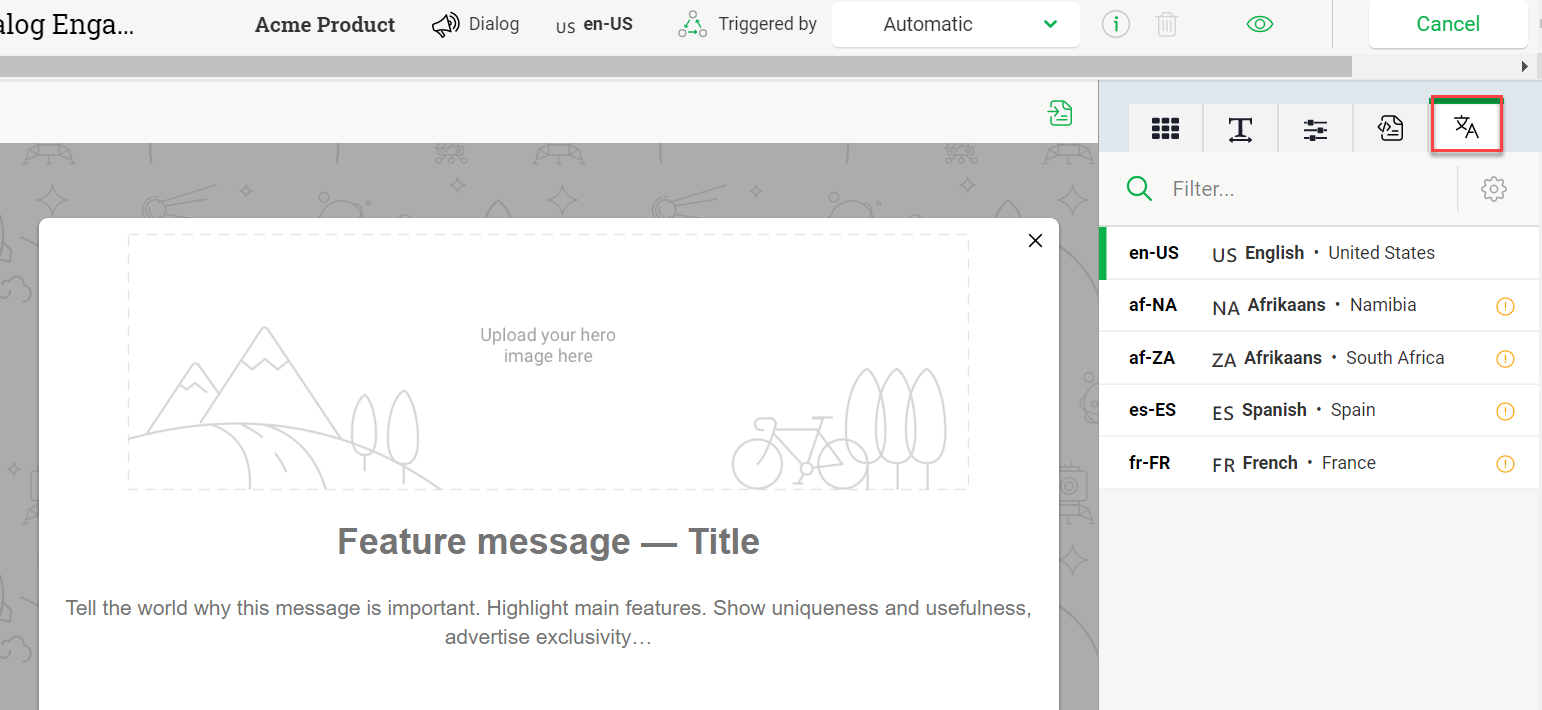
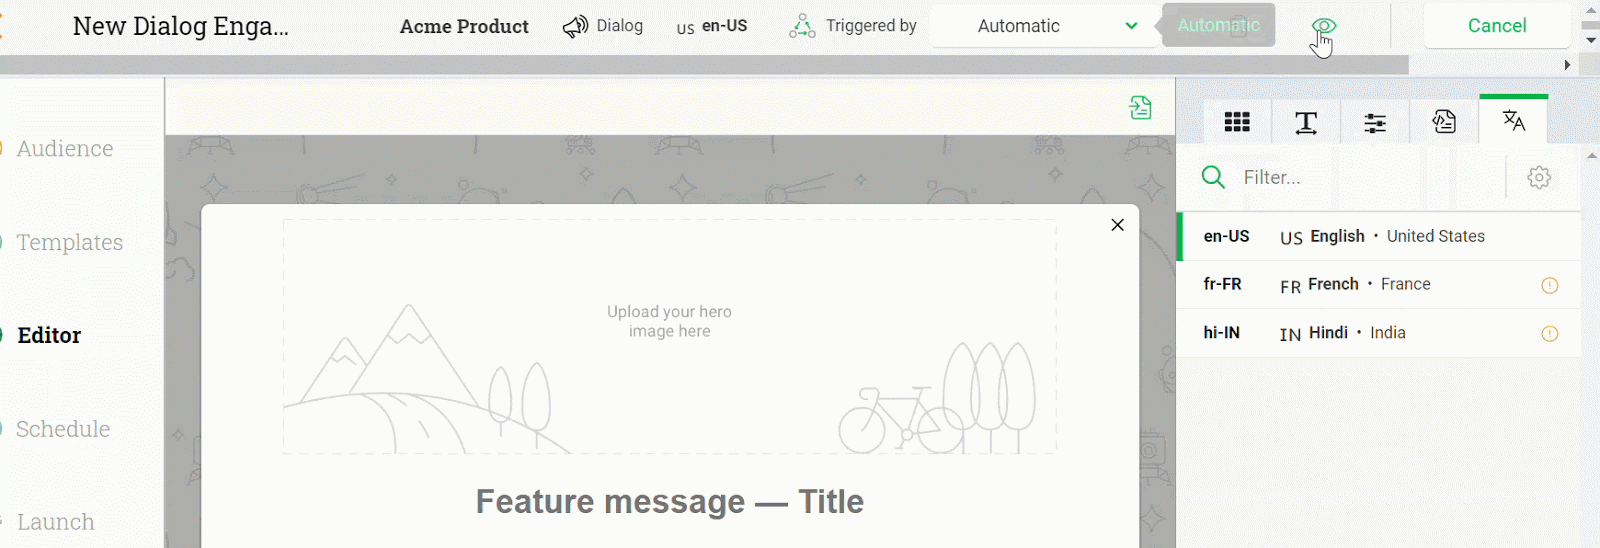
- Language Selection: Admins can select the languages to which an engagement must be translated. Users can translate engagements to only those languages which an admin selects in this section. Apart from selecting the languages for translation, you can also set one of the languages to be the default language.
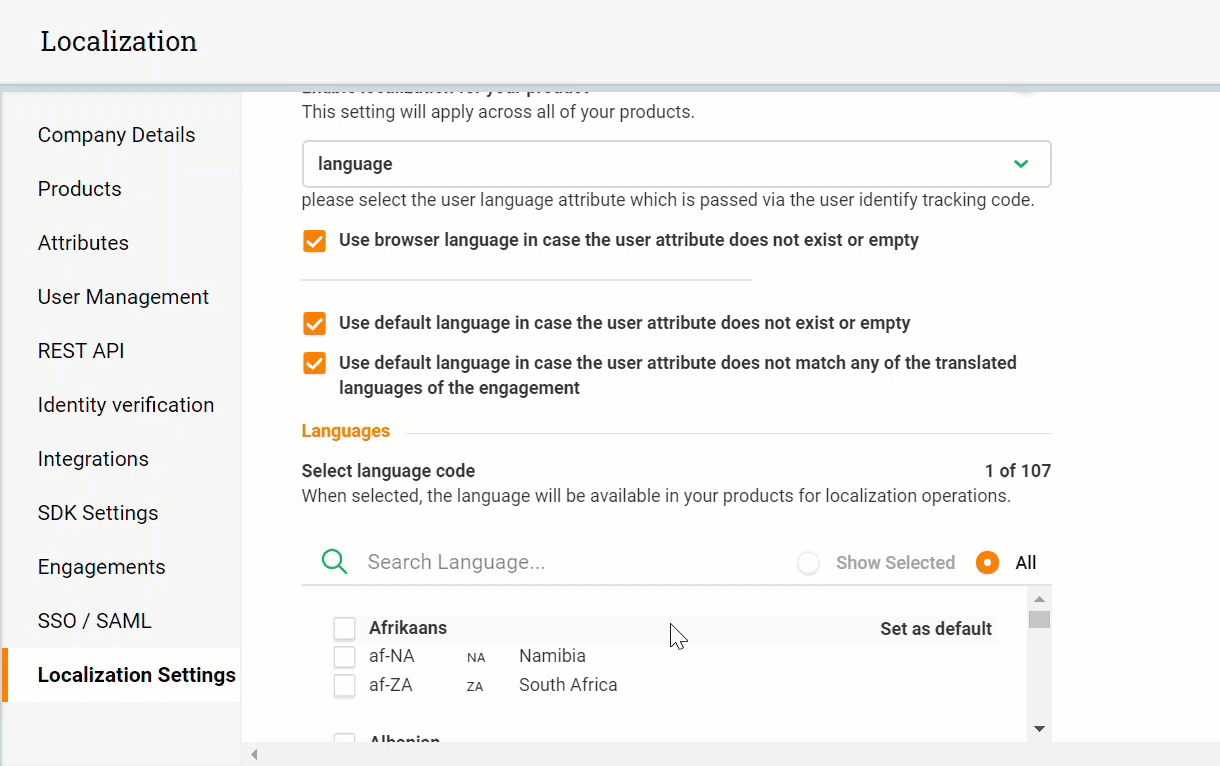
In the above example, three languages are selected; English, Hindi, and French. English is set as the default language and does not require any translation. Hindi and French translation can be performed by users from the engagement page.
Translate Content
Once an admin completes the configuration, users can start translating the content to the required language. To translate content, users must first draft the content and then export it as an XLIFF file. The translation must be performed in the XLIFF file and then the translated XLIFF file must be uploaded back to the engagement. You cannot translate the default language.
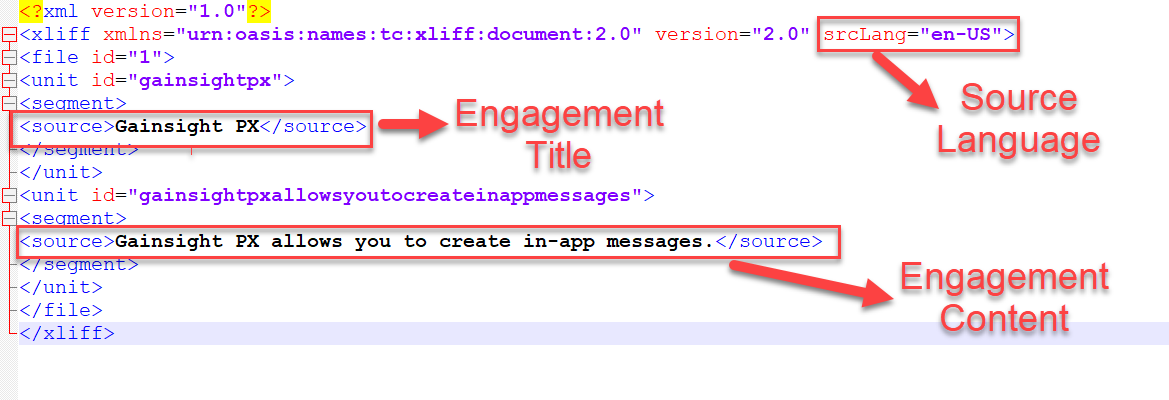
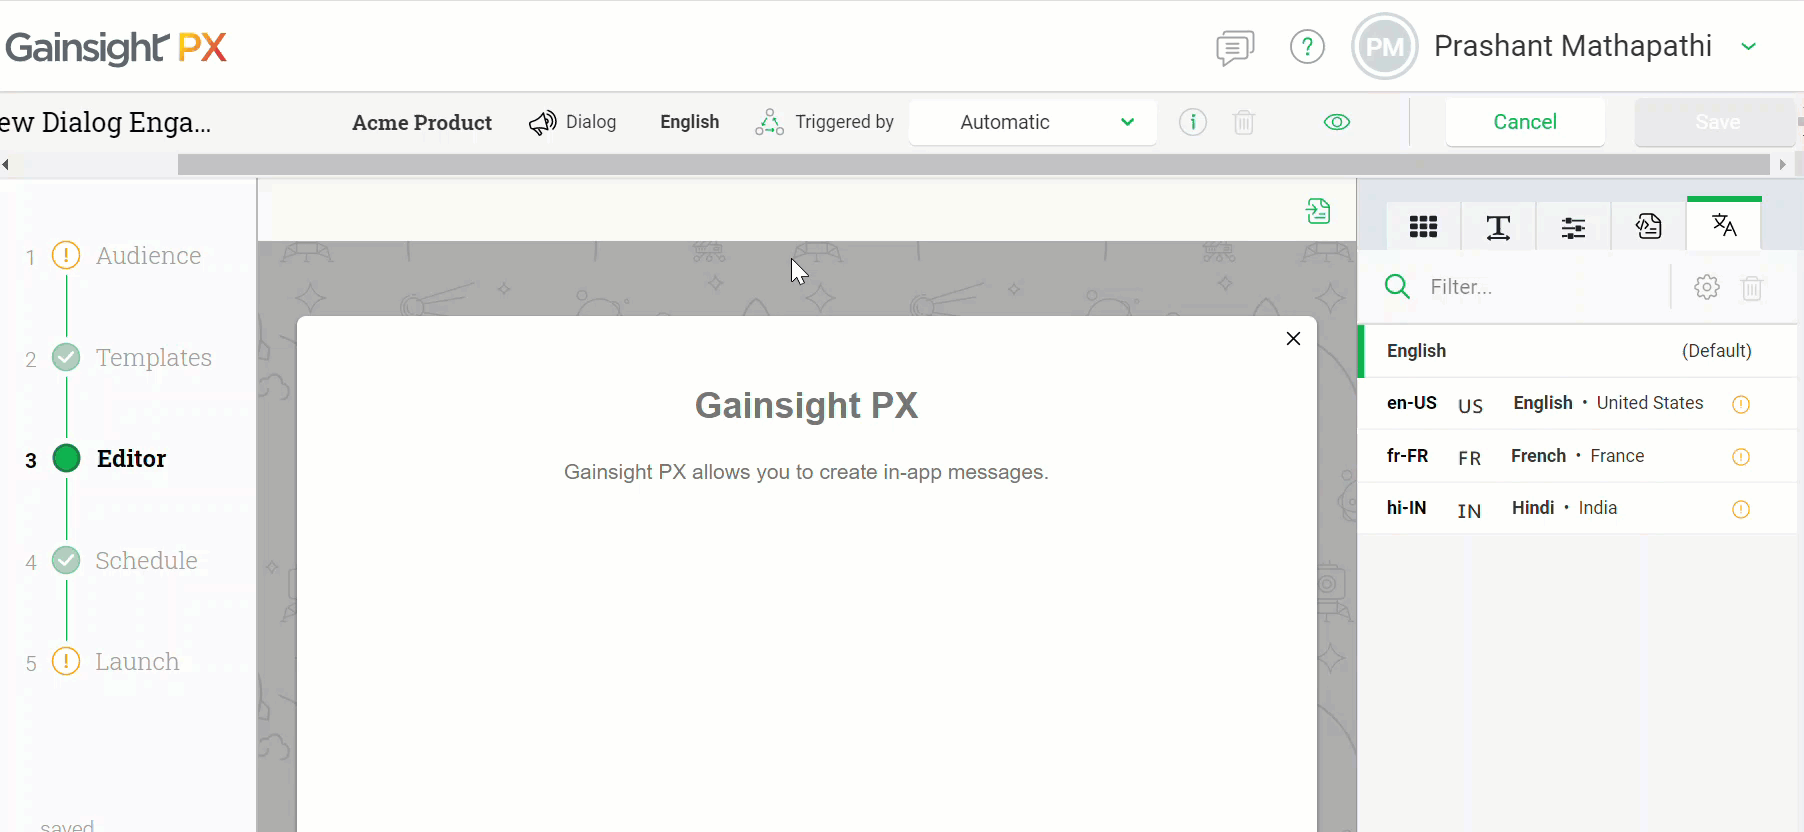
To perform translation, select Export XLIFF for the required language. The content available in your engagement is exported to the XLIFF file.
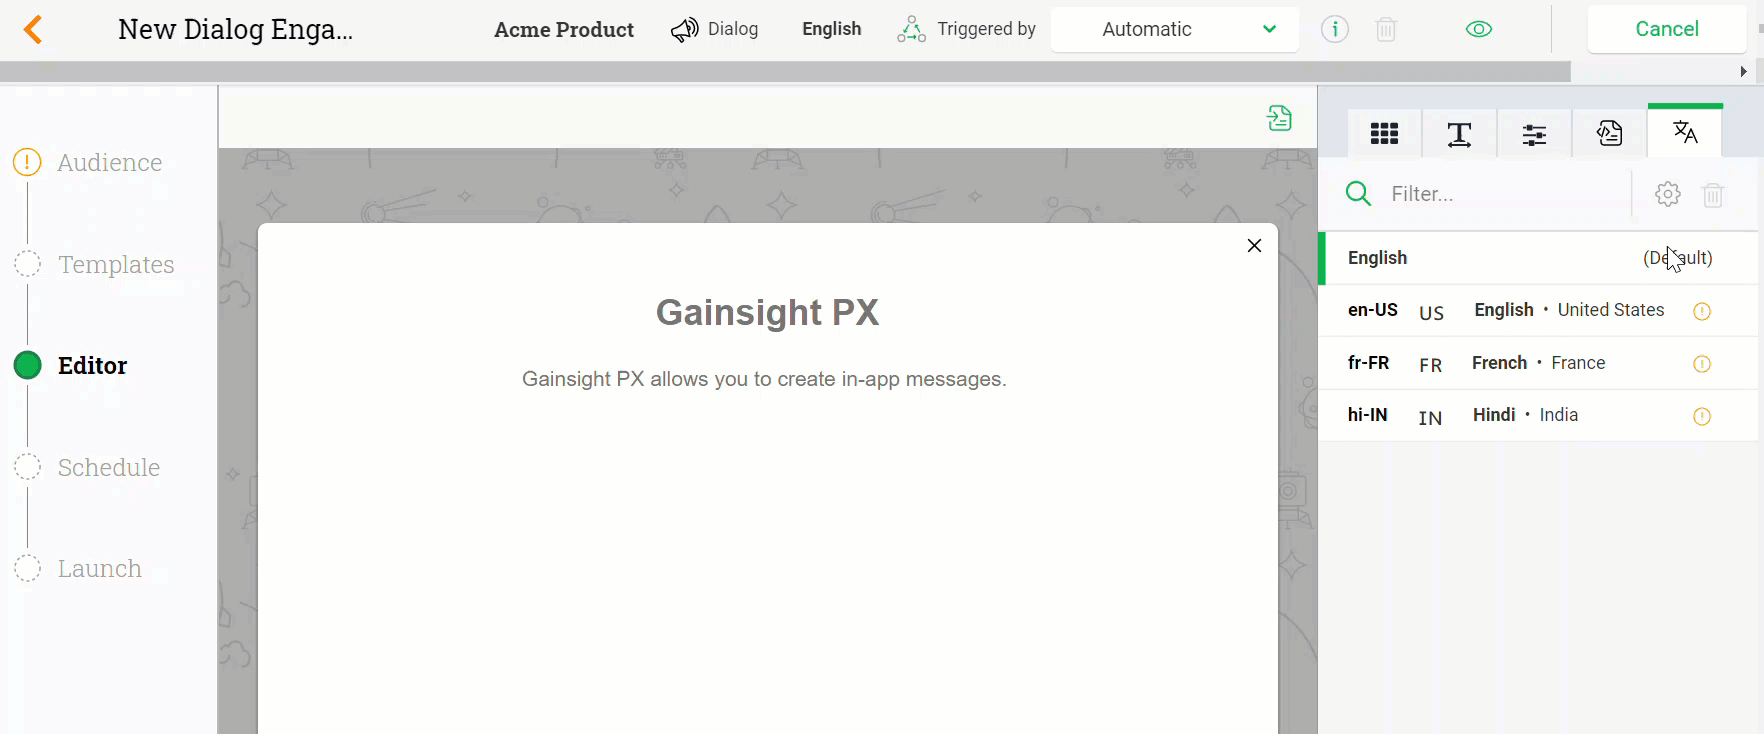
The exported XLIFF file has three important sections. The source language code and the source messages (title and content of the engagement).
You can perform translation of the content from an external application. Once you perform the translation, you must ensure that:
- The srcLang (source language) tag is followed by trgLang (target language) tag. This target language tag must have the language code of the translated language.
- Each source tag must have a target tag. The target tag must contain the translated version of the source language.
If the above two requirements are not present in your XLIFF file, you cannot upload it back to PX.
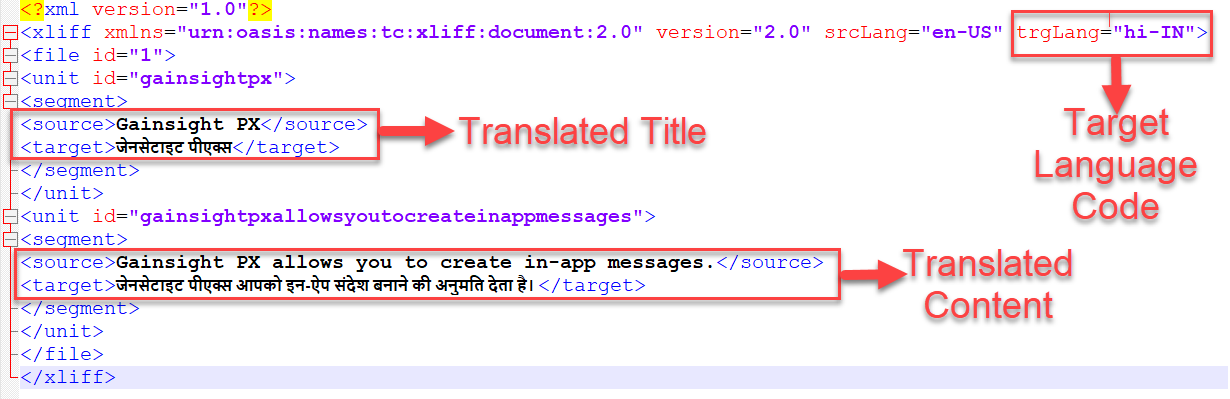
In the following image, the source language English is translated to Hindi language.
You can now upload this XLIFF file back to PX.
Once you upload the XLIFF file, you can click the language name to view and edit the engagement content in the translated language.
If you modify the engagement content (either from the default language or any of the translated language), the changes are not reflected in other languages. You must export the XLIFF file, translate the content, and import the XLIFF file, once again.
Similarly, translation can be performed for the French language as well. If you do not perform translation for any language and launch the engagement, the engagement is displayed in the default language if Fallback to default language in case translation doesn’t exist check box is selected by the admin in the Localization Settings section. If this check box is not selected, and translation is not performed, the engagement is not displayed to those users for whom the non translated language is the local language.
Analytics
- Support for logout tracking - Gainsight PX allows you to explicitly call logout functionality which will resend the tracked session. Logout is useful for an app that allows users to roam between subscriptions within the same browser and where you’d like to split the tracked session into two separate sessions.
Note: This feature resets cookies set by Gainsight PX in your application. If you have set any additional cookies in your application, those cookies are not reset.
Knowledge Center Bot
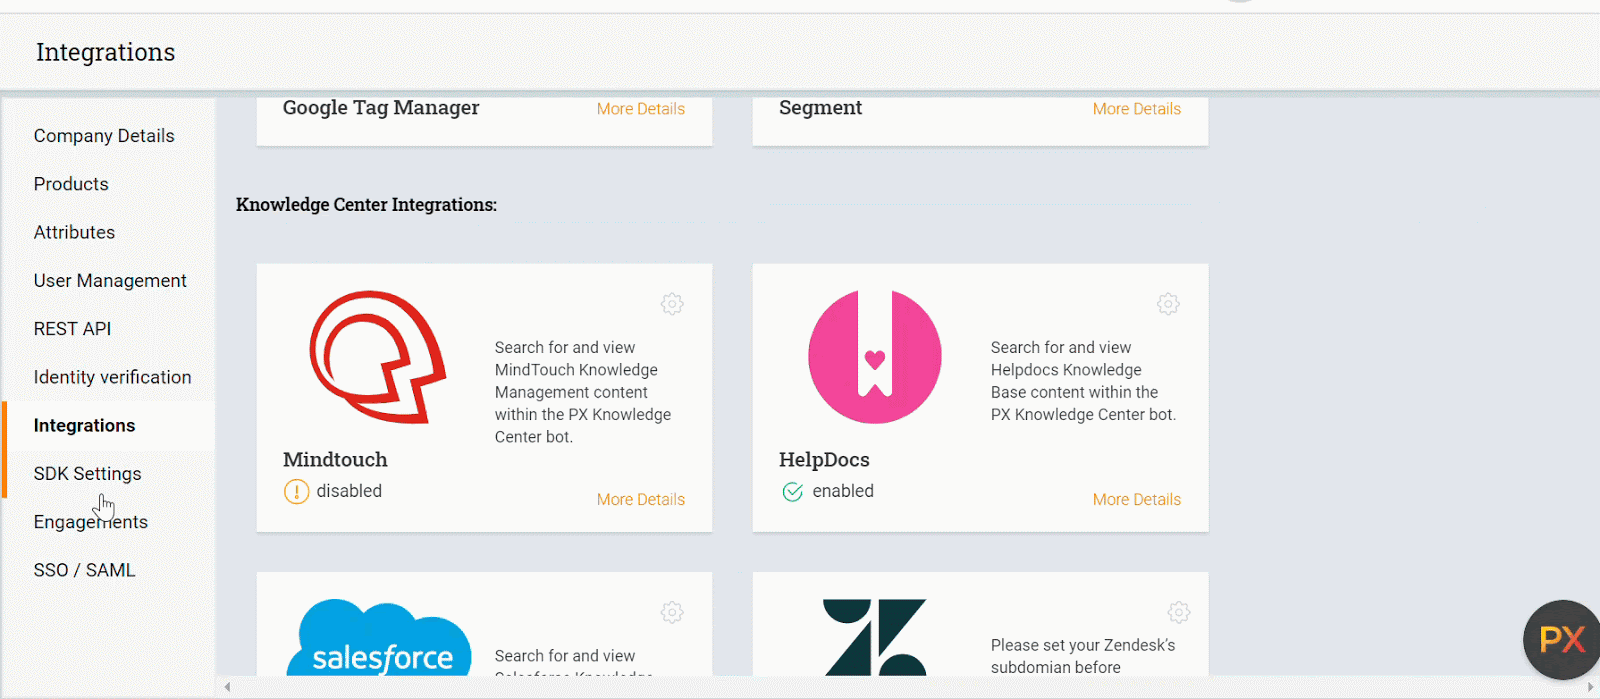
Knowledge Center Bot is an onboarding assistant that guides users in learning your product. The bot contains links to engagements and external URLs in order to effectively onboard new users, as well as educate existing users. Optionally, you can also integrate your knowledge base (eg. Zendesk or Mindtouch) content to display in the bot.
- Perform Faceted Search in Mindtouch Knowledge Base: Gainsight PX now allows you to perform a faceted search in the KC Bot, when you use Mindtouch as the Knowledge Base. You can use this feature to set the bot search area to a specific section or category within Mindtouch.
An admin must configure the Mindtouch Knowledge base widget from the Integrations section, with the required facet. A new field called Facet is introduced in the Mindtouch Knowledge Base widget to facilitate this enhancement.
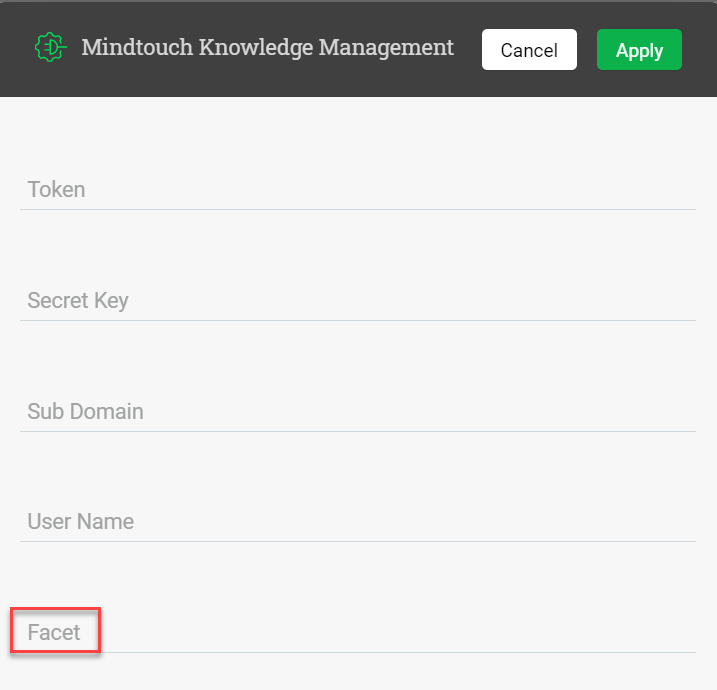
How to Set the Facet: The Path (also known as sub-directory) section of your Mindtouch Knowledge Base URL can be used as a Facet in the Mindtouch widget. For instance, consider that your Mindtouch Knowledge Base URL is www.mindtouch.com/producthelp. In this URL, producthelp is the path. You can use the path as the facet in the Mindtouch widget. The Bot then searches and displays only those articles which are located under the producthelp path.
Business Use Case: Consider that you have two products and two Gainsight PX subscriptions. The Knowledge base for the two products is hosted in different Mindtouch domains like www.mindtouch.com/first_product, and www.mindtouch.com/second_product. With this feature, you can now configure the Bot for your first subscription to display search results only for your first product. Similarly, you can set the Bot in the second subscription to display results only from your second product.
To use this feature:
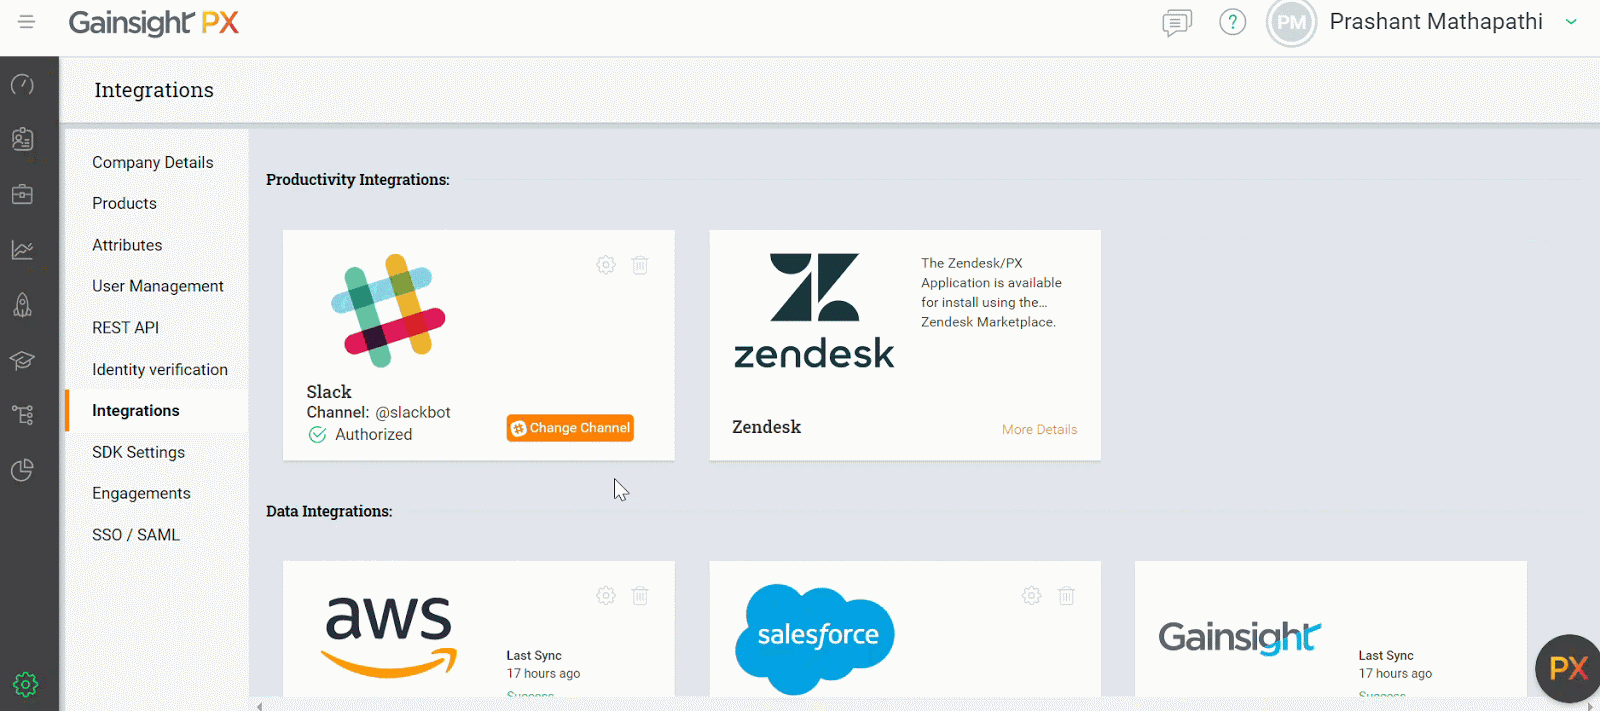
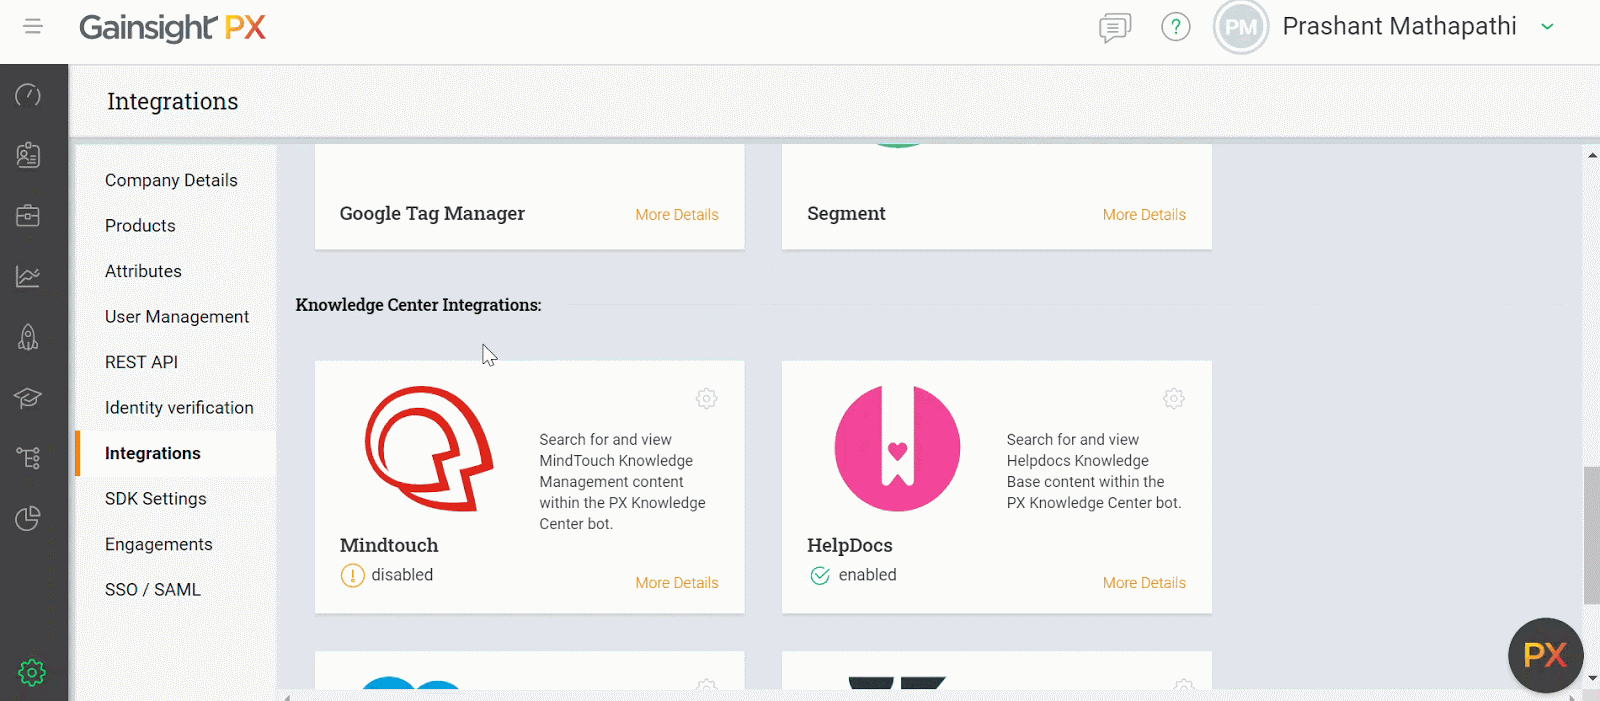
- Navigate to Settings > Integrations.
- Click the Settings icon for the Mindtouch widget.
- Configure the Facet field (and other fields) with the required path.
Integrations
- Authorize Zendesk Knowledge Base with OAuth: Gainsight PX now allows you to authorize your Zendesk Knowledge Base with Open Authorization (OAuth) mechanism. Previously, you could authorize your Zendesk Knowledge Base only with an API Token. This enhancement provides you with an additional secured authorization method. A new button Use OAuth is introduced on the Zendesk Knowledge Base widget to facilitate this enhancement.
Zendesk API Tokens can only be created by Zendesk account admins. This restricted non admin users from authorizing their Zendesk instance. This enhancement allows non admin users to integrate their Zendesk knowledge base with Gainsight PX.
Note: Apart from the Use OAuth button, another button Use API Token is also introduced. This button facilitated authorization from an API token. Previously, you could perform token based authorization from the Settings icon. With this enhancement the Settings icon can be used only to enter the sub-domain of your Zendesk account.
IMPORTANT: Before authorizing your Zendesk widget, you must enter the subdomain of your Zendesk account.
To use this enhancement:
- Navigate to Settings > Integrations.
- Click Use OAuth.
- Click Authorize. You are redirected to your Zendesk account.
- Click Allow.
Note: You may need to enter your Zendesk credentials, if you are not logged in.