Create Guide Engagement for Mobile App
This article explains how to create, view, and launch a Guide Engagement for your mobile application.
Overview
A Guide engagement allows you to create a walkthrough on a specific feature. You can either create a single-step guide to assist users with one or more features of your application, or a multi-step guide with a sequence of hotspots, tooltips, and dialogs that navigate the user through different screens of your application.
Prerequisite
Ensure that the Gainsight PX org has the latest features/pages for which you want to build a guide. Copy the URL to use later for setting in-app engagements. If your target element appears more than once in a specific module, you may add a specific page that has a unique URL. This helps you to identify your target element on a specific page.
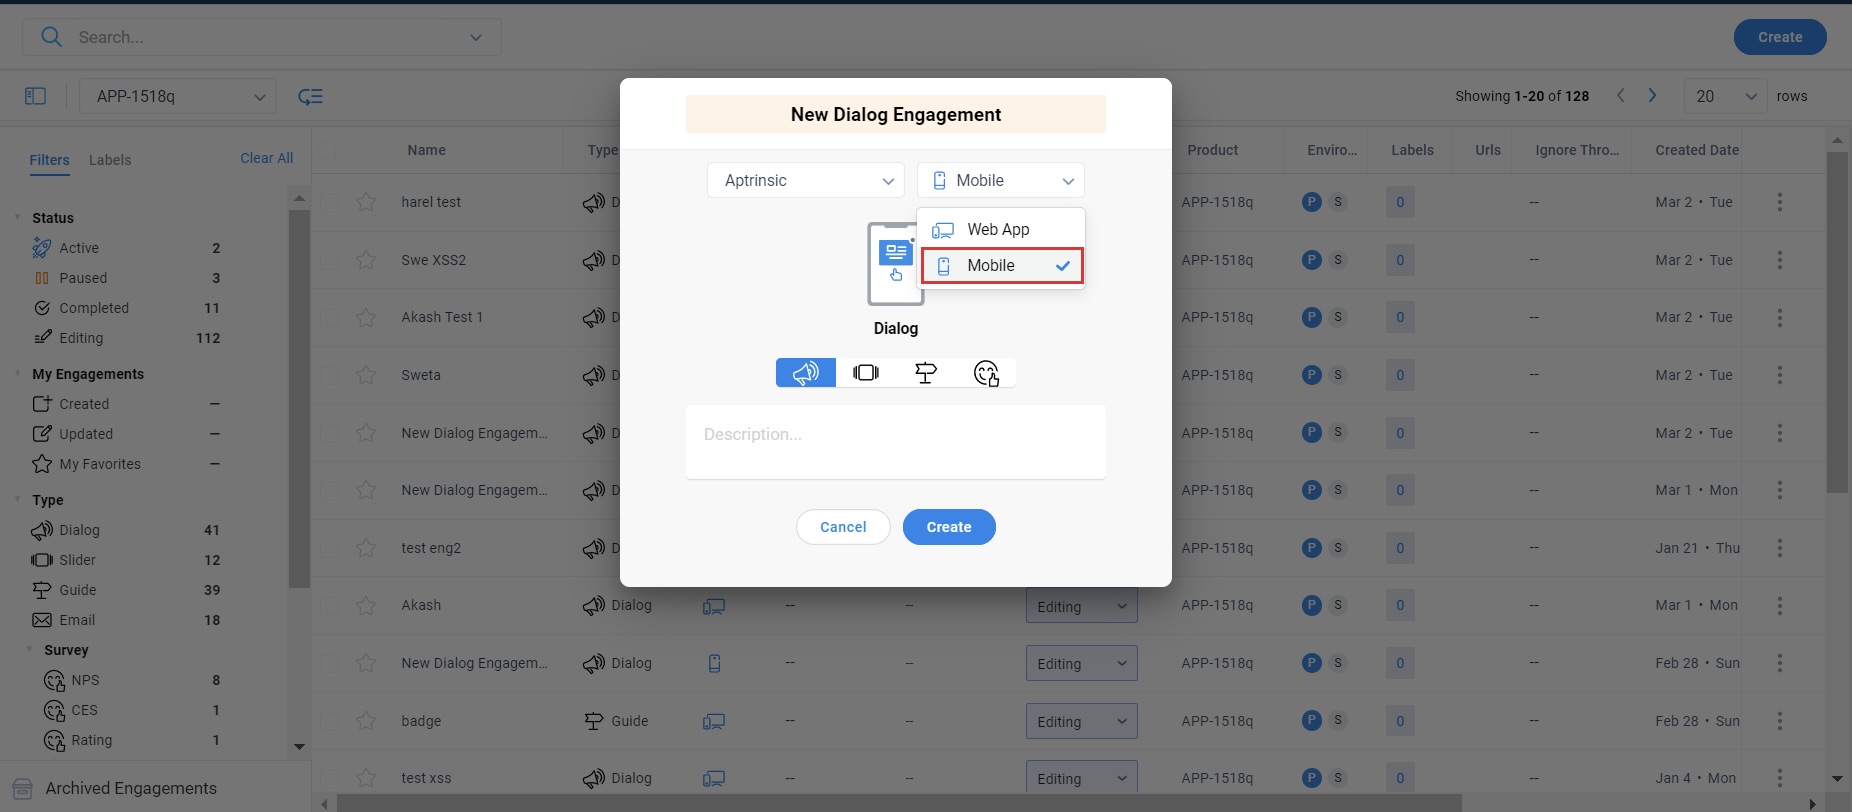
Create Guide Engagement from Web Application
When you click the Create button in the Engagement list view, you can now select the channel from the newly introduced drop-down. This drop-down menu has two options; Web App and Mobile. Once you select the Mobile option, you can see the list of available engagements.
Set Audience
The audience section helps you configure the set of users who qualify to view the engagement. You can create rules to match your requirements.
For example, the below rule ensures that the engagement is displayed only to the user with the specified email ID, and who resides in the United States as the AND logic is selected. You can use the AND or OR logic within a rule, to configure multiple parameters. Click + Add to add multiple parameters.
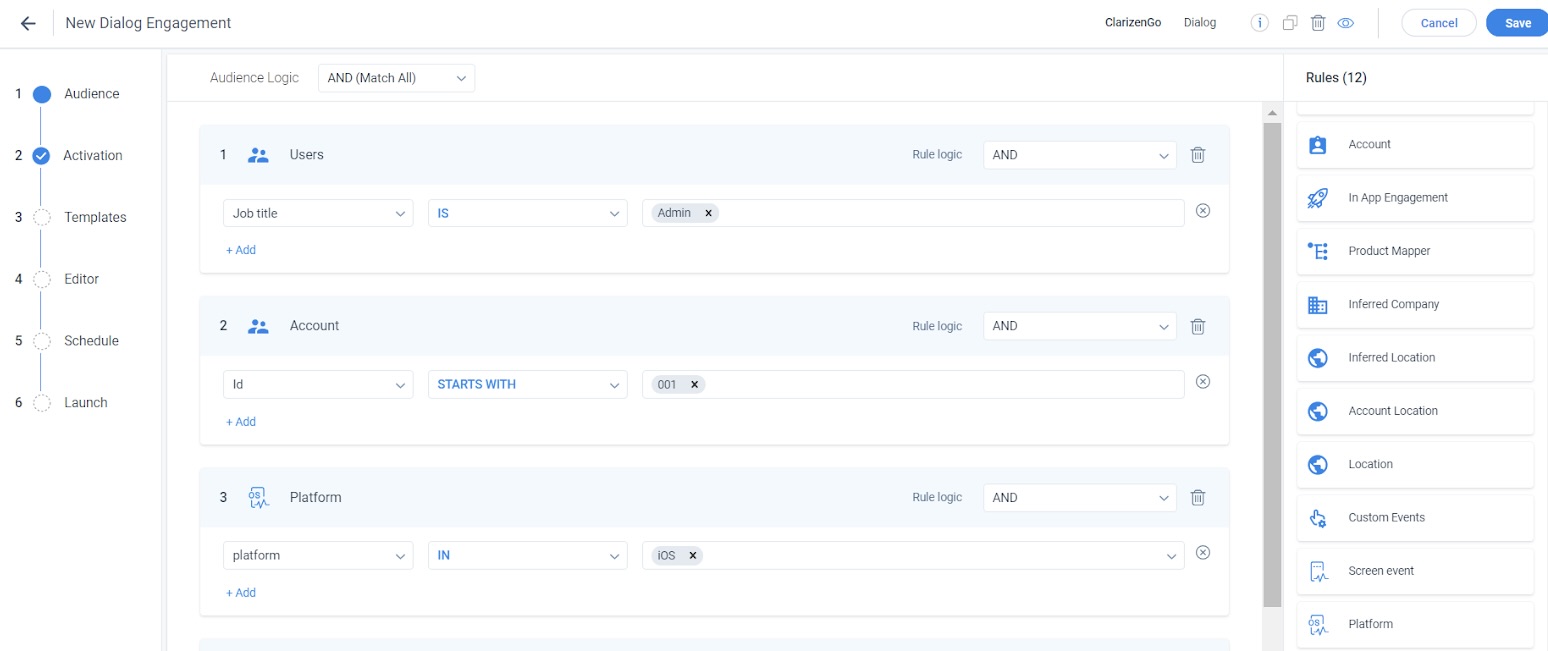
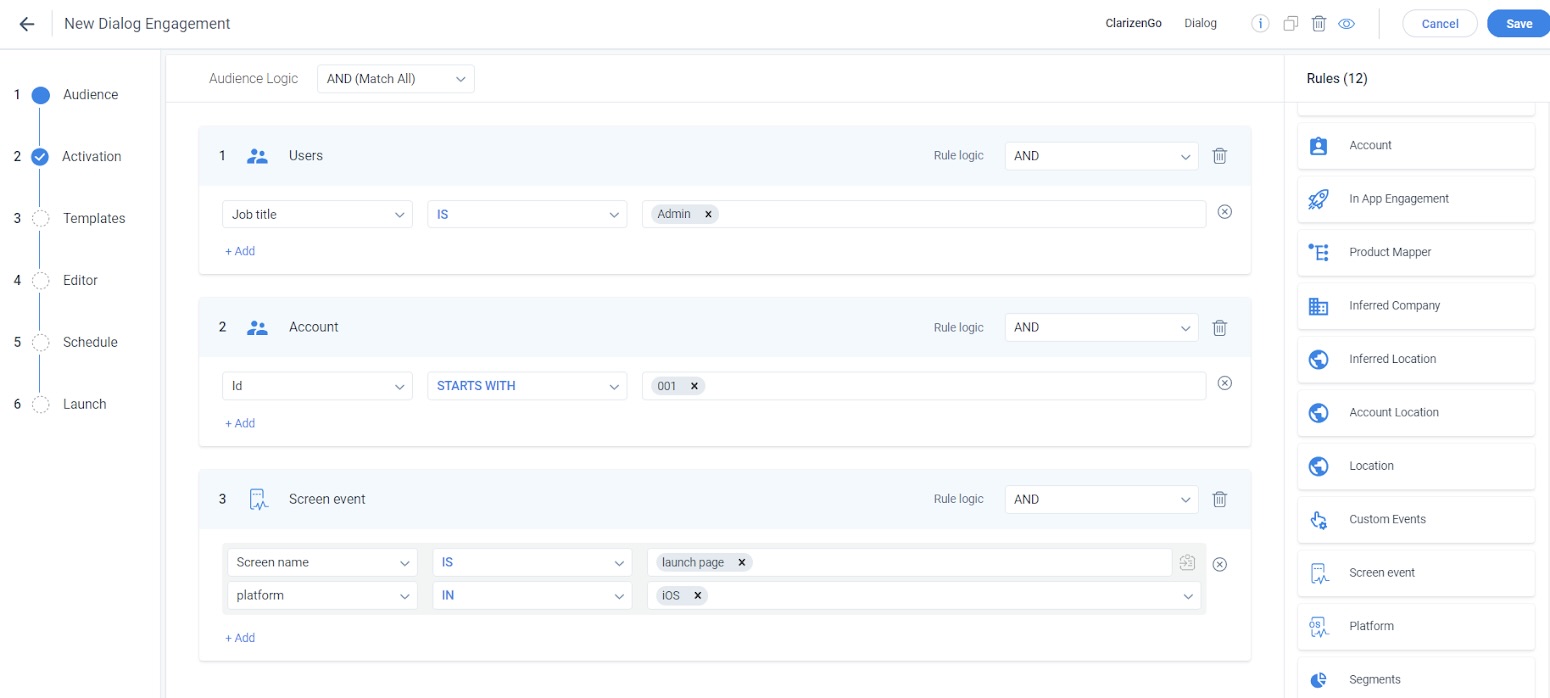
The Audience section has two new rules for Mobile engagements; Screen event and Platform. The screen event rule allows you to select a Screen name in your app or a Screen class of your app. The engagement is launched on the selected screen or class. Apart from selecting the screen name or class, you must also select the platform of your app (Example: iOS, Android) on which you wish to launch the engagement. The screen name/screen class and platform together form a single Screen rule.
In the following image, the engagement is launched on the Launch screen of the app. Also, the engagement is launched only for the iOS version.
IMPORTANT: If you are using multiple screen event rules, ensure that you set the Rule logic to OR for the Screen event rule block. The overall Audience Logic can be OR or AND.
The Platform rule allows you to select your app’s platform (iOS or Android) on which you wish to launch the engagement. If you do not want to launch your engagement on any specific screen or class of your app, you can use this rule to select only the platform. The engagement can be viewed on all the screens/classes of the selected platform.
Tip: If you wish to launch the engagement on all the screens and on all the platforms, do not use the above two rules.
Apart from these two new rules, you can use Users, Account, In-app engagement, Product Mapper, Inferred Company, Inferred Location, Account Location, Location, Custom Events, and Segments rules in a Mobile engagement. The behavior of these rules is the same as with a Web App engagement.
IMPORTANT:
- While using an In-app engagement rule in a Mobile engagement, you can select a Web App engagement as well.
- While using the Segment rule in mobile engagement, you can only select those Segments that were created for Mobile.
- For mobile engagements, Audience and Activation are evaluated separately. The user must first meet the audience criteria before the triggering event occurs. If both happen at the same time, the engagement may not display correctly.
Configure Activation
This is a new section exclusively for mobile engagements. This section allows you to set events that trigger your mobile engagement. Once the configured event is triggered, the engagement is displayed on the selected screen/class.
Note: Mobile SDK events are processed in batches and sent to the server in intervals. To ensure the engagement triggers correctly, schedule the activation event to occur at least 20 seconds after the user qualifies for the audience. If both events are included in the same batch, the engagement will not be triggered.
There are three events in this section. OR operation is applied between the events you add in this section.
Custom Events: Custom Events are a set of events that are configured to exclusively track those activities which are not readily available on the UI. An example of a custom event can be when a user tries to perform an editing activity on a specific screen of your app.
Screen Events: You can use Screen events rules in the Activation section as well, apart from the Audience section. Screen events consist of Screen name or Screen class. When you select a Screen name or a screen class as the Activation method, the engagement is launched when the selected screen or class is accessed.
Application Events: An application event rule block consists of three rules; App opened, App installed, and App updated. You can select any of the rules as your trigger method. For example, if you select the trigger method to be updated, the engagement is launched when the user updates your app and opens it for the first time after updating.
For more information on configuring events, refer to the Create Engagements for your Mobile Application article.
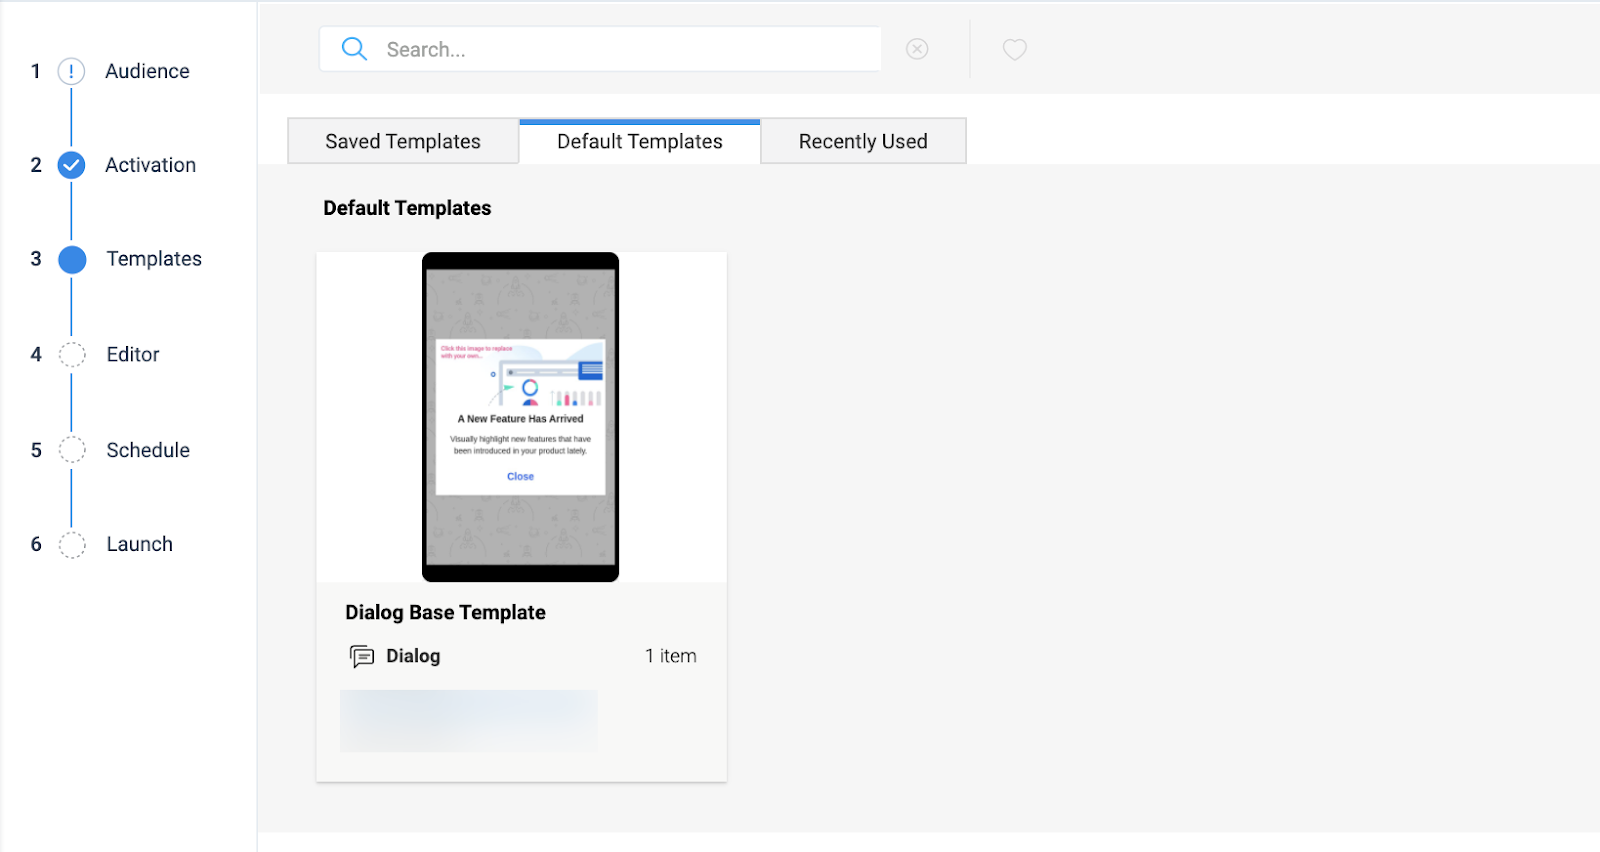
Use Template
The Templates section allows you to select a template that matches your requirement for the Mobile engagement:
- Navigate to the Templates section.
- Select a template from the Saved Templates/Default Templates/Recently Used options.
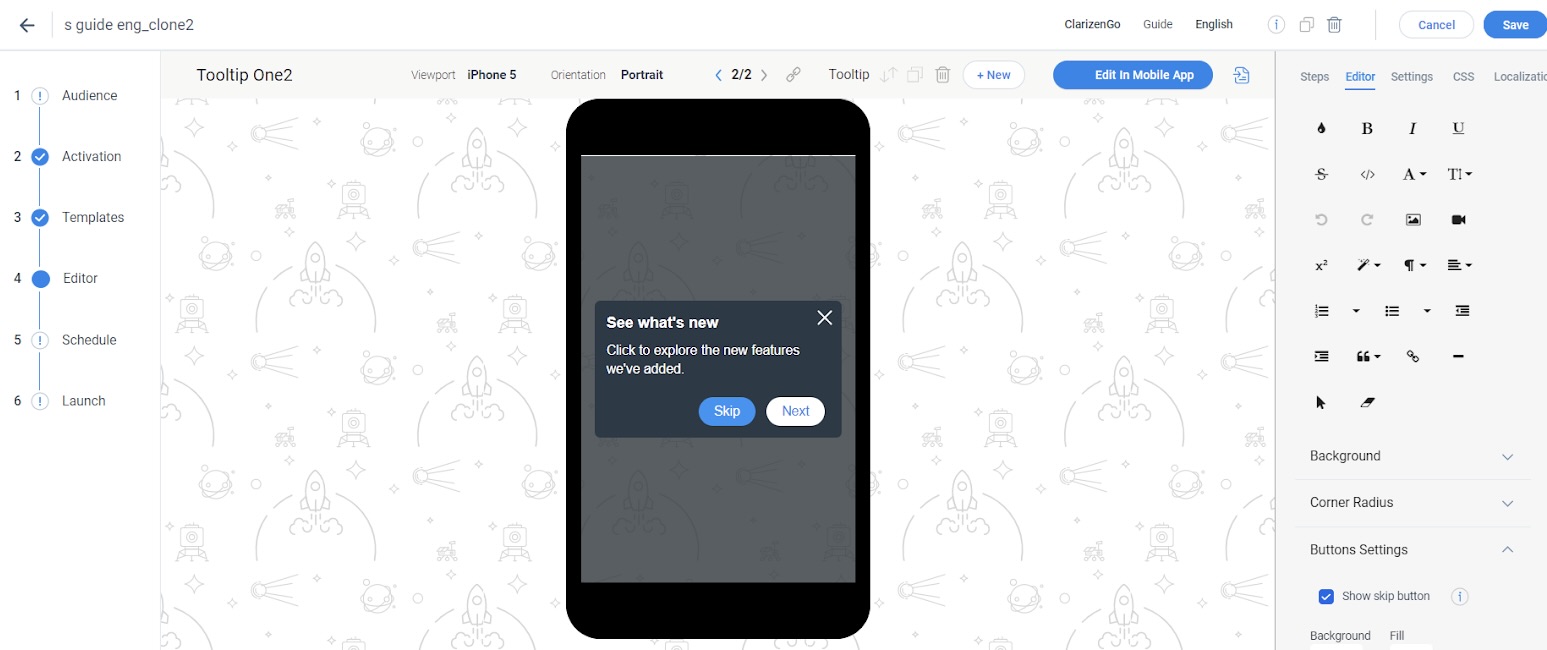
Customize Guide using Editor
You can select a template from the Templates section or create your own template starting with a blank one.
Following are few customizing options of the many capabilities of the Editor:
- Text change
- Ability to insert image or video or hyperlink
- Background color or fill changes
- Corner curvature options
- Ability to show/hide the Next, Skip, or Close buttons
- Size changes for Hotspot and Tooltip
Platform Selector
The Platform Selector options allow you to select the platform in which you want to launch the Guide and also specify the element on which the Hotspot/Tooltip needs to be linked.
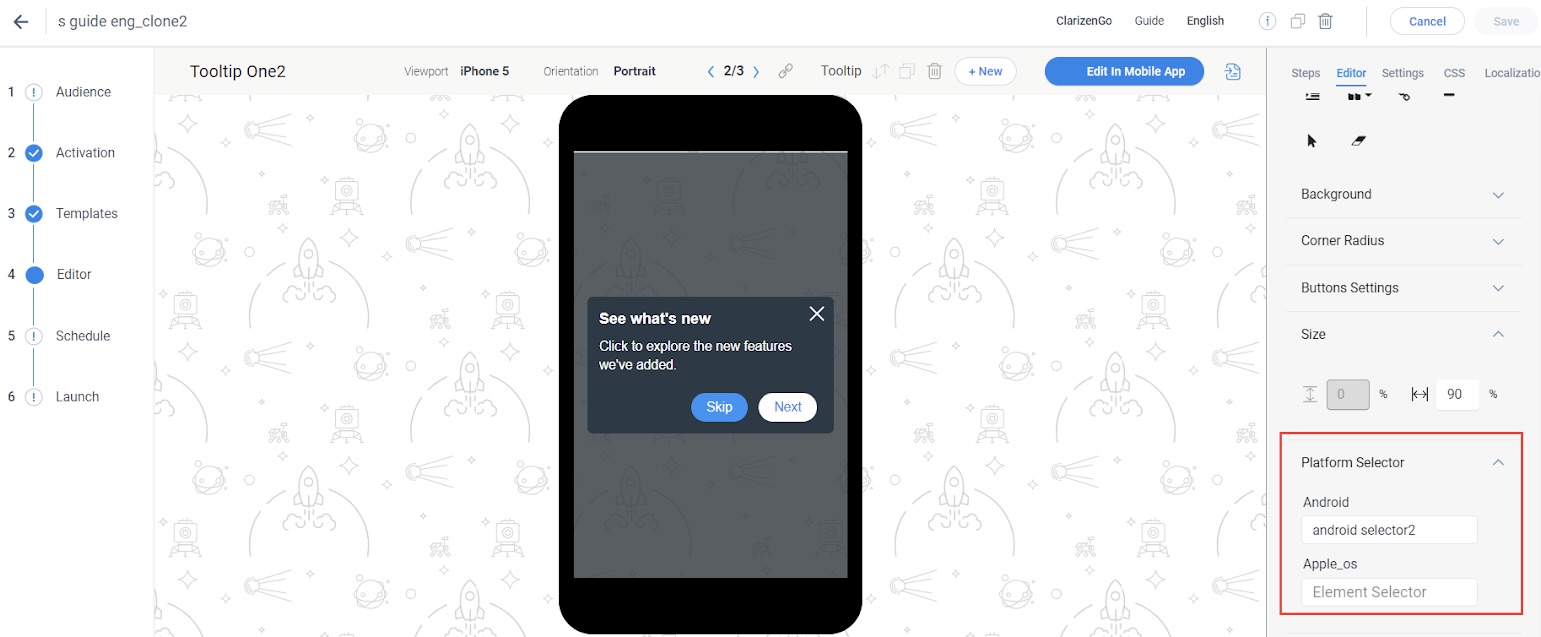
Note: Gainsight PX recommends that you configure the element from the in-app editor rather than the platform selector for more accurate results.
Link and Preview Guide Engagement from Mobile App
To create effective Tooltips and Hotspot, you need to link the intended UI elements to the engagement steps and preview them before launching.
View Engagement
This section explains how to navigate to the mobile app to view the engagements and how to link Tooltip and Hotspot to the UI elements on which they need to be displayed.
To view the engagement:
- Click the Edit in Mobile App icon. The screen displays a QR Code.
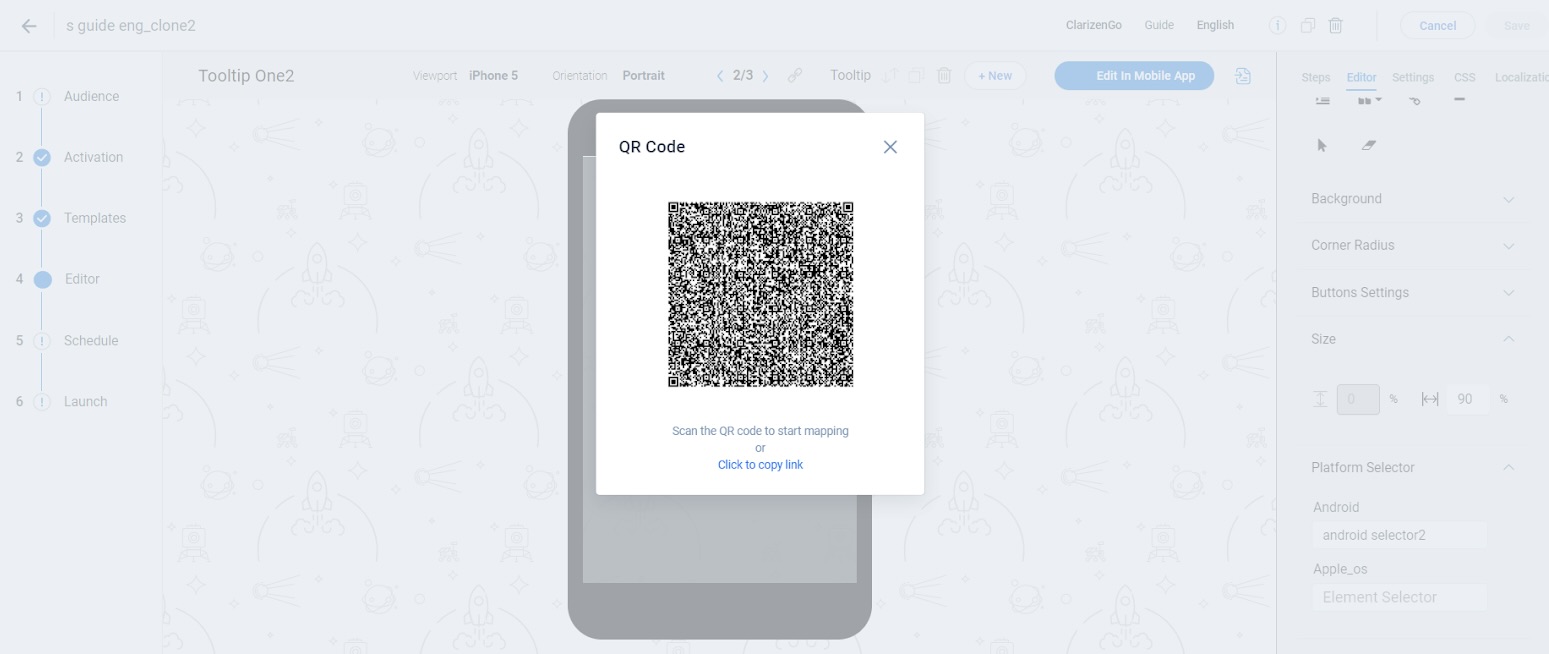
- Scan the QR code with an app on your mobile device or copy an URL using Click to copy link and send the link to your mobile device.
- From the displayed screen, click the OPEN IN APP link. Your mobile application is launched. (that has Gainsight mobile SDK).
- You can now edit the engagement in the mobile application.
- Alternatively, when you click the PX icon on the home screen and then click Engagements, a list view of engagements appears.
- Click on the required engagement to see the preview.
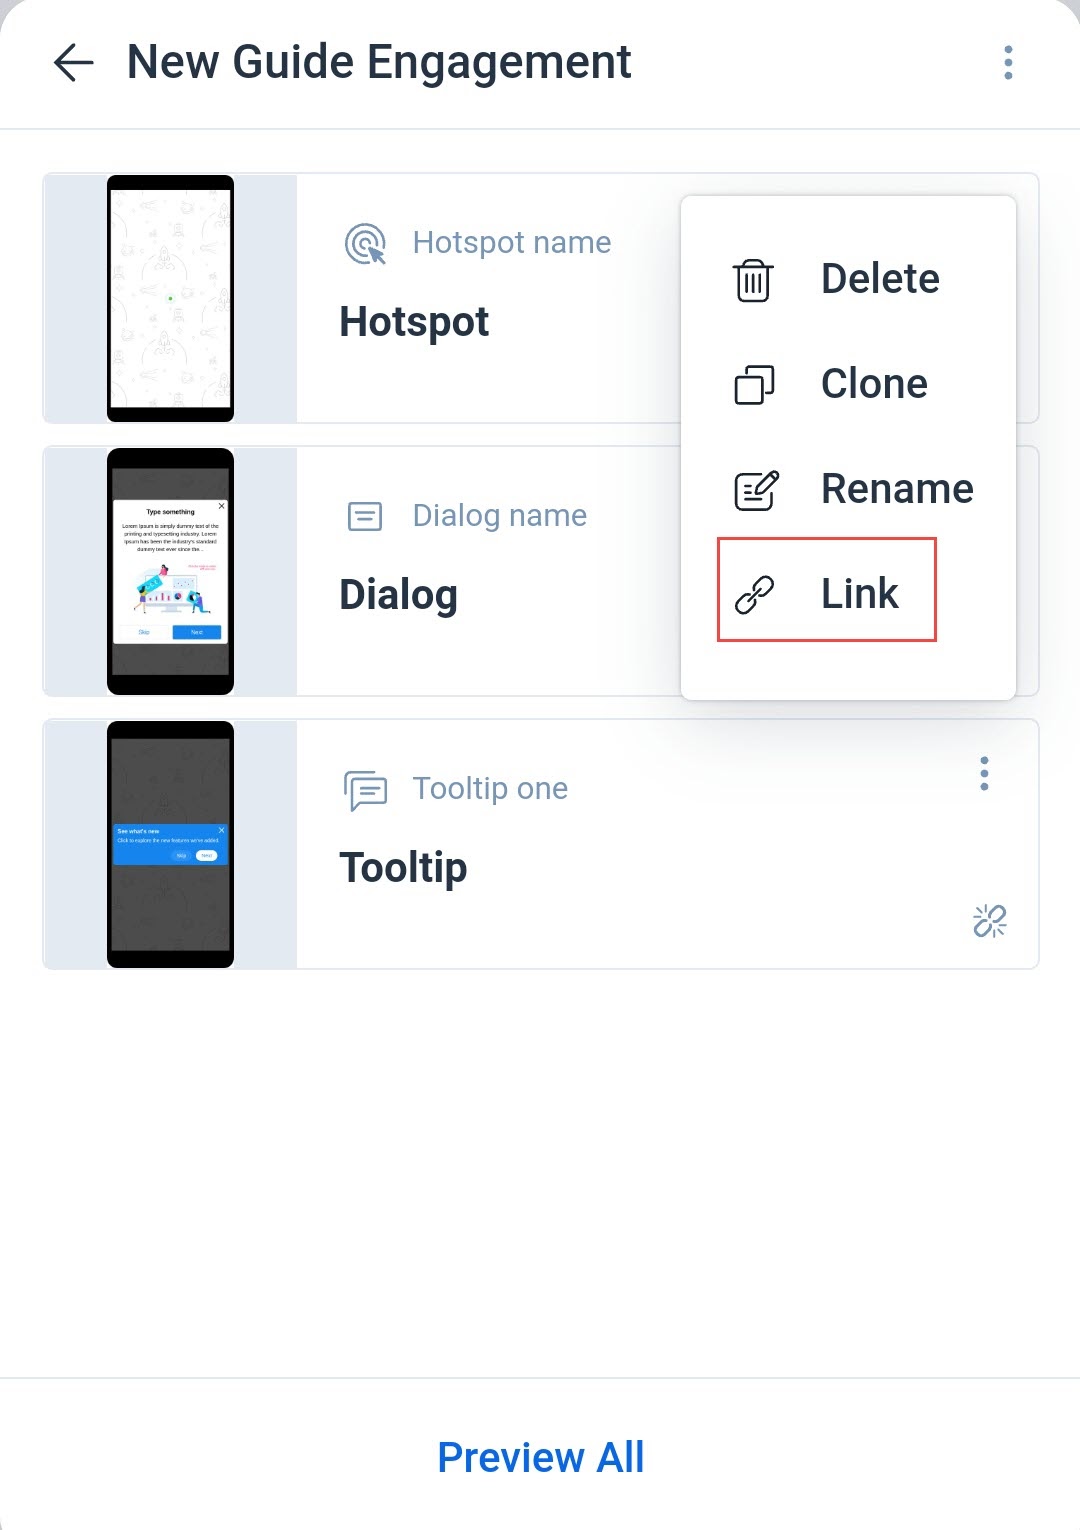
Link Hotspot and Tooltip
To link UI elements to the engagement steps:
-
Tap the PX icon and click Engagements.
-
Tap on the required engagement from the list. The engagement steps appear.
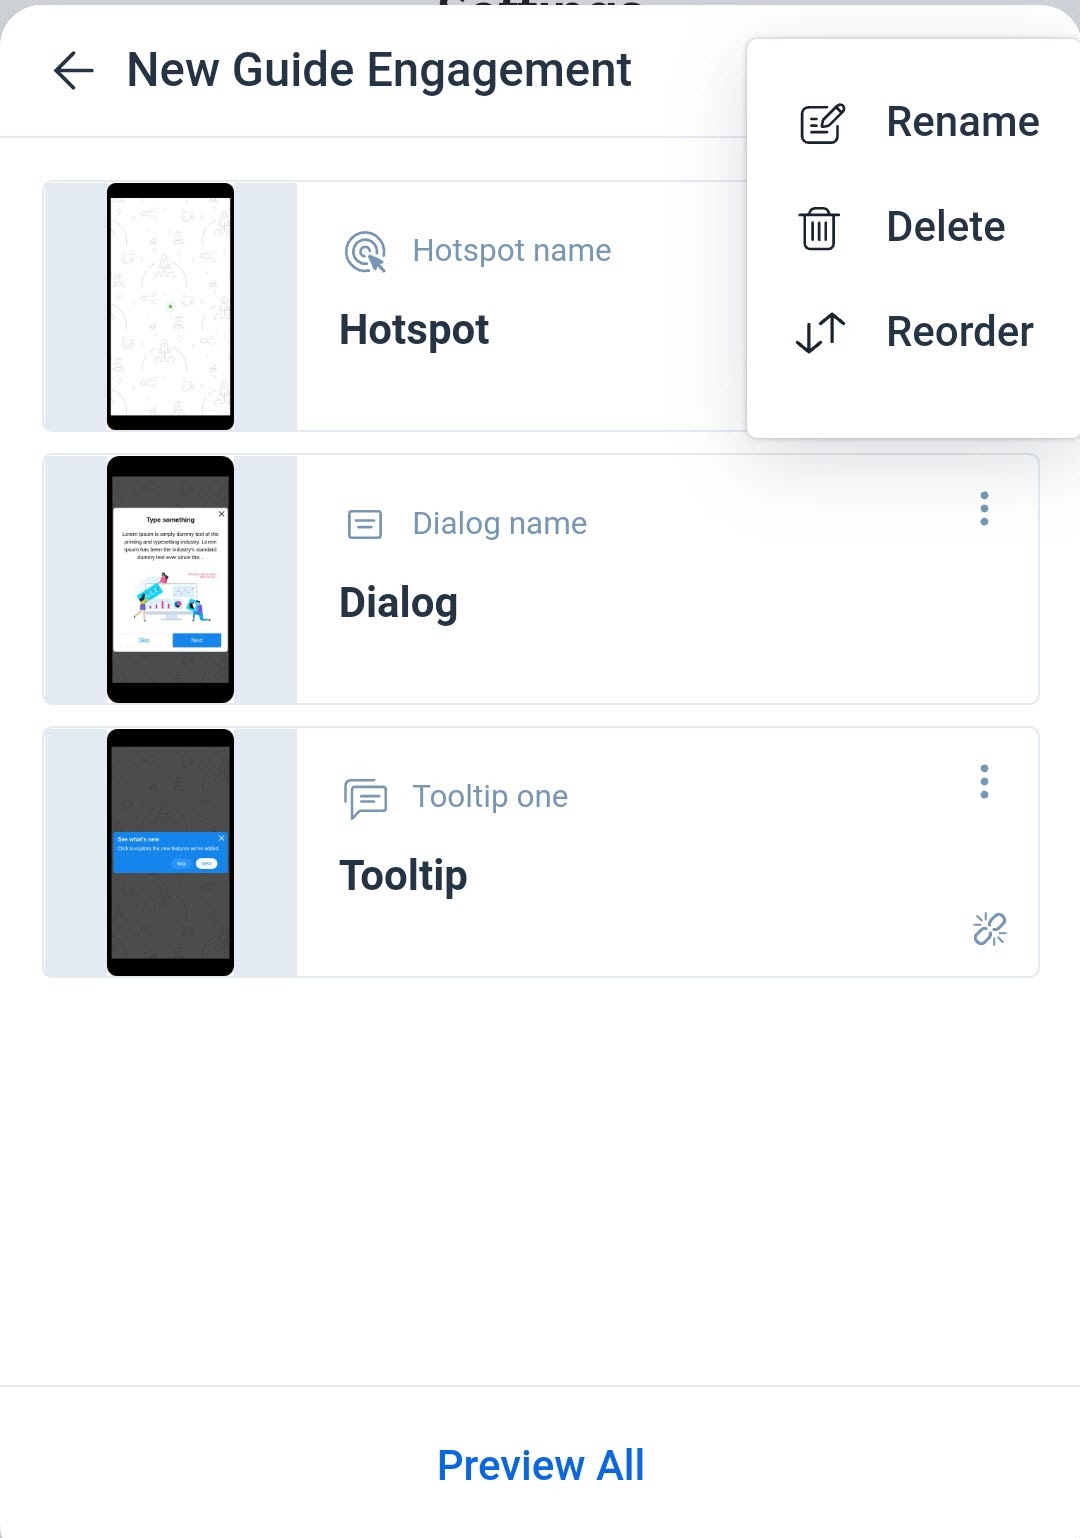
Note: Tap the ellipsis (main menu) button to rename and delete the engagement or reorder the steps. You can drag and drop to reorder the steps.
- Tap the ellipsis menu for the corresponding step and select the Link option.
-
From the Step Name screen, select one of the following options based on the element:
- Attribute: If the element needs to be identified by element ID
- Item index: If the element can be identified with an index
- Full path: If the element can be described by its entire path.
Note: This is the most accurate mapping. - Parent: If the element can be identified by its parent element.
Note: Only the options applicable to the chosen element will be displayed.
- Verify the Screen Name and Screen Class and click Save.
The step is now mapped to the element.
Preview and Edit Steps
You can preview each step of the engagement individually or preview all the steps together. However, you need to link all the steps to be able to preview the whole engagement.
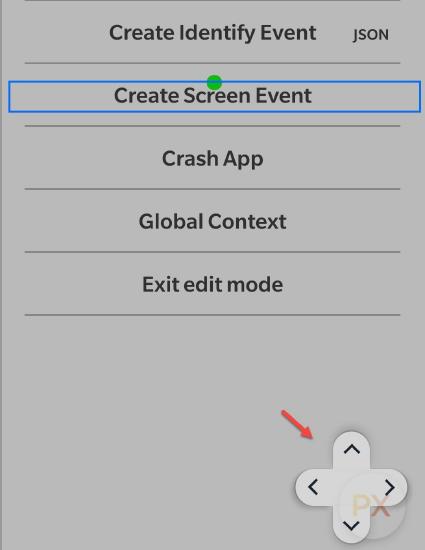
While previewing if you wish to change the position of the Tooltip or Hotspot, edit the step and then use the navigator button to adjust the position.