Configure In-App Hub (formerly KC Bot) - Content
This article explains how to add and manage the various resources to a Knowledge Center Bot in Gainsight PX.
Overview
The Knowledge Center Bot is a tool designed to help you deliver content to the end-users. These content could be in the form of in-app engagements, articles hosted on PX, external knowledge base articles and so on. The Content section of the Knowledge Center Bot allows you to configure the various resources that should be available in the KC Bot.
The following are the types of resources you can add to a KC Bot:
- Engagements
- Articles
- Web Links
- Recommendation
You can directly add resources to the KC Bot, or create categories to efficiently organize all the content.
Example Business Usecases:
- Consider a scenario where you want to create an onboarding checklist for new users who sign up to your application. You can leverage the KC Bot to create a curated list of tasks that new users should complete within the first week of joining. These tasks can include a collection of guide engagements to set up the application, links to security documents, and more.
- Consider a scenario where a user encounters a challenge in performing a task in your application, and seeks assistance. They would typically navigate away from the application, and look for help in your documentation or help center. However, with the KC Bot, you can bring the required help right into the application. By integrating your knowledge base with KC Bot, users can search and access information right in the application, without the need to navigate away.
- User feedback is of utmost importance, and the KC Bot streamlines the collection process. With the help of the Feedback tab in KC Bot, you can set up mechanisms to collect user feedback at the product level, to understand user pain points and valuable suggestions.
Create Bot Categories
Categories in KC Bot are a valuable tool for efficiently grouping and organizing your resources. This systematic approach enhances your overall management, leading to quicker access for your users to essential resources.
To create a category:
- On the Engagements tab, click the Manage Categories icon. The Categories window is displayed.
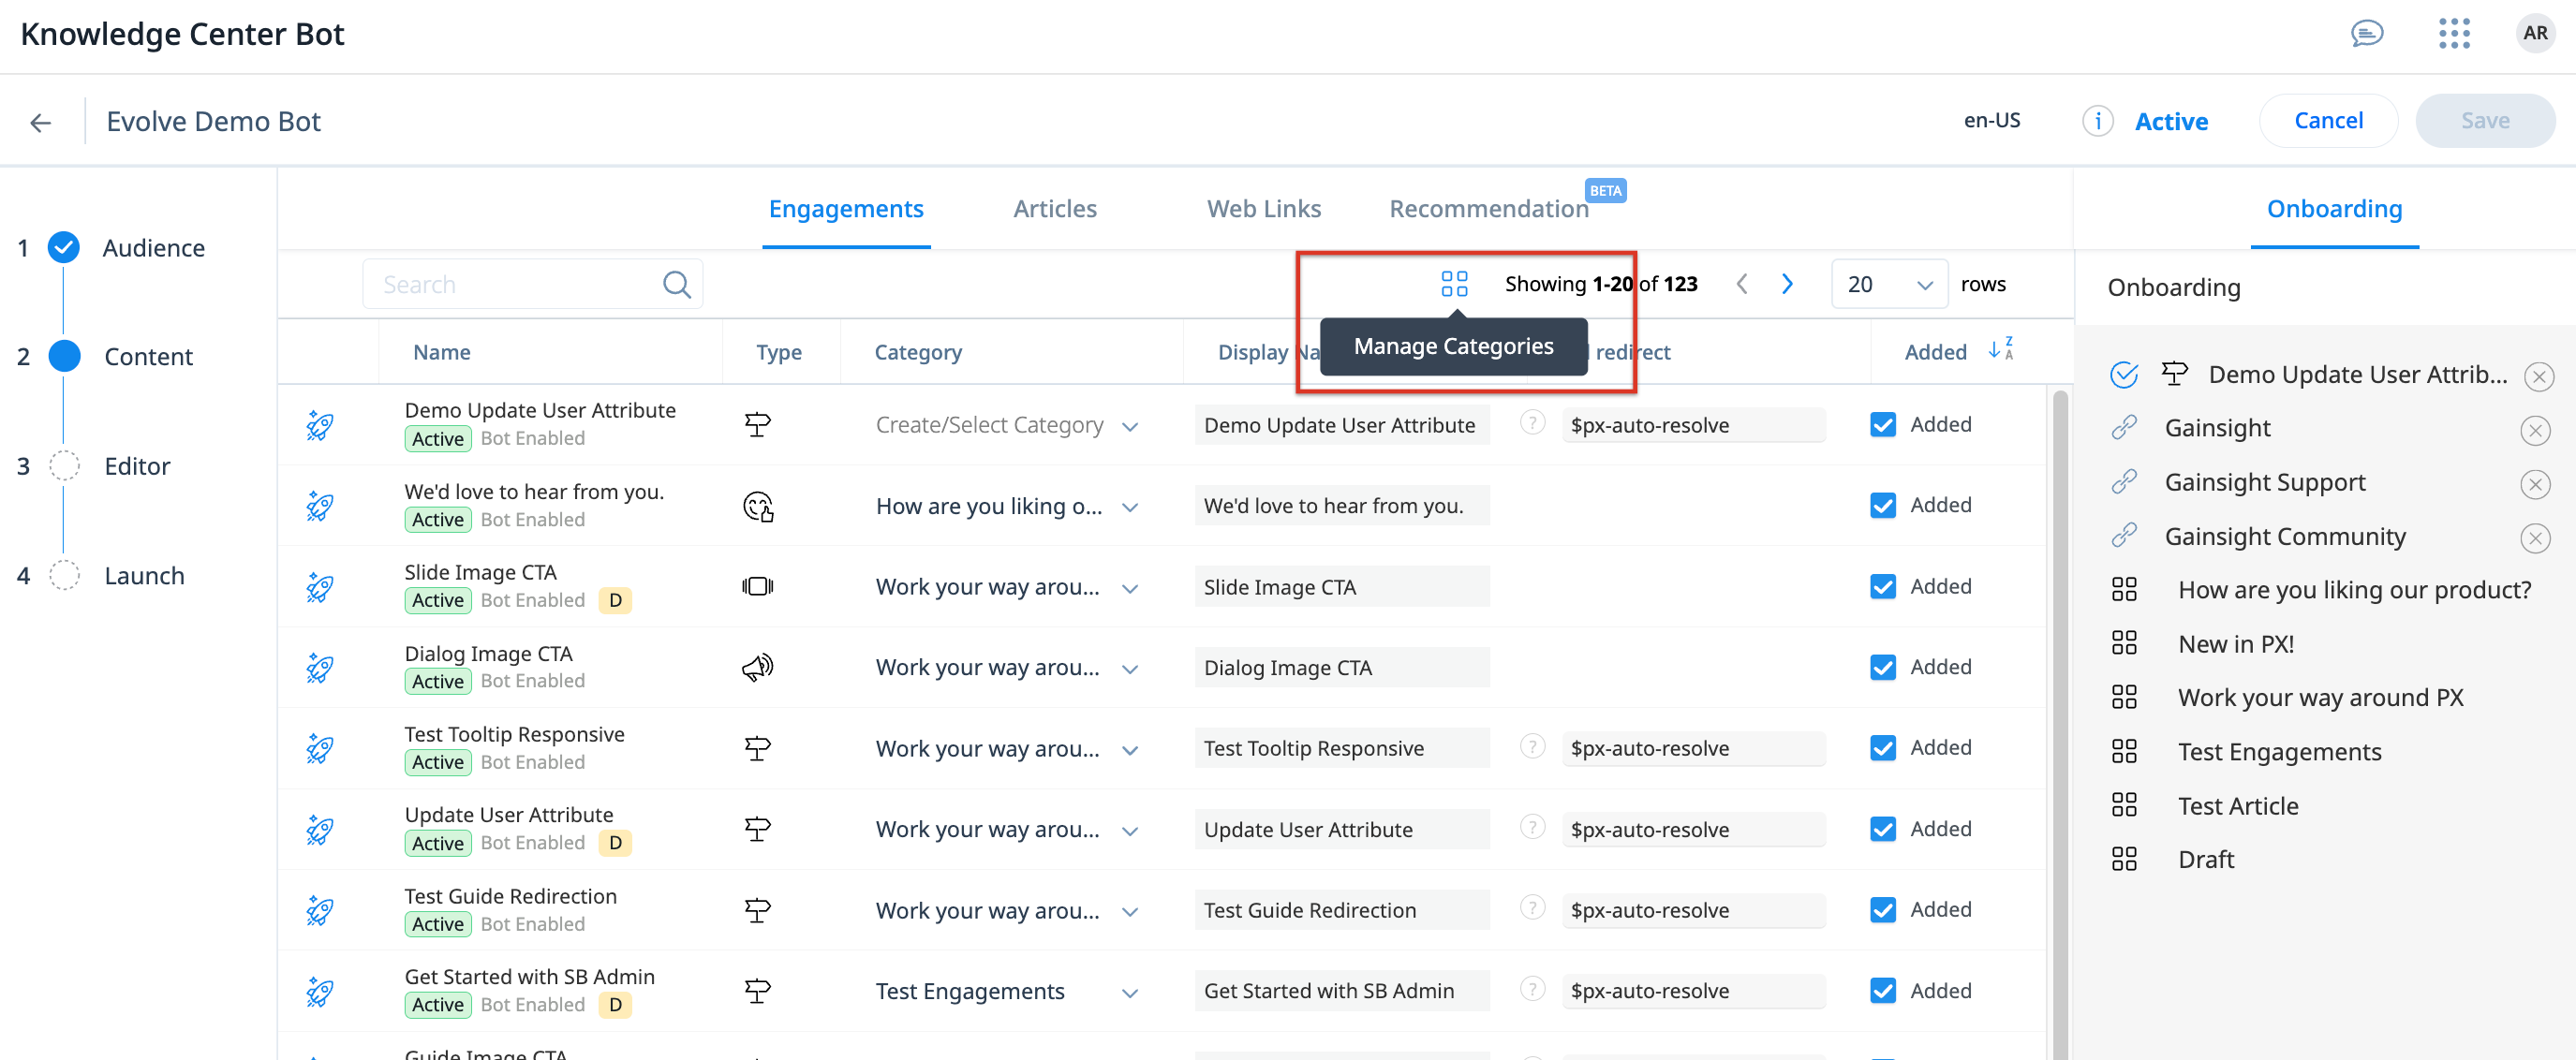
- Click Create.
- Enter a name and brief description for the category.
- Click Add. The category is created and appears in the drop-down under the Category column.
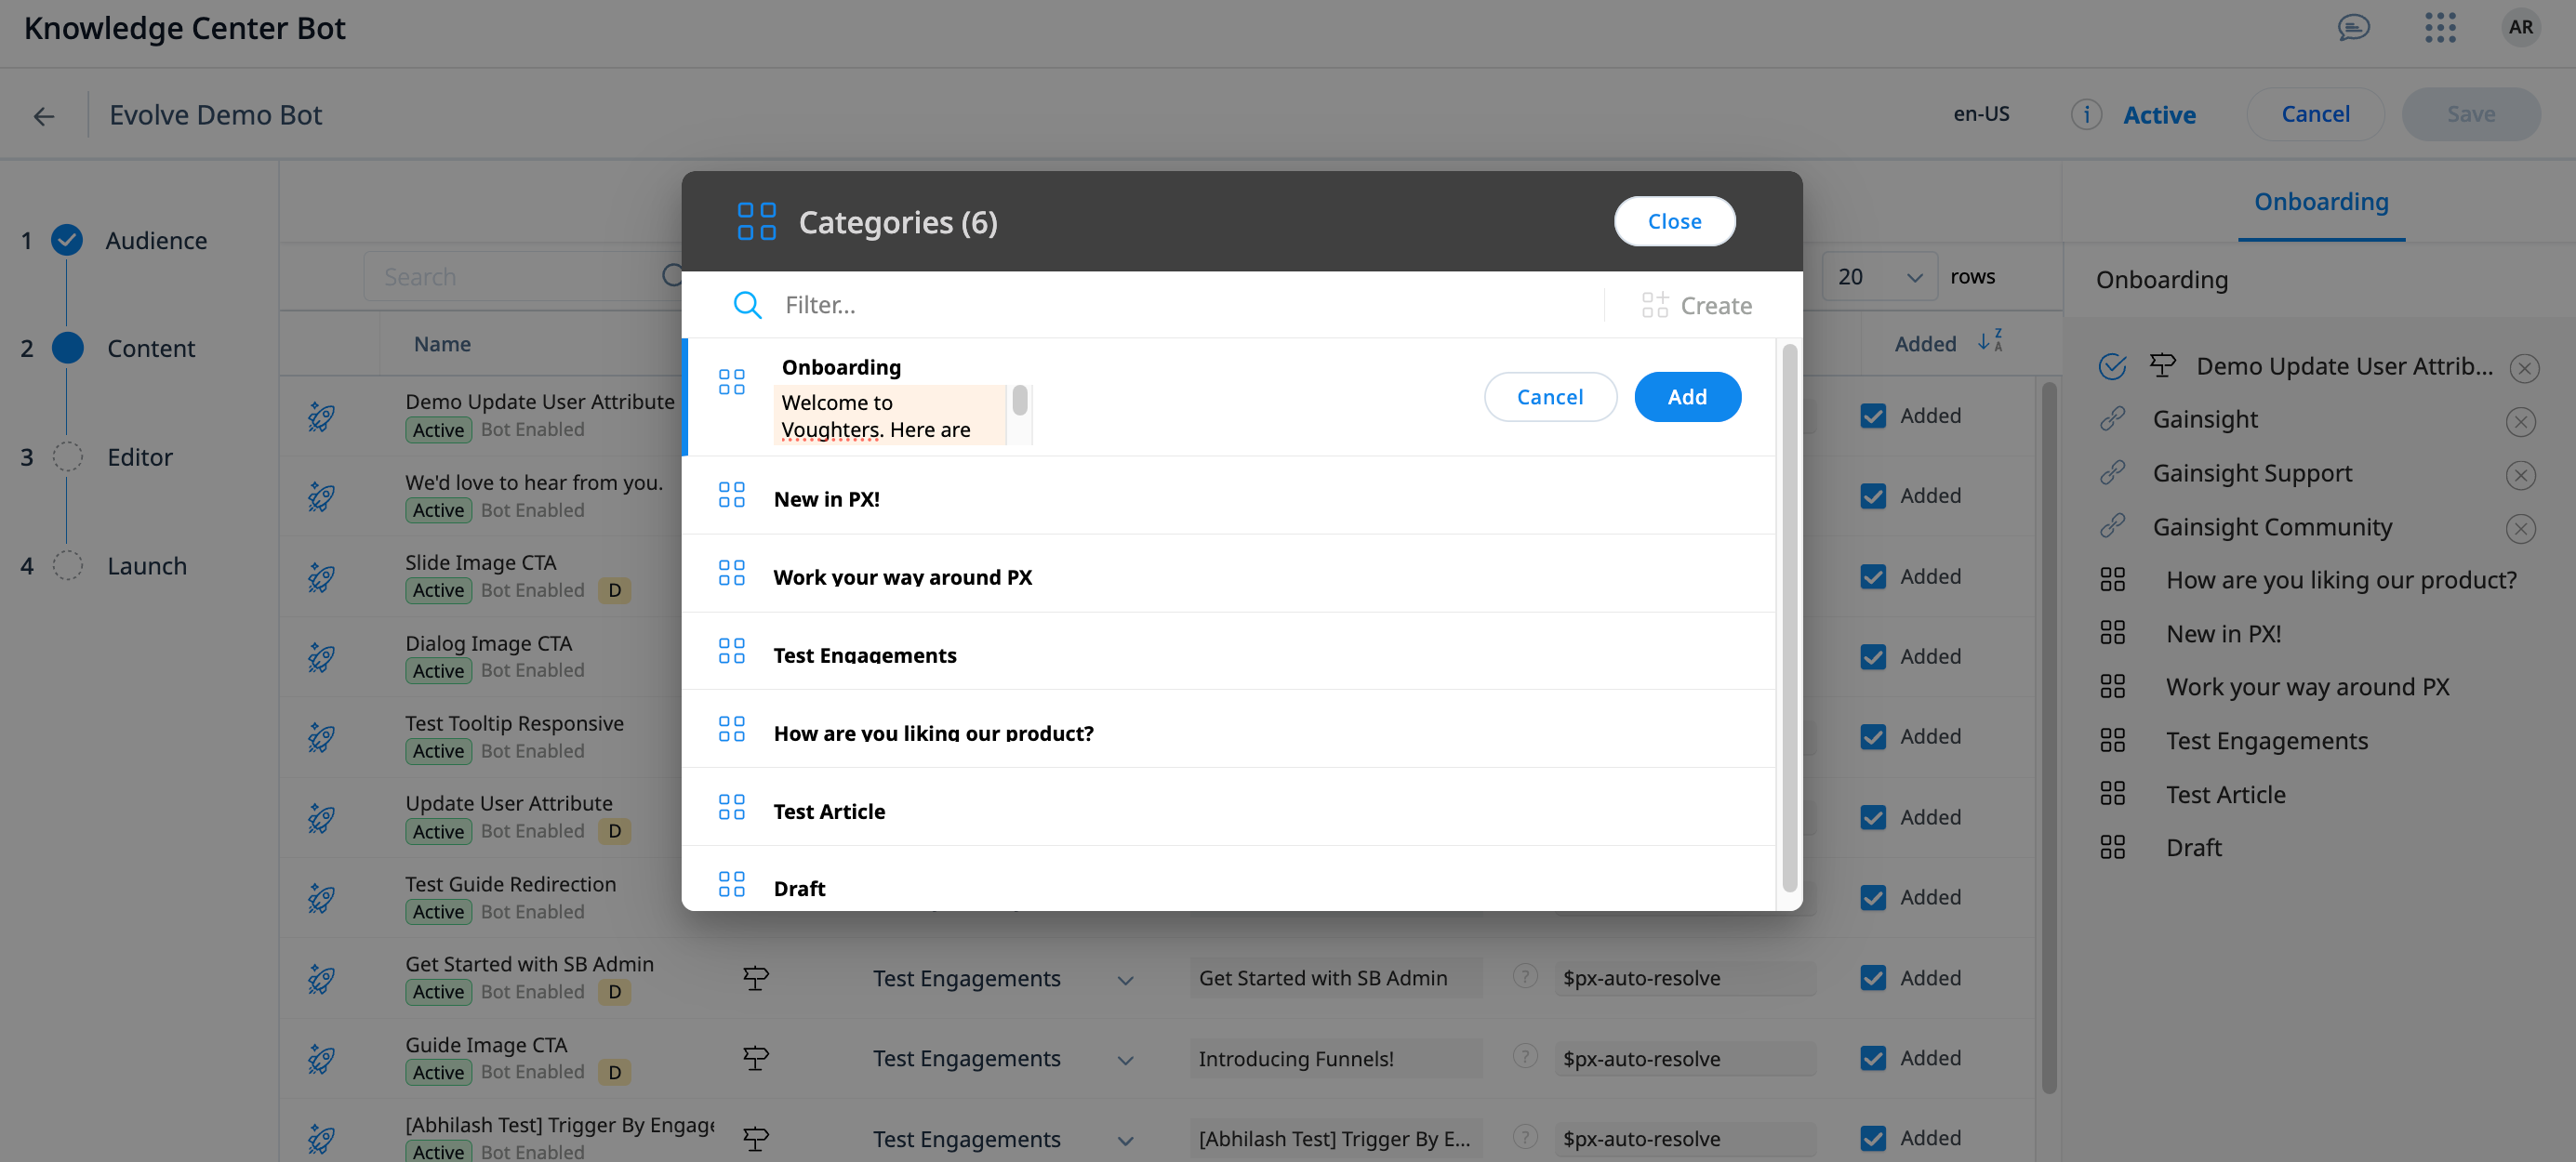
Note: Alternatively, you can also create a category by directly entering the name in the Create/Select Category dropdown.
If you have created multiple categories, you can set the order by dragging and reordering the Categories as required.
Engagements
The Engagements tab allows you to add engagements to the KC Bot to make it always accessible to your users.
To add engagements:
- From the Category column, select the applicable category in which the engagement is to be added.
- From the Added column, select the Add checkbox of the required engagement to add it to the bot. The engagement is added to the bot.
- (Optional) If you wish to display a different name for the engagement to the user, change the name in the Display Name column.
- (Optional) If you have multiple engagements, drag and reorder the engagements based on how it must appear on the bot.
- Click Save.
Articles
Knowledge Center Articles allow you to create documents in PX that can directly be accessed in the KC Bot, as opposed to an external knowledge base or support site. You can create an article and add the same article to multiple bots within the same product. This eliminates the need to create duplicate articles in case you maintain multiple bots.
Example Business Usecase: Consider a scenario where you have documents such as EBR decks or best practices that cannot be published to a knowledge base. Or if you have release notes that you would like your users to quickly access from within your application. You can create such documents as Articles in PX, and add them to the KC Bot for your users to access.
Prerequisite: Ensure that you have created the article before adding it to the bot. For more information on how to create articles in PX, refer to the Create Articles for Knowledge Center Bot article.
To add articles to the bot:
- Navigate to the Articles tab. A list of articles created in your subscription appears.
- From the Category column, select the applicable category in which the article must appear.
- From the Added column, select the Add checkbox of the required article to add it to the bot. The article is added to the bot.
- (Optional) If you wish to display a different name for the article to the user, change the name in the Display Name column.
- (Optional) If you have multiple articles or engagements, drag and reorder the articles based on how it must appear on the bot.
- Click Save.
Link Articles
You can link articles from your Knowledge Base and add them to the KC Bot.
Prerequisite: Ensure that you have a successful integration with the required knowledge base set up in PX. For more information on how to connect PX with an external knowledge base, refer to the Knowledge Center Integrations category of articles.
To link articles:
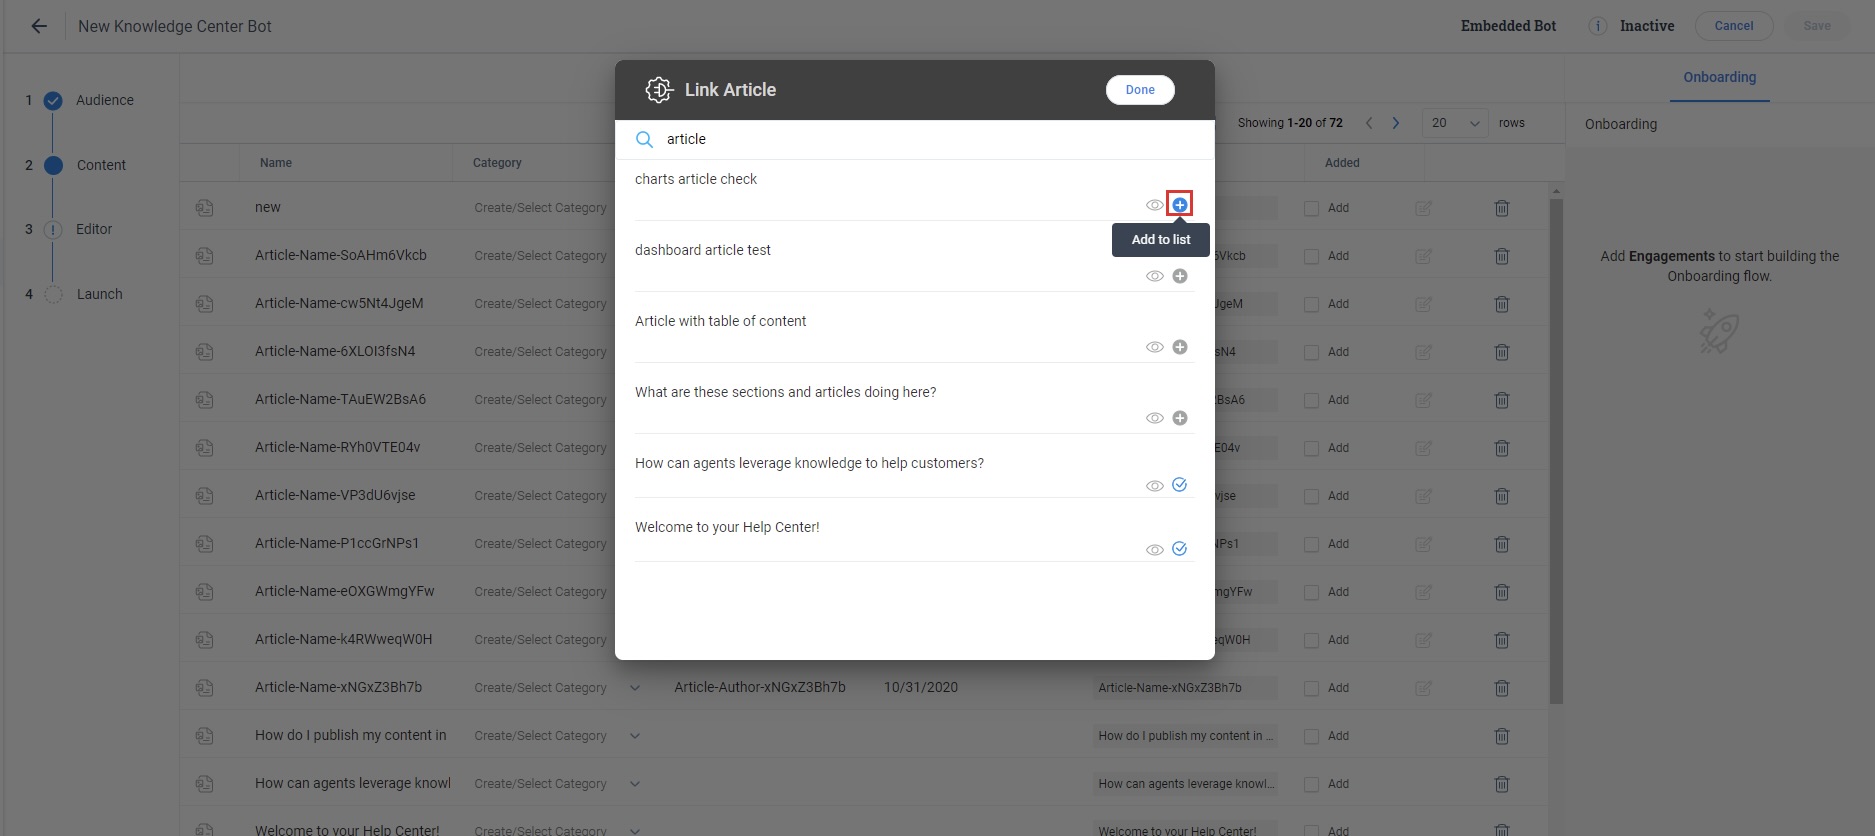
- Navigate to the Articles tab.
- Click Link. The Link Article window appears.
- Enter the keywords to search the required article(s).
- Click the Add to List button to select the article(s).
- Click Done. The selected articles are added to the articles list.
- Select the Add checkbox next to the article in the list view. The article is added to the bot.
Web Links
Web Links allows you to create a link to an external resource and add them to your Knowledge Center Bot with an option to configure the link to open in the same tab or a separate tab.
Example Business Usecase: Consider a scenario where you want to provide resources to a specific document in your knowledge base, or direct users to content that does not exist in your help center. Using Web Links, you can directly add such URLs to your bot for quick access for your users.
Create Web Links
To create links to external URLs:
- Navigate to the Web Links tab. A list of all links created in your subscription appears.
- Click Create. The Create Link window appears.
- Enter the name and description of the link.
- In the Type section, select one of the following:
- Link: Select Link to direct users to a specific URL.
- JavaScript Function: Select JavaScript Function to invoke a JavaScript function defined in your application. For more information, refer to the Add JavaScript Functions to KC Bot section.
- Enter the URL or JavaScript Function Name based on the type selected.
- In the Target section, select how the URL must be opened - New Tab or Current Tab. This option is only available for Link type articles.
- Click Create.
Add Web Links to KC Bot
Once you have created web links, you can add them to the KC Bot to display them to your users.
To add a web link to the bot:
- From the Category column, select the applicable category in which the link must appear.
- From the Added column, select the Add checkbox of the required article to add it to the bot. The web link is added to the bot.
- (Optional) If you wish to display a different name for the link to the user, change the name in the Display Name column.
- (Optional) If you have multiple web links, drag and reorder the links based on how it must appear on the bot.
- Click Save.
Add JavaScript Functions to KC Bot
Gainsight PX allows you to link external resources and add them to Knowledge Center Bot. You can configure the link to open in the same tab or a separate tab. This enhancement helps you invoke JavaScript functions defined in your application as links in Knowledge Center Bot.

IMPORTANT: Admins need to add the JavaScript function to the product tag to ensure security. Following is an example of adding the tag where the function to add is allowedLink.
var config = {kcAllowedFuncNames : ["allowedLink"]};
Recommended Content
Content recommendation is a powerful way of engaging your audience with your knowledge base. You can create recommendations with a set of articles and engagements that are useful to the users or that they may be interested in.
To create recommendations:
- Navigate to the Recommendation tab.
- Click Create.
- In the Details step, provide the following details:
- Enter a name for your recommendation.
- (Optional) Enter a description of how the content could be useful.
- In the Audience Rules section, configure the rules to qualify users. These help you create more contextual content based on the rules defined.
- Click Next.
- In the Recommended Content step, search for the required content, and click Add.
- Click Create. The content is added to the Recommendation tab.
- Turn on the Status toggle switch to add the content to the bot.
You can customize the look and feel of the recommendation in the Editor section. For more information, refer to the Configure Knowledge Center Bot - Editor article.