Create Articles for Knowledge Center Bot
This article explains how to create, manage and localize articles for Knowledge Center Bot.
Overview
You can use the Articles section of the Knowledge Center (KC) Bot to create, manage and localize content.
The feature helps you with:
- The content editor to create new articles.
- The search option to find the required articles.
- The Article List View with the KC Bot details where each article is added.
- The Localization tab to translate the article content in different languages.
Business Use Case:
If you have important documents like EBR decks or best practices that cannot be published to the knowledge base, you can add the documents to the KC Bot directly.
Note: For more information, refer to the Knowledge Bases article from the Additional Resources section.
Create Articles
This section explains how to create articles that need to be added to the KC Bot:
To create an article:
- From the left pane, click Knowledge Center Bot.
- Click Articles.
- Click New Article.
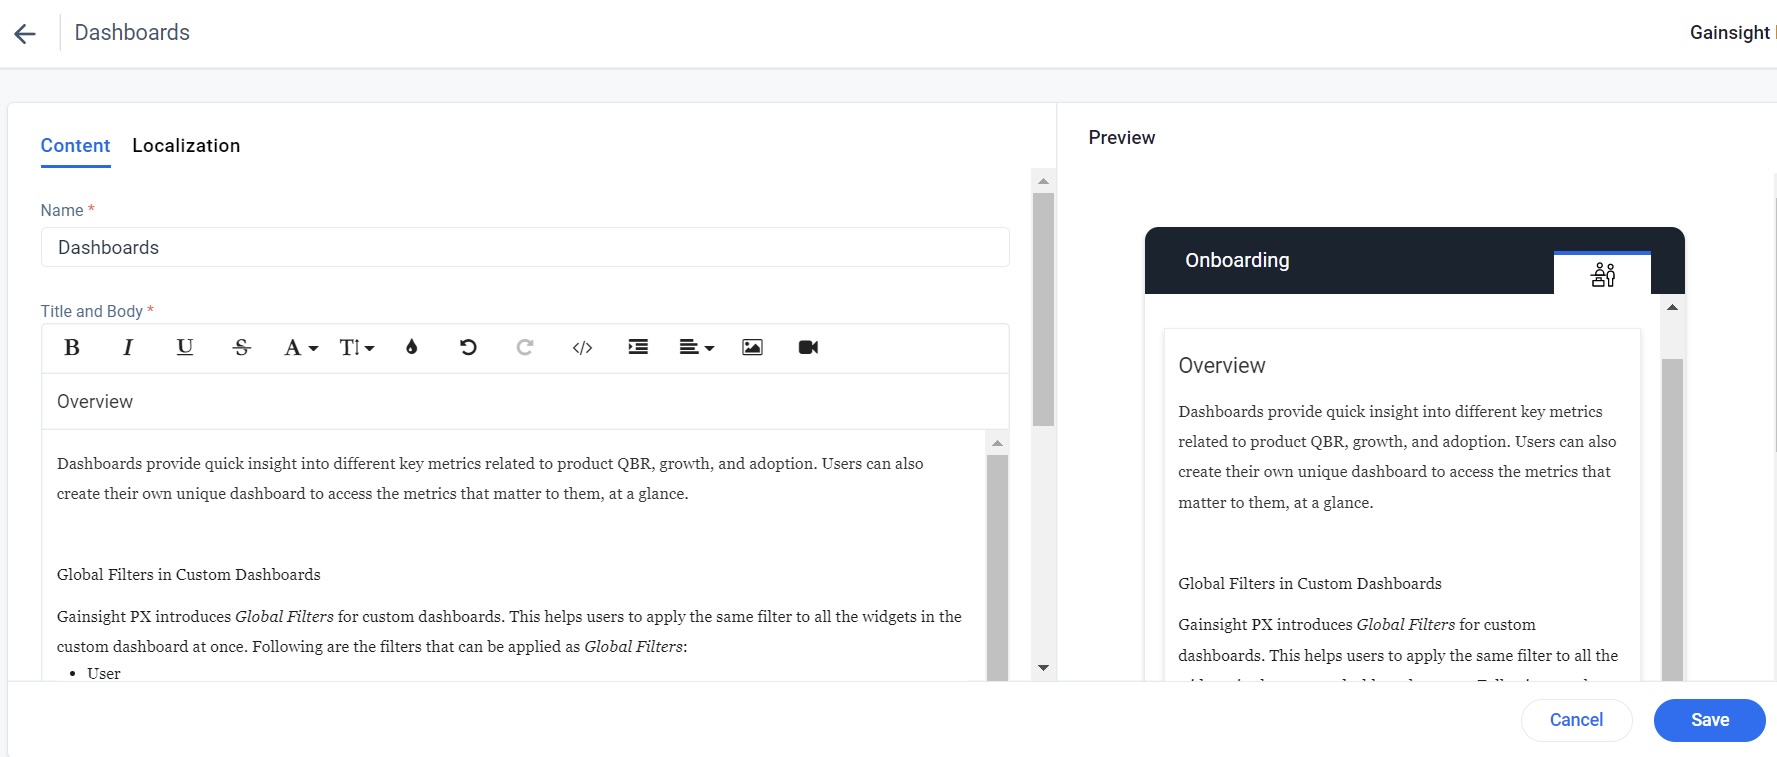
- In the Content tab, enter the following details:
- Name: Enter a name for your article. This name helps you identify your article.
- Title: Enter a title for your article. This can be the same as the Name.
- Body: Paste the content of your article. You can either add all the content to the body section and not include any URLs, or add some content in the Body section and redirect users to your URL for more info. The option to add images and videos is available. PX supports BMP, GIF, JPEG, PNG, SVG, TIFF, and WEBP image formats.
Note: The Card view of the content is available for your preview. - Link: The URL of the Knowledge Base content to give more details on the article.
- Link Text: The text on which the URL needs to be hyperlinked. (Example: Read More)
- View Type: Select from the options Default or Card
- Author Name: Name of the content owner
- Release Date: Date of the product release if the article is related to it.
- Click Save. The new article is created in the Articles list view.

Edit or Delete or Clone Articles
Click the three-dots vertical menu button to edit or delete or clone an article.

Localize Articles
After creating and saving the article content, you can localize the article to one of the preferred languages from the available list of languages.
Perform the localization in the following method:
- Download XLIFF file from PX
- Set Localization Status
- Perform localization in the XLIFF file
- Upload XLIFF file back to PX
Localization Statuses
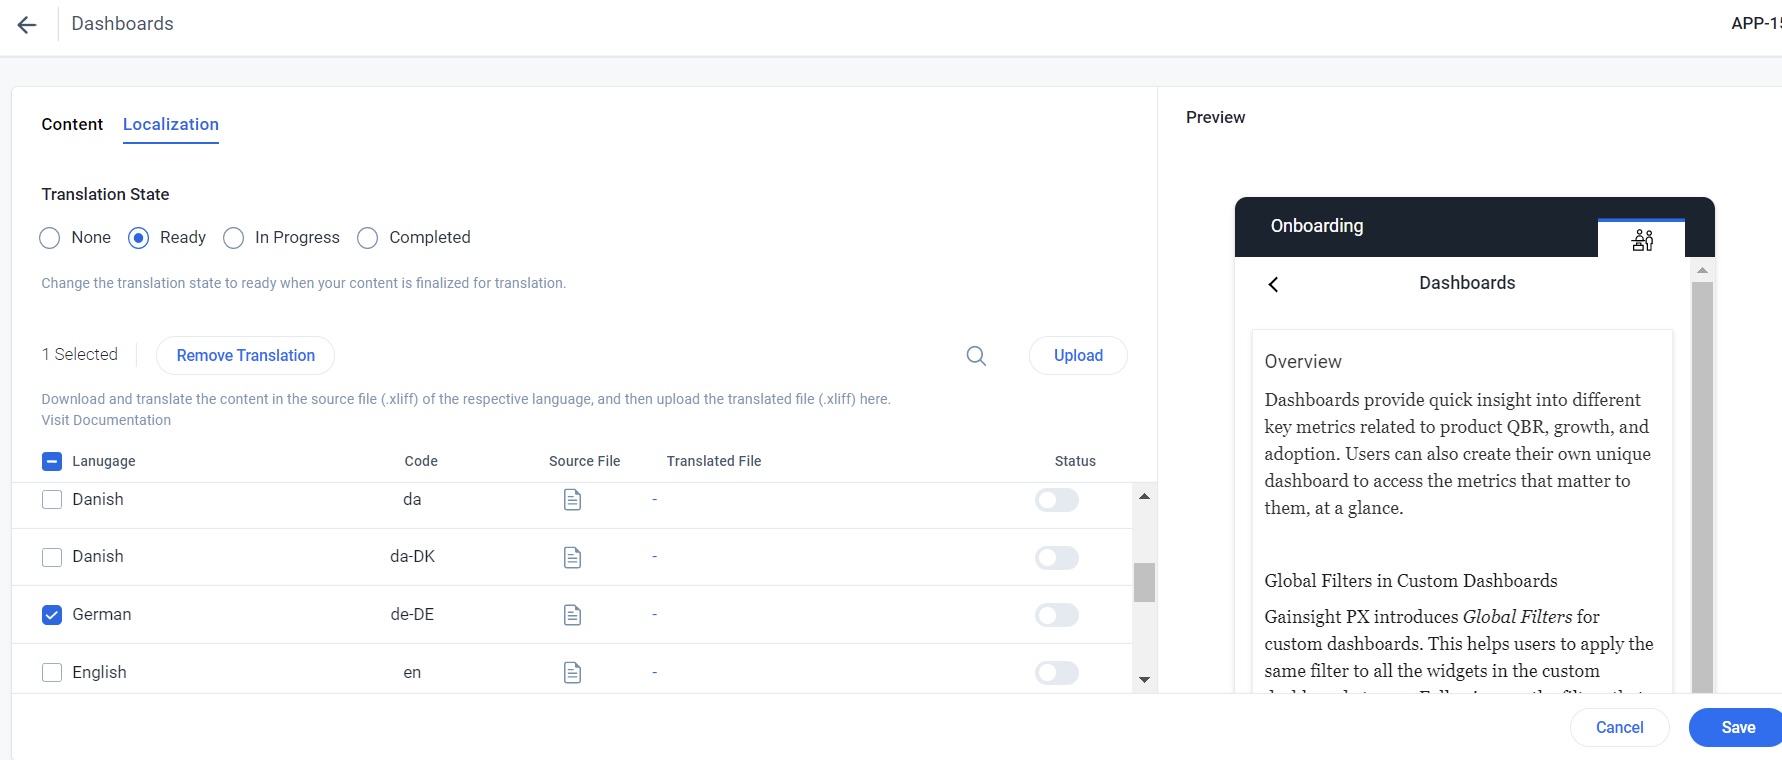
During the localization process, you can set the following statuses manually to mark the stage of localization that is applicable to each article.
- None: Localization workflow has not started yet.
- Ready: The article is complete and the writer wants to communicate to the Translation team that it is ready for translation.
- In Progress: The translation team is performing the localization process.
- Complete: The translation team has completed the localization process and the file is ready to be uploaded.
To localize an article:
- From the left pane, click Knowledge Center Bot.
- Click Articles.
- Select an article from the list view that needs to be localized.
- Click the Localization tab.
- Select the intended language of localization and click Source File.
- Select the required version of the XLIFF file to be downloaded from the options HTML or contextual.
Note: The HTML version is recommended by PX. - Perform the translation in the XLIFF file and click Upload to export the file back to PX.

Add Articles to KC Bot
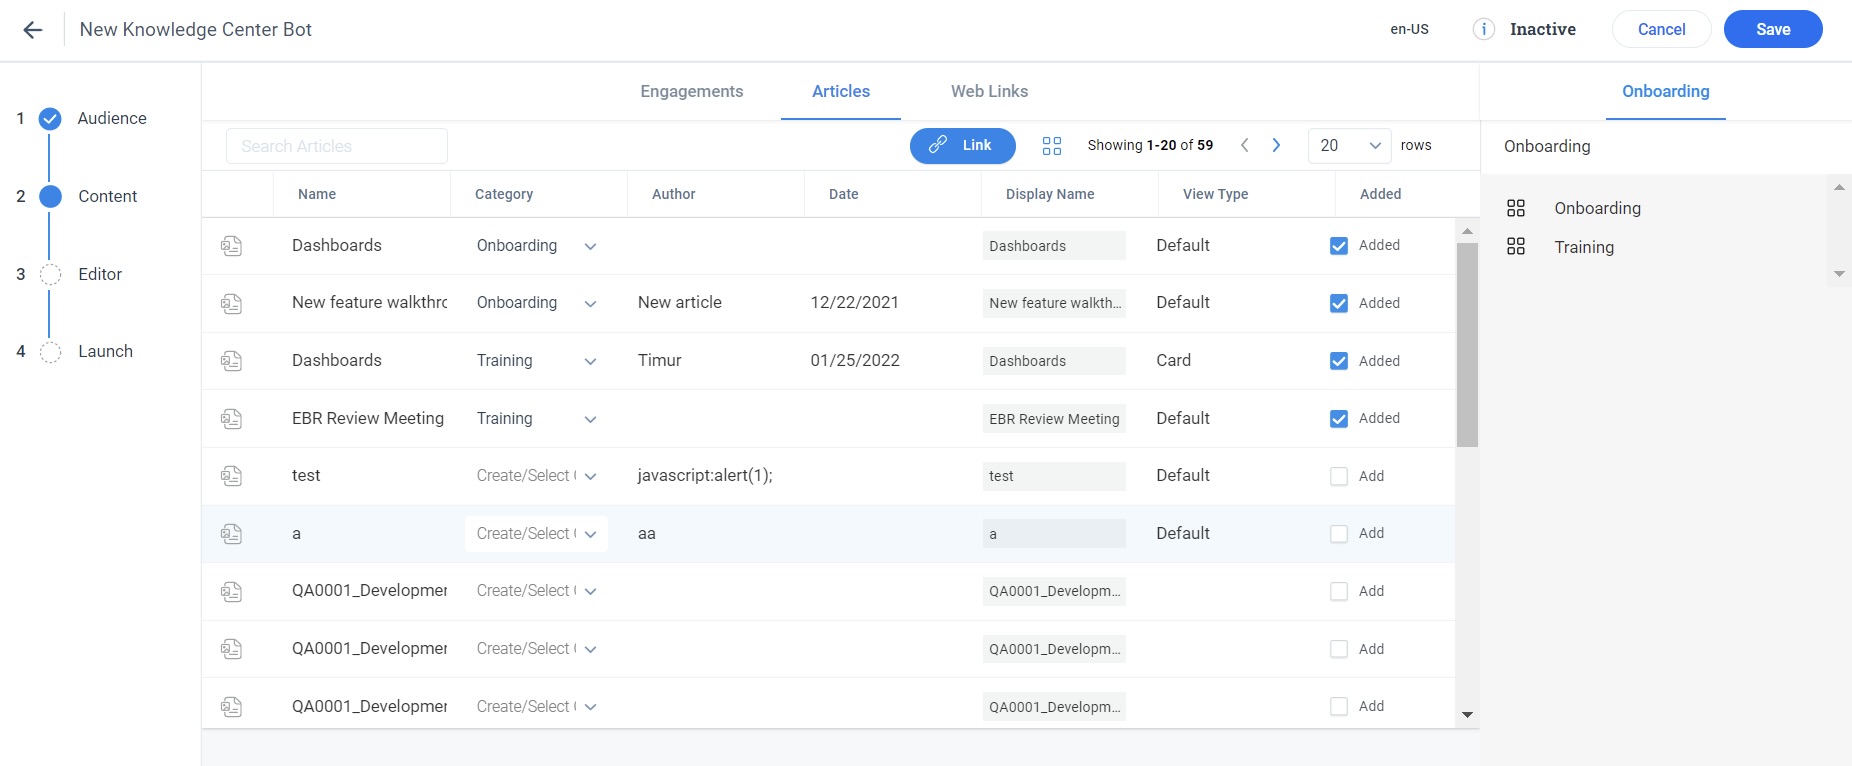
The articles that you created appear in the Content section of the Bots. You can customize each Bot to display the required articles.
To add the articles to Bot:
- From the left pane, click Knowledge Center Bot.
- Click Bots.
- Navigate to the Content section of the Bot and click the Articles tab.
- Select the required category in the Bot to which the article needs to be displayed and then select the Added checkbox.
Note: You can create new categories by clicking the category menu button. - Click Save.
Note: You can also link external articles hosted on your support site by clicking Link.
