Configure SAML Authentication
This article explains how to configure SAML authentication using the Identity Provider (IdP) for Gainsight PX.
Overview of SAML and Idp
Security Assertion Markup Language (SAML) is an Extended Markup language (XML) based open source authentication and authorization mechanism. SAML allows you to log in to multiple applications with just one set of credentials. SAML consists of two main components; IdP and Service Providers (SP). When a user logs in to a SAML enabled device, the service provider requests authorization for the user from the IdP. The IdP authenticates the user’s credentials and returns the authorization for the user to the respective service provider. The user can now use the application.
Configure SAML in Gainsight PX
Gainsight PX supports SAML authentication with Okta, AuthO, and GSuite IdPs. After you configure an IdP, your users can log in to Gainsight PX using the configured IdP. When the user is authenticated on the IdP provider's application, they can access Gainsight PX (and also other apps configured with the IdP). Before setting up IdP, configure the SAML settings in Gainsight PX using the SSO / SAML page in the Administration menu.
To configure SAML settings in Gainsight PX:
- Navigate to Administration > SSO / SAML. The Login Settings page is displayed.
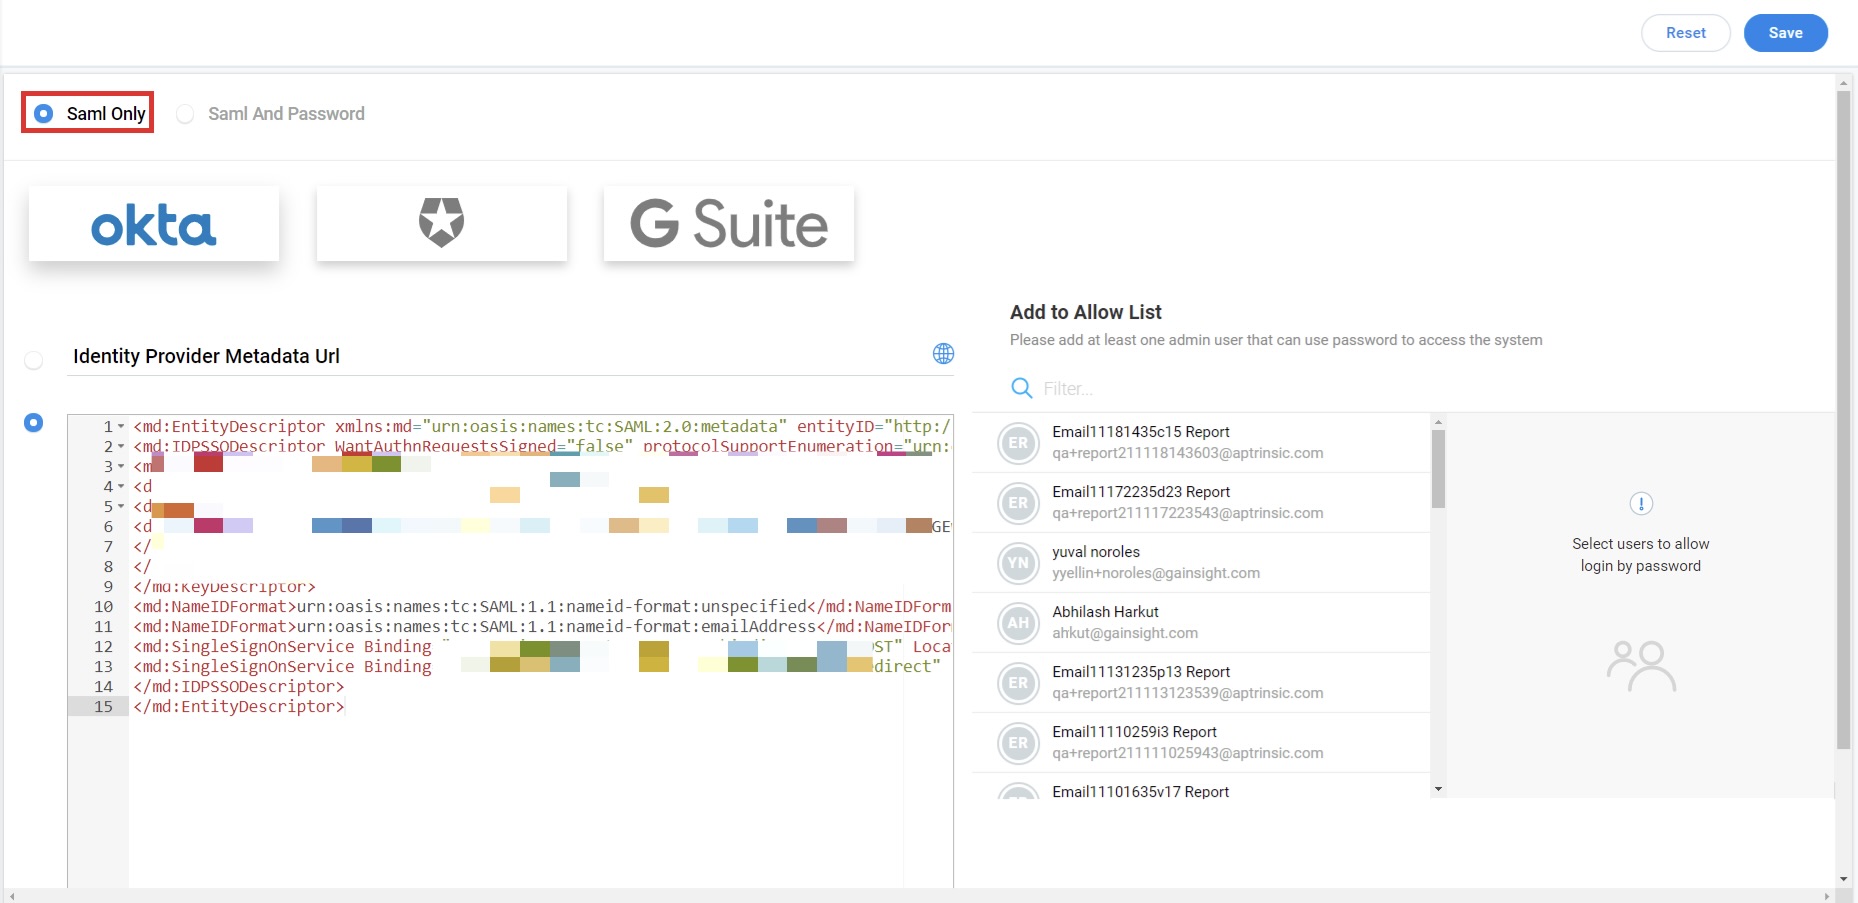
- Select an authentication method:
-
Saml Only: If you select this option, users can log in to Gainsight PX only through SAML. However, you can select a few users to log in using Gainsight PX application as well. Gainsight recommends using the Saml Only option with multi-factor authentication in your SAML IdP, and not to add any users to the Allow List.
-
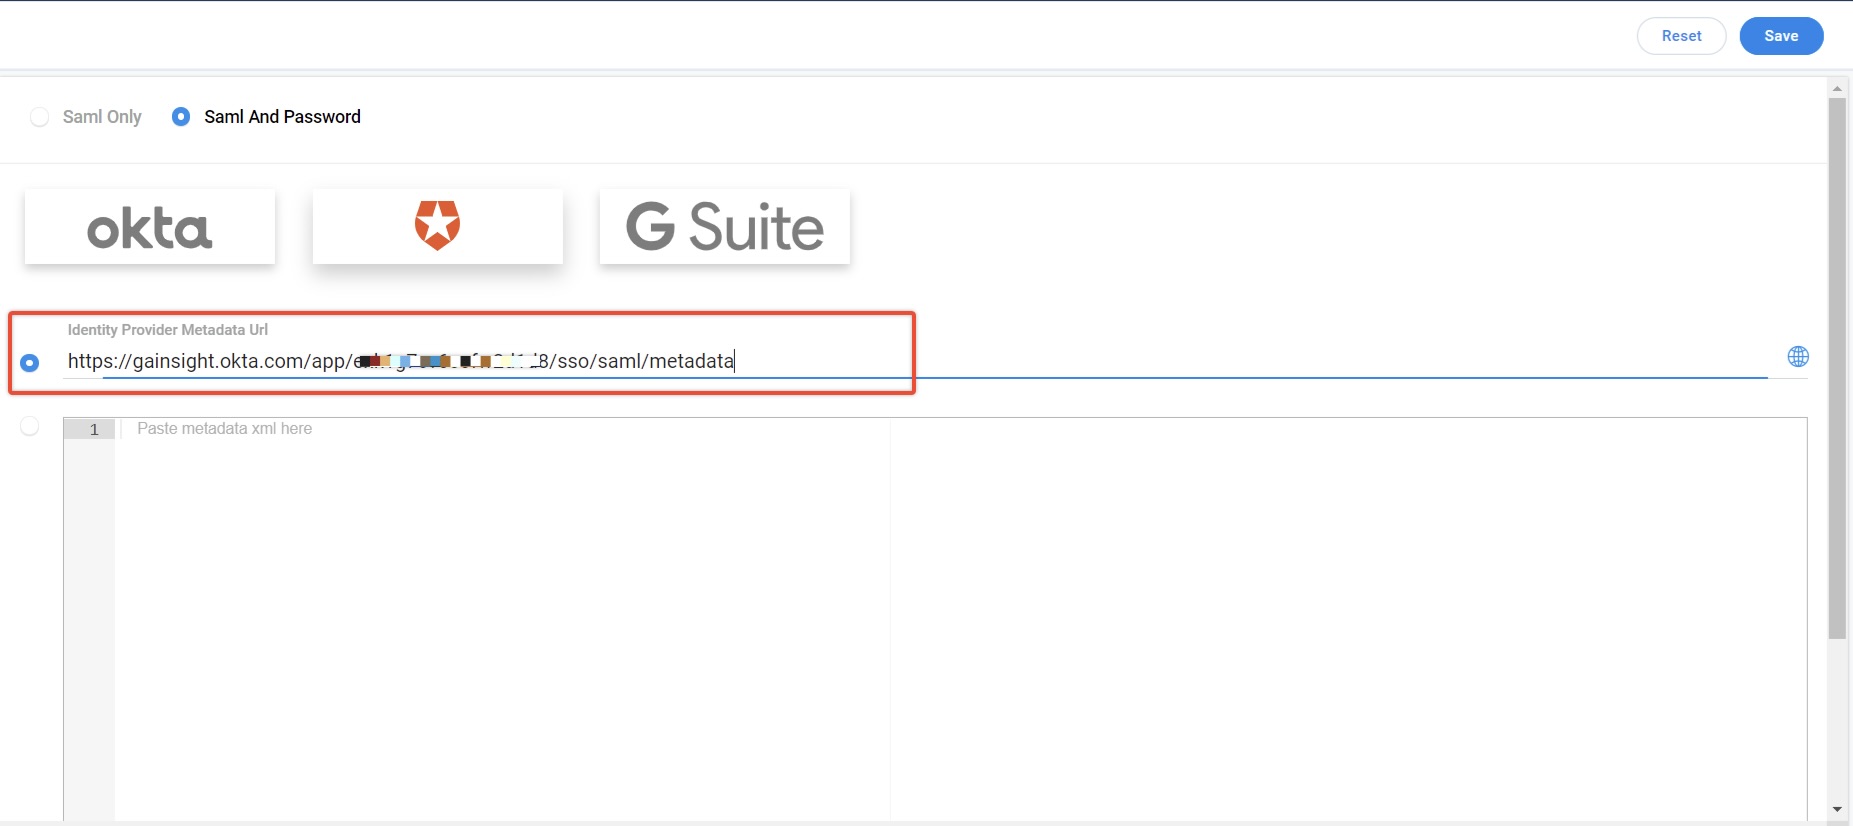
- Saml And Password: If you select this option, all the users can log in to Gainsight PX, either from a SAML based IdP or from the Gainsight PX application.
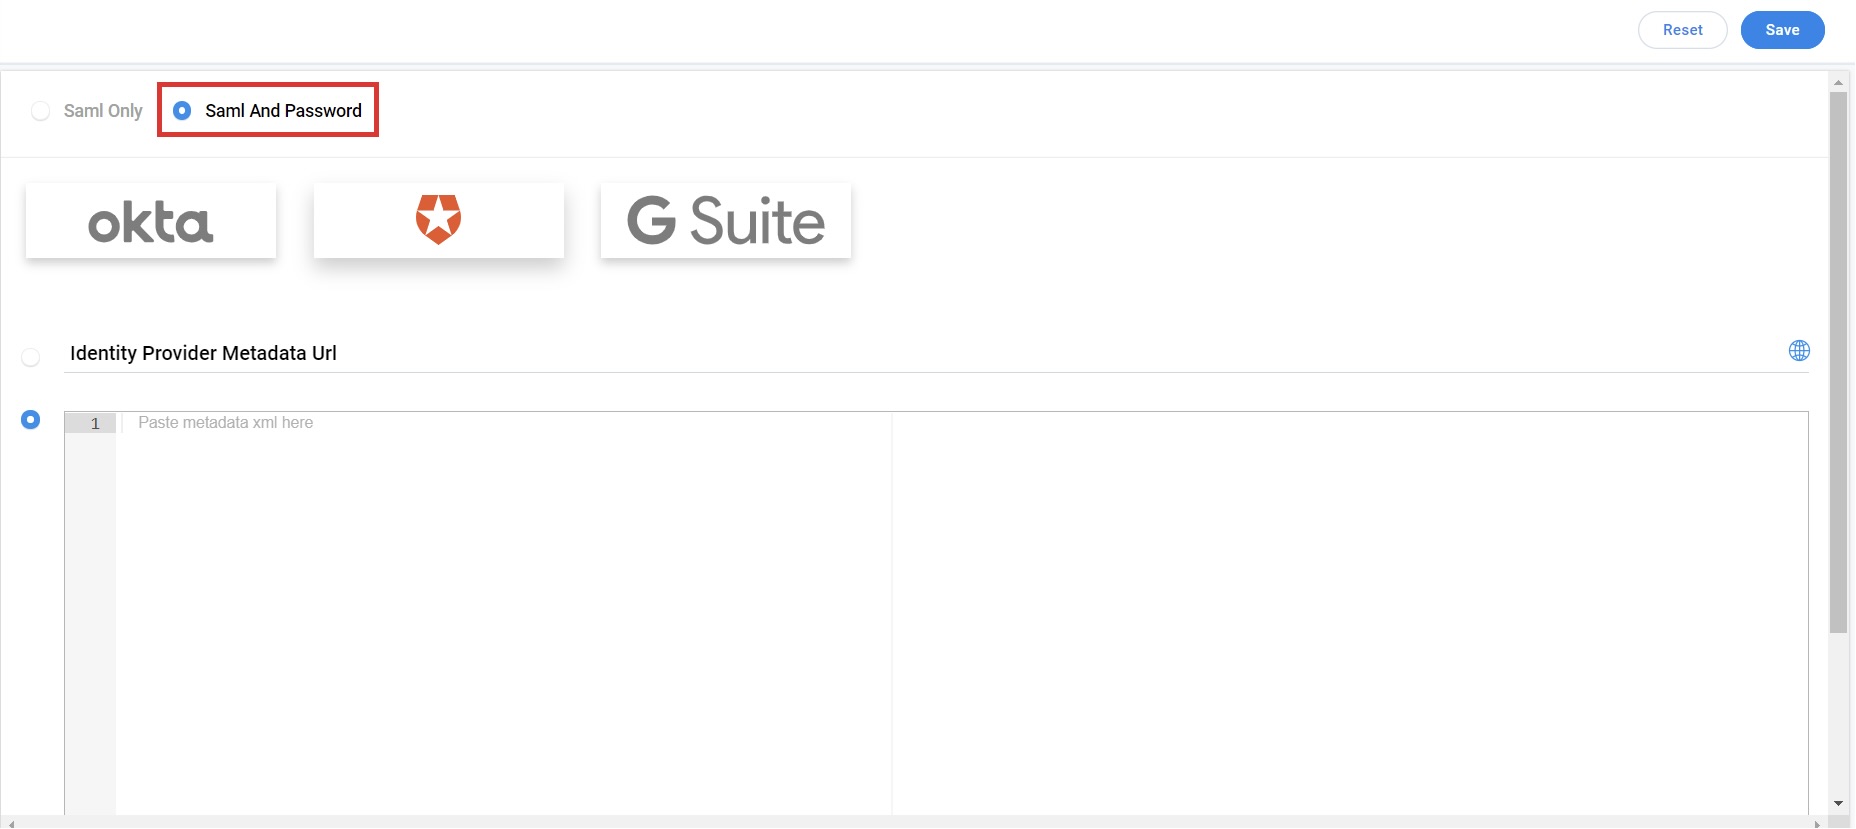
Identity Provider Metadata Url configurations are explained in the following sections.
Configure Okta as Identity Provider
This section explains how to configure Okta as the IdP for Gainsight PX SAML authentication so that your users can log in to Gainsight PX from Okta.
To configure Okta as an IdP:
- Log in to your Okta developer account.
- Click Admin on the upper-right corner.
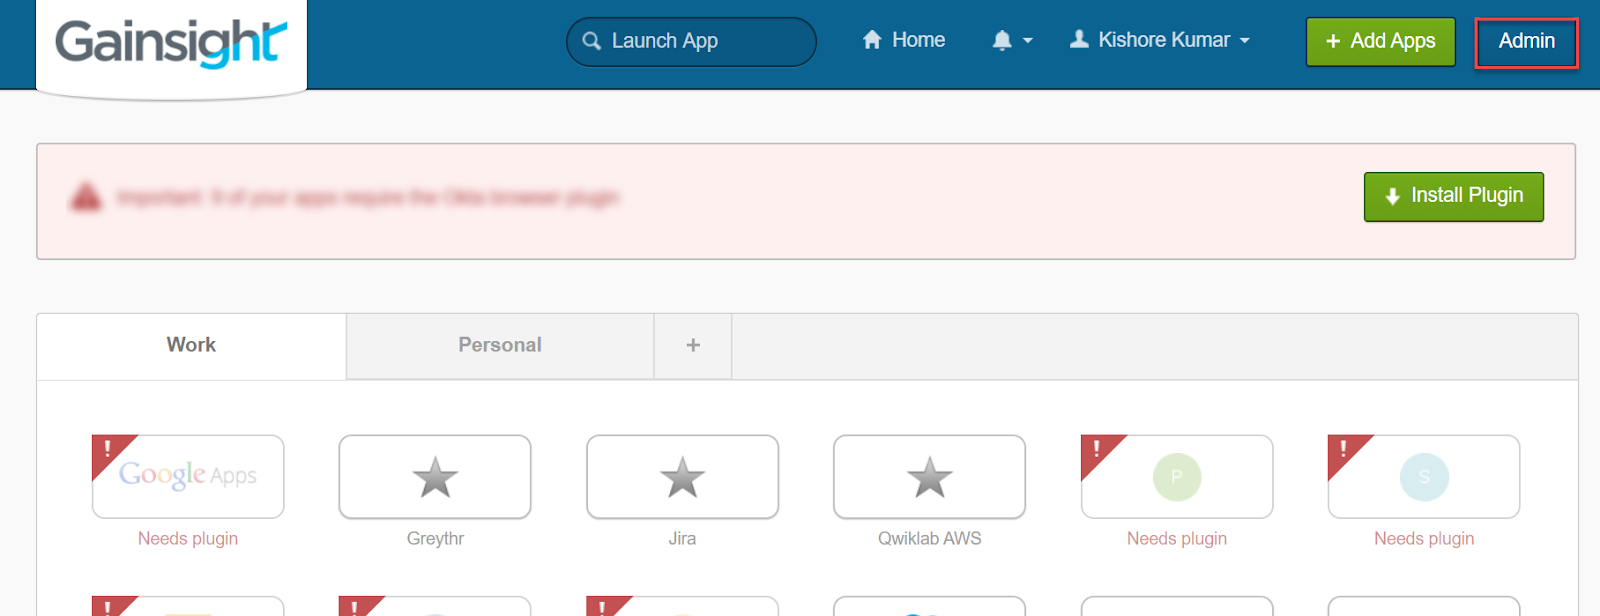
- On the admin Dashboard, click Add Applications in the Shortcuts section.
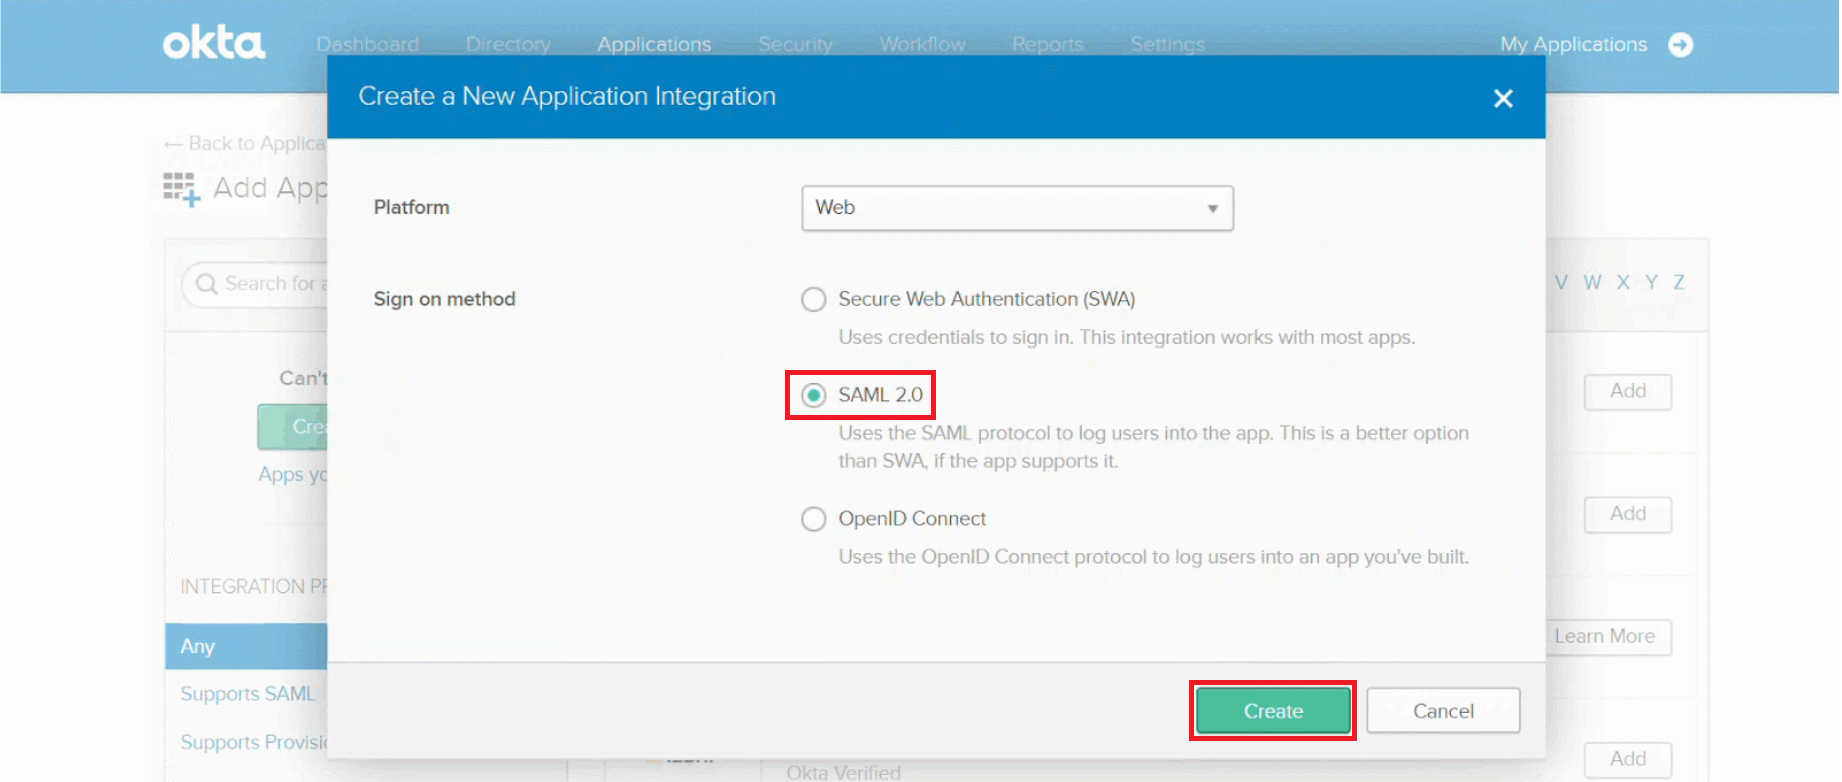
- Click Create New App on the Add Applications page. The Create a New Application Integration window is displayed.
- Select SAML 2.0 as the Sign on method.
- Click Create.
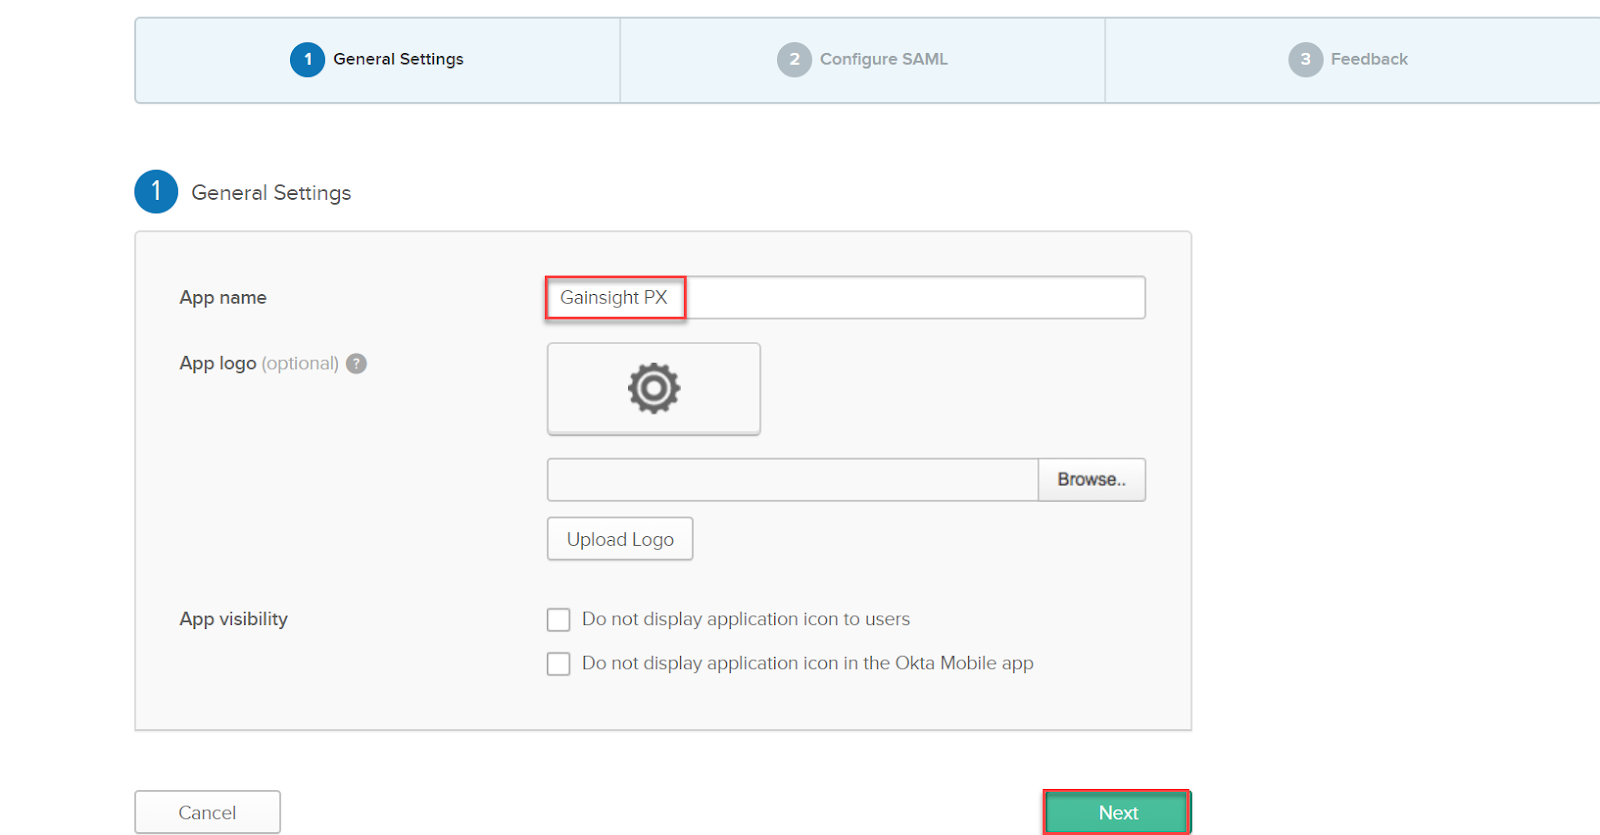
- In the App name field, enter a name for your application. The name you provide here is the name your users see in Okta for the PX widget.
- Click Next.
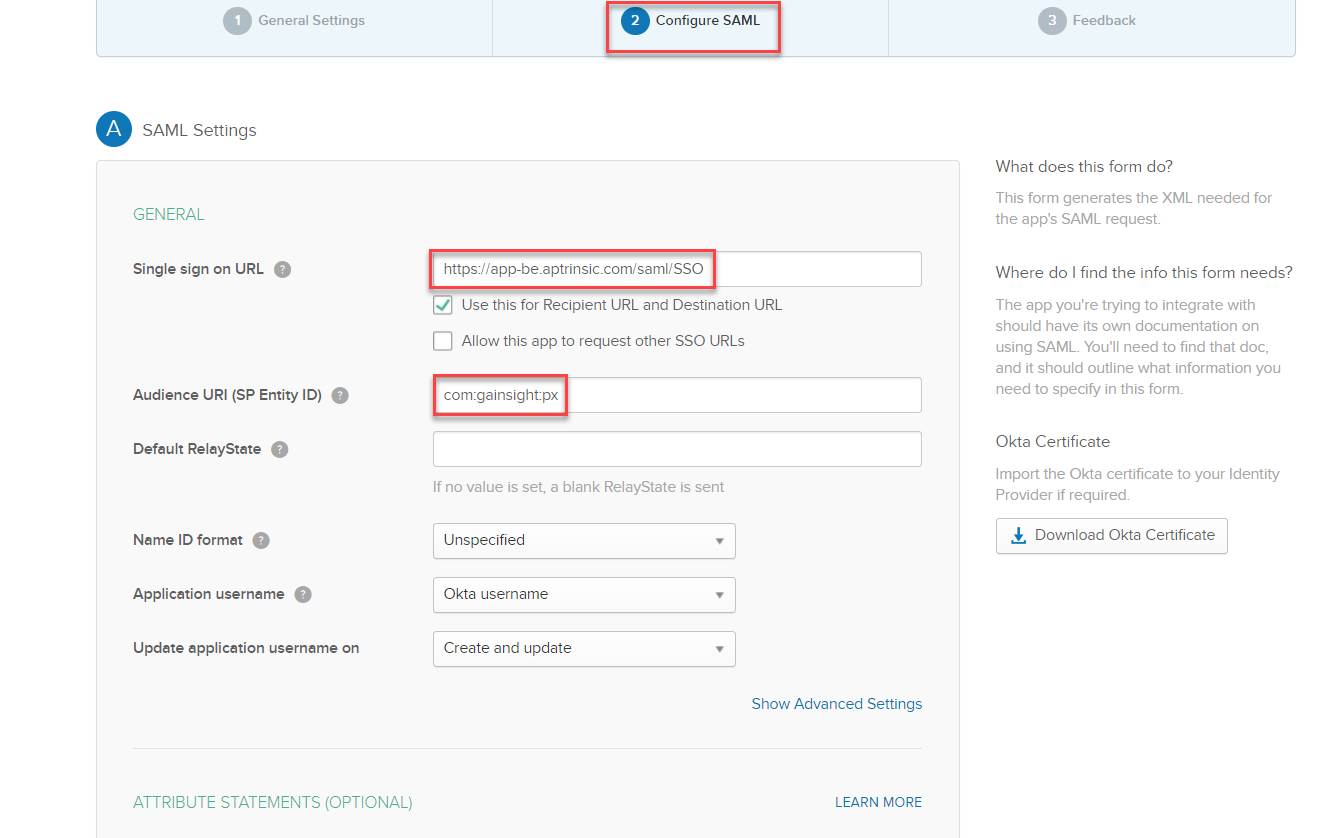
- Click on the Configure SAML tab.
- In the Single sign on URL field, enter https://app-be.aptrinsic.com/saml/SSO
Notes:
- For PX-EU users, the single sign-on URL/ACS URL is https://app-be-eu.aptrinsic.com/saml/SSO.
- For PX-US users accessing the US2 Data Center, the single sign-on URL/ACS URL is https://app-be-us2.aptrinsic.com/saml/SSO.
- In the Audience URI (SP Entity ID) field, enter com:gainsight:px.
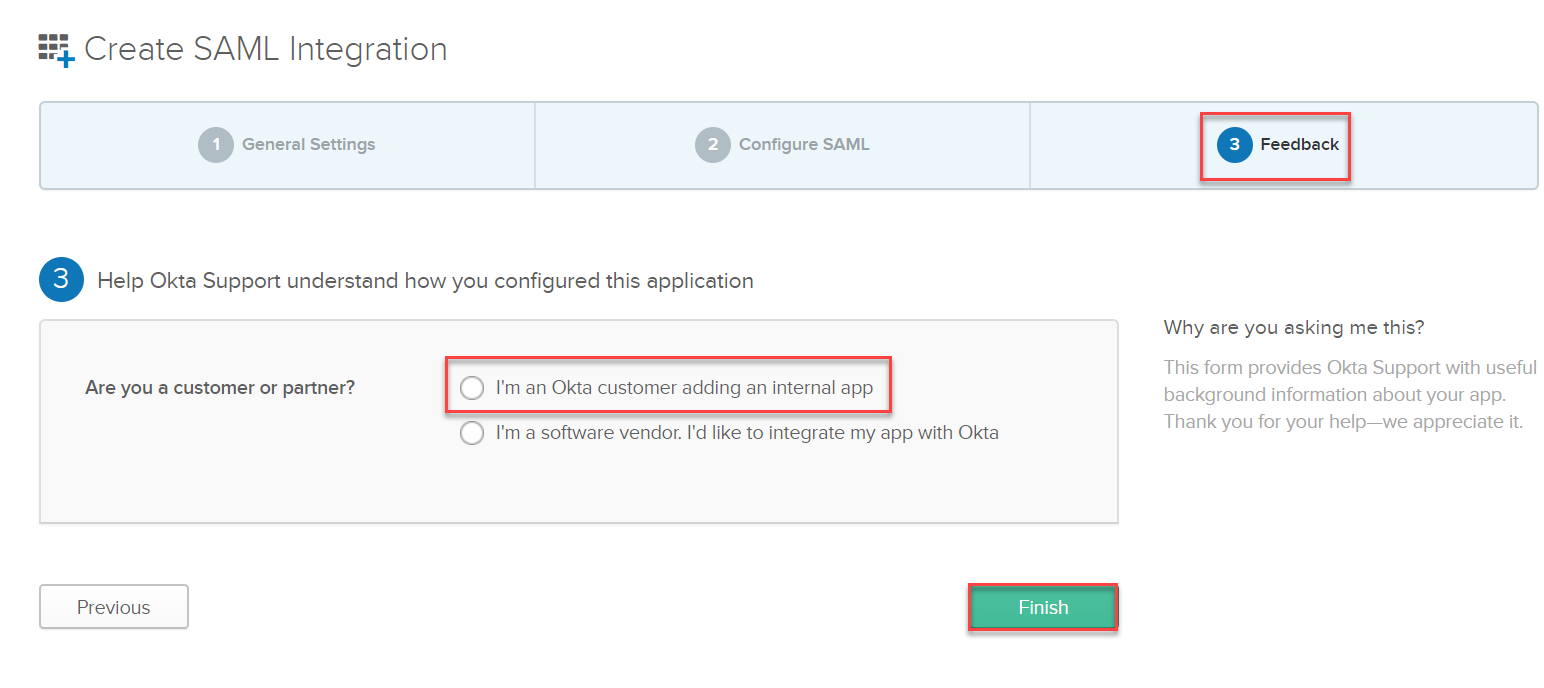
- Click on the Feedback tab.
- Select the I’m an Okta customer adding an Internal app radio button.
- Click Finish.
- In the Settings section of the Sign On tab on the Gainsight PX details page, copy the link address for Identity Provider Metadata.
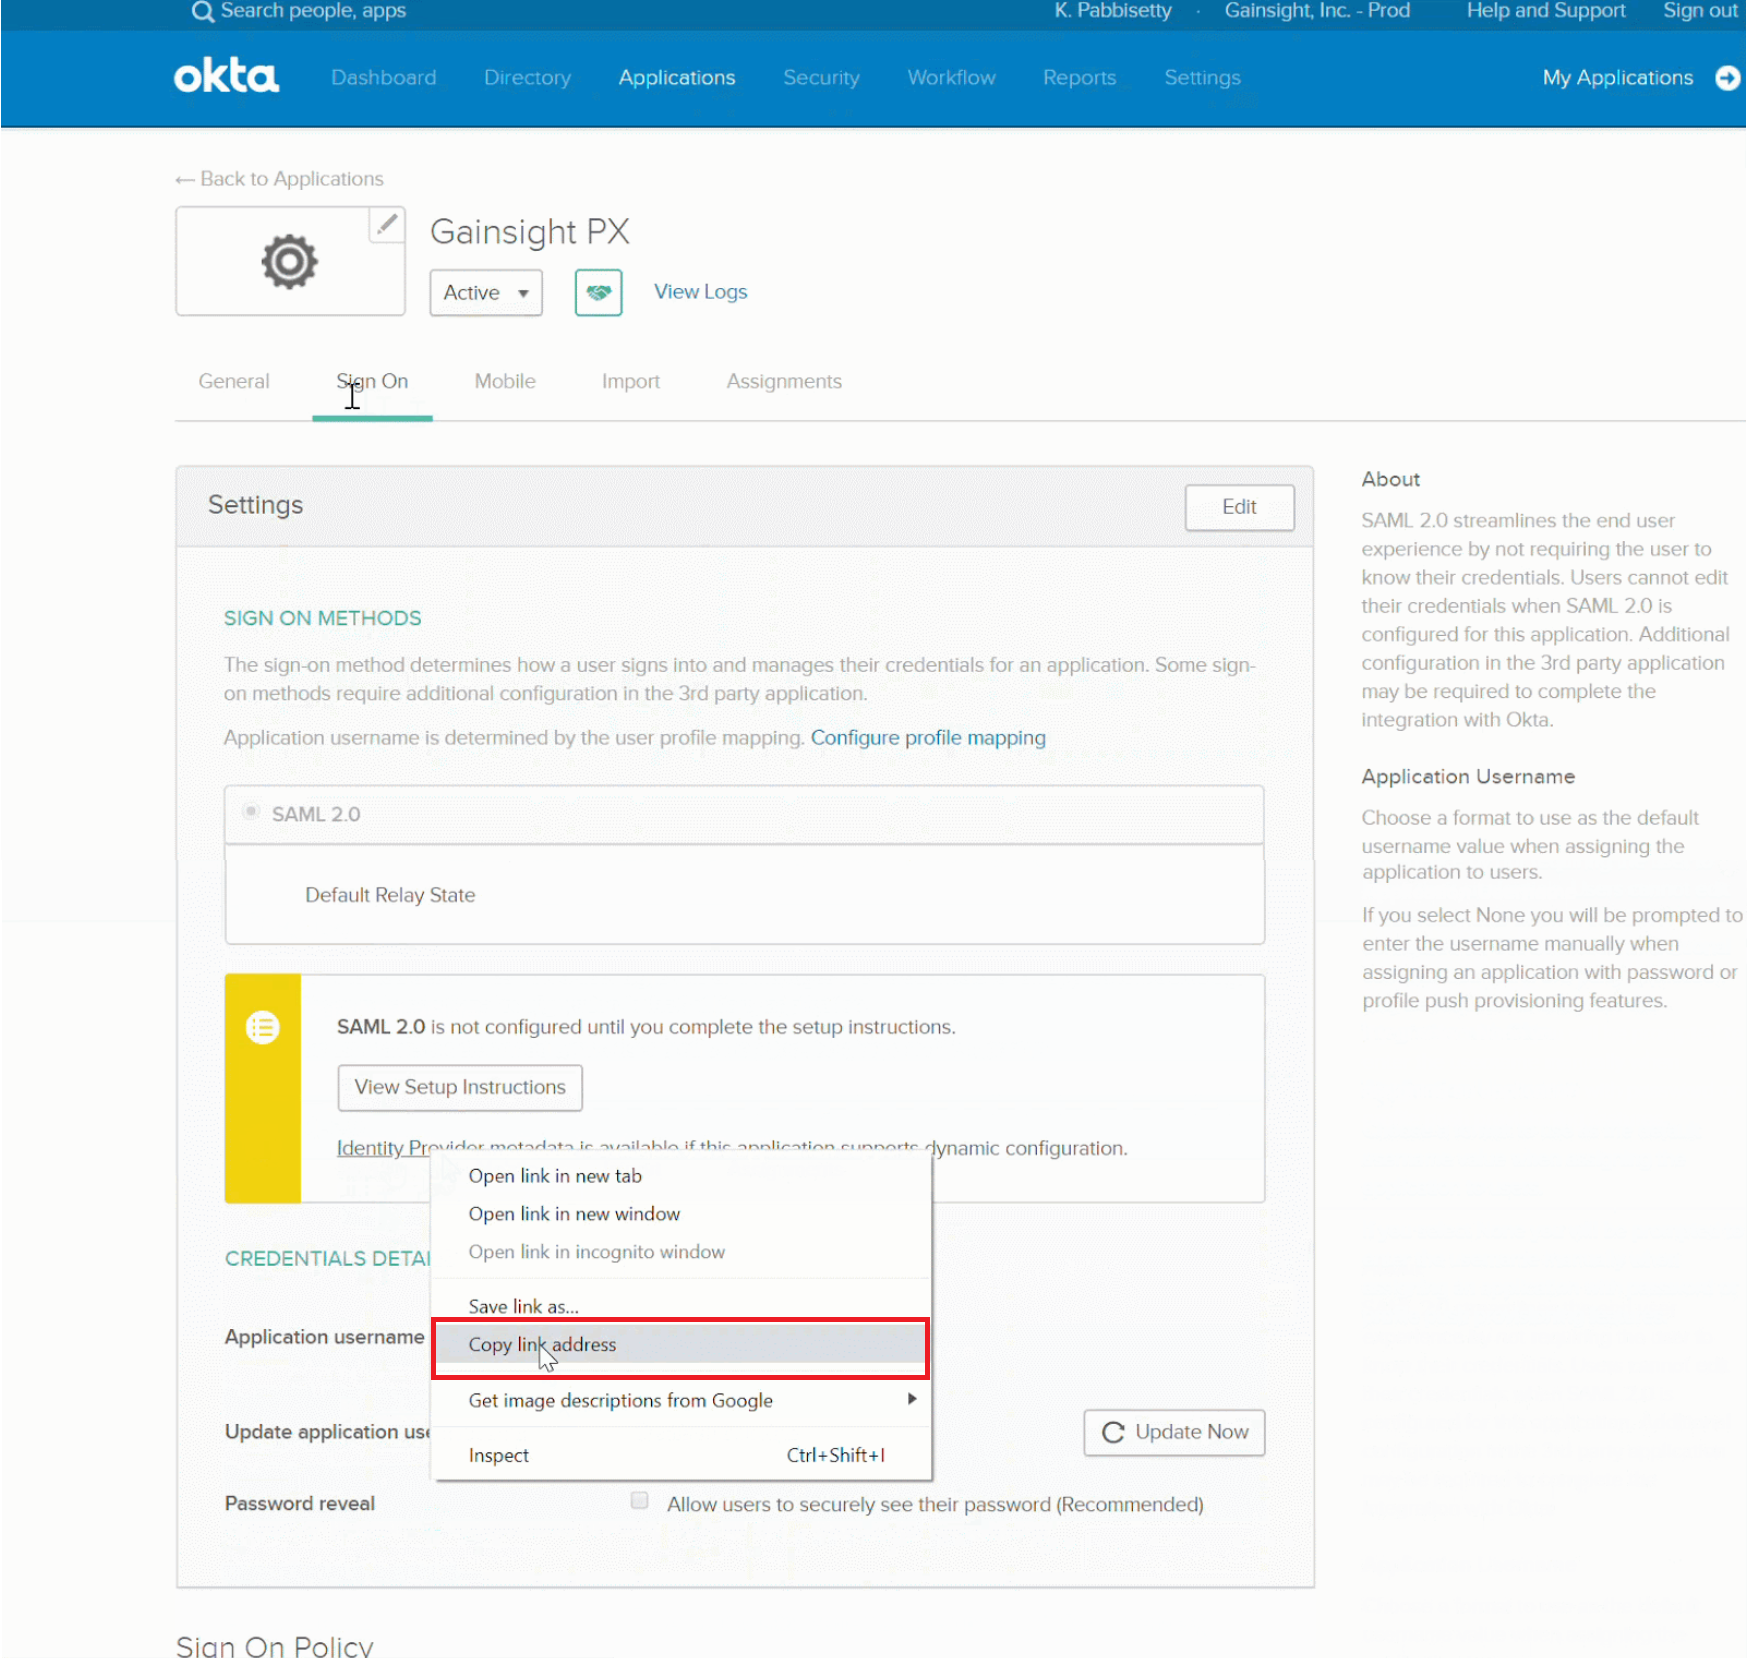
- Navigate to Gainsight PX and paste the URL in the Identity Provider Metadata Url field on the Login Settings page.
You can paste the URL either in the Saml Only section or Saml And Password section. The URL is automatically copied to the other section if you change your SAML authentication method later.
- Click Save. Users can now log in to Gainsight PX from Okta.
Configure AuthO as Identity Provider
This section explains how to configure AuthO as the IdP for Gainsight PX SAML authentication so that your users can log in to Gainsight PX from AuthO.
To configure AuthO as an IdP:
- Log in to AuthO.
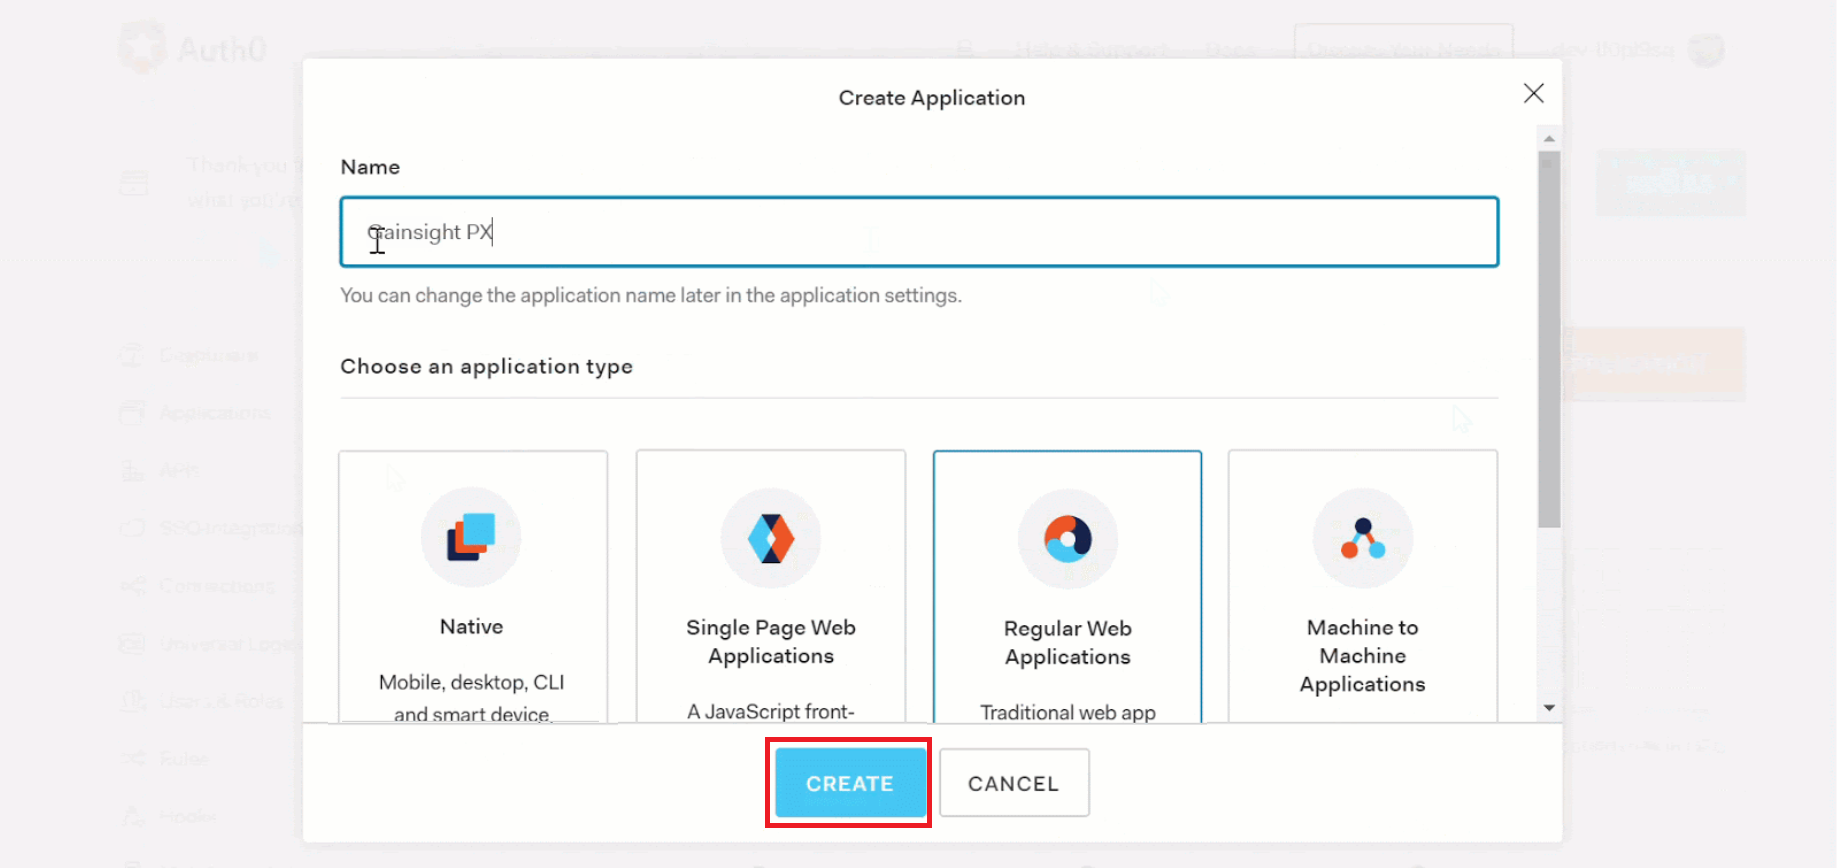
- Click + CREATE APPLICATION. The Create Application window is displayed.
- In the Name field, enter a name.
- Select the Regular Web Applications widget.
- Click Create.
- On the Gainsight PX details page, click on the Addons tab.
- Turn ON the SAML2 WEB APP toggle switch.
- In the Application Callback URL field, enter https://app-be.aptrinsic.com/saml/SSO
Notes:
- For PX-EU users, the URL is https://app-be-eu.aptrinsic.com/saml/SSO.
- For PX-US users accessing the US2 Data Center, the URL is https://app-be-us2.aptrinsic.com/saml/SSO.
- In the Settings section, enter the following code.
{
"audience": "com:gainsight:px",
    "nameIdentifierProbes": [
    "http://schemas.xmlsoap.org/ws/2005/05/identity/claims/emailaddress"
  ]
}
- Click ENABLE.
- Click the Usage tab.
- Copy the URL from the Identity Provider Login URL field.
- Click the Download link for the Identity Provider Metadata.
- Navigate to Gainsight PX and paste login URL and the metadata code in the Identity Provider Metadata Url field on the Login Settings page either in the Saml Only section or Saml And Password section. The URL is automatically copied to the other section if you change your SAML authentication method later.
- Click Save. Users can now log in to Gainsight PX from AuthO.
Configure Google Workspace as Identity Provider
This section explains how to configure Google Workspace as the Identity Provider (IdP) for Gainsight PX SAML authentication so that your users can log in to Gainsight PX from their Google account.
To configure Google Workspace as an IdP:
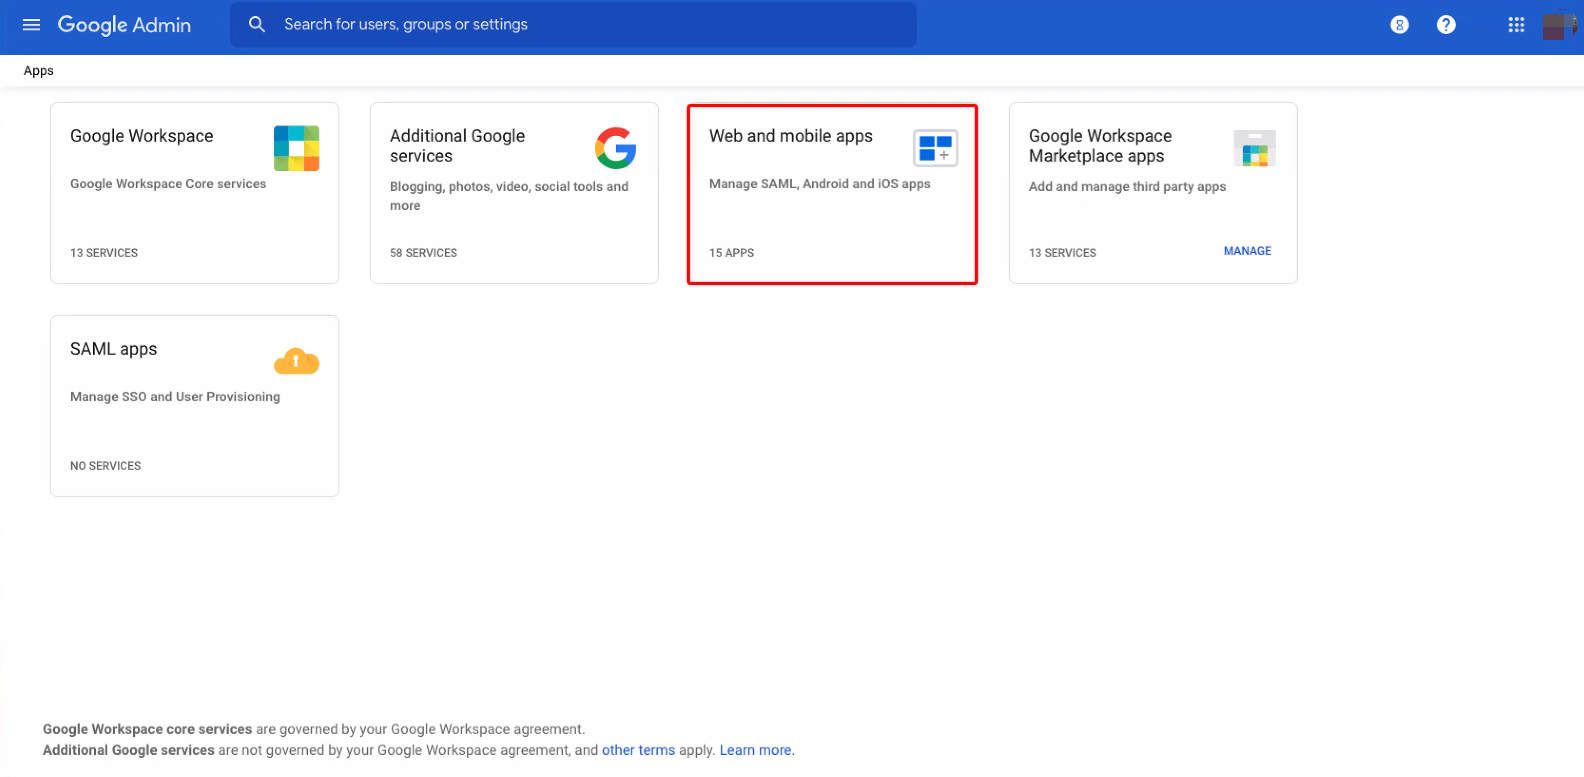
- Log in to Google Admin Console.
- From the Admin console Home page, navigate to Apps and then Web and mobile apps.
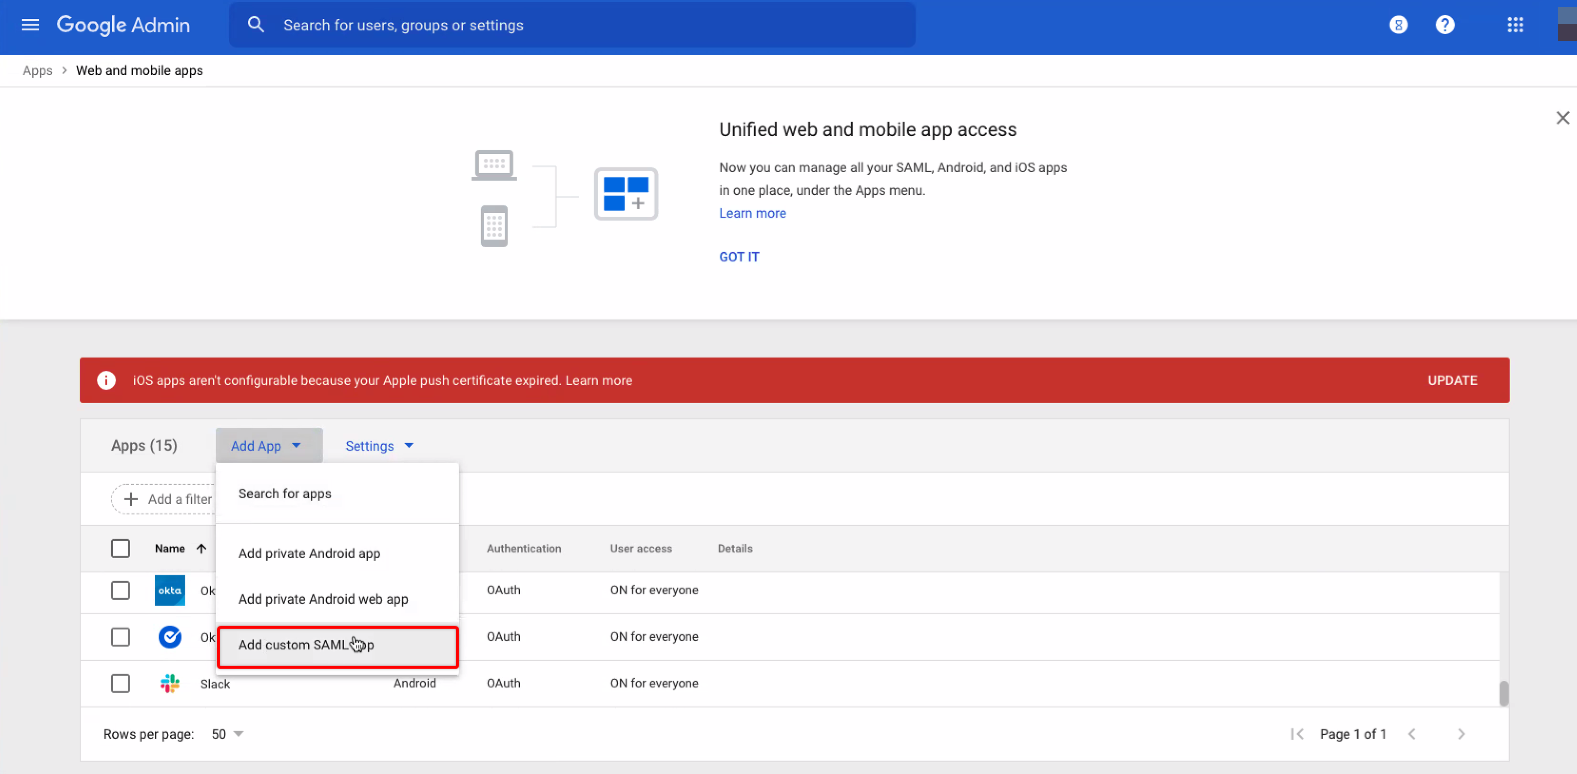
- Click Add App and then Add custom SAML app.
- On the App Details page, enter a name for your application (here, Gainsight PX).
- (Optional) Upload an image for your application.
Note: If you do not upload an image, the first two letters of the app name are used to create an icon.
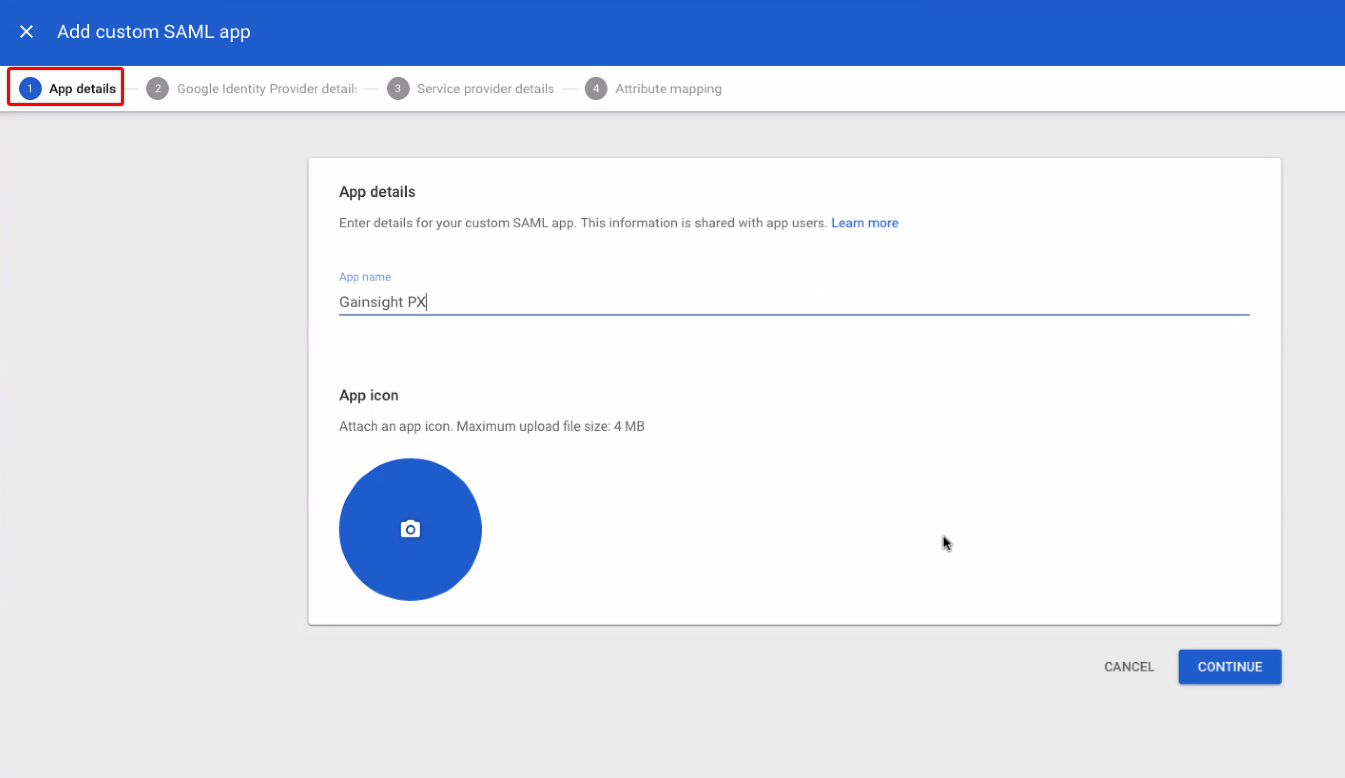
- Click Continue.
- From the Google Identity Provider details page, download the IdP metadata file.
- Click Continue.

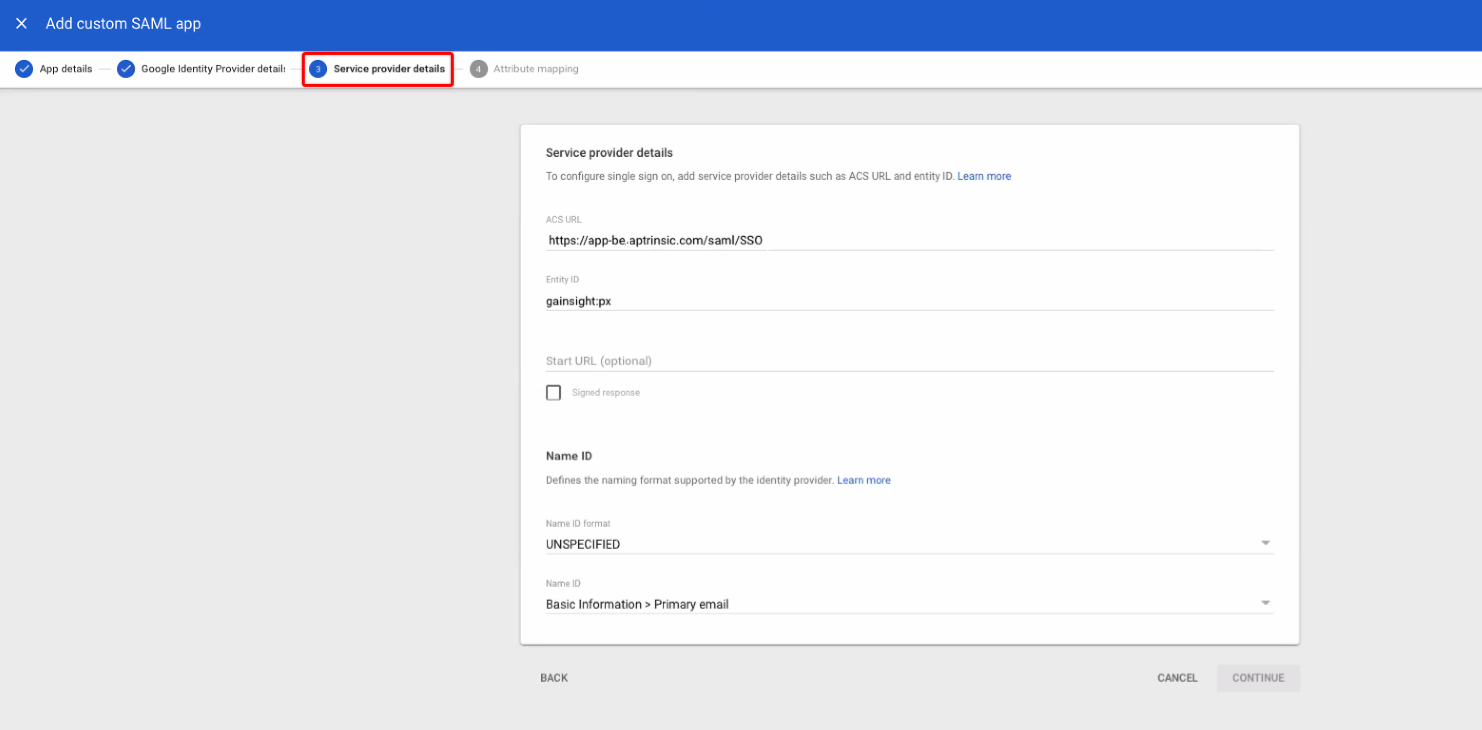
- In the Service provider details page, enter the following information:
| Field Name | Value |
|---|---|
| ACS URL |
https://app-be.aptrinsic.com/saml/SSO Notes:
|
| Entity ID | com:gainsight:px |
| Name ID format | UNSPECIFIED |
| Name ID | Basic Information > Primary email |
- Click Continue.
- Click Finish.
- Log in to Gainsight PX.
- Navigate to Administration > SSO/SAML.
- In the Login Settings page, Select either the Saml Only or Saml And Password option.
- Click on the G Suite (generic SAML 2.0) option.
- Paste the xml code in the Identity Provider Metadata Url field.
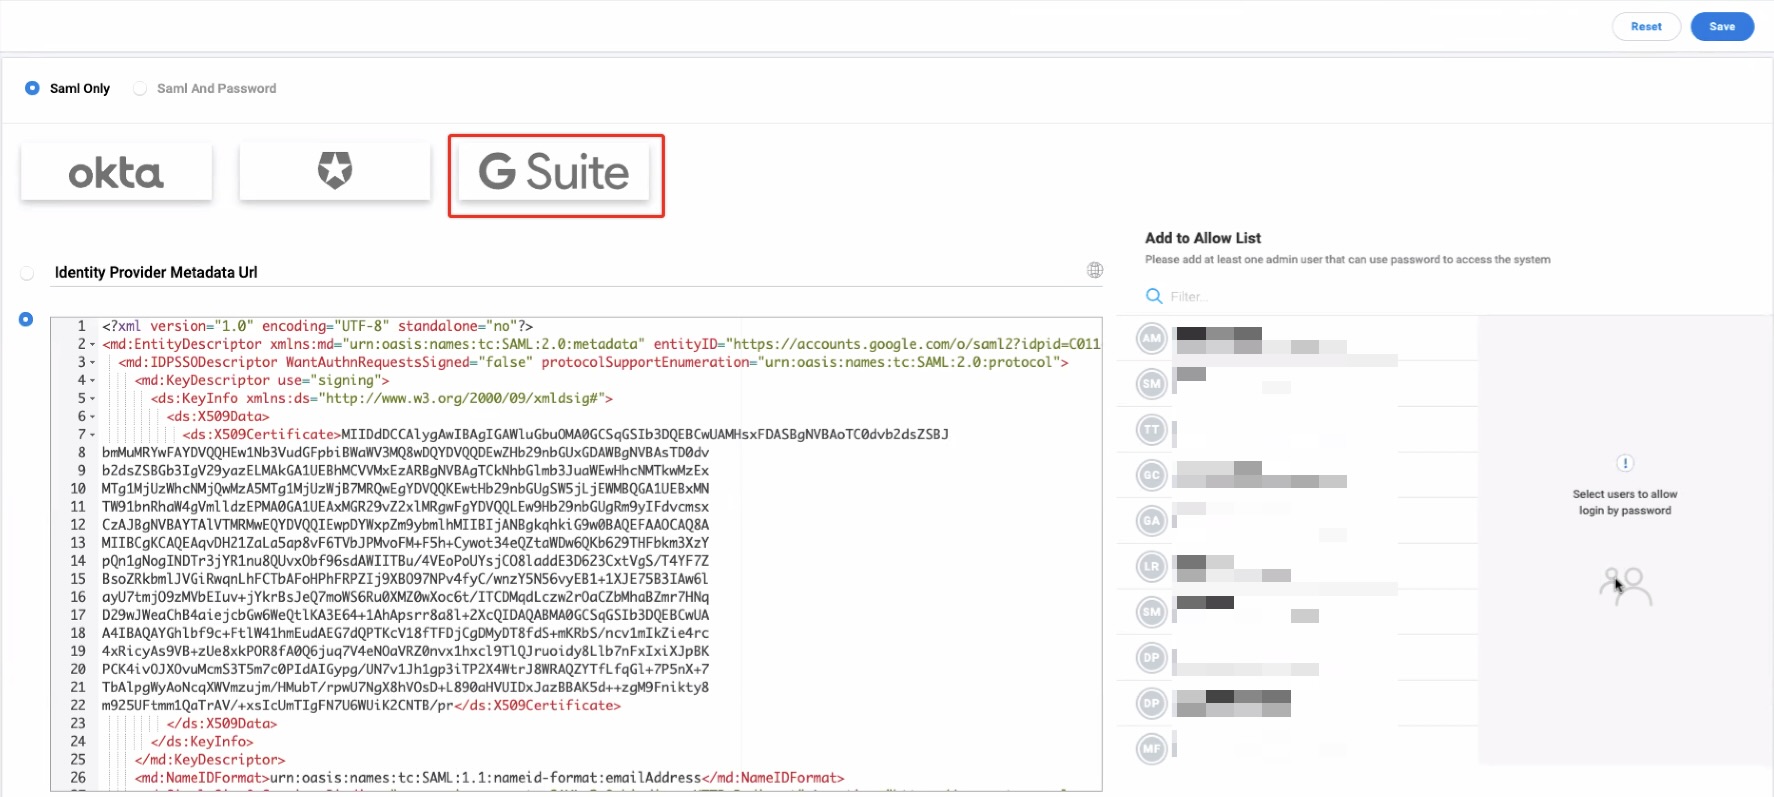
- Click Save.
Microsoft Azure AD as Identity Provider
This section explains how to configure Microsoft Azure AD as the IdP for Gainsight PX SAML authentication so that your users can log in to PX from their Microsoft Azure account.
To configure Microsoft Azure AD as an IdP:
- Log in to Microsoft Azure.
- In the Azure Services section, click on Azure Active Directory.
- In the Manage section on the left pane, click Enterprise applications.

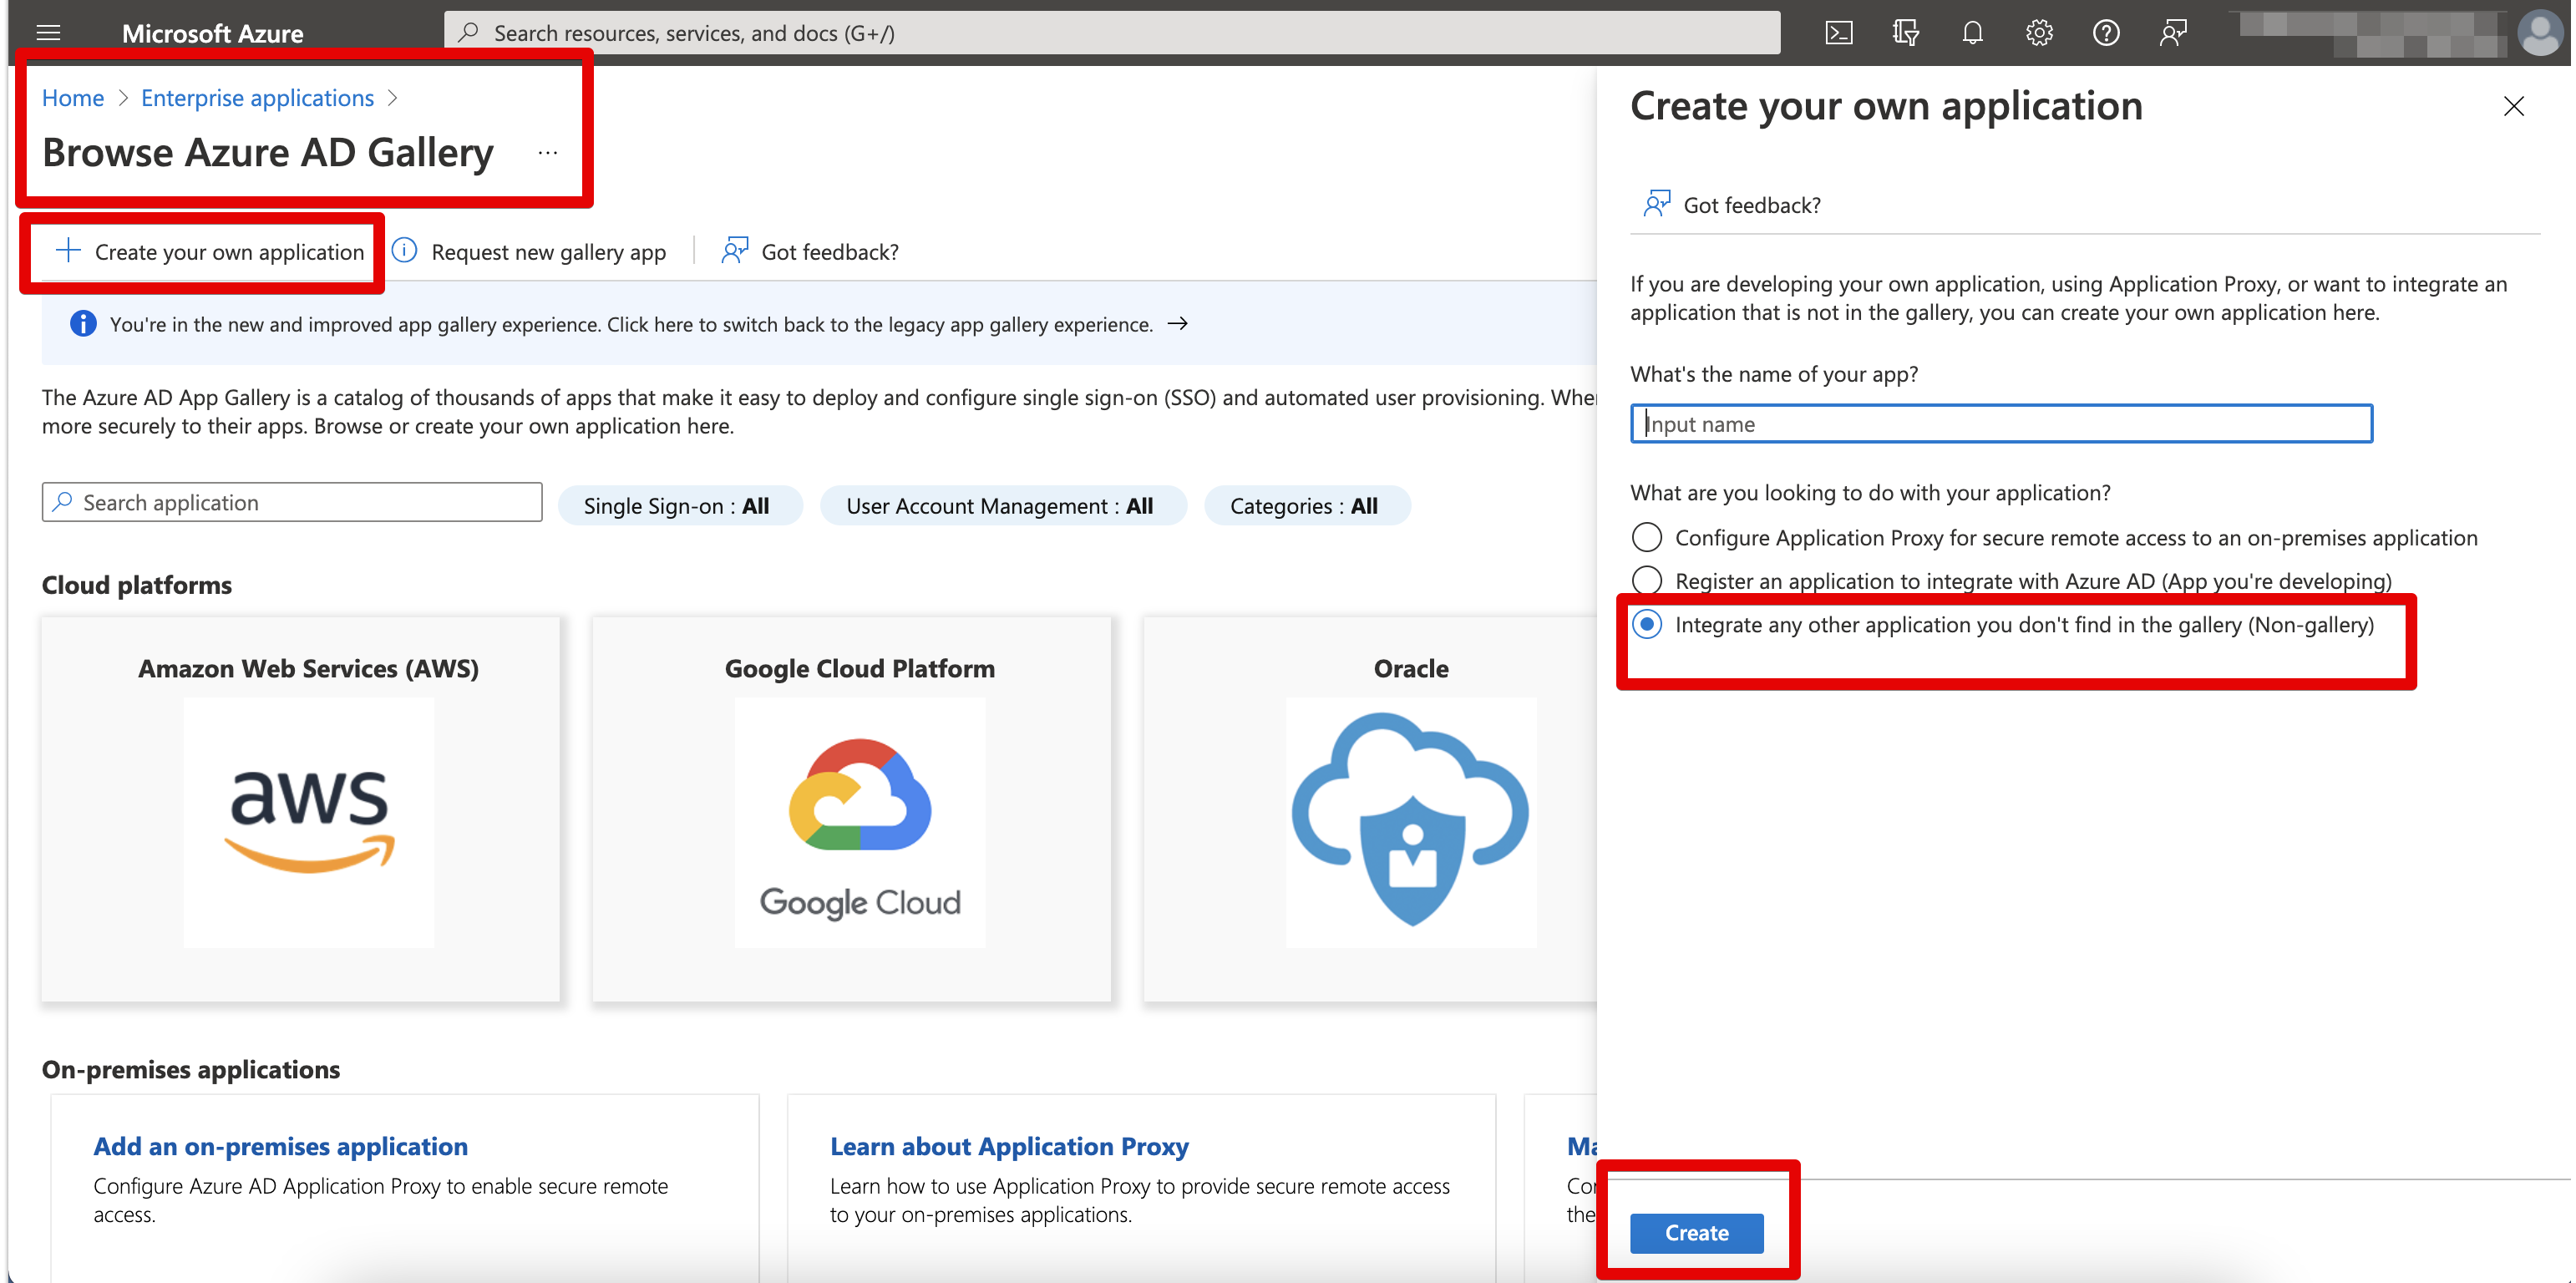
- In the All applications page, click New application.
- In the Browse Azure AD Gallery page, click Create your own application.
Note: You need to create the Gainsight PX application in the Azure account as it will not be available in search.
- Enter the name of the application as Gainsight PX.
- Select the Integrate any other application you don't find in the gallery (Non-gallery) option.
- Click Create. The Gainsight PX application is created.
- Click Single sign-on on the left pane. The Set up Single Sign-On with SAML configuration section is displayed. You can also click on the Set up single sign on tile in the Getting Started section on the right side of the page.
- In the Single sign-on page, click on the SAML tile. The Set up Single Sign-On with SAML page appears.

- In the Basic SAML configuration step, click Edit and enter the following information:
| Field Name | Value |
|---|---|
| Identifier (Entity ID) | com:gainsight:px |
| Reply URL |
Specify the URL of the application to receive the SAML token. The reply URL is also called Assertion Consumer Service (ACS) URL. This is a mandatory field. Notes:
|
| Sign-on URL | This value is not required. When a user launches the application from the Azure AD SSO URL, the IdP initiates the log in. |
| Relay State | (Optional) The URL to redirect the user after authentication is completed. |
| Logout URL | (Optional) Sends the SAML Logout responses to the application. |
- In the User Attributes & Claims step, enter the Unique User Identifier value as user.mail.
- In the SAML Signing Certificate step, click Edit and perform the following:
- From the Signing Option dropdown, select Sign SAML response and assertion.
- From the Signing Algorithm dropdown, select SHA-256.
- Click Save.
- In the Federation Metadata XML field, click the Download link to download the IdP metadata file.
Configurations in Gainsight PX for Azure AD
- Log in to Gainsight PX.
- Navigate to Administration > SSO/SAML.
- In the Login Settings page, select either the Saml Only or Saml And Password option.
- Click on the G Suite (generic SAML 2.0) option.
- Paste the xml code in the Identity Provider Metadata Url field. For more information, refer to the Configure SAML in Gainsight PX section.
- Click Save.
Login to PX Using Identity Providers
Gainsight PX provides you the option to activate login to the PX application using the IdP credentials. The IdP for Gainsight PX SAML authentication must be configured in the SSO/SAML page.
Note: You can also log in to PX using the emailID and password without selecting the IdP.
To login using IdP:
- On the PX login page, enter the username (emailID) of your PX account.
- Click Next.
- Click on the IdP via which you want to login. PX application navigates you to the IdP login page.
- Enter credentials of your IdP account.