Gainsight PX C# SDK
This article explains how developers can use Gainsight PX’s .NET SDK to set it up in their application.
Overview
Gainsight PX supports .NET SDK for desktop applications. The Gainsight PX .NET SDK is a powerful tool that can measure the statistics of your desktop applications and provide you with powerful insights into the analytics data.
The developer-friendly Gainsight PX SDK has the following features:
- Tracking back-end data and services
- Operationalize engagement lifecycle
- Fetch/update usage data and metadata
- Display Survey Engagements
- Ability to create and update User and Account records using Gainsight PX public APIs
Enable the Desktop Channel
Desktop channel in PX is not enabled by default. Contact your Client Outcomes Manager(COM) or Account Executive to enable the desktop channel in your subscription.
Install .NET SDK
After creating your project, add the version of .dll from GainsightPX_DotNetSDK_Latest.zip file that matches the .NET framework that your project uses. Add it as a reference to your project. Ensure that you also have Newtonsoft.Json as a Nuget dependency in your project. For more information on the additional dependencies for engagements, refer to Engagements section of this article.
Initialize
Create an instance of the Gainsight.Client with your API key and Configuration to start sending events. You can also change some of the default settings for the improved performance of the Gainsight client.
using System;
using System.Threading;
using GainsightPX;
using GainsightPX.Model;

namespace PXDesktop
{
class Program
{
static void Main(string[] args)
{
Console.WriteLine("Gainsight PX SDK - Hello world");
Config config = new Config.Builder()
{
Enabled = true,
//This is optional. Use only for debugging.
LogLevel = Logger.Level.DEBUG,
//durable tracking
DurableQueueDirectoryName = "C:\\Cache_Folder_Name",
QueueLimit = 1000,
//session emulation
SessionTimeout = new System.TimeSpan(0, 30, 0)
}.Build();
String _gainsightPxProductKey = "AP-CHANGE-ME-PLEASE-4";
Gainsight.Initialize(_gainsightPxProductKey, config);

//Avoid exit demo app until messages have a chance to send to PX
Thread.Sleep(3000);
}
}
}
Configuration
This section describes some of the variables, for which you can modify the configurations during the initialization stage. Configuration properties are explained in the Configuration Tables section of this article.
The following are a few attributes used for caching in the Config object used for initialization:
-
QueueLimit: Limits the number of events that are stored in the queue. This attribute is applicable to both the queue options (memory and disk).
-
DurableQueueDirectoryName: The file system location for disk queue.
There are two types of queuing:-
Memory Queue: This is the default configuration. It stores the events only in the memory, without accessing the disk. As this type of queue is not persistent, all the events that are not sent to the server are erased when the application is closed.
-
Disk Queue: This queue saves the events to the disk so the events are not erased in case the application is closed. To use the Disk queue, the developer must provide a path to the folder where the events are saved. This option is enabled when DurableQueueDirectoryName is set.
-
- DurableQueueEncryption - IStorageEncryption implementation. For the Disk cache, the developer can also implement the IStorageEncryption interface to apply encryption on the stored data. The encryption input and output are strings, and the output should not contain newline characters or any special characters.
Example:
In this example, the SDK will write to the C:\GPX folder. Gainsight recommends that you set QueueLimit and encryption strategy.
Config config = new Config.Builder() {
DurableQueueDirectoryName = "C:\\GPX",
DurableQueueEncryption = null, // add your own IStorageEncryption implementation if needed
QueueLimit = 1000
}.Build();
Enabled and EngagementsEnabled Runtime Properties
Both Enabled and EngagementsEnabled properties can be modified during the lifetime of the application using either the Config object or GainsightPX instance directly.
Gainsight.Client.Enabled = true; // or false
Is the same as
Gainsight.Client.Config.Enabled = true; // or false
And
Gainsight.Client.EngagementsEnabled = true; // or false
Is the same as
Gainsight.Client.Config.EngagementsEnabled = true; // or false
Note:
In the prior versions, you could create the Config object directly using its constructor. From the current version (1.1.0) onwards, you can create the Config object only using the Builder pattern. The builder has the same attributes so migration can be easily done as follows:
Instead of:
Config config = new Config(){
...
};
Use:
Config config = new Config.Builder(){
...
}.Build();
Tracking Pre-identified User operations
You can send events to the server even before the user is identified, and those events are shown as the user events after the identify operation. In order to achieve that, GainsightPX allocates a local ID (PXVisitorId) that is sent with all events. The identifier is generated every time when Gainsight PX is being initiated so you can cache this value and provide it back to the configuration on the following runs.
Example:
string cachedId = "GET_ID_FROM_DURABLE_CACHE";
Config.Builder configBuilder = new Config.Builder() {
…
};
configBuilder.PXVisitorId = cachedId;
var config = configBuilder.Build();SAVE_TO_DURABLE_CACHE(config.PXVisitorId);
Logging
There are several logging options you can use to get some insight on how well the SDK is working.
Logger
You can add a handler to the logger to receive all logs output that the SDK is trying to print out. This need to be used when you try to debug the SDK to find error messages.
Example:
Logger.Handlers += (level, message, args) =>
{
Console.WriteLine($"{level}: {message}");
};
Success/Failed Handlers
After you register to Succeeded and Failed handlers, you are notified of any exceptions that occurred while creating track events and during success or failure of the API request on sending the events to the server.
The succeeded handler provides BaseAction object and Failed handler provides Error along with BaseAction object. BaseAction object contains information about the event.
Example:
Gainsight.Client.Succeeded += (action) =>
{
Console.WriteLine($"Event Sent: {action.Type} - {action.MessageId}");
};
Gainsight.Client.Failed += (action, error) =>
{
Console.WriteLine($"Event failed to sent: {action.Type} - {action.MessageId}: {error.Message}");
};
Identify
By identifying the user who is using the app, you can generate more accurate information about their application usage.
Note:
The user id field is the only mandatory field. The custom attributes can be configured by navigating to Administration > Attributes.
/*PLEASE CHANGE TO REAL UUIDs*/
string userid = "UNIQUE_USER_ID";
string accountid = "COMPANY_ID";

/* EXAMPLE */

Gainsight.Client.Identify(
new User(userid) {
/* optional user attributes */
/* will be set by PX or you can override: */
SignUpDate = new DateTime(2002, 7, 7, 9, 30, 50),

/* See the list of default optional attribute in PX admin UI */
Email = "user@email.com",
RegionName = "NorthAmerica",
CountryName = "Canada",
Role = "Consultant",
CustomAttributes = new Dict()
.Add("objective", "analytics") .Add("isAdmin", true)
},
/*optional*/
new Account(accountid) {
Name = "Gainsight",
WebSite = "www.gainsight.com"
});
IMPORTANT: Starting from version 1.3.0, developers can use any IDictionary<string, object> instead of Dict.
The minimum requirement for this call is the user id. Each user should be uniquely identified in the system, so they can be identified throughout all devices. You can also identify the user from User and Account objects. While creating one of these objects, you must use user ID (Account ID is not the same as User ID). You can add more attributes as additional information about the user. The CustomAttributes in User and Account is of Dict<string, object> type. The value of Dict should be built-in types. The key strings used in CustomAttributes are case-sensitive.


Custom Events
Custom events allow you to track specific events of your choice that you want to see on your dashboard.
Notes:
- You need to use constant custom event names.
- The actual runtime entity name should be passed via the payload. For example, fileName.
To see the full list of Custom events that are created, navigate to Administration > Events.
//This method will be named Track

Gainsight.Client.Track("FileUpload", new Dict {
{ "title", "Software" },
{ "name", "PX" },
{ "format", "DCF" },
{ "size", 950897157 },
{ "uploaded", new DateTime(2002, 7, 7, 9, 30, 50) }
});
IMPORTANT: Starting from version 1.3.0, developers can use any IDictionary<string, object> instead of Dict.
Properties can be added to elaborate on the event that happened as shown in the above example.
Tracking Client-Side Errors Using Custom Events
If you have a catch-all, you can consider passing the error to PX. However, Gainsight does not recommend passing long string values like stack-trace so that event dropping can be avoided.
The device and user data are passed via identify and global context. These need not be passed on to each event.
//This method will be named Track

Gainsight.Client.Track("DesktopError", new Dict {
{ "errorMessage", "Failed to upload file" },
{ "errorCode", "ERR-403" }
});
IMPORTANT: Starting from version 1.3.0, developers can use any IDictionary<string, object> instead of Dict.
Global Context
After creating all the required events, set events with a global context. Set a global context with key-value pairs and send it with the payload. Global context can be set on Date, String, Double, Int, and Boolean data types. Global Context data is stored at the memory level and not disk-level. The key-value pairs are sent with the payloads. If the application terminates, all the key-value pairs are erased.
Note: Global context fields are automatically generated in PX Dashboard on creating global context from SDK.
Use the following code snippet to set globalContext:
Gainsight.Client.SetContext(<#string#>, <#Double#>)
The SetContext method returns a Client object. Below is a sample of globalContext usage.
Example:
Gainsight.Client.SetContext("dateTime", DateTime.UtcNow)
.SetContext("double", 2.0)
.SetContext("int", 9)
.SetContext("string", "book")
.SetContext("bool", true);

Example
Gainsight.Client.SetContext("LifeCycleStage", "Release") /* beta/release */
/* version */
.SetContext("VersionFull", "2022.1.673")
.SetContext("VersionMajorMinor", "2022.1")
.SetContext("VersionBuild", "673")
/* beta */
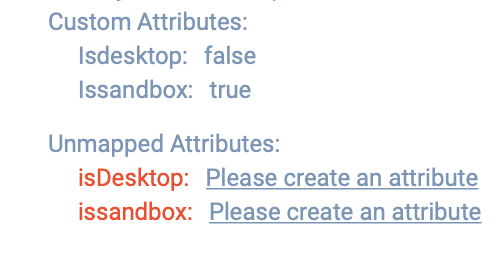
.SetContext("IsSandbox", false)
/* localization */
.SetContext("Language", "en-CA")

/* Device */
.SetContext("Memory", 40707)
.SetContext("Architecture", "x64")
.SetContext("OperatingSystem", "Microsoft Windows NT 10.0.19044.0")

/* Graphics*/
.SetContext("Graphics.Graphics.ResolutionWidth", 1920)
.SetContext("Graphics.Graphics.ResolutionHeight", 1080)
.SetContext("Graphics.OpenGL", "NVIDIA Corporation")
.SetContext("Graphics.Configuration", "NVIDIA Quadro P520")
.SetContext("Graphics.ConfigurationDriver", "30.0.14.7291 (2021-12-12)");
Along with SetContext, use the following methods to get context for a key, remove context for a key and to get all keys of a context.
object GetContextForKey(string Key);
bool RemoveContextForKey(string Key);
ICollection<string> GetContextKeys();
Example:
var value = Gainsight.Client.GetContextForKey(<#string#>);
var isRemoved = Gainsight.Client.RemoveContextForKey(#string#);
var keys = Gainsight.Client.GetContextKeys();
Flush
Calling flush directly sends all events in the queue to the server without waiting for the next automatic flush. Typically, you need not call flush directly. However, there are some cases (such as when you use memory cache and you want to flush all events before closing the application) where you want to make sure that the events are flushed. In such cases calling flush directly is recommended.
To flush the events, use the following method:
void Flush();
Other
Following are a few additional APIs:
HasPendingEvents
HasPendingEvents method returns a boolean value of whether there are pending events in the cache that must be routed to the server.
Example:
var hasPendingEvents = Gainsight.Client.HasPendingEvents();
-
WriteKey
WriteKey property returns the productKey used to initialize Gainsight.
Example:
var key = Gainsight.Client.WriteKey;
-
Config
Config property returns Config object used to initialize Gainsight.
Example:
var config = Gainsight.Client.Config;
Engagements
Engagements can be enabled/disabled during the lifetime of the application using either the config object or the Gainsight instance.
Examples:
Config config = new Config.Builder()
{
...
EngagementsEnabled = true
}.Build();
Gainsight.Client.Config.EngagementsEnabled = true; // can be used in run time
Prerequisites
Following are the prerequisites for engagements
-
Gainsight.Winform: Add the Gainsight.Winform.dll, provided in the GainsightPX_DotNetSDK_Latest.zip in GainsightPX.WinForms folder, to the project dependencies. This module is intended to be used on WinForm applications.
For the engagement scaling to perform as expected, add the below configuration to your App.config file:
Example:
<System.Windows.Forms.ApplicationConfigurationSection>
<add key="DpiAwareness" value="PerMonitorV2" />
</System.Windows.Forms.ApplicationConfigurationSection>
-
IRenderContainerProvider: Add the CEF8829Impl.cs class file, provided in the GainsightPX_DotNetSDK_Latest.zip in Container Provider Implementations folder, to the project and make sure the CEFSharp.Winforms(v88.2.90) dependency is added to your project. In case you want to use a different type of web view, ensure to implement the interface IRenderContainerProvider and pass the web view as the control. You can refer to the CEF8829Impl.cs class for more details on implementation. After adding the CEF8829Impl.cs class file to the project, change the namespace in the file to your project namespace.
After you perform the above steps, and initialize the SDK, GainsightPX.Winform.EngagementHandler should be provided with the Gainsight.Client object and IRenderContainerProvider implemented class object, as below:
Example:
Config config = new Config.Builder()
{
...
EngagementsEnabled = true
}.Build();
Gainsight.Initialize(<#API-KEY#>, config);
...
GainsightPX.WinForm.EngagementHandler.AttachEngagementsHandler(Gainsight.Client, new CEF8829Impl());
For updates starting from 1.3.0, Gainsight recommends you to use the following code for setting the IRenderContainerProvider implementation.
 Config config = new Config.Builder()
 {
        ...
        EngagementsEnabled = true
      }
      .SetRenderContainer(new CEF8829Impl())
      .Build();
 Gainsight.Initialize(<#API-KEY#>, config);
Setting Reference Control
Starting from version 1.3.1, developers have the ability to set the Form or Control (on WinForm) / Window or FrameworkElement(WPF) that they want the engagement to be shown in.
Gainsight.Client.SetEngagementReference(<#Your control#>);
Surveys
Surveys help you gain insights into customer opinions and enhance your product or services. Surveys are useful to assess product usage patterns, derive insights, and identify risks. Using surveys, you can measure customer satisfaction at a granular level.
Survey Engagements are a great means to drive communication between you and your customers. Using Survey Engagements, you can launch in-app surveys on desktop applications.
Gainsight PX offers five types of Survey Engagements to suit your business requirements:
- NPS® (Net Promoter Score)
- CES (Customer Effort Score)
- Rating
- Boolean
- Multi Question
Create Survey Engagement
To create Survey Engagement from your Gainsight desktop SDK:
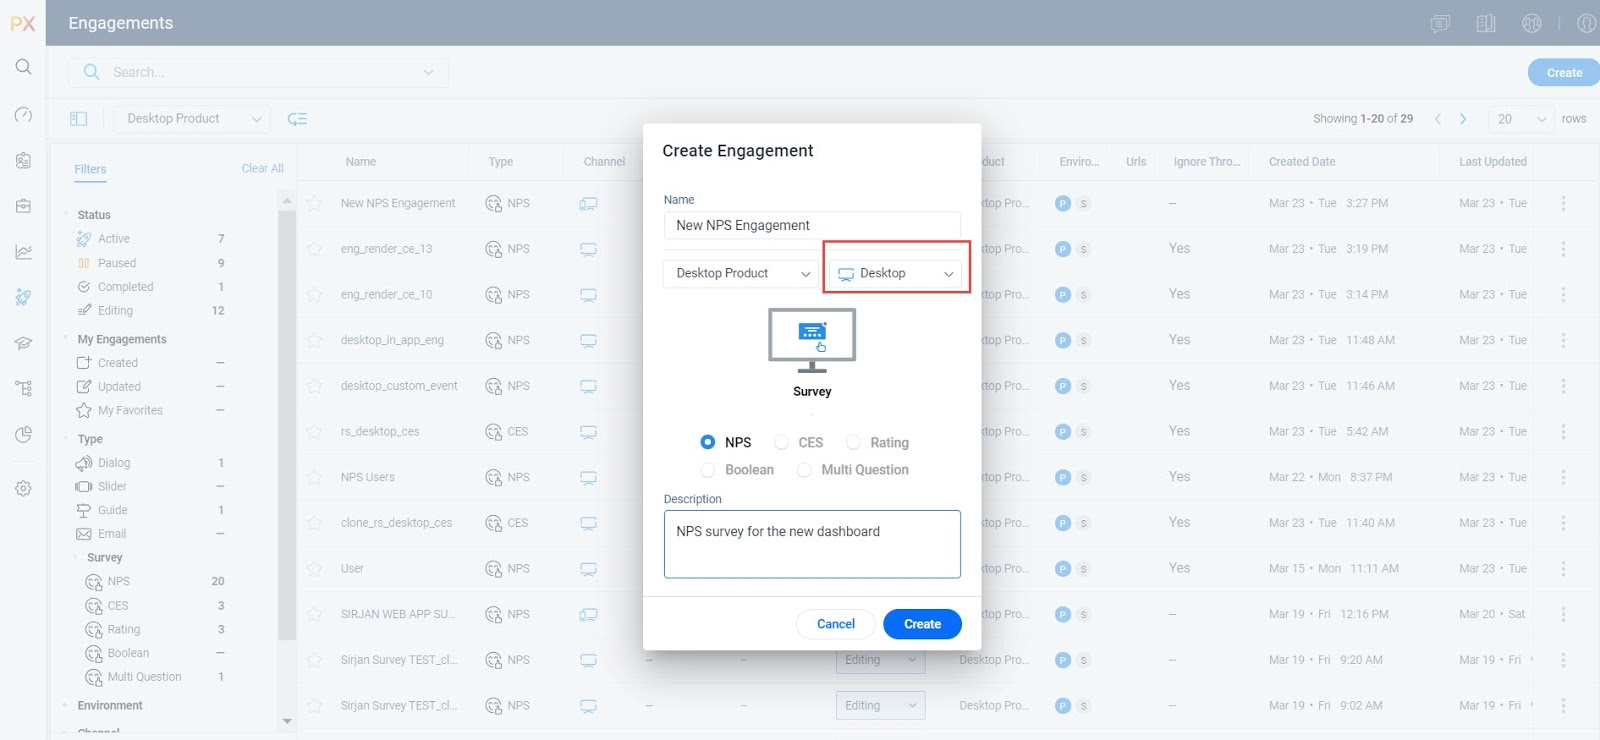
- From the left pane, click Engagements.
- Click Create.
- Enter a name for your engagement.
- Select the type of target application: Desktop.

- Select the type of survey you need to create. The NPS® option is selected by default.
- Enter a description.
- Click Create.
- In the Audience step of the smart wizard on the left, select the target audience based on user, account and/or behavioral rules.
- Choose a template in the Templates step.
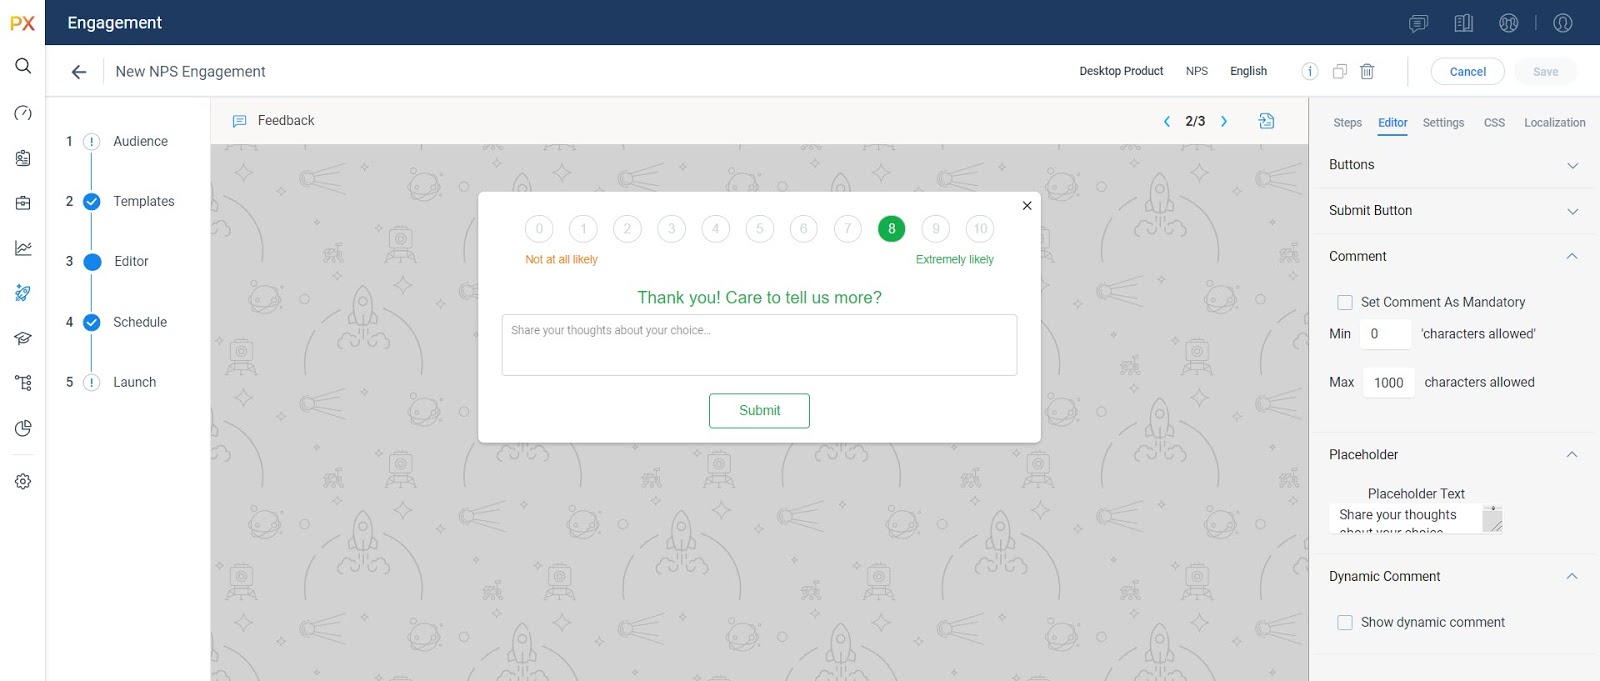
- Customize the look and feel by using the Editor tab and optionally display the ‘Thank you’ step.

- On the Settings tab, check the style, content placement, title and so on.
- (Optional) Set the View Type (Dialogue or Bar) and Position of the Survey engagement to be displayed on the screen.
- Click Save.
- Set the date range and intervals you would like to collect survey results from users. For more information about scheduling, refer to the Engagement Scheduler article from the Additional Resources section.
- Select the Time zone and the Recurring option in the Scheduler section.
- Select the Intervals checkbox to show the Survey Engagement multiple times with recurring intervals during a specific time period.
- On the launch step, review the configurations and click Launch.
Survey Analytics
Gainsight PX allows you to measure feature adoption or engaged users based on their responses using Engagement Analytics. To learn more about how you can follow up with the users who did not take the survey, refer to the articles from the Additional Resources section.
To learn about all frequently asked questions, refer to the Surveys FAQs article from the Additional Resources section.
Best Practices
Gainsight recommends the following best practices for creating survey engagements:
- Coordinate survey requirements across departments to create a comprehensive strategy and avoid survey burn-out.
- Solicit NPS® feedback quarterly for fresh data every three months, but choose criteria to rotate your distribution list.
- Connect PX to your Slack channel to get real-time feedback. For more information, refer to the Gainsight PX Slack Integration article from the Additional Resources section.
Configuration Table
This section describes variables, whose configurations you can modify during the initialization stage.
| Property | Type | Default | Description |
|---|---|---|---|
| Enabled | bool | True | Enables the Desktop SDK. Should be set as True to send events from the client. |
| Proxy | string | Null | The string for IWebProxy. |
| DataCenter | PXHost | .US | All data requests are sent to the given data center Note: If the Host is configured, then the data center value is ignored. |
| Timeout | TimeSpan | 5sec | The timeout for HTTP request. |
| PXVisitorId | string | UUID | Unique identifier for a user; will be overridden with the server given ID after Identify call. |
| LogLevel | Level | .NONE | The log level to be passed on to Logger Handlers. |
| SessionTimeout | TimeSpan | 30min | Timeout for session. |
| QueueLimit | int | 100 | The maximum number of records to store in the memory/disk queue. This will be used when network connectivity is down or intermittent |
| DurableQueueDirectoryName | string | Null | The name of directory for disk cache option. |
| DurableQueueEncryption | IStorageEncryption | Null | Encryption used to store data on disk. |
| EngagementsEnabled | bool | True | Indicates whether to fetch engagements. |
For the detailed Account and User properties that can be sent during Identify, refer to the User and Account Model article from the Additional Resources section.
Dependencies
| Version | Dependency |
|---|---|
| For all versions |
Newtonsoft.Json - 13.0.2v |
| For netstandard1.3 |
|
| For net35 |
|
| For net45 |
|
| For net461 |
|