Migrate Picklists with X-Org
Gainsight NXT
| IMPORTANT: This article applies to the old version of X-Org. If you are using new version of X-Org, you can find the support documentation by clicking here. |
Overview
This article explains the process of migrating Custom picklists using X-Org tool. X-Org is Gainsight's migration tool which can be used to migrate data from a source object to a target object. (Source object can be a sandbox org and target object can be a production org). To learn more about the X-Org tool refer to X-Org Migration Overview.
Migrate Custom Picklists
To Migrate Custom picklists using X-Org tool:
- Navigate to Administration > X-org Migration
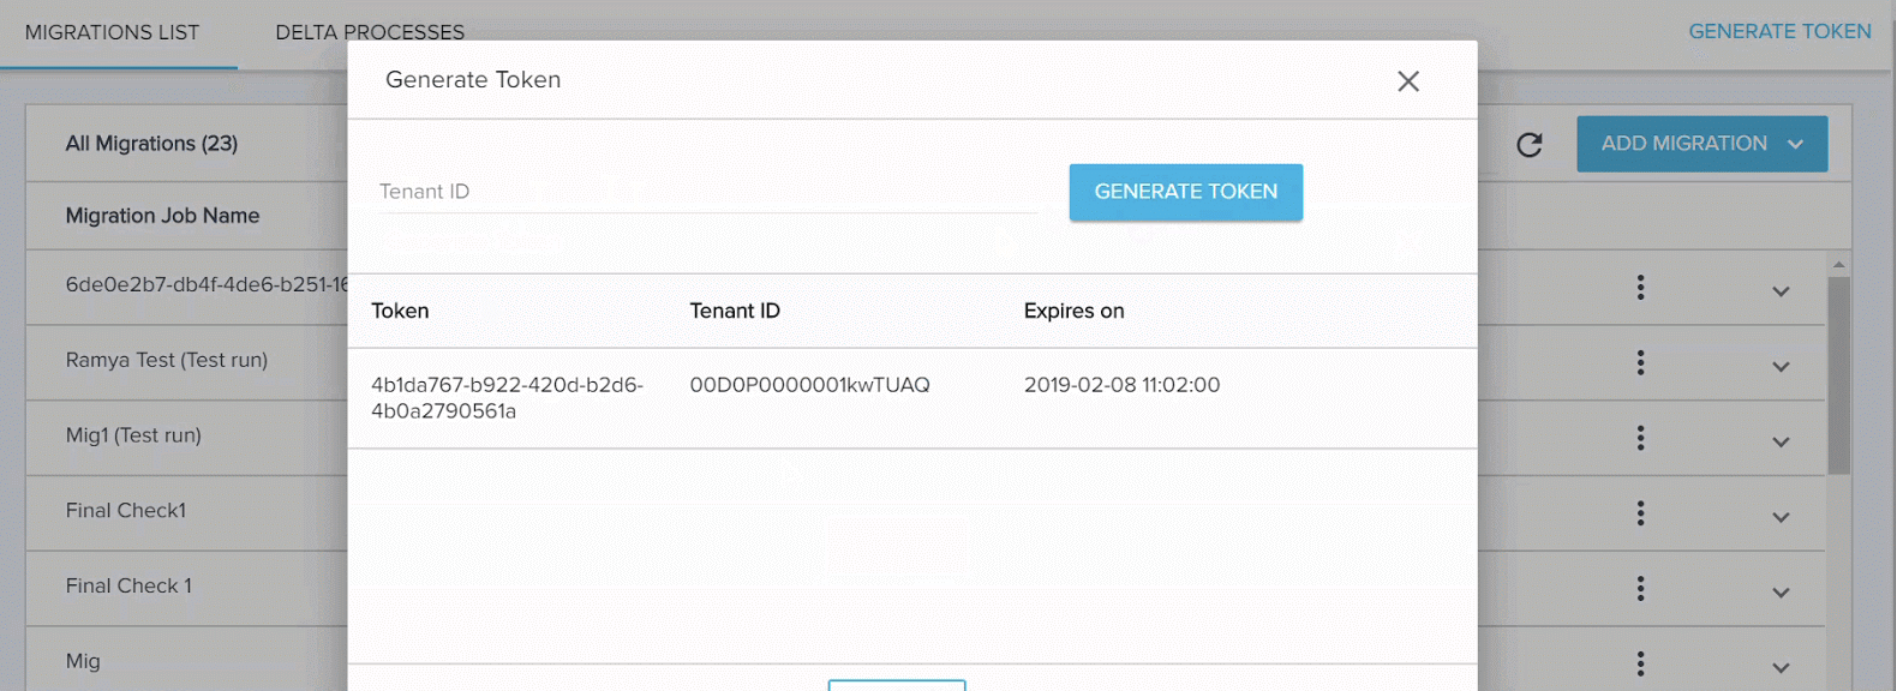
- Click GENERATE TOKEN.
- Enter the Tenant Id of the target org.
- Click GENERATE TOKEN.
- Click the copy icon to copy the token and click CLOSE.
Note: If you have already generated the token for target org, you can use the existing token.
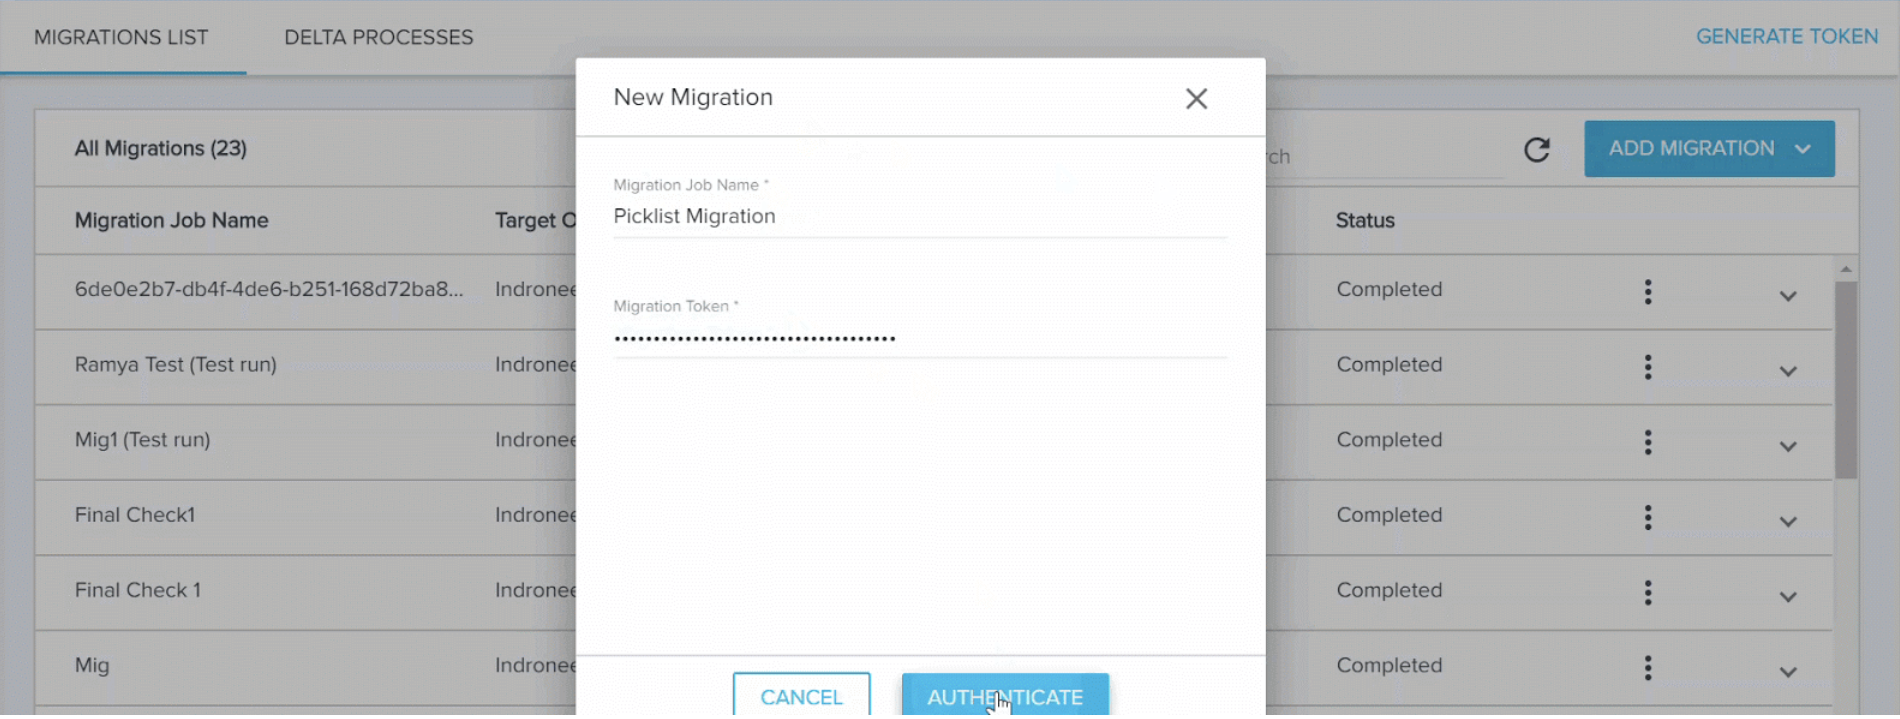
- Select New Migration from the ADD MIGRATION menu.
- Enter a name for the Migration.
- Enter the Migration Token.
- Click AUTHENTICATE. The Assets window is displayed.
- (Optional) Select the checkbox for the assets to be migrated.
- Click CONTINUE. The Configurations window is displayed.
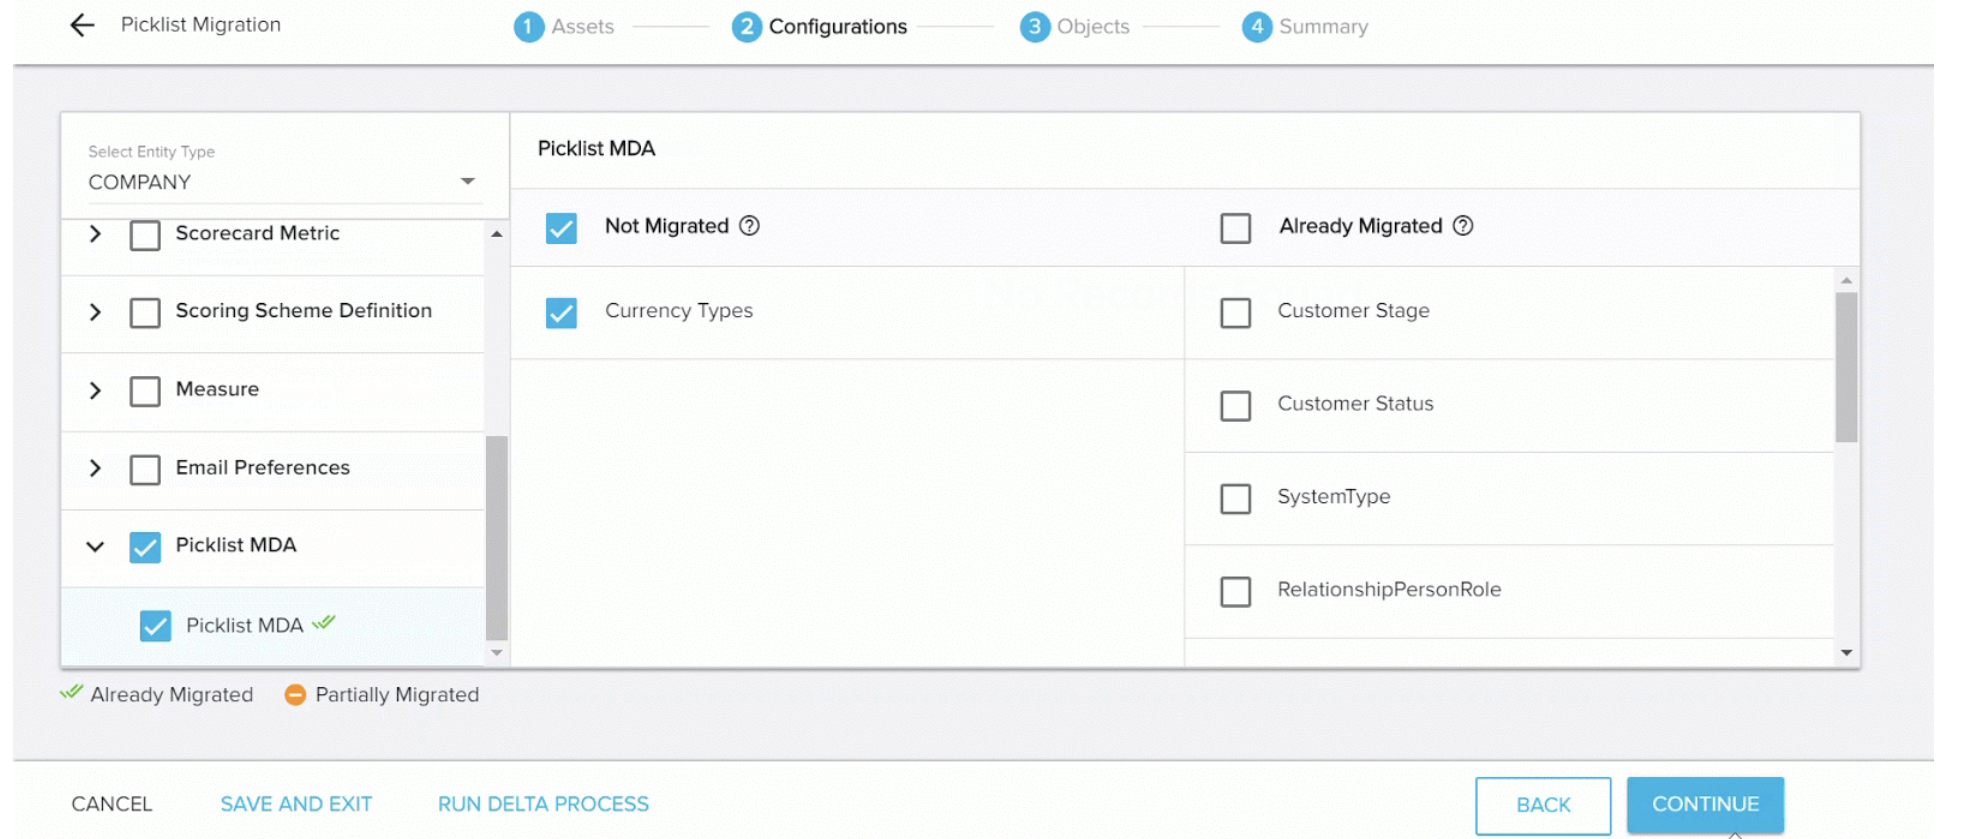
- From the Select Entity Type drop-down menu, select COMPANY.

- Expand Picklist MDA and click Picklist MDA. You can view a list of Picklist items which are migrated and yet to be migrated.
- Select the Picklist MDA check box. All the picklists are selected. You can clear the check box for the picklists which are already migrated.
- Click CONTINUE.
- (Optional) Select the Objects to be migrated.
- Click CONTINUE.
- Ensure that all the assets selected for migration are displayed. In this case, Countries is picklist selected for migration.
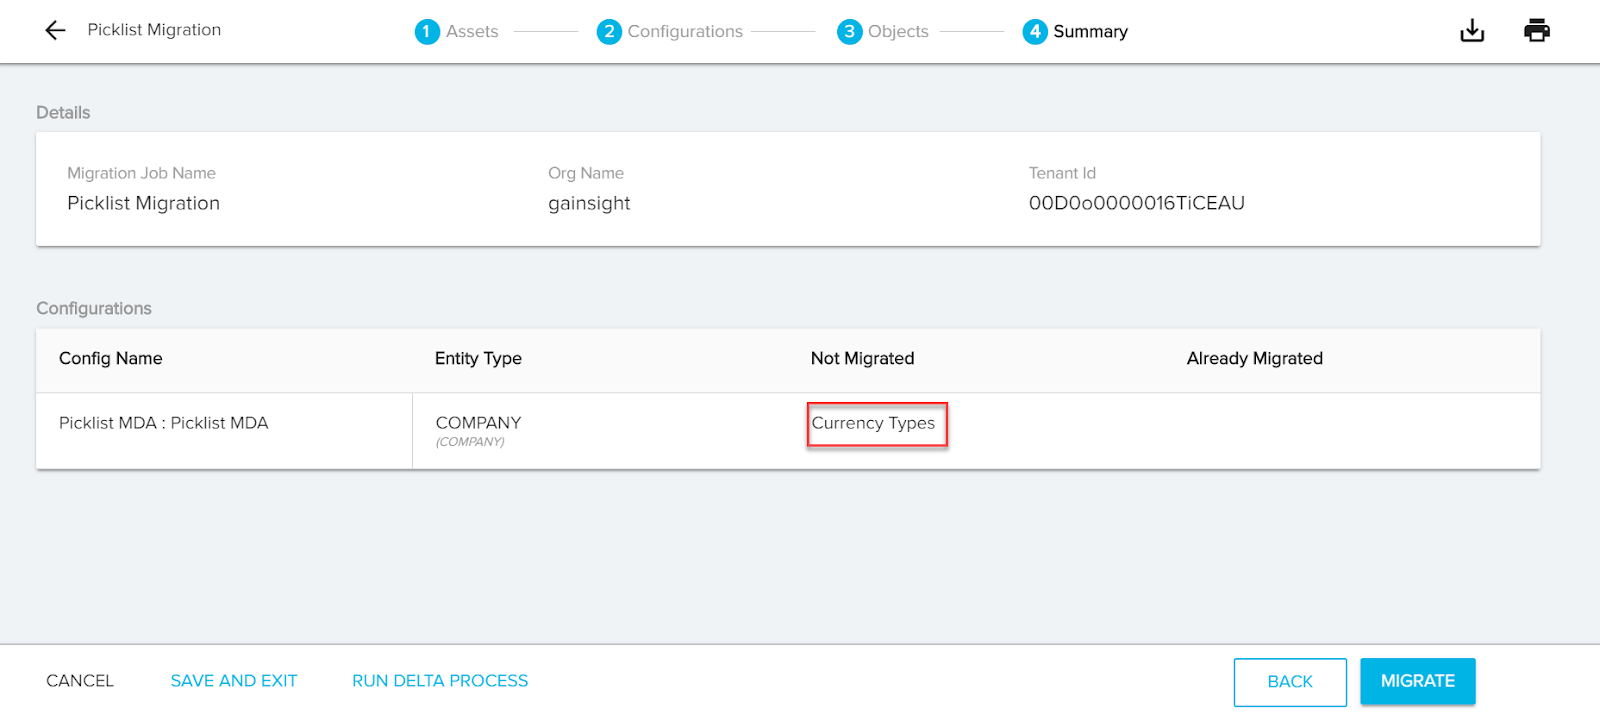
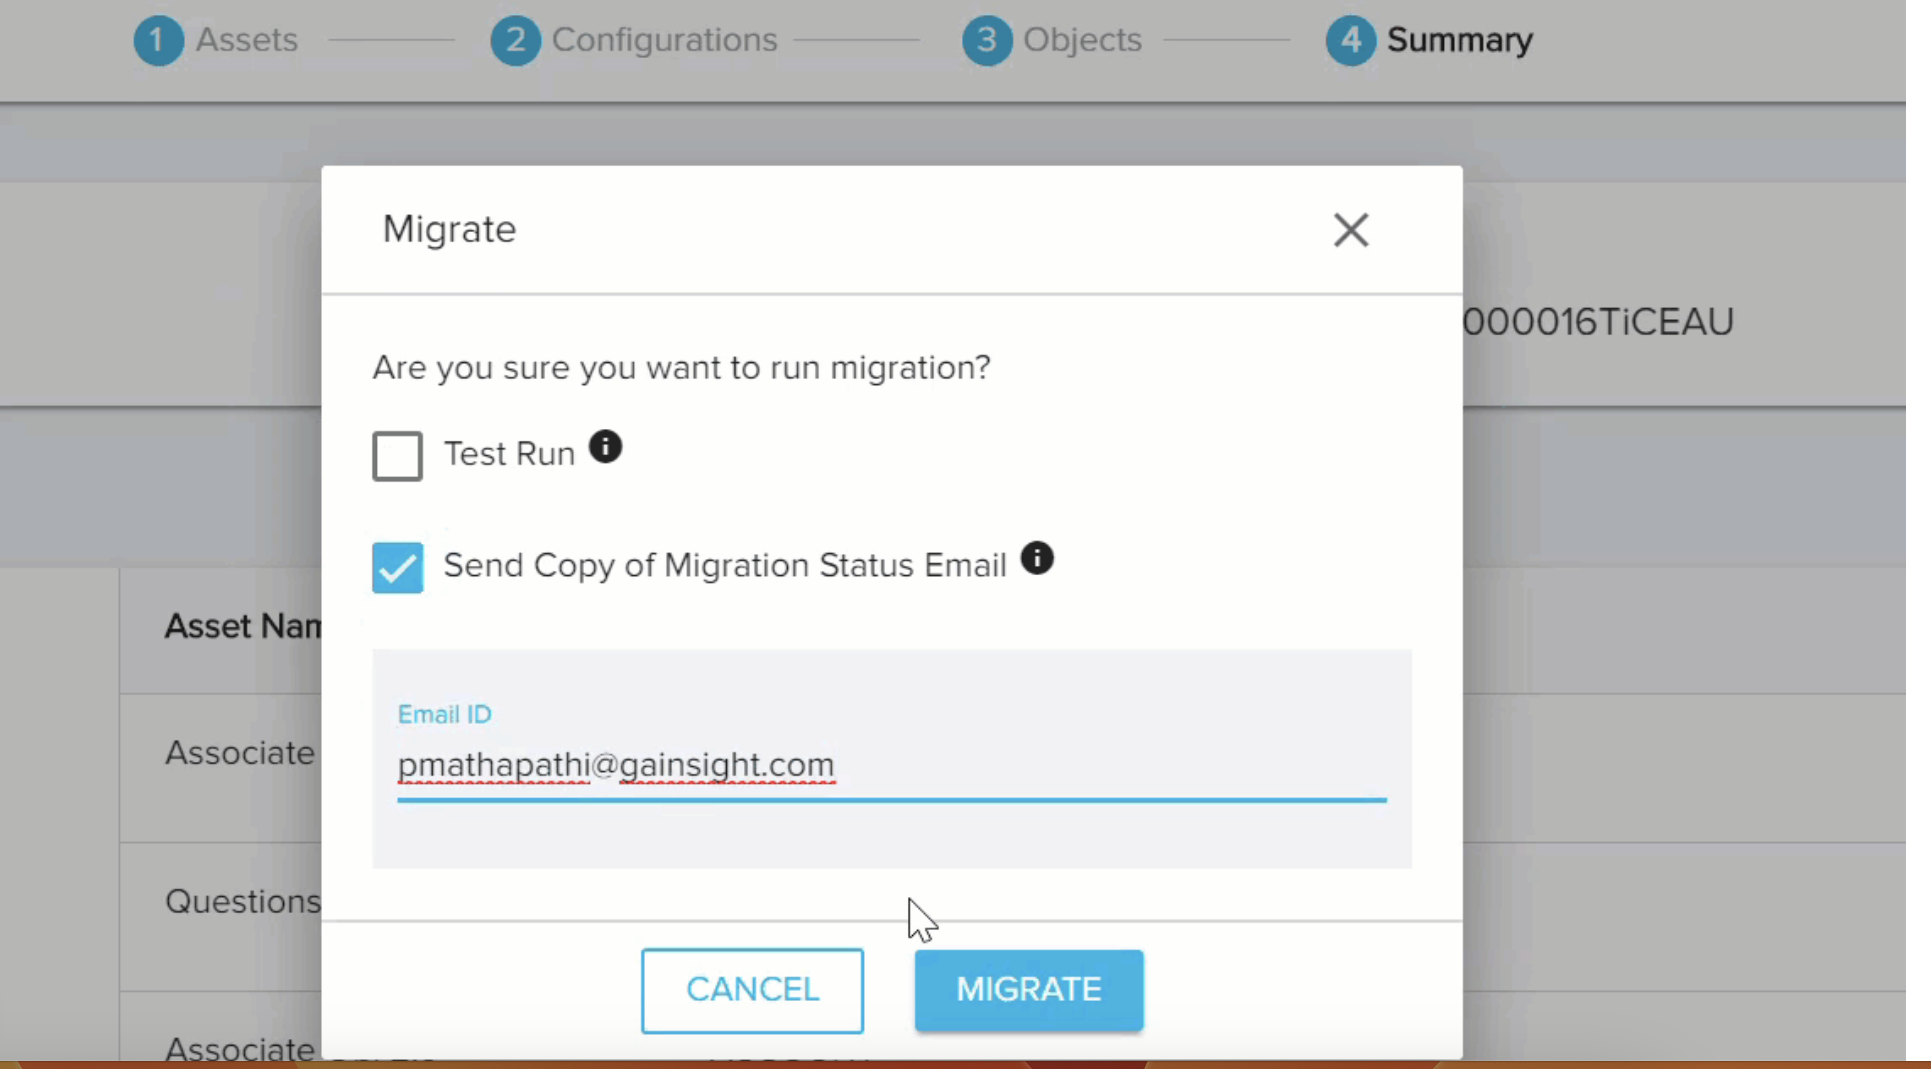
- Click MIGRATE. The Migrate window is displayed.
- (Optional) Select the Test Run check box to perform a test migration.
- (Optional) Select the Send Copy of Migration Status Email check box and provide recipient Email IDs to whom the migration results must be mailed.
- Click MIGRATE. The migration process starts.