Define Person Duplicates
This article explains how to set up and manage a Unification Person project for Person Data in Gainsight.
Note: Before proceeding further Gainsight recommends that you to go through the Unification Overview article from the Additional Resources section for a better understanding of the Unification feature.
Overview
A person is a Standard object in Gainsight that contains unique records of real-world individuals, including personal attributes such as Name, Email, Mobile phone, Twitter profile, LinkedIn profile, and more. With Gainsight's Unification feature, admins can merge and sync person data from multiple sources to create a consolidated unified record. This record is then stored in the Person object.This capability helps organizations maintain a single source of truth for their customer data and improve data accuracy, consistency, and accessibility.
Using the Unification feature, admins can:
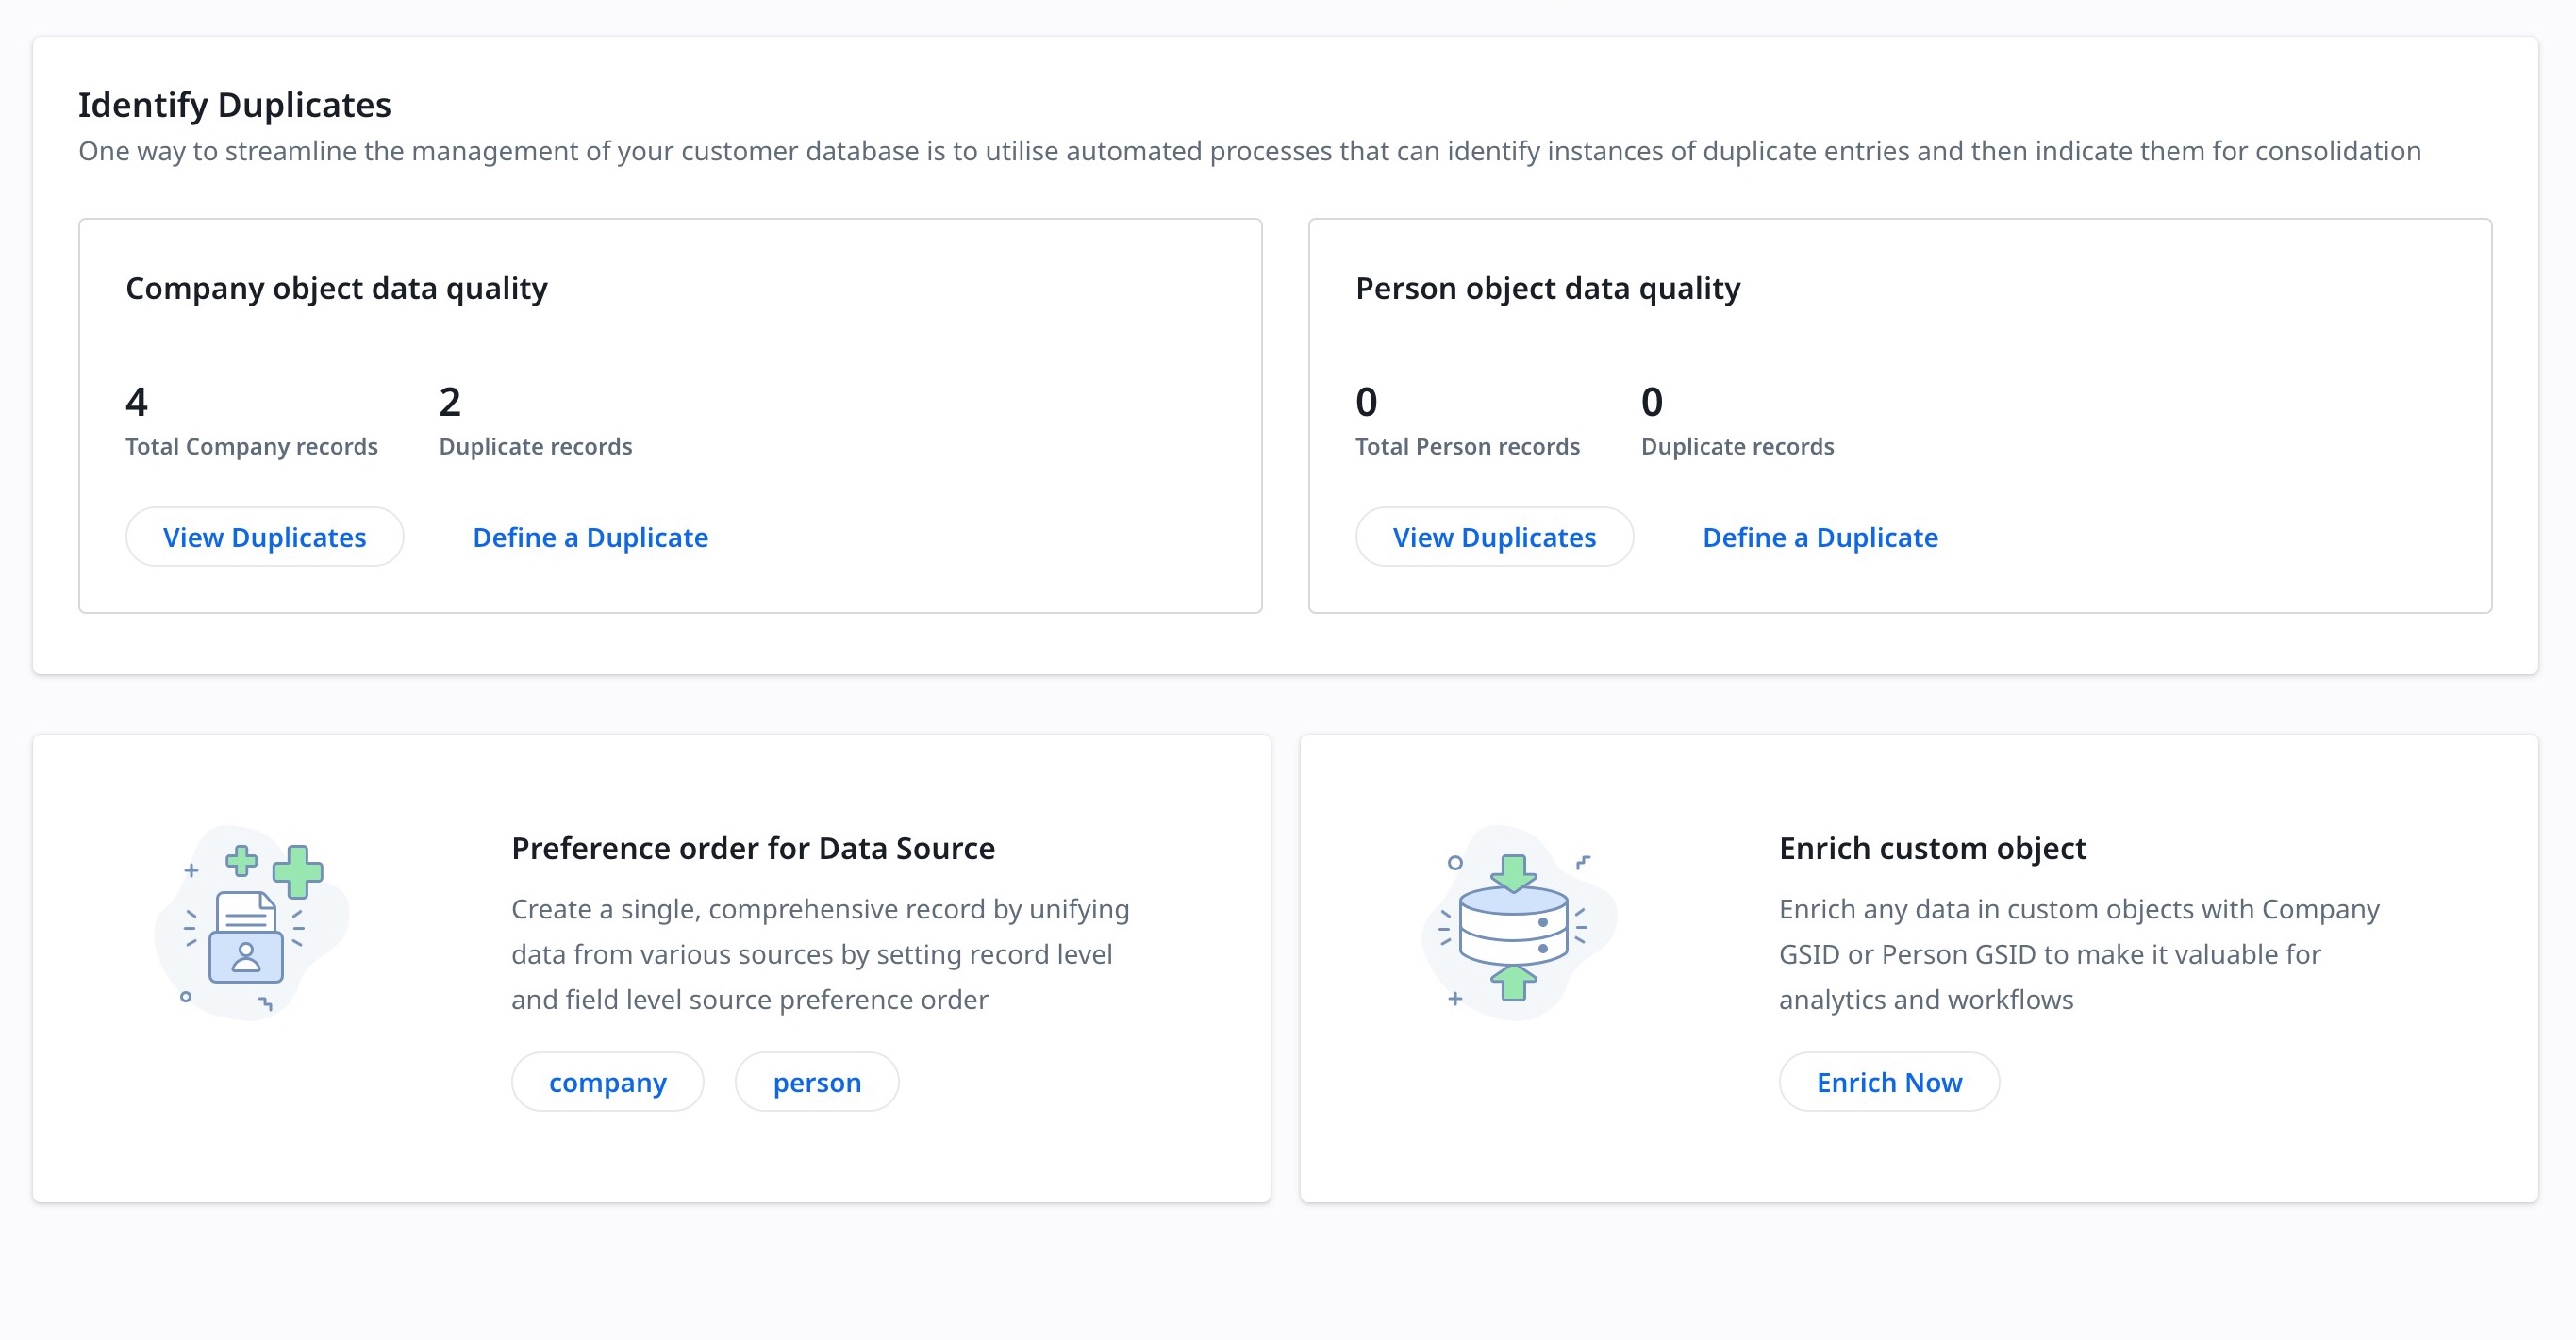
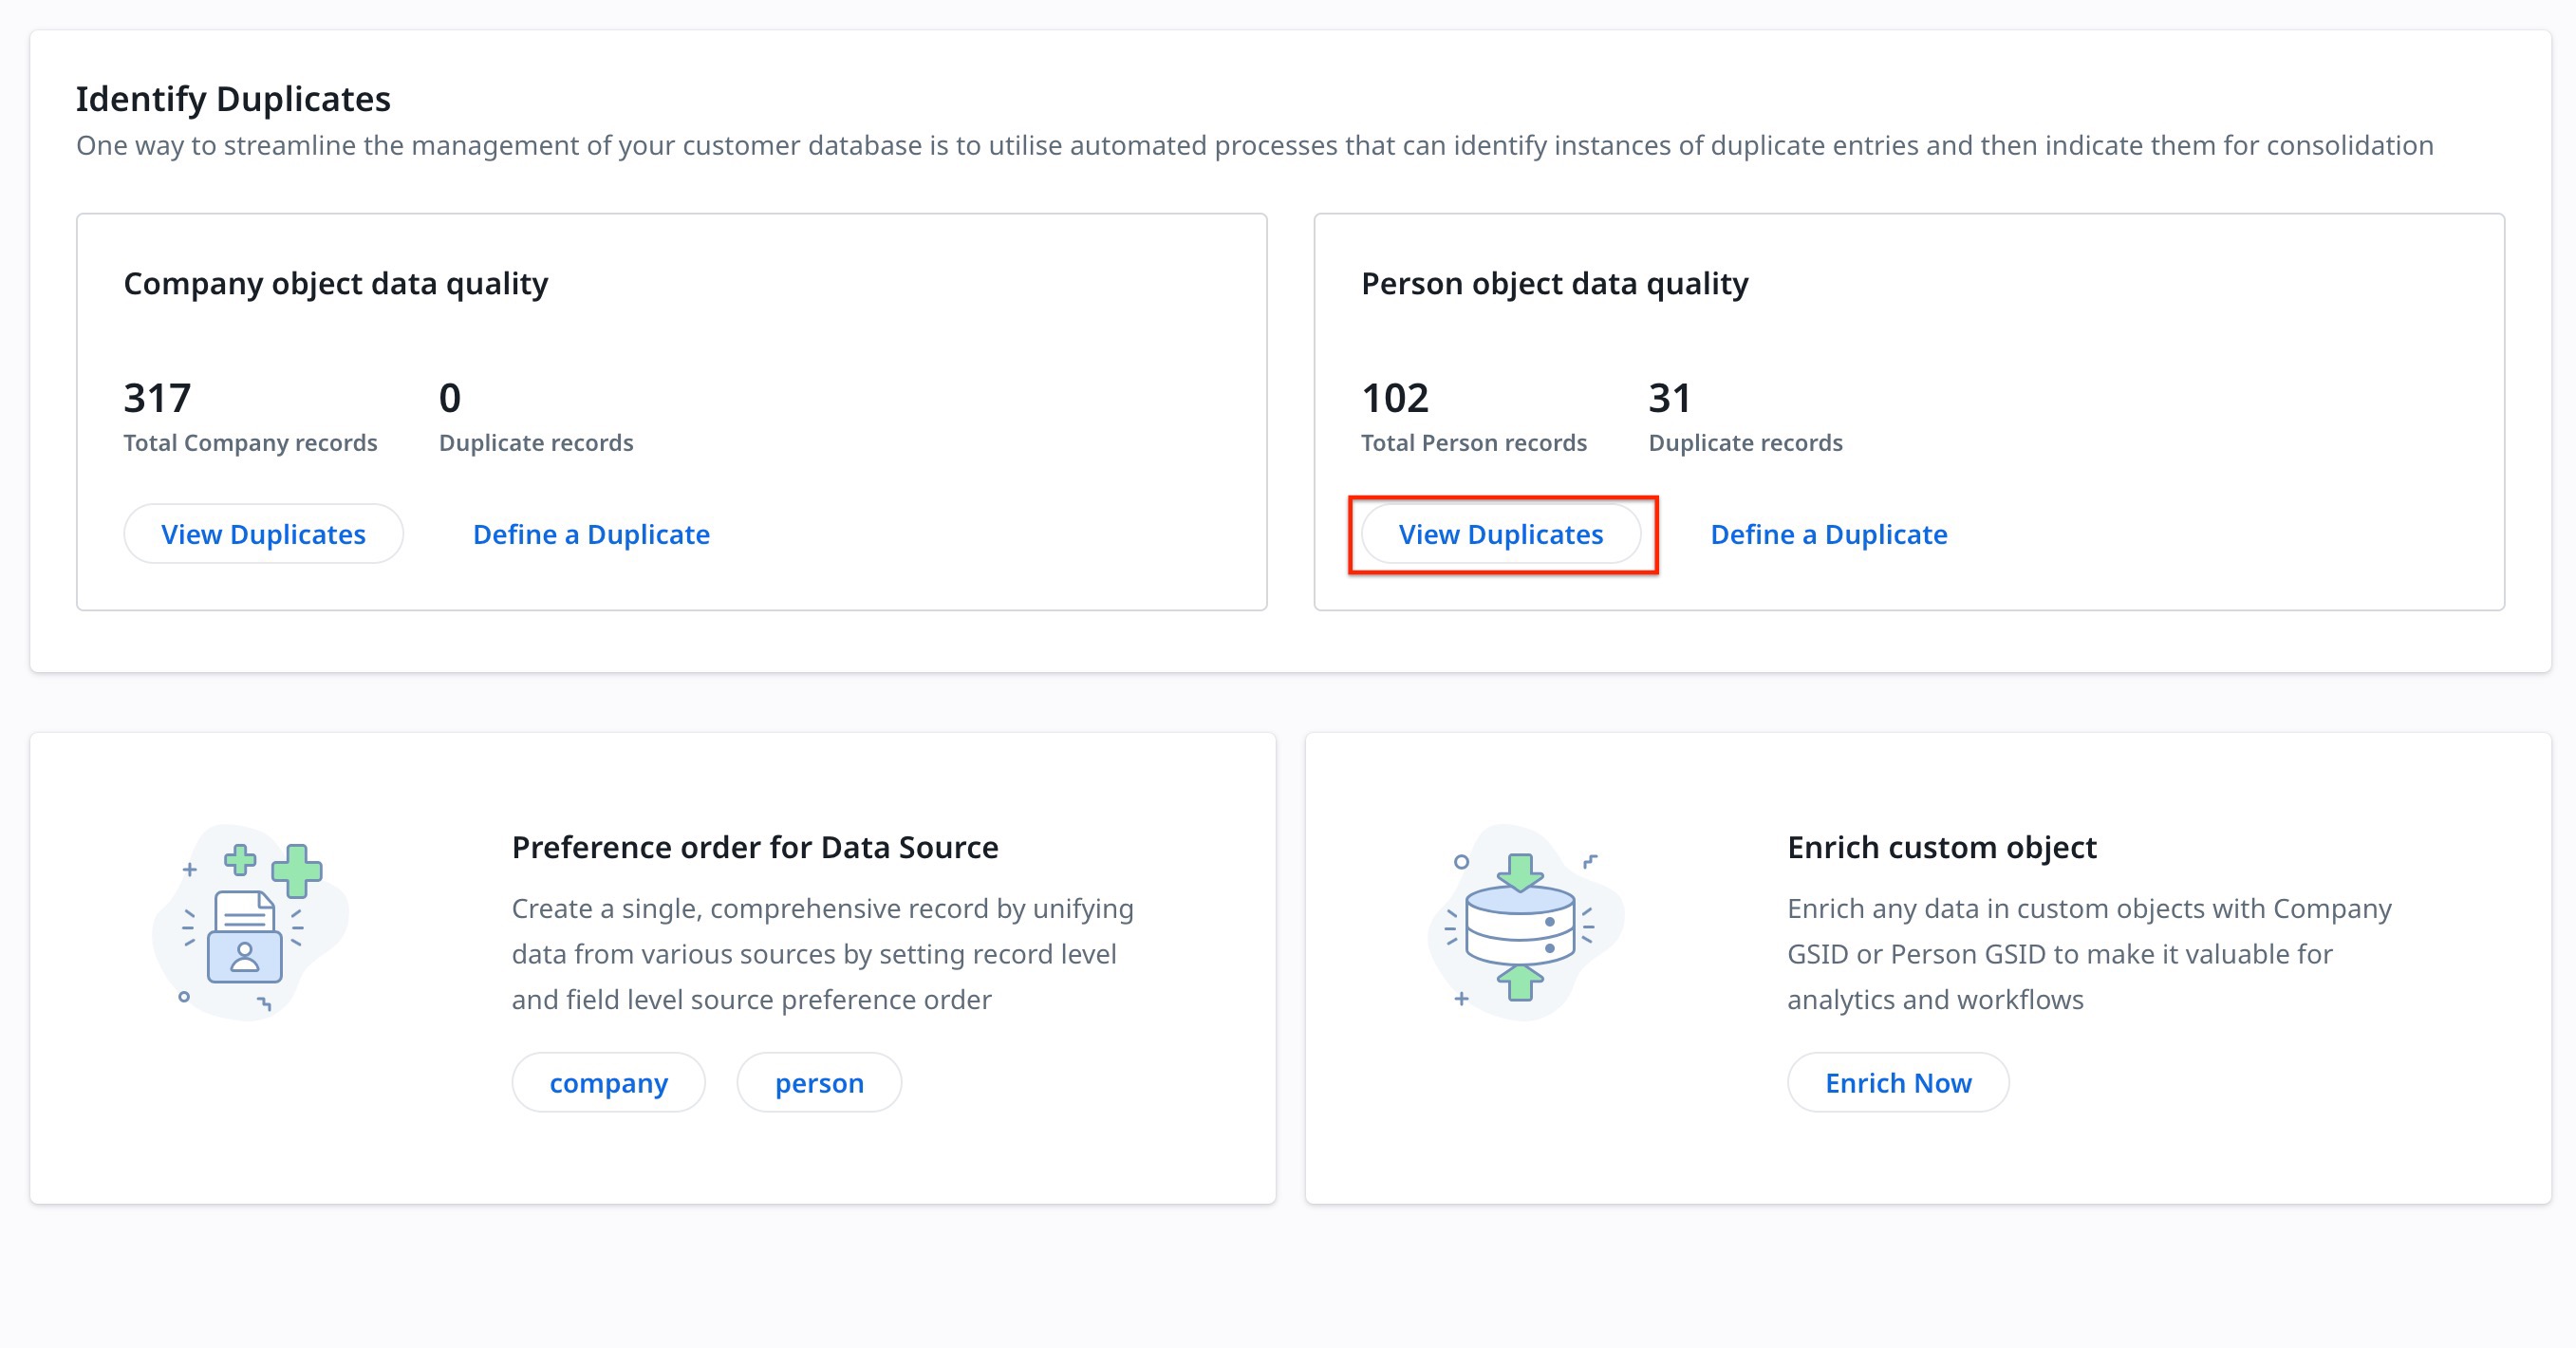
- Identify duplicates
- Select and prioritize the sources to unify data
- Enrich any data in Custom objects with Company or Person GSID
To use Unification:
- Navigate to Administration > Unification and perform configurations on the Unification page.
Define Person Duplicate
The Person object is added by default to the project and the mapping of attributes of the person object is also created by default based on the Resolution Key.
Note: The person’s global Resolution Key is set as the default matching criteria. For more information on the Resolution Key, refer to the People Management article from the Additional Resources section.
To define Person Duplicate Records:
- Navigate to Administration > Unification. The Unification page appears.
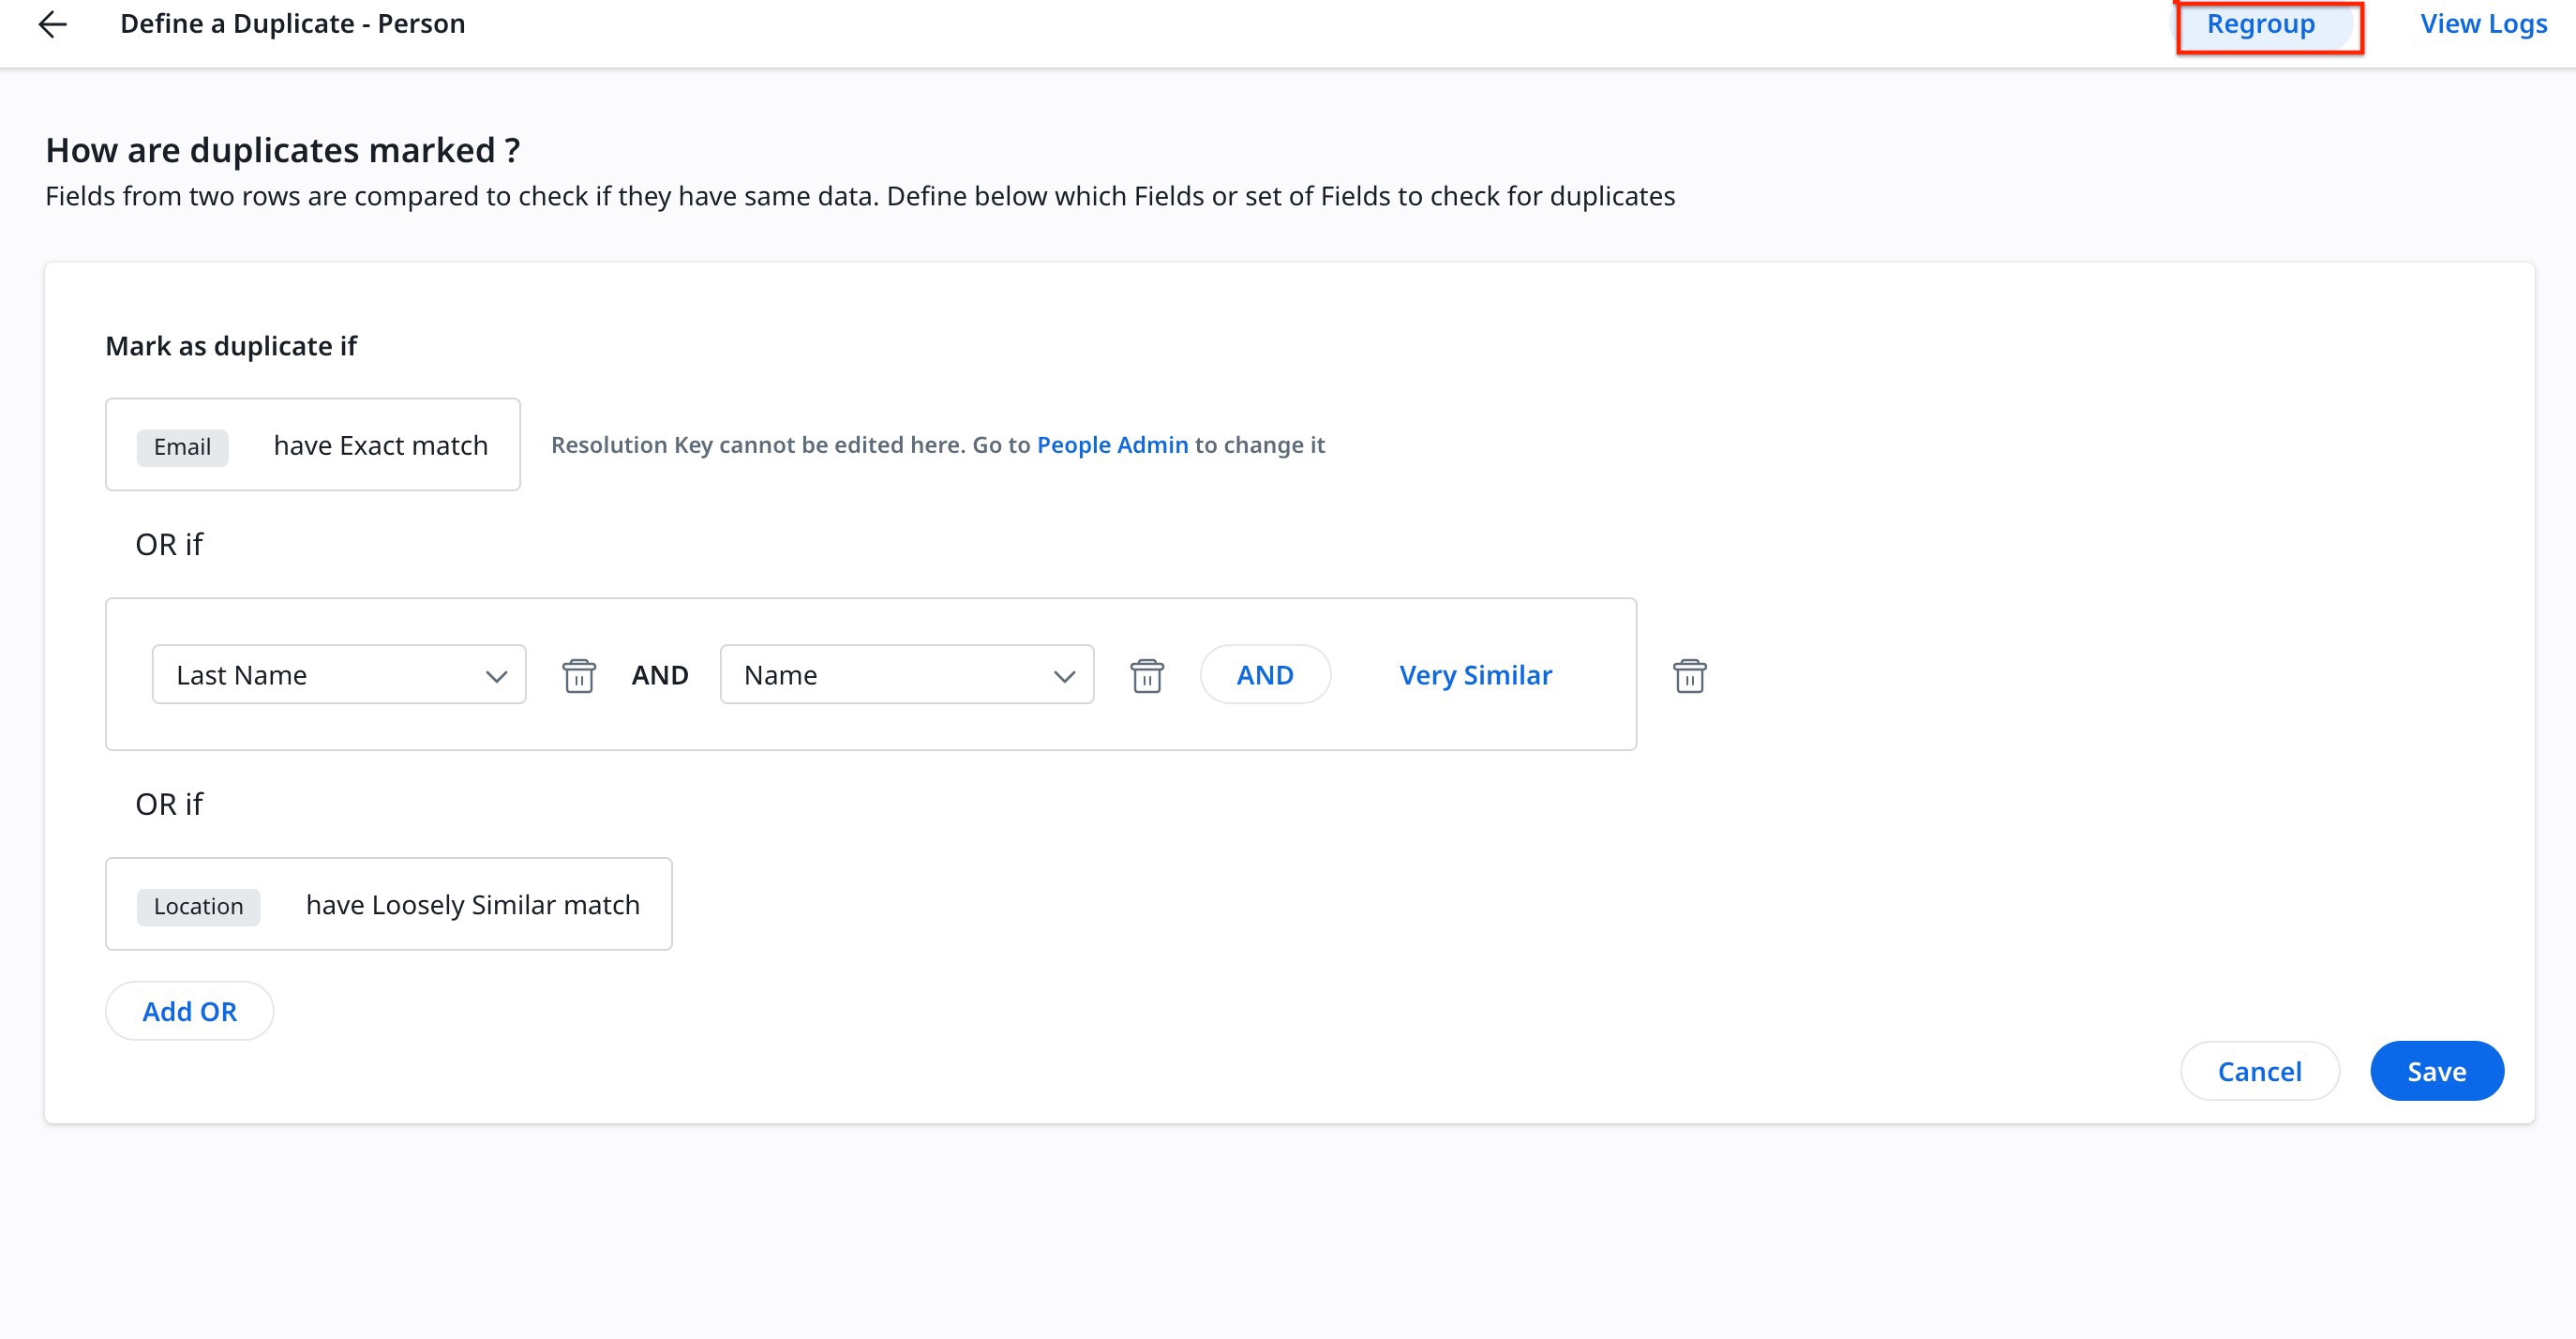
- Click the Define a Duplicate button from the Person Object Data Quality tab. The Define a Duplicate - Person screen appears.
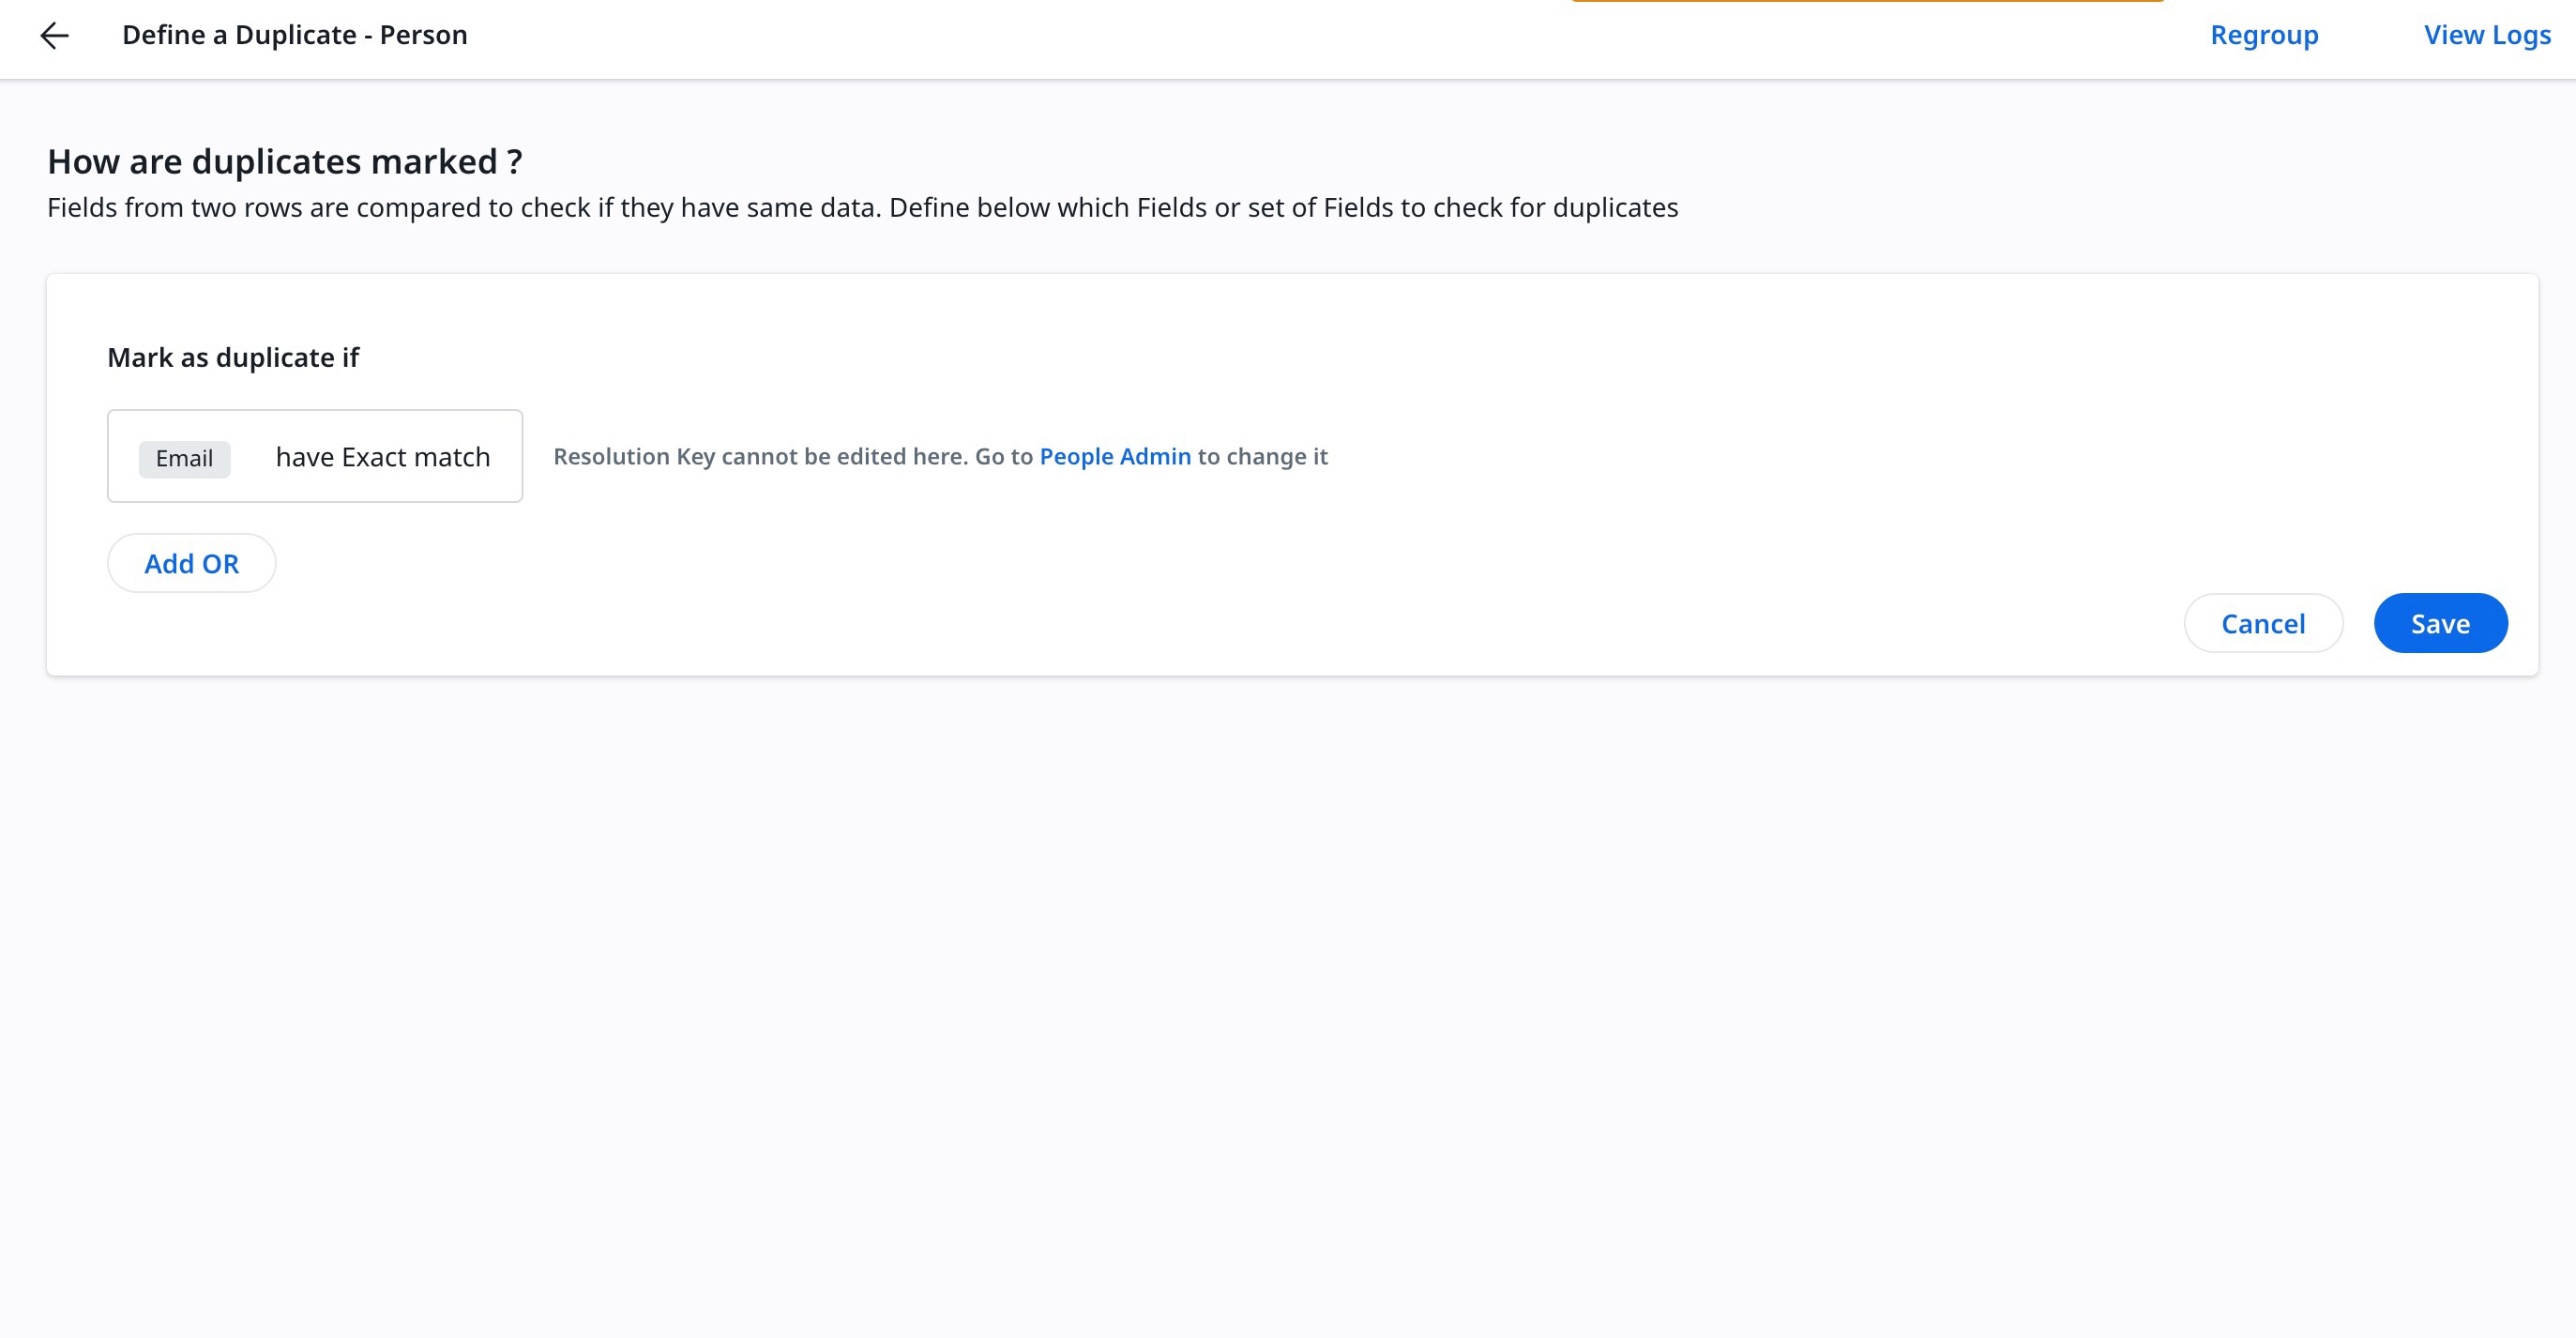
- (Optional) Click Add OR to define additional criteria to identify the person records.
- From the Select Field dropdown, select the field for the criteria.
- Click AND to additional fields.
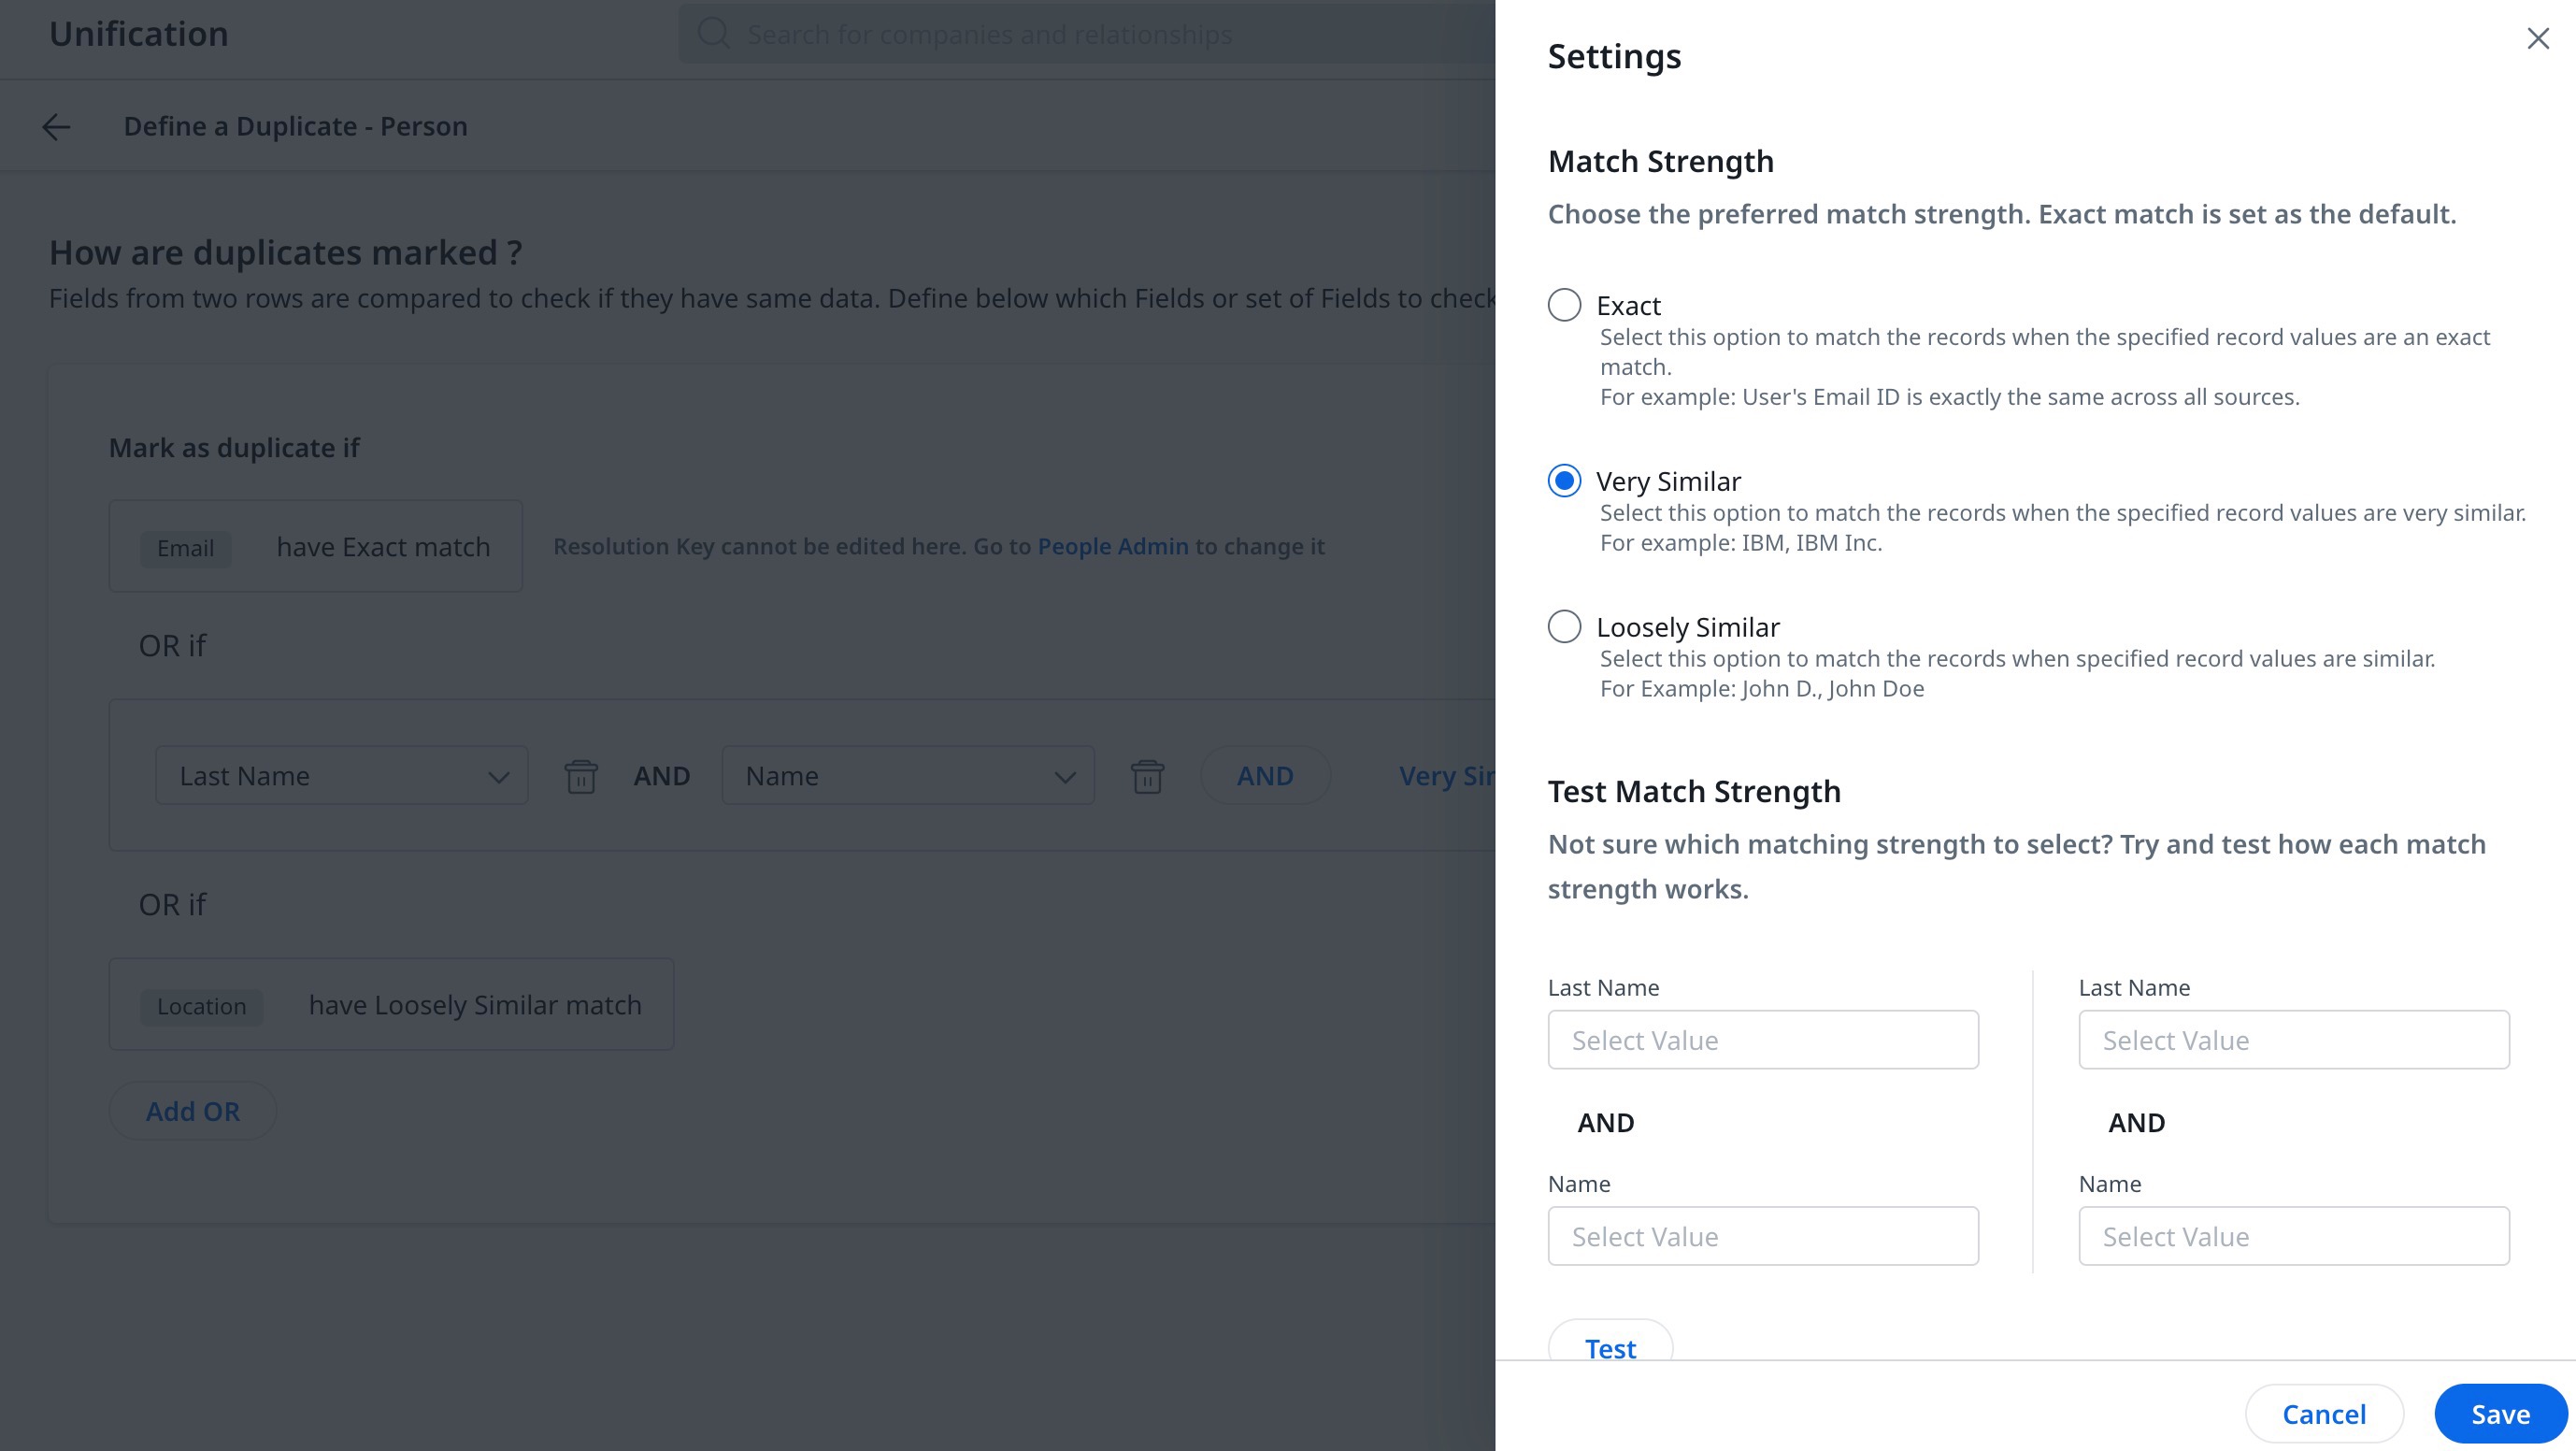
- Click Exact to define the match strength for identifying the duplicates. The Settings slide-out panel appears.
For more information on selecting the match strength, refer to the Match Strength section in this article.
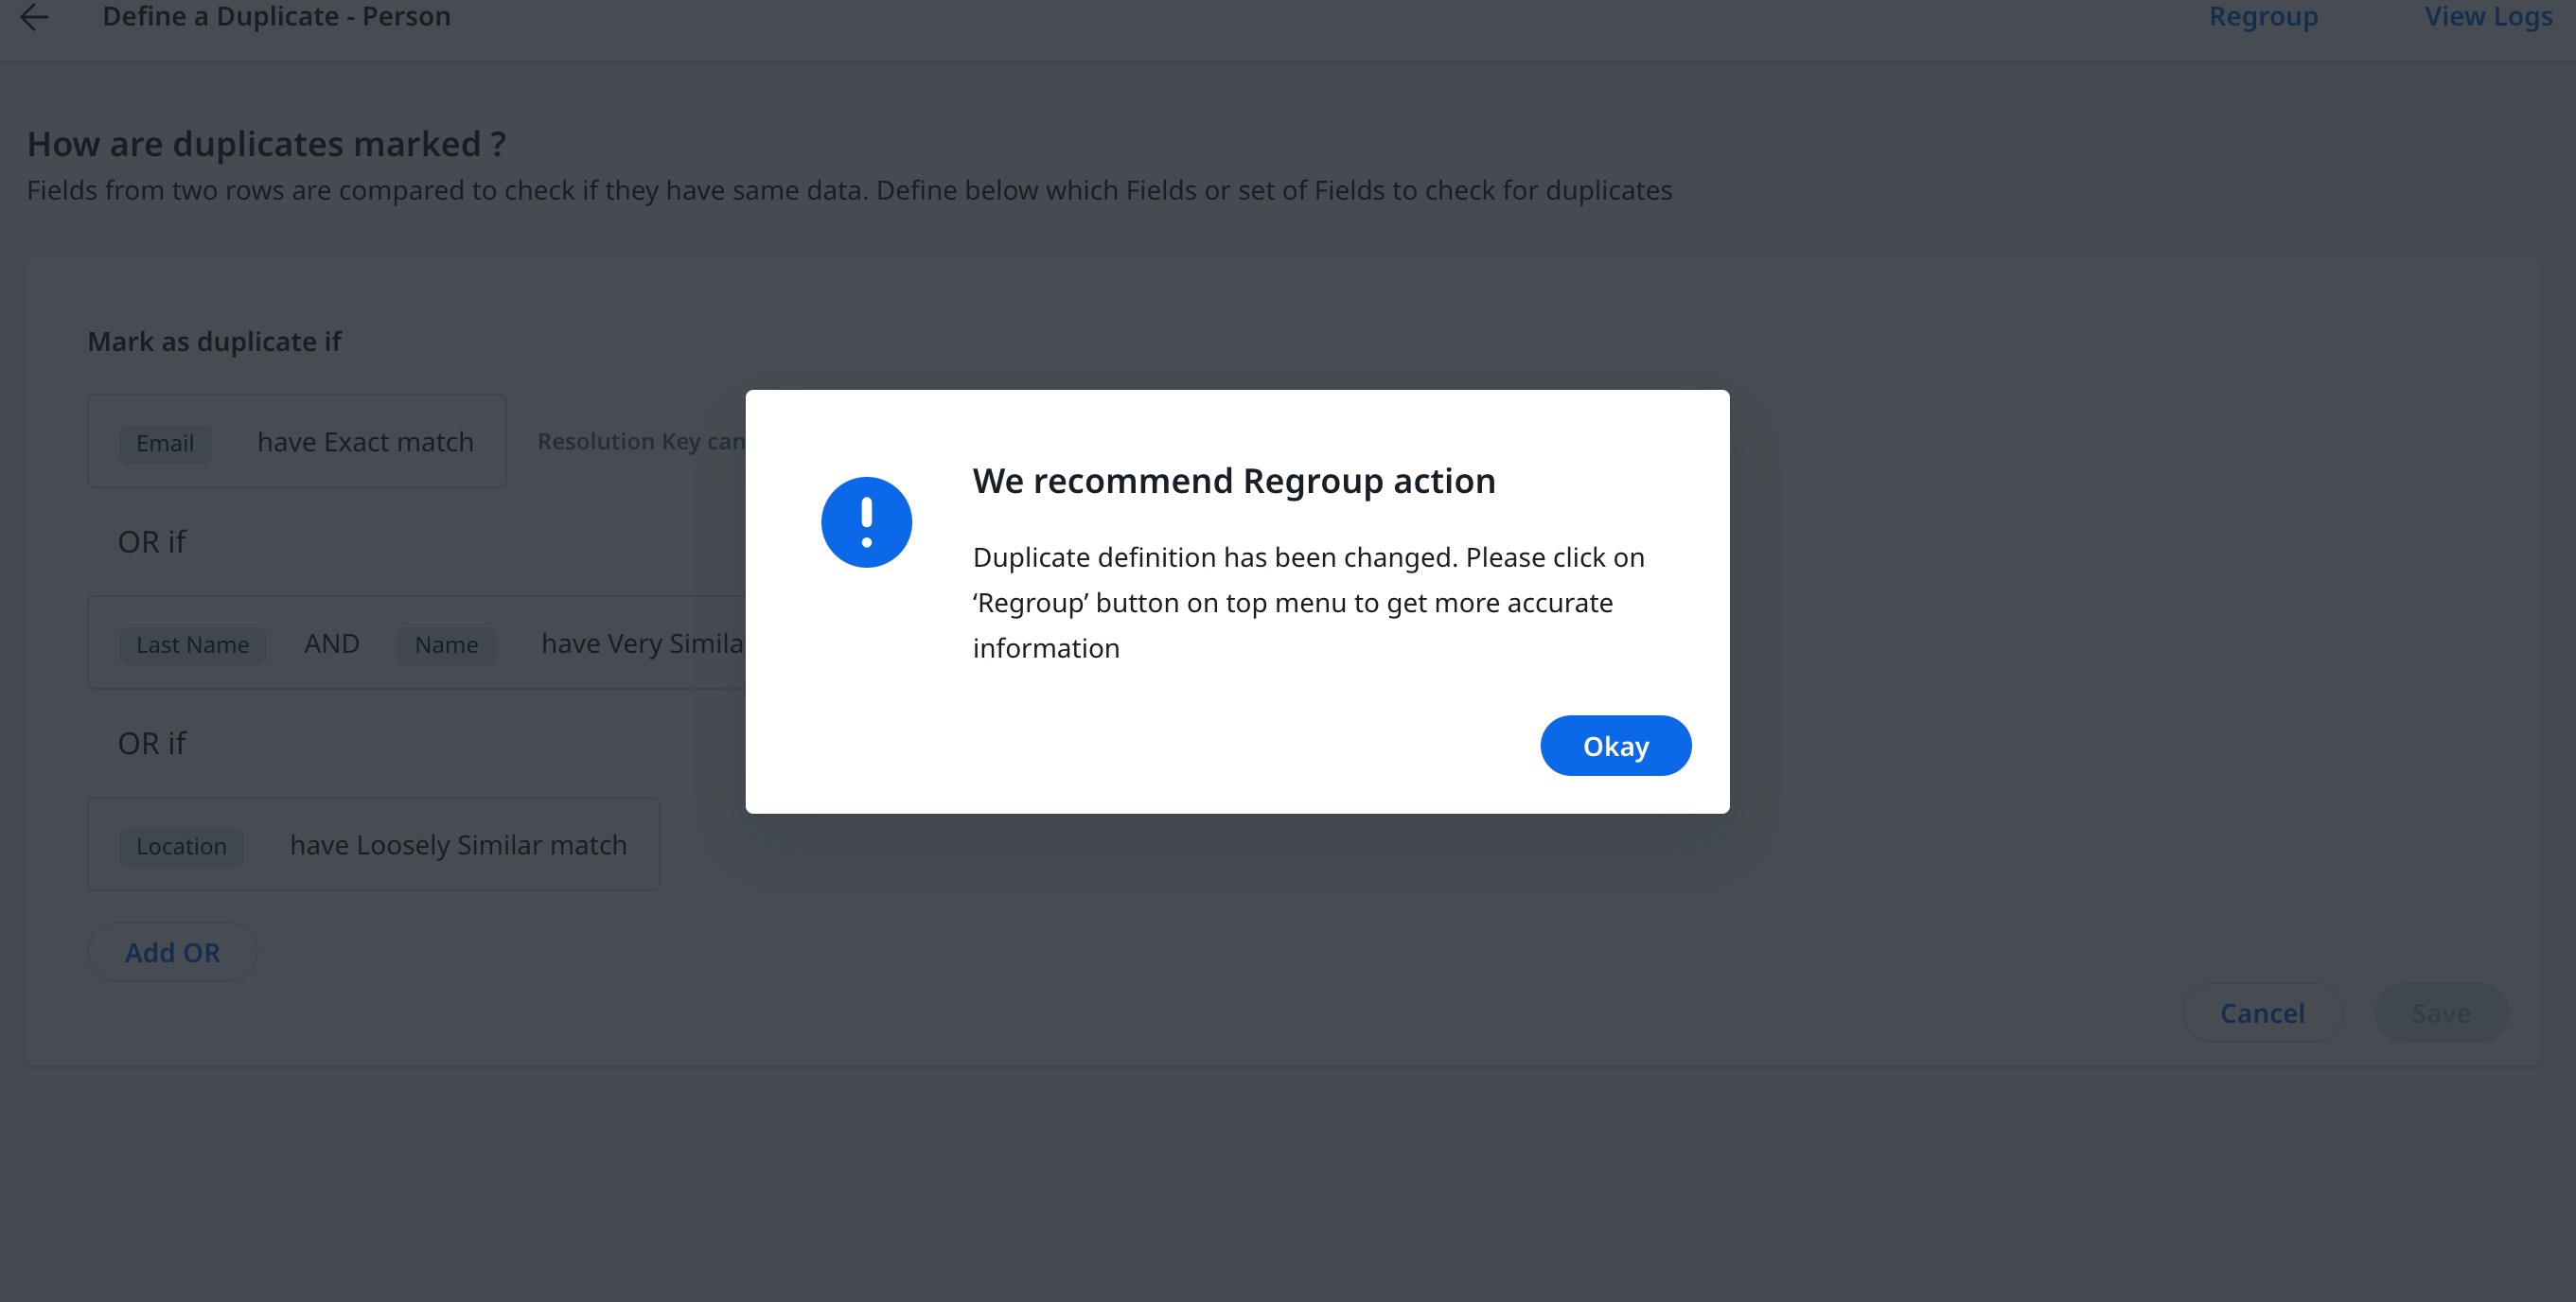
- Click Save. The Regroup action confirmation window appears.
For more information on Regroup, refer to the Regroup section in this article. - Click Okay. The Unification data is updated based on the newly defined criteria.
After the criteria are defined, Unification updates the number of duplicates present in your instance.
Match Strength
Admins can define the Match Strength to identify the matching records. The following types of match strengths can be defined:
- Exact: Select this option to match the records when the specified record values are an exact match. If not, the system will trigger the next rule to identify the match type between the records. For example, the User’s Name and Email ID can be used for an exact match, as they are mostly considered to be identical across various sources.
- Very Similar: Select this option to match the records when the specified record values are very similar. For example, IBM, IBM Inc.
- Loosely Similar: Select this option to match the records when the specified record values are similar. For example, John D., John Doe.
To select Match Strength:
- Click Exact to define the match strength for identifying the duplicates. The Settings slide-out panel appears.
- Select the Match Strength based on their criteria.
- (Optional) Use Test Match Strength to test how the match strength works.
- Click Save to confirm settings.
- Click Save to confirm the Match criteria settings.
Note: After match criteria are set, admins need to regroup unification data.
Regroup
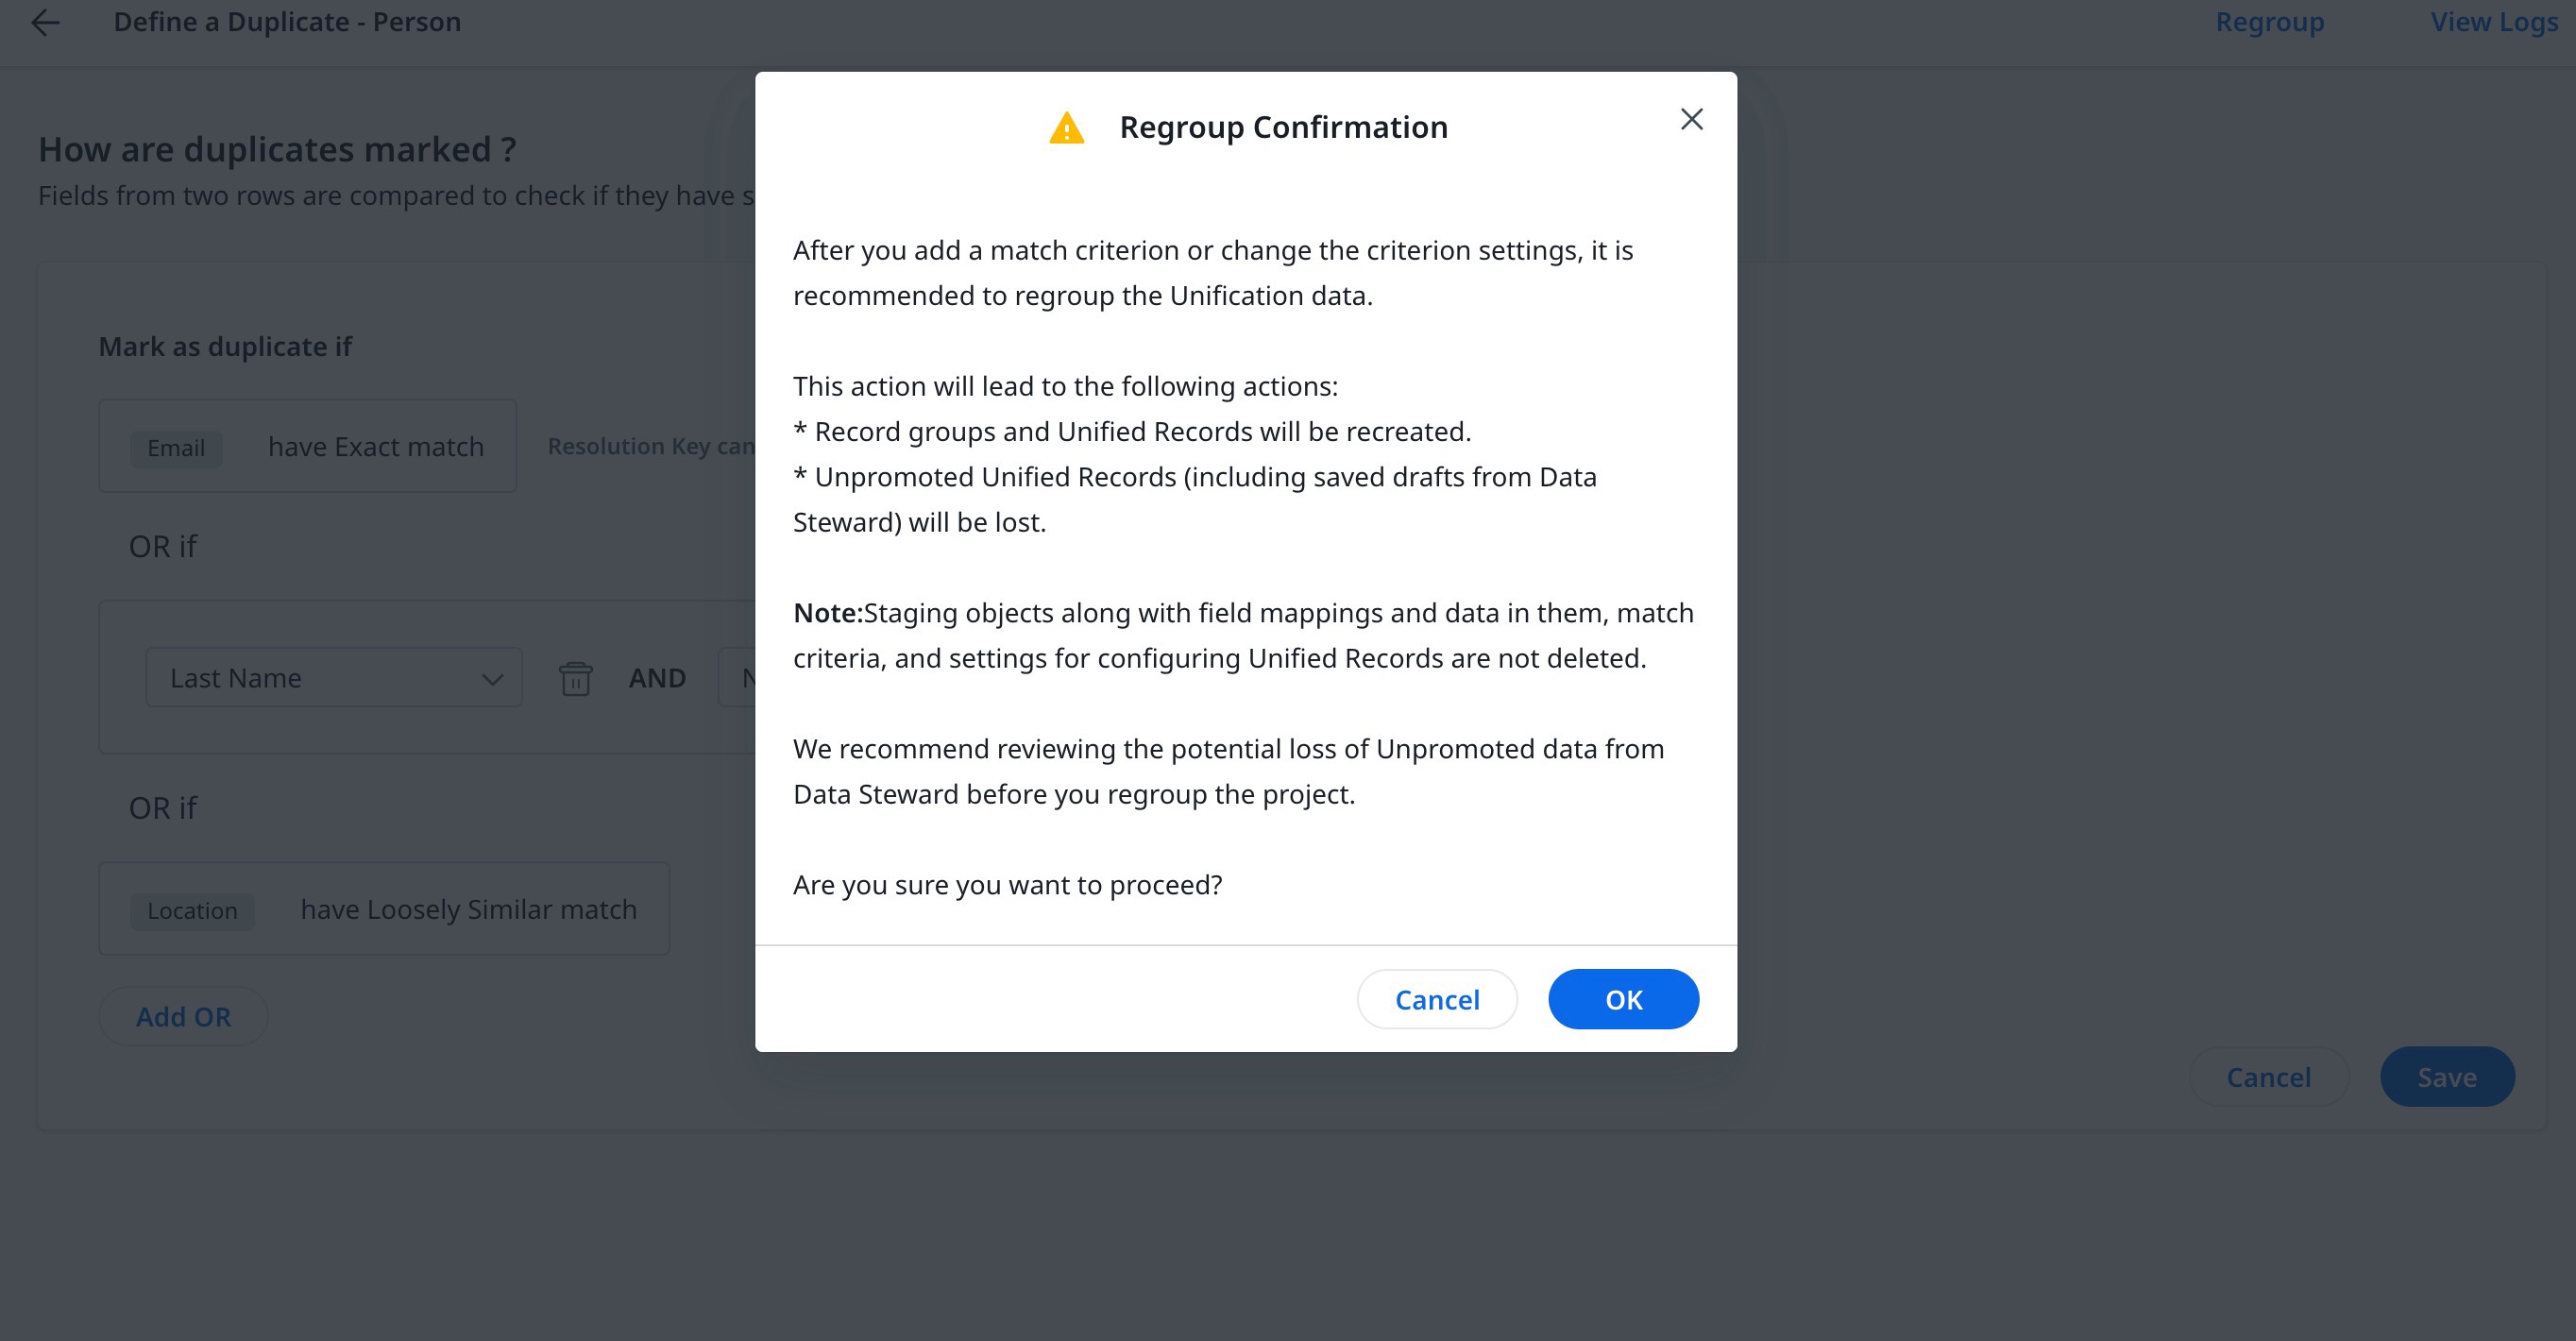
You may need to regroup the Unification data when you add a rule or change the rule settings. The Regrouping step triggers the following actions:
- Record Groups and Unified Records are recreated based on the new rules.
- Saved but unpromoted Unified Records that have manual changes from Data Steward are lost.
- Attributes that do not have Company as the first preferred source, could lose changes from Data Steward even after promotion of the records.
- Staging objects along with field mappings and data in them, match criteria, and settings for configuring Unified Records are not deleted.
To Regroup records:
- Click Regroup, on the top right corner.
- The Regroup Confirmation window appears. Click OK.
The unification data is updated with the newly matched criteria.
View Logs
Admins can view logs of activities related to regroup projects. You can sort the logs by:
- Activity Name
- Status
- Start time
- End Time
- Run Info
To View Logs:
- Navigate to Administration > Unification > Define A Duplicate tab.
- Click View Logs. The View Logs screen appears.
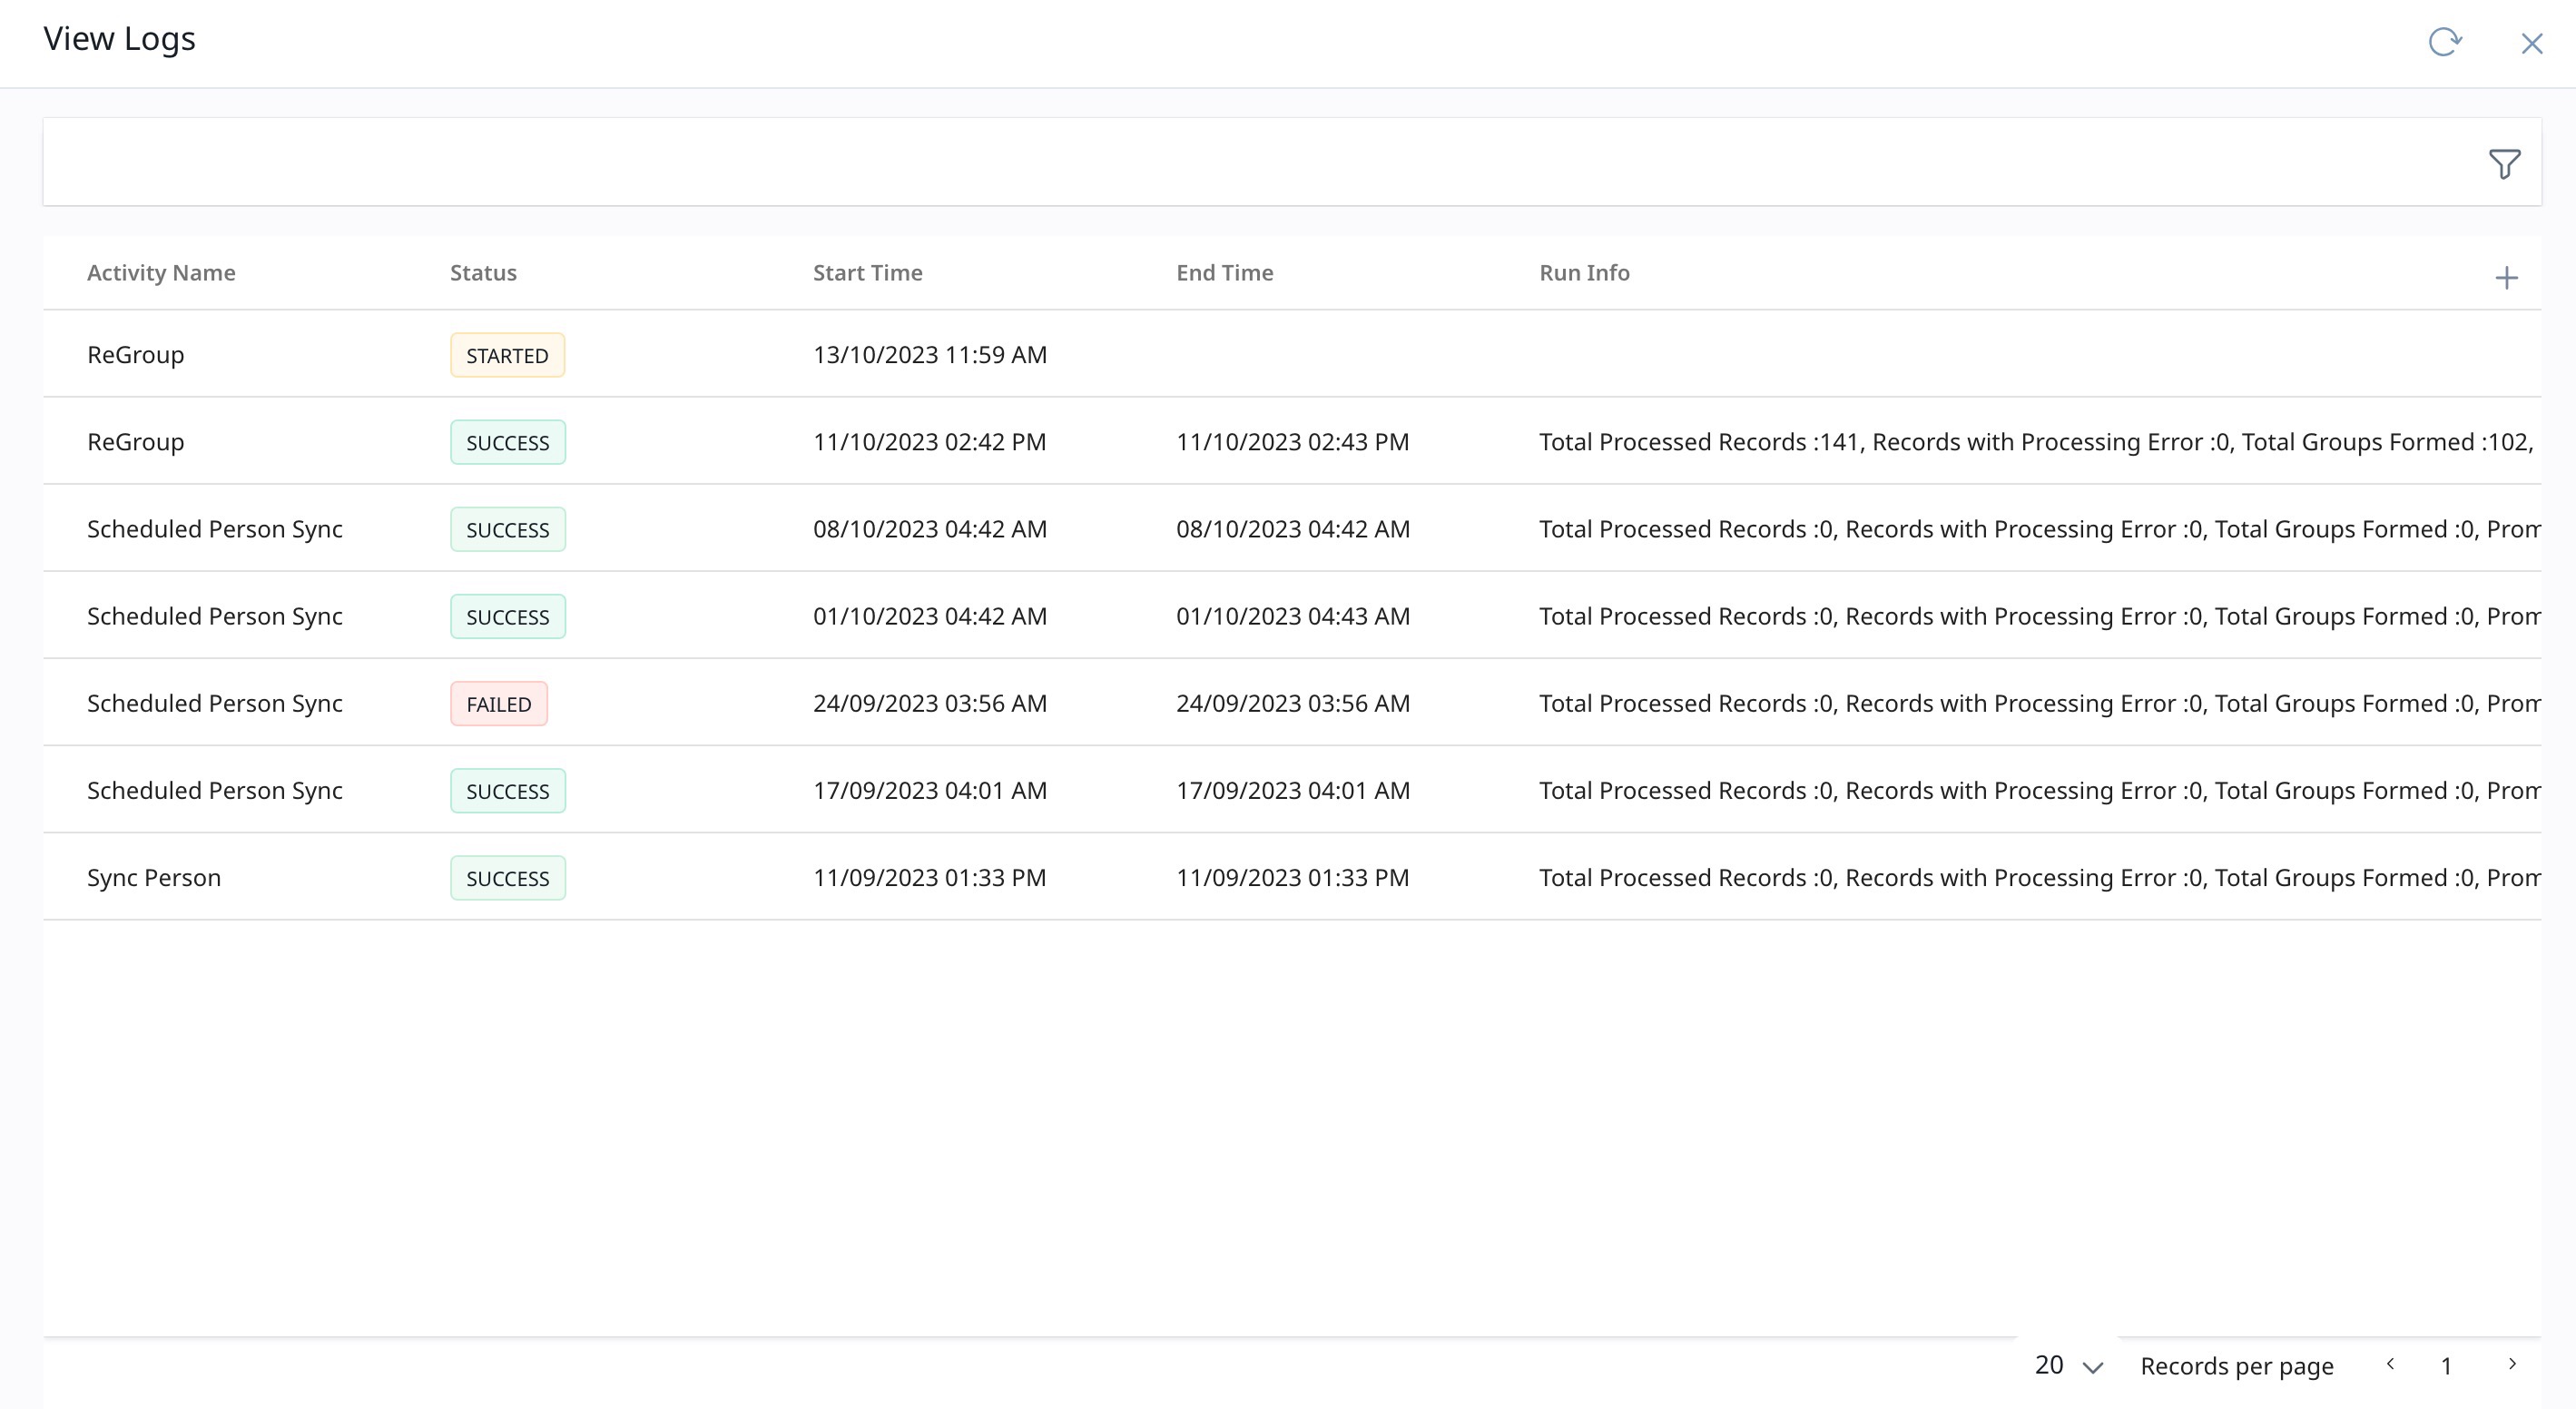
On the View Logs page, you can view the following information:
| Fields | Description |
| Activity Name |
Displays the name of the activity. Activity names include:
|
| Status | Displays the status of the activity. Activity statuses include: Started, In progress, Success, and Failed. |
| Start Time | Displays the start time of the activity in the following format: MM/DD/YYYY | HH:MM (AM or PM) |
| End Time | Displays the end time of the activity in the following format: MM/DD/YYYY | HH: MM (AM or PM) |
| Run Info | Display additional details about each activity type. |
View Duplicates
Once the above configurations are completed, admins can merge duplicate records, explore matches, move records, deactivate records, and edit unified records in the Data Steward feature.
To navigate to Data Steward, click View Duplicates. You will be redirected to the Data Steward landing page.
For more information on how to merge duplicates, refer to the Data Steward: Person article from the Additional Resources section.
Additional Resources
- Unification Overview
- Define Company Duplicate
- Configure Preference Order for Data Source
- Enrich Custom Objects
- Data Steward: Company
- Data Steward: Person
- People Management