Email Opt-Out Configurations
Introduction
Admins can create and configure opt-out pages and categories on the email preferences page. You can create custom opt-out pages to better control how customers proceed through the opt-out experience, and custom opt-out categories specific to the needs of your customers. This article will show you how to design opt-out pages, as well as how to create and report on opt-out categories.
Pages and categories configured under Email Preferences will be available for selection under Opt-Out Settings in the email template designer. For more information on the email template designer, refer to the Create Journey Orchestrator Email Templates article. For more information on opting out of emails, refer to the Email Opt-Out Policy article.
Navigate to Administration > Communication > Opt-out Configuration to view this page.
Opt-Out Pages
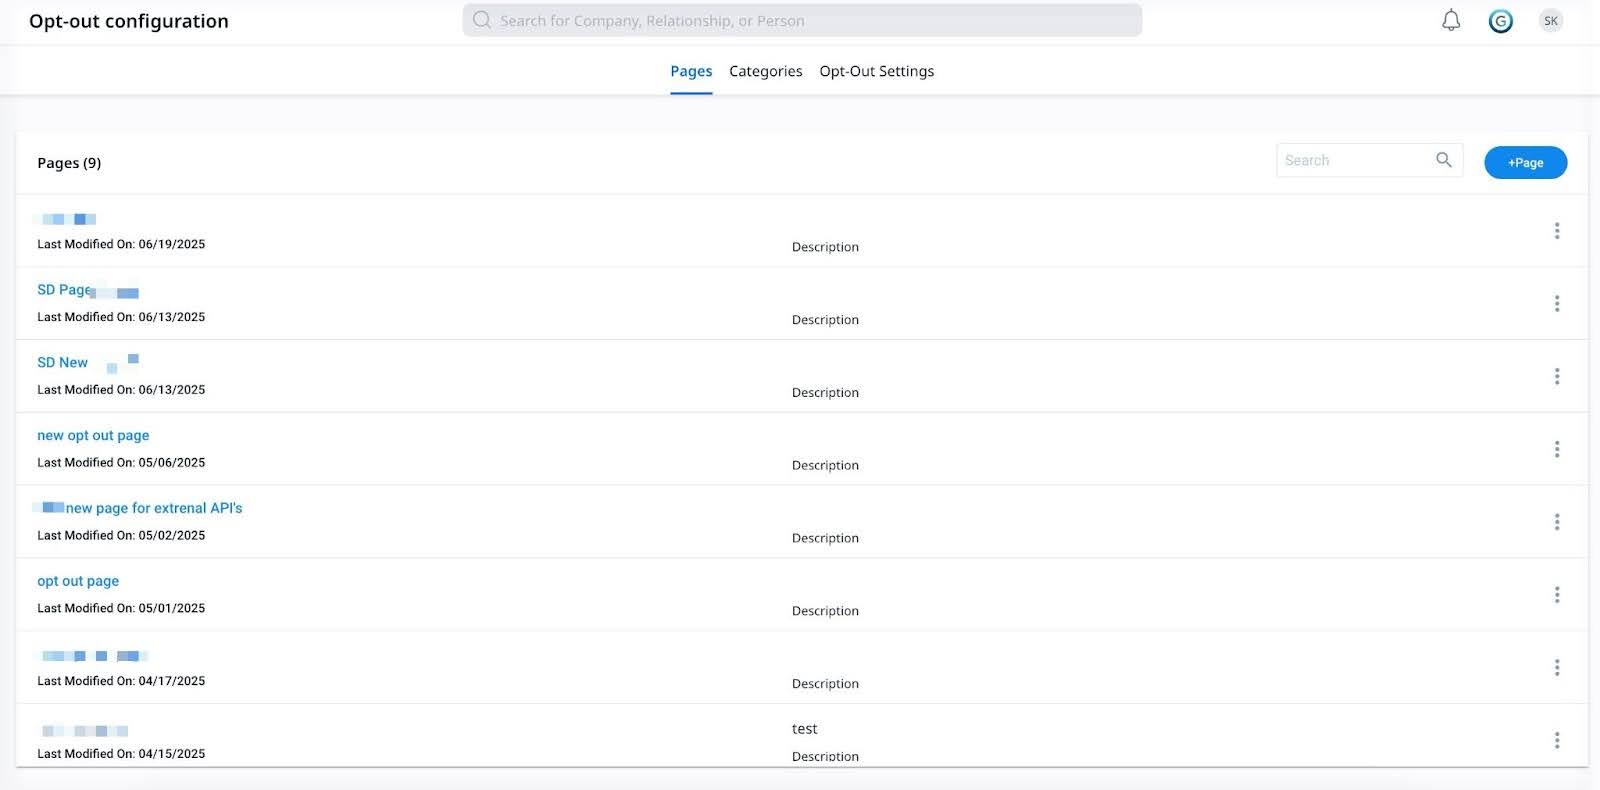
On the Pages tab, you can create and edit opt-out pages. In addition to the Default Page, you can create custom opt-out pages. You'll select an opt-out page when creating a non-operational email template. Customers will navigate to this page after selecting to opt-out of an email.

- Page Search: Enter text to search for a page by name.
- +Page: Click to begin creating a new page, starting with the page’s properties.
- Three Dots: Click to select one of the following options for an existing page:
- Edit: Click to navigate to the opt-out page designer and edit the page.
- Clone: Click to create a clone of the page.
- Delete: Click to delete the page. The Default Page cannot be deleted.
Page Designer
When you select to edit or create an opt-out page, the page designer opens. On the designer page, you can select options for the page’s Properties and Build.
Properties
You can configure the following options on the Properties tab:
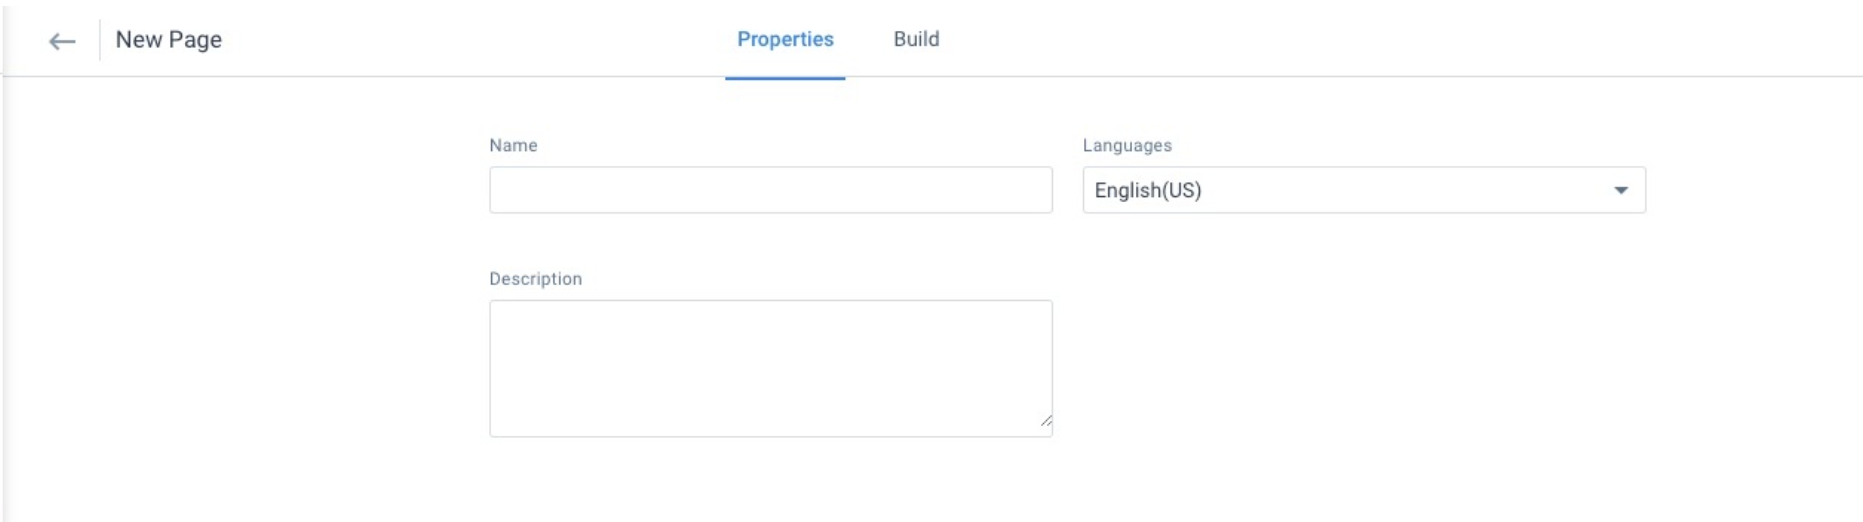
- Name: Enter text for the Page’s name.
Note: You should give unique names to any new opt-out pages you create. Only custom opt-out pages with unique names are supported throughout Gainsight. - Languages: Select a language for the page. The list of languages will be pulled from Administration > Communications > Languages.
Note: If the Language is used in Journey Orchestrator then it does not allow users to delete it from the Languages page. - Description: Enter the text to give the page description.
Build
An opt-out page’s Build determines how it will appear to the recipient, the categories available for the recipient to opt-out of, and the reasons they can select for why they are opting out. You can configure the following options on the Build tab:
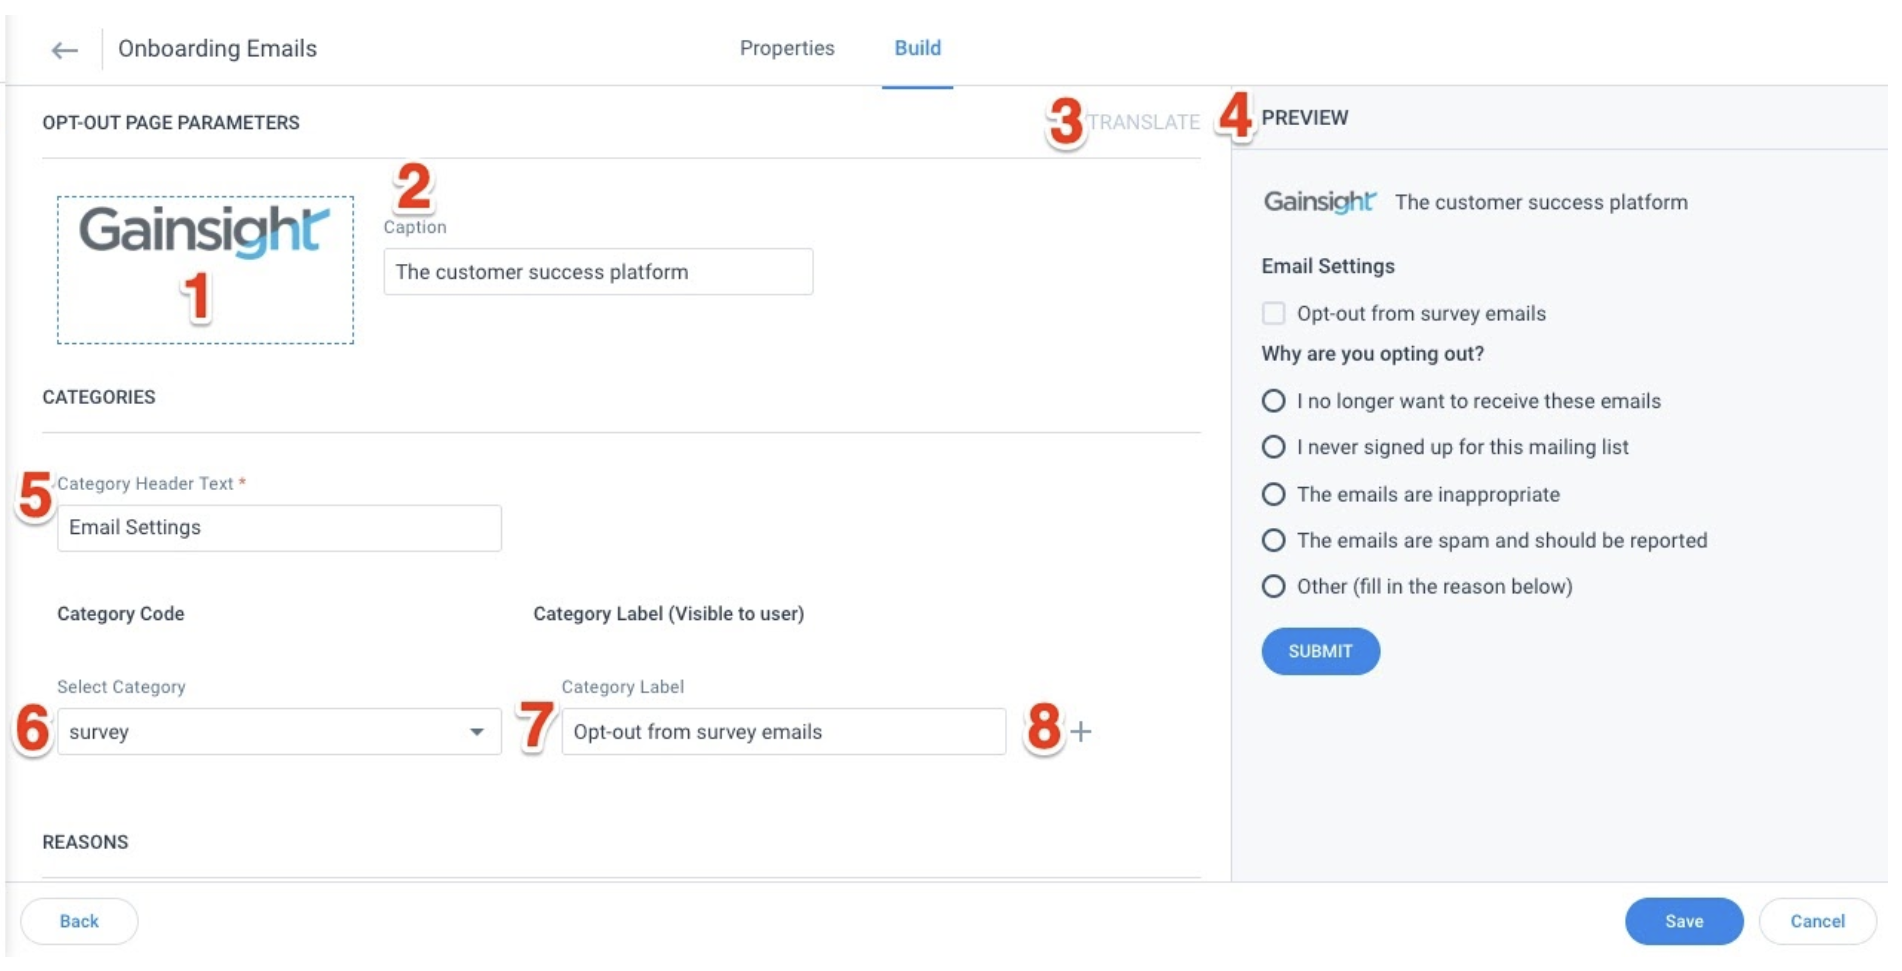
- Add Image: Click to add a new or existing image to be displayed at the top of the page.
- Caption: Click to add text for the image’s caption.
- Translate: Click to begin translating the page’s text to another language you have selected on the Properties tab.
- Preview: This section displays how the page will appear with its current configurations.
- Category Header Text: Click to add or edit text for the category header.
- Select Category: Select a category from the drop-down. For more information on categories, refer to Opt-Out Categories.
Note: You can only select opt-out pages for email templates that have at least one common category. - Category Label: Click to add text for the category label. This will be visible to the user.
- Add New Category: Click to add another category selection. When more than one category has been added to this section, you can click the X icon to remove a category.
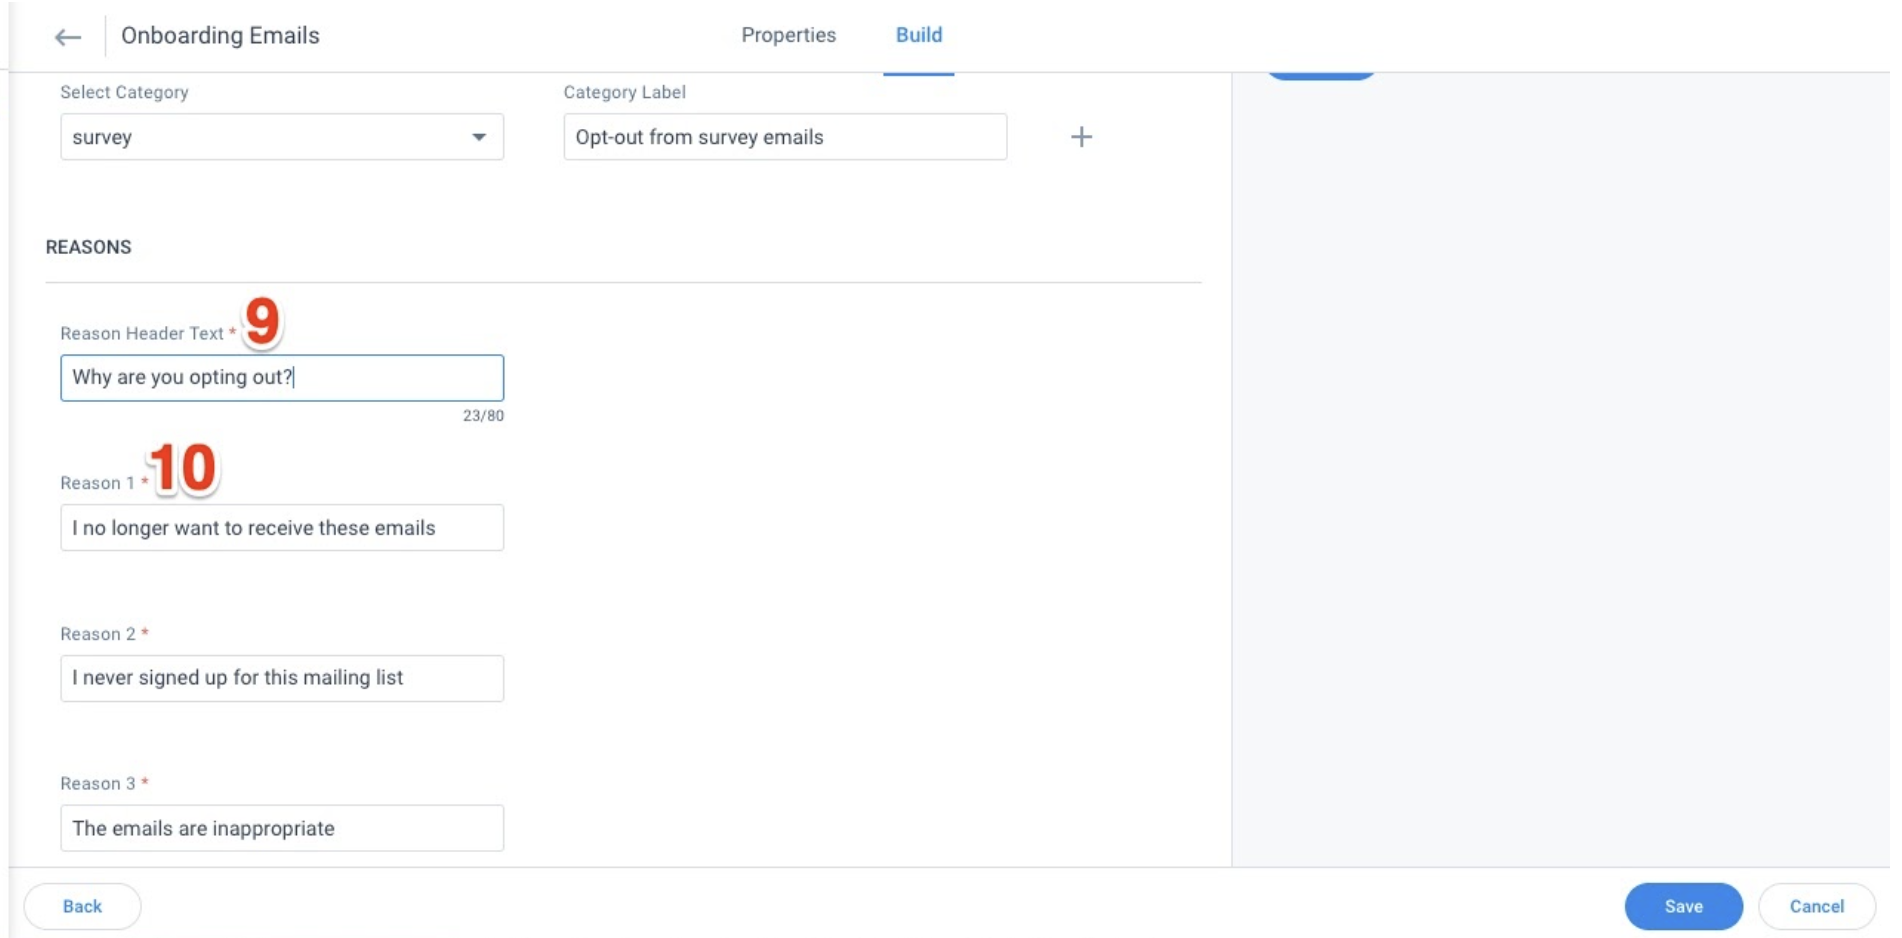
- Reason Header Text: Click to add or edit text for the reason header.
- Reason Text: Click to add or edit text for one of the opt-out reasons. You can select five reasons for users to select.
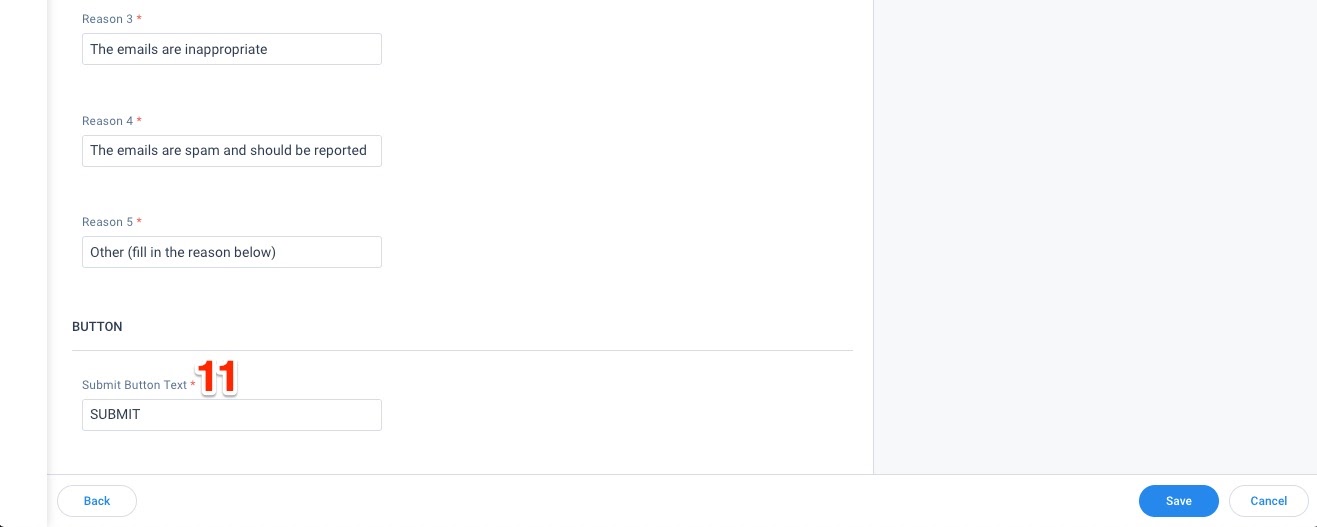
- Button Text: Click to add or edit text for the submit button.
Opt-Out Categories
On the Categories tab, you can create and edit opt-out categories. Gainsight has two out-of-the-box categories: Customer Success Communications and Surveys.
In addition to the out-of-the-box categories, you can create granular opt-out categories specific to the needs of your customers and organization to reduce mass unsubscription of emails from contacts. When you create a non-operational email template, you must select for it to have one or multiple opt-out categories. You can take the following actions on the Categories tab.

- Out-of-the-box Categories: Gainsight has two out-of-the-box categories: Customer Success Communication and Surveys. It is not possible to delete these categories.
- Category Code: Click to add text for the category’s name. This field will not be visible to the user. It cannot be edited once the category is saved.
- Category Label: Click to add or edit text for the category’s default label. This field will be visible to the user. It can be edited after the category is saved.
- Add New Category: Click to add a new category.
- Delete Category: Click to delete the category.
- Save/Cancel: Click to save any changes made to the Categories page, or to cancel any unsaved changes.
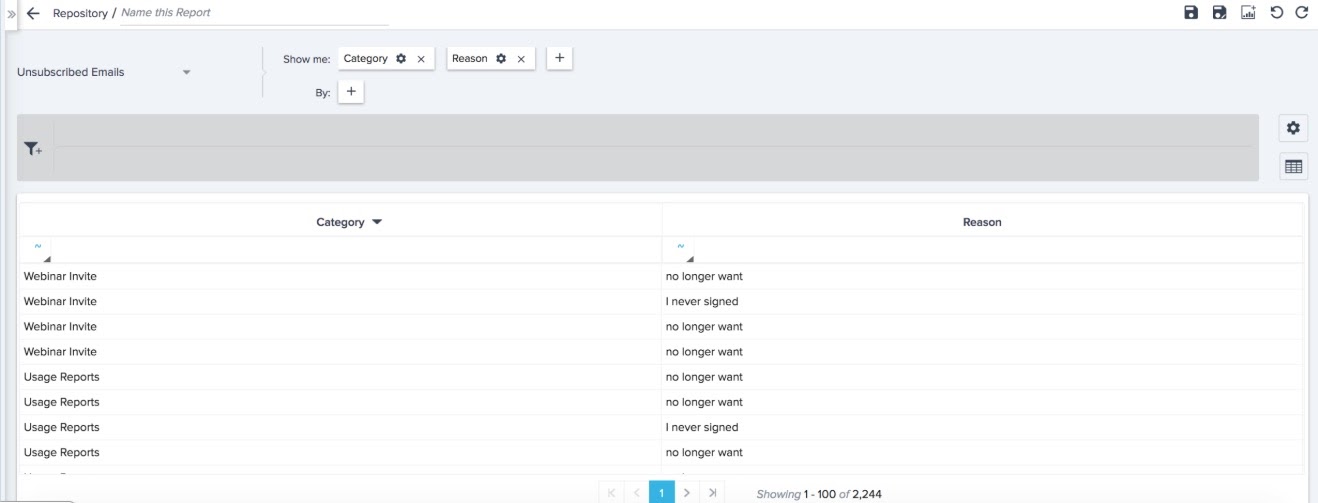
Reporting on Opt-Out Categories
You can build reports to view the category your contacts selected when opting out of an email. Under Administration > Report Builder, build a report based off of the Unsubscribed Emails object and select Category as one of the Show Me fields. For more information on building reports, refer to the How to Build Basic Reports article.