How to Test a Program
Gainsight NXT
Programs are multi-step outreaches that admins can configure to guide a customer through a responsive series of email interactions. Because of the number of configuration options for program models and emails, we recommend previewing and testing your program before publishing. This article walks you through how to preview a Program Email, and how to test a complete Program configuration. Some steps assume that you have configured a Program already. For more information on configuring your Program, see the article How to Configure Programs (Path).
Preview Program Email
Each Program model has email steps that you can configure and preview. Some email steps are included automatically in the Program model, others have to be added. The steps for previewing a program email below assume you have already completed the following prerequisites:
- The email step you want to preview has already been configured. For more information on configuring email steps, refer to Configure Emails for Programs.
- You have added, mapped, and synced at least one participant to the program that currently has a status of either Review, New or Active. For more information on adding participants, refer to Adding Participants to a Program.
To preview an email step in Programs:
- Navigate to Digital Journey > Programs.
- Click to edit the program containing the email step you wish to preview. This opens the model configuration page.
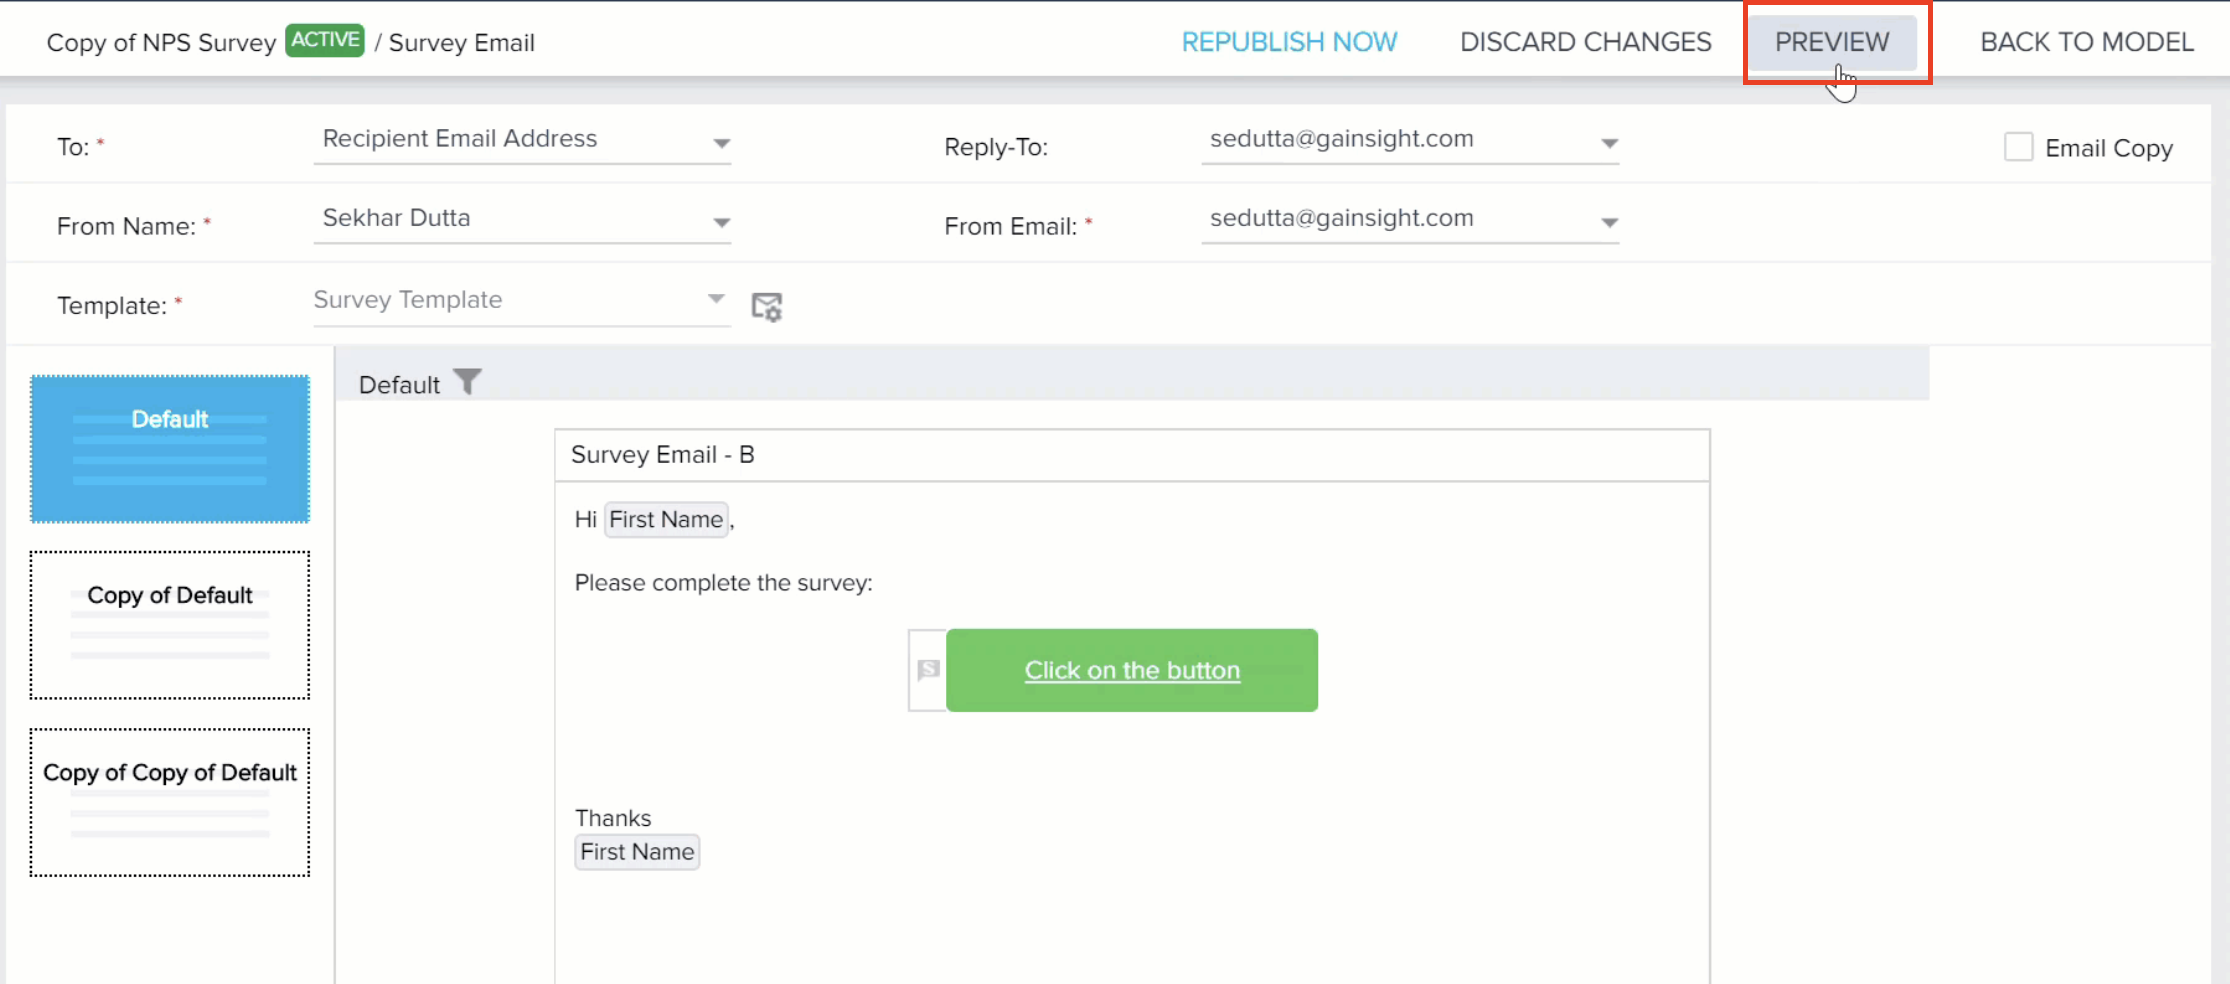
- Click to edit the email step you wish to preview.
- Click PREVIEW at the top-right of the page. The Email Preview dialog appears.
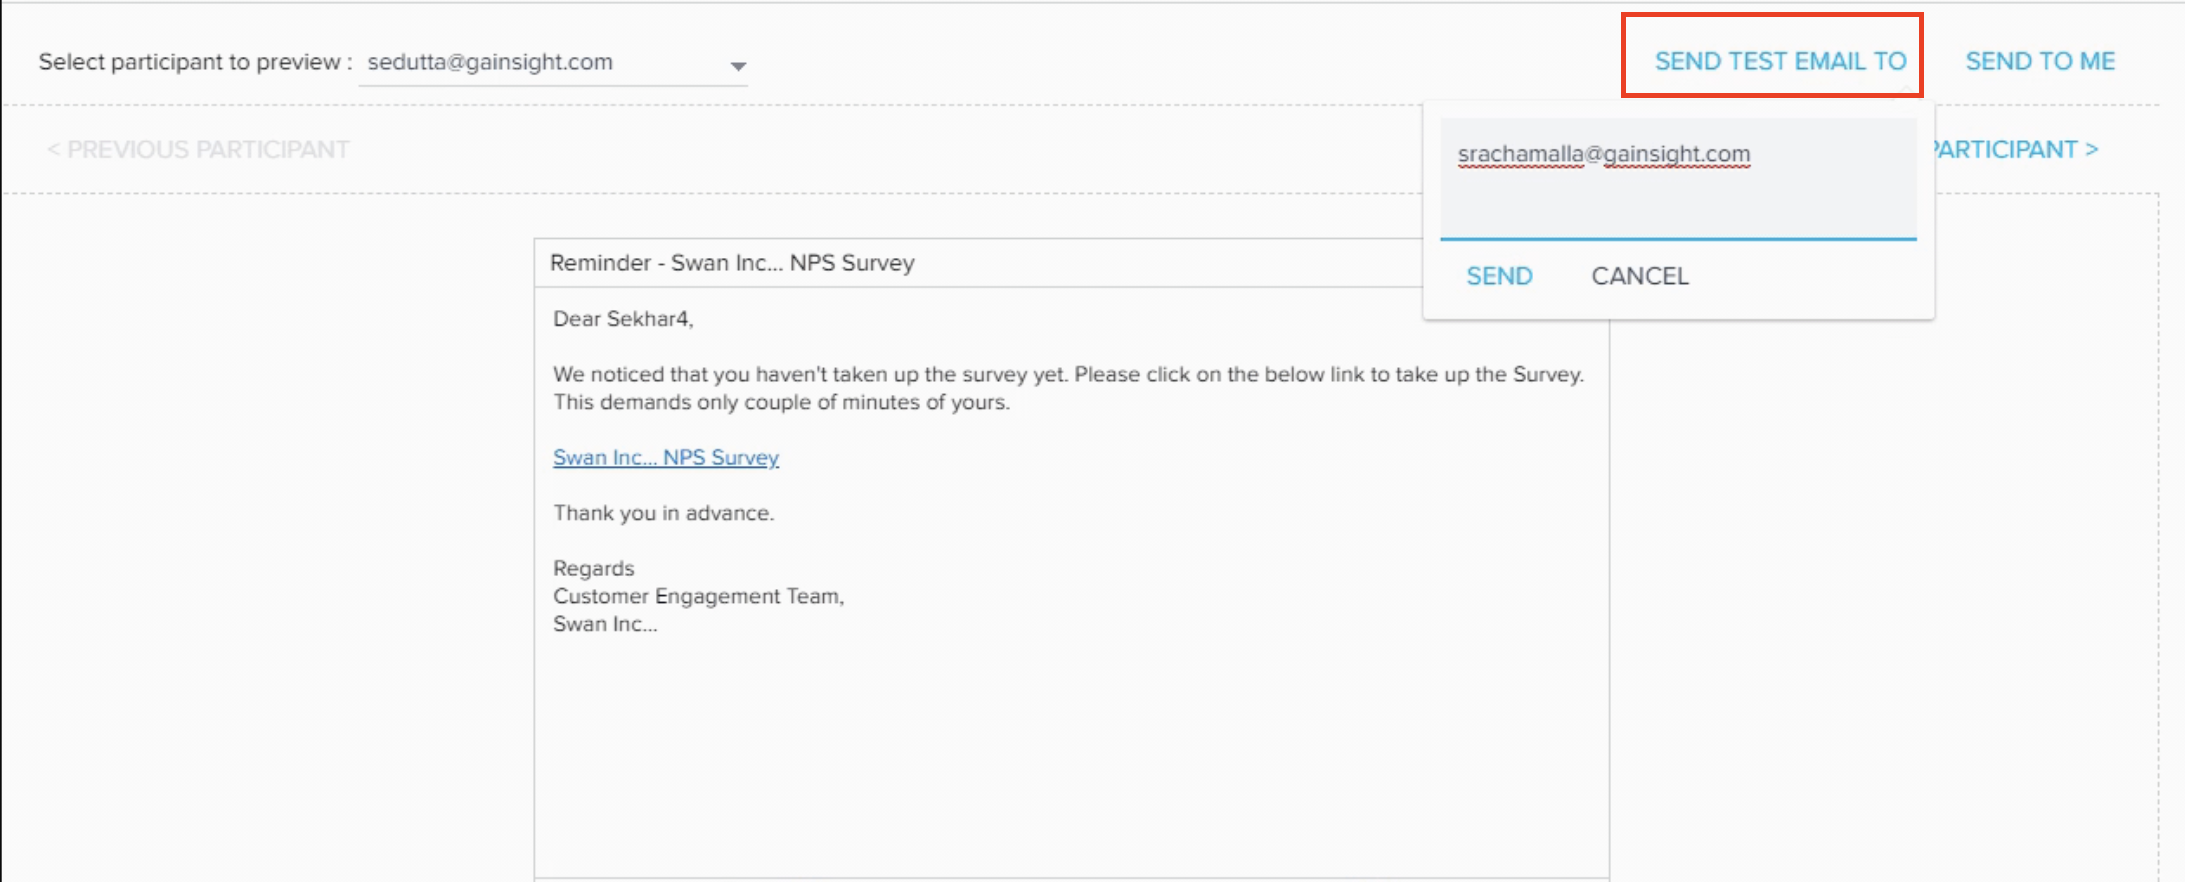
- Select a participant from the drop-down list. The email preview changes according to the selected participant and tokens will also be updated.
-
You can also use Previous Participant and Next Participant options to view the email preview for each participant.
- Click SEND TO ME to send an email preview to the logged-in user, or click SEND TEST EMAIL TO and enter an email address to send the email preview.
Notes:
- This option is only available for Programs with participants in Review, New, or Active Status.
- To create an accurate preview email, the participant mapping must be completed correctly. If this mapping is incorrect, the Preview may look incorrect. To learn more about participant mapping, refer to Adding Participants to a Program.
- This feature can be used without publishing the Program.
Test Complete Program Configuration
By testing a program before publishing it, you can ensure that participants will move through each step in the program model as expected. To test a configured program:
- Clone Existing Program: Cloning your Program will recreate it with the same configurations you selected. After a Program is Published, you will not be able to re-configure it. Creating a clone of your Program will allow you to test it, and gives you the chance to make any necessary changes before publishing the actual Program to your contacts. Take the following steps to clone a program:
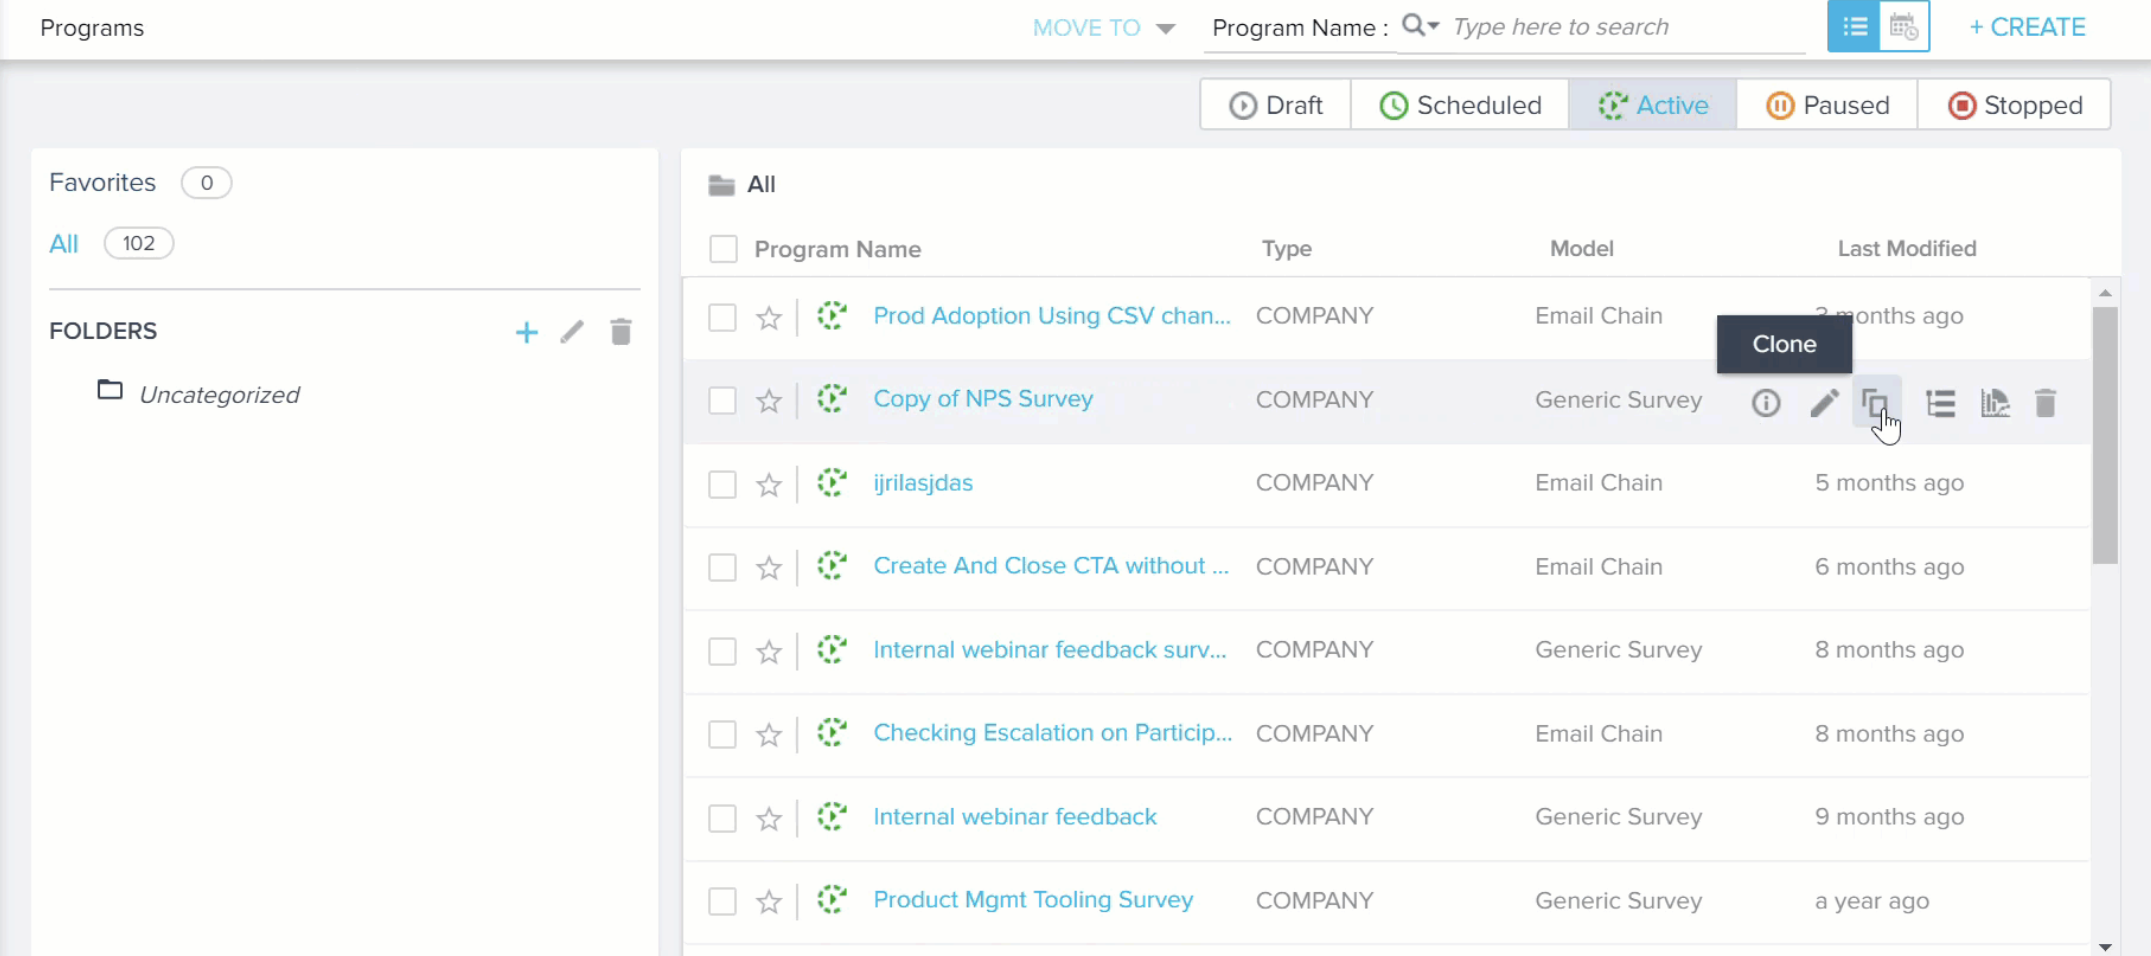
- Navigate to Digital Journey > Programs.
- Hover over the Program you want to test. The clone button will appear.
- Click the Clone button. A dialogue box asking if you wish to proceed with cloning will appear.
- Click OK to create the clone. The model configuration screen for the cloned Program will open automatically.
- Remove Original Participants: Your cloned Program will also copy participant sources from the original. These sources need to be removed to make sure the Program is not sent to your contacts before it is tested. Take the following steps to delete participant sources:
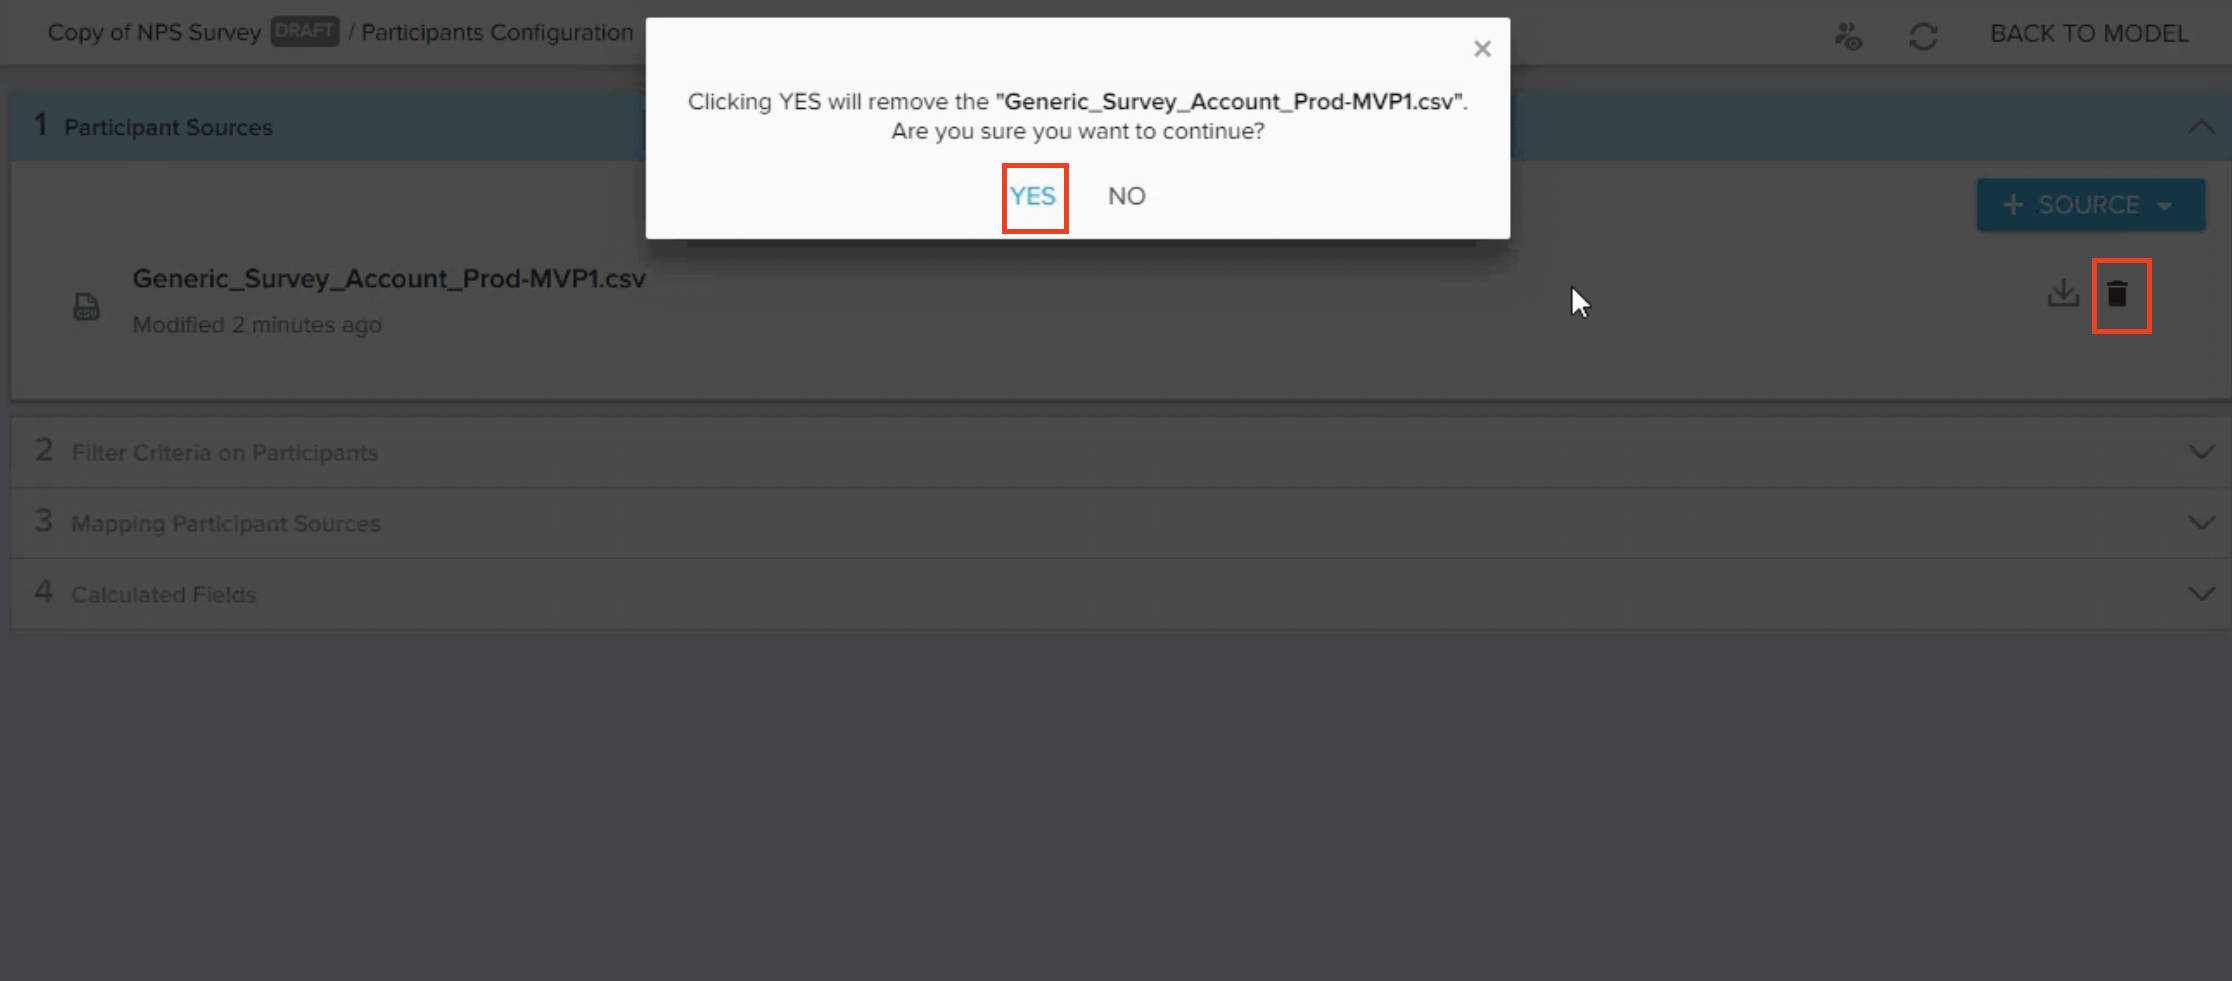
- Click the green Participants icon to open the Participant configuration page.
- Click the Delete icon next to each participant source to remove the copied participant sources. A dialogue box asking if you wish to proceed with removing the source.
- Click Yes.
- Add Test Participants: To fully test your program, you’ll need dummy participants to observe how they move through the program. Your test or dummy participant will need a real email address, preferably one you have access to, so you can observe the program emails sent to it. No other specific criteria are required for this test.
Typically the easiest way to add a test participant is via CSV. You can add test participants via a Query Builder or Event source, but the steps below assume you will be adding them via CSV. Take the following steps to add a CSV source with test participants:- Configure your CSV source file. Be sure to include test data for any fields that will require mapping within the program.
Note: You can download a sample CSV file after selecting CSV as a new participant source. This sample file provides an easy foundation for creating a new CSV file with test participant data. Once you’ve configured this template with the email address and other test data you will need, you can upload it as your CSV. Steps b. and c. below explain where you can download the sample file.
- Configure your CSV source file. Be sure to include test data for any fields that will require mapping within the program.

- On the Participants Configuration page, click +SOURCE and select CSV.
- Click Choose CSV To Upload to select your CSV file to upload. You can also download a sample CSV by clicking the “sample CSV file” link.
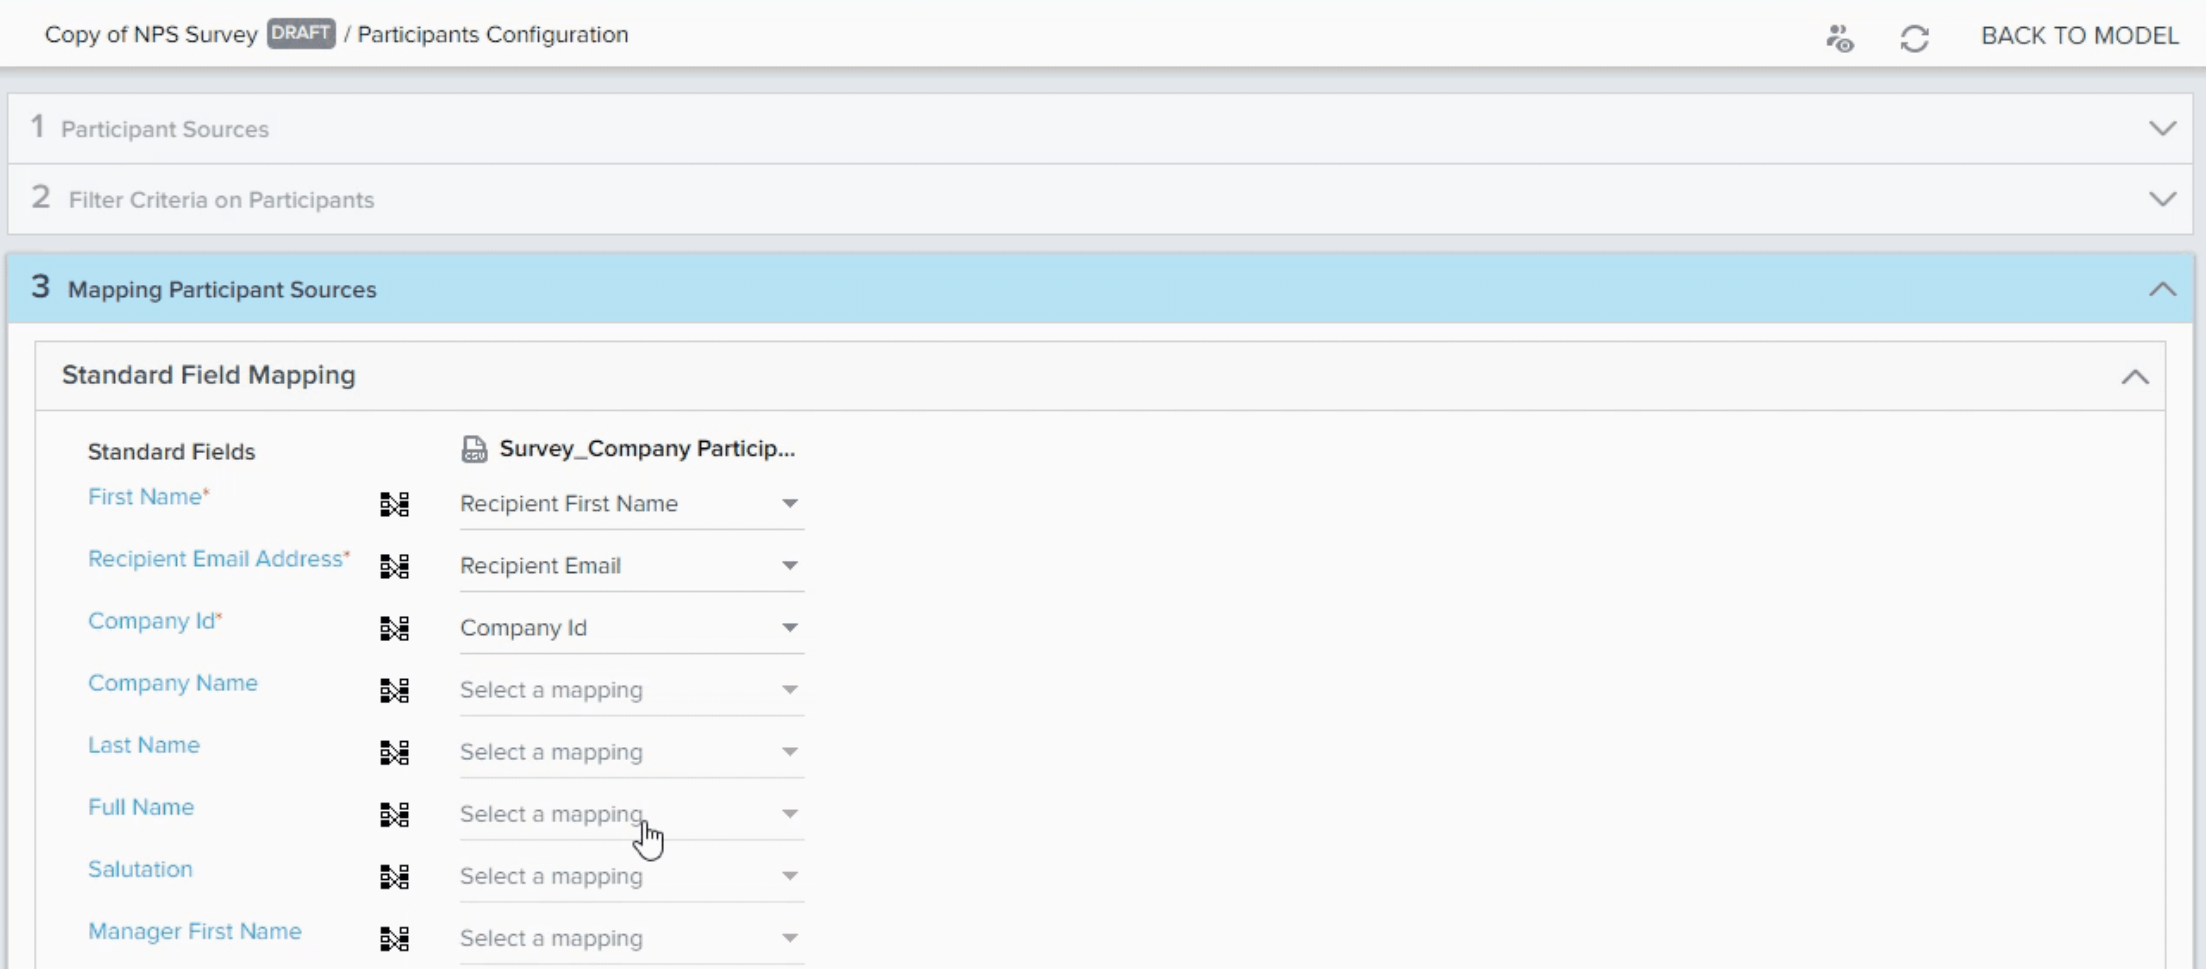
- Add Uniqueness Criteria, Map, and Sync Participant Sources: You will need to add Uniqueness Criteria, map the participant source fields, and sync participant sources as you would with a standard Program. For more information on how to complete these steps, see the article Adding Participants to a Program.
- Change Set Timer and Conditional Wait: If you would like to test every email that will be sent out by the outreach on the same day, you may need to change the Time Limit and Waiting Periods that were set up in the original outreach’s Set Timer and Conditional Wait options. To learn more about configuring these options, see the article Configure Model and Emails for Program.
- Publish Outreach: After your test participant(s) is added, publish the test Program to begin sending emails.
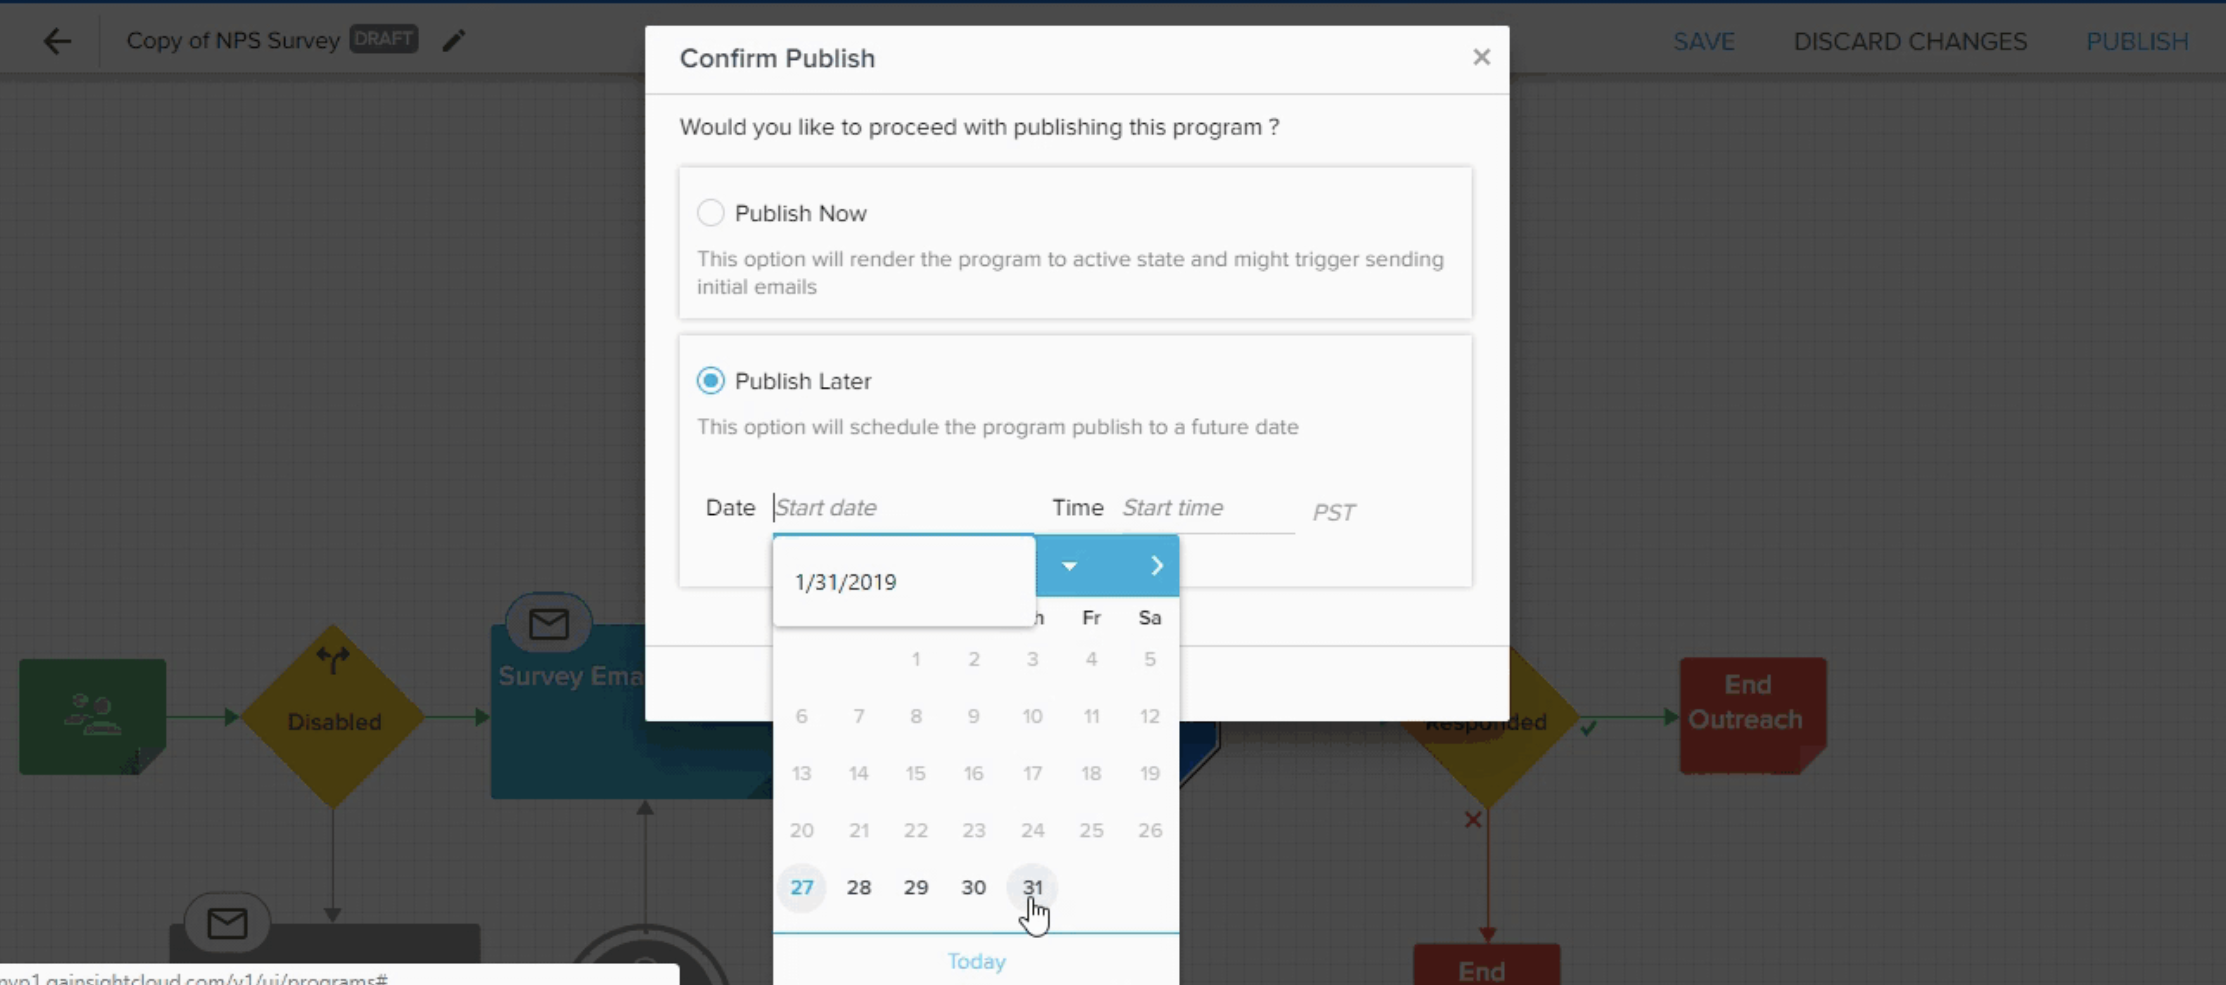
- On the model configuration page of your cloned Outreach, click the PUBLISH option. A dialogue box will automatically open asking if you wish to proceed with publishing the program and if you would like to publish the program now or at a later date.
- Select Publish Now unless you would like the program test to start automatically at a later date.
- Click Yes.
- Act as the Recipient of the Outreach: Depending on how you’ve configured your outreach, you may need to take different steps in order to test every aspect of it. This could include waiting a set period of time after receiving the Heads Up Email before the Survey Email is sent, responding to the survey to receive the Thank You Email, or not responding to the survey long enough for a Reminder Email or Escalation Email to be sent.