X-Org Migration
Gainsight NXT
|
IMPORTANT: This article applies to the new version of X-Org. If you are using the old version of X-Org, you can find the support documentation by clicking here. |
This article explains to admins about the overview of X-Org migration, prerequisites, limits, how to set up a migration and various actions that you can perform in the respective tabs.
Overview
X-Org helps you to migrate configuration and assets from source org to target org. For example, you can migrate a custom object's schema, reports, rules, and playbook assets from a source org to a target org. To access this feature navigate to the Administration > General > X-Org.
Business use case: If you have built and tested rules in your sandbox org, you may want to migrate them to your production org. This feature saves admins valuable time and is enabled within your org by default.
Prerequisites: You must be a Super Admin in order to complete a migration.
Limitation: You can only migrate assets from NXT to NXT and Hybrid to Hybrid.
Supported Modules and Assets for Dependency Resolution
In order to streamline operations in Gainsight, businesses need to efficiently manage dependencies between various objects and components such as rules, playbooks, surveys, templates, reports, dashboards, and so on. These components and objects may have dependencies on each other. For example, a rule may depend on a specific playbook or template, or a dashboard may depend on certain reports or data sources.
Dependency resolution is used to identify and display all the dependencies of an asset automatically and ensure that they are migrated to the target tenant.
IMPORTANT:
- When an asset is selected for migration, all of its dependencies are also selected automatically. Admins cannot deselect the list of dependencies.
- When an asset migration occurs, X-org checks the latest modification date. If the asset in the target org is the most recently modified, the migration is skipped. If the asset in the source org is the most recently modified, the system initiates migration and updates the asset in the target org.
- For assets such as Rules and Programs, if the designated default owner does not exist in the target tenant, the asset will be created with the System Administrator assigned as the default owner.
Following is a list of modules in X-Org for that are either supported or not supported for dependency resolution
| Modules | Assets Types | Dependency Resolution Support |
|
Business Modeler
|
C360 Sections |
Yes |
|
R360 Sections |
Yes |
|
|
Success Plan |
Success Plan Templates |
Yes |
|
Reports |
Horizon Analytics Reports |
Yes |
|
Success Snapshots |
All Success Snapshots |
Yes |
|
Data Management |
Objects |
Yes |
|
Dropdown lists |
Yes |
|
|
Rules Engine |
Bionic Rule |
No |
|
Horizon Rule |
Yes |
|
|
People Management (Only Bionic Rules) |
NA |
No |
|
Cases Management (only Bionic Rules) |
NA |
No |
|
Dashboards |
Horizon Analytics Dashboards |
Yes |
|
Old Dashboards |
Yes |
|
|
Cockpit |
Reporting Category |
Yes |
|
DA |
Yes |
|
|
Picklist |
Yes |
|
|
PlayBooks |
Yes |
|
|
Scorecards |
SC Mass Edit Report |
Yes |
|
SC Habit Report |
Yes |
|
|
Timeline |
Activity Configuration - Activity Types |
Yes |
|
Journey Orchestrator |
Programs |
Yes |
|
Communication Hub |
Email templates |
No |
|
Surveys |
All Surveys |
Yes |
| Connectors | Jobs | Yes |
Supported Modules and Assets for Conflict Resolution
The Conflict Resolution feature in X-Org simplifies the migration process of assets between tenants. It automatically identifies and resolves any duplicate uniqueness ID at the target tenant without requiring admin intervention. This feature ensures that the migration process does not fail due to duplicate IDs.
The resolution is pre-configured for each module and is derived based on the following configuration:
- Update Configuration: Overwrites the duplicate asset at the target tenant.
- Duplicate Configuration: Creates a copy of a duplicate asset at the target tenant.
- Skip Configuration: Skips migrating the duplicate asset at the target tenant.
The following are the supported modules in X-Org for Conflict Resolution:
- Cockpit/ Success Plan
- Journey Orchestrator
- Scorecards
- Timeline
- Text Analytics
- Data Management
- Rules
- Layouts
- Renewal Center
- CSQL
- Adoption Explorer
- Data Designer
- Connectors
Cockpit and Success Plan
Following are the supported asset types in Cockpit and Success Plan for Conflict Resolution:
| Assets Types | Conflict Resolution Behavior |
|
PlayBooks |
Skip |
|
Reporting Category |
Skip |
|
Da Picklist |
Update |
|
Success Plan Template |
Skip |
Limitation
If an admin migrates the CTA type and Success Plan type with the same name in the DA Picklist asset type, the layout is updated.
Journey Orchestrator
Following are the supported asset types in Journey Orchestrator for Conflict Resolution:
| Assets Types | Conflict Resolution Behavior |
|
Advance Programs |
|
|
Simple Programs |
|
| Redesigned Advanced Programs |
Limitation
To prevent an unsuccessful X-Org migration for a Journey Orchestrator program, consider the following aspects:
- If the link or domain of a survey embedded in email changes during migration, X-Org does not support it. As a solution, the admin needs to remap the survey in the Journey Orchestrator program after migration as a special case.
- Programs with entity type as user are not supported for X-org migration.
- X-Org does not currently support the migration of Journey Orchestrator program assets that include an Email Template with the 'C360 layout' element.
- X-Org does not currently support the following:
- Calling external API action
- PX engagements action
- Using events as a data source
The programs with these actions require manual reconfiguration after migration.
Communication Hub
Following are the supported asset types in Communication Hub for Conflict Resolution:
| Assets Types | Conflict Resolution Behavior |
|
Email Templates |
Scenario 1: When Journey Orchestrator is a parent entity (Level 1 or more)
Scenario 2: For all other cases ( playbook parent, no parent, and others) All the communication hub assets perform update operation as the conflict resolution behavior. |
|
Email Preferences |
|
|
Segments |
| IMPORTANT: Asset types for Communication Hub will be available soon. |
Scorecards
Following are the supported asset types in Scorecards for Conflict Resolution:
| Assets Types | Conflict Resolution Behavior |
|
Scorecard |
Update |
|
Measure groups |
Update |
|
Scorecard Measures |
Update |
|
SC Mass Edit Report |
Update |
|
SC Habit Report |
Update |
Limitation
Scorecard Scheme definitions are not migrated, so the admin needs to define them in the target tenant.
Timeline
Following are the supported asset types in Timeline for Conflict Resolution:
| Assets Types | Conflict Resolution Behavior |
|
Activity Type |
Update |
|
Activity Sync |
Update |
|
Load to Activities rule action |
Update |
|
Milestones |
Update |
|
Activity Type |
Update |
Limitation
The migration of Timeline assets is based on the asset name as an identifier. For example, activitytypename. If the activitytypename is renamed at the source tenant, the asset migration will not be successful.
Text Analytics
Following are the supported asset types in Text Analytics for Conflict Resolution::
| Assets Types | Conflict Resolution Behavior |
|
Survey |
|
Data Management
Following are the supported asset types in Data Management for Conflict Resolution:
| Assets Types | Assets | Attributes | Conflict Resolution Behavior |
|
Objects |
Standard |
- |
Skip |
|
System |
- |
Skip |
|
|
Custom |
- |
Update |
|
| - |
Object Description |
Update |
|
|
Fields |
Standard |
- |
Skip |
|
System |
- |
Skip |
|
|
Custom |
- |
Update |
|
| - |
Hidden |
Update |
|
| - |
Required |
Skip |
|
| - |
Decimal Places |
Update |
|
| - |
defaultValues |
Update |
|
| - |
Identifiers |
Update |
|
| - |
Named and Searchable |
Update |
|
| - |
Mappings |
Update |
|
| - |
Formula Field |
Update |
|
| - |
MDA Lookup |
Update |
|
| - |
Refernce Operation |
Update |
|
| - |
RTA Length |
Skip |
|
| - |
Description |
Update |
|
|
Dropdown lists |
Standard |
- |
Skip |
|
System |
- |
Skip |
|
|
Custom |
- |
Update |
|
|
Dropdown Dependency |
- |
Update |
Rules
Following are the supported asset types in Rules for Conflict Resolution:
| Assets Types | Conflict Resolution Behavior |
|
Load to SFDC |
Update |
|
Call External API |
Update |
|
Load to Gainsight |
Update |
|
Load to Activities |
Update |
|
Load to Company |
Update |
|
Load to Relationship |
Update |
|
Load to People |
Update |
|
Success Plans 2.0 |
Update |
|
Call To Action 2.0 |
Update |
|
Set Score |
Update |
|
Load History object in Scorecard V2 |
Update |
|
Load to Survey |
Update |
|
Load To Opportunity |
Update |
|
Load To PX |
Update |
|
Load to User |
Update |
|
Load To Licence |
Update |
|
Load To Licence Entitlements |
Update |
|
Load to Cases |
Update |
|
Load to Leads |
Update |
|
Load to GS Opportunity |
Update |
Layouts
Following are the supported asset types in Layouts for Conflict Resolution:
| Assets Types | Conflict Resolution Behavior |
|
Dashboards |
Update |
|
My Portfolio |
Update |
|
Adoption Explorer |
Update |
|
Renewal Center |
Update |
|
Reports |
Update |
|
Scorecard Widgets |
Update |
|
Standard Widgets - Rich Text |
Update |
|
Standard Widgets - Web Page |
Update |
Limitation
To prevent an unsuccessful X-Org migration for a Dashboards asset type, consider the following aspects:
- Scorecard widgets and Image widgets are not supported in the Dashboard asset type.
- Currently, only the following widgets are supported for dashboard migration:
- Reports
- RichText
- WebPage
- When a dashboard with the same name is migrated using X-Org, an update operation is performed at the target tenant and all the widgets and global filters are overwritten.
Renewal Center
Following are the supported asset types in Renewal Center for Conflict Resolution:
| Assets Types | Assets | Conflict Resolution Behavior |
|
Renewal Center |
Global Filter |
Update |
|
Forecast Scenarios |
Update |
|
|
Booking Types |
Update |
|
|
Change Tracking |
Update |
|
|
GS Opportunity Stage |
Update |
|
|
Other Settings |
Update |
|
|
Renewal Center Table Views |
Product Table View (layouts) |
Update |
|
Opportunity View |
Update |
|
|
Company View |
Update |
|
|
Renewal Center Detail Views |
Opportunity Detail View (layouts) |
Update |
Limitation
To prevent an unsuccessful X-Org migration for a Renewal Center, consider the following aspects:
- The sync option configuration is not migrated during migration, so the admin needs to configure them in the target tenant.
- The admin must configure the sync option before using X-Org to migrate the configurations for the table and detail views.
- The data science feature in the Other Settings configuration has to be configured manually at the target tenant.
CSQL
Following are the supported asset types in CSQL for Conflict Resolution:
| Assets Types | Assets | Conflict Resolution Behavior |
|
CSQL table view |
Lead table view |
Update |
|
Opportunity table view |
Update |
|
|
CSQL detail view |
Lead detail view |
Update |
|
Opportunity detail view |
Update |
|
|
CSQL Configuration |
GS Lead Status |
Update |
Limitation
To prevent an unsuccessful X-Org migration for a Renewal Center, consider the following aspects:
- The sync option and email communication configurations are not migrated, so the admin needs to configure them in the target tenant.
- The admin must configure the sync option before using X-Org to migrate the configurations for the table and detail views.
- To sync with Salesforce as leads or Gainsight, the admin should migrate the configurations for the lead table view and lead detail view only.
- To sync with Salesforce as an opportunity, the admin should migrate the configurations for the opportunity table view and opportunity detail view only.
Adoption Explorer
Following are the supported asset types in Adoption Explorer Conflict Resolution:
| Assets Types | Assets | Conflict Resolution Behavior |
|
Project |
Project settings |
Update |
|
Logs |
Update |
|
|
Project Listing |
Update |
|
|
Source /Fields/Derived Fields |
Update |
|
|
Adoption Explorer Dashboards |
Update |
|
|
Adoption Explorer Usage Reports |
C360/R360 |
Update |
| GS Home | Update | |
| Dashboards | Update |
Limitation
Global filters and product filters for Adoption Explorer Dashboard are not currently supported for migration using X-Org.
Data Designer
Following are the supported asset types in Data Designer for Conflict Resolution:
| Assets Types | Conflict Resolution Behavior |
|
Data Design / Data Design Templates |
For existing designs, during migration if the design name and Config name are the same, it updates the existing assets. |
Limitation
To prevent an unsuccessful X-Org migration for a Data Designer, consider the following aspects:
- If only the Name or configName of an asset matches, the asset is not migrated. An error is displayed in the Migration Logs.
For Example,
- Source Name = Account Design and Source configName = Account_Design
- Target Name = Customer Design and Target configName = Account_design
Note: Config Name is an internal name generated based on the initial design’s name.
- Data Design schedule is not migrated, so admins needs to reschedule it again at target tenant.
Note: Gradually, all modules of Gainsight will become available in X-Org conflict resolution. If you are looking for something specific that is not present in the article, reach out to Gainght support team.
Connectors
Following are the supported asset type in Connectors for Conflict Resolution:
| Asset Type | Conflict Resolution Behavior |
|---|---|
| Jobs | Update / Upsert |
Pre-requisites
The Connectors in the source and the target tenant must be authorized for the migration to be successful.
Limitations
- Migration of Jobs for Jira, Productboard, and Aha connectors are not supported.
- Connection mapping is required before migrating jobs from the source to the target tenant.
- Migration of Currency and Image sync jobs for Salesforce connector is not supported.
- If the source tenant has multiple connections for the same connector:
For Example: Primary and secondary connections; then map the primary connection of the source to the corresponding primary connection at the target tenant and other connections accordingly.
Note: If a connection is used and linked within Gainsight ( Rules Engine, Data Designer, and so on) such a connection is considered a primary connection. - For Hubspot Connector, you can only migrate one Timeline Sync job from source to target tenant.
For more information on Connector migration, refer to the Migrate Connector Jobs via X-Org 2.0 article.
Setup Migration
To migrate assets from a source org to a target org, perform the following steps:
Create a Connection Request
Admins must create a connection request from source to target org. After the request is accepted by the target org, admins can migrate the asset bundles from source to target org.
IMPORTANT:
- Your Tenant Name and ID will be shared with the request.
- This connection request will be valid for 3 days. After which you need to send a new request in order to perform the assets migration.
To create a connection:
- Navigate to the Administration > General > X-Org > Connected Tenants tab.
- Click Create Connection. The Request Tenant Connection window is displayed.
- In the Target Tenant ID field, enter the tenant ID of the target org.
Note: You can get the tenant ID of the target org in the Administration > General > Application Settings.
- Click Send Request. An email is sent to the Admin of the target org containing the connection request information.
Accept Connection Request
After a connection request is submitted from the source org, you will receive a connection request In the target org. You can approve or decline the request as per your requirement.
To accept connection request:
- Navigate to the Administration > General > X-Org > Connected Tenants tab.
- Click the three-vertical dots menu of the connection request and select Approve. The Approve Connection Request window is displayed.
- From the Connection Expiry Date field, select the preferred date.
- Click Approve.
Note: After you approve the request, your tenant name will be shared with the source org.
Create and Migrate a Bundle
Bundle is a collection of assets from various Gainsight features. You can create a Bundle with many assets from different Gainsight features.
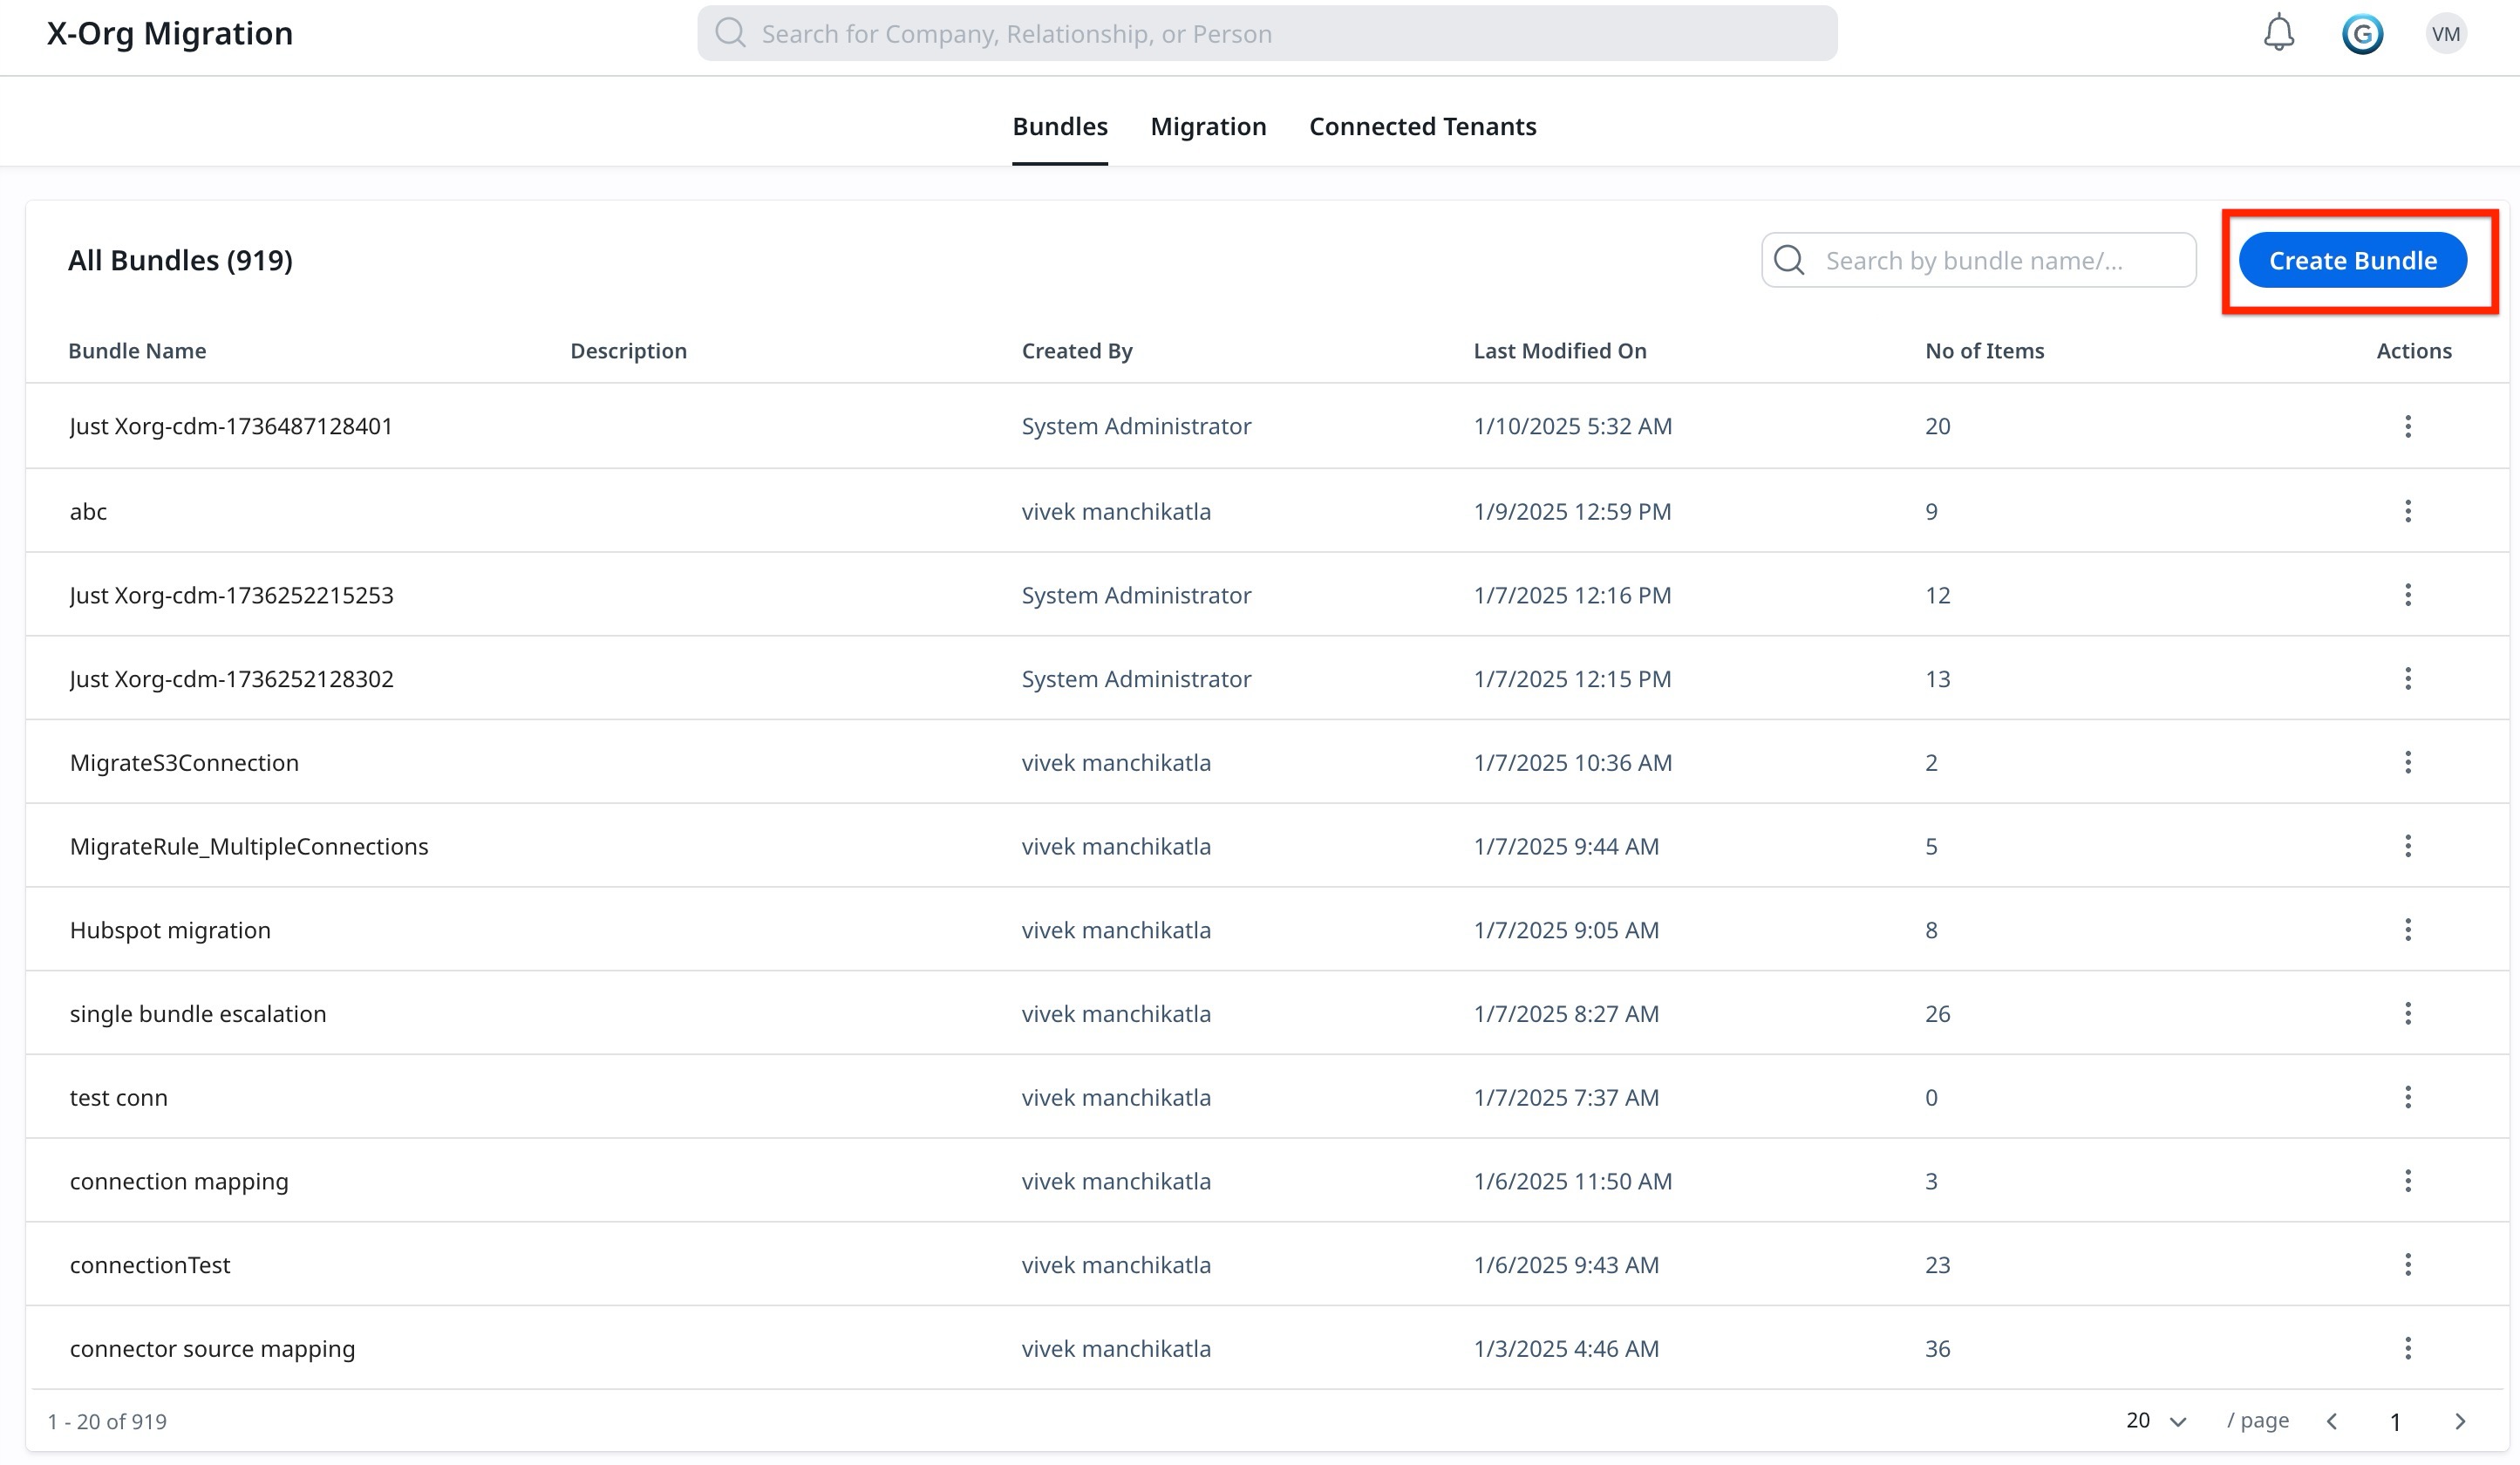
To create and migrate a bundle:
- Navigate to the Administration > General > X-Org > Bundles tab.
- Click Create Bundle. The Basic Information page appears.
- In the Bundle Name field, enter a unique name for the bundle.
- In the Bundle Description field, enter a brief description of the bundle.
- Click Prepare. The Preparation page appears.

- From the Asset Type dropdown, select the required type of asset.
- From the Select Assets section, drag and drop the assets to the Preparation screen.
Note: Currently, dependency resolution is supported only for a few features, Gainsight will gradually add this capability for all the features in the future releases.

- (Optional) Click Save to save the changes and migrate the assets later.
- Click Save and select Save & Migrate to start the migration. Migrate <Bundle Name> slide-out panel appears.

- From the Target Tenant dropdown, select the target org.
- In the Notify via Email to field, enter the email ID to receive notification about the migration status.
- In the Connection Mapping section, Source Connection is automatically populated.for the successful migration.
Note: Connection Mapping is visible only when there is a job to be migrated. - From the Target Connection dropdown, select the target connection.
Note: For a successful migration, admins must ensure the connector is created and authorized in the target tenant.

- (Optional) In the Fields Mapping: If tenant has objects with same name as source, the X-Org maps the field automatically. However, to map to a different object:
- From the Target Objects dropdown, select the object to be mapped.
Note: You can add multiple source objects to map the respective target objects.
- From the Target Objects dropdown, select the object to be mapped.
- (Optional) Click Run Test Migration to test the migration of assets to the target org.
- Click Migrate to submit the migration request.

Options in Connected Tenants Tab
Once the connection is accepted in the target org, you will see the connection details under the All Tenants section. The following details are displayed in this section:
- Tenant Name: Displays the name of the target org.
- Tenant ID: Displays the ID of the target org.
- Tenant Type: Displays the tenant type of the connection:
- Source: The current org is a source org from where the assets need to be migrated to target org.
- Target: The current org is a target org which receives the assets from the source org.
- Expiration Date: Displays the expiry date of the connection.
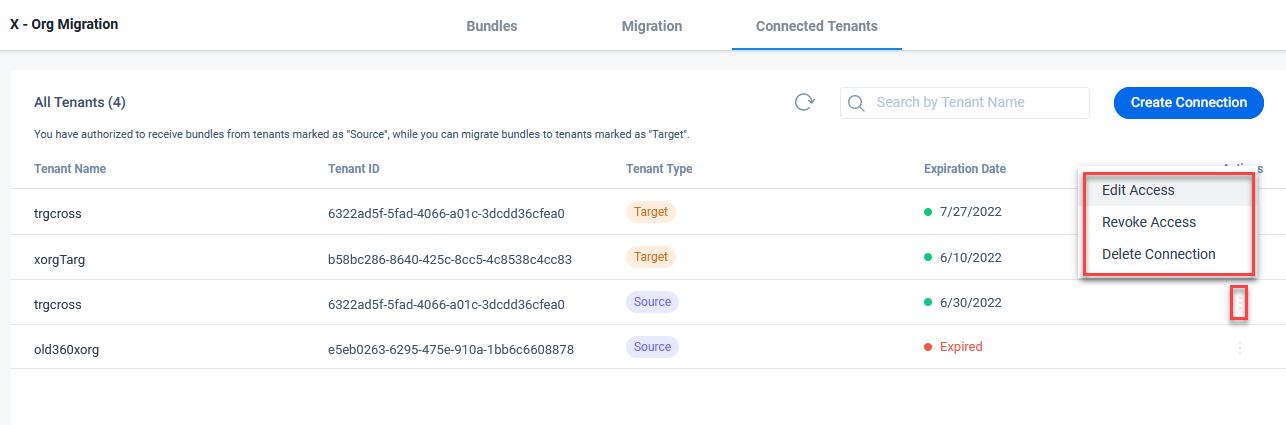
- Actions: It contains the following options based on the Tenant type:
- Edit Access: (Only applicable to target org) You can edit the connection to update the expiry date.
- Revoke Access: (Only applicable to target org) You can end the access source org’s access.
- Delete: Deletes the connection between the two orgs.
Options in Bundles Tab
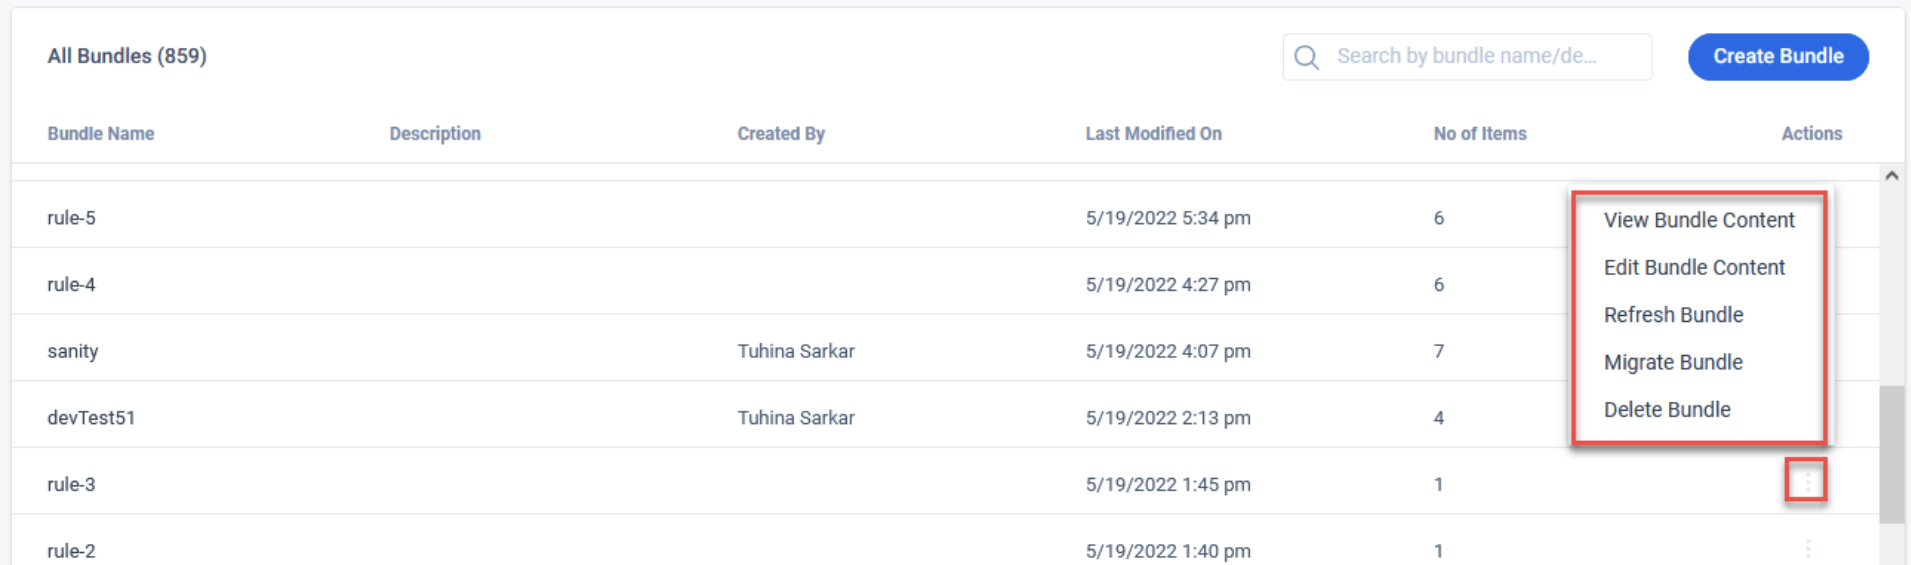
After a bundle is created, you can find the following options in the Bundles tab:
- View Bundle Content: Displays the assets of the bundle. You can also perform the following activities:
- Edit: You can modify the bundle’s basic information and assets.
- Prepare for Migration: You can directly migrate the bundle to the target org.
- Edit Bundle Content: Modify the bundle’s basic information and assets.
- Refresh Bundle: Refresh the bundle to update the assets information.
- Migrate Bundle: Copies the bundles to the target org.
- Delete Bundle: Deletes the bundles permanently from the respective org.
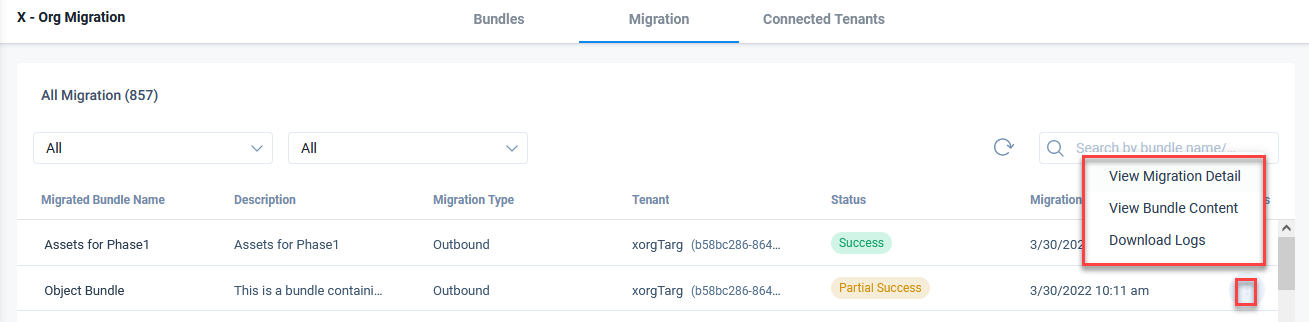
Options in Migration Tab
In the Migration tab, you can find the following options:
- Filter Migrated Bundles: Displays the migrated bundles as per the following options:
- All, Inbound, or Outbound
- All, Failure, In Progress, Partial Success, Pending, or Success
- Refresh: Refreshes the migration bundle list.
- Search: Helps to find the specific bundle by its name.

- Context Menu of the Bundle: The three-vertical dots menu of a Bundle contains the following options:
- View Migration Detail: Displays the details of the migrated Bundle like name, migration type, target tenant ID, target tenant name, migration date and assets. You can also perform the following activities:
- Download Logs: You can download a csv file containing the details of the migration.
- Prepare for Migration: You can directly migrate the Bundle to the target org.
- View Bundle Content: (Only applicable to Source org) Displays the assets of the Bundle. You can also perform the following activities:
- Edit: You can modify the Bundle’s basic information and assets.
- Prepare for Migration: Migrate the bundle directly to the target org.
- Download Logs: Downloads a CSV file containing the details of the migration.
- View Migration Detail: Displays the details of the migrated Bundle like name, migration type, target tenant ID, target tenant name, migration date and assets. You can also perform the following activities:
Migrate Rules with S3 Dataset
If you migrate a Rule with an S3 dataset task, the bucket details are also migrated successfully. When you migrate a Rule with an S3 dataset:
- The rule and the associated S3 bucket (Gainsight Managed or Custom) are successfully migrated.
- The bucket associated with an S3 dataset task is migrated as an independent asset.
- A corresponding bucket with the same name as provided in the source org is created in the target org. However, if the target org already has a bucket with the same name as in the source org, a new bucket will not be created.
- When a new bucket is created in the target org, the associated Access Key and Security Token are not copied from the source org.
- You must go to the Connectors 2.0 page and update the Access Key and Security Token for the bucket which was created due to migration.