Create Data Sync Jobs
Gainsight NXT
IMPORTANT - Articles Impacted due to 6.34 October NXT Release
Due to the v6.34 October, 2022 release, this article has been impacted. Steps, images, and playable GIFs in this article will soon be updated to reflect the latest changes.
For more information about the latest UI changes, click here.
IMPORTANT NOTE: Gainsight is upgrading Connectors 2.0 with Horizon Experience. This article applies to tenants which are yet to be upgraded to the Horizon Experience of Connectors 2.0. If you are using Connectors 2.0 with Horizon Experience, you can find the documentation here.
This article is the fourth in a series of HubSpot Connector articles. Gainsight recommends you refer to the initial articles and then proceed with this article.
This article explains how to create a custom data sync job to fetch data from a HubSpot object to Gainsight.
A Data sync job fetches data from the authorized HubSpot Account and ingests it into Gainsight. A Data sync job has five stages and you must configure these stages, as required. The five stages of a Data Sync job are:
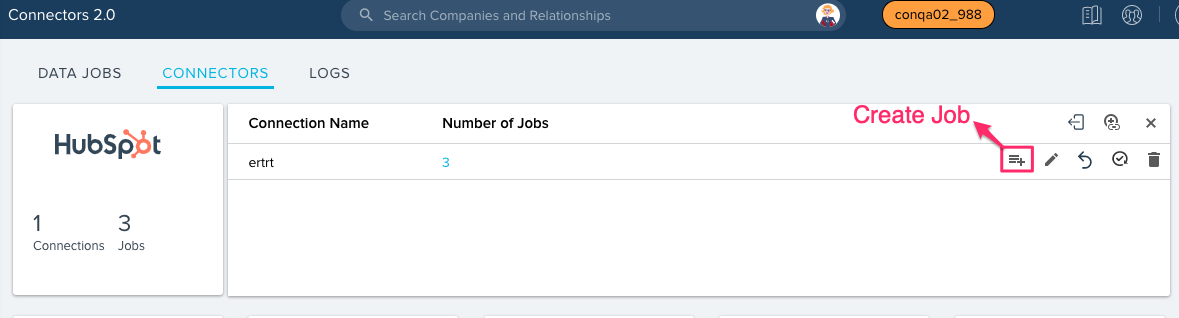
You can click the Create job icon to create a new job. The New Job window is displayed. You can proceed to the rest of the job configurations as shown below.
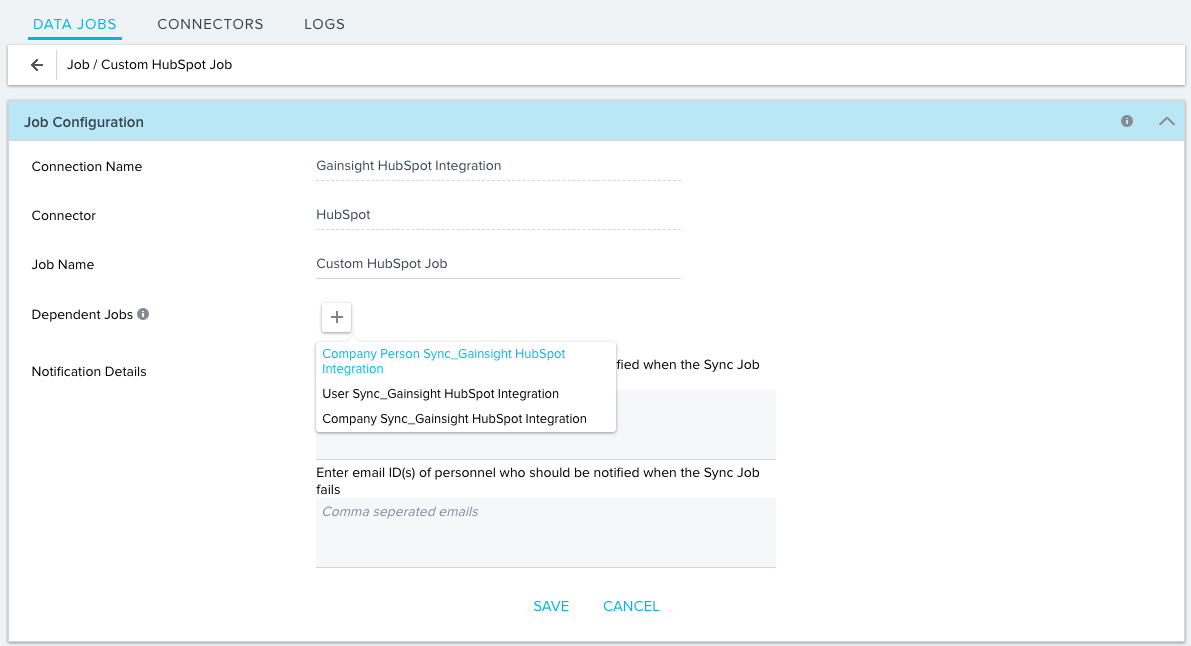
Job Configuration
This section consists of the basic settings to be configured in a Data Sync job. In this stage, you can configure the following fields:
- Connection Name: The connection for which this job is created. This field is automatically populated with the name of the connection. You cannot edit this field.
- Connector: This field displays the name of the connector. This field is always set to HubSpot in all the jobs.
- Job Name: This field holds the name of the job, entered by you. You can edit the job name at any time.
- Dependent Jobs: If any other job must be completed before the current job, you must add that job here. The dependent job is executed first and then the current job. You can add only one dependent job.
- Notification Details: This field notifies users about the success or failure of the current job. In the first text box, enter the email address of the recipient(s) who should be notified when this job is executed successfully. In the second text box, enter the email address of the recipient(s) who should be notified when this job fails to execute. You can enter multiple email addresses separated by a comma.
Data Source and Field Mappings
In this section, you can select the source object from HubSpot and target object from Gainsight. You can map the source fields from HubSpot object to their corresponding fields in Gainsight. In this section, you can configure the following fields:
- Select HubSpot Source Object: You can select a HubSpot object. All the fields of the selected object can be included in the field mappings and Sync Filters sections. You cannot change the source object once you proceed to the field mappings. You can select any of the following objects:
- Company
- Contact
- Owner
- Deal
- Ticket
- Product
- Select Target Gainsight Object: You can only see Standard and Custom Gainsight objects in this field. You cannot change the source object once you proceed to the field mappings.
HubSpot Data to Gainsight Data Mappings: You should map fields from the source object to the target object in the field mappings section. Data is synced from source fields of the HubSpot object to target fields of the Gainsight object, based on the field mappings configured by you.
To add field mappings:
- From the Select HubSpot Source Object field, select the source object.
- From the Select Target Gainsight Object field, select the target object.
- Click PROCEED TO MAPPING. Field mappings section appears.
- Click ADD to add the field mappings.
- In the Source Field column, select the field from which data must be imported.
- In the Target Field column select the field to which data must be imported.
- Click ADD, to add more field mappings.
- Select the Upsert key check box for at least one of the fields. Upsert key helps to identify a unique record from HubSpot to Gainsight while syncing data into the remaining mapped fields. Any HubSpot field which has unique values can be used as an Upsert key.
In the following image (after Step 9) for example, the values from Company ID field of HubSpot are synced into the HubSpot Account ID field in Gainsight. Similarly, data from other source fields are synced into Gainsight fields. The Company ID field in HubSpot helps in identifying unique HubSpot records and syncs them to Gainsight. - Click SAVE MAPPINGS. Clicking this button enables the Derived Mappings stage. You can even proceed to the Sync Filters or Schedule stage directly, if required.

Derived Mappings
This section is optional and you must configure it only if any of the target fields in the above mappings have a field of GSID data type. In this section, you can create Lookup mapping in a data sync job. You can have a lookup to the same object or another standard object and match up to six columns. Once the required matching is performed, you can fetch Gainsight IDs (GSIDs) from the lookup object into GSID data type fields. The main purpose is to populate GSIDs of the records from the same or another object. Derived Mappings are also known as Data Import Lookup.
There are two types of lookups; Direct and Self.
- Direct lookup enables admins to lookup to another Gainsight standard object and fetch GSIDs of the records from the lookup object.
- Self lookup enables admins to lookup to the same standard object and fetch GSID of another record to the target field. To learn more about Derived Mappings, refer to the Data Import Lookup article.
IMPORTANT: To use Derived Mappings, your Target Object selected in the field mappings section must have at least one field with GSID Data Type.
To add Derived Mappings:
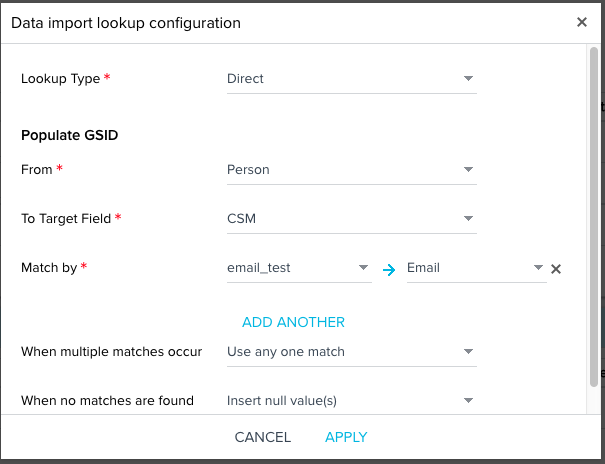
- Click ADD. The Data import lookup configuration window is displayed.

- Lookup Type: Select either Direct or Self Lookup.
- Direct: In Direct Lookup, you can have a lookup to another Gainsight Standard Object and fetch GSIDs of the records from the lookup object.
- Self: In Self Lookup, you have a lookup to the same standard object and fetch GSIDs of another record to the target field.
- From: Select the source object from which the GSID must be fetched. This field is automatically set to the same object in Self lookup, since lookup is on the same object itself.
- To Target Field: Select the target field into which GSID must be loaded. You can only view fields with GSID data type in this field.
- Match by: Select the two fields based on which records must be matched. The first field is from the HubSpot source object and the second field is from the lookup (From) object.
- (Optional) Click ADD ANOTHER, to add additional mappings.
- Select a value in the When multiple matches occur field. The selected value determines what action must be performed when multiple records are found for the matching criteria.
- Use any one match: If this option is selected, one of the two records is selected.
- Mark record with an error: If this option is selected, the record is marked as an error in the target object and it will be synced to the target object.
- Select a value in the When no matches are found field. The selected value determines the action to be performed when no matching records are found.
- Insert null value(s): If this option is selected, null value is inserted in the GSID field of the target object.
- Reject record: The specific record is not considered and is rejected.
- Click APPLY.
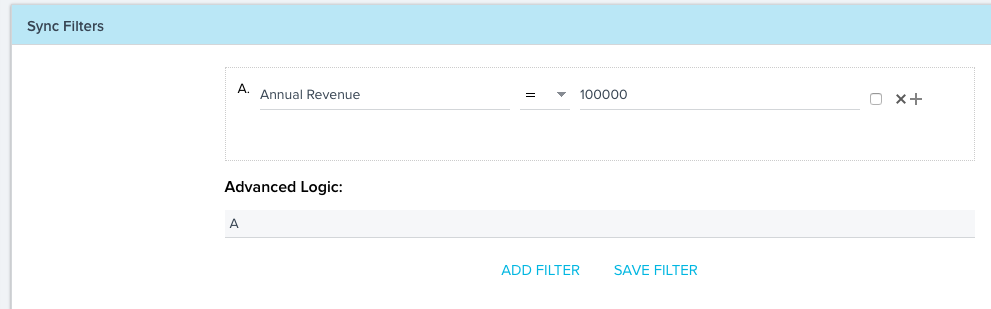
Sync Filters
In this section, you can add filters to refine the list of records that should be synced. Any field in the HubSpot source object can be used to filter data being synced into Gainsight.
To add filters:
- Click + ADD FILTER.
- Select a field from the HubSpot object, in the select a value section.
- Select the required operator.
- Select the matching criteria.
- Click SAVE FILTER.
- (Optional) Click + next to the filter or + ADD FILTER, to add more filters.
When you add multiple filters, the AND operation is applied by default. If you have more than two filters, you can design Advanced Logic with the AND operator between the filters, as required.
Schedule Jobs
This section allows you to schedule the execution of this job. The schedule of this job works the same way as in the User Sync job in the Out of the Box. The configurations to schedule the execution remain the same. Refer to the Schedule section in the User Sync Job for more details.
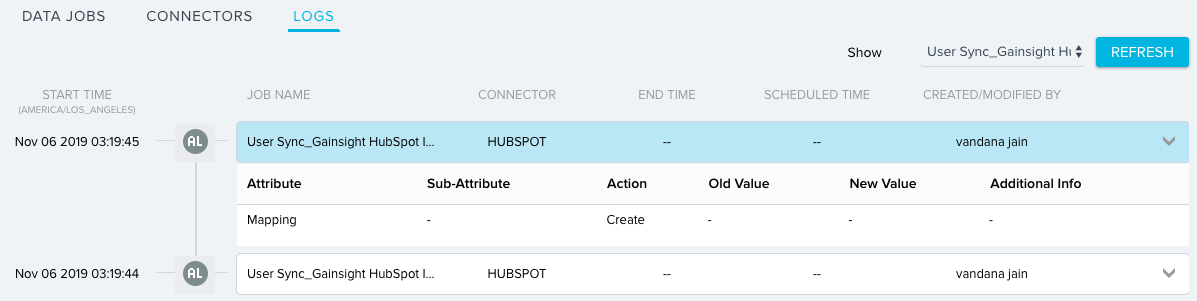
View Logs
You can navigate to the LOGS tab to see the log history of all the data sync jobs. This page displays logs from all of the Connectors. You can filter this page to display logs only for a specific job from a specific connector. To filter the logs, select the required job from the Show drop-down menu and click REFRESH.
In the previous image, a filter is applied to display logs only for the User sync job of Gainsight HubSpot Integration connection.
Gainsight maintains two types of Logs for every Data Sync job:
- Audit logs: An audit log is recorded when an activity is performed on a job. The various activities include Create, Edit, delete, and so on. Audit logs are represented by AL symbol. The various fields displayed in this log are:
- Attribute: The section of the job which was modified. For example, if you modified at Mapping section, this field displays Mapping.
- Sub-Attribute: The element modified in an attribute.
- Action: The activity performed on the job. Possible values can be Create, Edit, Delete.
- Old Value: The value which was modified.
- New Value:The current value in the modified field.
- Additional Info: Additional information about the activity.
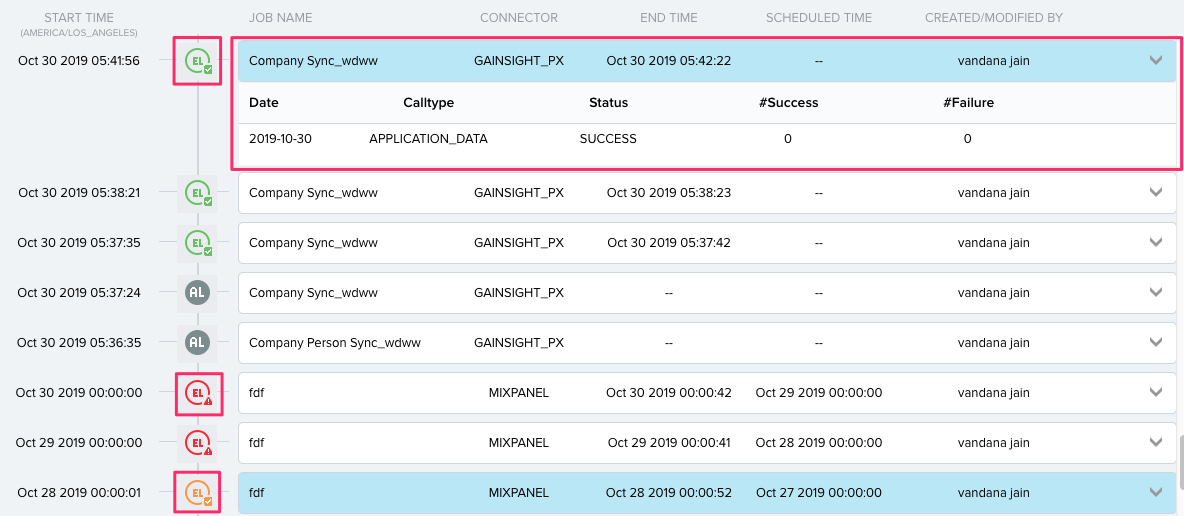
- Execution logs: An Execution log is created when a job is executed. Execution logs are represented by EL symbol. An EL symbol can have any one of three colors to represent the execution as shown below:
- Green: Successful execution
- Yellow: Partially Successful execution
- Red: Failure execution
The various details displayed by Audit logs are:
- Date: The date of job execution.
- Calltype: Always displays APPLICATION_DATA for HubSpot connector.
- pStatus: The status of the job. Possible values could be a SUCCESS, FAILED, PARTIAL_SUCCESS.
- # Success: Number of records which were synced successfully.
- # Failure: Number of records which failed to sync.
The LOGS page displays the logs for all the Data Sync jobs. To view the Connection logs, you can navigate to the HubSpot Connector logs page as shown below:
- Navigate to CONNECTORS page as shown below.
- Click the View Connection Logs icon.
The various columns in Connection logs are:
- Connection Name: The name of the connection.
- User: The user who created the connection.
- Action: The action performed on the connection.
- Modified on: The date on which the connection was last modified.
- Attribute: The element modified in the connection.
- Old Value: The value which was replaced after modification.
- New Value: The new value which replaced the old value.
