Migrate Connector Jobs via X-Org 2.0
This article helps admins to understand the process of migrating Connector jobs using Gainsight’s X-Org migration tool.
Overview
X-Org is Gainsight's migration tool which can be used to migrate data from a source tenant (for example, sandbox org) to a target tenant (for example, production org). For more information on X-Org, refer to the X-Org Migration article.
Business Use Case: Admins can migrate assets such as Connector jobs seamlessly between the sandbox and production environments. This allows admins to validate the effectiveness of a configuration before it is implemented in the production environment.
Pre-requisites:
- Connectors in the source and target tenant must be authorized for the migration to be successful.
- Connection mapping is required before migrating jobs from the source to the target tenant.
Limitations:
- Migration of jobs for Jira, Productboard, and Aha connectors is not supported.
- Migration of Currency and Image sync jobs for Salesforce connector is not supported.
- If the source tenant has multiple connections of the same connector( for example, primary and secondary connections), you must first map the primary connection of the source to the corresponding primary connection at the target tenant and other connections accordingly.
Note: If a connection is used and linked within a module in Gainsight ( Rules Engine, Data Designer, and so on), such a connection is considered a primary connection.
- For HubSpot Connector, you can only migrate one Timeline Sync job from source to target tenant.
Job Migration Flow
The following flowchart provides an overview of how Jobs are migrated in Gainsight CS.
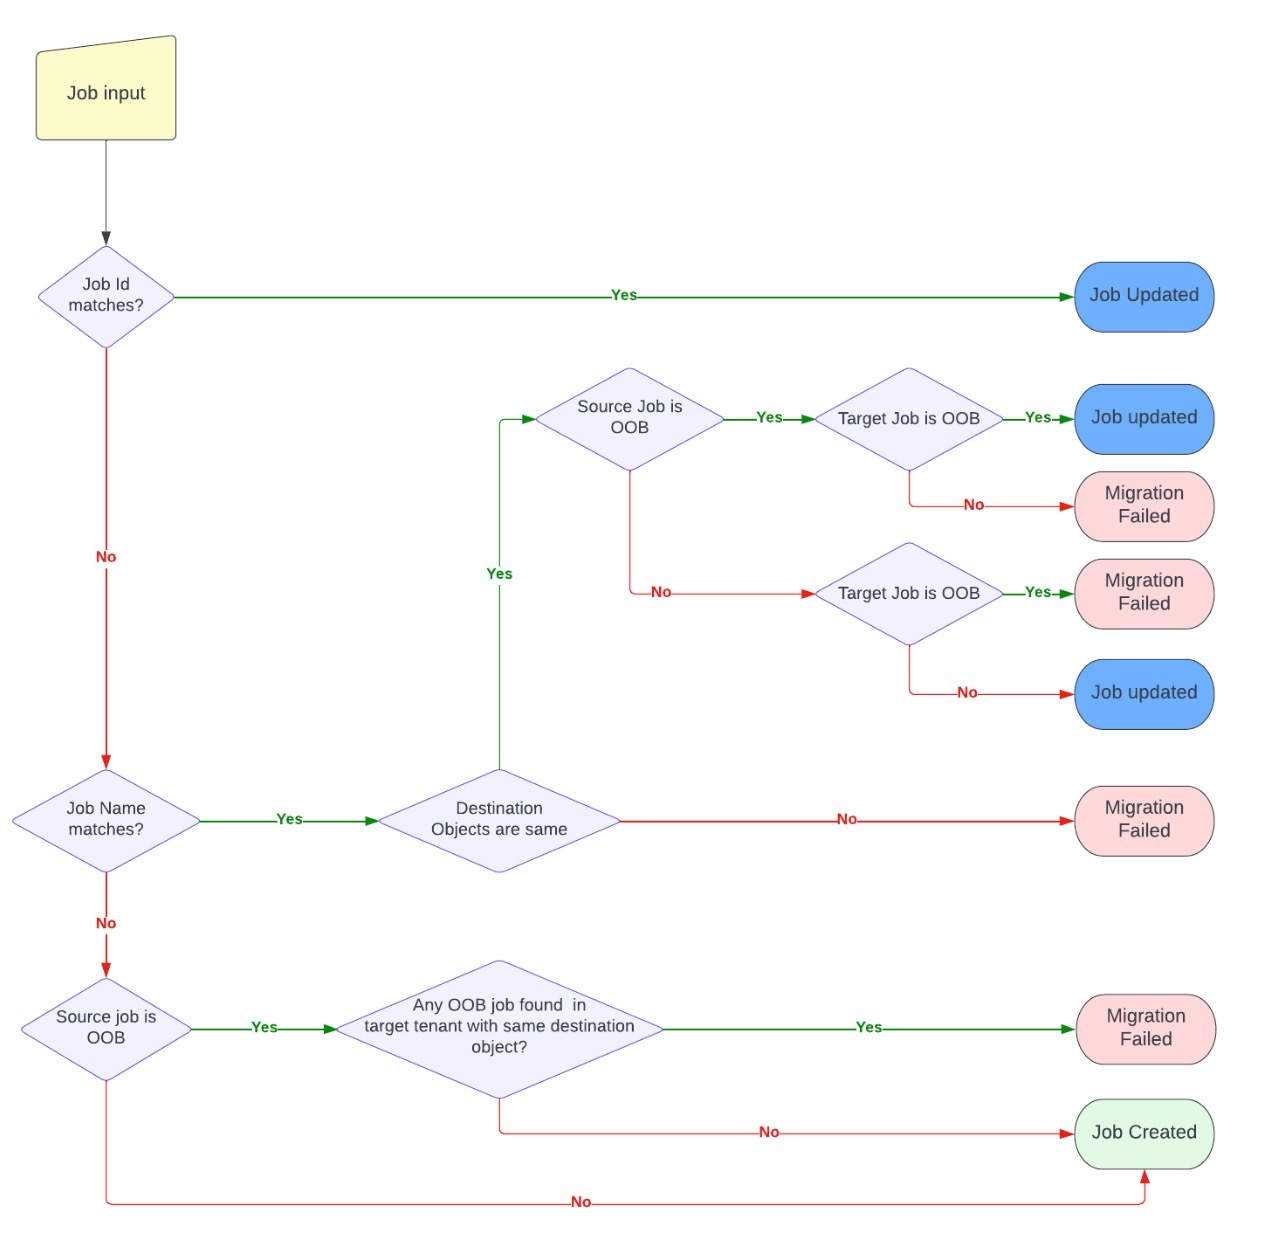
Jobs migration in Gainsight is processed based on the following conditions:
- When Job IDs at the source and target org match
- When Job Name at the source and target org match
- When Job ID and Name are different at source and target org
Job ID Matches at Source and Target Org
| Condition | Result |
|---|---|
| Job ID matches | Job updated |
Note:
- Job ID is a unique ID assigned to jobs by Gainsight. Jobs IDs match if the source and the target tenants are created through sandbox or are copies of tenant.
- If a Job in the sandbox tenant is re-created, then a new job ID is assigned to the newly created job.
Job Name Matches at Source and Target Org
| Condition | Result |
|---|---|
| Destination Objects Are Different | |
| Job name matches | Migration fails |
| Destination Objects Are Same | |
|
Source job: Out-of-the-Box (OOB) job Target job: OOB job |
Job updated |
|
Source job: OOB job Target job: Custom job |
Migration fails |
|
Source job: Custom job Target job: OOB job |
Migration fails |
|
Source job: Custom job Target job: Custom job |
Job updated |
Job ID and Job Name are Different at Source and Target Org
| Condition | Result |
|---|---|
| Source job: not an OOB job | Job created |
| Source job: OOB job Target job: OOB job with same destination |
Migration fails |
| Source job: OOB job Target job: OOB job with a different destination |
Job updated |
Note: To ensure that the migrated job is created or updated under the correct connection, the connector mapping between the source and target org is necessary.
For more information on how to map and migrate the connector, refer to the Setup Migration section in this article.
Setup Migration
To migrate assets from a source org to a target org, perform the following steps:
Create a Connection Request
Admins must create a connection request from the source to the target org. After the request is accepted by the target org, admins can migrate the asset bundles from the source to the target org.
IMPORTANT:
- Your Tenant Name and ID will be shared with the request
- This connection request will be valid for 3 days. After which you need to send a new request in order to perform the assets migration.
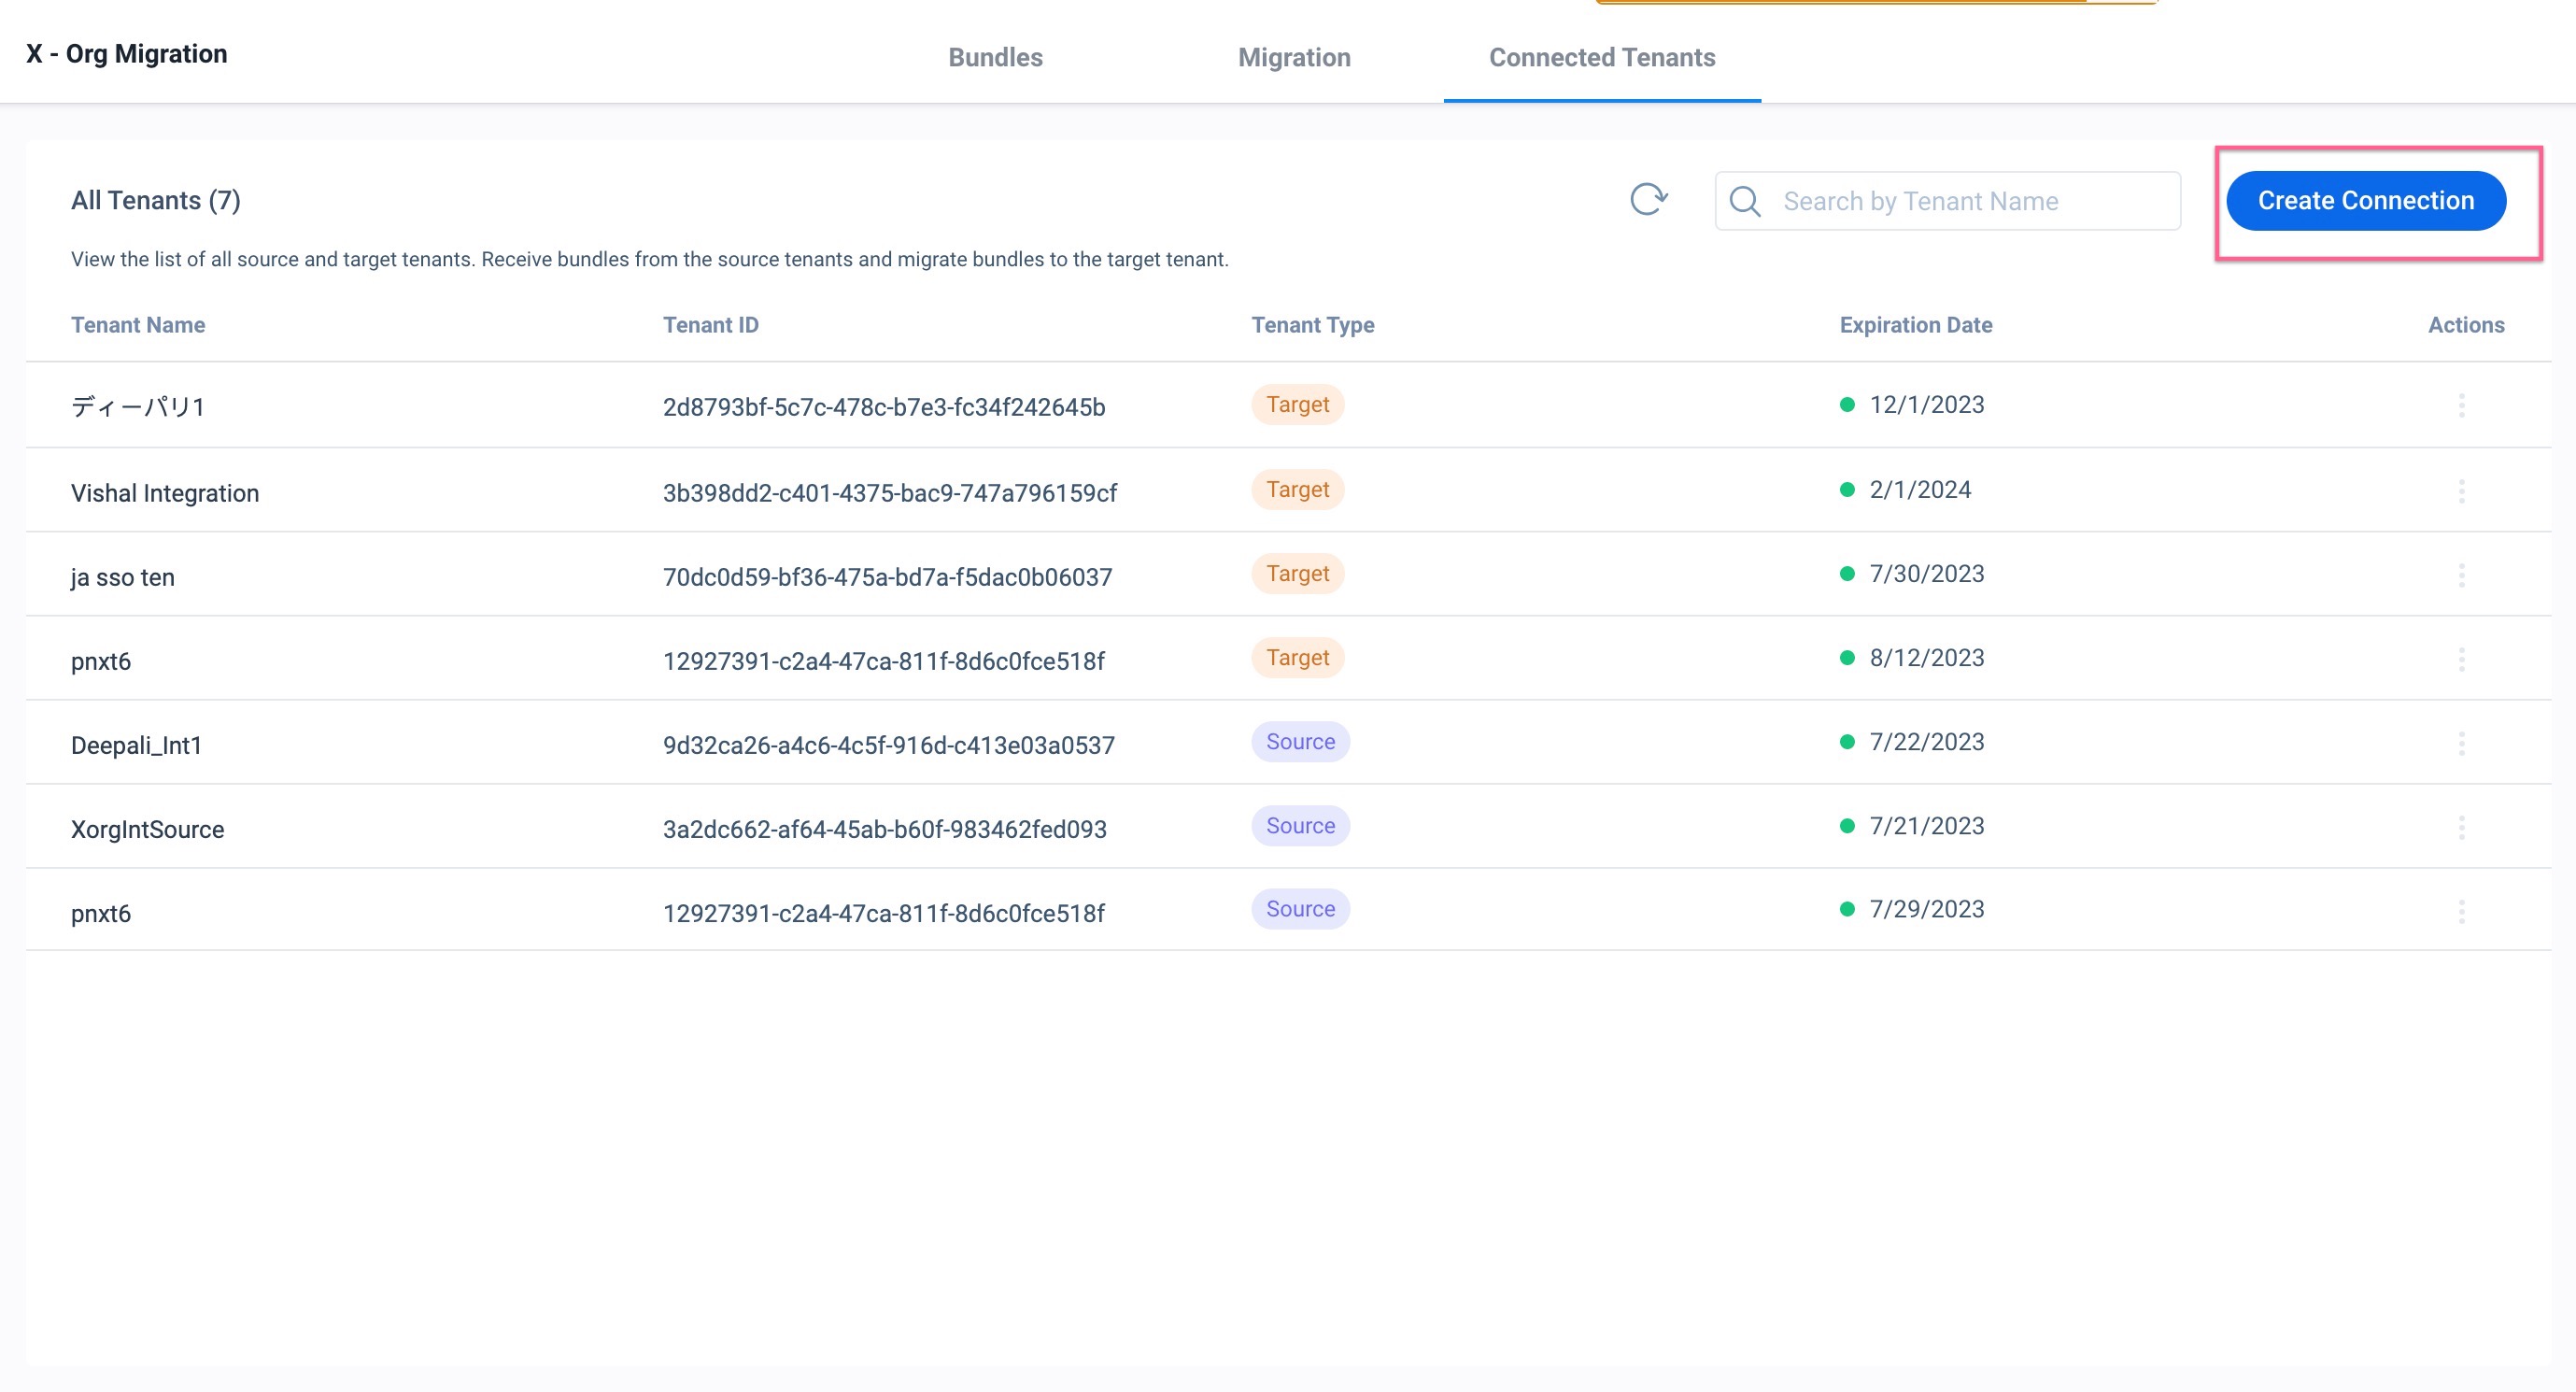
To create a connection:
- Navigate to the Administration > General > X-Org > Connected Tenants tab.
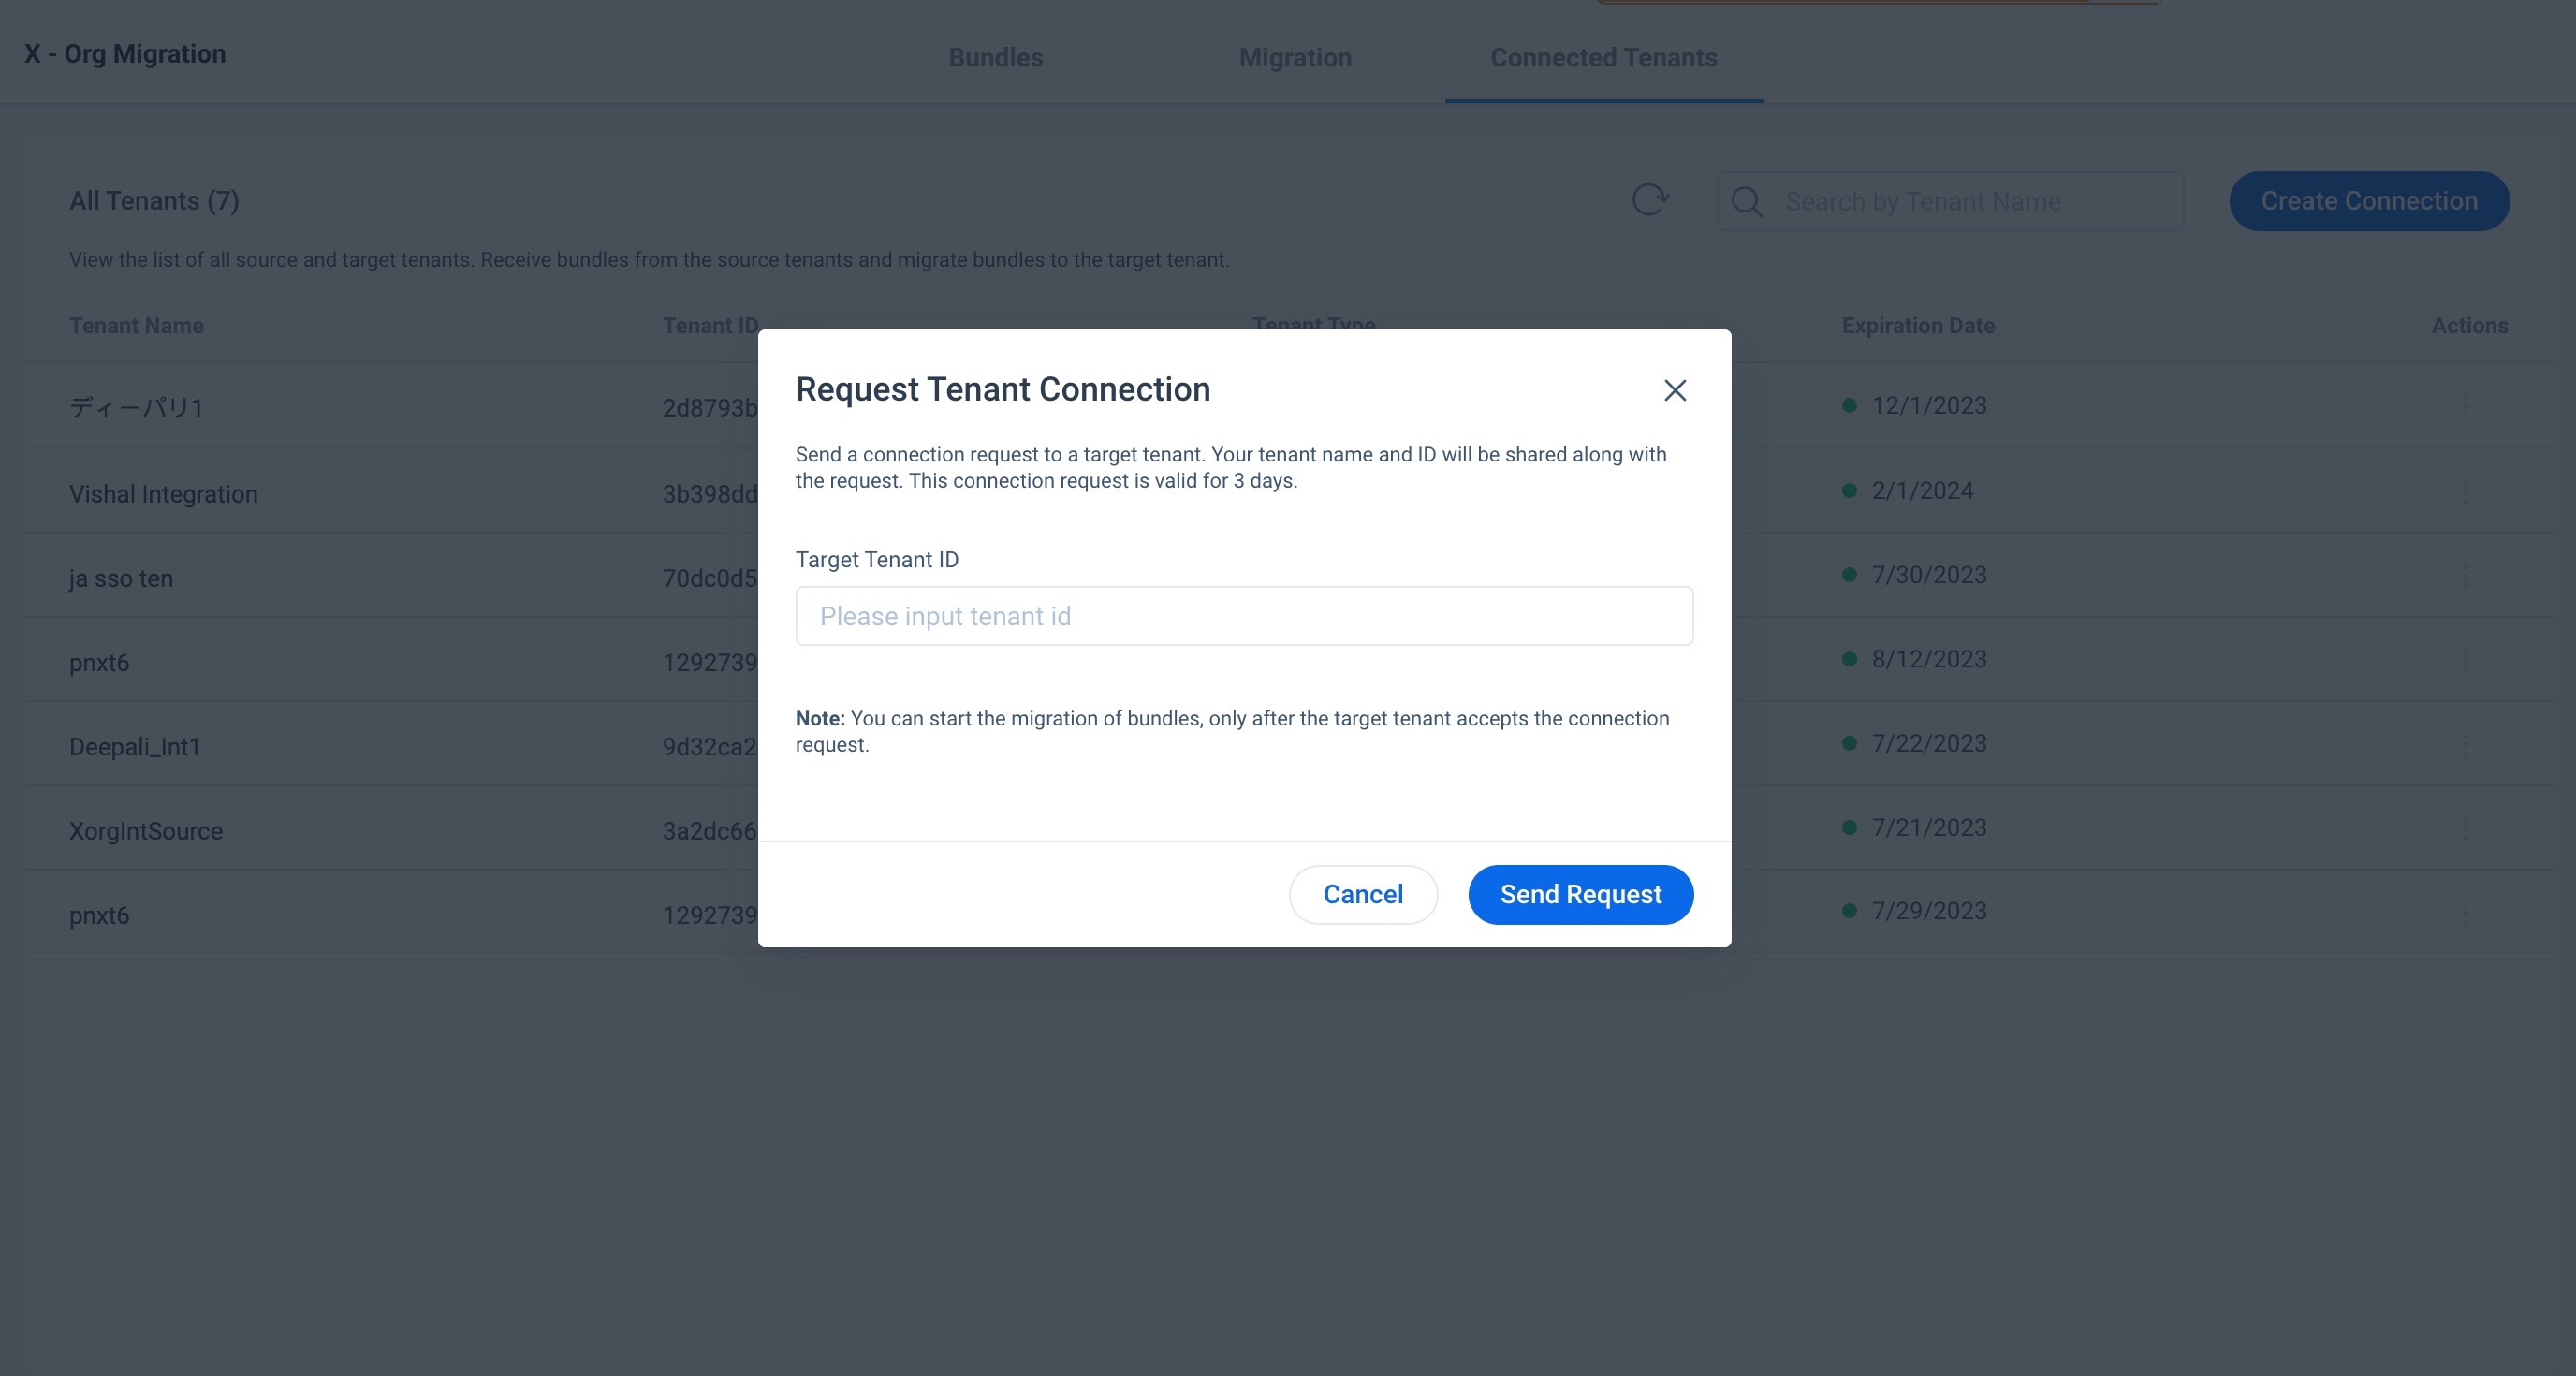
- Click Create Connection. The Request Tenant Connection window appears.
- In the Target Tenant ID field, enter the tenant ID of the target org.
Note: You can get the tenant ID of the target org in the Administration > General > Application Settings. - Click Send Request. An email is sent to the Admin of the target org containing the connection request information.
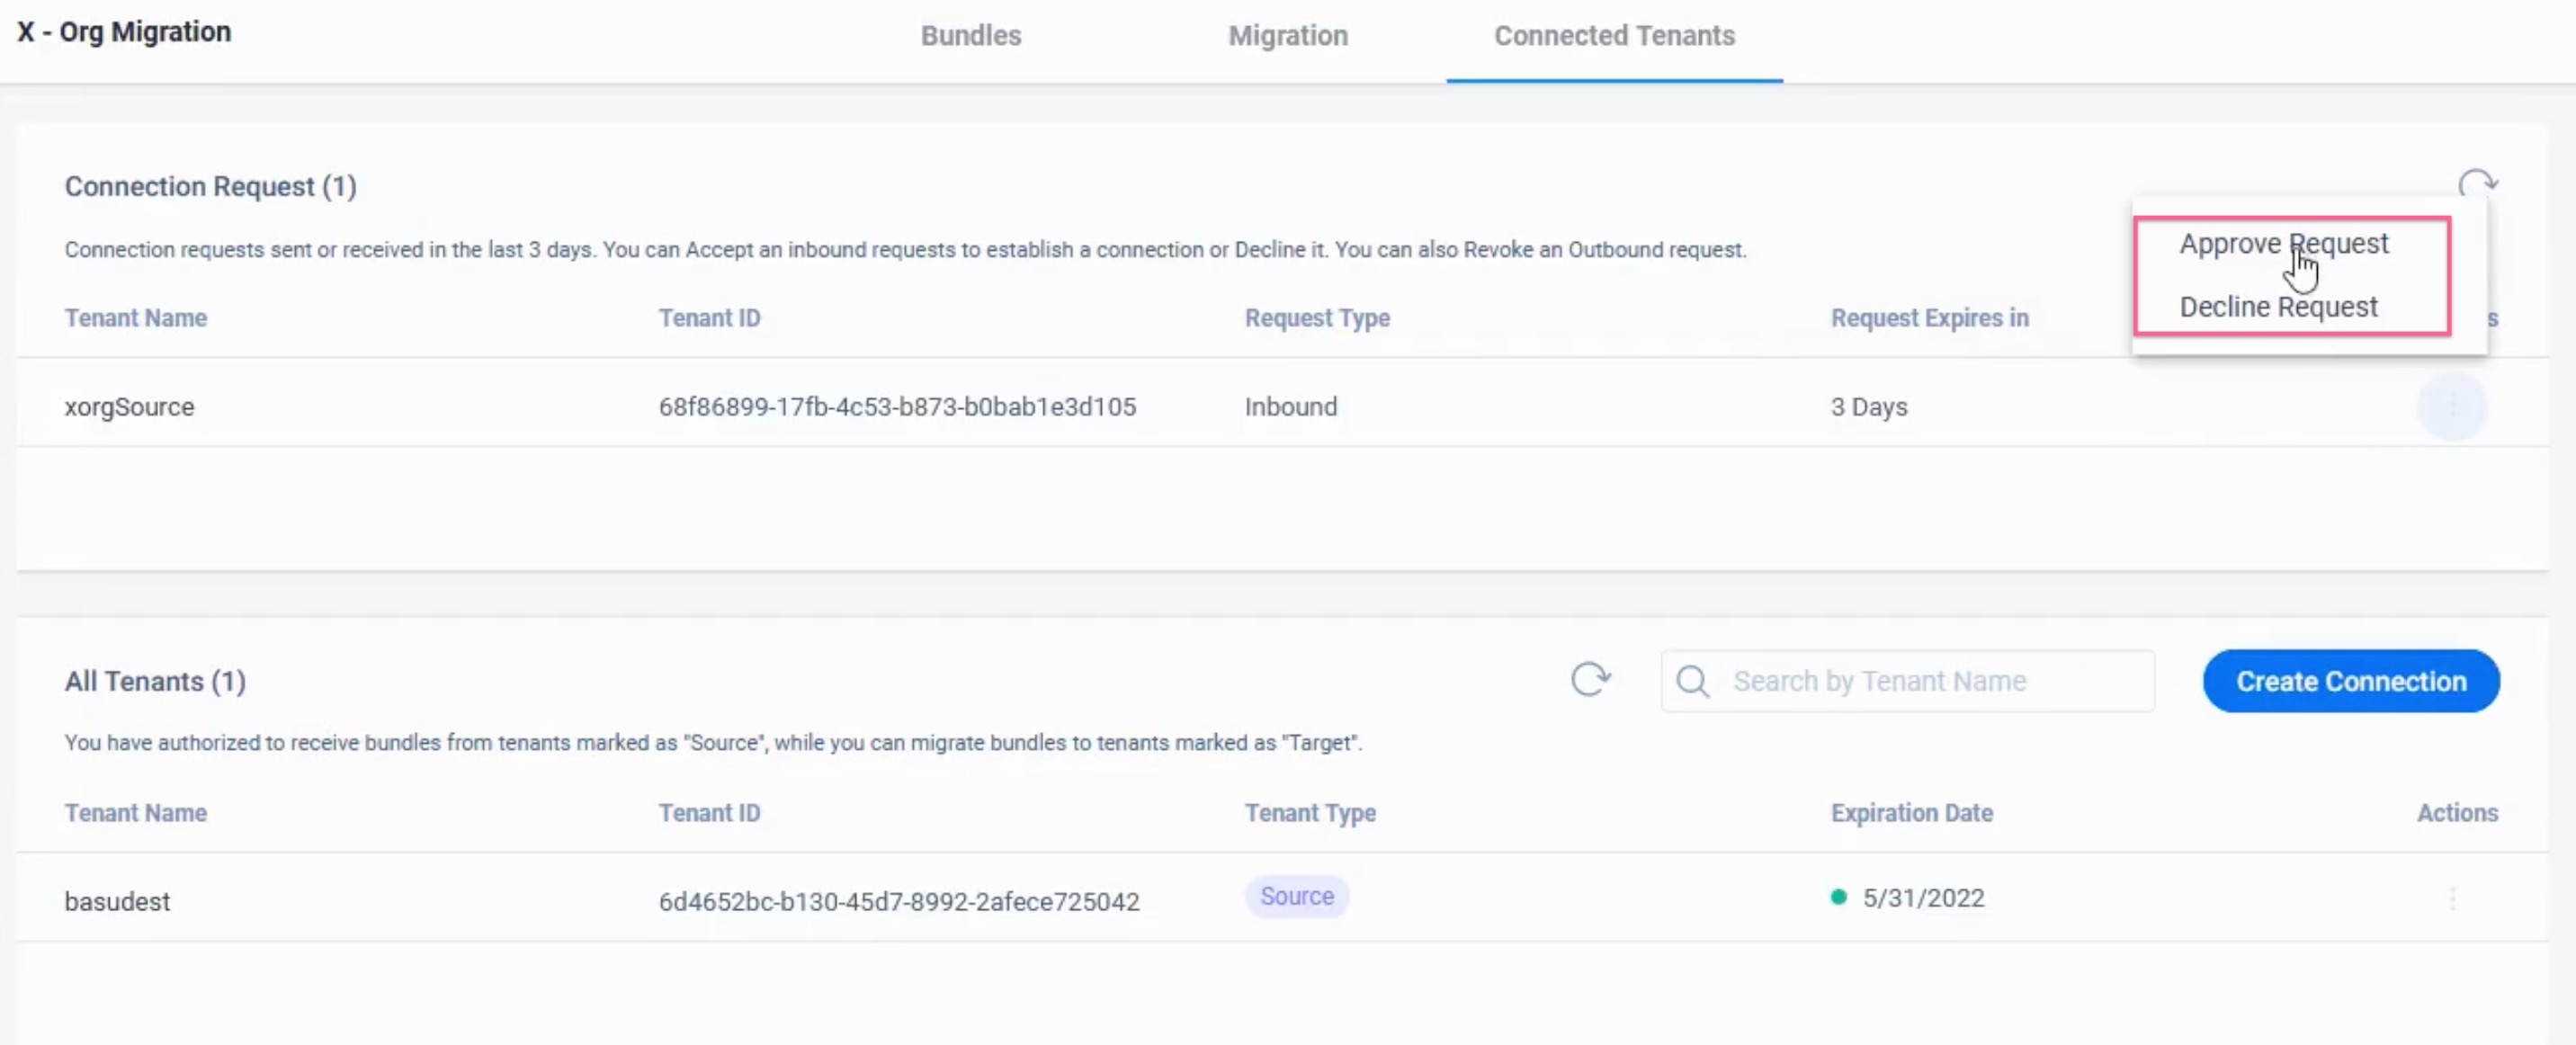
Accept a Connection Request
After a connection request is submitted from the source org, you will receive a connection request in the target org. You can approve or decline the request as per your requirement.
To accept the connection request:
- Navigate to the Administration > General > X-Org > Connected Tenants tab.
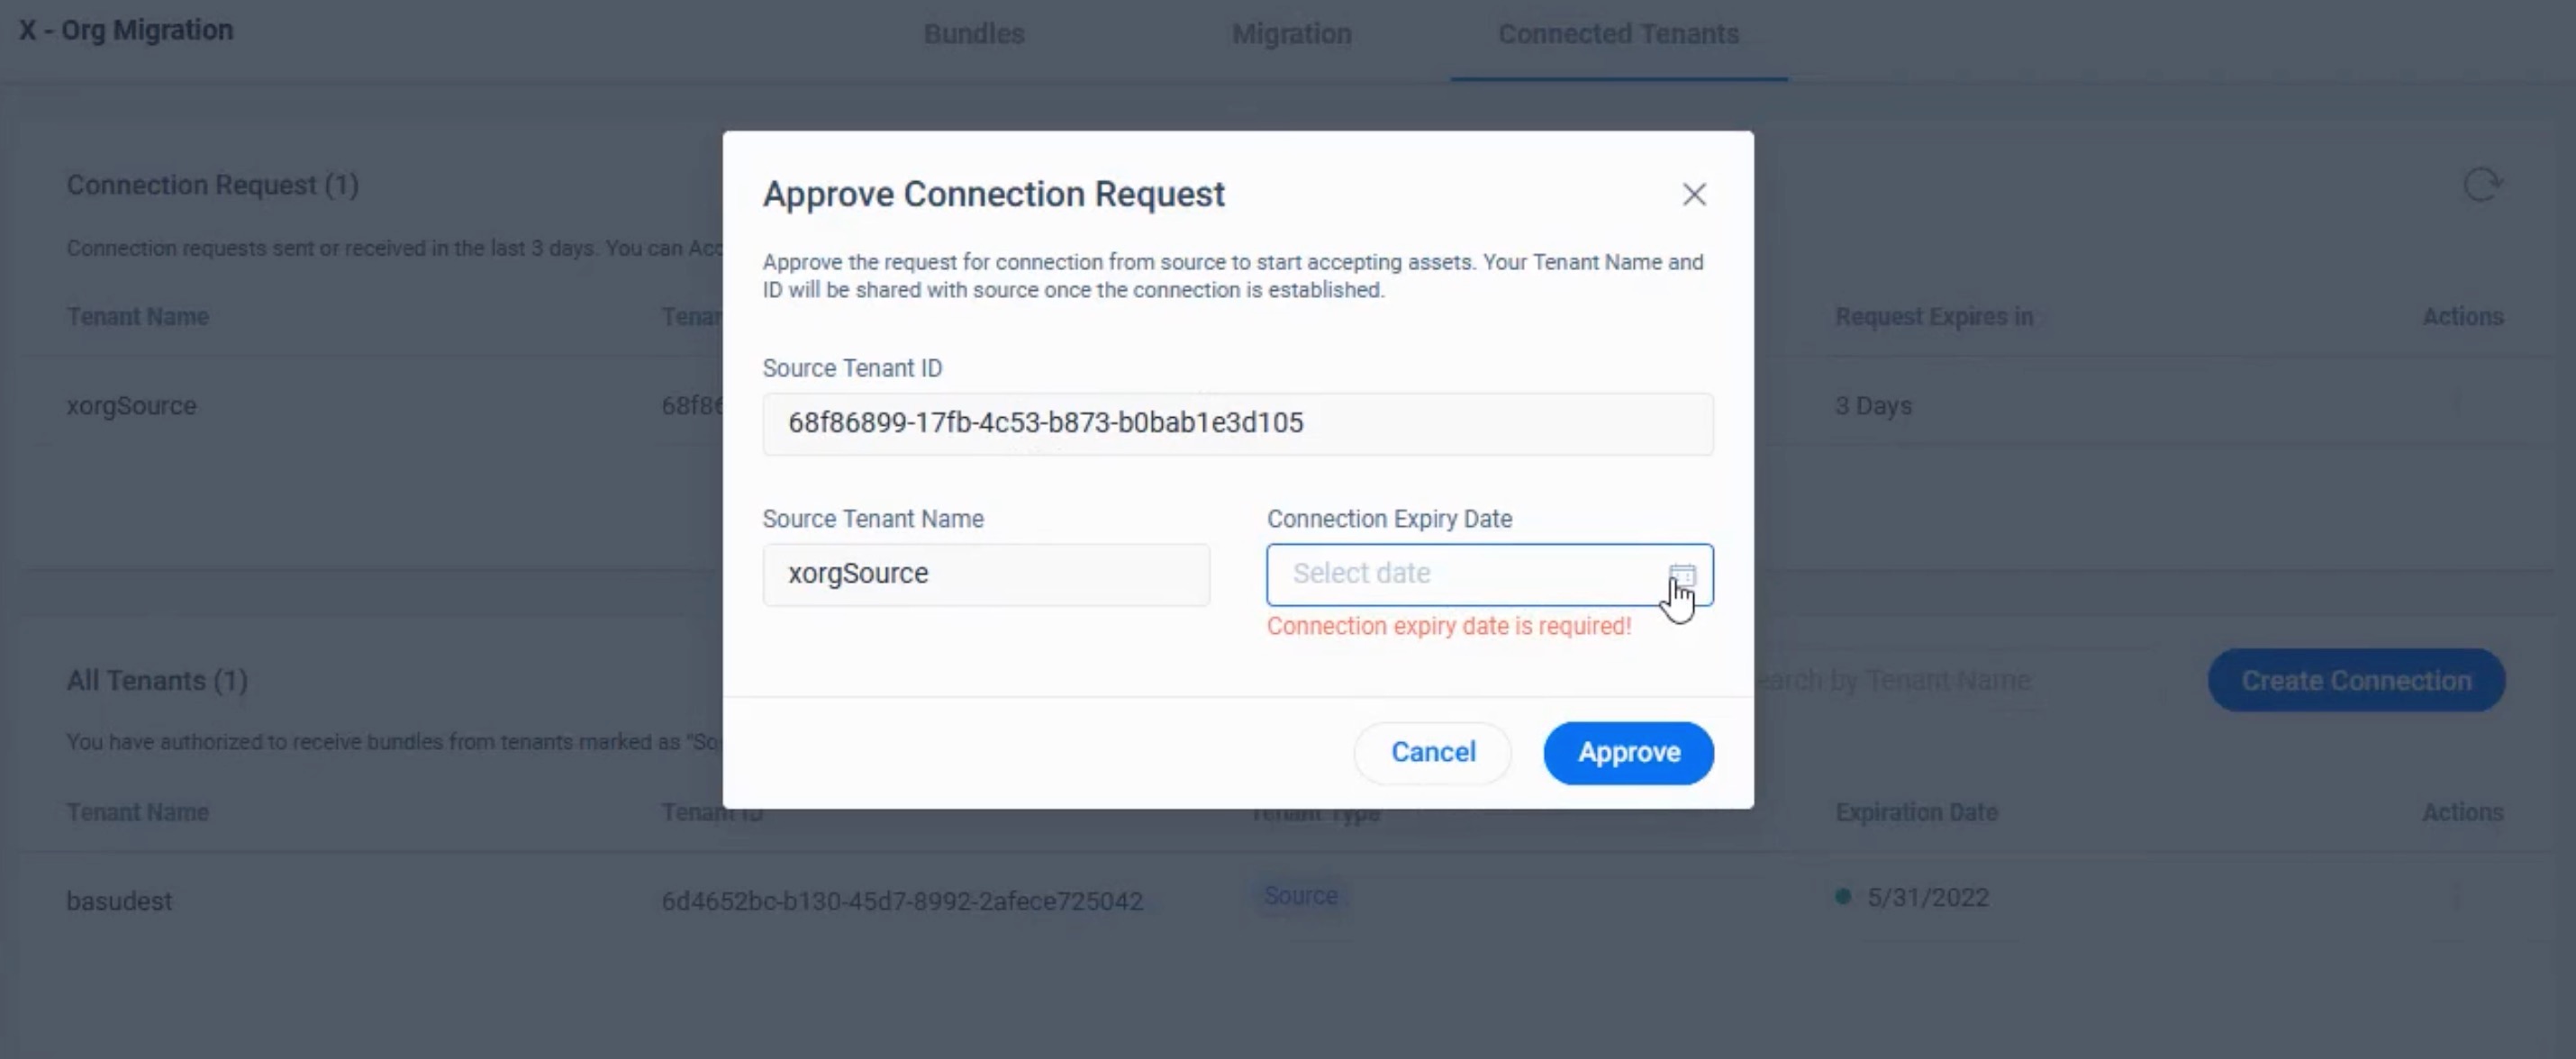
- Click the three-vertical dots menu of the connection request and select Approve Request. The Approve Connection Request window appears.
- From the Connection Expiry Date field, select the preferred date.
- Click Approve.
Note: After you approve the request, your tenant name will be shared with the source org.
Create and Migrate a Bundle
Bundle is a collection of assets from various Gainsight features. You can create a Bundle with many assets from different Gainsight features.
To create and migrate a bundle:
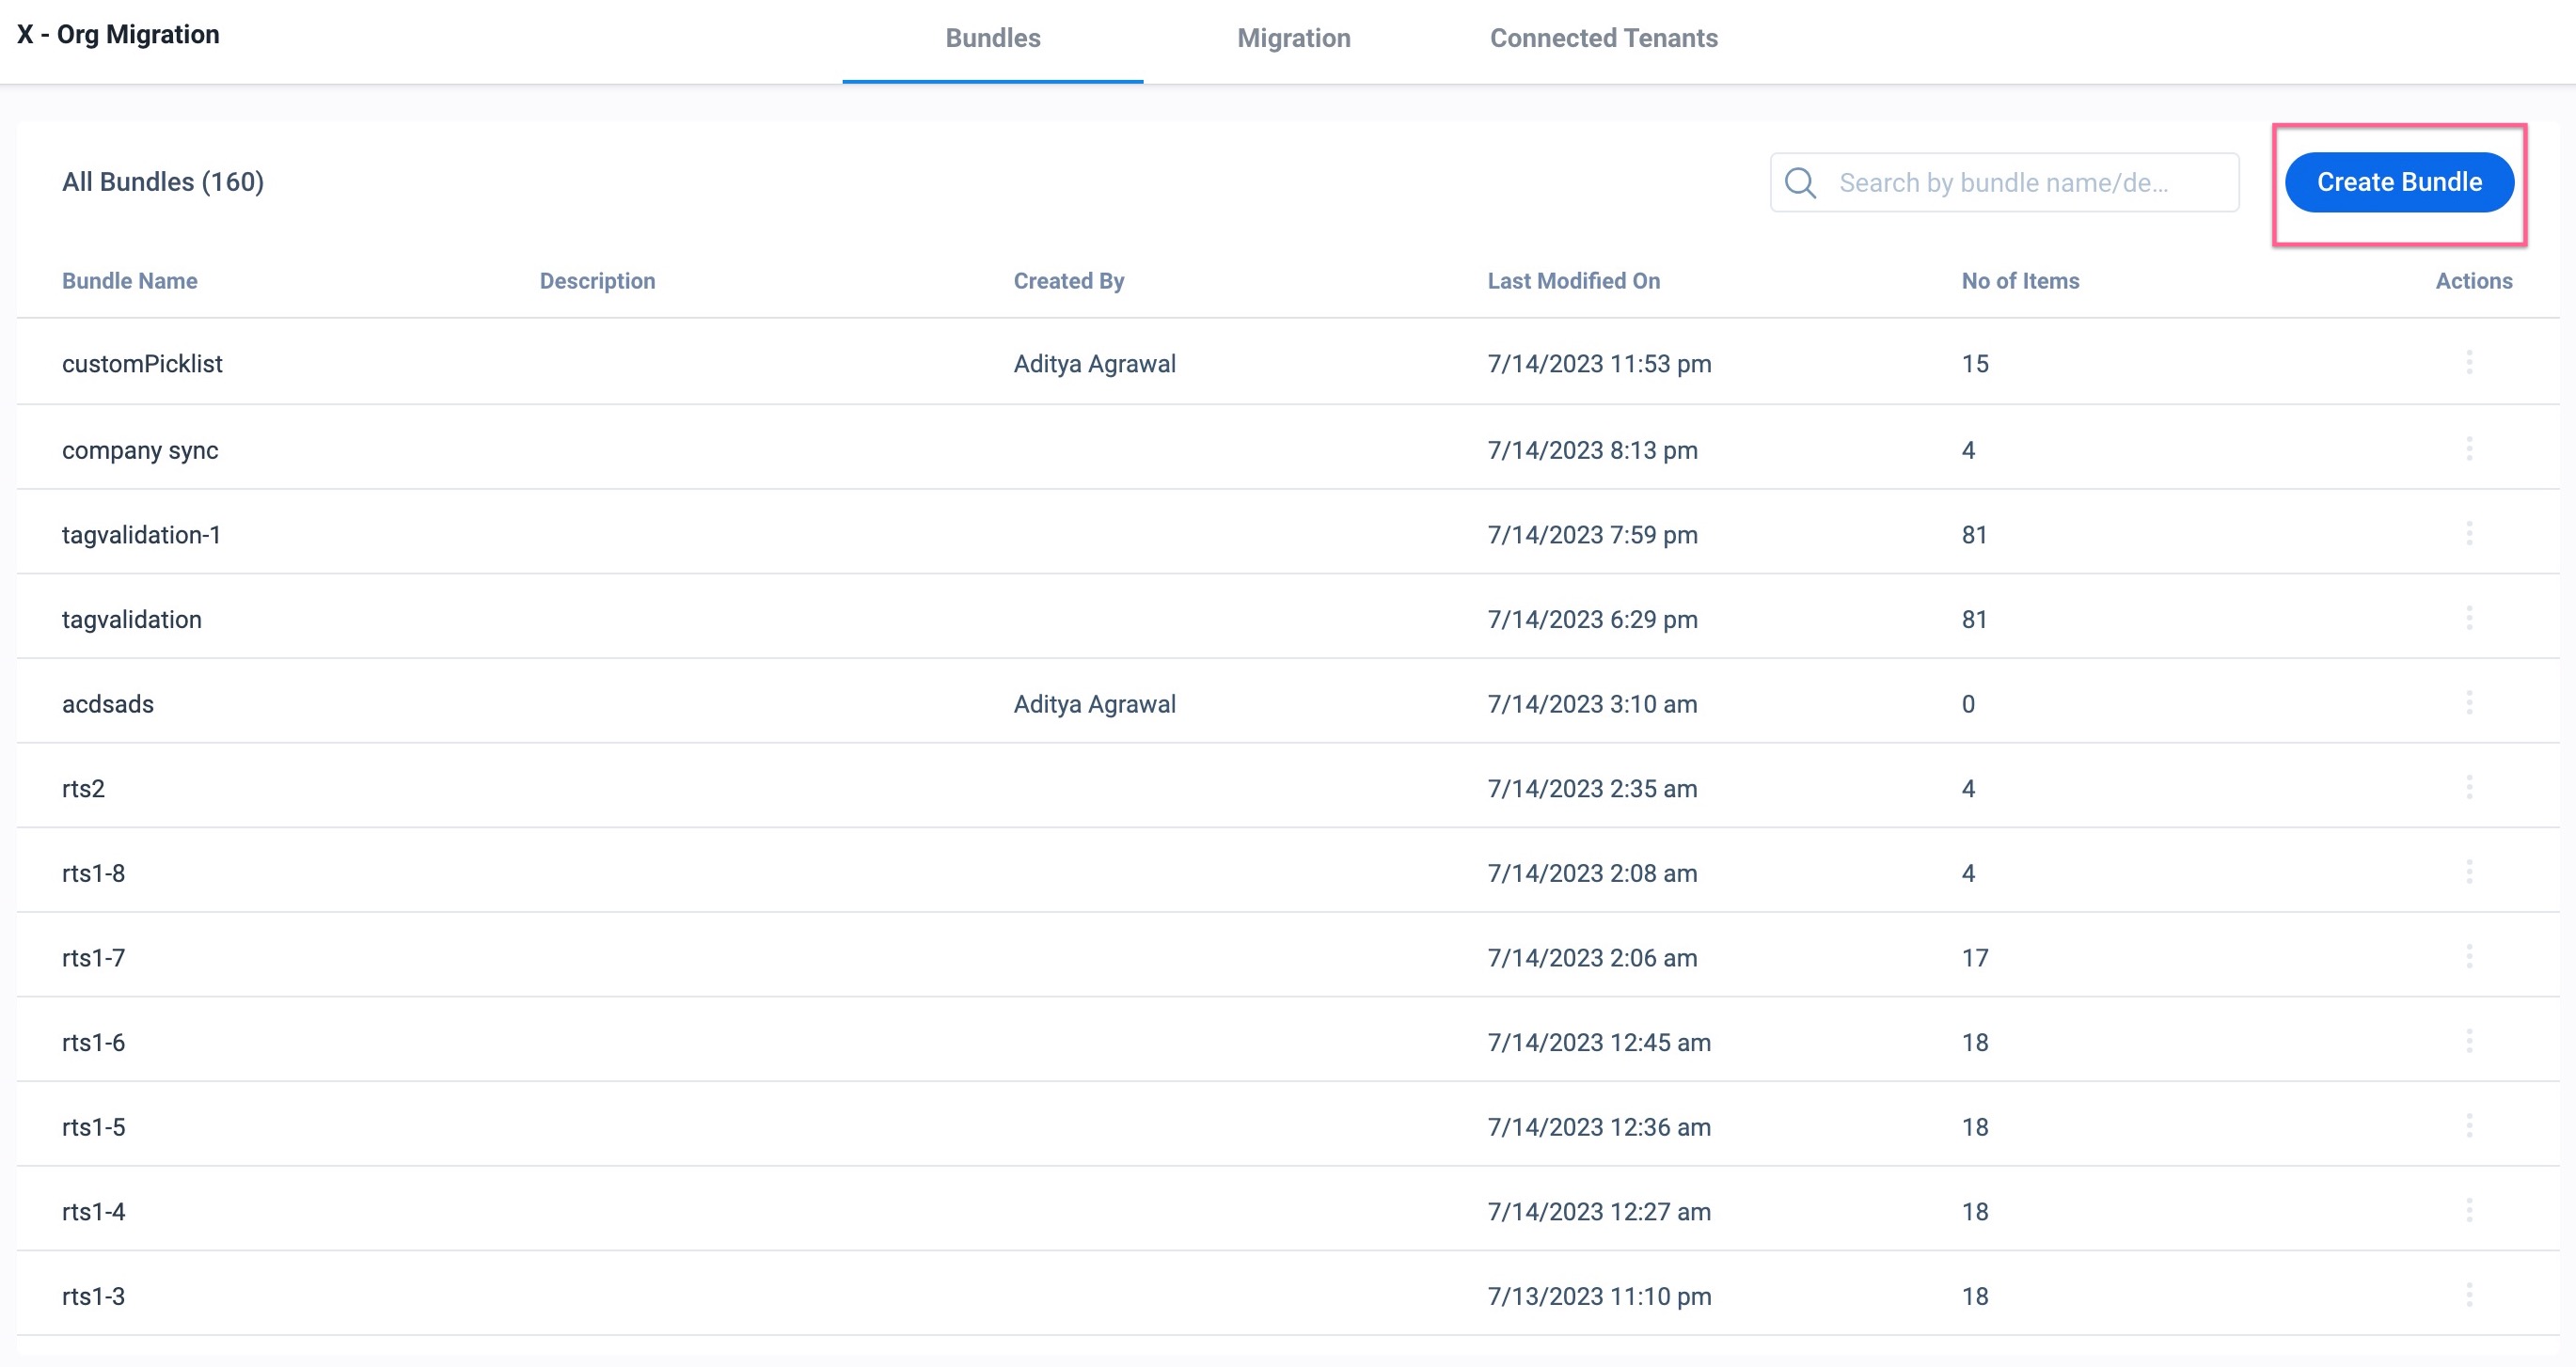
- Navigate to the Administration > General > X-Org > Bundles tab.
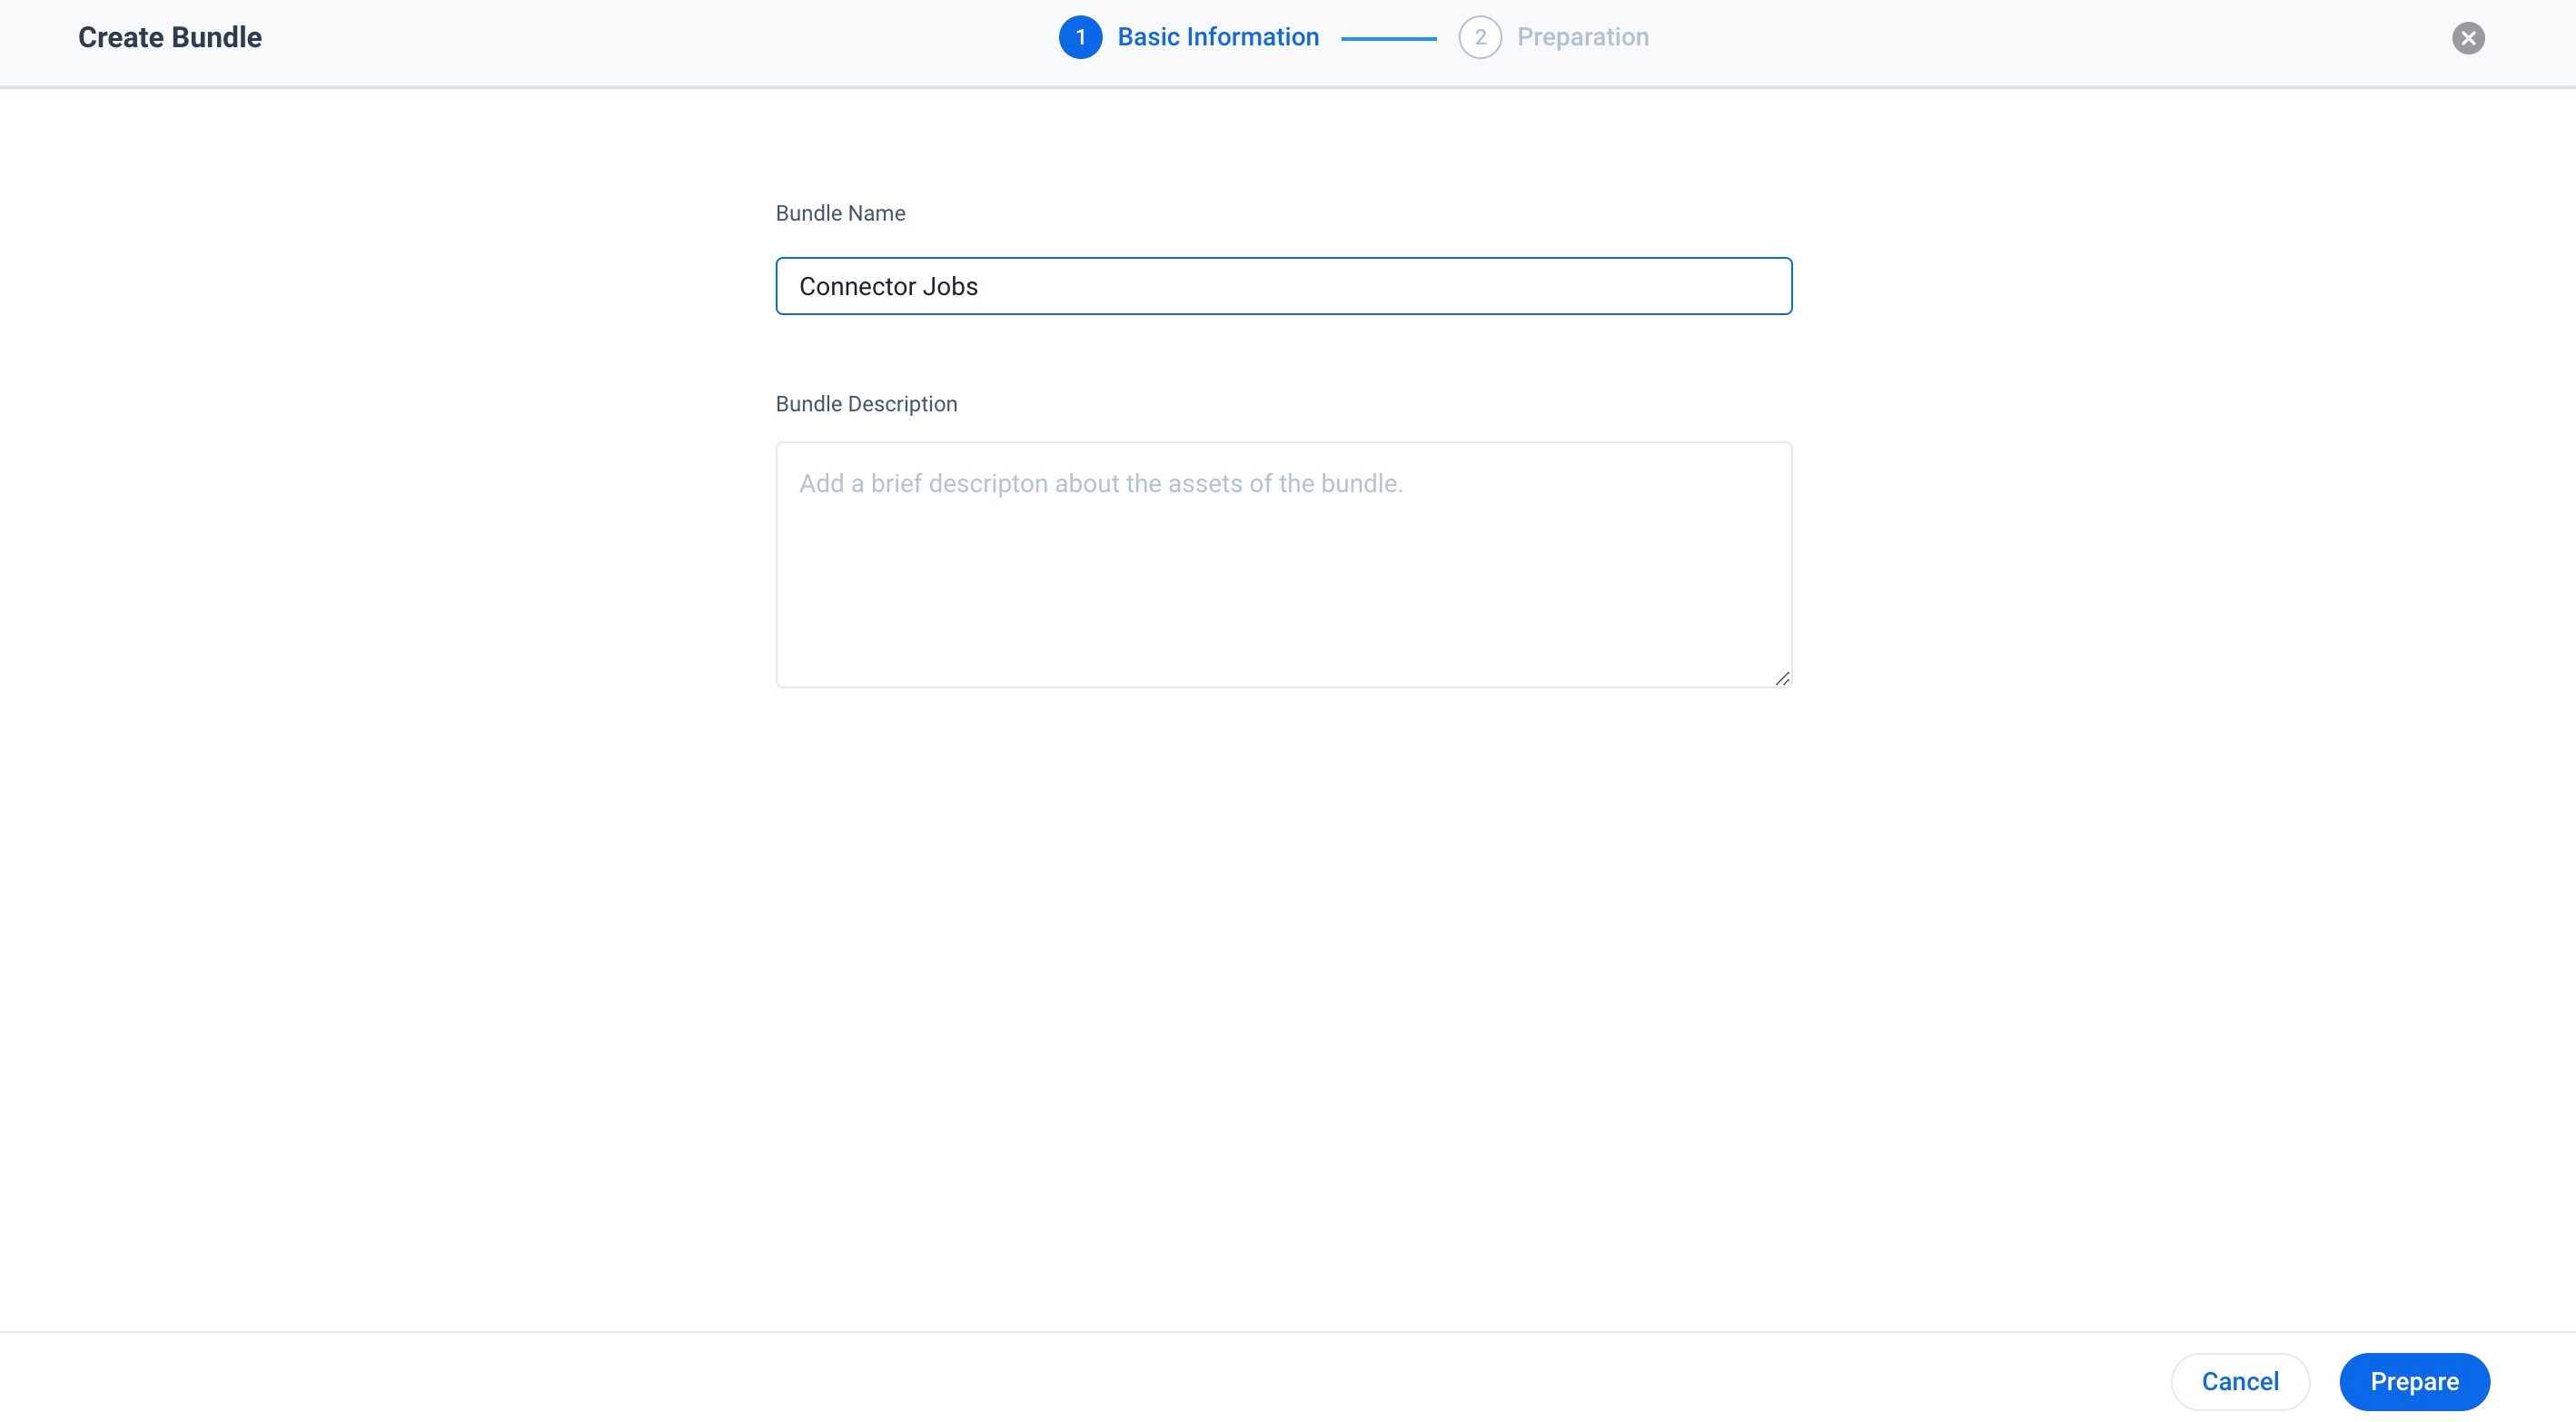
- Click Create Bundle. The Basic Information step is displayed.
- In the Bundle Name field, enter a unique name for the bundle.
- In the Bundle Description field, enter a brief description of the bundle.
- Click Prepare. Preparation page appears.
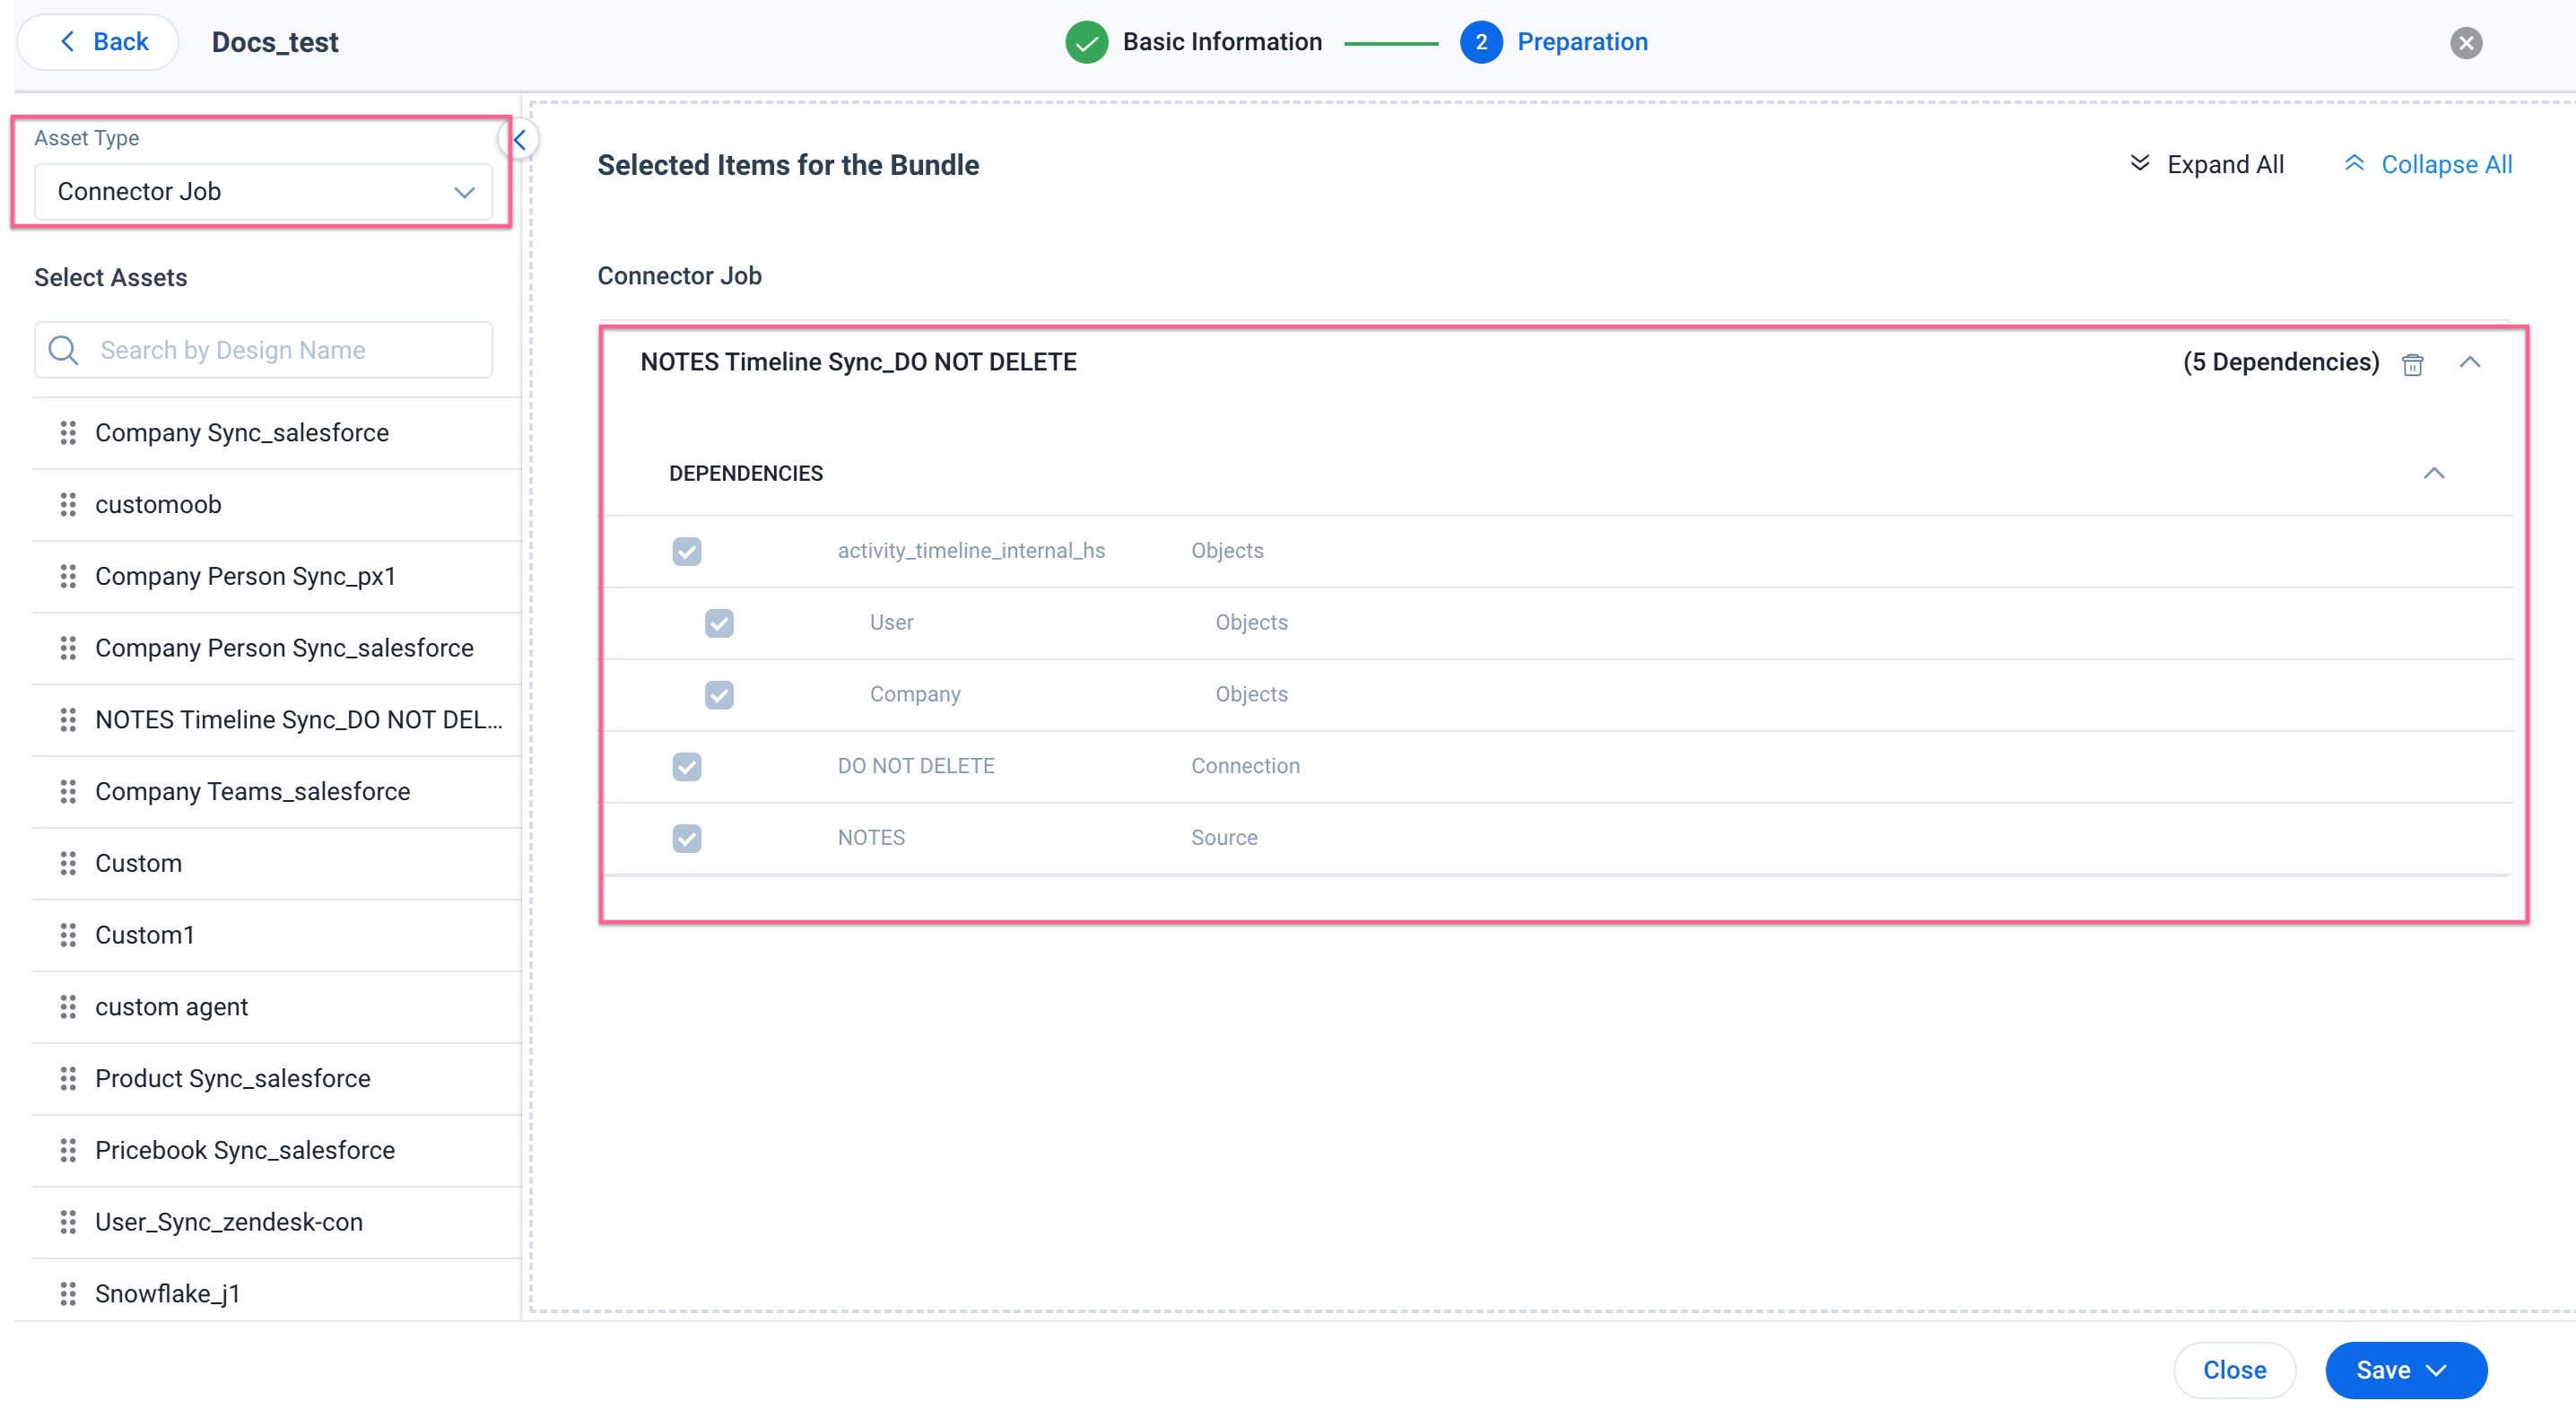
- From the Asset Type dropdown, select the required type of asset.
- From the Select Assets, select the required type of entity.
- Drag and drop the assets from the left pane to the Preparation screen
Note: Expand the assets to view the dependencies of the Connector Job. - (Optional) Click Save to save the changes and migrate the assets later.
- Click Save and select Save & Migrate to start the migration.
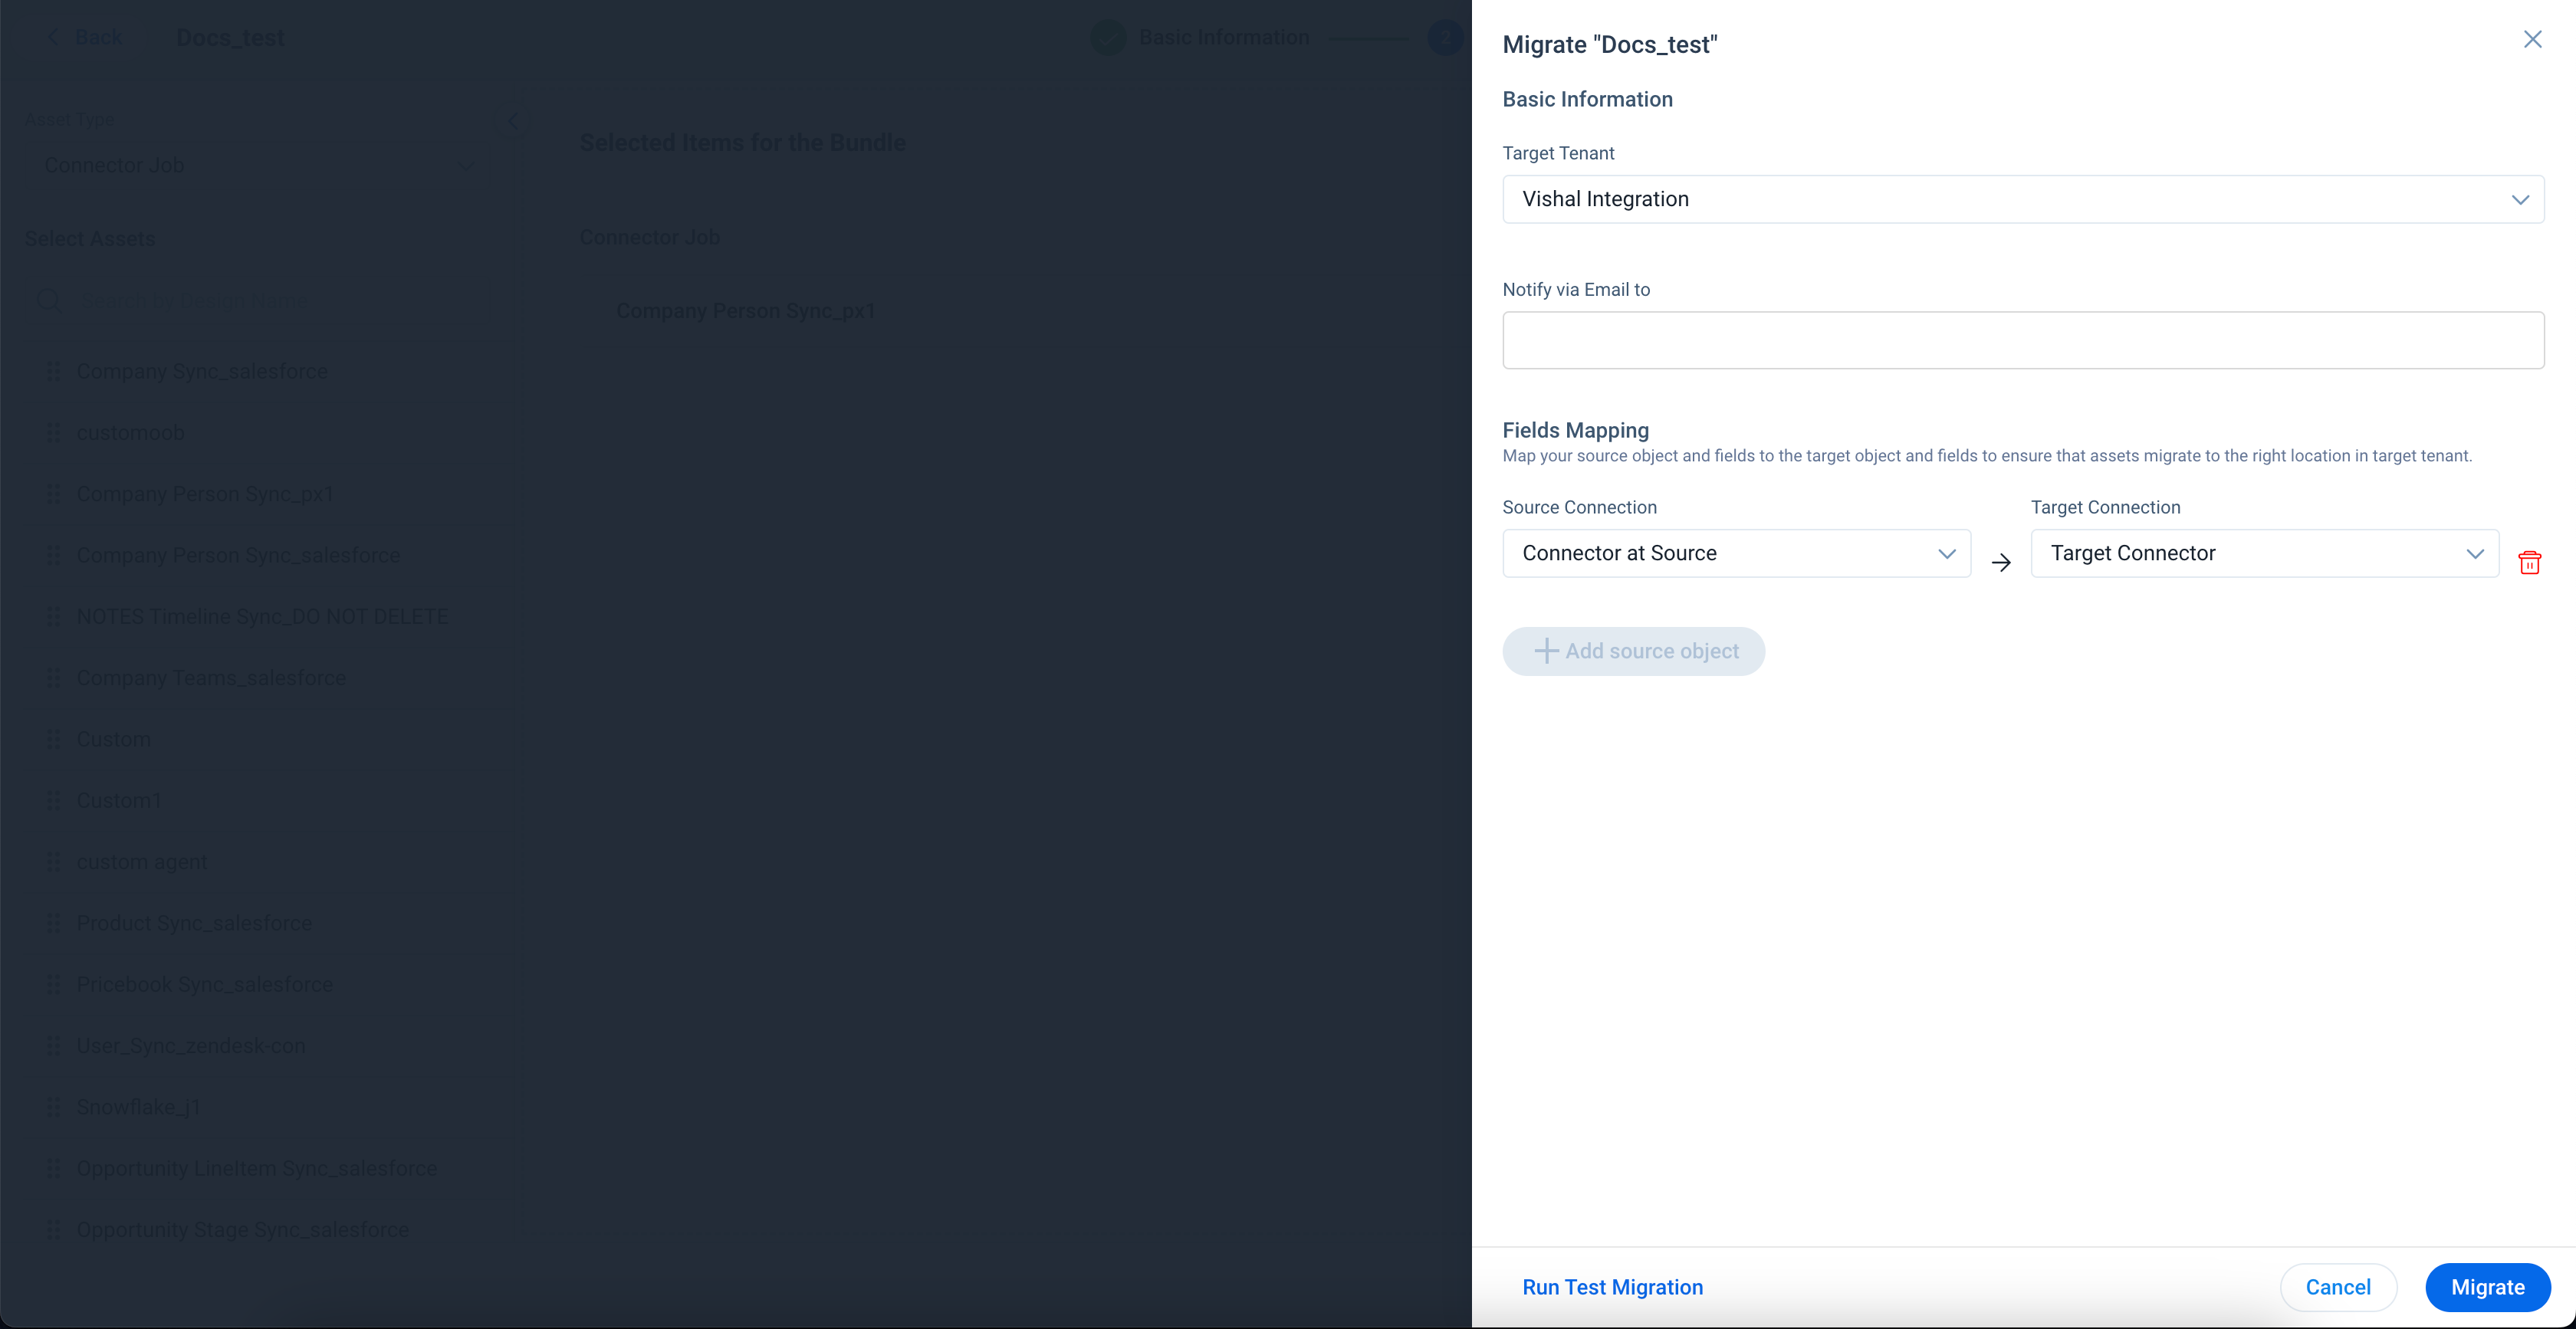
- From the Target Tenant dropdown, select the Target org connection.
- In the Notify via Email to field, enter the email ID to receive notification about the migration status.
- In the Fields Mapping section, click + Add Source Asset to map the source connection to the target connection for the successful migration.
Note: You can add multiple source objects to map the respective target objects. - (Optional) Click Run Test Migration to test the migration of assets to the target org.
- Click Migrate to submit the migration request.
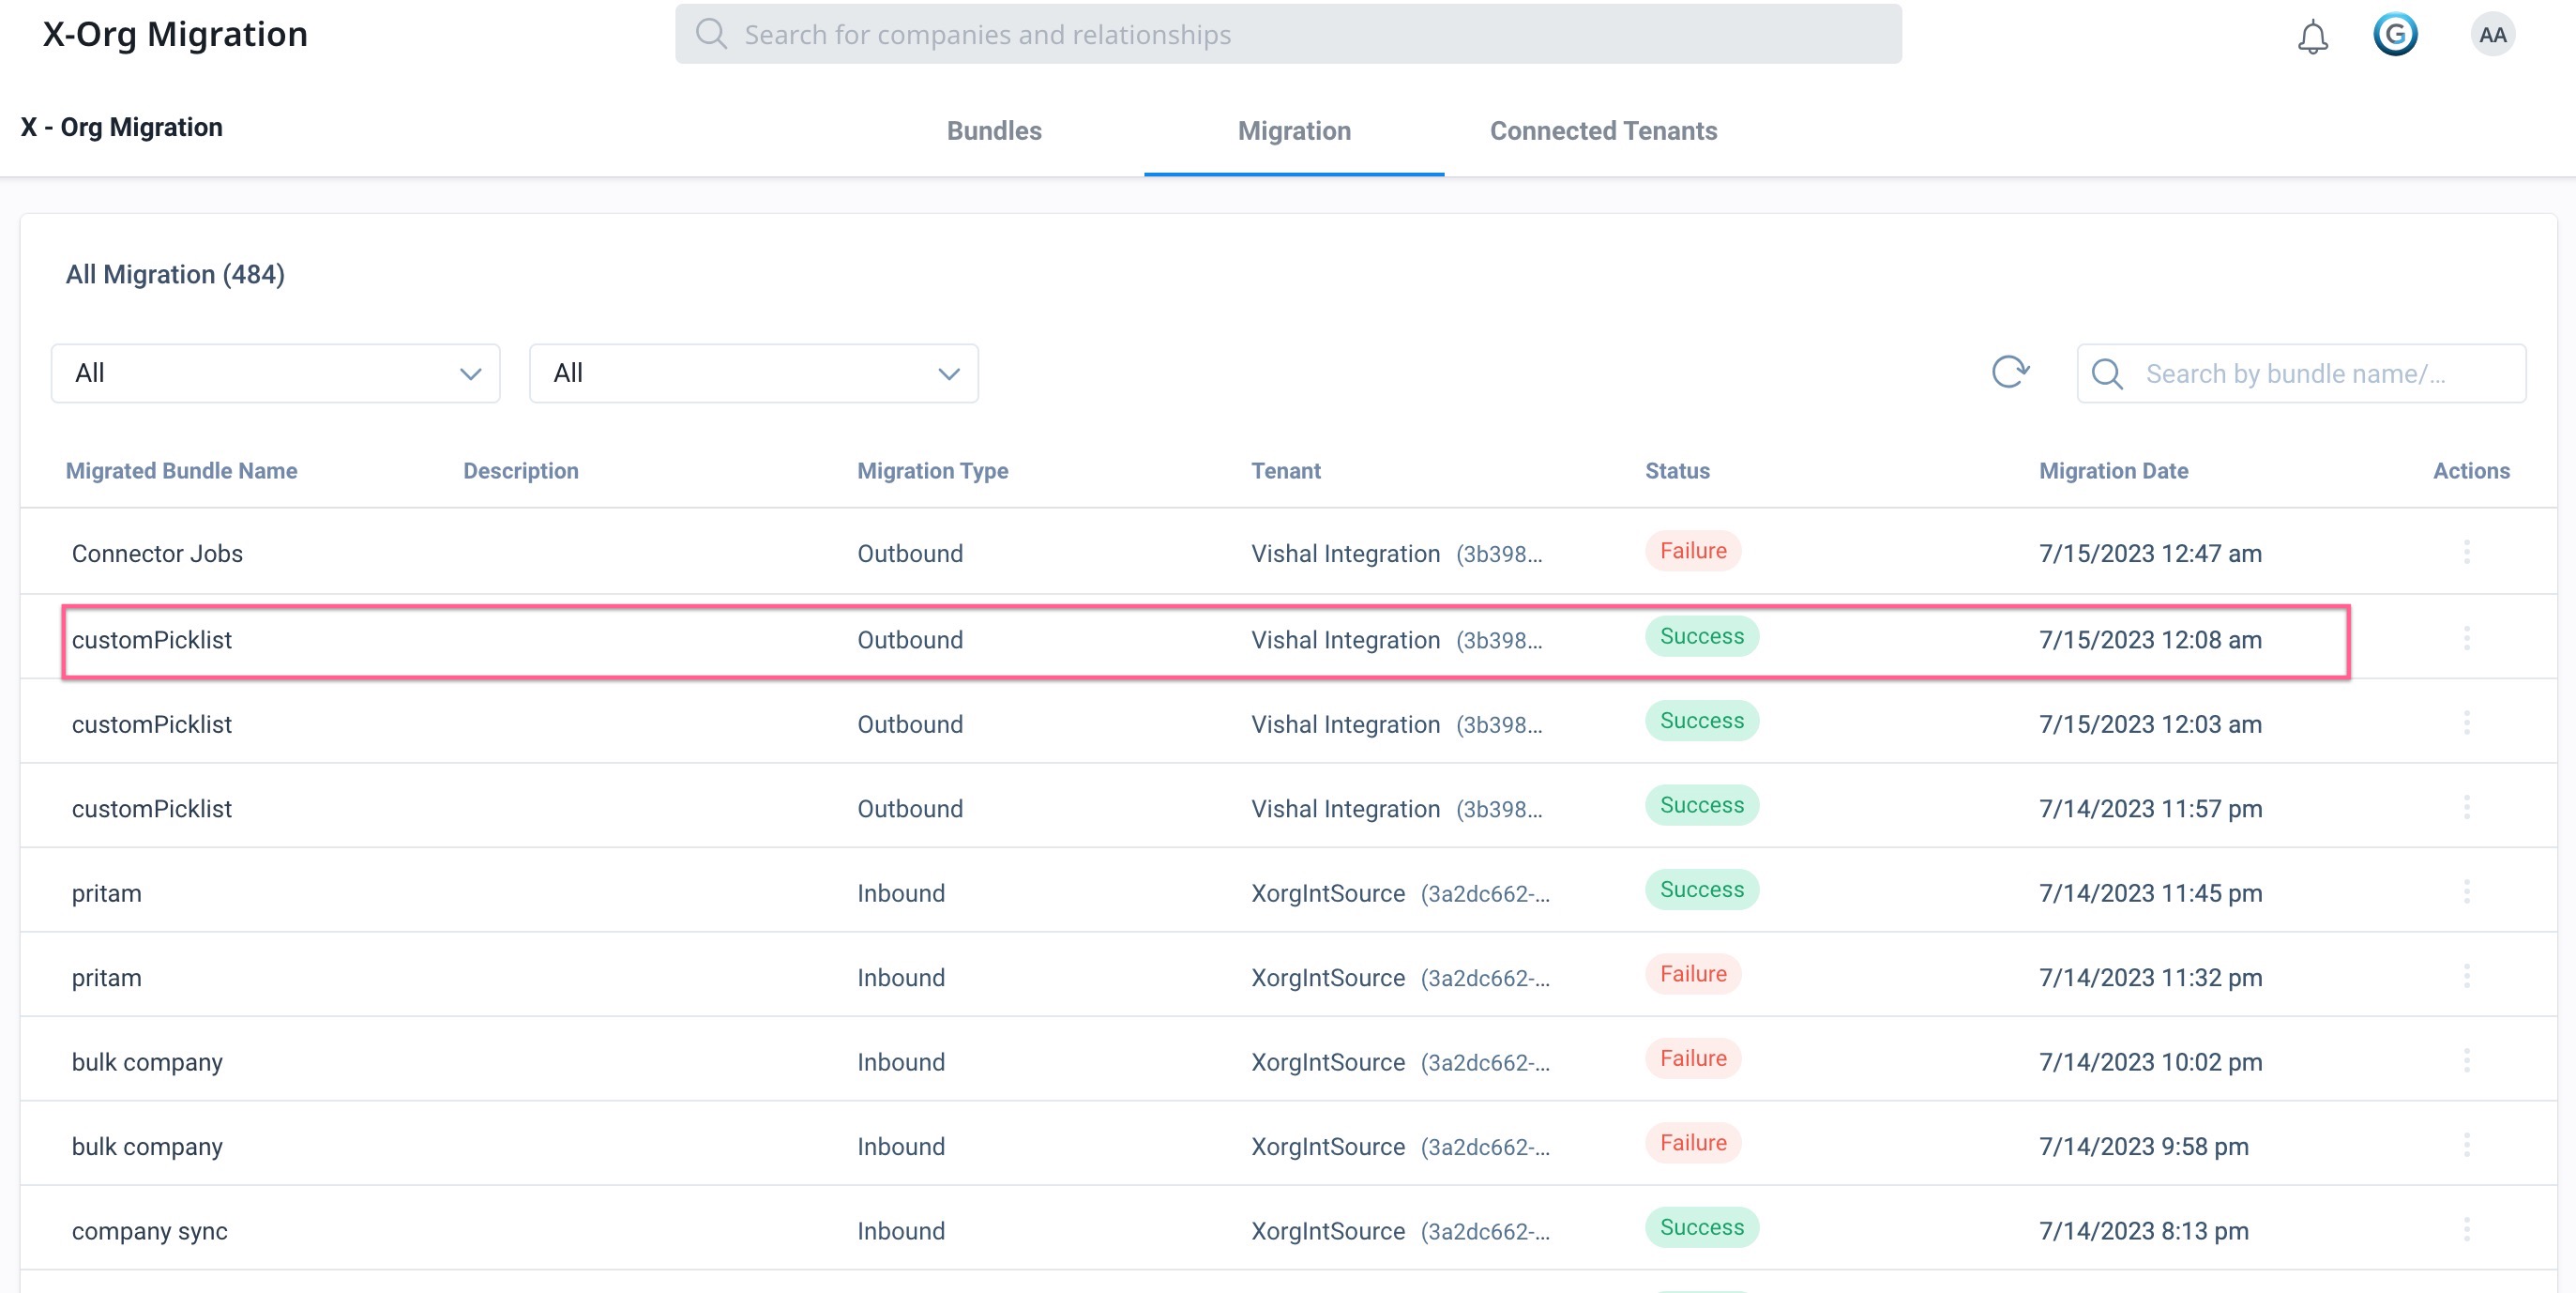
Admins can see the status of migration from the Migration tab.
To know about the different options available in the Bundle, Migration, and Connected Tenants, refer to the X-Org Migration article.