Custom Views in Renewal Center
Gainsight NXT
This article explains the Views feature in Renewals. After reading this article, readers will be able to use predefined views and create custom views in Analyze and Forecast pages. Also, update the share access of views based on their requirements.
Overview
Multiple teams are involved in renewals. As a result, different personas such as Executives, Customer Success Managers (CSMs), and Renewal Managers use Renewals. These users should have access to the data since they each have different requirements. The Custom Views feature in Renewals solves this use case.
Note: Users can filter the renewal data using the Custom Fiscal Periods as configured by their admins. For more information, refer to the Custom Fiscal Year section in the Applications Setting article.
Analyze
Analyze View helps you create and manage the key metrics related to your renewals by using a set of widgets and global filters. This view helps in visualizing the most important metrics and in taking the necessary action.
Key Benefits:
- Create multiple views and share with users across the organization.
- Filter out the necessary data (example: company-specific metrics) and create a view of the same.
- Create multiple versions of the same chart with different Forecast periods to analyze the behavior changes.
Use Predefined Views
Renewals provides three Predefined Views that address a few common use cases. The default forecast period selected for these views is the Current Quarter.
Following Predefined Views are available in the Analyze page:
- All Opportunity: For executives who need to see an analysis of all opportunities.
- My Opportunity (CSM): For CSMs who need to see all opportunities related to the accounts they manage. However, the CSMs can edit and save this as a new view using the Save As option.
- My Opportunity (Opp Owner): For opportunity owners who need to see all opportunities they own. This view is editable.
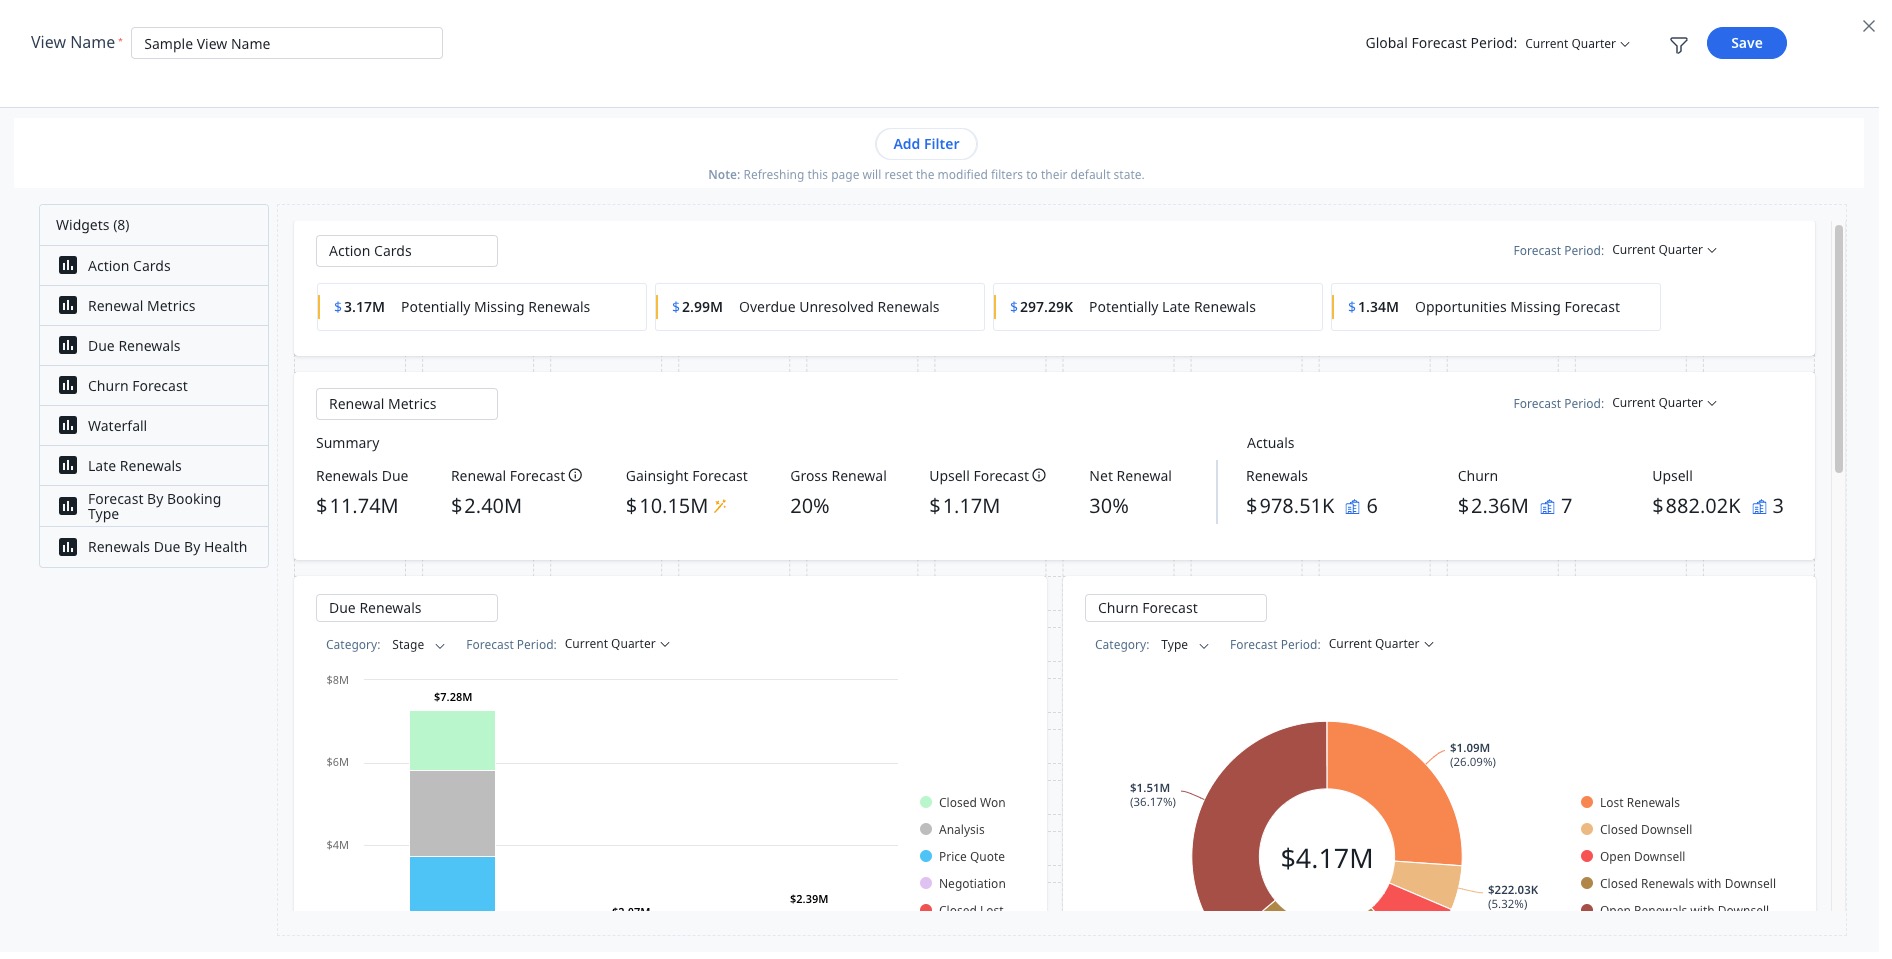
Create Custom View
Following features are available to configure Analyze View:
- Manage view Actions (Create/Edit/Delete)
- Add Widgets
- Configure Permissions
To create a View:
- Navigate to Renewals > Analyze.
- From the Views dropdown, select Create New View.
- Click Add Filter in the global filters ribbon. The Configure Filters slide-out panel appears.
- Click Add Filter. The criteria you set here refines the required opportunities for the view.
- Click Save. Selected filters are saved.
- From the Widgets pane, drag and drop the required widgets to the View.
- (Optional) To delete a widget, click the Delete icon on the top right corner of the widget.
- Enter the View Name.
- Click Save. A new view is created.
Notes:
- Use the Save and Save As options that appear when you add/update the filters to save the changes.
- You need to add at least one widget in the view to enable the Save option.
Add Widgets
Renewals offers nine different widgets to help sort the renewal metrics to suit your business requirements. You can add up to 20 widgets in a view.
For more information on how to configure different widgets, refer to the Widgets section of the Renewal Center User Guide article.
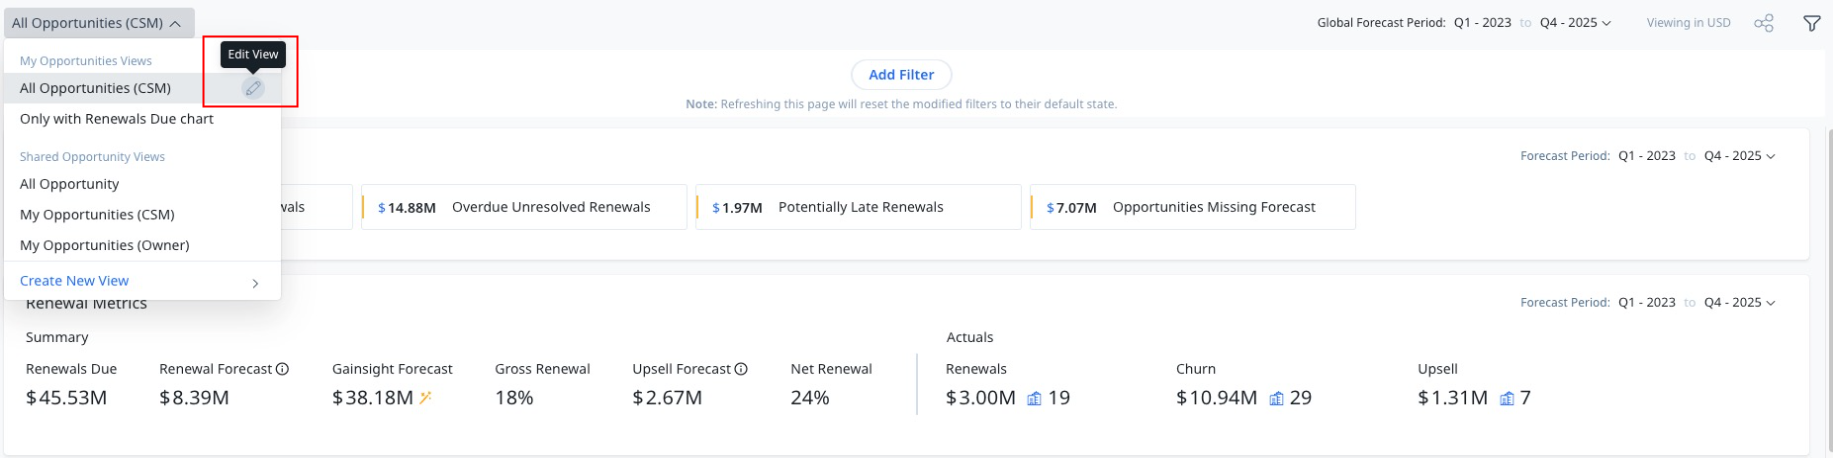
Edit View
You can update the details of a View that you have created, or that is shared with you along with edit permissions. You can also edit a Predefined View, however it will be saved as a new view.
Editing a view helps in making the following changes:
- Add new widgets or remove existing widgets.
- Reposition or resize widgets.
- Update the Forecast period for widgets.
- Update the widget category.
- Save the column configurations.
To edit a View:
- Click the Edit icon for the selected view.
- Click Save to make changes to the existing view. (Or) Click Save As New to create a copy of the view.
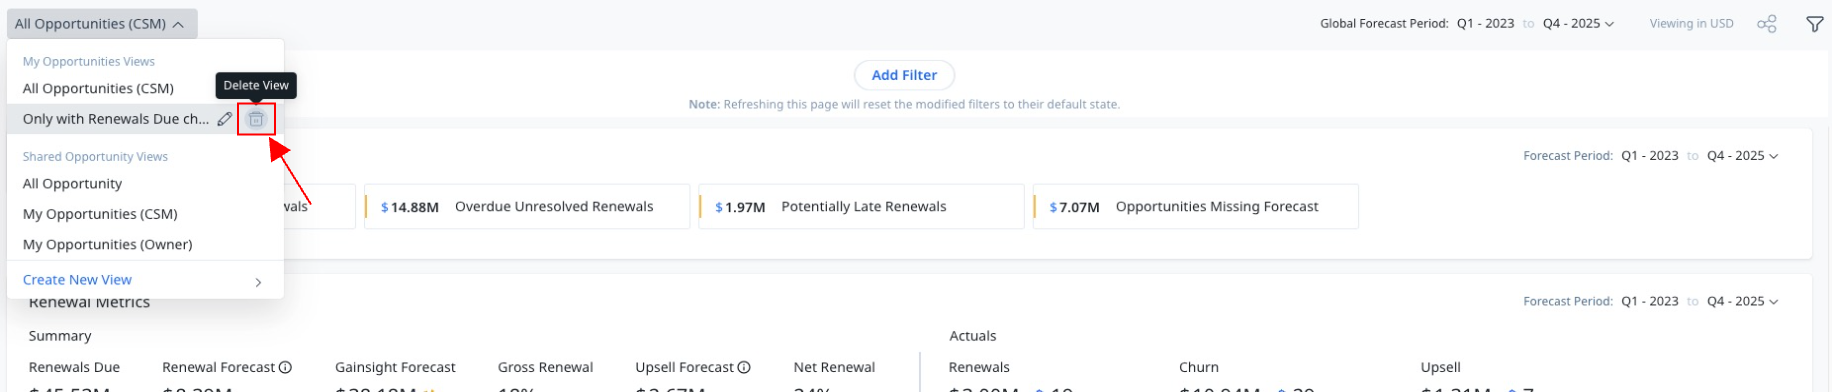
Delete View
You can click the Delete icon to remove a view. However, deleting a view that you are currently viewing is not allowed. Navigate to another view and then delete the required view from the list of views.
Forecast
Renewals Forecast page addresses users need to see their list of opportunities and accounts in various scenarios in order to forecast efficiently. The opportunity and account level views help to create and manage the list of opportunities and accounts that you need to monitor.
Use Predefined View
At the opportunity level, Gainsight provides My Opportunities (CSM), My Opportunities (Opp Owner), My Renewals Due (CSM), and My Renewals Due (Opp Owner) as out-of-the box views. At the account level, My Forecast view is available as the out-of-the-box view.
These predefined views help to view, edit, and share the list of opportunities and accounts that may not be progressing appropriately. Thereby, allowing CSMs to take quick actions.
For more information on actions that CSMs can perform on the My Forecast view, refer to the Account Based Forecasting (Company View) for CSMs article.

Create Custom View
You can create views in the Forecast page to have a quick snapshot of different sets of opportunities sliced and diced with various filter criteria, and take action accordingly.
To create a View:
- Navigate to Renewals > Forecast.
- From the Views dropdown, select Create New View.
- Select the Opportunity View radio button.
- Click Add Filter in the global filters ribbon. The Configure Filters slide-out panel is displayed.
- Click Add Filter. The filter criteria you set here refines the list of opportunities for the view.
- Click Save. Selected filters are saved.
- Enter the View Name.
- Click Save. A new view is created.

Notes:
- Any global filter fields you add to the View homepage are not saved in the views. Edit a view and then add the filters in order to save the filter criteria in the view.
- You need to add at least one filter criteria in the view to enable the Save option.
- You will not be able to create an Opportunity View if the admin has turned OFF the Show Opportunity View toggle switch. For more information on how the admin can control the Opportunity Views, refer to the Show/Hide Opportunity View section of the Configure Renewal Center article.
Edit View
You can update the details of a view that you have created, or that is shared along with edit permissions to you. You can also edit a Predefined View.
Editing a view helps you make the following changes:
- Add new filter criteria to update the list of opportunities in a view
- Create a new copy of an existing view
To edit a View:
- Click the Edit icon for the selected view.
- Click Save to make changes to the existing view. (Or) Click Save As New to create a copy of the view.

Delete View
You can click the Delete icon to remove a View. However, deleting a View that you are currently viewing is not allowed. Navigate to another view and then delete the required view from the list of views.
Share Views
As the owner of your views, you have the privilege of sharing the views with other users. The user actions on the shared views depend on the view permission type that you assign.
Following view permission types are available:
- Private
- Public
- Give Access to Specific People
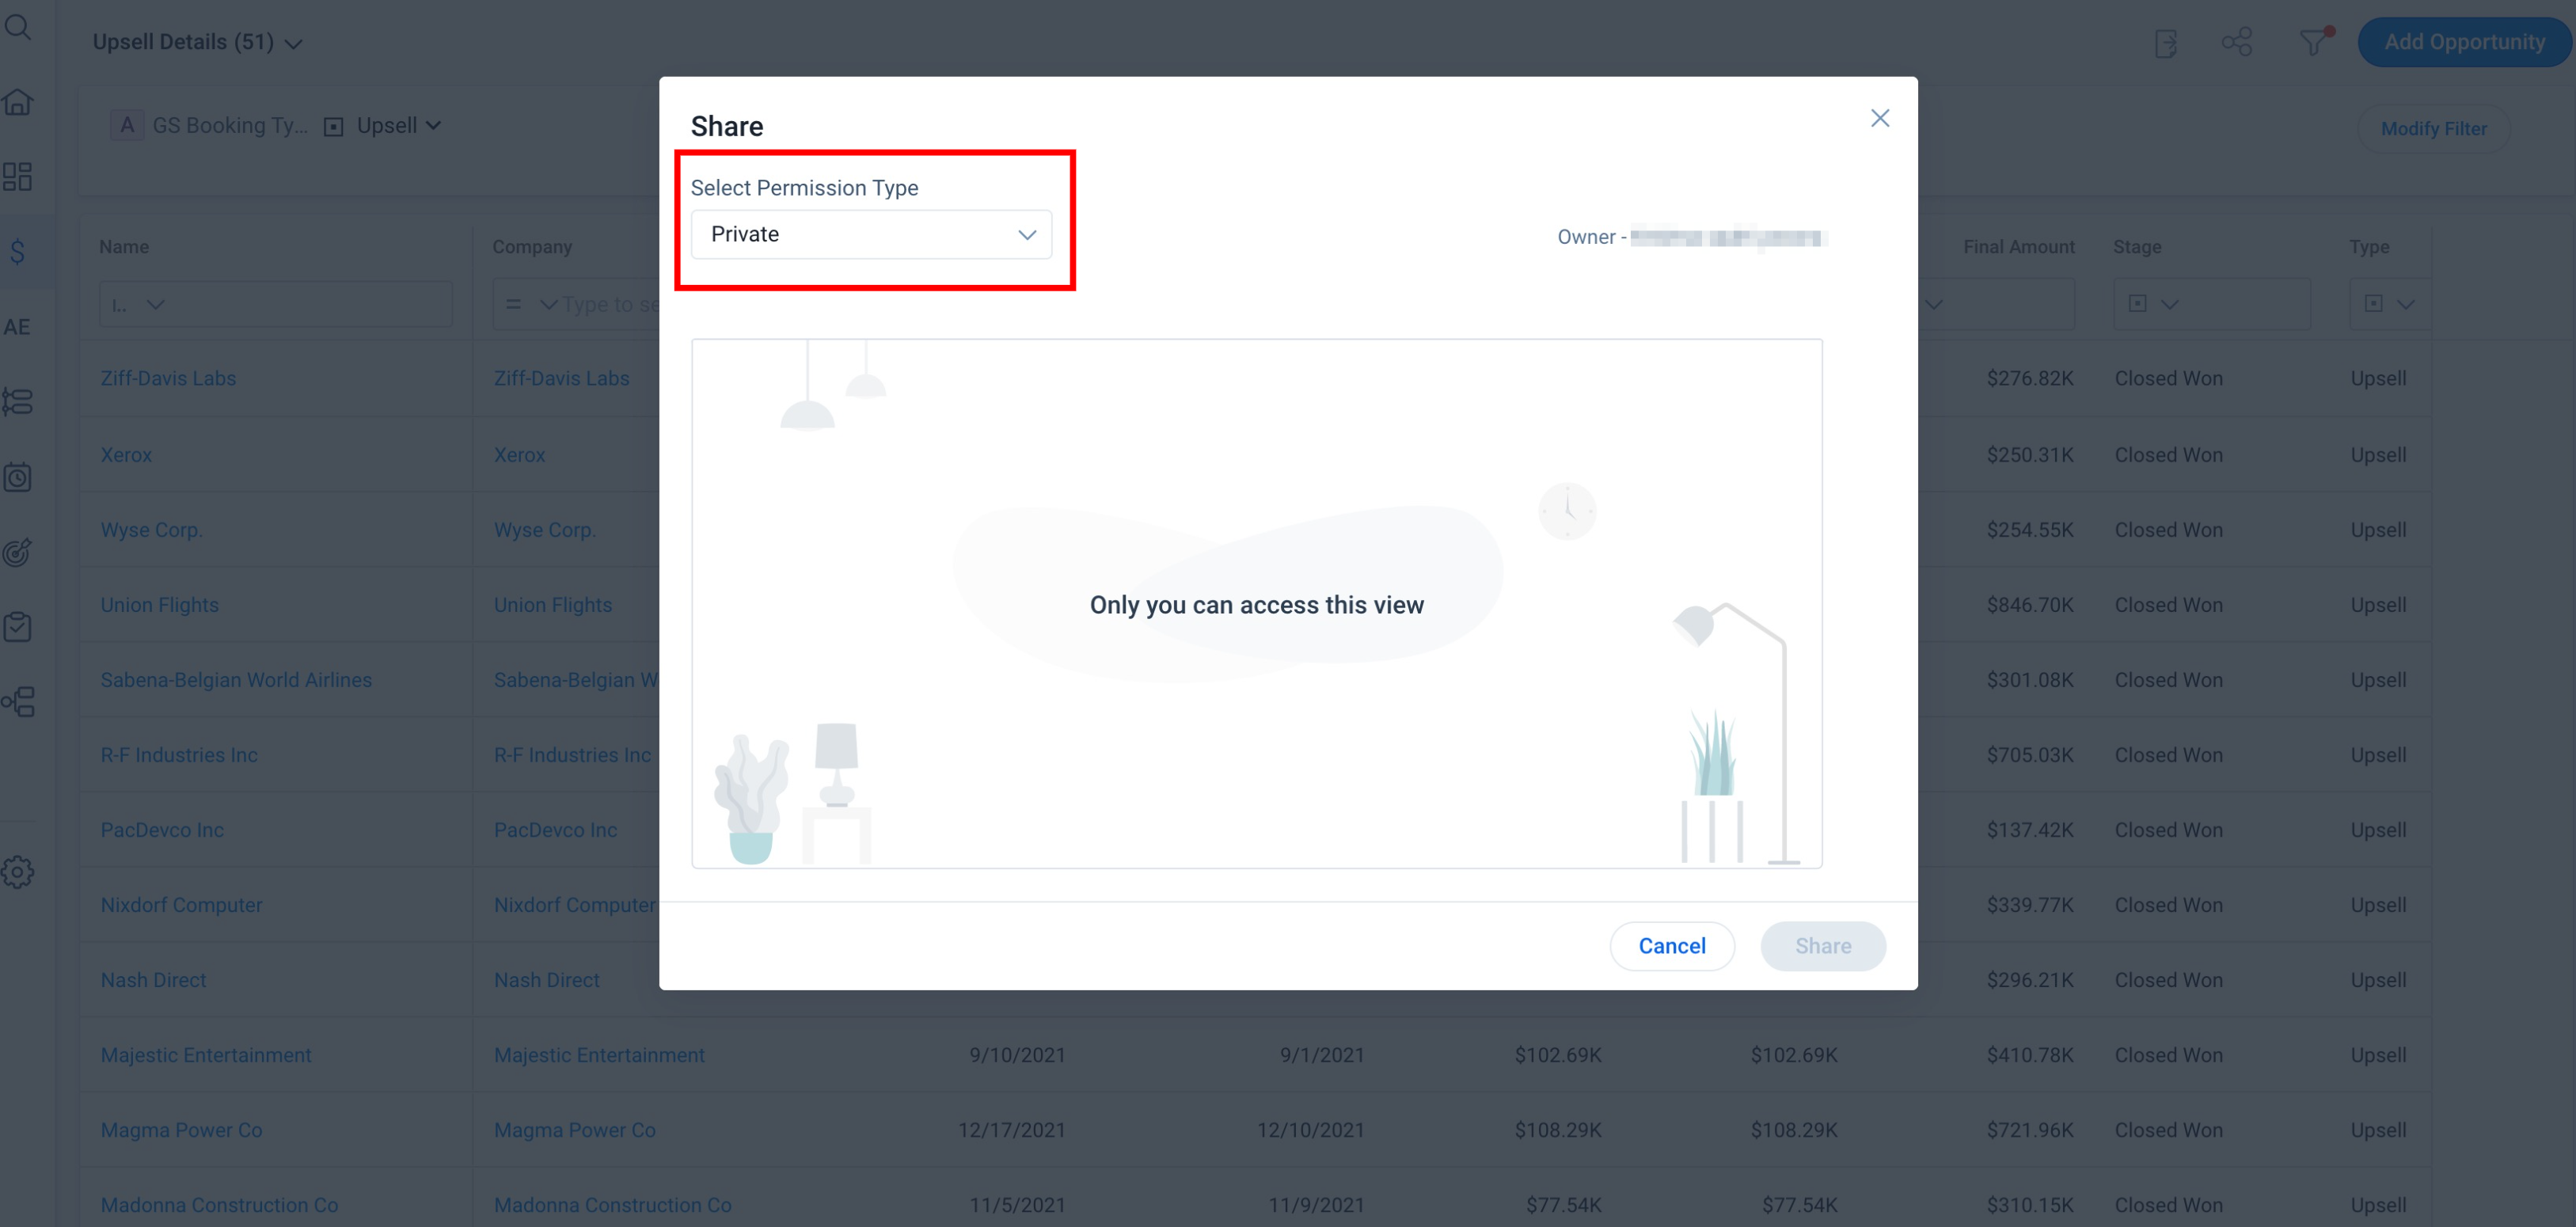
Private
Access to a view is restricted to the owner when the permissions are set as Private. When you create a view, the permission type is set as private by default. If you have shared a view with other users, perform the following steps to set the view as private again.
To assign permission type as Private:
- Click the Share icon on the top right corner of the Views page. The Share window appears.
- From the Select Permission Type dropdown menu, select the Private option.
- Click Share. The view is now set as Private.
Public
The views that are set with the permission type as Public, appear in the list of Shared Views for other users.
To assign permission type as Public:
- Click the Share icon on the top right corner of the Views page. The Share window appears.
- From the Select Permission Type dropdown menu, select the Public - View option.
- Click Share. The view is now shared as public for all the users.
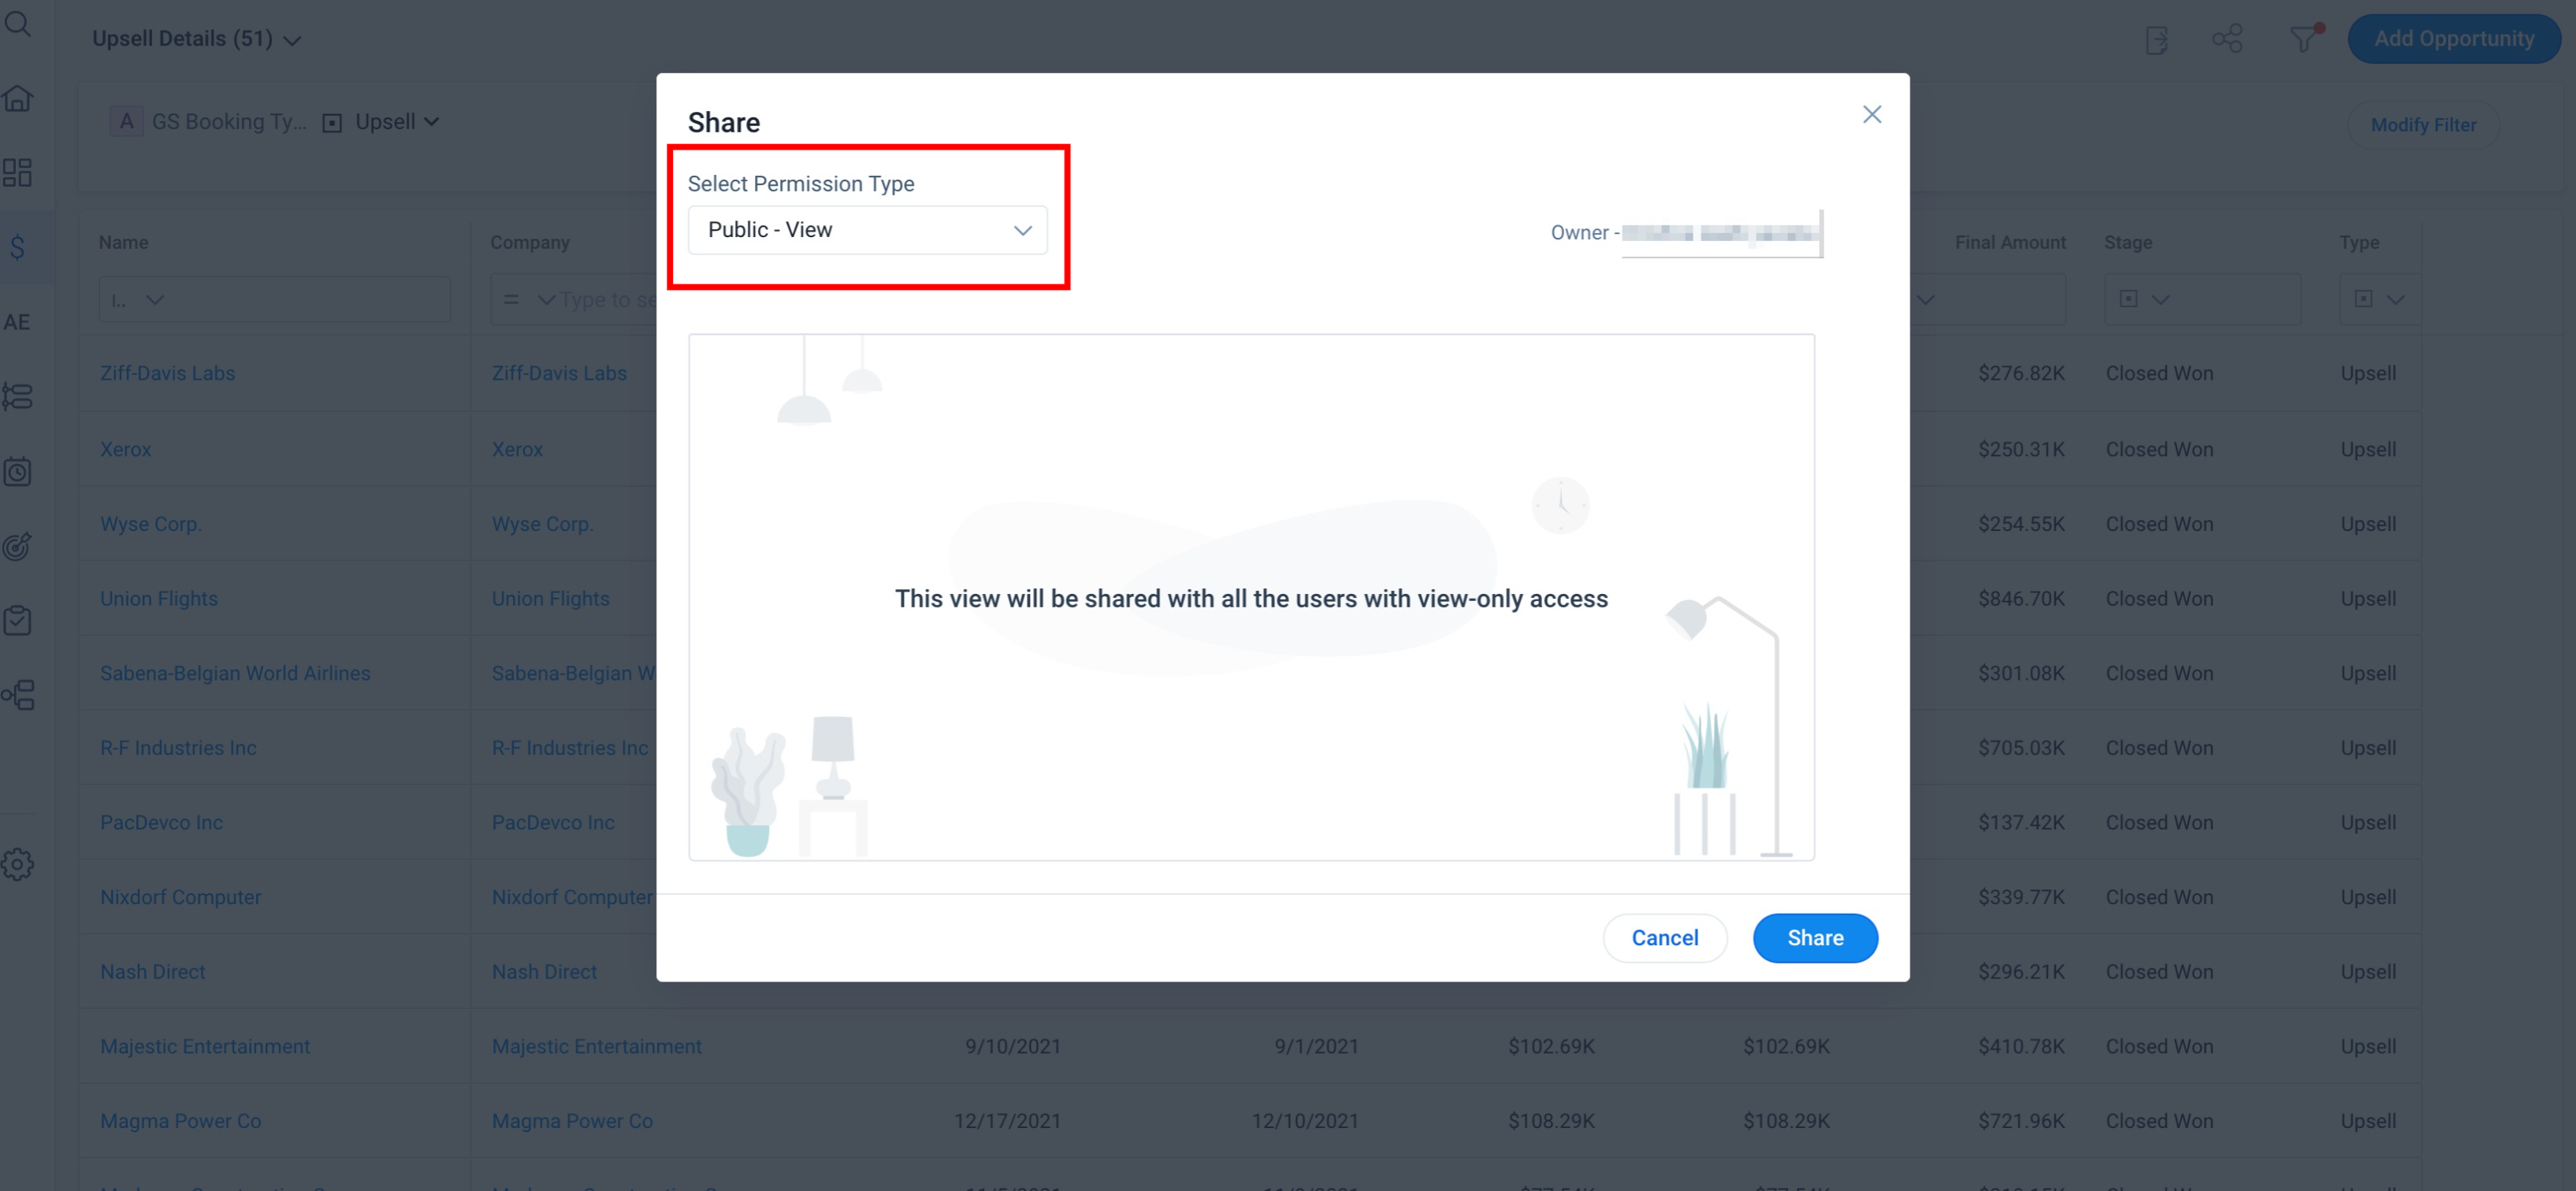
Note: When a view is shared as public, the edit option is enabled for the shared users. However, such users cannot edit the original view. Any changes made while editing the view are saved as a new copy of the view.
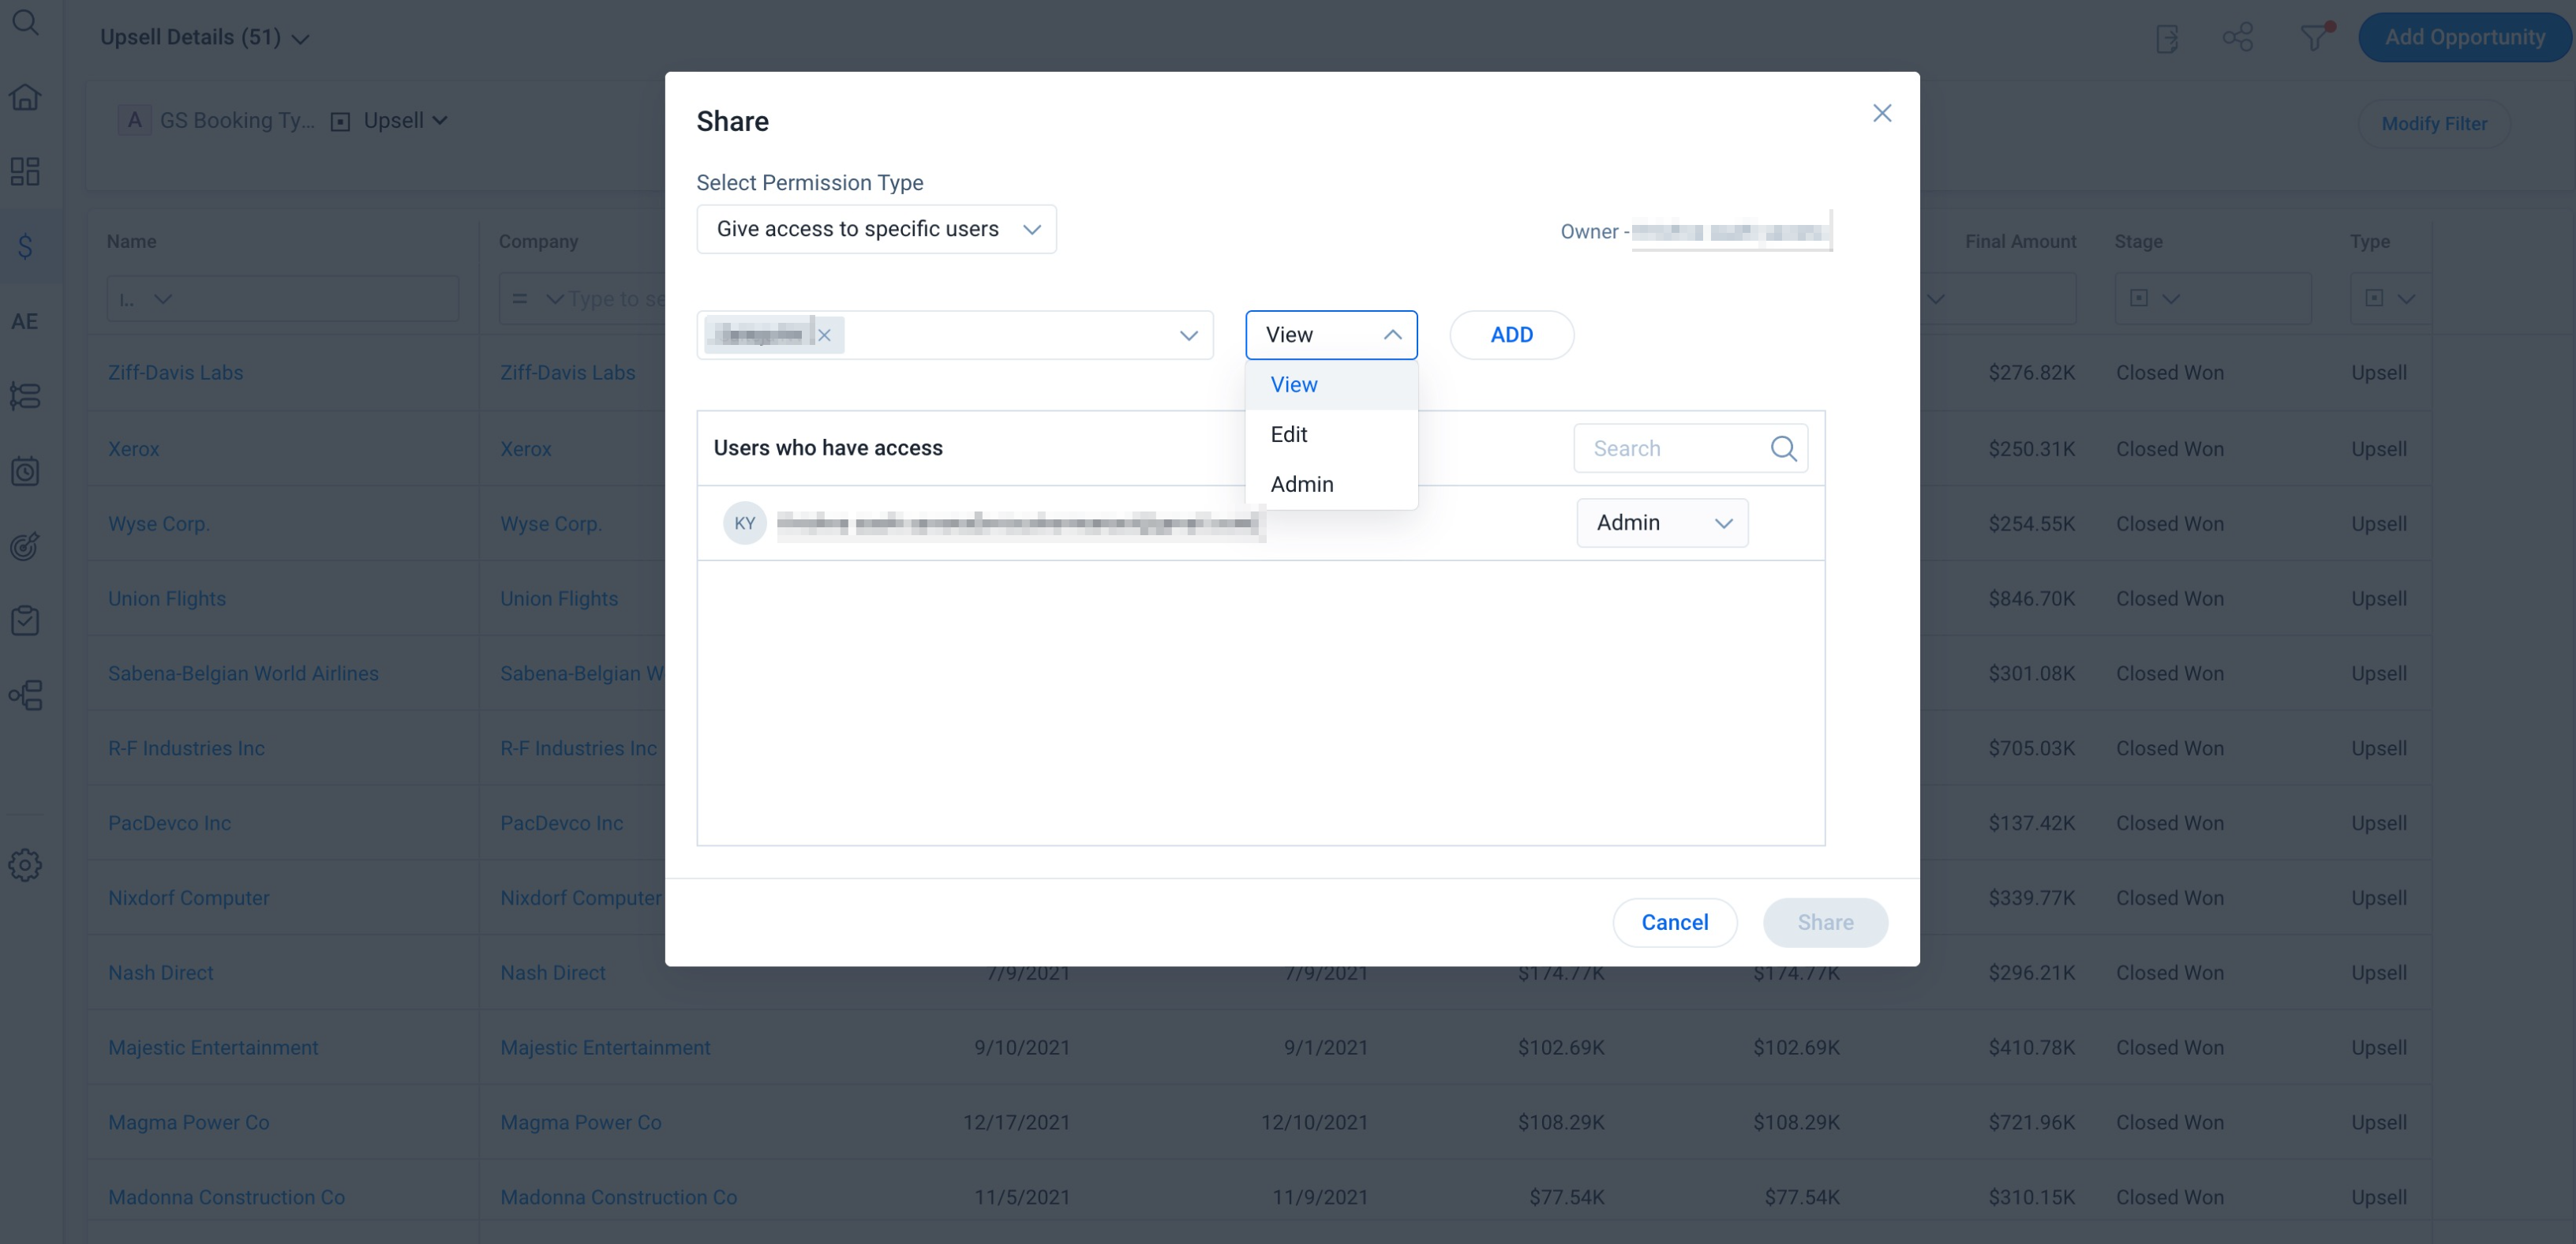
Give Access to Specific People
Assigning this permission type entitles specific users with different access rights on a view.
To assign this permission:
- Click the Share icon on the top right corner of the Views page.
- From the Select Permission Type dropdown, select the Give access to specific people option.
- Search the name of the intended user by entering at least 3 alphabets from the name.
Note: You can also assign this permission to user groups. - After selecting the user, select one the following access rights:
- View: Allows the user to see the view and save as a copy
- Edit: Allows the user to edit the original view and save the changes.
- Admin: Allows the user to edit and share the original view, even to override the permissions assigned by the owner.
- Click Share. The view is now shared with the selected users.
Scenarios
- If a user (who received shared permission as admin to a view) deletes the owner from the access list, then the ownership of the view is transferred to the admin.
- When a view is shared with a group of specific users and then the view permission is updated as Public, then the specific users are removed from the access list. The view is made publicly available to all users.
- When an admin changes the permission of a view (created by another user) to Public, then the ownership of the view is transferred to the admin.