Configure Product Requests
Gainsight NXT
This article explains how admins can configure Product Requests feature for Customer Success Managers (CSMs) and Product Managers (PMs) for Aha integration.
Overview
Customer Success Managers (CSMs) and Product Managers (PMs) can leverage Product Requests as a platform to collaborate and work on the enhancement requests received from customers.
The Product Requests consist of an Enhancement Request Form that CSMs can leverage to create the enhancement request and submit it to the Product Managers for approval.
For more information on workflow of Product Requests, refer to the Product Requests Overview article.
To access the Product Requests admins must perform following sequential steps:
- Create a connection between Gainsight and Aha!
- Add a workspace
- Add the Product Requests to C360 Layout
For more information on how to add C360 layout, refer to the Configure 360 Layouts article.
Create an Aha! Connection
Admins must create a connection between Gainsight and Aha! to use the Product Request feature.
IMPORTANT: To have a successful connection with Aha!, the Aha! Account must have roadmaps and Idea advanced packages.
To create an Aha! connection:
- Navigate to Administration > Product Requests.
- Click Navigate to Connectors. The Connectors page appears in a new tab.
Note: Alternatively, admins can directly navigate to Administration > Connectors 2.0.
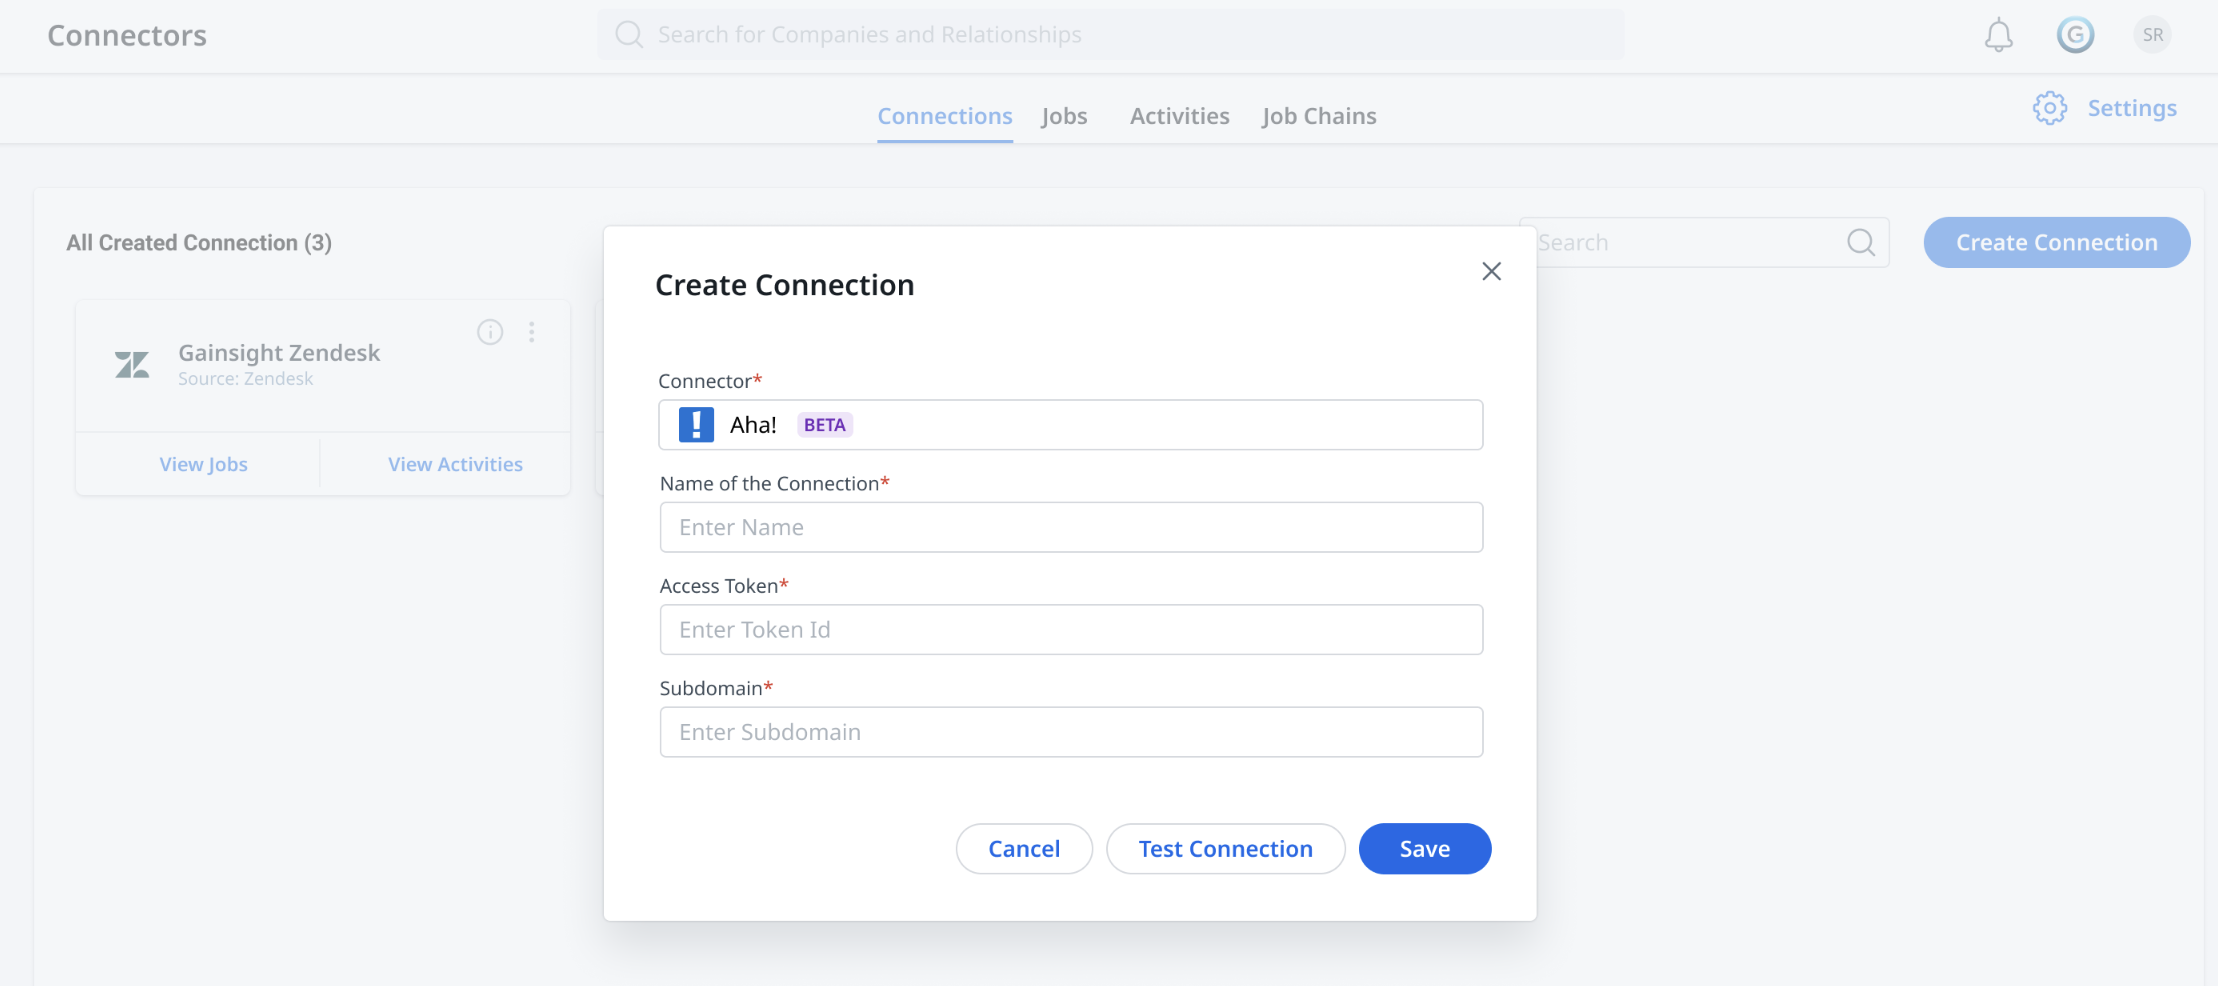
- Click Create Connection. The Create Connection window appears.
- From the Connector dropdown, select Aha!.
- In the Name of the Connection field, enter the connection name.
- In the Access Token field, enter the token ID for the Aha!.
- In the Subdomain field, enter the subdomain value for Aha! integration.
Note: Admin must reach out to Product Management for the token ID and subdomain.
- Click Save. The Connection Successful message appears.
- Click Done.
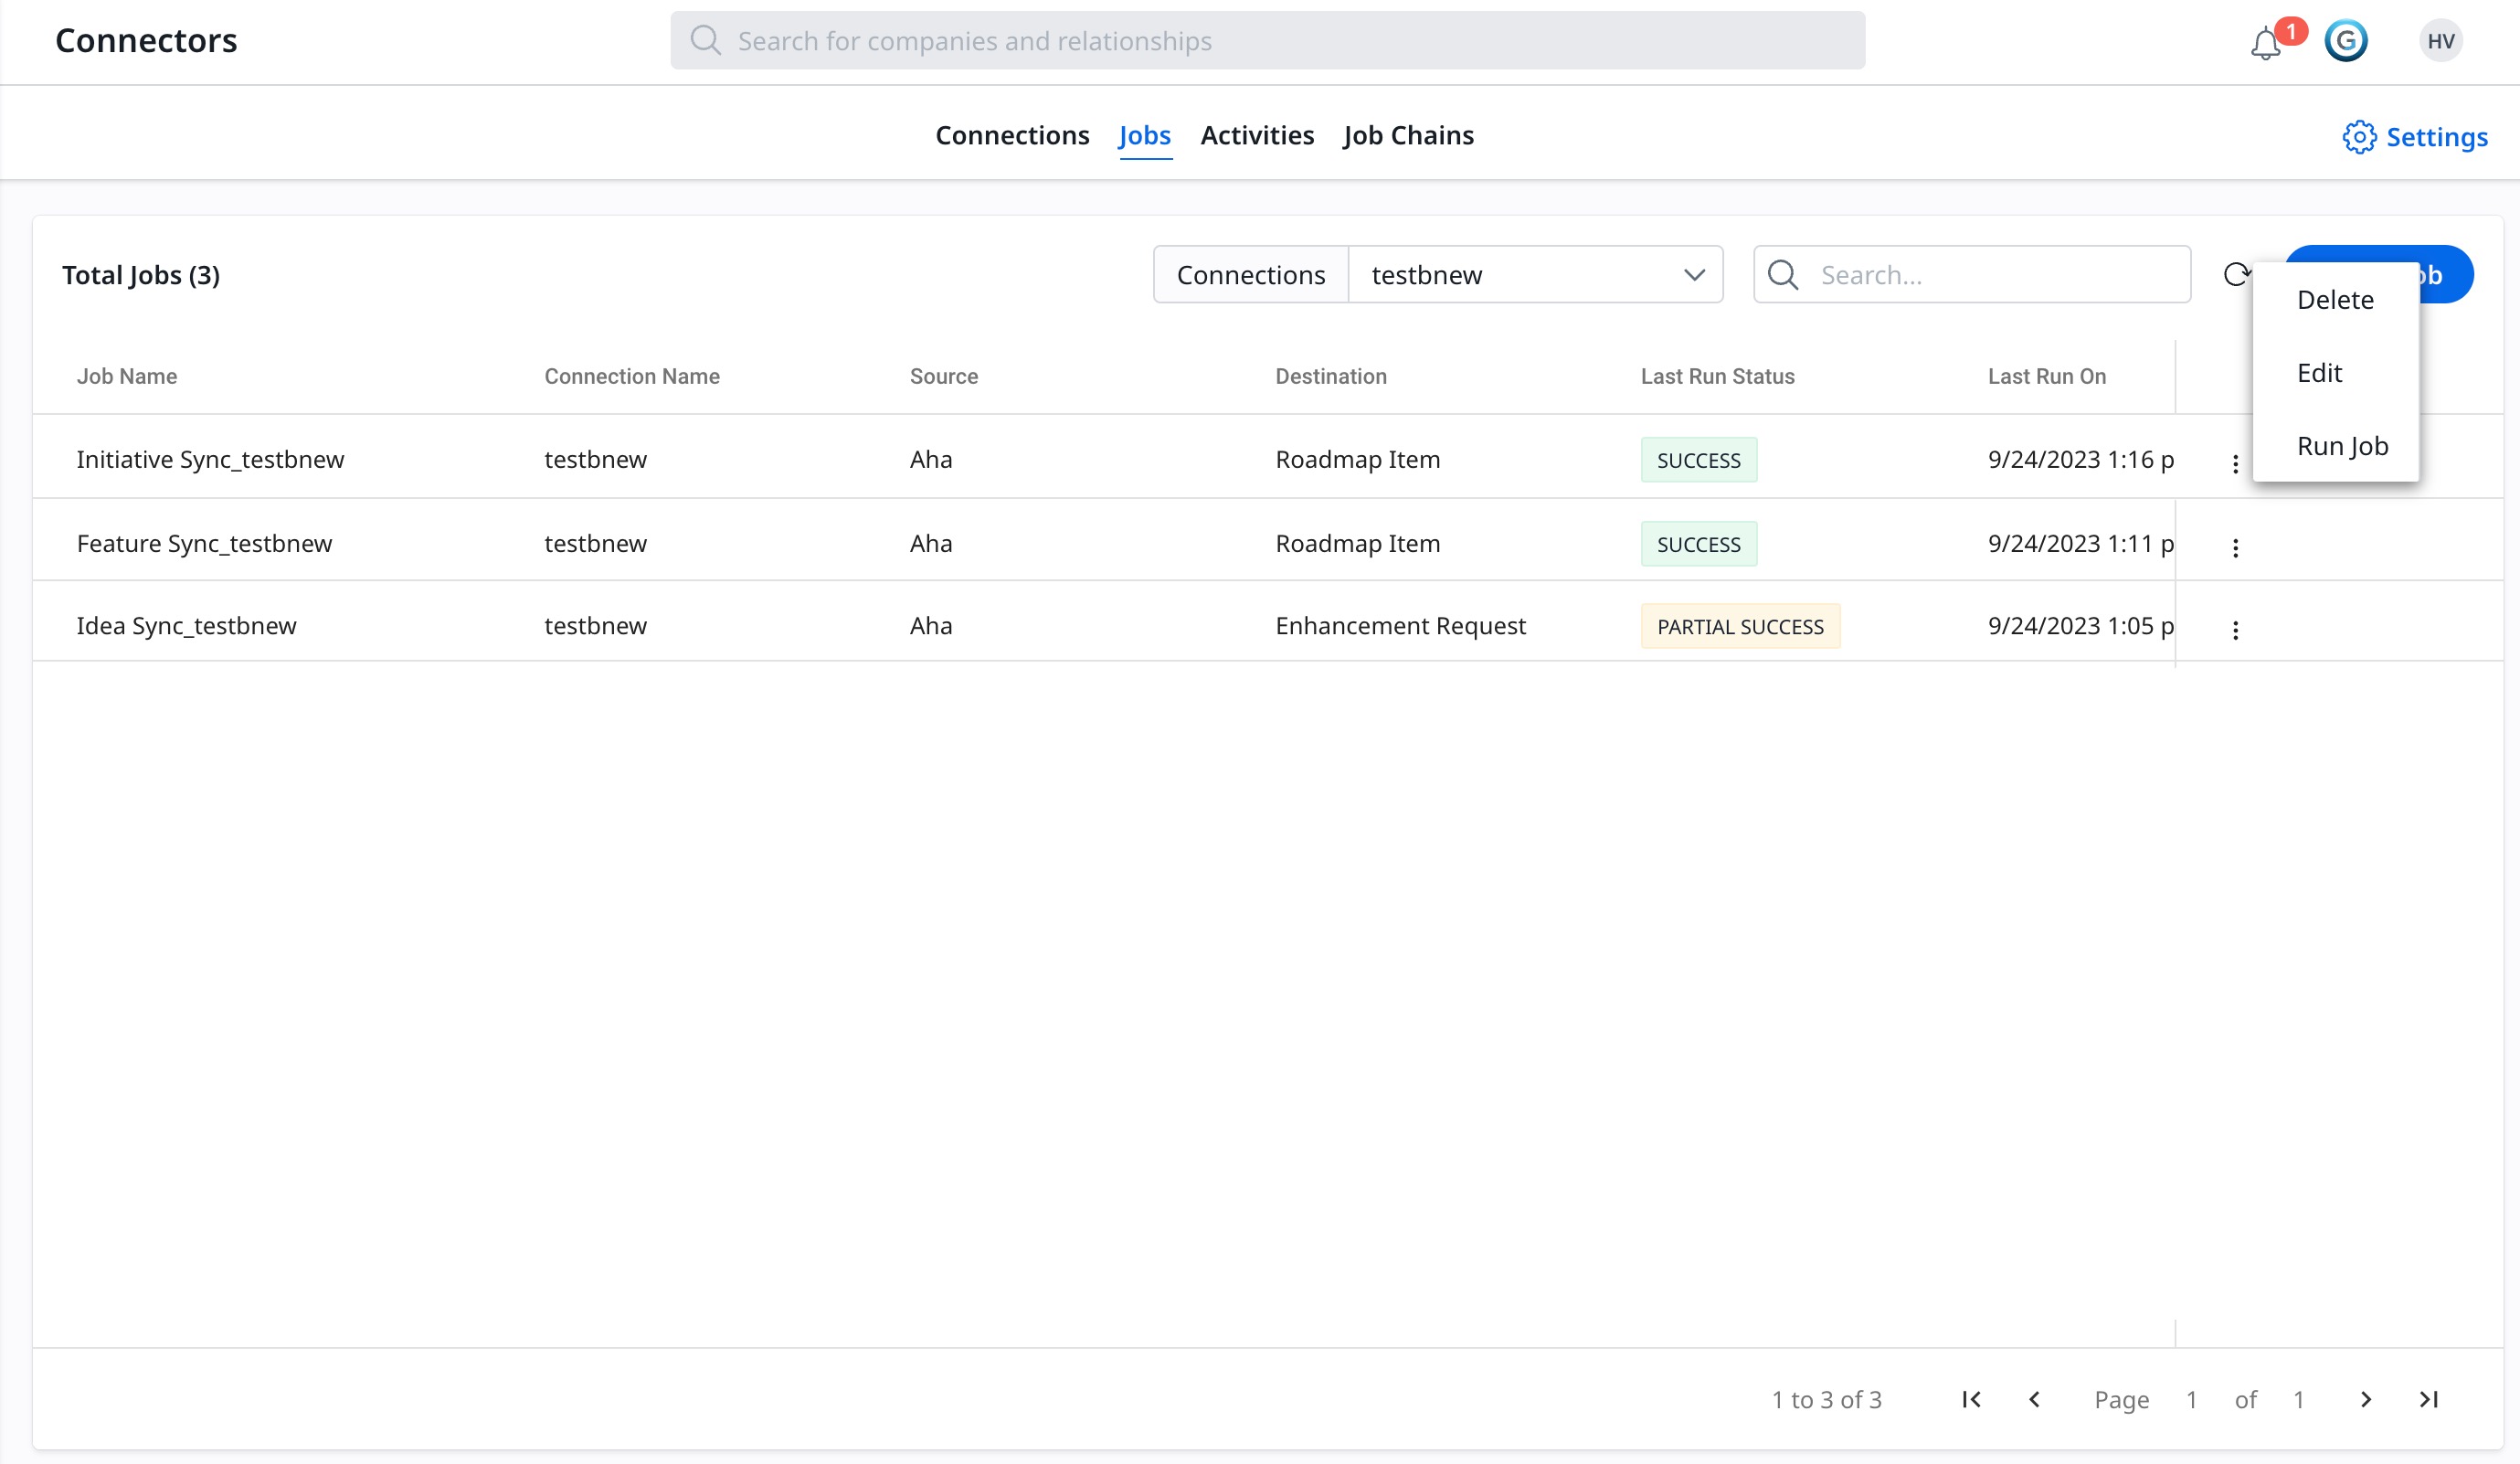
- Click the Jobs tab.
- Click the three-vertical dots that appear beside the created connection name.
- Click Edit. The Preparation tab appears.
- Click Configure. The Configure tab appears.
- Configure the Job schedule. To configure the job schedule, refer to the Configuration of Job or Job Chain Schedule article.
- Navigate to Administration > Product Requests > Create Connection tab.
- Refresh the Product Requests Configuration page.
Note: If the connection is established successfully on the Connectors page, the Create Connection tab displays a connection created success message.
 Add Workspace
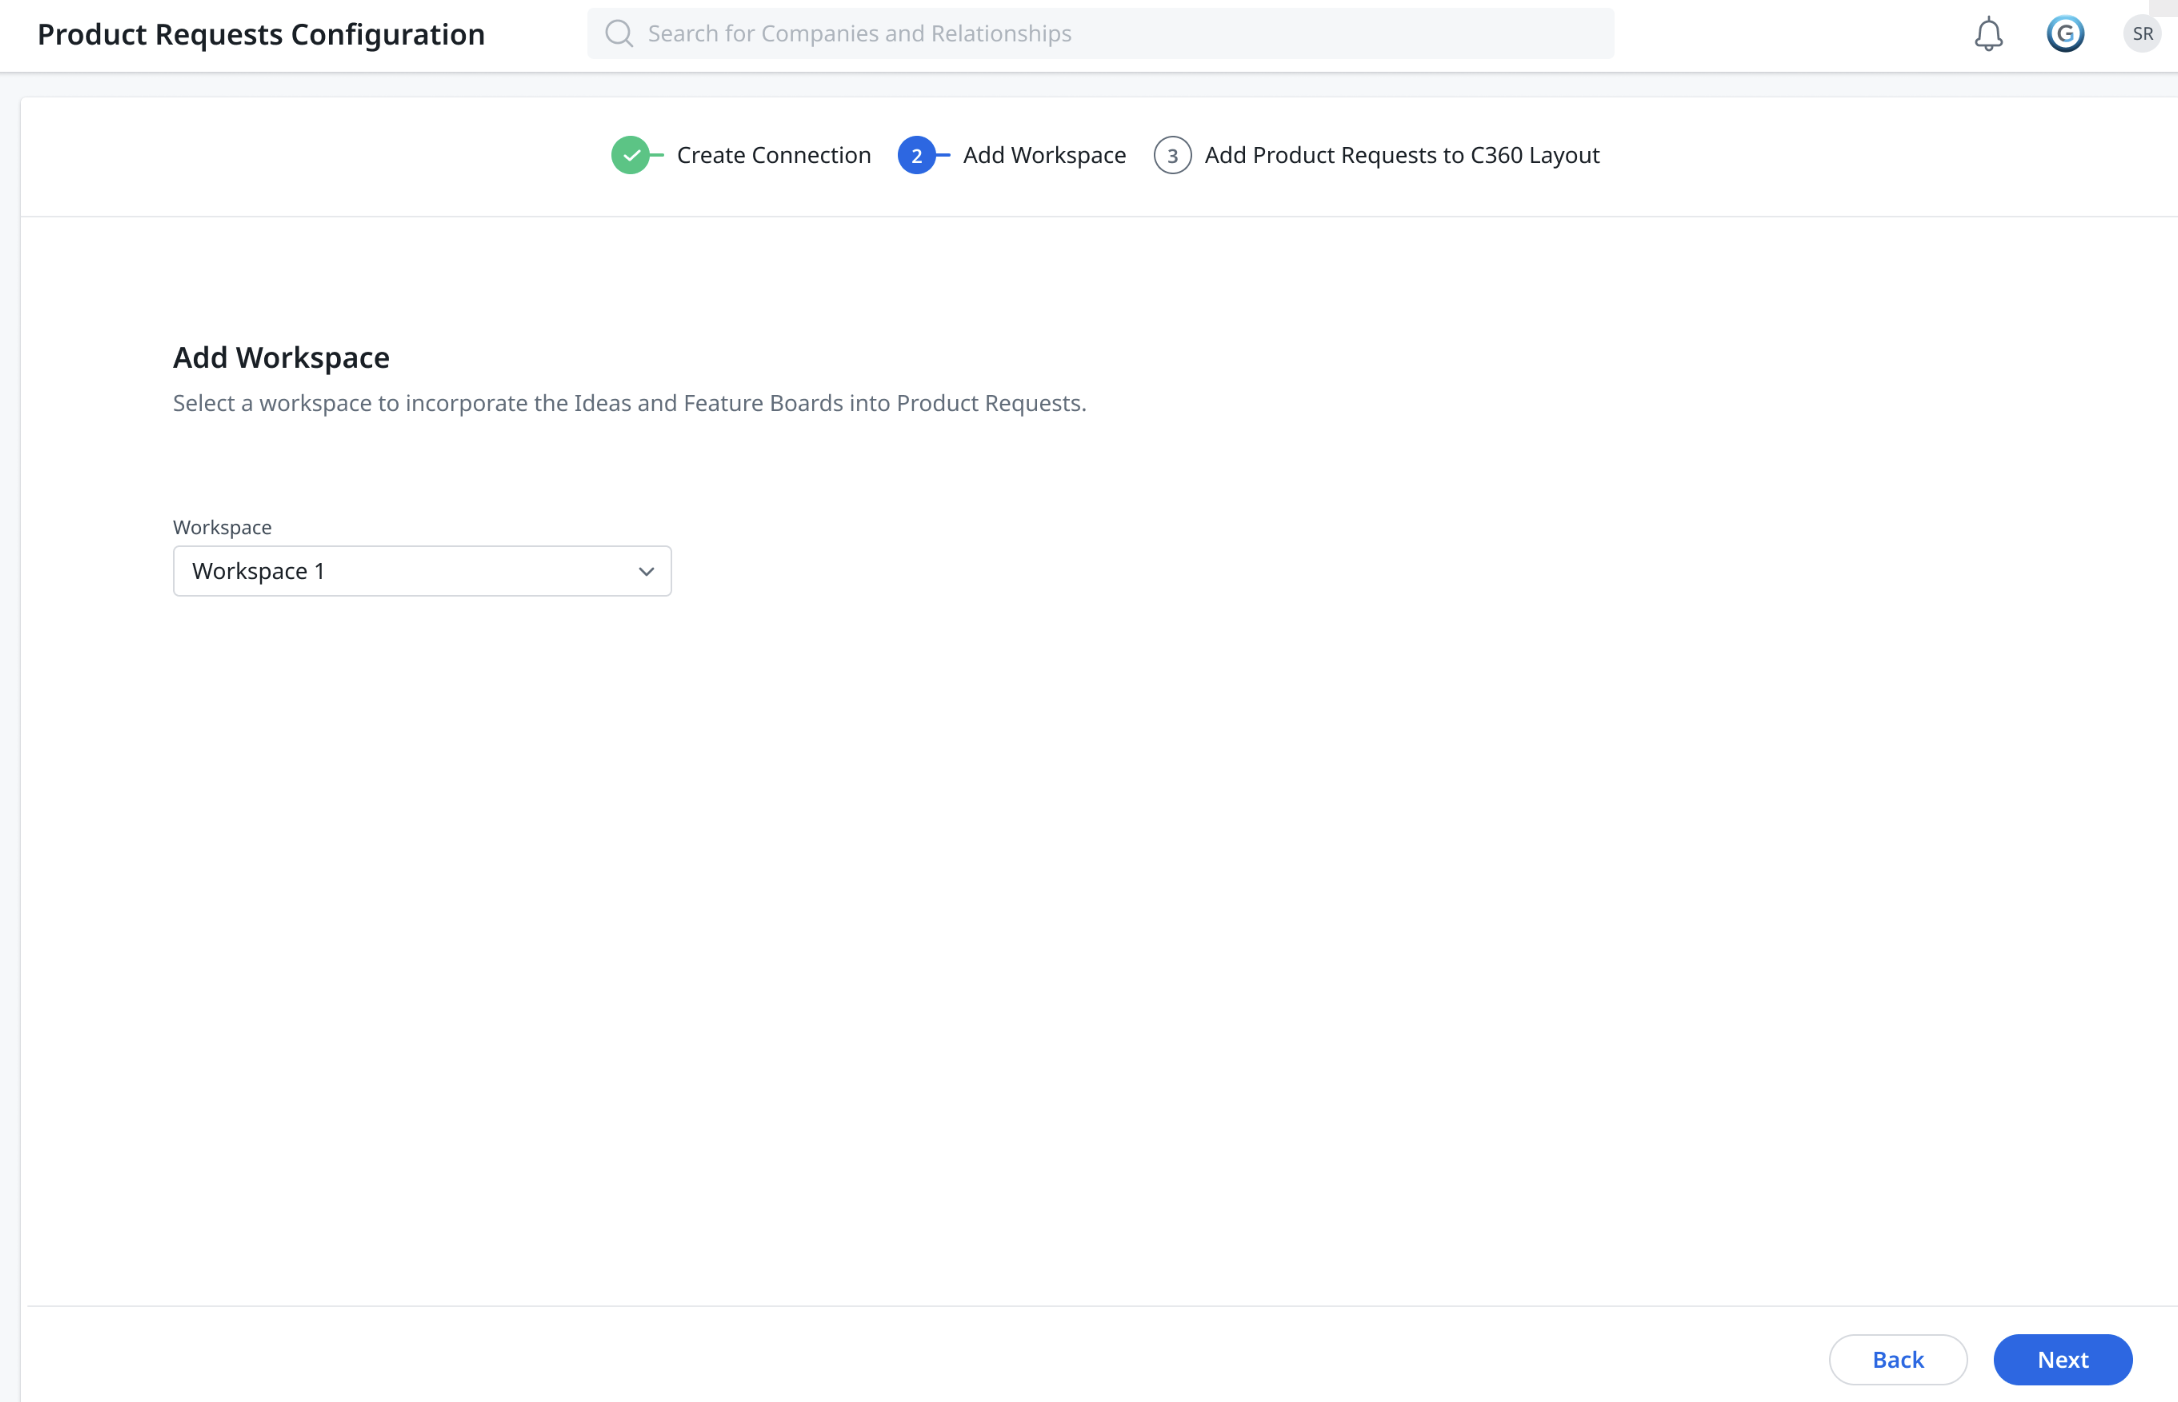
In Aha, a workspace is a dedicated area for a team or group to collaborate and manage their work. Workspaces are used to organize data and configurations in Aha based on specific projects, products, or initiatives.
The Add Workspace tab in Gainsight helps admins to select a workspace for integrating ideas and feature board into product requests.
Prerequisite:
To add a workspace, the admin must first establish a connection with Aha!
To add a workspace:
- Navigate to Administration > Product Requests > Add Workspace tab.
- From the Workspace drop-down menu, select a workspace.
- Click Next.
Add Product Requests to C360 Layout
Admins must add the Product Requests tab to the C360 layout to access the Product Requests tab on the C360 page of a company.
For more information on how to add a C360 layout, refer to the Configure 360 Layouts article from the Additional Resources section.
Prerequisite:
To add the Product Requests tab to C360 Layout, admins must establish a connection with Aha! and add a workspace.
Modify an Enhancement Request Form
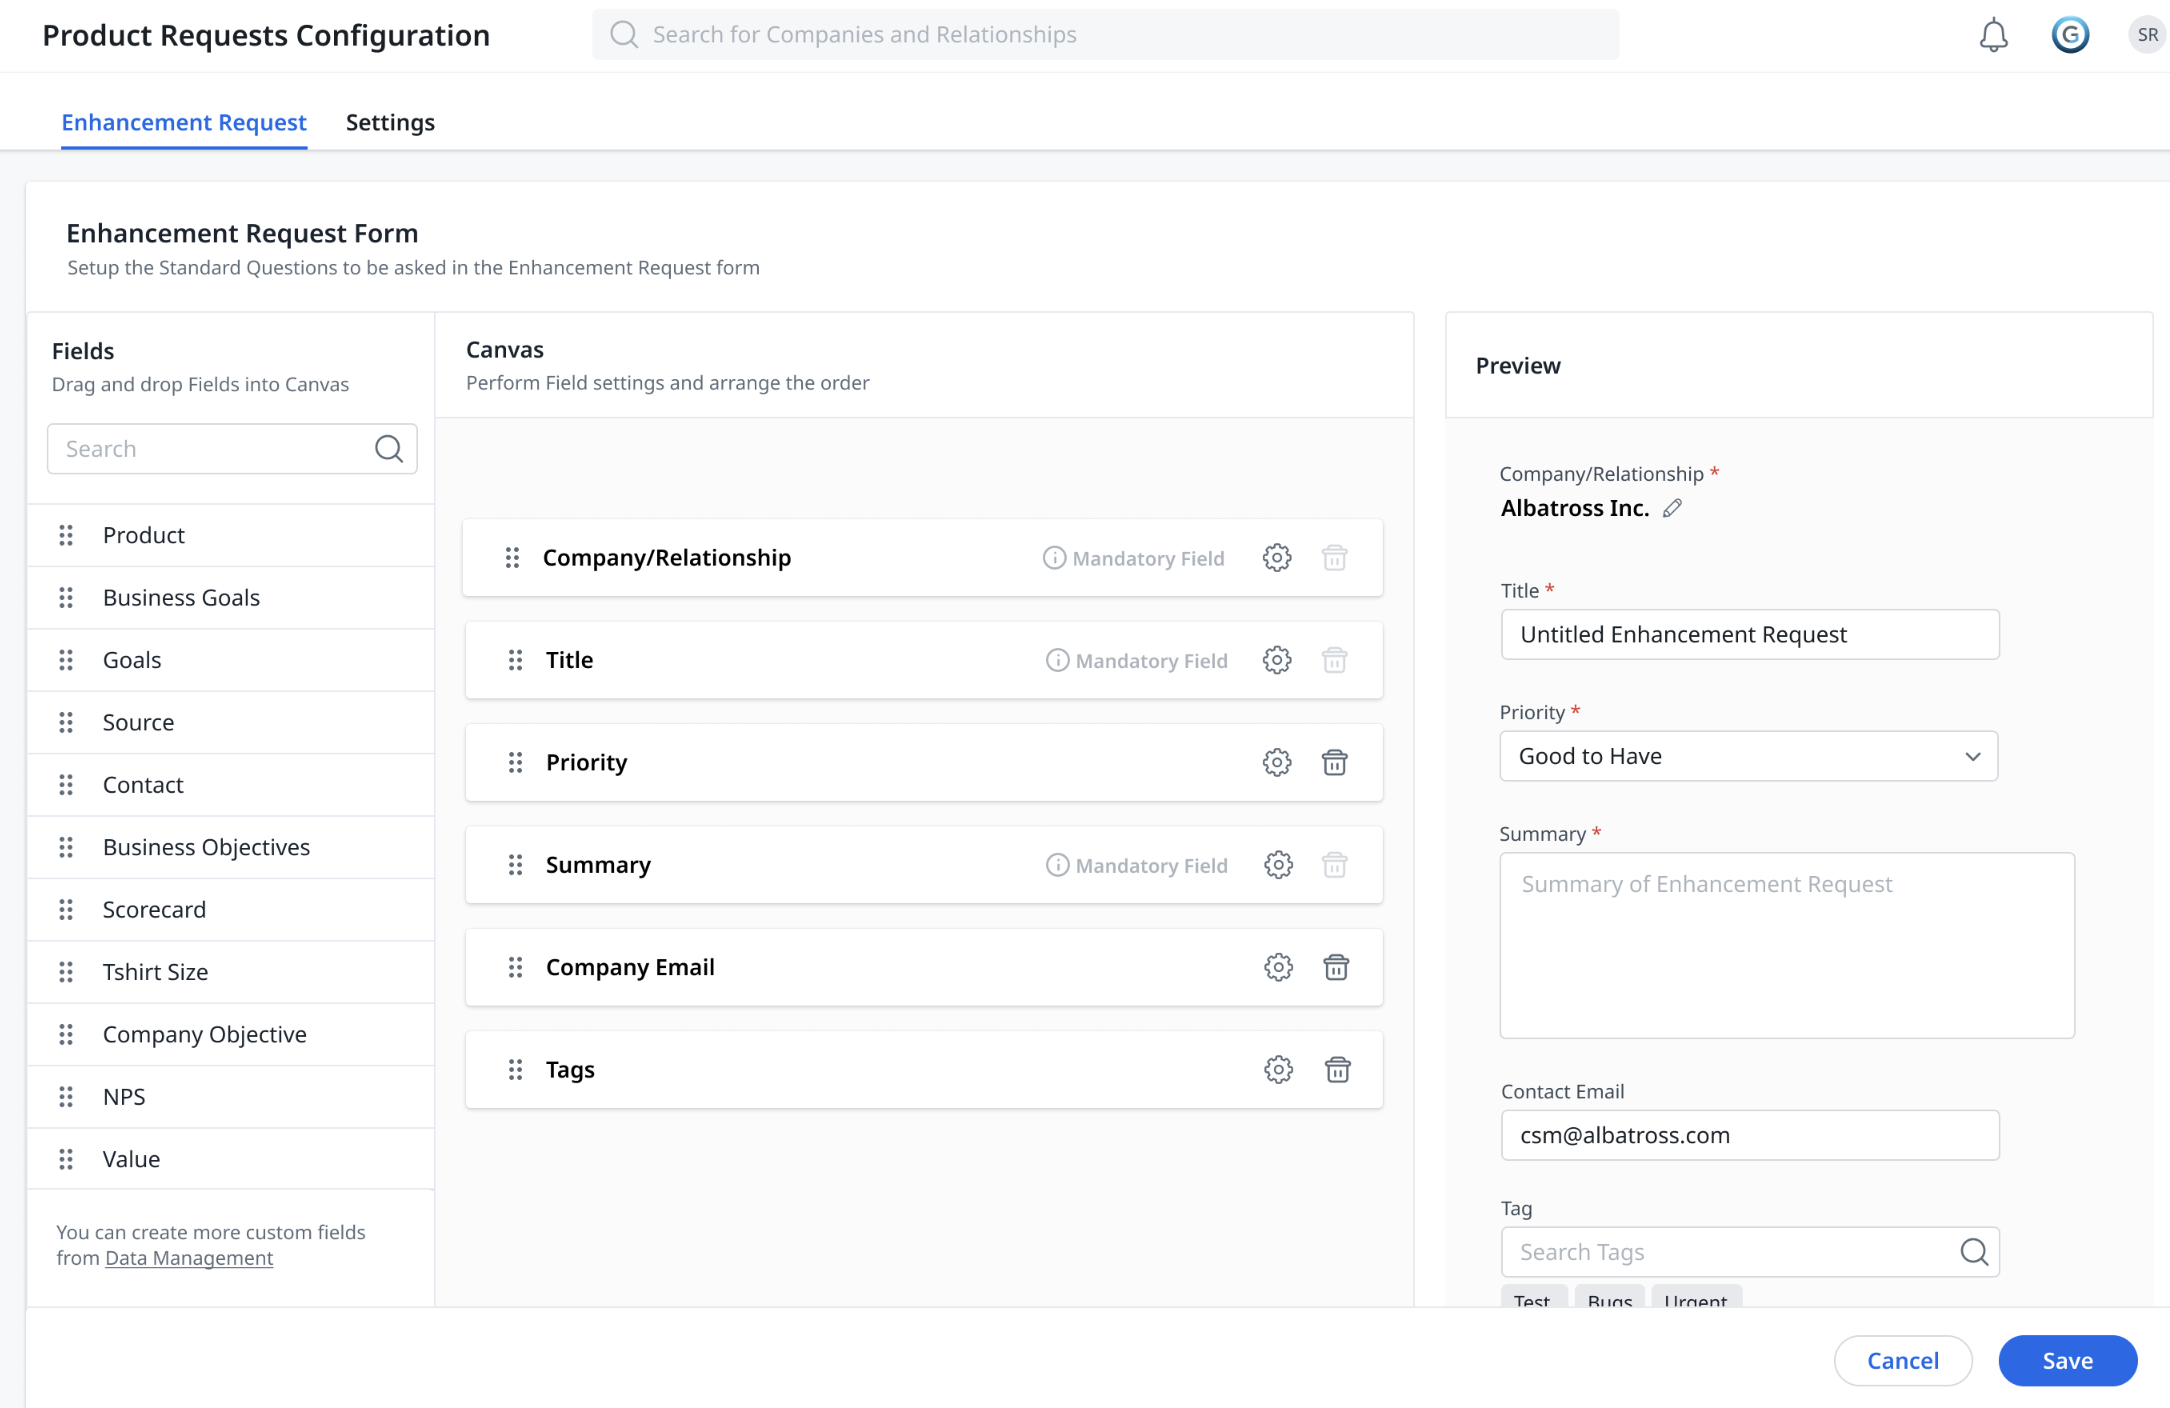
Gainsight provides a standard Enhancement Request Form for CSMs. Admins can work with Product Managers to modify the form according to their needs. This helps the Product Managers to make informed decisions for their Product.
To modify the enhancement request form:
- Navigate to Administration > Product Requests.
- Drag and drop the fields from the Fields section into the Canvas section.
- (Optional) Hold and drag the added fields in the canvas section to arrange the fields.
Note: Following are the standard fields and cannot be edited or deleted:
- Company
- Enhancement Request Title
- Priority
- Summary
- Contact Email
- Click the Settings icon to access the settings page of the field.
- In the Title field, enter the name of the field.
- Toggle the Required Field button to make the field mandatory.
- Click Save.
- Click Save to save the enhancement request form.
For more information on how to create custom fields, refer to the Basic Operations in Gainsight Data Management article..
Note: Additional fields can be added to the Enhancement Request object.
Configure Gainsight Data Points
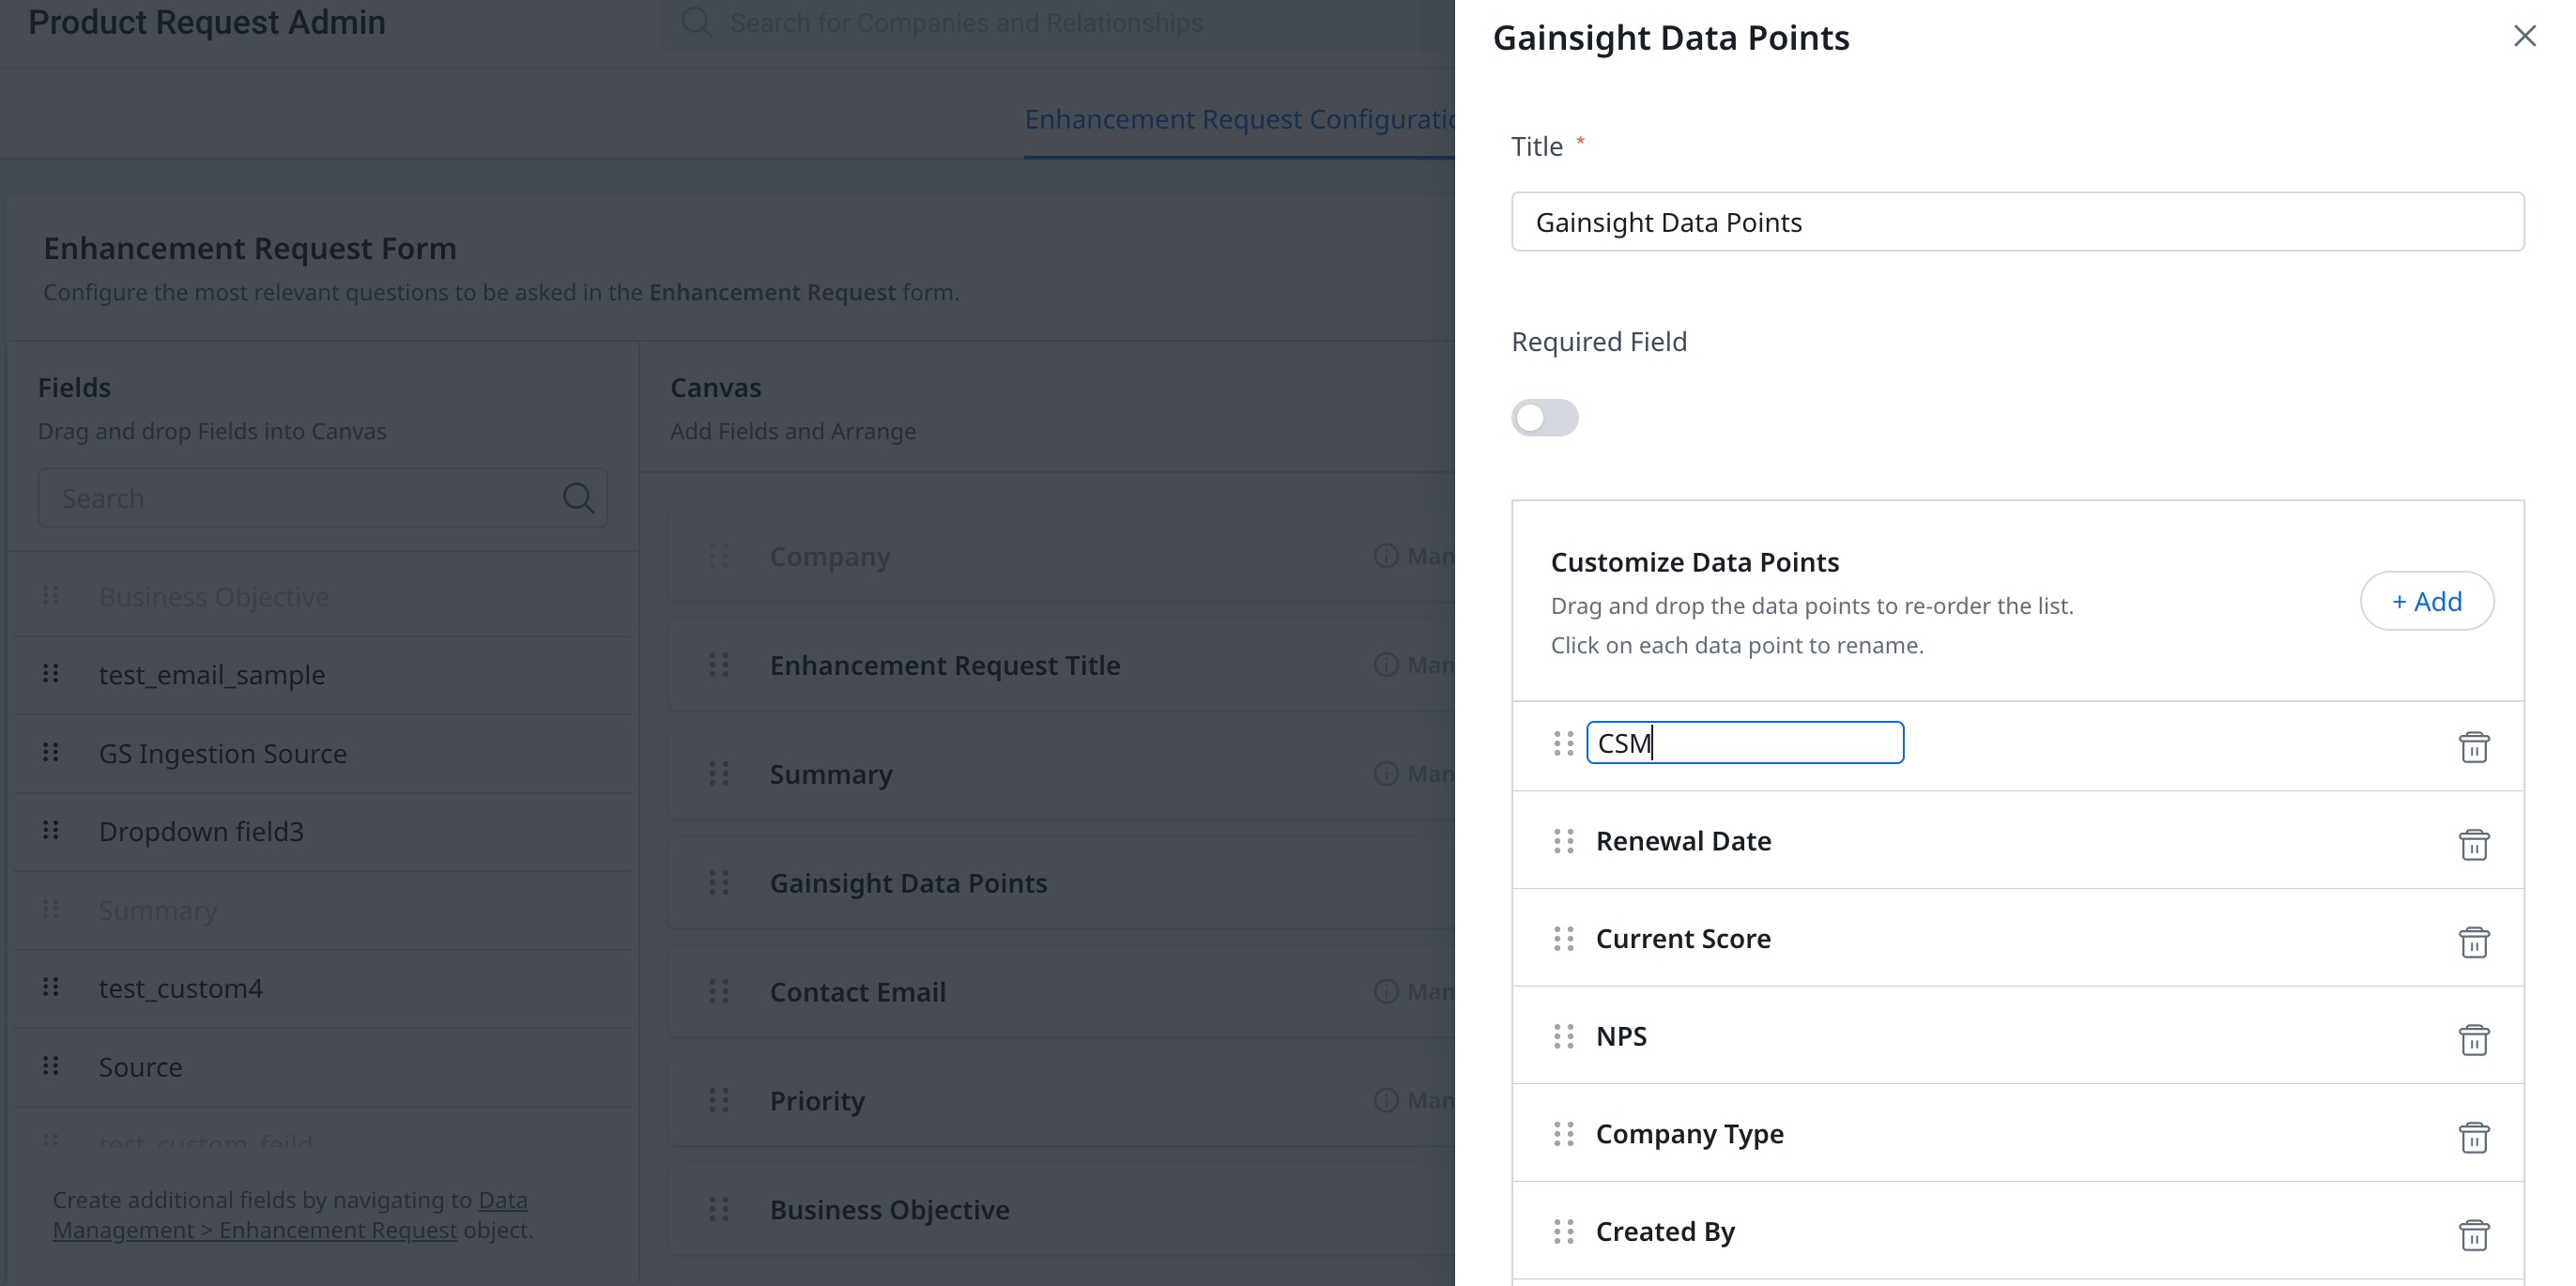
Gainsight data points are the customizable fields from the Company object in Enhancement Request Form. Admins can add, delete, or rename the data points. By selecting Gainsight Data Points, admins are selecting the information to be shared with the product managers. The configured data points are added to the Enhancement Request page as a new field.
To configure Gainsight Data Points:
- Navigate to Administration > Product Requests.
- Drag and drop the Gainsight Data Points field from the Fields section into the Canvas section.
- Click the Settings icon. The Gainsight Data Points slide-out panel appears.
- In the Title field, enter the name of the field.
- Toggle ON the Required Field button to make the field mandatory.
- In the Customize Data Points section,
- Click +Add to select and add relevant Data Points.
Notes:- A maximum of 15 data points can be added.
- A minimum of one data point must be added.
- (Optional) Click the Delete icon to delete the Data Points.
- (Optional) Click the Data Point title to rename it.
- Click +Add to select and add relevant Data Points.
- Click Save.
Note: Only those Data Points which are added in the Customize Data Points section are visible on the New Enhancement Request page to CSMs with data obtained from Gainsight.
Update Workspace
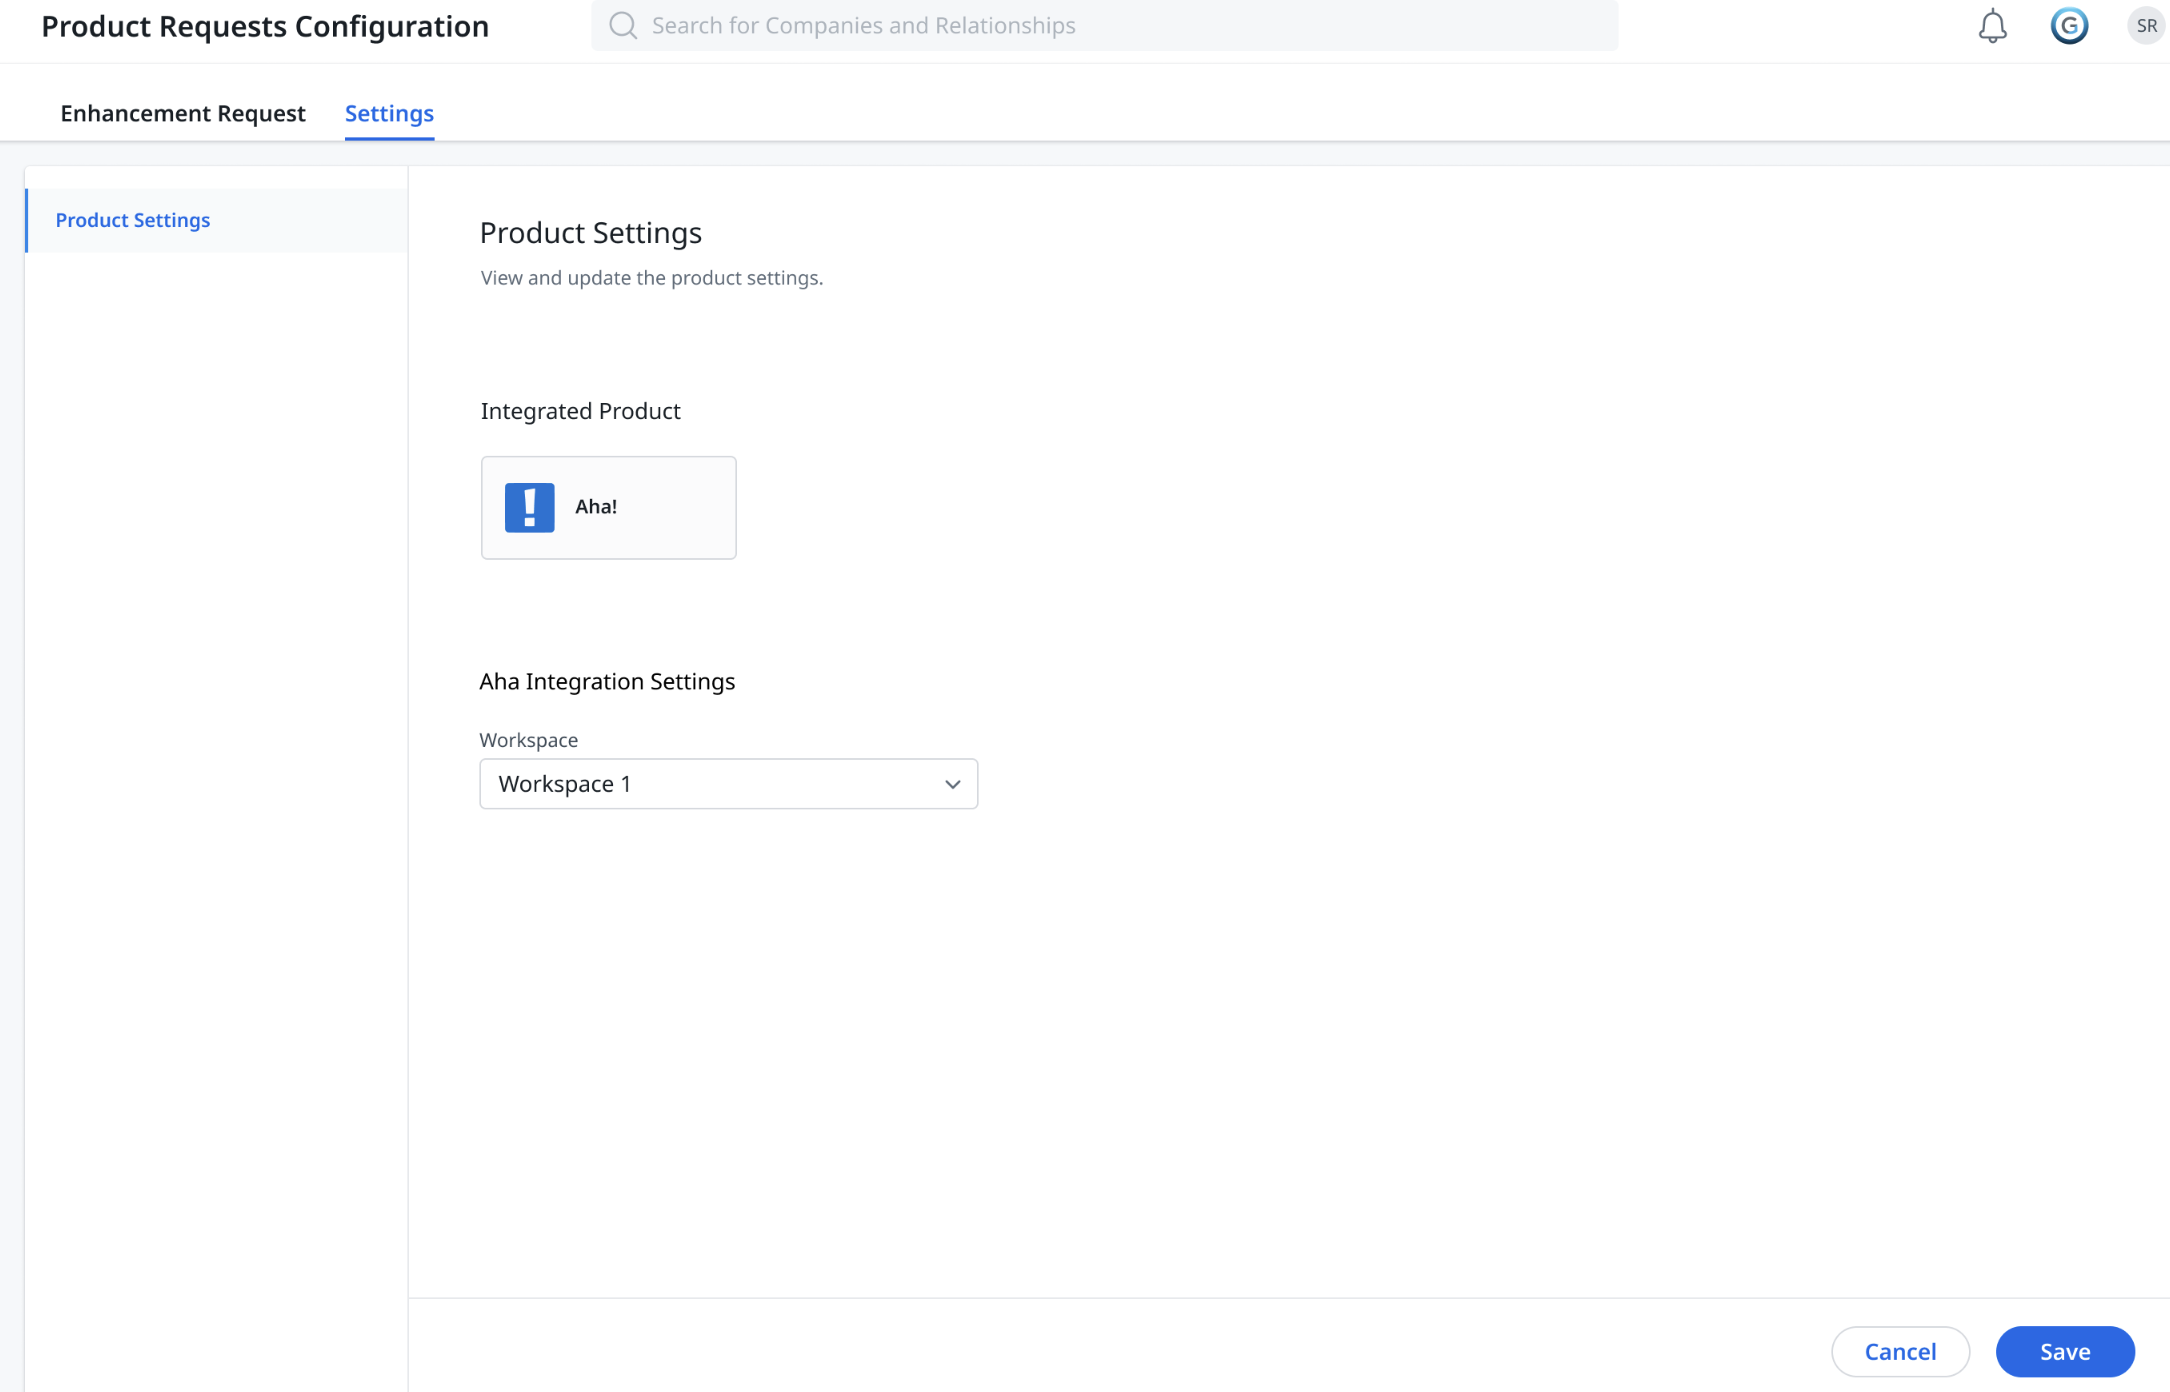
The Settings tab displays the current settings for product requests, including the integrated app name and selected workspace. It also enables admins to update the workspace.
To update a workspace from the Settings tab:
- Navigate to Administration > Product Requests > Settings tab.
- From the Workspace drop-down menu, select a workspace.
- Click Save.
Settings
Admins can adjust and tailor settings to align with their specific requirements.
Product Settings
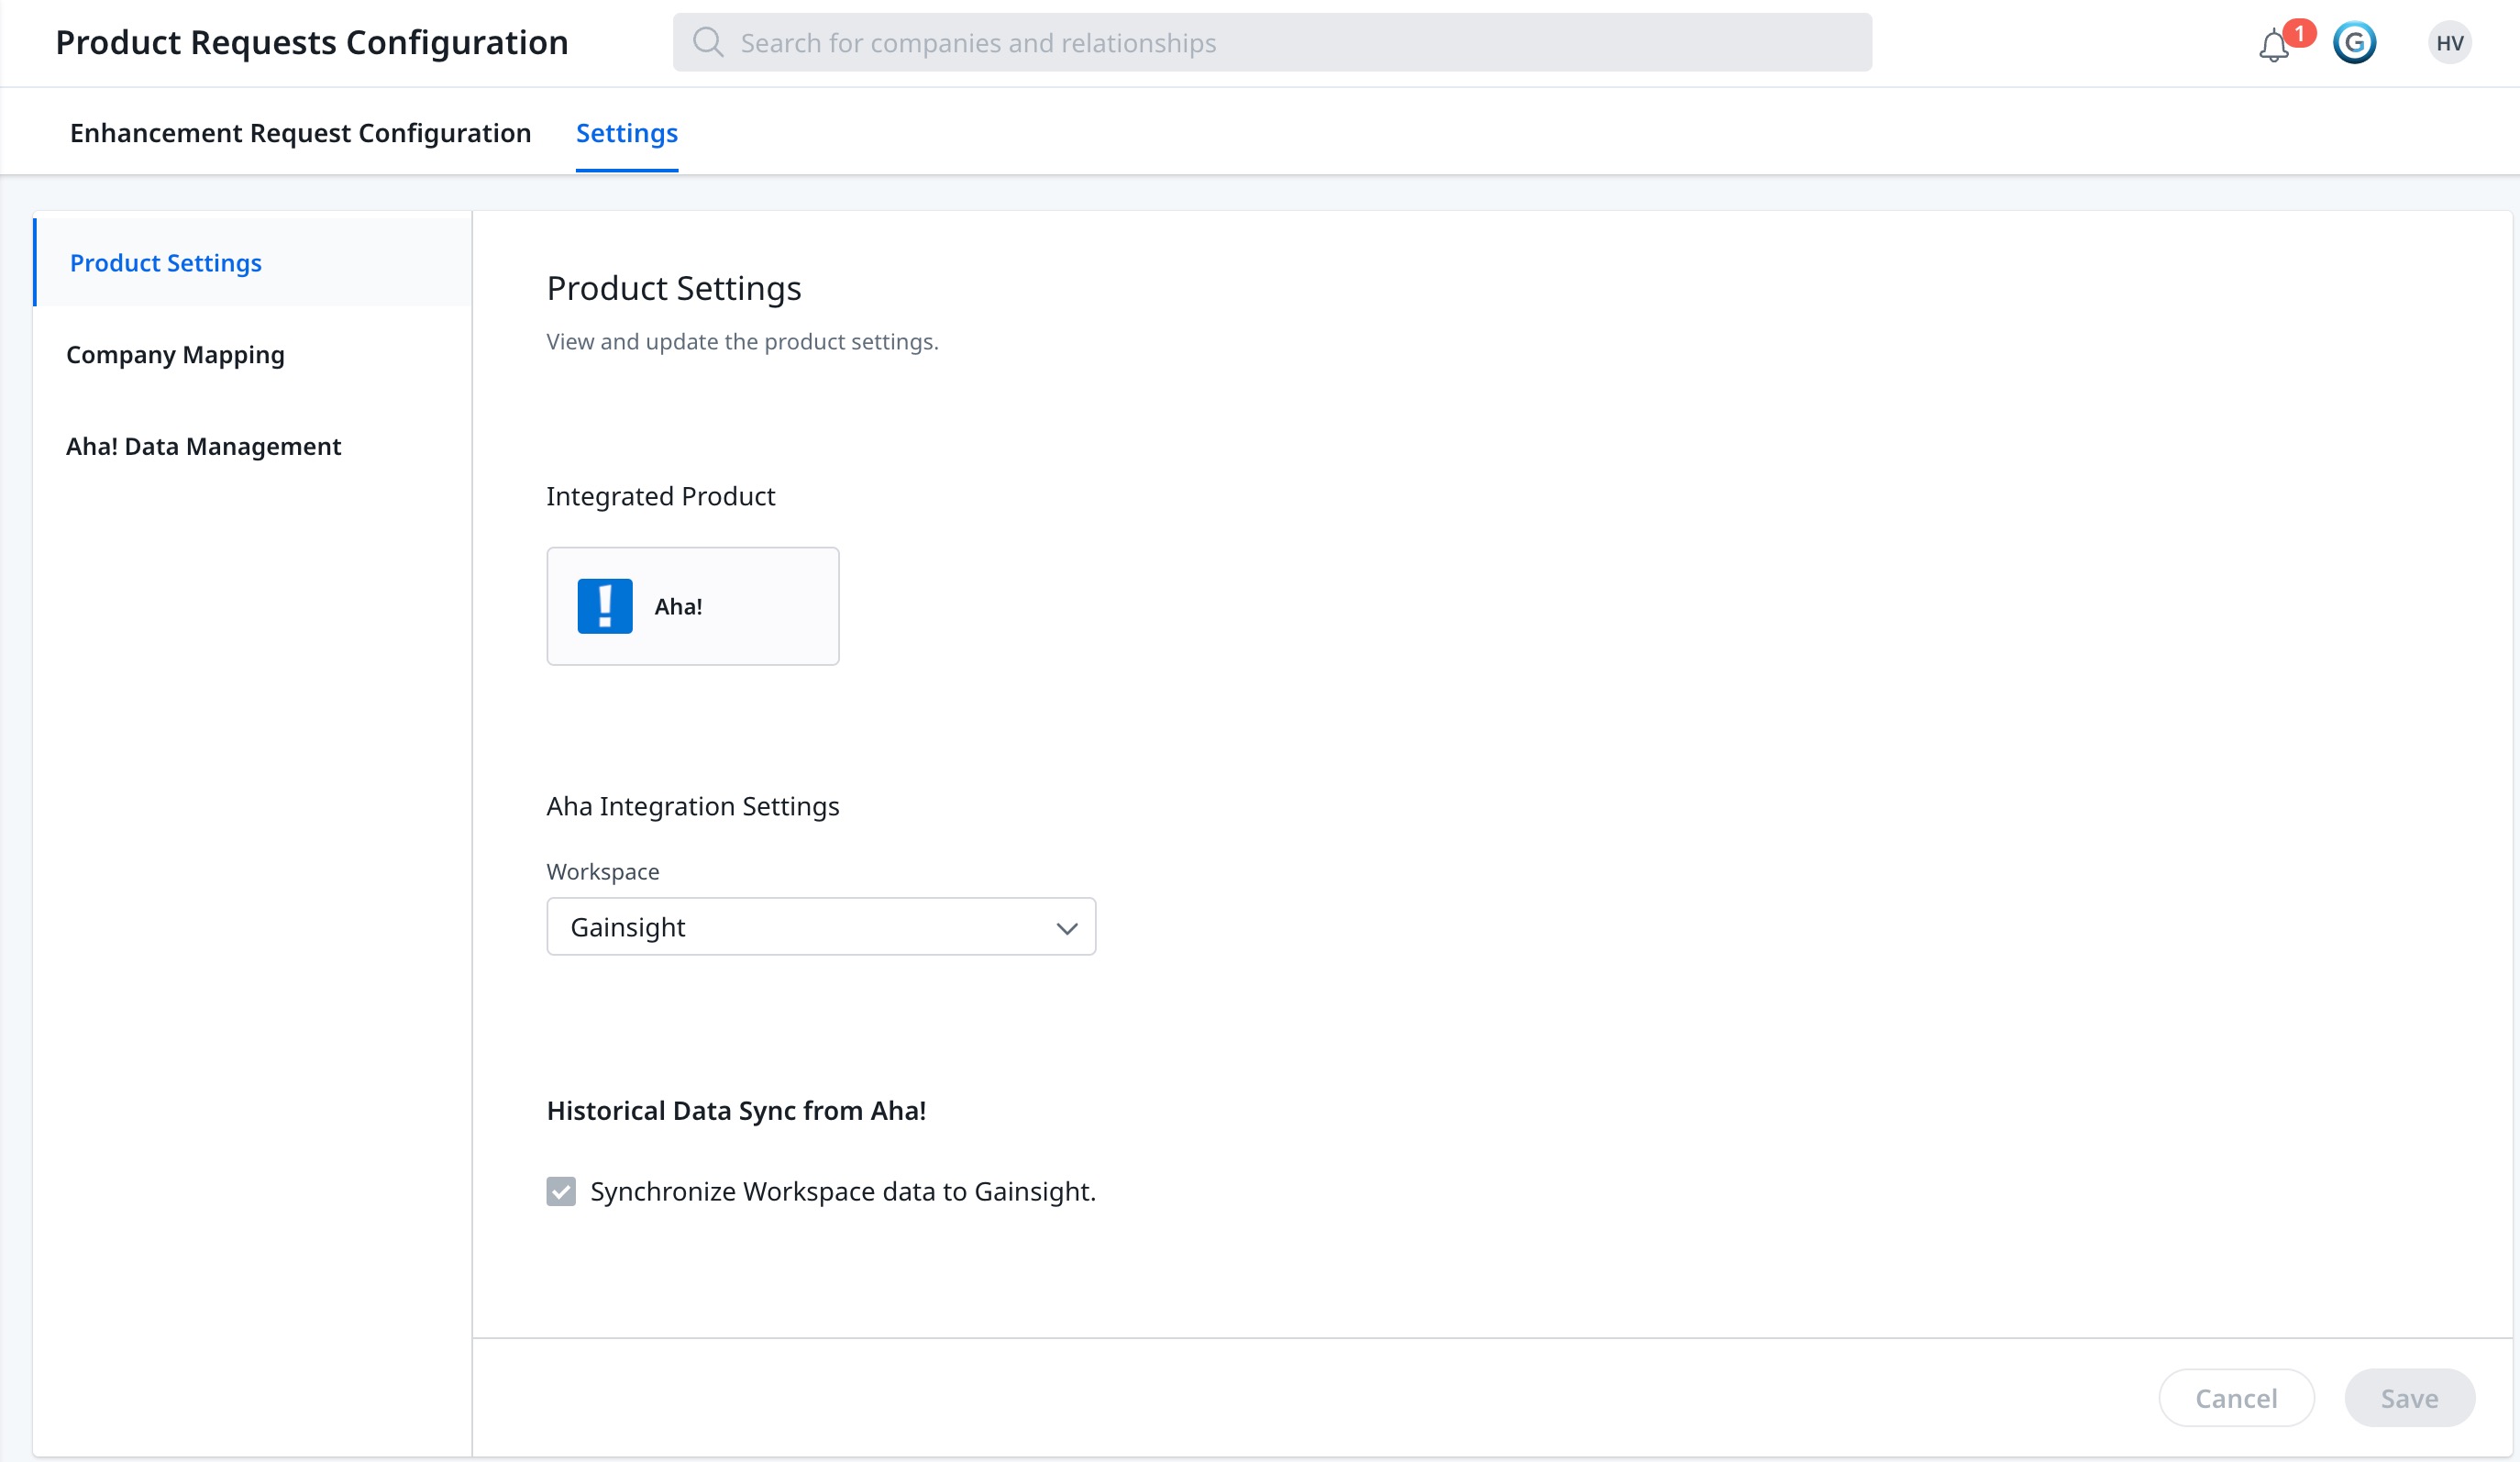
Admins integrate their Product requests with the Aha! on the Settings page. You can synchronize Aha! data into Gainsight from this page.
Note: The historical data sync from Aha! once enabled, cannot be undone.
To integrate the enhancement requests with the Productboard, you need to follow the below steps:
- Navigate to Administration > Product Requests > Settings.
- From the Workspace drop-down menu, select the desired workspace.
- Select the checkbox to Synchronize Aha! data into Gainsight. A confirmation message appears.
- Click Confirm Sync.
Note: The historical data sync from Aha! is a one-time sync, once enabled, it cannot be unchecked.
- Click Save.
Company Mapping
The company related information is displayed on this page after the data is synced from Aha!
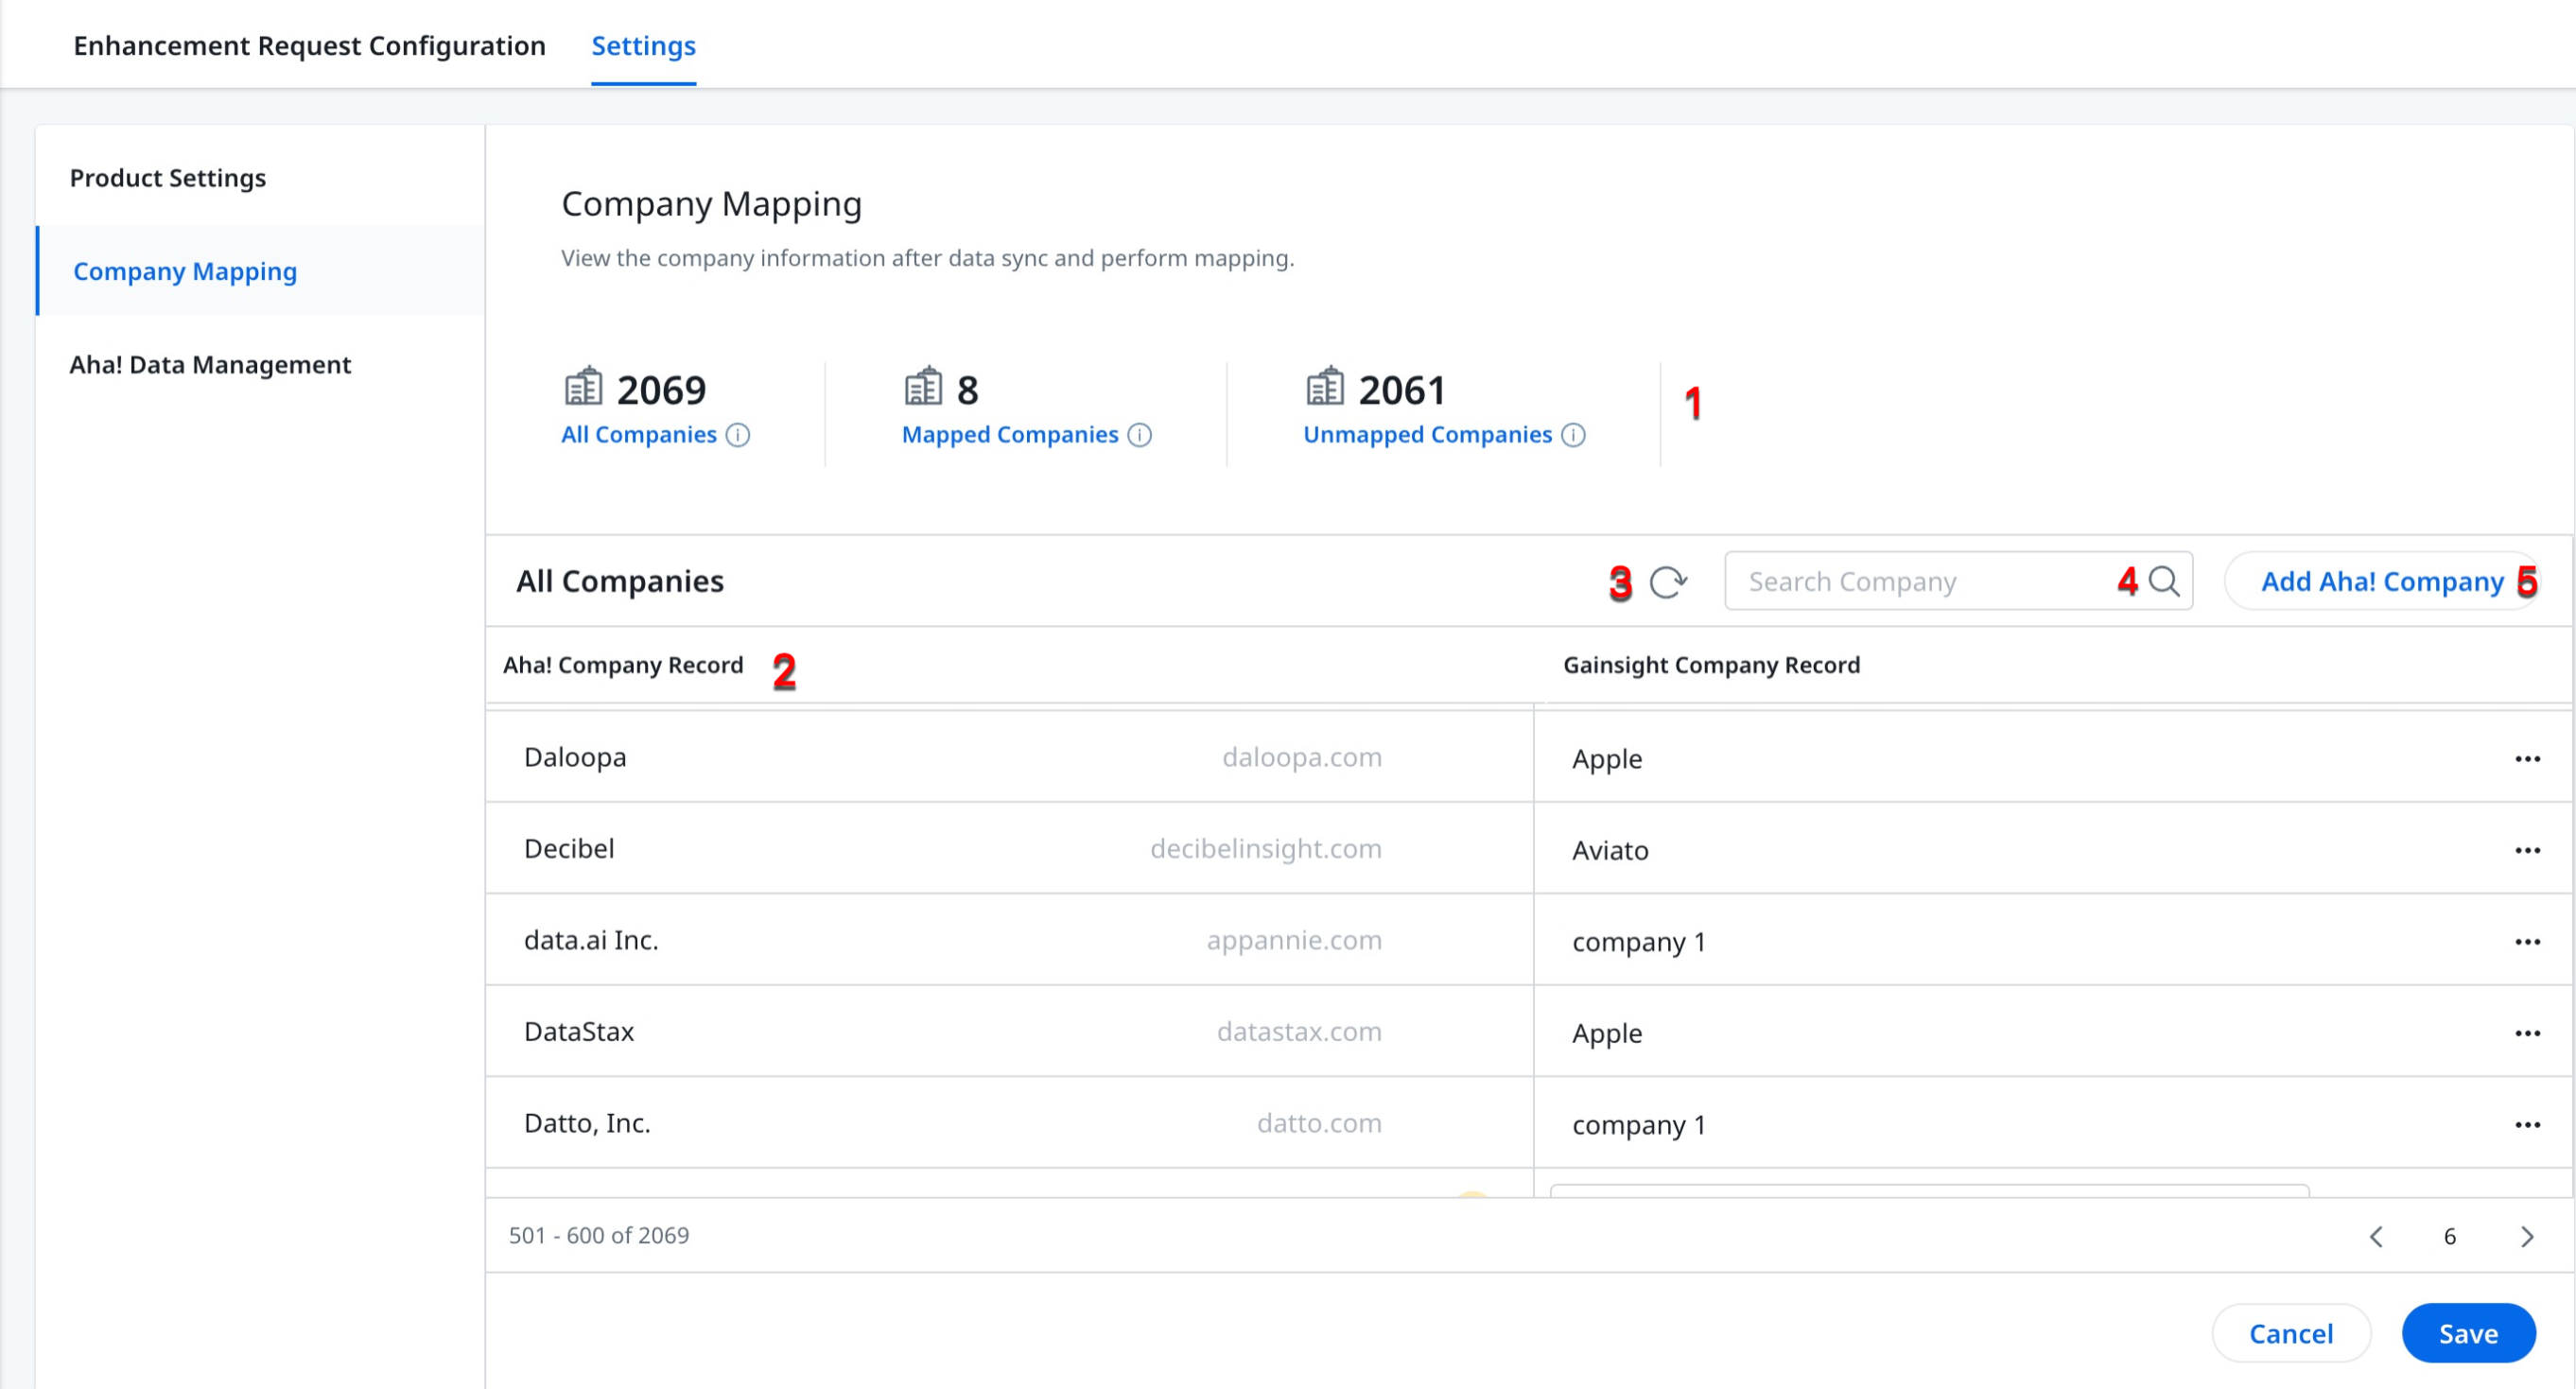
- The summary ribbon sections show the following number of Companies Mapping:
- All Companies: Total number of companies.
- Mapped Companies: Number of companies mapped.
- Unmapped Companies: Number of companies unmapped.
- Click the Refresh icon to refresh the company mapping data in Aha!
- All the objects from Aha! are automatically mapped to the Gainsight objects.
- Click the three vertical dots to perform the following actions:
- View Company Record
- Delete Record.
- Click the three vertical dots to perform the following actions:
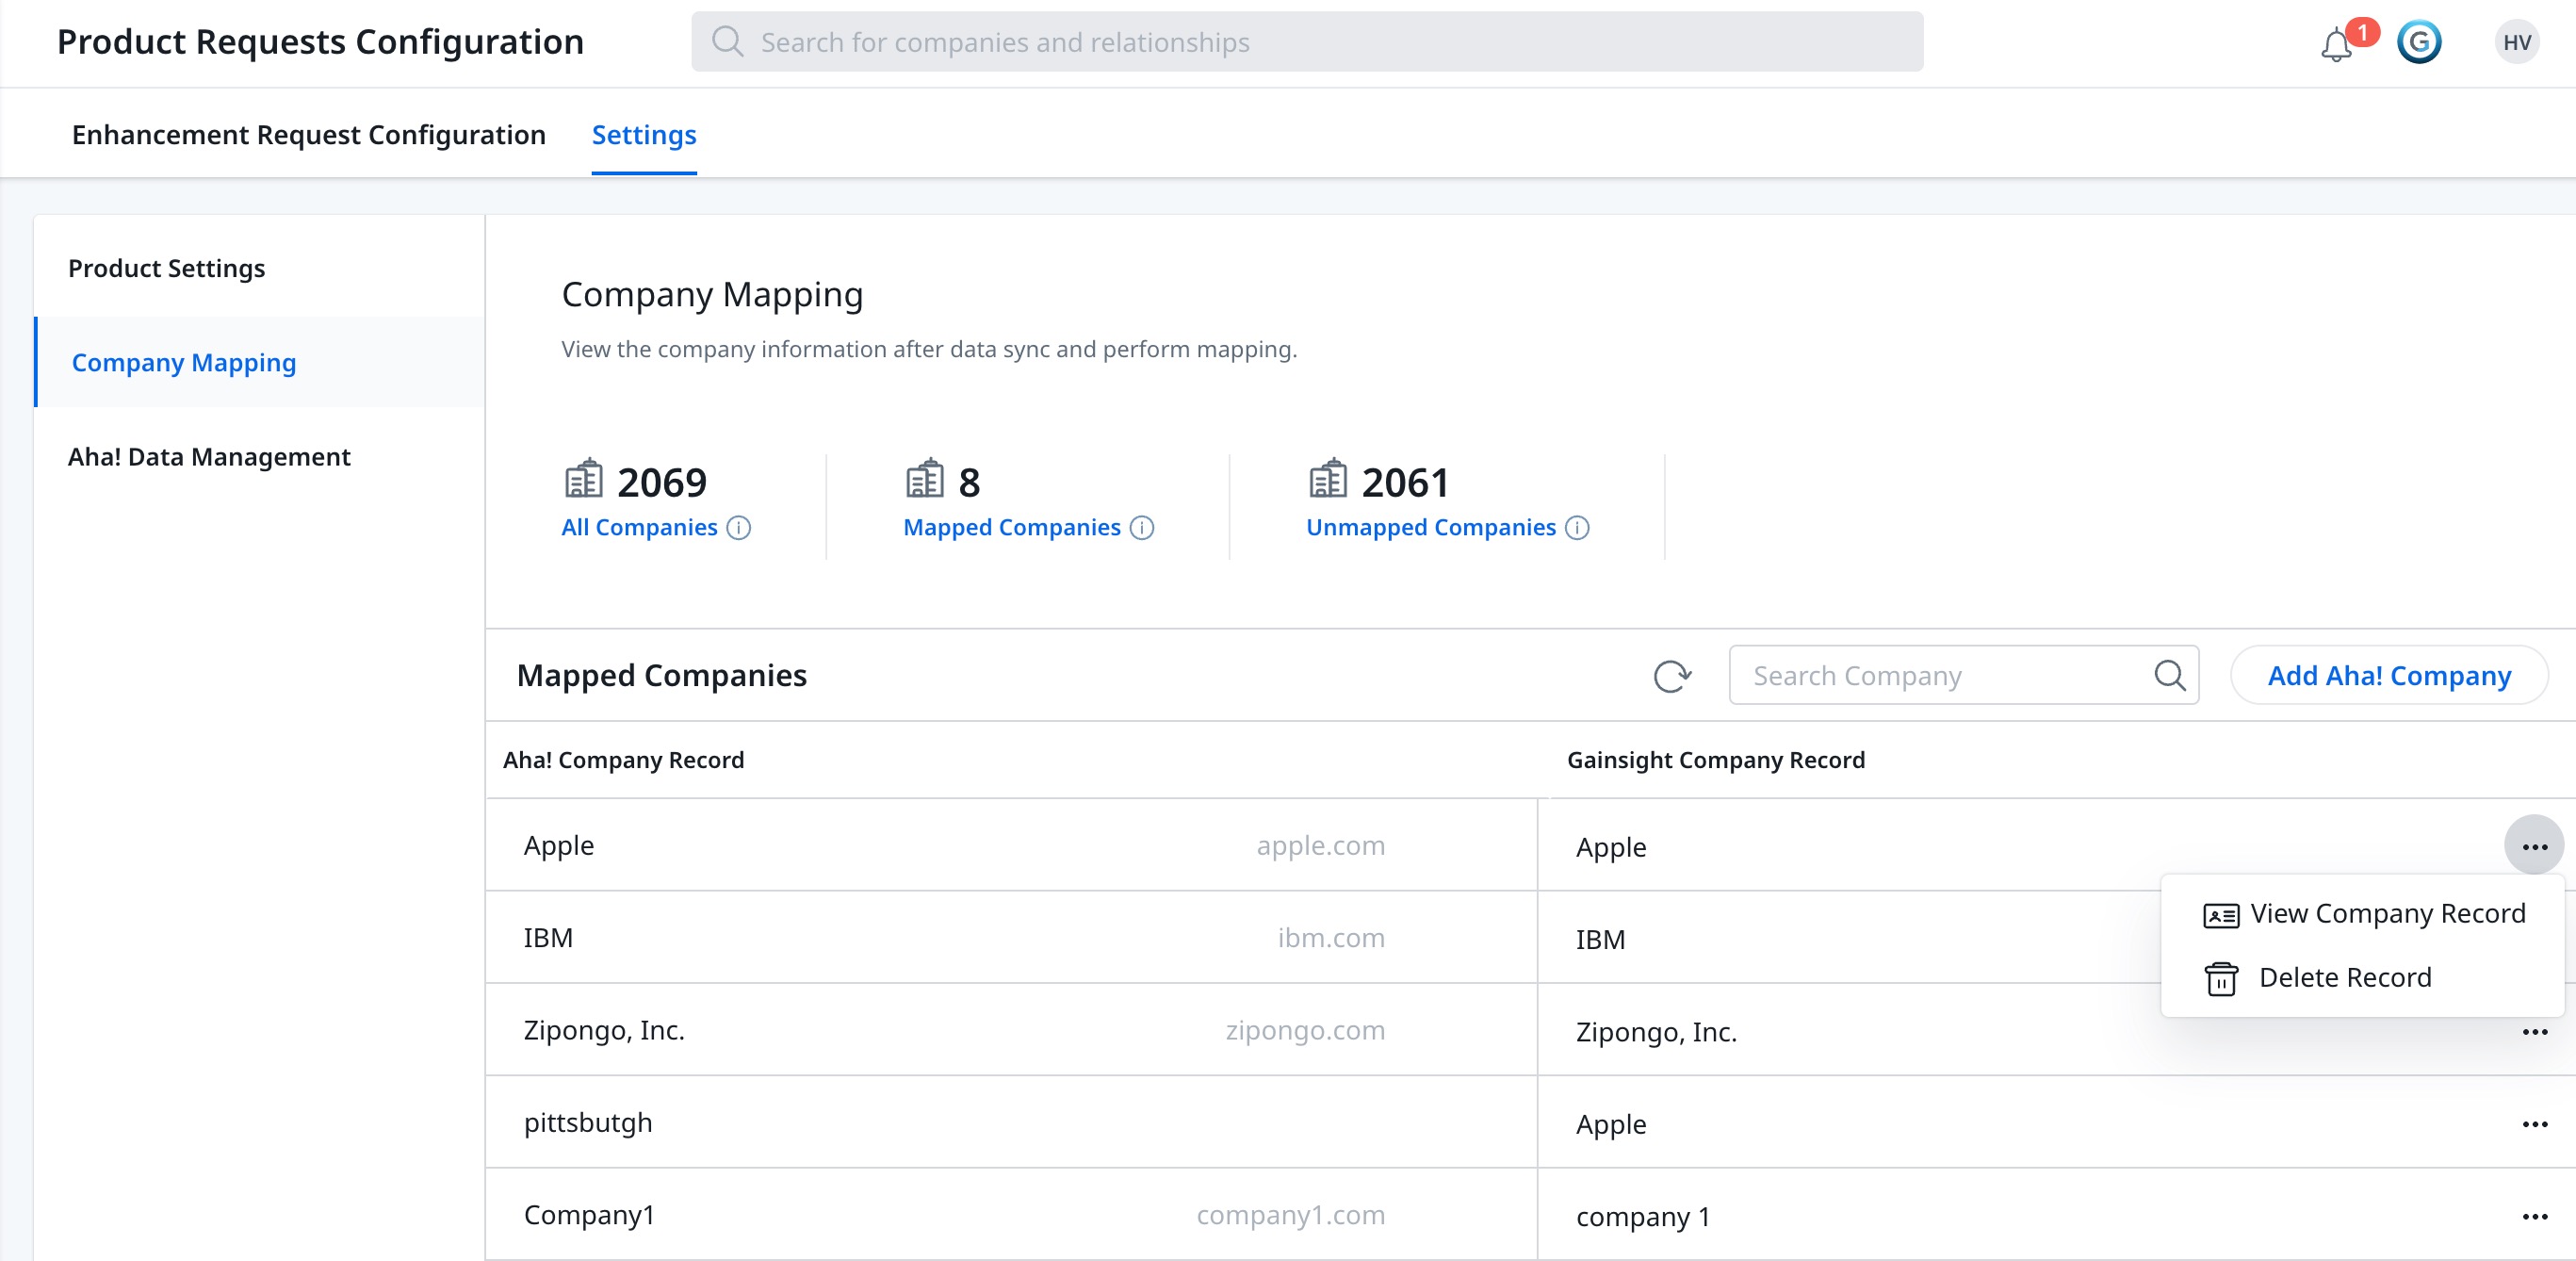
- Search the records with the Company name in the text box.
- Click Add Aha! Company. The Add Aha! Company slide-out panel appears.
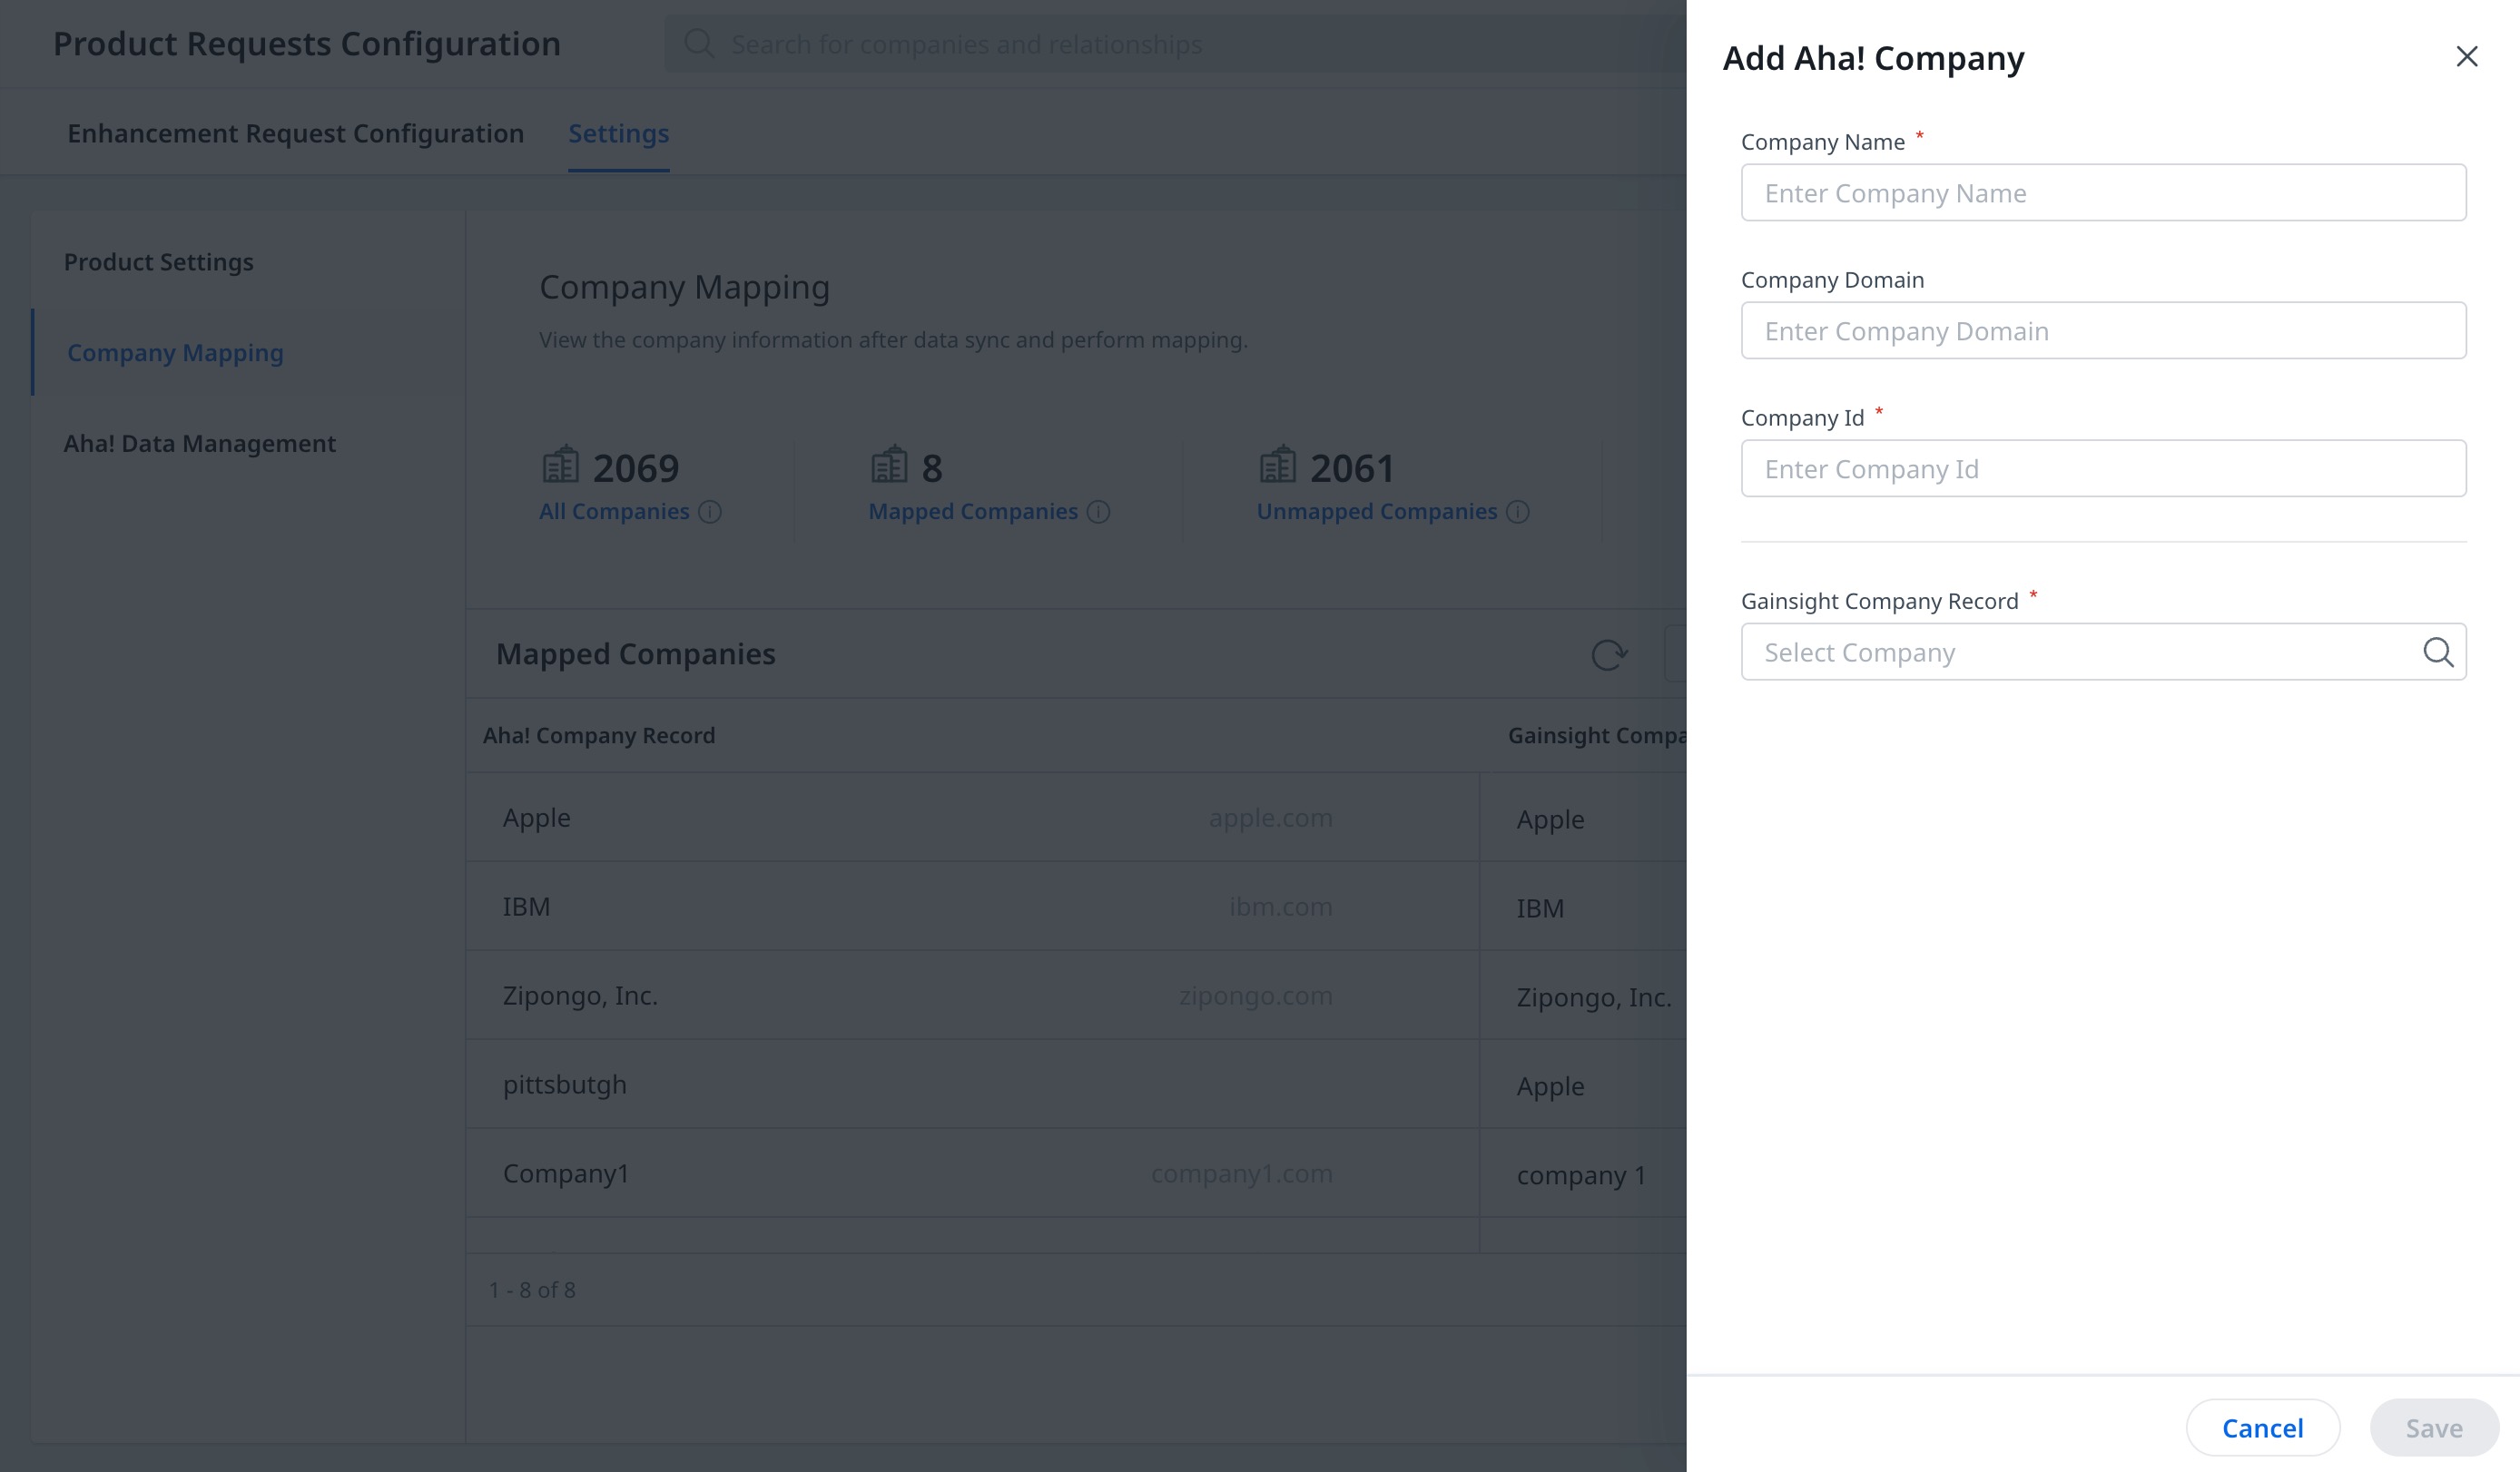
- Enter the following details:
- Company Name: Enter the Company Name.
- Company Domain: Enter the Company Domain.
- Company ID: Enter the Company ID.
- Gainsight Company Record: Select Company from the search text box.
- Click Save. The Company Mapping page appears.
- Click Save.
Aha! Data Management
To manage the Aha! data to be synced to Gainsight, follow these steps:
- Click Navigate to Connectors. The Connectors page appears.
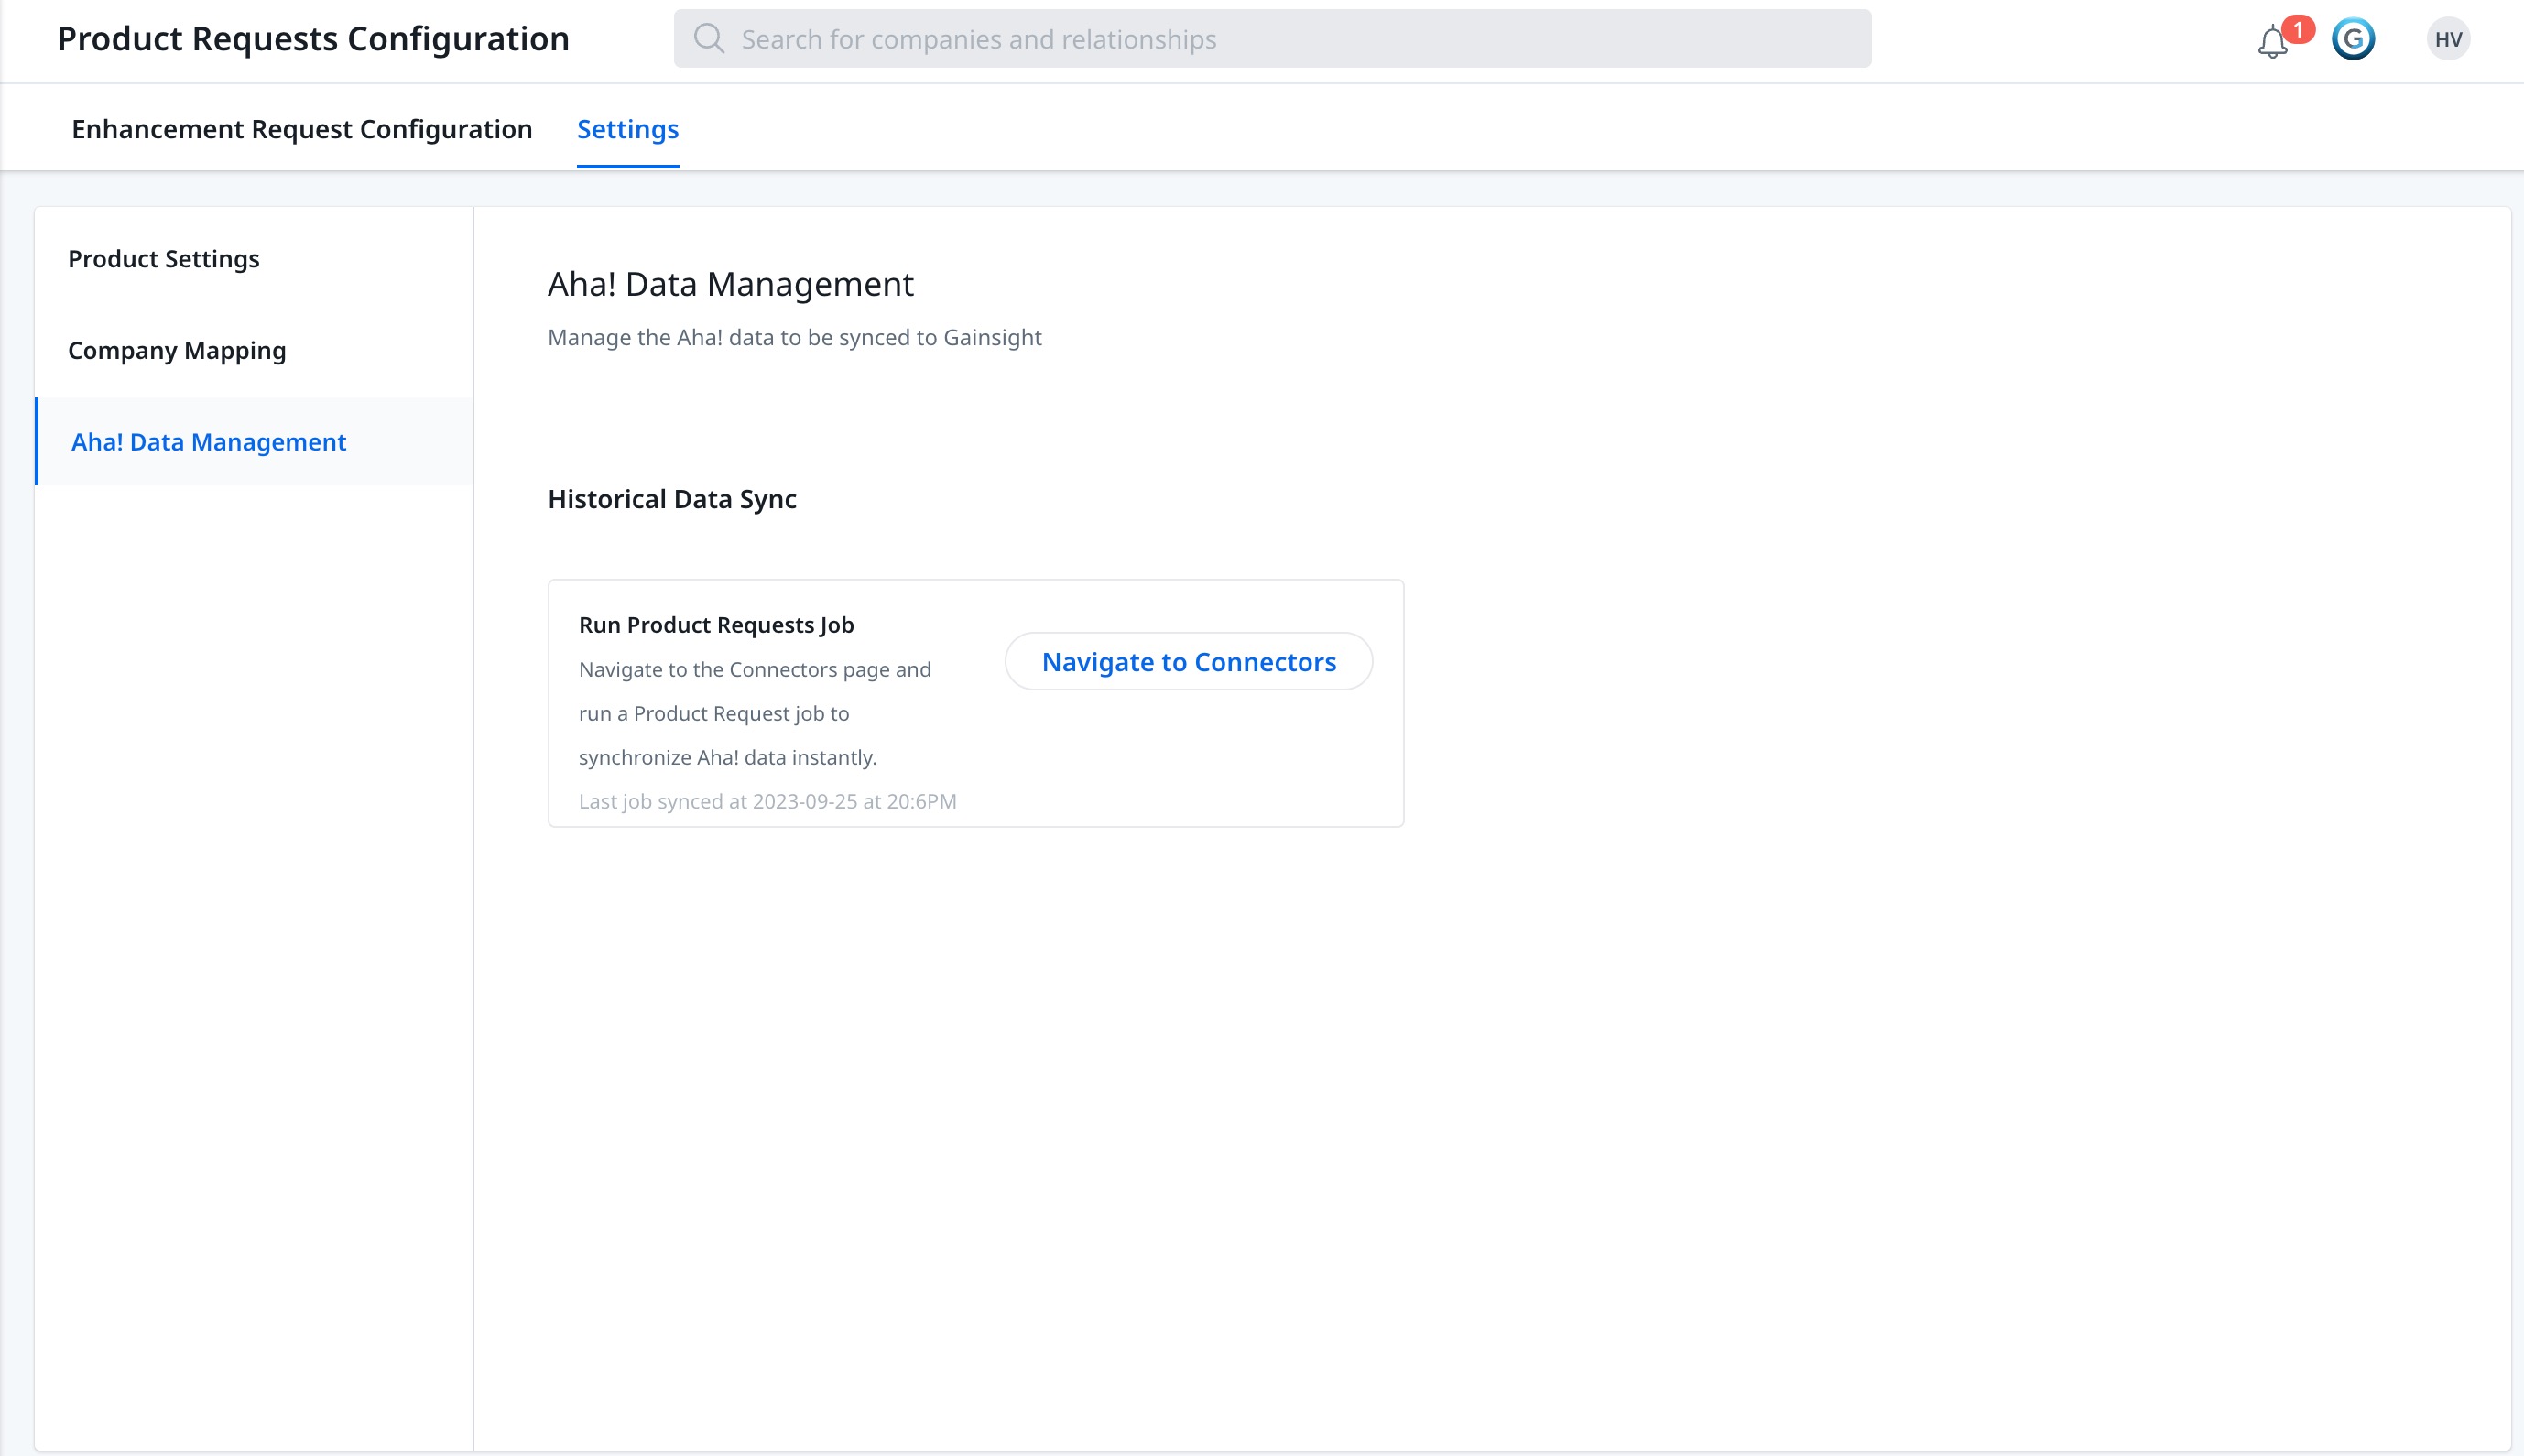
- From the Aha! Connection, click View Jobs. The Jobs page appears.
- From the three vertical dots menu, click Run Job. The data gets synced into Gainsight.
