Load to GS Company Forecast Action Type
Gainsight NXT
This article helps admin to use the Load to GS Company Forecast action type using Horizon Rules in the Rules Engine.
Overview
The Load to GS Company Forecast action type allows admins to preload upcoming renewals data for customers to forecast and to make updates. This rule also helps when admins want to use a different data source. The updates can be adding custom fields, updating data in existing fields, or loading data from a custom object.
Example Business Use Cases:
- When admins configure account based forecasting for the first time, data is preloaded from the Company object. Often, changes occur in the account details post the initial configuration. In such cases, admins can run the Load to GS Company Forecast rule action to load the updated data. They can also use this rule to load custom fields from the Company object that are not initially available.
- Account based forecasting preloads data from the Company object and provides CSMs with account level details. However, CSMs might require to view the data that is sorted at the account level from a custom object rather than the Company object. Admins can run the Load to GS Company Forecast rule by selecting the custom object as the source object and achieve the required results.
Gainsight recommends reading the configuration of the Rules Details, Data Setup, and Schedule steps before reading this article. For more information, refer to the Create New Rule section of the Rules Engine Horizon Experience article.
Configure Load to GS Company Forecast Action Type
To configure the Load to GS Company Forecast action type:
-
In the Action Setup step, hover on the dataset. The Add Action icon appears.
-
Click the Add Action icon. The Add Criteria slide-out panel appears.
-
(Optional) Click Add Criteria to define a filter criteria for the dataset.
-
Click Continue to navigate to the Add Actions step.
-
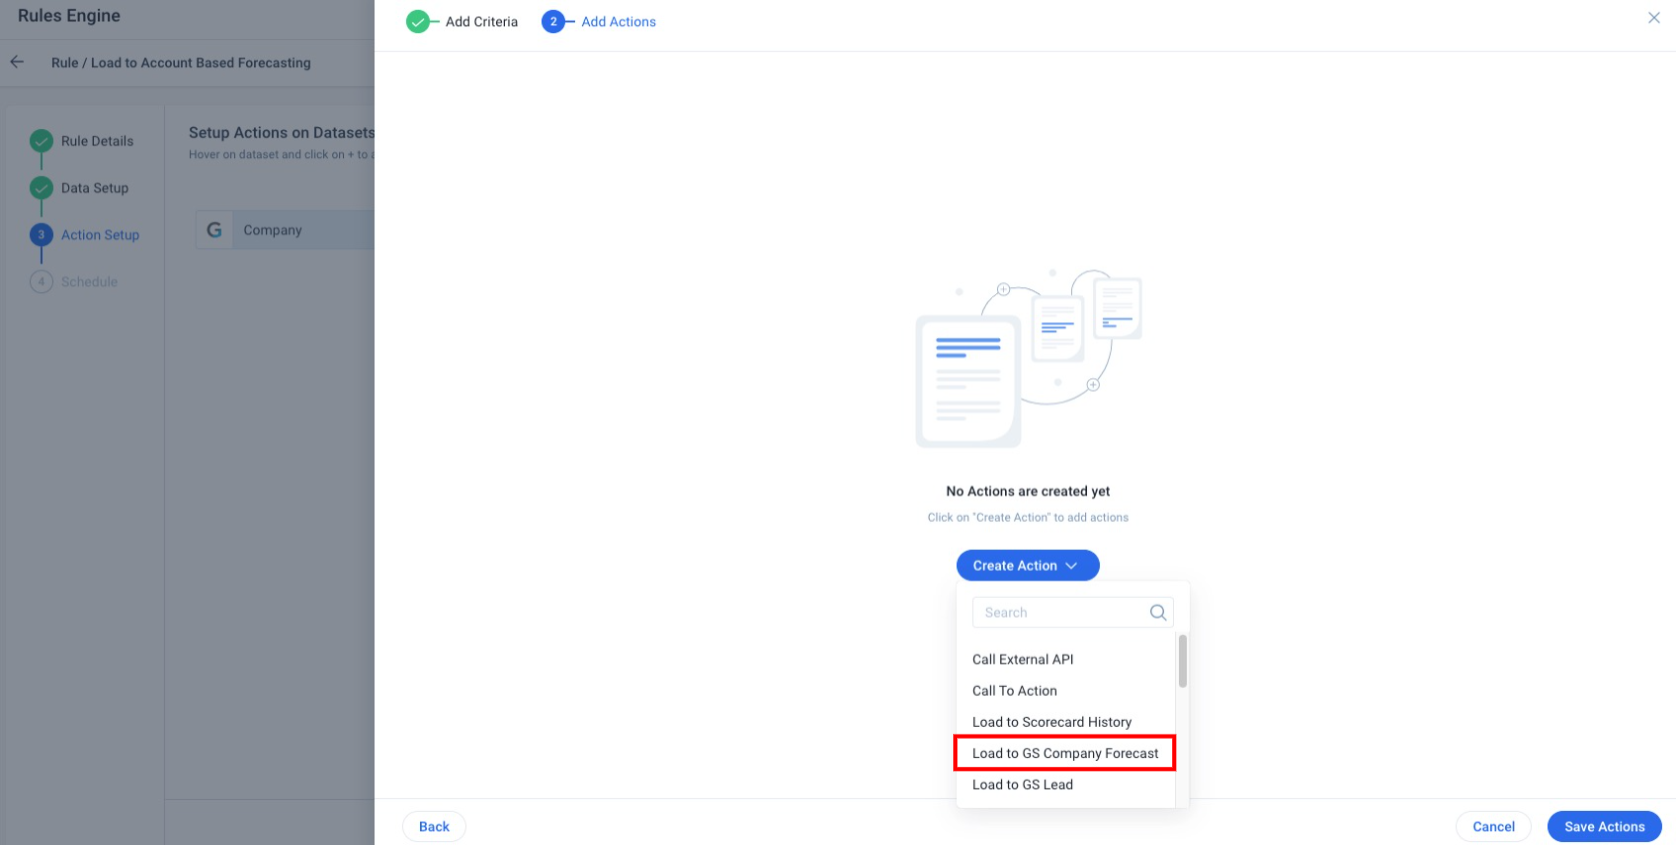
From the Create Action drop-down list, select the Load to GS Company Forecast action type.

-
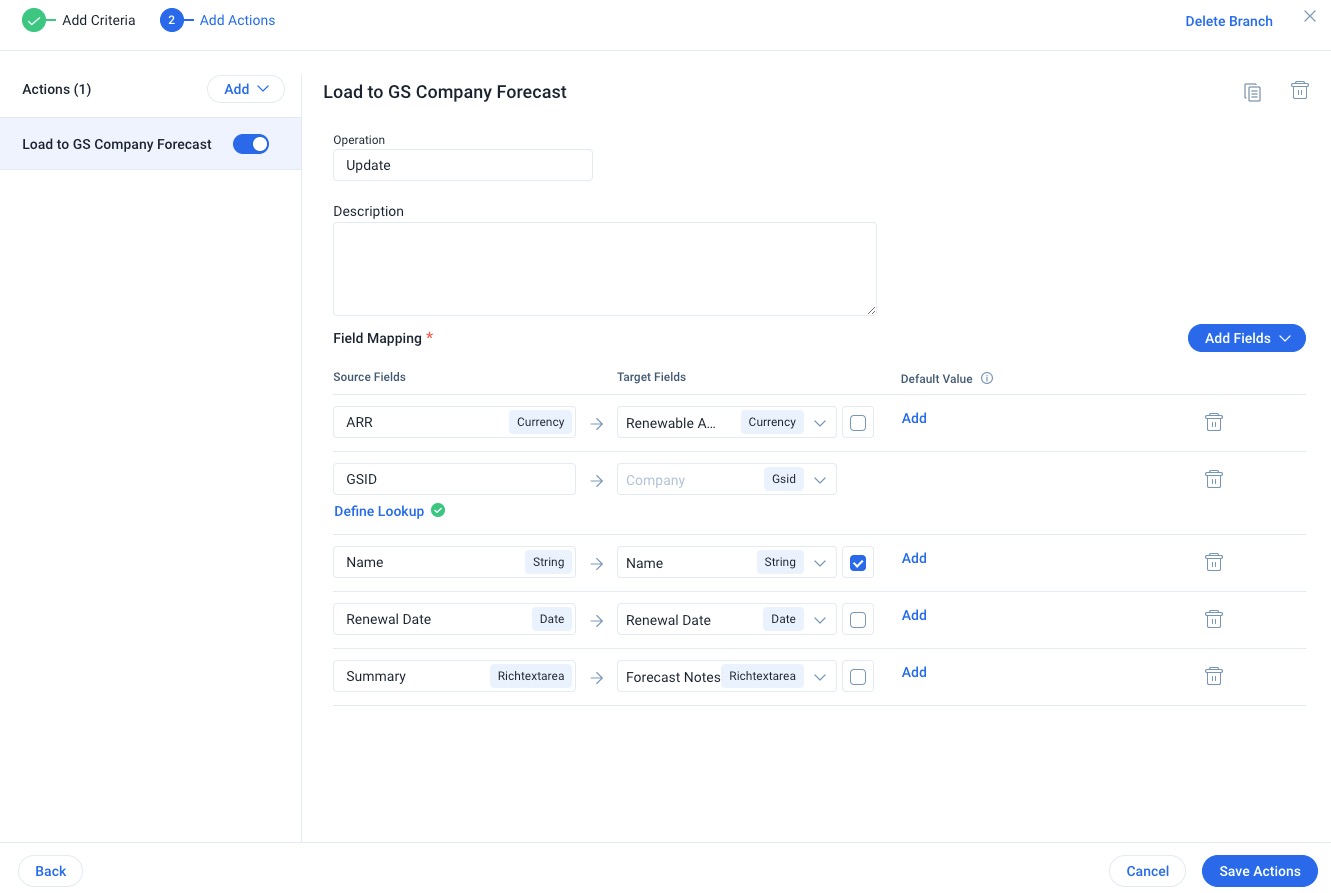
In the Load to GS Company Forecast section, provide the following details:
-
Operation: Select one of the following options.
-
Upsert: Select Upsert to insert new data or update existing data from the source fields into the target fields.
Note: As a best practice, Gainsight recommends using the Upsert operation for creating and running a new rule. -
Update: Select Update to only update the data from source fields into the target fields.
Note: As a best practice, Gainsight recommends using the Update operation when you intend to add new field mappings.
-
(Optional) Description: Enter a description for the rule action.
-
From the Add Fields drop-down list, select from the following types of fields to add to the action.
-
Source Field: This option lets you select source field(s) from the source object and map it to the target field in the GS Company Forecast object.
-
Click Source Field. The Select Fields slide-out panel appears.
-
Select the checkbox of the source fields from where the data should be fetched.
-
Click Select. The selected source fields are added to the Field Mappings section.
-
Select the Target Fields where the data should be loaded.
-
(Mandatory) Select at least one Include in Identifiers checkbox. This helps to avoid data duplication.
-
(Optional) Add a Default Value.
Note: This value is populated in the target field in case the source field value is invalid or not available. -
Configure the Define Lookup operation. It fetches the source field data through an intermediate object and loads it into the target field.
-
-
Custom Field: This option lets you provide a custom value to the target field in the GS Company Forecast object.
-
Click Custom Field. A custom field line is added to the Field Mapping section.
-
From the drop-down list, select Target Fields.
-
Enter the value that should be loaded in the selected target fields.
-
-
Reuse Source Field: This option lets you reuse a source field from the list of source fields already selected. The configuration remains the same as the Source Field section that is elaborated above.
-
-
Click Save Actions. The rule is saved successfully.

