Using the Text Editing Tool in Your Dashboard
Customize your text lesson content and lesson summaries, such as changing text size and color, and adding images, and tables by using the built-in text editing tool within your Skilljar dashboard.
For more detailed information about embedding extra content into your lessons, such as video, and PDF lessons, please read Embed Content in a Lesson.
Using the text editing box
On various pages throughout your Skilljar dashboard, you'll find a text editing tool. This allows you to include the details of your courses and lessons, and customize them with items such as numbered lists, hyperlinks, images, and tables.

You can also manage the HTML and CSS code to make more detailed edits. For more information about using code, please read Embed Content in a Lesson.
The text editing tool works like most readily available document tools, such as Google Docs and Microsoft Word. Simply select the large box and type your content. You can manipulate text to change the size, color, and alignment. You can also add numbered and bulleted lists.
Adding images
You can add various image formats to your page, such as:
- PNG.
- JPEG.
- Gif - including animated Gifs.
To add an image from your device or a web page:
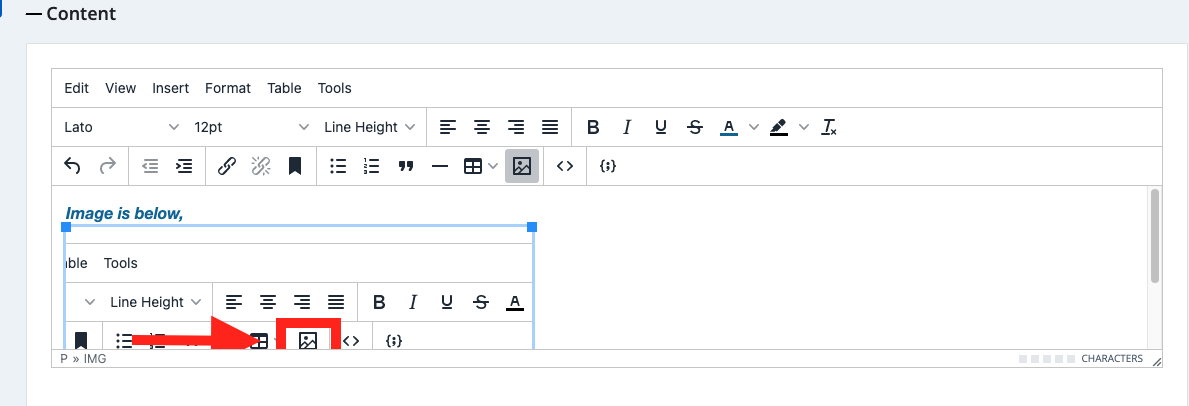
- Select the image button on the editing toolbar.

- In the new window, select the icon next to the source box, or paste the weblink to the image in the source box, if you have one.

- In the Upload window, select Choose File.
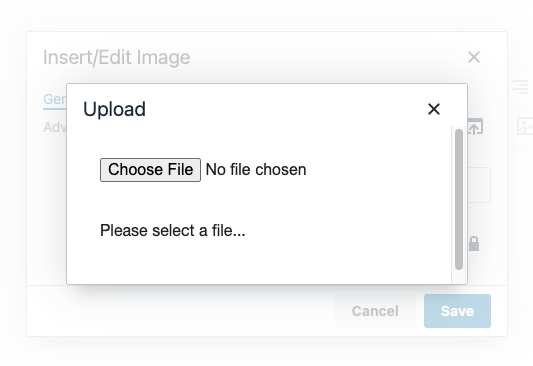
- Find the image you want to add.
- Optional: Add an alternative description and change the width and height of your image.
- Select Save.

Your image will then appear in the editing box.
Select Save Lesson to save the changes.
Adding tables
To add a table:
- Select the table icon on the editing toolbar.
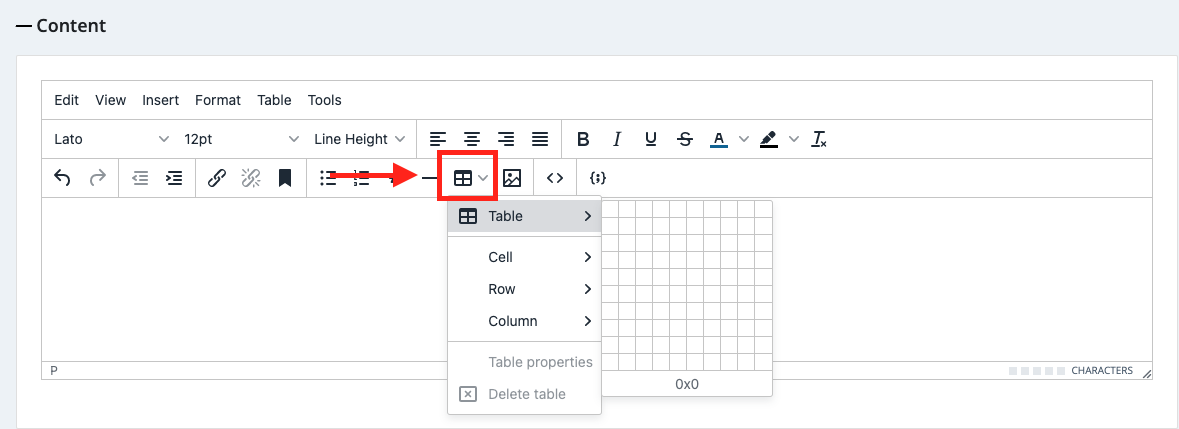
- Expand the Table header and select the number of columns and rows you want to add.
- The table will auto-populate in the editing box.
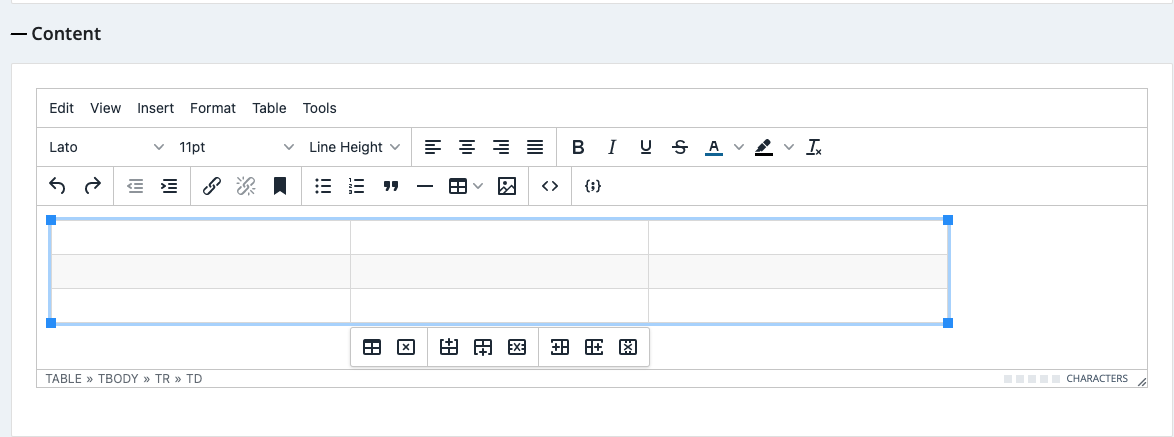
- To add text, select the cell you want to edit.
- To add, remove, or change the style of the table, select the icon bar underneath, or select the table icon and then the relevant option.
- You can make advanced edits to the table and cells, such as adding a header, and a border by selecting the table icon, expanding the Cells header, and choosing Cell Properties.
- When you’re finished, select Save Lesson.
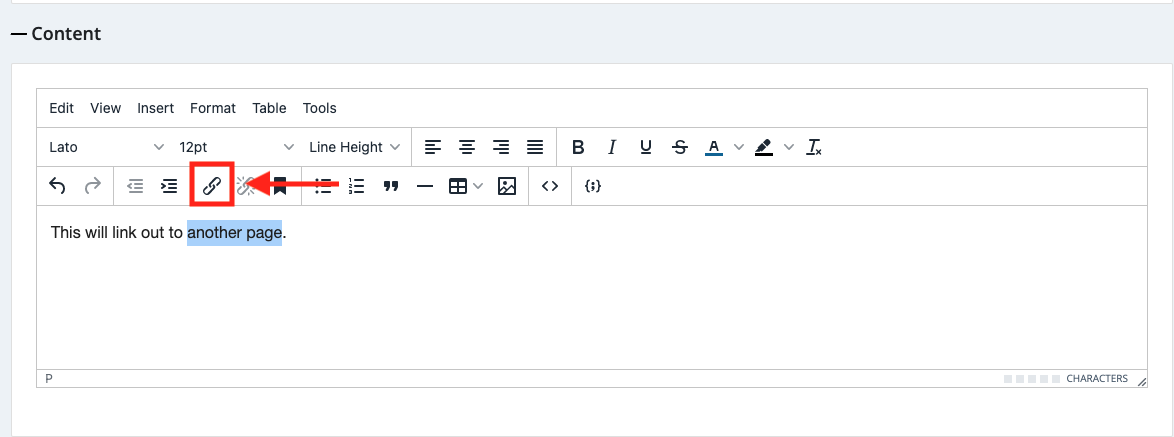
Adding links
To add a link to another page:
- Highlight the text or image you want to turn into a link.
- Select the link icon in the toolbar.
- Paste or type your link address into the URL bar.
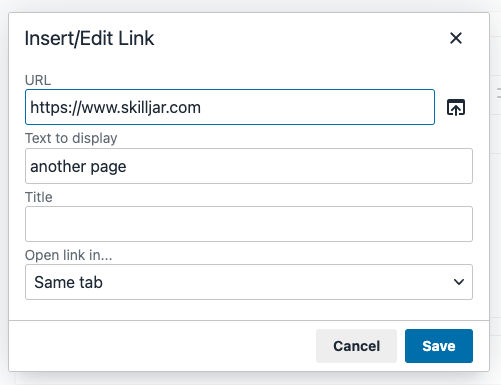
- Optional: Manage the link settings, such as if the link will open in the same window as your lesson or a new window.
- Select Save.
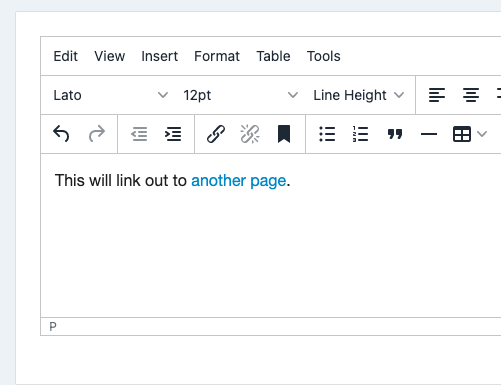
- The text with the link will change to blue.
- When you’ve finished editing, select Save Lesson.