Setting up Workato for Skilljar Webhook Triggers
Pass data from Skilljar into Workato, an integration platform as a service (iPaaS) solution.
Workato has over 1000 application connections that require no coding, allowing you to use Skilljar's Webhook triggers to easily pass data between different business applications. You can find more about Webhooks at Using Webhooks API and iPaaS Webhook Setup Instructions.
To setup Workato for Skilljar Webhook triggers, follow these steps:
1. Create an API Key for Workato from your Skilljar Dashboard
Application programming interface (API) keys are used to set up your Workato Integration. You can read more about API keys at Getting started with the Skilljar API.
Admins can create API keys for Workato via the Skilljar Dashboard using these steps:
- Select Organization on the left of the page to reveal the options.
- Select API Credentials to open the settings page.
- Select Create a Key to generate a new API Key.

2. Create a new recipe in Workato
To create a new recipe in Workato, login to the Workato app and follow these steps:
- Select the Assets tab
- Select Create Recipe in the top right corner. The recipe setup screen will appear.

- Enter the name of your recipe in the Name box
- Select Trigger from an app, and then Start building to begin building the recipe.

- Search for and Select the Skilljar app via the options on the right.

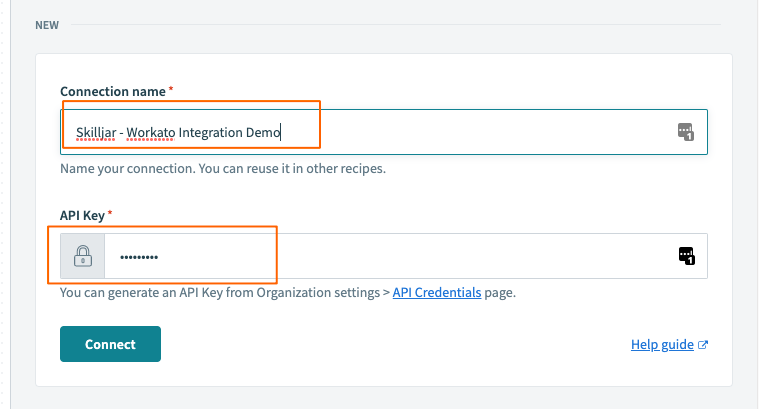
3. Authenticate the connection using your API key
If you've previously set up authentication in Workato with your Skilljar organization, you can select the Integration from the Connection name drop-down and move to the next step.
To create a new authentication, enter your API key from Step 1 in the API Key box and select Connect.
4. Select which Object you would like to receive through this trigger
Within the Skilljar Trigger Settings, select your recipe to filter to one specific Skilljar Event type from the Objects drop-down.
Learn more about the different Webhook event types on our Webhook help article.
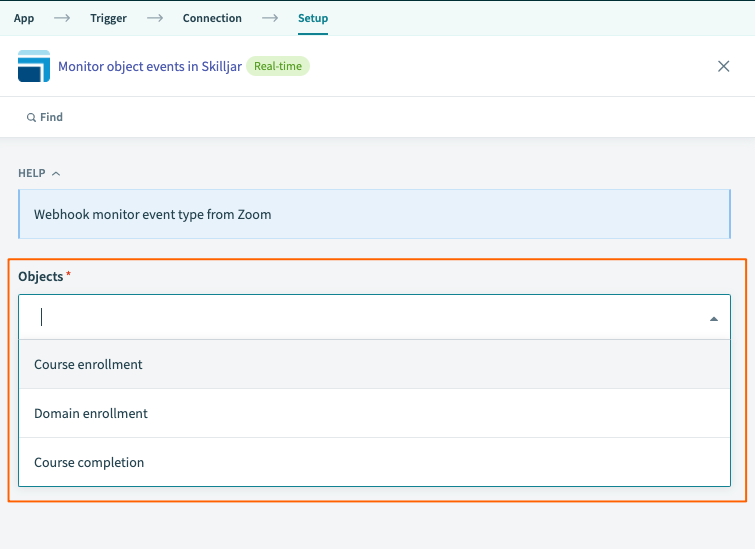
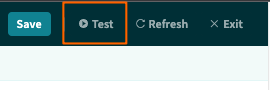
Select Test to make sure the webhook connection is successful.
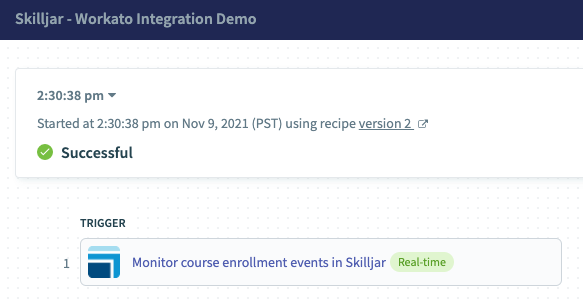
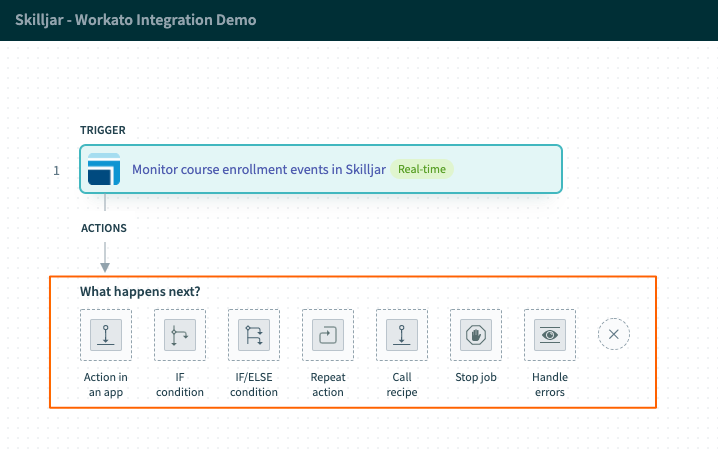
In the example below, Workato is monitoring for course enrollments:
5. Create / add actions in the recipe to send Skilljar Data which can be sent to other tools
You can now easily populate Skilljar data into the thousands of tools that Workato connects to!
Some types of connections that might be useful for your training program include:
- CRM and ERP tools - Send Skilljar training data to CRM and ERP tools
- Collaboration and Messaging - Send Skilljar data in a Slack Message or other Messaging tools
- Full list of Workato Connections - view the full library of the Workato connections
Be sure to ask our Customer Success team or Workato Account team about how else you can use this training data in your existing or new workflows.