Instrument your Mobile Application with Product Mapper
This article explains how to instrument your mobile application with Gainsight Product Mapper.
Overview
The Product Mapper feature allows you to model your application using a simple and powerful hierarchical tree structure that is designed to help you quickly and effectively map your application features and associate the tracked user events into the corresponding features and modules with zero codings. After the mapping is completed, you’ll be able to monitor account and user activity in your application, and see for example which features are more heavily used or which ones they’re unaware of.
Prerequisite
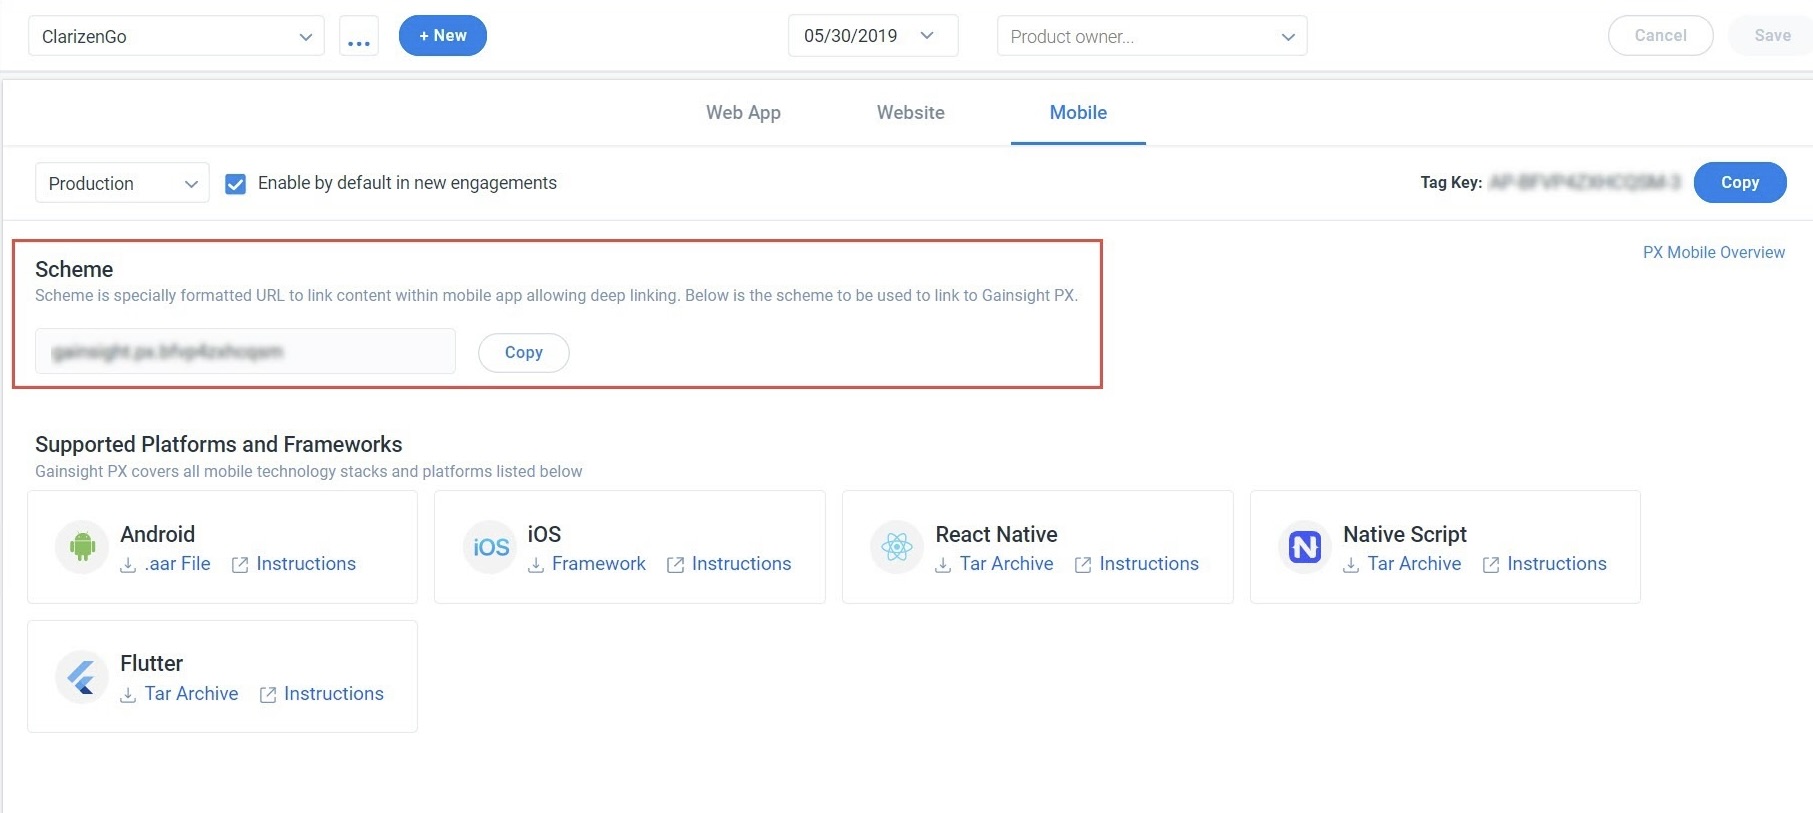
Configure Scheme which is a specially formatted URL to link content within a mobile app allowing deep linking. Perform the configuration steps specific to your platform. To copy the scheme URL navigate to Administration > Products.
Anatomy of Product Mapper
The Gainsight PX Product Mapper is composed of three elements; Modules, Features, and Rules.
Module
A Module in Product Mapper represents a section in your mobile application. Each section can have sub-sections or pages. For example, an e-commerce application can have modules like Home, Products, Sign in, Sign up, and so on. The Products module can further have sub-modules like Electronic equipment, home appliances, Kitchen needs, and so on. A module consists of pages in your mobile application.
Feature
A Feature represents a page in your mobile application. A page or group of pages can be part of a module. For example, Sign in, Sign up, About us, can all be part of the Home module.
Rules
You can create rules to track page views. Gainsight PX supports three kinds of rules for mobile applications:
- Screen Rule: This rule is used to track the number of visits for a page (feature) in your mobile application. You can also track which user visited.
- Custom Event Rule: This rule tracks events fired via API.
- Tap Rule: This rule events are created when the user taps on the mapped element.
Web Product Mapper
This section explains how to create modules and features to the Product Mapper for your web application. You can modify or rearrange the modules or features, as required. A sample mobile application is used to demonstrate creating modules and features.
Create Modules
This subsection explains the process of creating Modules in Gainsight PX. Once you create modules, you can add features under the modules.
To create Modules:
- Navigate to the Product Mapper from the left pane.
- Select the Mobile channel.
- Select the required mobile product.
- Click Create module or select the Module option from the + New menu.
Note: You can also create a module by clicking on the Add new... Module icon on the right side of the screen.
-
Enter a name for the module and hit the enter key. In the following image, a new module called Mobile is created.
Create Features
This subsection explains the process of creating Features in Gainsight PX. You can create a Feature under a module or keep it independent under your product tree.
To create Features:
-
To create a feature under a module, right-click the required module, and select Feature.
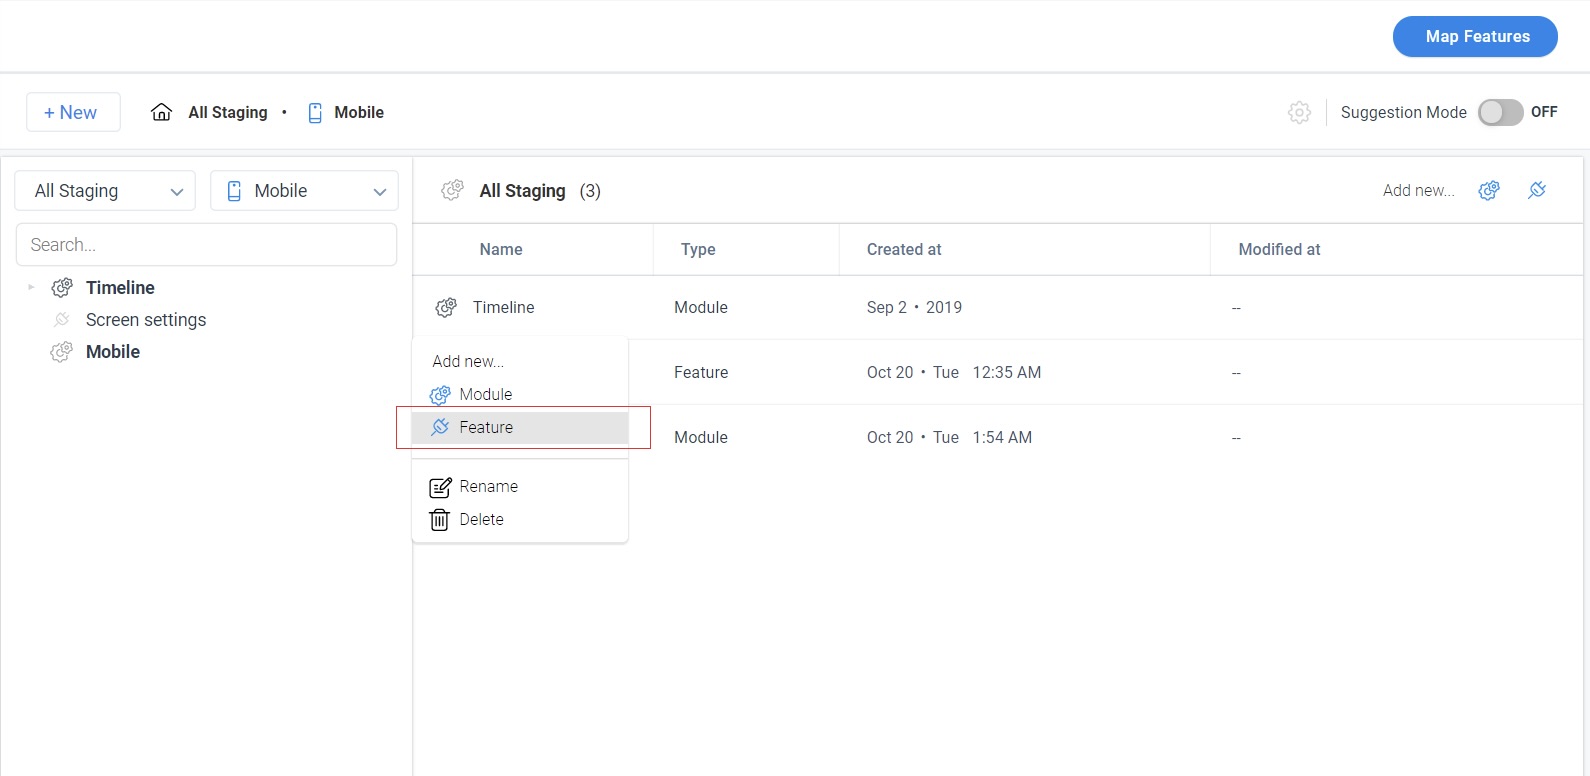
The new feature is created under the selected module.
Note: To create a feature independently, select the Feature option from the + New menu.
-
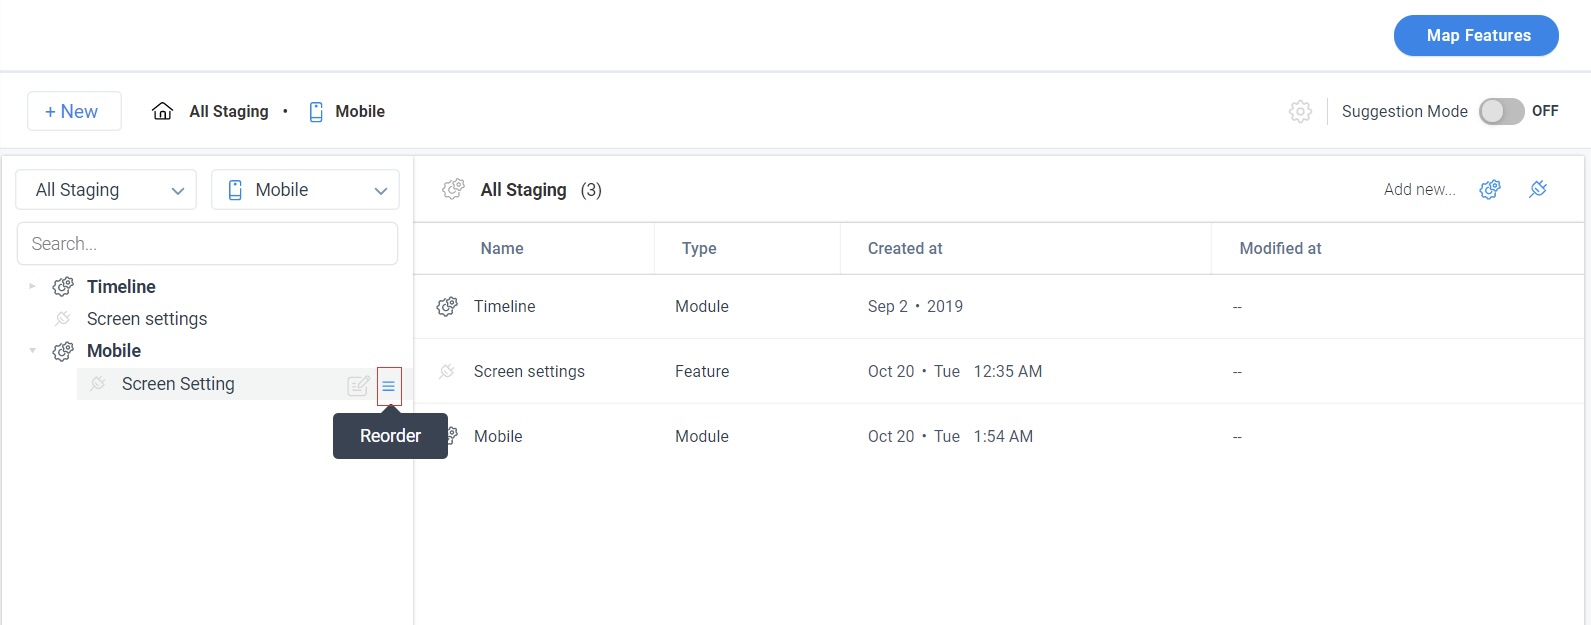
(Optional) Click Reorder and drag a feature or module, to change its position.
Similarly, create modules and features as required.
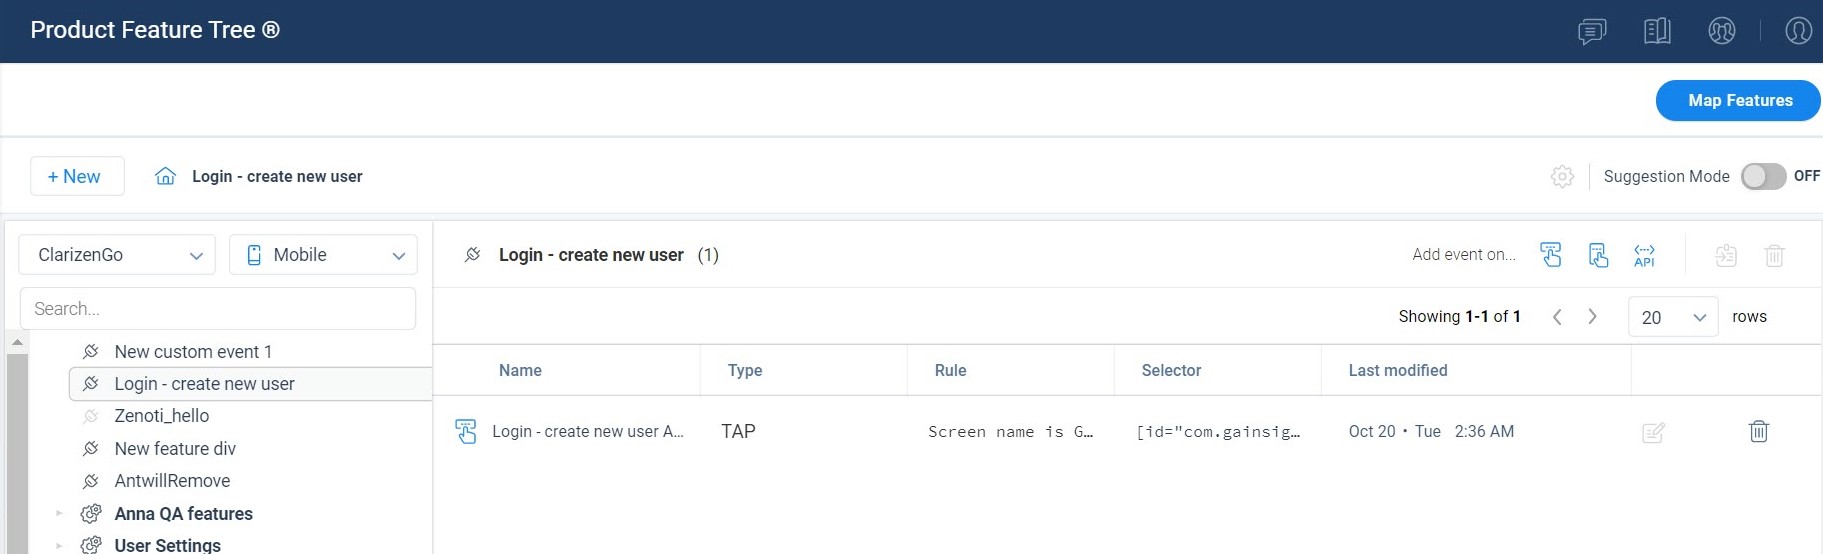
Create Screen Rule
This section explains how to create a Screen rule. Once you create features for your mobile page, you must create screen rules for tracking page views.
To create screen rule:
- From the left pane, click Product Mapper.
- Select the required feature.
- Right-click the feature and select Screen rule. The Rule window displays.

You can also click the Screen rule icon on the top right corner.

- Enter a name for your rule.
- Select either Screen name or Screen class from the first drop-down menu.
- Select a suitable operator.
- Enter the name of the Screen name or Screen class (based on the option selected in step 7). A set of matching options are suggested. Select your Screen name or Screen class.
- Select Platform.
- Select either Android or iOS from the platform drop-down menu and select a suitable operator.
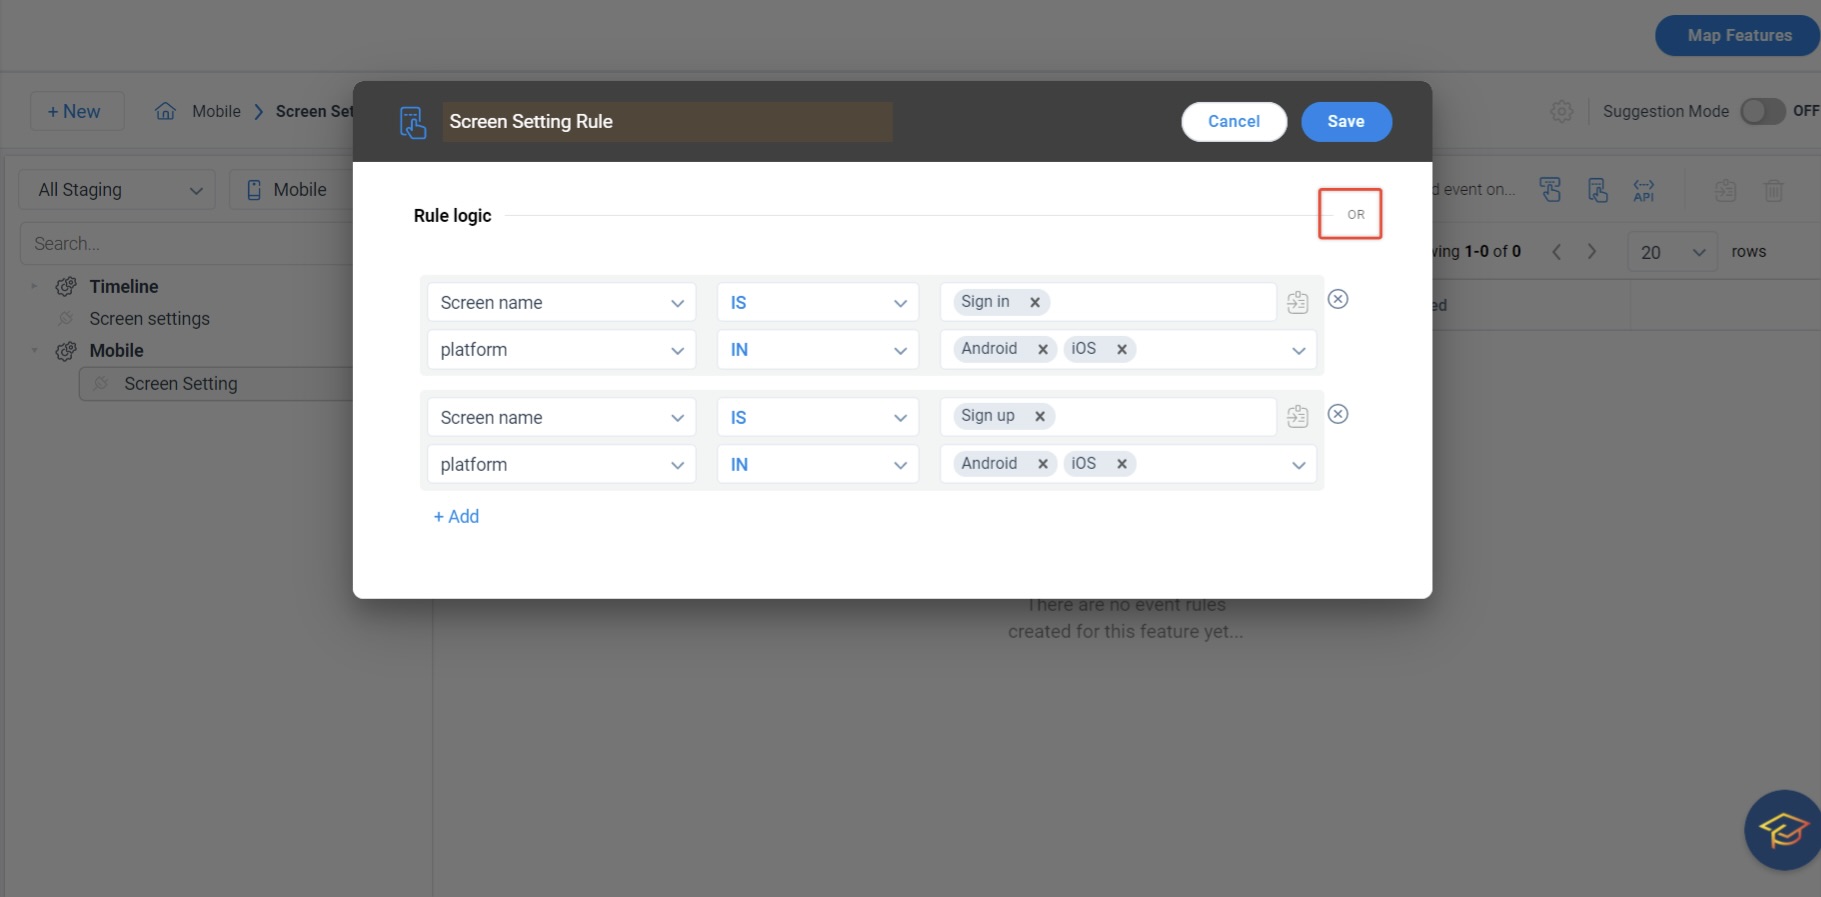
The above rule tracks the feature when a user views the page called screen mobile from the Android app.
To create multiple rules in a single feature, click + Add. For example, to create a feature that tracks both the sign-in page and sign up pages simultaneously, create two rules in the same feature. This feature jointly tracks all sign in and signup attempts. You must use the OR logic to ensure that the feature is tracked when either of the two rules is executed. The AND logic must be used when you want to track the feature only when both rules are satisfied.
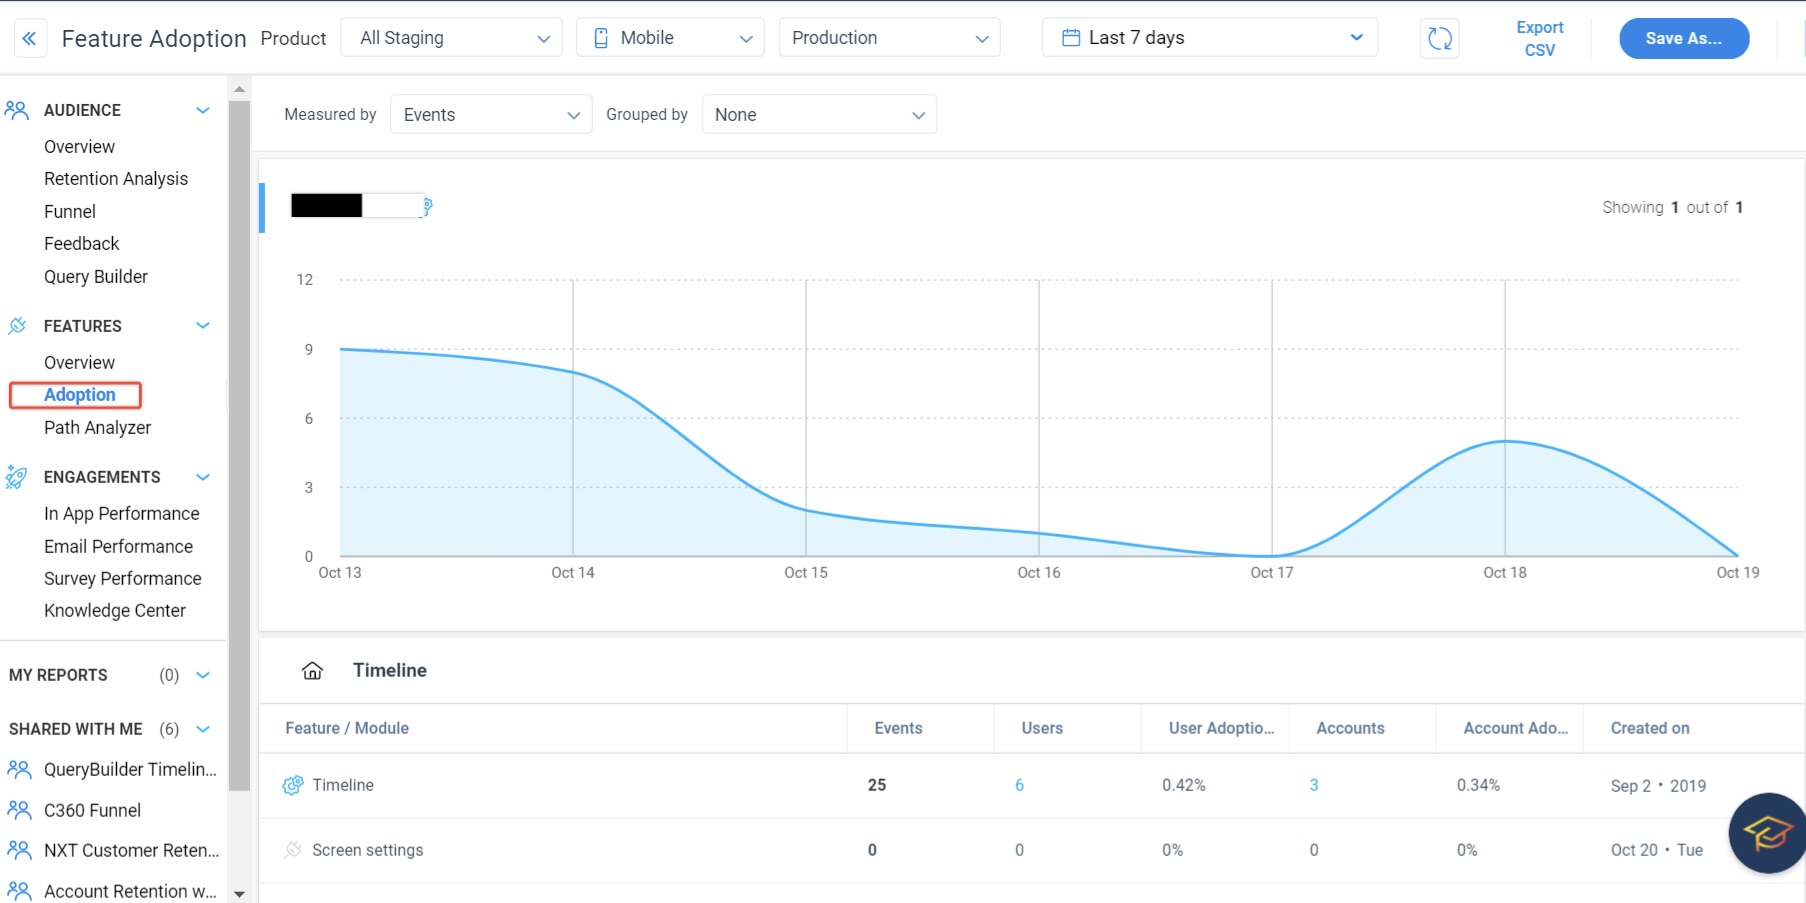
You can view the analytics of the feature or modules from the Adoption report.
You can also view the features that a user has accessed, from the Recent Activity section of the Audience Explorer page.

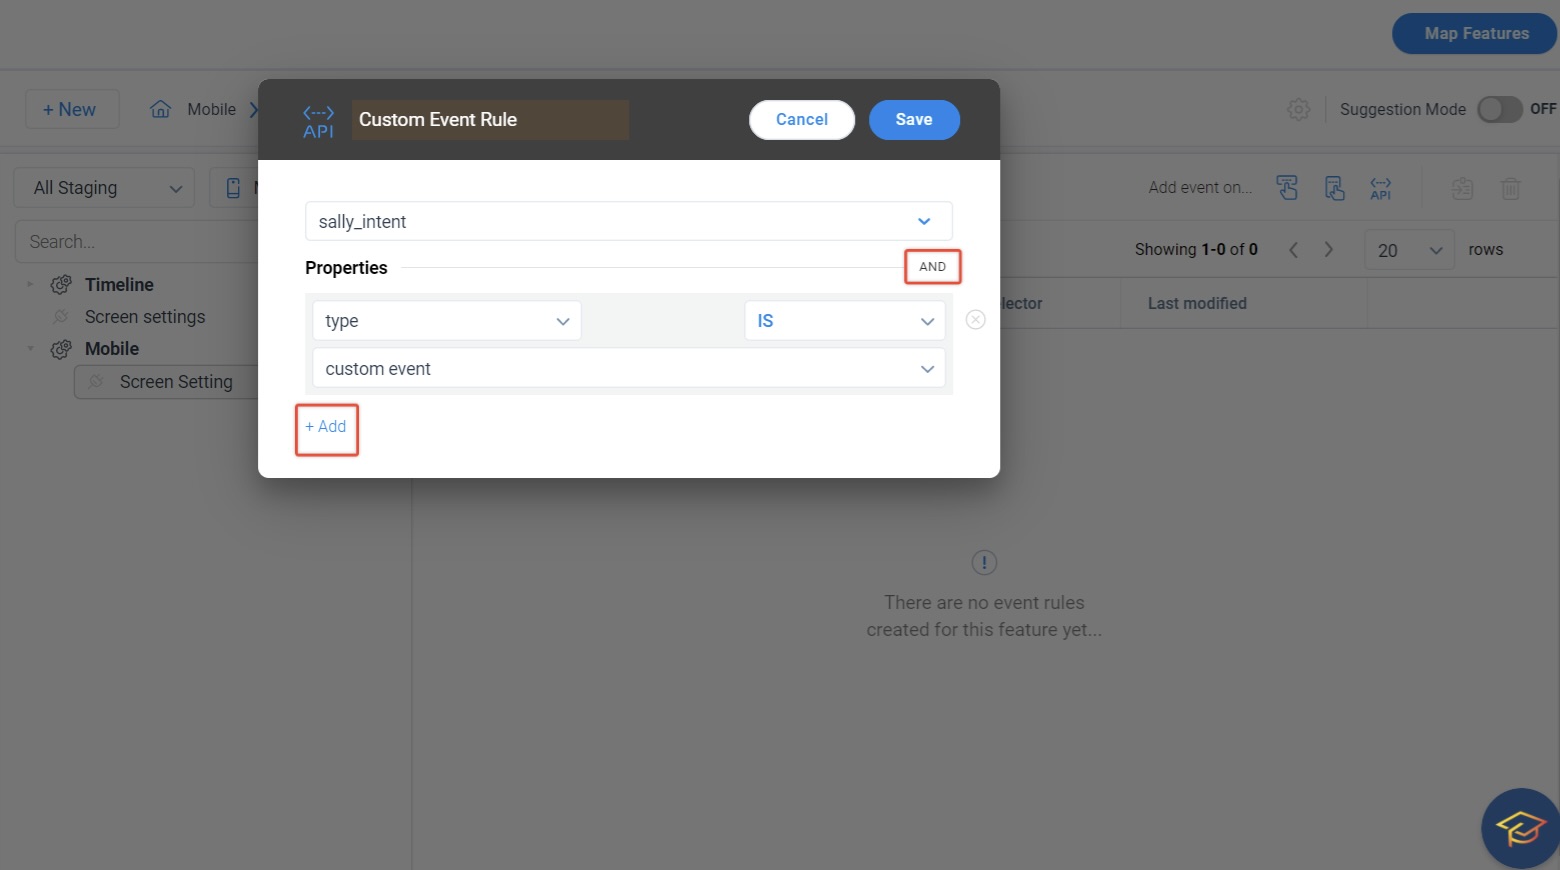
Create Custom Event Rule
This section explains how to create custom event rules. Custom event rules track those aspects of your mobile application that are not readily displayed on mobile. A developer must first create custom events in your own application and associated properties if any before you can create custom event rules.
To create Custom event rules:
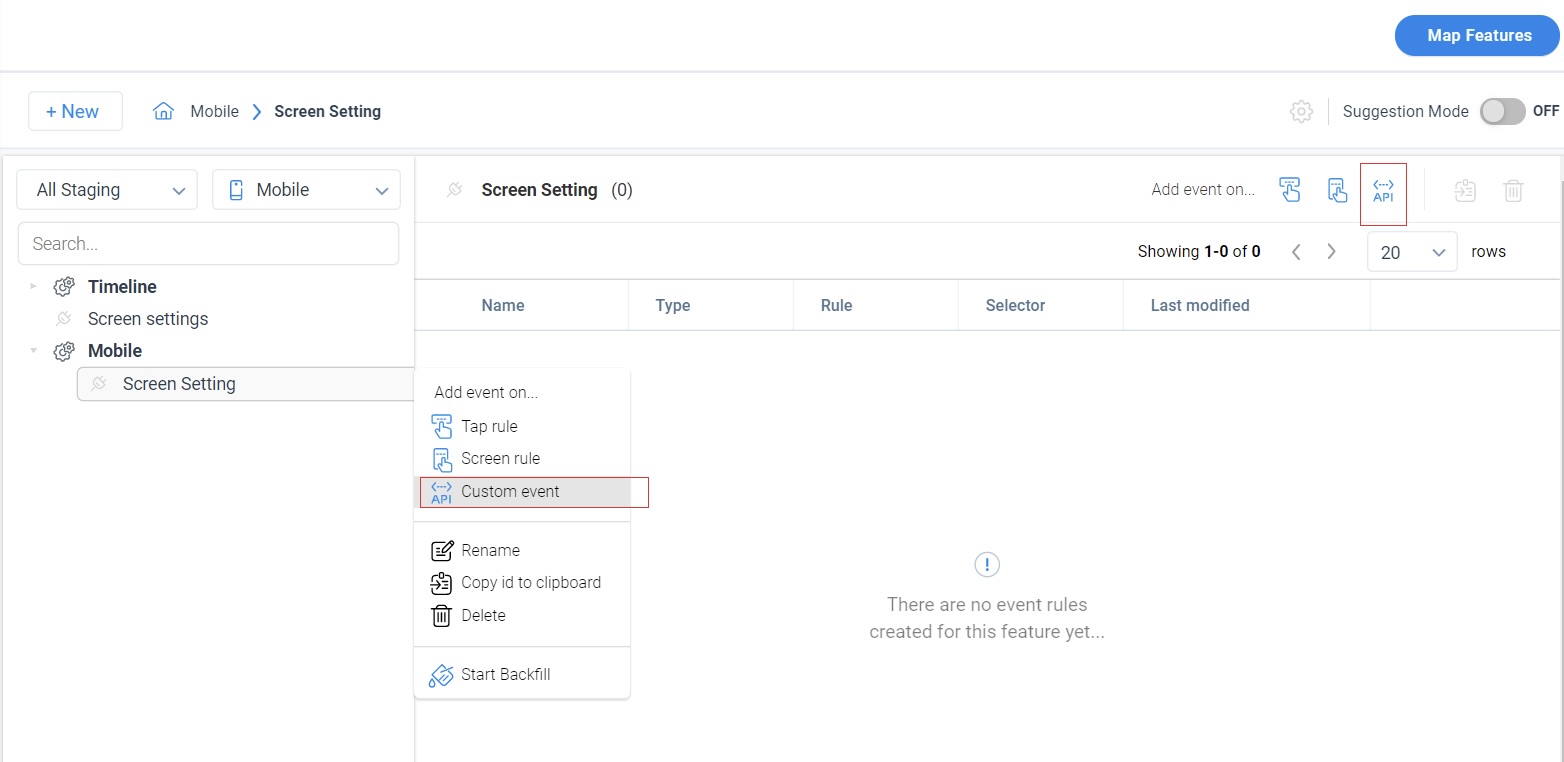
- Select the required feature.
- Click the Custom event icon or right-click the required feature and select Custom event.
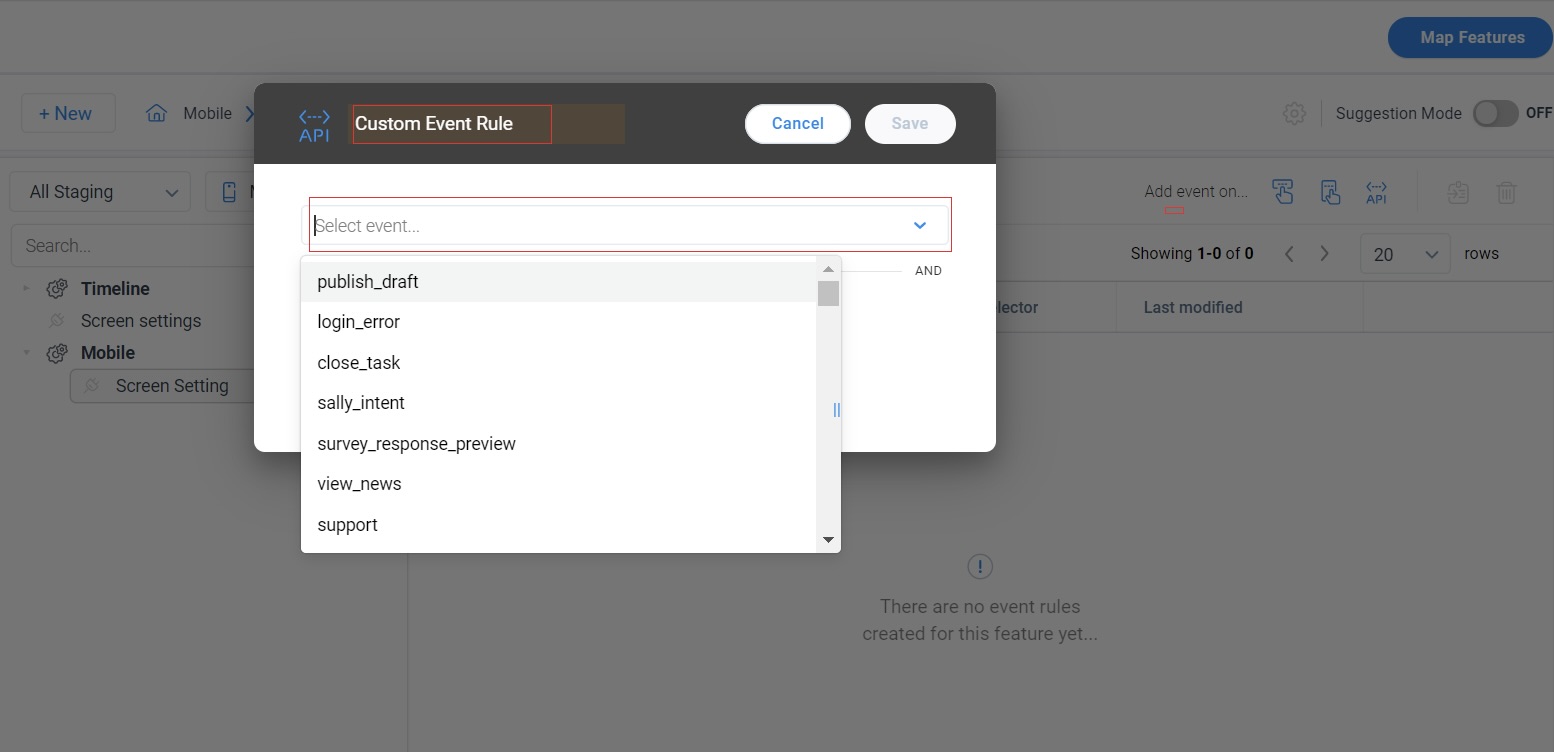
- Enter a name for the rule.
- Select the required event from the drop-down menu.
-
(Optional) Click + Add to add properties for the event.

-
Select a suitable operator for the property type and enter the name of the property.
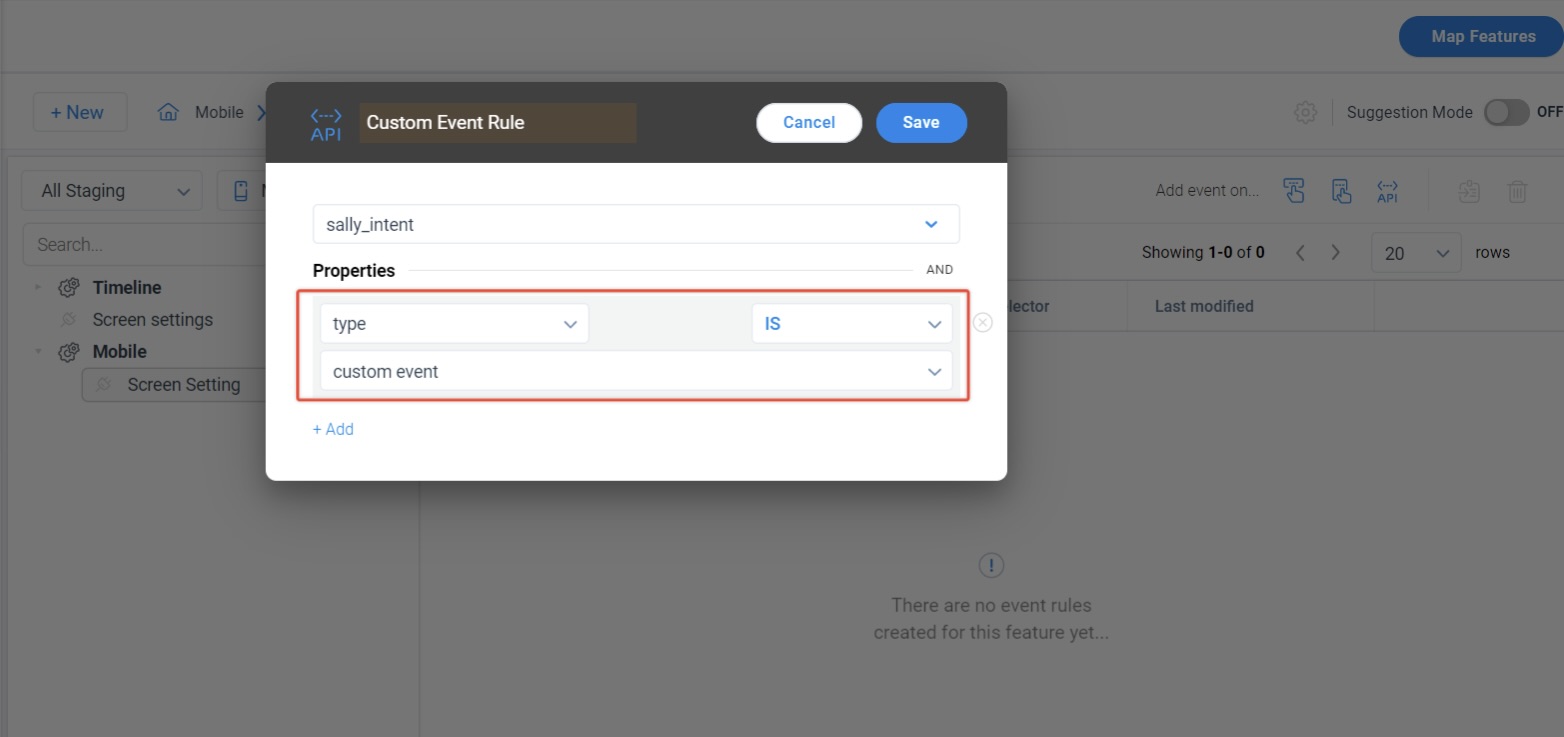
-
(Optional) Click + Add to add multiple Properties. You can apply AND or OR logic between properties.
In-App Product Mapper
When you use Gainsight PX across their mobile product portfolio you might want to build a product tree end to end from Mobile.
Gainsight PX supports full mobile product mapping experience with the following capabilities:
- View and edit the Product Tree
- Search and edit and delete Module/Features
- Add Tap Rules for Module/Features
This section explains how to create modules and features to the Product Mapper for your mobile application. You can modify or rearrange the modules or features, as required. A sample mobile application is used to demonstrate creating modules and features.
Create Modules
This subsection explains the process of creating Modules in Gainsight PX. Once you create modules, you can add features under the modules.
To create a module:
- Log into your Gainsight PX mobile subscription.
- Select the required product and type of application as Mobile from the available drop-down options.
- From the left pane click Product Mapper and then click Map Features. The screen displays a QR Code.

- Scan the QR code with an app on your mobile device or copy an URL using Click to copy link and send the link to your mobile device.
- From the displayed screen, click OPEN IN APP link. Your mobile application is launched. (that has Gainsight mobile SDK).
- Tap the PX icon on the home screen.
- From the displayed options, tap Product Feature Map. The product tree displays.
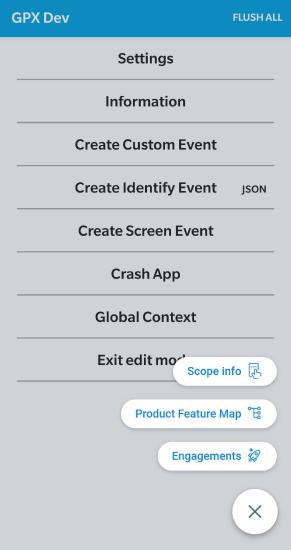
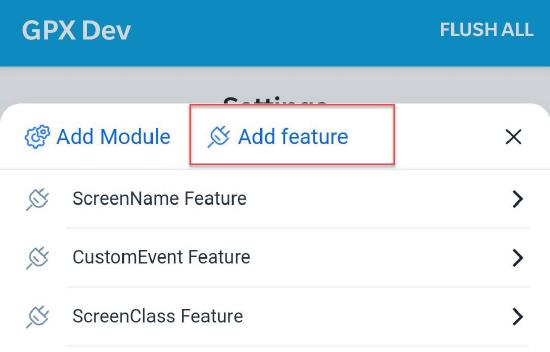
- Tap the + icon and then click Add Module.
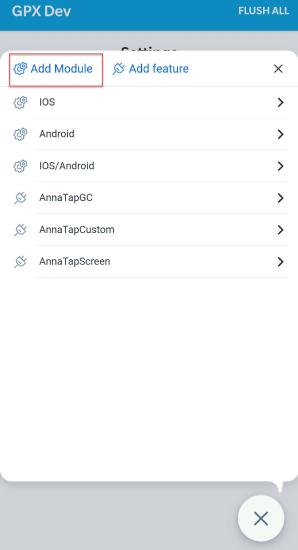
- Enter the module name and tap Done. The new module now appears in the product tree.
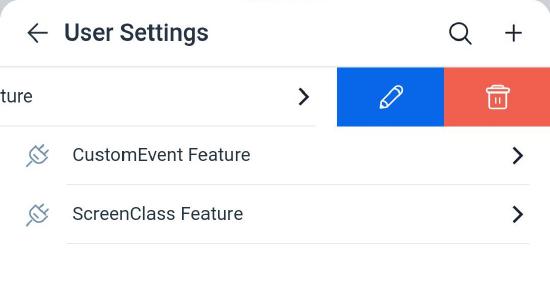
Edit or Delete Module
To edit to delete a module, select the required module, touch down and drag to the left. Tap the edit or delete button as required.
Create Features
This subsection explains the process of creating Features in Gainsight PX. You can create a Feature under a module or keep it independent under your product tree.
To create Features:
- Tap the PX icon on the home screen.
- From the displayed options, tap Product Feature Map. The product tree displays.
- Tap the module for which you want to create the feature.
- Tap the + icon and then tap Add Feature. The new feature is created within the selected module.
Edit or Delete Feature
To edit to delete a module, select the required feature, touch down and drag to the left. Tap the edit or delete button as required.
Create Tap Rule
This section explains how to create a Tap Rule. Once you create features for your mobile page, you must create tap rules for tracking tap events for the elements on your application.
To create tap rule:
- Tap the PX icon on the home screen.
- From the displayed options, tap Product Feature Map. The product tree displays.
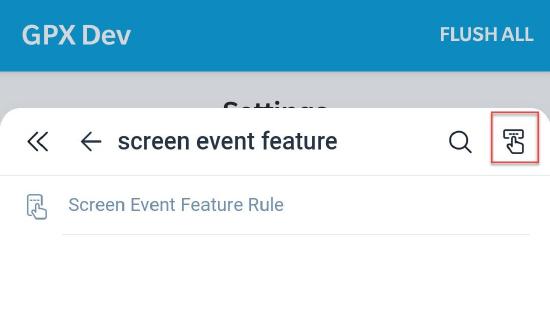
- Select the feature for which you want to create the rule and tap the create Tap Rule icon.
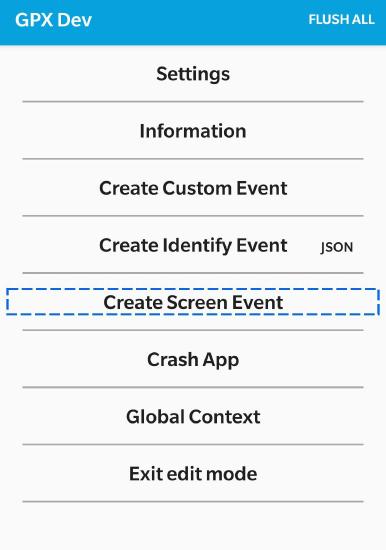
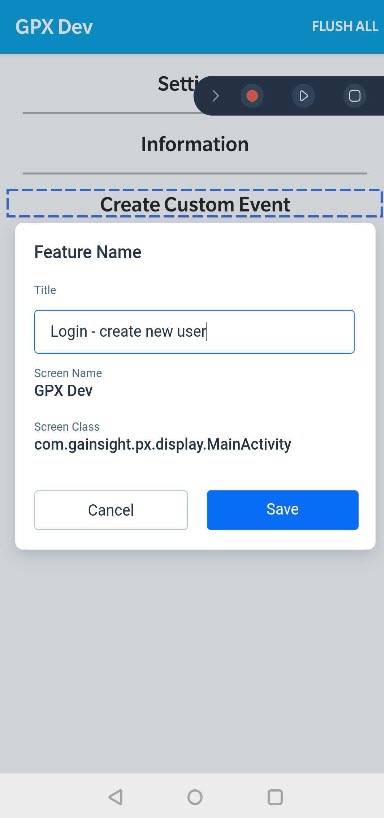
- Touch down and drag your thumb on the screen and then select the element that you want to map. A blue dotted line appears around the selected element. Touch up (release your thumb) once you reach the required element.
- Enter the Title of the rule and click Save. The red button starts blinking when the feature is being mapped. You can also pause/stop the mapping using the respective buttons.
- View the new feature details that appear in your Product Tree.
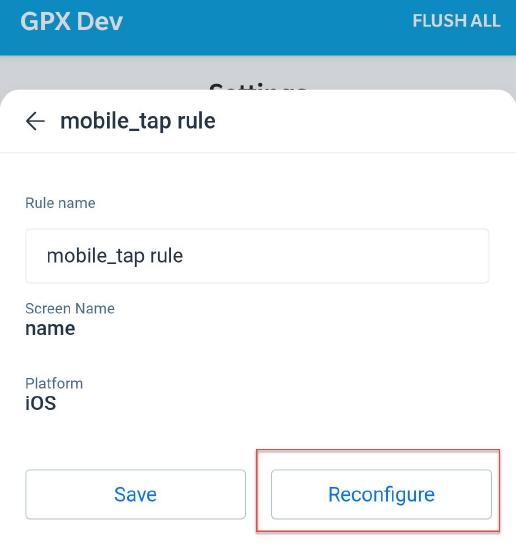
Reconfigure or Delete Tap Rule
To edit to delete a rule, select the required rule, touch down and drag to the left. Tap the edit or delete button as required. when you select the edit option, you can reconfigure the rule by selecting a different element.
Preview Mapped Elements
To preview the mapped elements, tap the required rule from the list of rules. The mapped element is highlighted with a blue dotted line.