
Connect Gainsight PX to LLMs Using MCP [Beta]
This article explains how to configure and connect the PX MCP Server with supported AI assistants such as Claude and ChatGPT.
Overview
The PX MCP Server enables you to connect Gainsight PX with supported AI assistants such as Claude and ChatGPT. After the connection is configured, you can use natural-language prompts to access product experience insights, feature adoption metrics, engagement analytics, survey feedback, and other contextual PX data directly from your AI workflow.
This document provides setup and configuration instructions for the PX MCP Server. For more information about PX MCP Server capabilities, supported use cases, limitations, and available tools, refer to the Gainsight PX MCP Server Integration Overview article.
Depending on your organization’s policies, administrative controls, and preferred AI workflow, you can configure the PX MCP Server using one of the following methods:
- Claude organization setup: A Claude organization administrator configures the PX MCP integration for the organization. Individual users of the organization can then connect and use the integration from their Claude accounts.
- ChatGPT organization setup: A ChatGPT workspace administrator creates and configures the PX MCP app for the organization. Individual users can then connect and use the integration from their own ChatGPT accounts. Some organisations may allow individual users to create and configure apps.
- Local MCP setup for Claude Desktop: If organization-wide connector setup is unavailable or restricted, individual users can configure a local MCP connection directly in Claude Desktop.
Set Up the MCP Server Connection in Claude
Integrating Claude with Gainsight PX using the PX MCP server allows Claude to access and query product experience insights and contextual PX data directly.
Add the PX Connector for Your Organization
A Claude organization administrator must first add Gainsight PX as a custom connector before users in the organization can use Claude with the PX MCP server. After the administrator completes the organizational setup, individual users can use the connection in their own accounts without performing additional configuration.
Ensure Third-Party Connectors (or Custom Connectors) are enabled for your workspace.
To add a connector in Claude as the admin:
- Click the profile icon in the bottom-left corner of Claude, and select Organization settings.
- Navigate to the Connectors section and click the Add button.
- Hover on Custom and select the Web option (recommended).

- In the Add custom connector dialog box, enter the following details:
- Name: Gainsight PX MCP
- Server URL: Use one of the following URLs based on your PX data center. To identify your PX data center, refer to your PX application URL. For example, https://app-us2.aptrinsic.com indicates the US2 data center.
- Select Add. PX appears in the connectors list for your organization for Claude Web, as well as Claude Desktop.
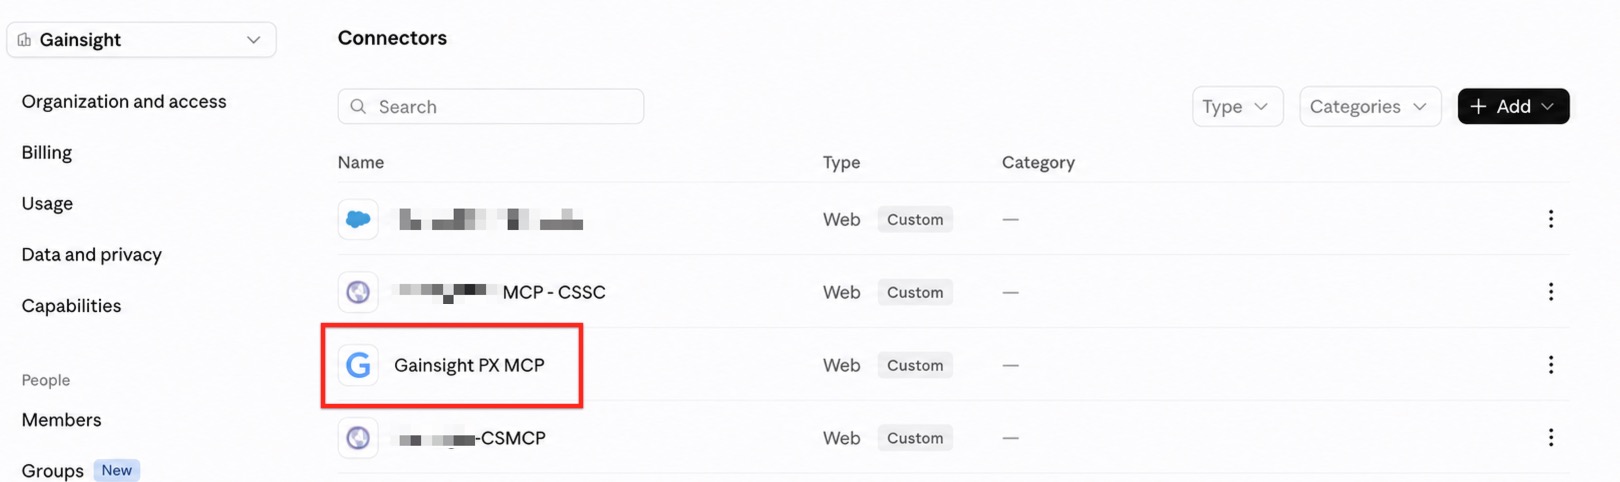
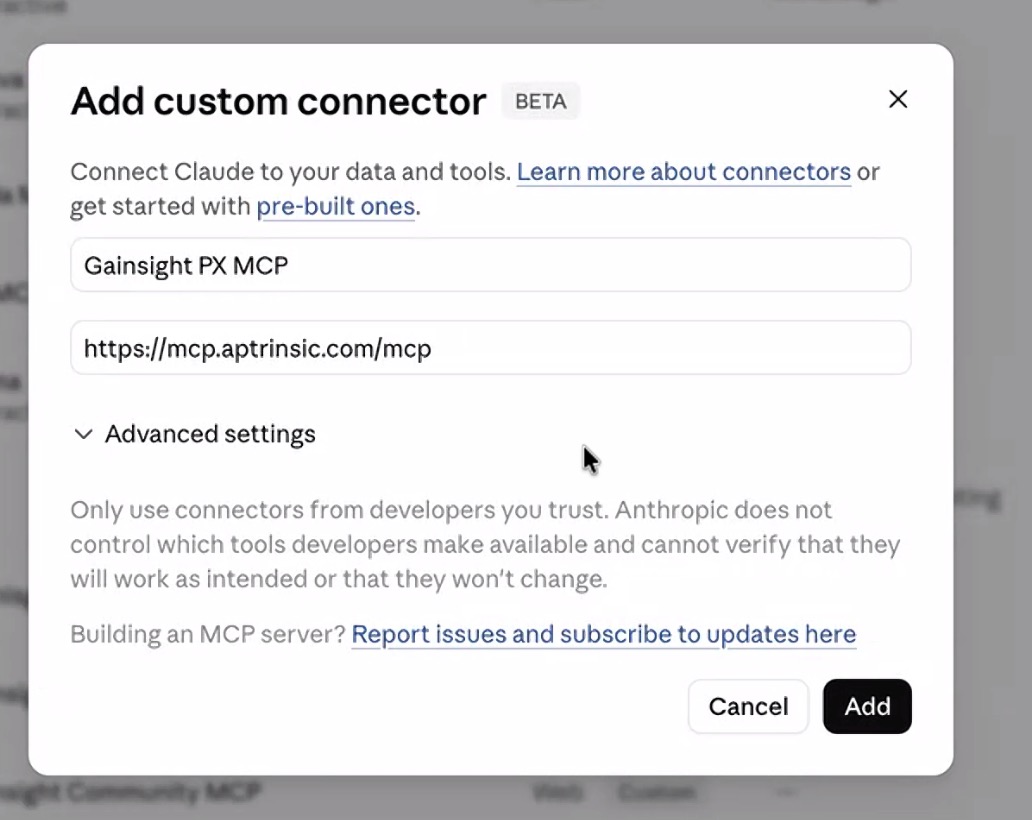
Connect PX to Claude
After the administrator adds the PX connector, individual users can connect and authenticate from their own Claude accounts.
- From the left menu, click Customize.
- Navigate to Connectors.
- In the Not connected section, select the PX connector installed by your organization's Claude admin.

- Click Connect. The PX login page appears.
- Sign in to your PX account when prompted, to connect Claude to your PX subscription. On successful login, you are redirected back to Claude’s Connectors page, with the PX connector connected. Here, you can view the available tools and set tool permissions. By default, all tools require approval per prompt. You can set all or individual tools to Always allow.

After successful authentication, the MCP connection appears as active in Claude.
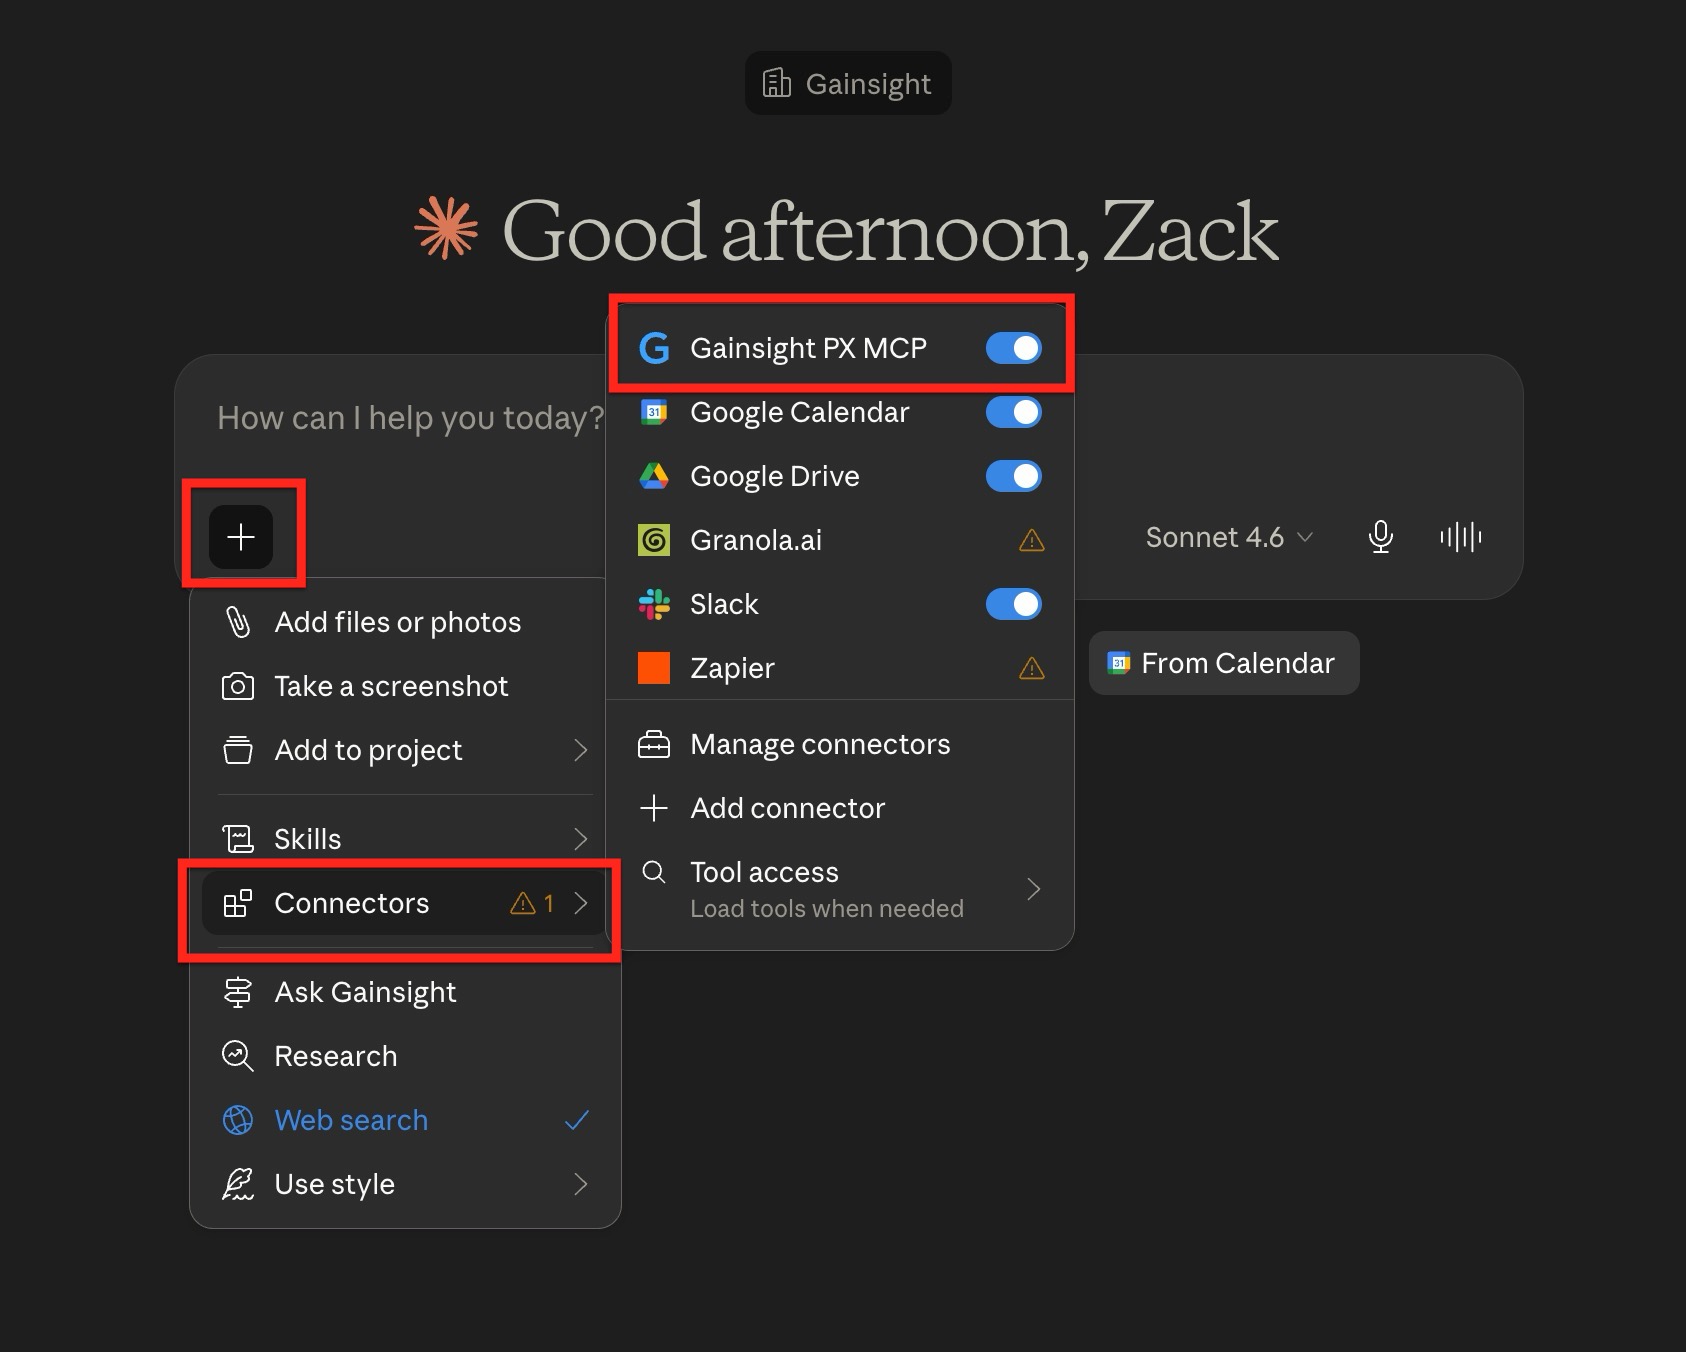
Set Up the MCP Server Connection in ChatGPT
Integrating ChatGPT (Web) with Gainsight PX using the PX MCP Server allows ChatGPT to access and query product experience insights and contextual PX data directly.
Create the MCP App in ChatGPT
A ChatGPT workspace administrator is typically required to publish organization-wide MCP apps, depending on your ChatGPT workspace permissions and policies. The administrator can configure the PX MCP integration for your organization. After the setup is complete, individual users can connect and use the integration from their own ChatGPT accounts without additional configuration.
To add the PX MCP app in ChatGPT (web) as an administrator:
- Navigate to Workspace Settings > Apps.
- Click Create.
- Click Enable developer mode in the popup that appears, in case you do not have it already enabled.

- In the New App window, enter the following details to create the app:
- In the Name text field, enter the name of the app as Gainsight PX MCP.
- (Optional) In the Description text field, describe the app.
- (Optional) In the Icon section, click the + icon to upload the PX icon. Click here to download the icon.
- In the MCP Server URL field, enter one of the following URLs based on your PX data center. To identify your PX data center, refer to your PX application URL. For example, https://app-us2.aptrinsic.com indicates the US2 data center.
- From the Authentication dropdown, leave the selection to OAuth.
- Review the disclaimer message and select the I understand and want to continue checkbox.

- Click Create. The new app is created and appears in the Drafts tab of apps for your organization.
- Click Publish.

- Review the warning information in the Review potential risk: Unauthorized data access section, and select the I understand checkbox. This is a standard warning displayed during MCP setup in ChatGPT.

- Review the warning and permission details in the Review potential risk: Malicious app section, and select the I trust this app and I have reviewed... checkboxes. These confirmations are displayed during MCP app setup in ChatGPT to help you review app access and permissions.

- Click Publish. The app is added to the Enabled tab of apps for your organization.

Connect and Authenticate
After the app creation is complete, ChatGPT admins or ChatGPT users of the organisation must proceed to connect ChatGPT with the organization's PX subscription.
To connect:
- Navigate to Workspace Settings > Apps.
- Access the PX MCP app using one of the following methods, depending on your role:
- As a ChatGPT administrator: For the newly added app, click the three-dots horizontal menu, and select App details.
- Click Show in directory.
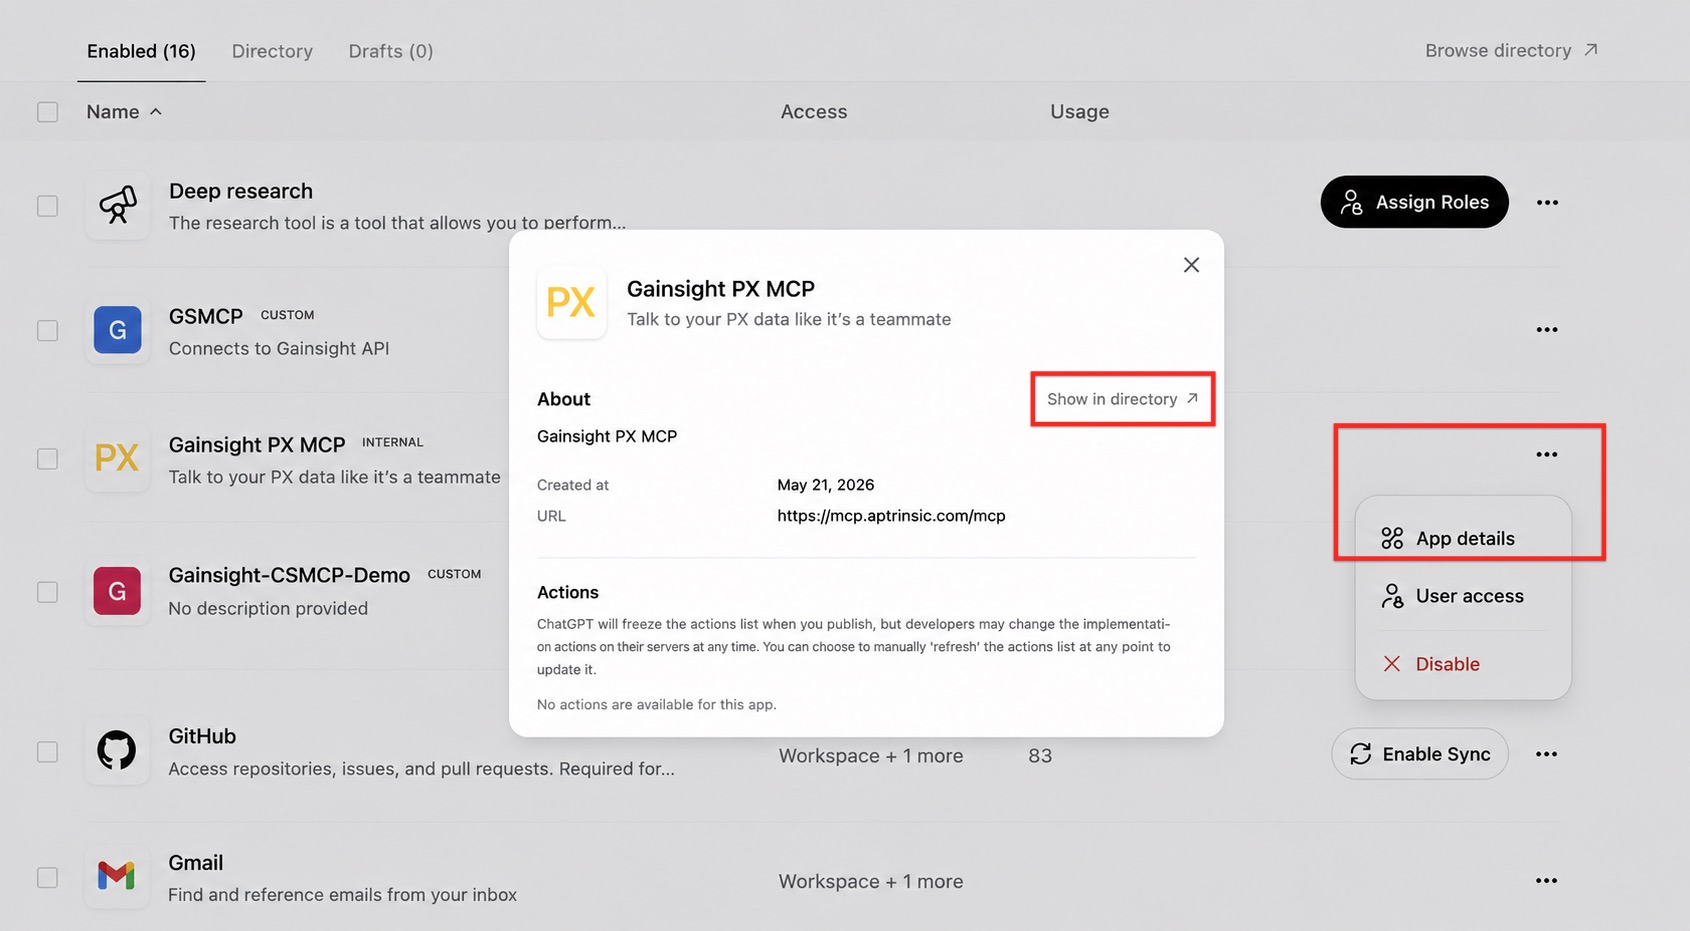
- Click Show in directory.
- As a ChatGPT user in the organization: Select the PX MCP app from the organization apps list.
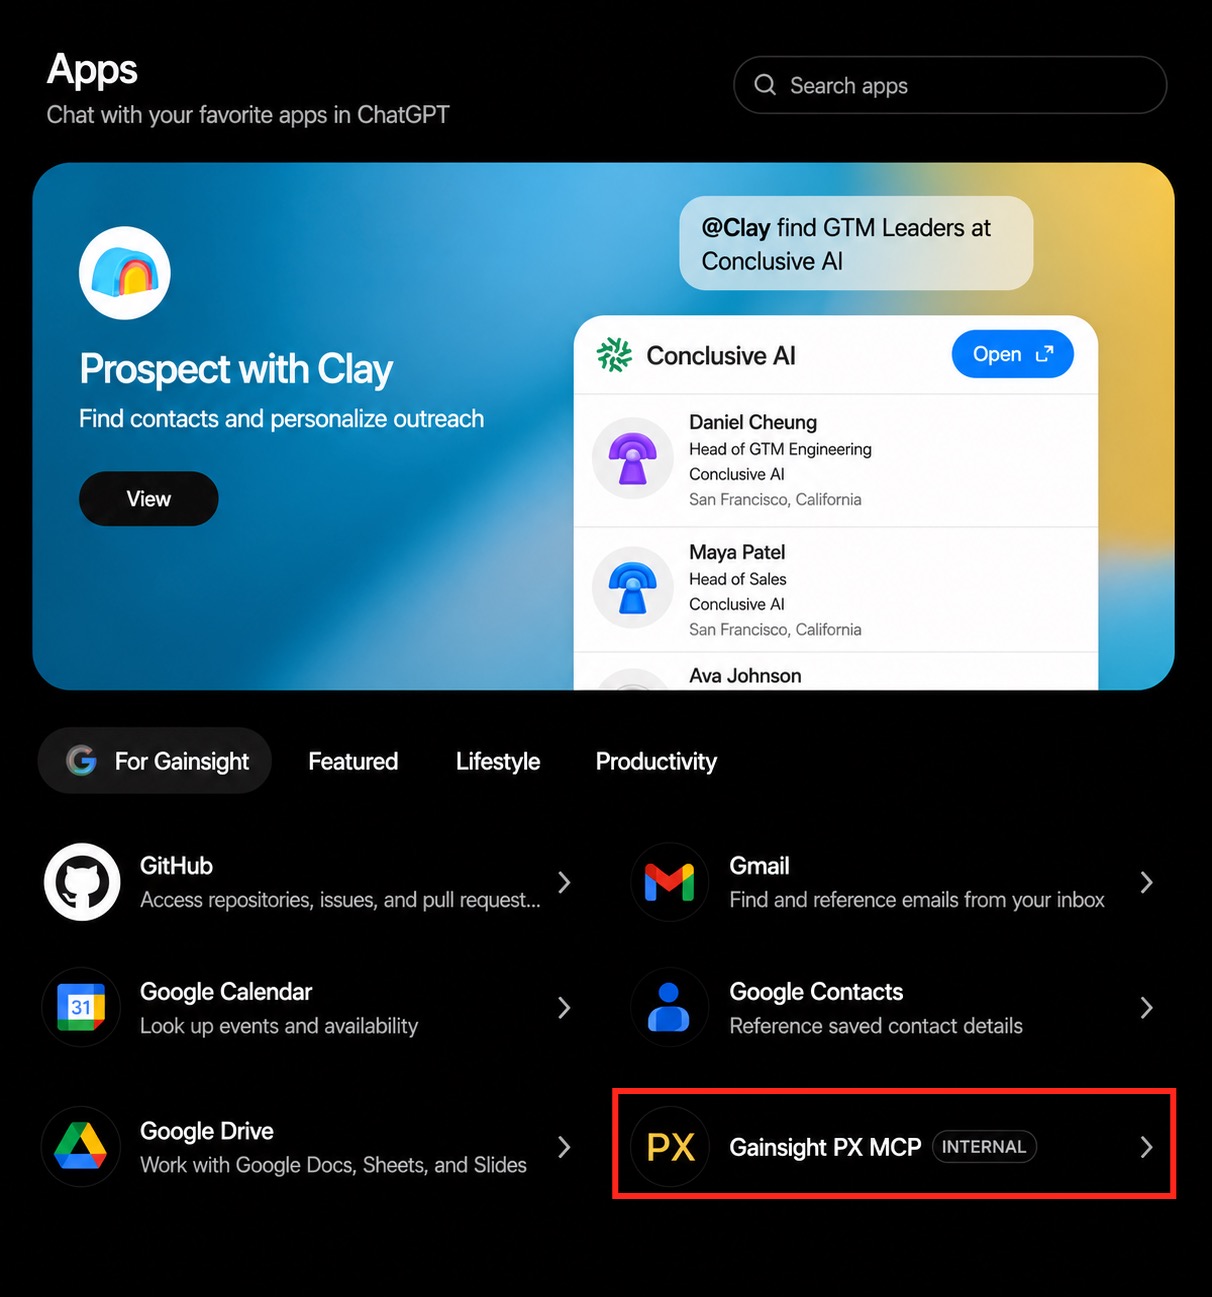
- As a ChatGPT administrator: For the newly added app, click the three-dots horizontal menu, and select App details.
- Click Connect.
- Click the Continue to Gainsight PX MCP button.

- On the PX login page, sign in to your PX account when prompted, to connect ChatGPT to your PX subscription. On successful login, you are redirected back to ChatGPT’s Apps page, with the PX connector connected. Here, you can click the settings icon to view the available tools used by the MCP.
After successful authentication, the MCP connection appears as active in ChatGPT.

Set Up a Local MCP Server Connection in Claude Desktop
You can configure a local PX MCP Server connection in Claude Desktop when your organization does not allow custom connectors, or when administrator approval for organization-wide integrations is unavailable or delayed. This setup enables individual users to connect Claude Desktop directly to Gainsight PX using a local MCP configuration.
Prerequisites: Ensure you have Node.js 18+ installed on your machine. For more information, refer to the Node.js download page.
To set up a local MCP:
- Click the profile icon in the bottom-left corner of Claude, and select Settings.
- Navigate to the Developer section and click Edit Config. This opens your machine’s file viewer for Claude files.
- Open the claude_desktop_config.json file using a text editor.
- Replace the existing content with the following configuration:
{
  "mcpServers": {
    "Gainsight PX MCP": {
      "command": "npx",
      "args": [
        "-y",
        "mcp-remote",
        "https://mcp.aptrinsic.com/mcp"
      ]
    }
  }
}
Update the MCP server URL based on your PX data center:
- Save the configuration file.
- Restart Claude Desktop.
After Claude Desktop restarts, the PX login page opens automatically. Sign in with your PX credentials to connect Claude Desktop with your PX subscription.
After successful authentication, the PX MCP Server appears on the Connectors page under the Desktop section. From here, you can view the available tools and manage tool permissions. By default, all tools require approval for each prompt. You can configure individual tools or all tools to Always allow.

After authentication is complete, you can begin interacting with PX using Claude Desktop.