S3 Account and User Import
This article describes how you configure the S3 integration required to import accounts and users into PX.
Overview
Gainsight PX is able to import daily updates to user data from a pre-defined directory structure in an AWS S3 bucket. The bucket directory structure and files need to follow strict rules that are defined below.
Prerequisites
- S3 Bucket Root Folders must be configured as defined in the Bucket Structure section of this article.
- An empty file with naming conventions as defined in the Process Data Flow section of this article must be placed in the subdirectory.
- The file guidelines as defined in the CSV Structure and Data Type sections of this article must be followed.
AWS Authentication
Gainsight PX allows you to authorize access to customer-owned AWS S3 buckets using the following two methods:
- User Access Keys
- IAM User Roles
User Access Keys
To authenticate using Access Keys, provide an access token and security key for an AWS user that has permissions to create files in the specified bucket. The token and security key can be obtained from the AWS Console. For more information on creating AWS users and security keys in the AWS Console, refer to the Managing access keys for IAM users article.
IAM User Roles
The IAM User Role method allows access to the S3 bucket to be controlled via AWS roles without the exchange of any secret keys. Authentication is accomplished by creating a customer-owned AWS role which has permissions to write to the customer’s bucket. In addition, the role is configured so that a provided Gainsight AWS user can assume the role.
To configure IAM Roles authentication:
IMPORTANT: In the JSON examples below, elements in green should be substituted with values from the AWS instance.
- Create an AWS role, with name
gainsight-px-export-rolewith the following policy, substituting in the ARN for your bucket.
{
    "Version": "2012-10-17",
    "Statement": [
        {
            "Action": [
                "s3:ListBucket",
                "s3:GetBucketLocation"
            ],
            "Effect": "Allow",
            "Resource": "arn:aws:s3:::aptrinsic-test-bucket"
        },
        {
            "Effect": "Allow",
            "Action": [
                "s3:PutObject",
                "s3:DeleteObject",
                "s3:GetObject"
            ],
            "Resource": "arn:aws:s3:::aptrinsic-test-bucket/*"
        }
    ]
}
-
Define Trust Relationship for the PX role, by substituting the PX Subscription ID obtained from the top of the Company Details page in your PX subscription. (https://app.aptrinsic.com/settings/subscription)
{
    "Version": "2012-10-17",
    "Statement": [
        {
            "Effect": "Allow",
            "Principal": {
                "AWS": [
                    "arn:aws:iam::581300747314:user/gspx-ext-s3-exports"
                ]
            },
            "Action": "sts:AssumeRole",
            "Condition": {
                "StringEquals": {
                    "sts:ExternalId": "PX subscription ID"
                }
            }
        }
    ]
}
- Create a bucket with a policy that grants access via the role created in Step 1 to the bucket:
{
    "Version": "2012-10-17",
    "Statement": [
        {
            "Sid": "allow-access-px-bucket",
            "Effect": "Allow",
            "Principal": {
                "AWS": "arn:aws:iam::99999:role/s3-export-role"
            },
            "Action": "s3:*",
            "Resource": "arn:aws:s3:::aptrinsic-test-bucket/*"
        }
    ]
}
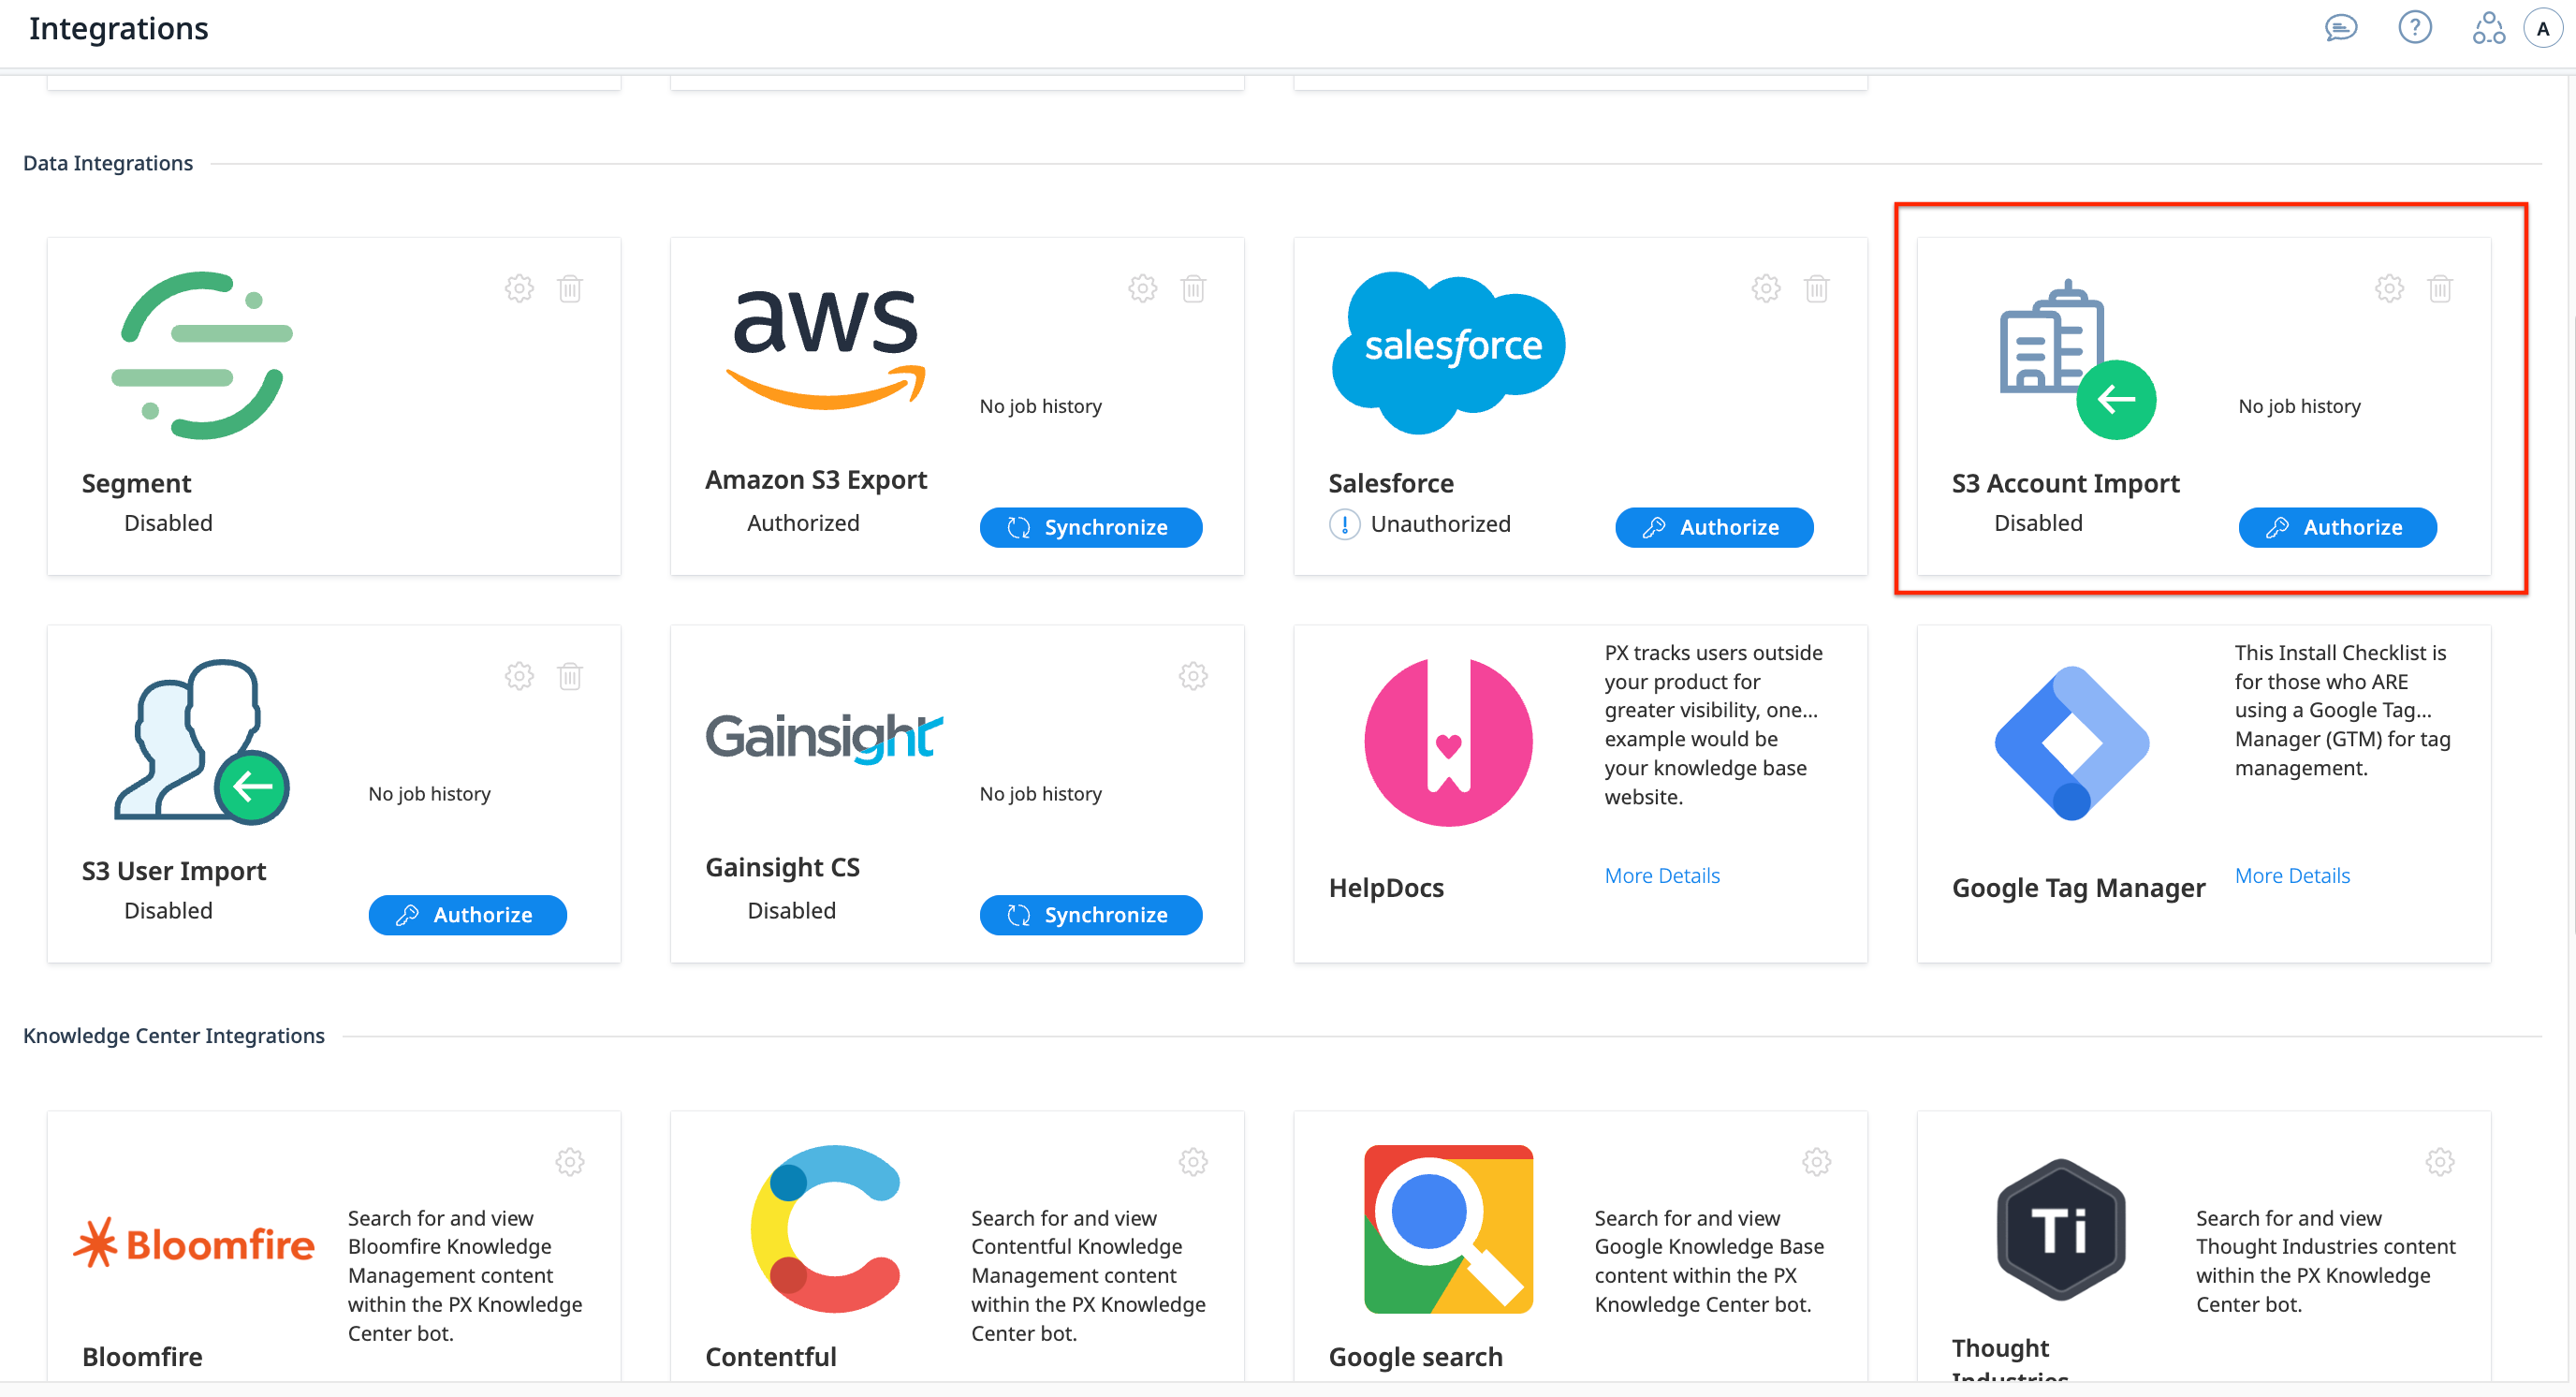
Configure Account Import
To configure a connection for account import:
- Navigate to Administration > Integrations.
- Click the Settings icon or Authorize button on the S3 Account Import widget in the Data Integrations section. The AWS S3 Import Settings dialog appears.
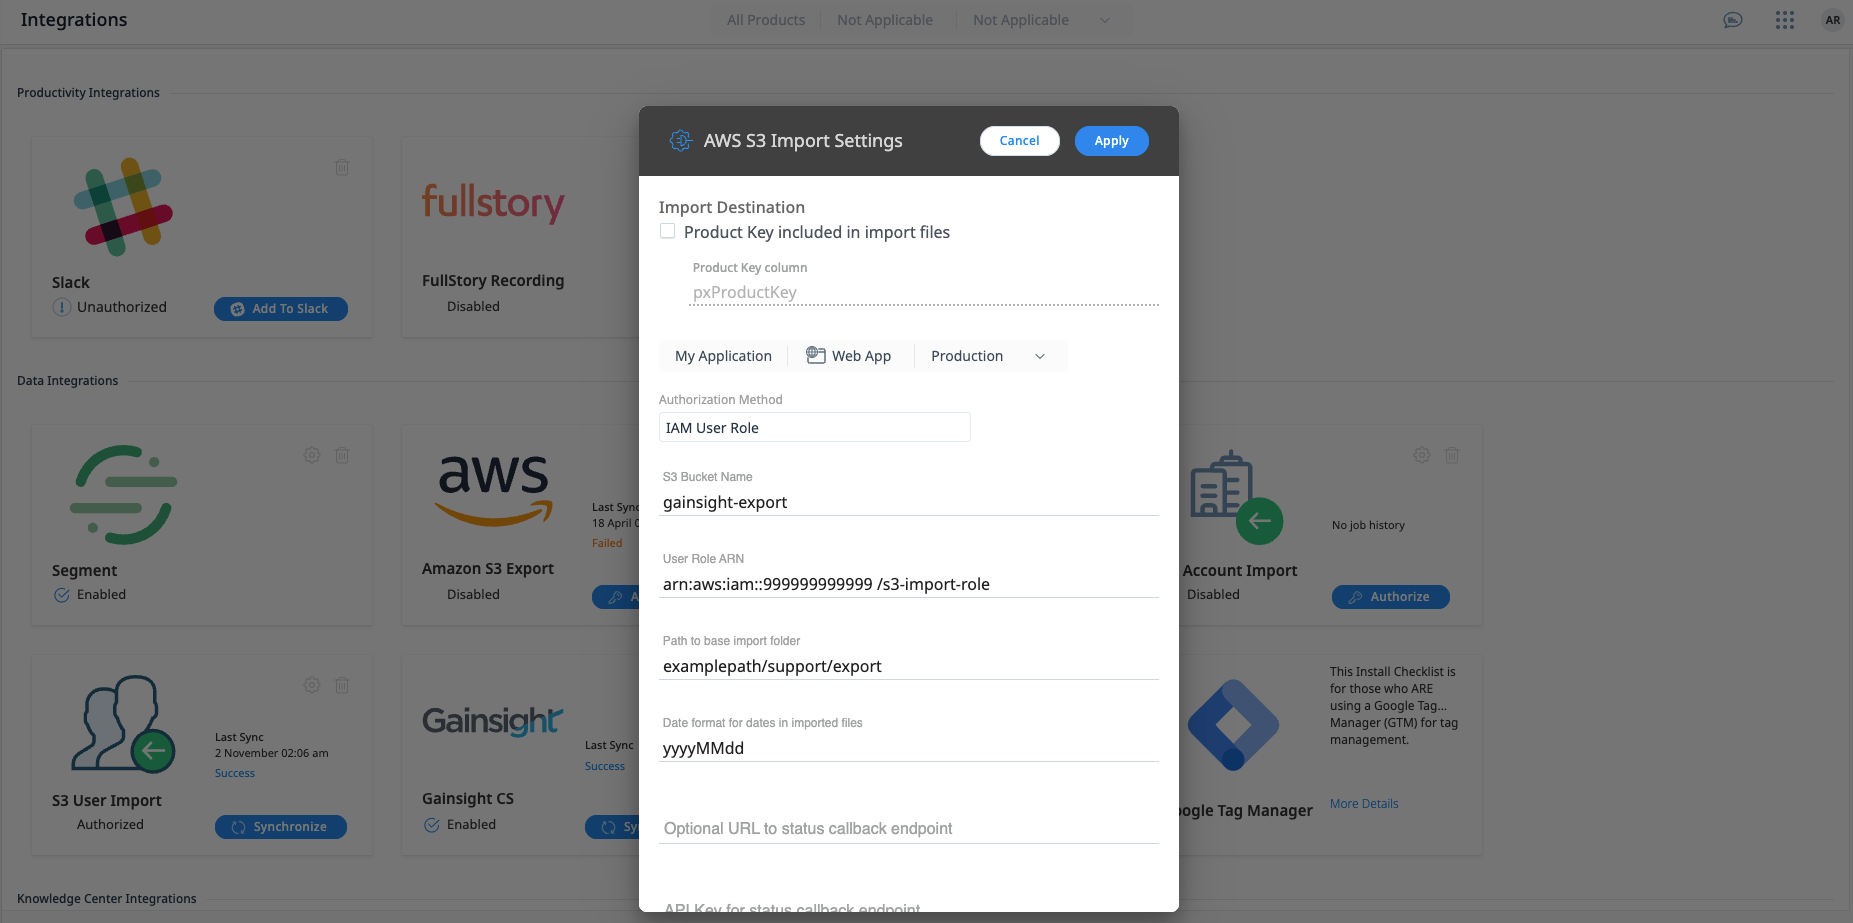
- From the Import Destination section, configure one of the following:
- Select the Product Key included in import files option if you wish to specify the product key in the imported file. In the Product Key column field, enter the header name of this column that contains the targeted product key for the imported record.
Note: The CSV column should contain the full product key (e.g., AP-XXXXXXXXXX-2-1). If no environment value is specified, it will default to production. - Or, select the Product, Channel, and Environment applicable for the import.
- Select the Product Key included in import files option if you wish to specify the product key in the imported file. In the Product Key column field, enter the header name of this column that contains the targeted product key for the imported record.
- From the Authorization Method dropdown menu, select the type of authentication.
- Enter the following details based on the Authorization Method selected:
- User Access Keys:
- S3 Bucket Name: Bucket name and any optional sub-folder(s) separated by slashes. This is the name of the bucket that was created in S3. For Example, to export files to a bucket ABC123 with a folder “export” use ABC123/export.
- AWS Access Key and AWS Security Token credentials of your S3 bucket. Ensure you enter valid credentials to establish an S3 integration.

- IAM User Roles:
- S3 Bucket Name: Bucket name and any optional sub-folder(s) separated by slashes. This is the name of the bucket that was created in S3. For Example, to export files to a bucket ABC123 with a folder “export” use ABC123/export.
- User Role ARN: Enter the ARN of the AWS user role that was created using the AWS Console. For more information, refer to the IAM Roles section.
- User Access Keys:
- Enter the following details:
- Path to base import folder: The path of the import folder
- Date Format for the dates in the imported files
- API Key for the status callback endpoint
- Click Apply.
Note:
- Each PX subscription has a unique list of accounts and users. Those users and accounts can be associated with one or more products. When using the import tool, a product key must be specified in either the UI or in the CSV file.
- UserId/AccountID is unique across the Subscription, however does not apply to Products/Environments. The same UserId/Account might exist across multiple Products and Environments, but it refers to the same user and the same data will be shown.
- If you need to import users or accounts to more than one PX product, Gainsight recommends to use the Product Key included in import files checkbox and include the product key value on each row in the import file.
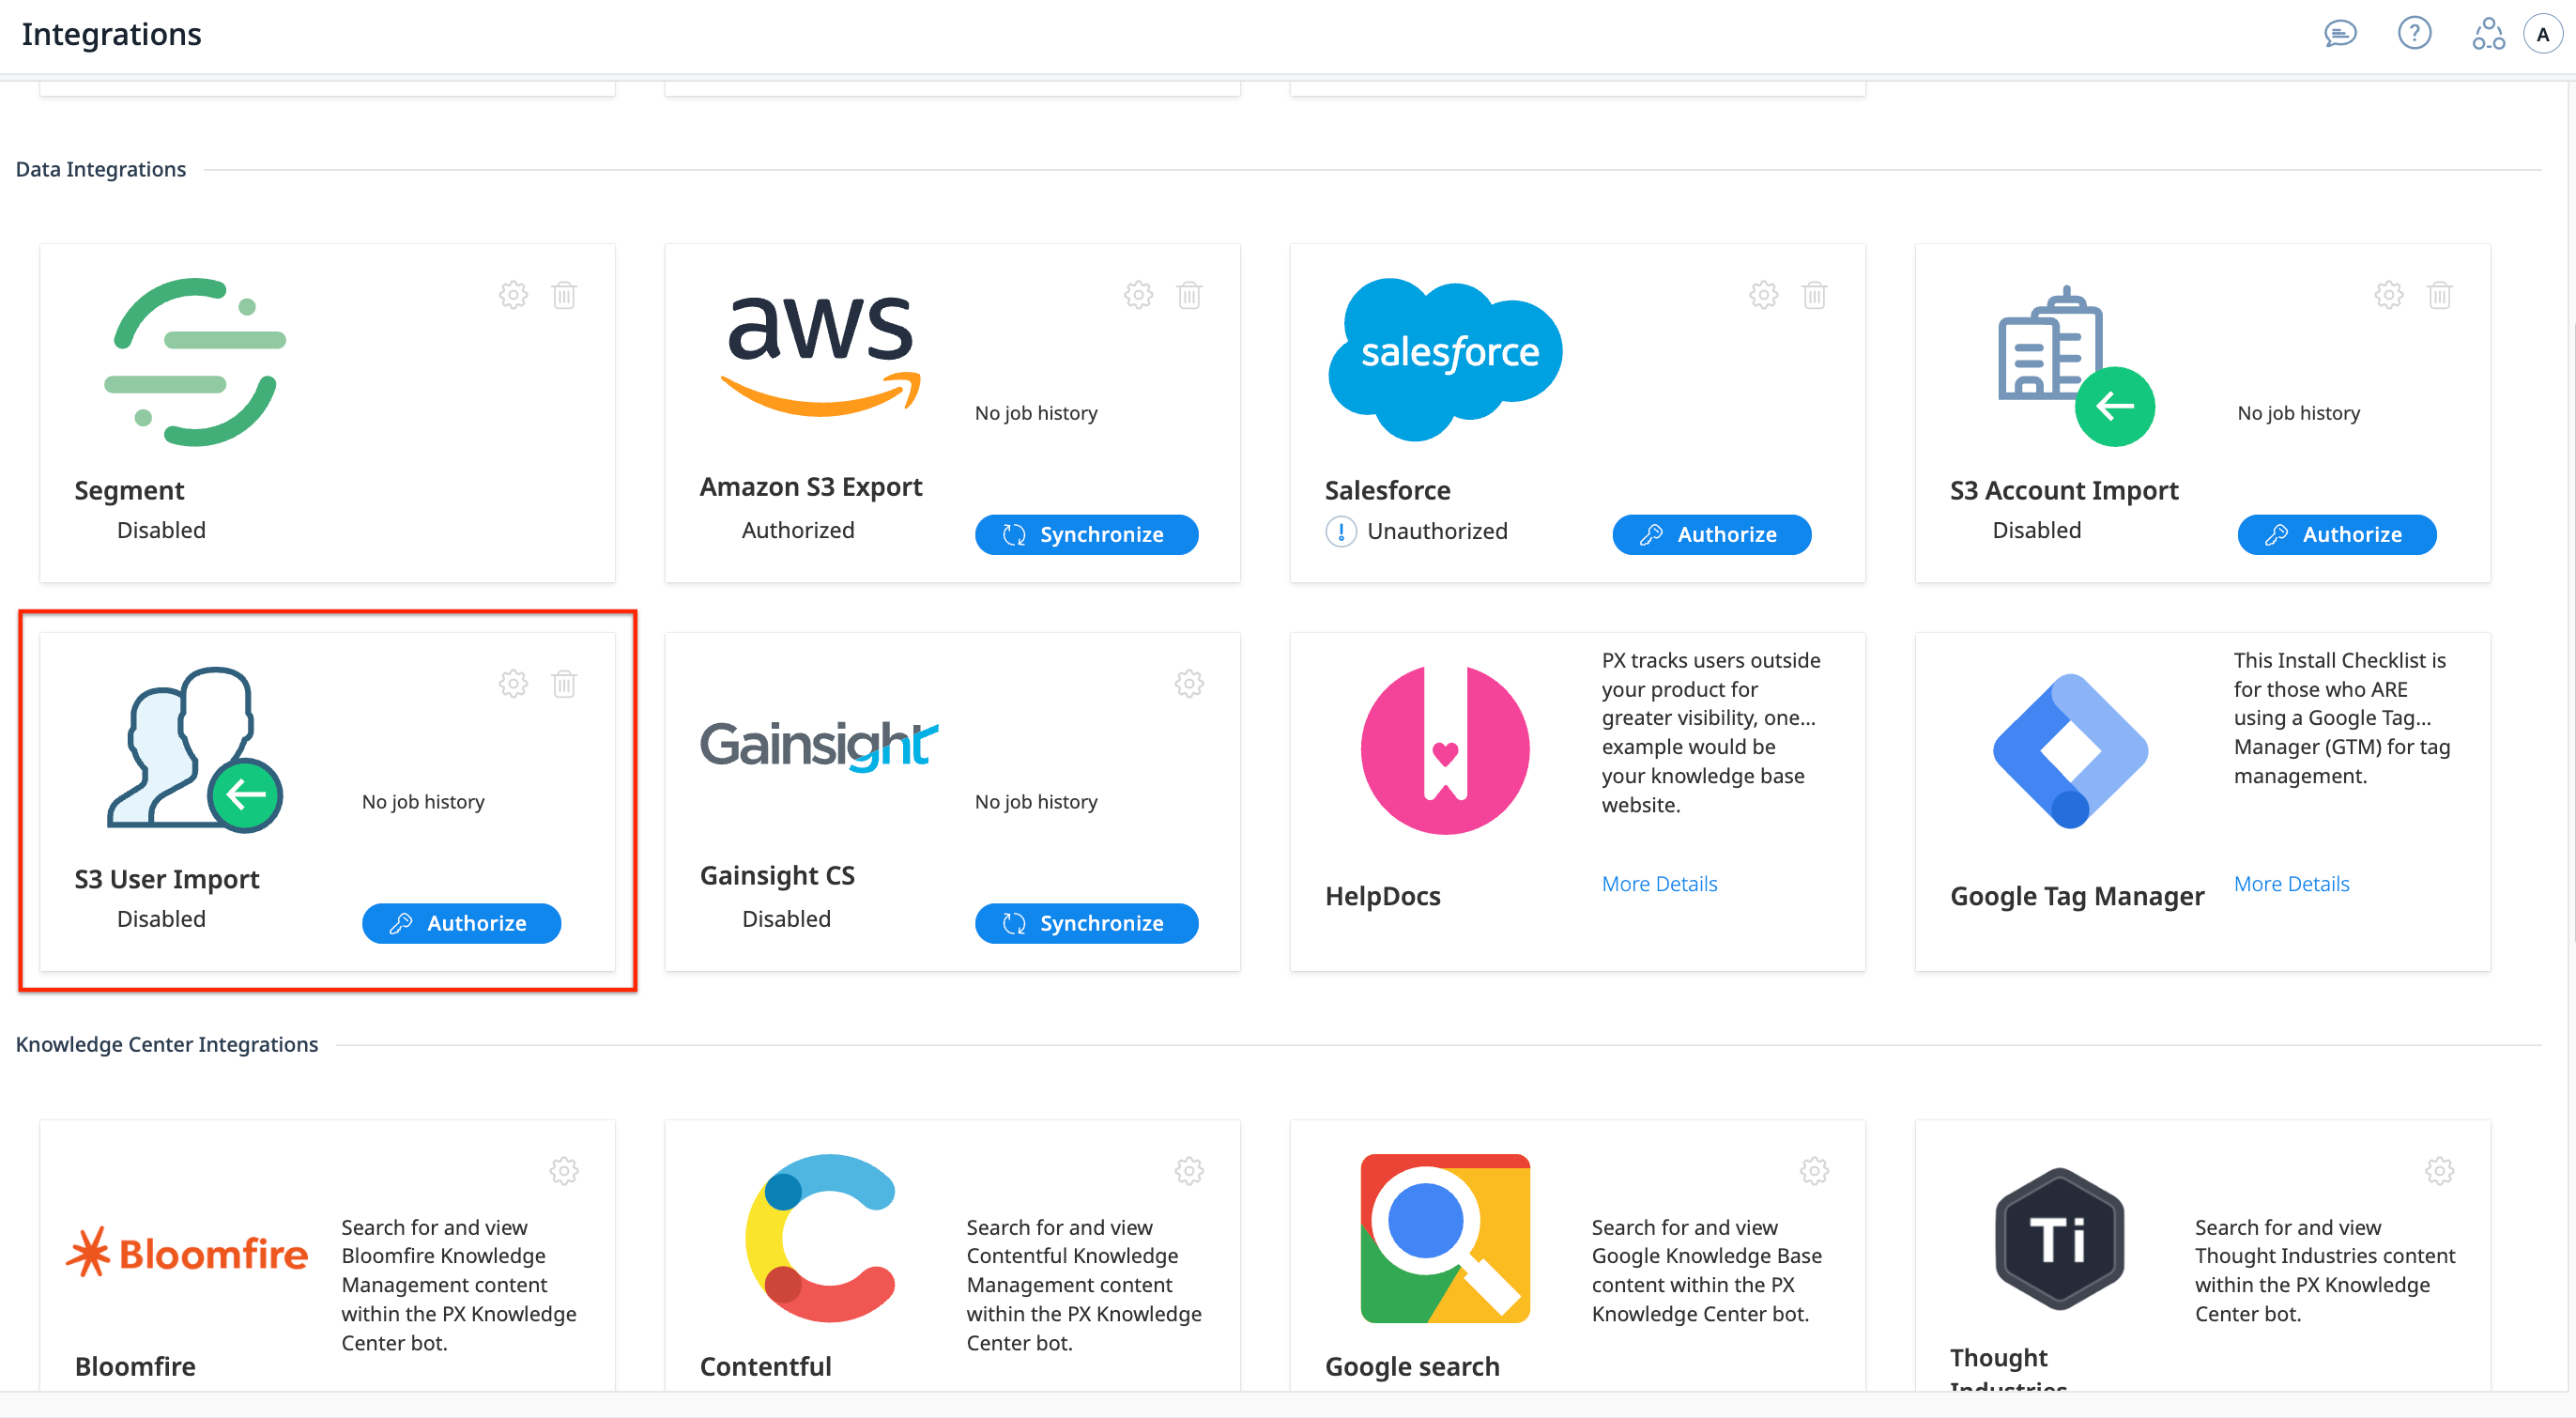
Configure User Import
To configure a connection for user import:
- Navigate to Administration > Integrations.
- Click the Settings icon or Authorize button on the S3 User Import widget in the Data Integrations section. The AWS S3 Import Settings dialog appears.
- From the Import Destination section, configure one of the following:
- Select the Product Key included in import files option if you wish to specify the product key in the imported file. In the Product Key column field, enter the header name of this column that contains the targeted product key for the imported record.
Note: The CSV column should contain the full product key (e.g., AP-XXXXXXXXXX-2-1). If no environment value is specified, it will default to production. - Or, select the Product, Channel, and Environment applicable for the import.
- Select the Product Key included in import files option if you wish to specify the product key in the imported file. In the Product Key column field, enter the header name of this column that contains the targeted product key for the imported record.
- From the Authorization Method dropdown menu, select the type of authentication.
- Enter the following details based on the Authorization Method selected:
- User Access Keys:
- S3 Bucket Name: Bucket name and any optional sub-folder(s) separated by slashes. This is the name of the bucket that was created in S3. For Example, to export files to a bucket ABC123 with a folder “export” use ABC123/export.
- AWS Access Key and AWS Security Token credentials of your S3 bucket. Ensure you enter valid credentials to establish an S3 integration.
- IAM User Roles:
- S3 Bucket Name: Bucket name and any optional sub-folder(s) separated by slashes. This is the name of the bucket that was created in S3. For Example, to export files to a bucket ABC123 with a folder “export” use ABC123/export.
- User Role ARN: Enter the ARN of the AWS user role that was created using the AWS Console. For more information, refer to the IAM Roles section.
- User Access Keys:
- Enter the following details:
- Path to base import folder: The path of the import folder
- Date Format for the dates in the imported files
- API Key for the status callback endpoint
- Click Apply.
S3 Bucket Configurations
Bucket Permissions
You need to provide an authentication token (and security token) that provides read/write access to the import folder in the bucket.
Process/Data Flow
Schedule:
The PX import job runs every 15 minutes. If any input files are found, the file is imported. If more than one file is found in a folder, the files are imported serially.
Data Flow:
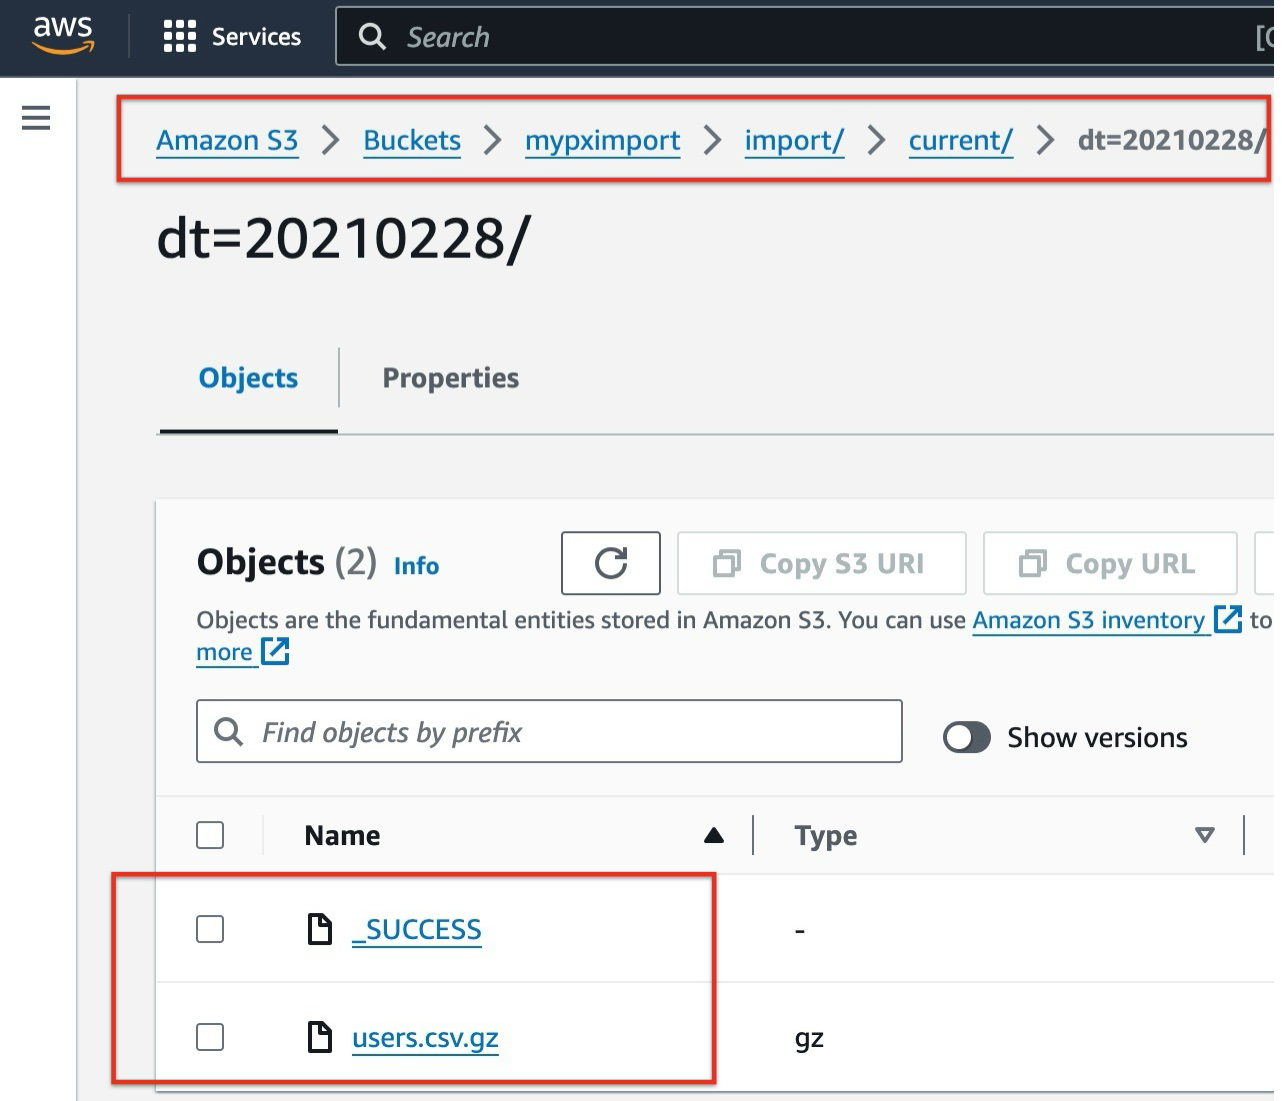
For each day’s data, you need to create a subdirectory with a name created using the current date in the format dt=YYYYMMDD. The exported user file needs to be placed in that subdirectory. When a data file is ready to be processed, place an empty file named “_SUCCESS” into the directory to signal that the write process is complete and PX can begin processing the file. Once the job is complete, the files are moved to the processed folder. For more details, refer to the Validate Import using Status File section of this article.
Input Queue Example:
 ./current
   /dt=20210228
      _SUCCESS
      users.csv.gz
Processed Files Example:
./processed
   /20210228
      status.txt
        _SUCCESS
        users.csv.gz
Bucket Structure
You need to configure the Bucket Structure as defined in the following sections.
Root Folder
The root folder should contain two subfolders called current and processed. For example, in the below scenario for User import, the root folder structure would appear as following:

Subdirectory
For each day’s data, you need to create a subdirectory with a name created using the current date in the format dt=YYYYMMDD. The _SUCCESS and users.csv.gz files must be placed under the subdirectory as follows:
The AWS S3 settings for the above structure would appear as follows:

CSV Structure
The following is the CSV structure suggested by Gainsight PX:
- Standard CSV (RFC0180)
For more information, refer to the CSV specifications article. - Gzipped, with extension “.csv.gz”.
- Filename prefix (example: “users”) is not significant.
- All columns must be defined in the User attributes area of PX, the column headers should be the “apiName”, not the View Name of the attribute.
- Data must be parseable according to types defined in PX (see below) • Limited to 350,000 rows per file
Note: The id column is mandatory.
Data Types
The following are the data types:
- String: Fields containing line breaks (CRLF), double quotes, and commas should be enclosed in double quotes. If double-quotes are used to enclose fields, then a double-quote appearing inside a field must be escaped by preceding it with another double quote.
- Numeric: Integer or floating-point values
- Boolean: “true” or “false” (not case sensitive)
- Date: Should be in the format specified by the Date Format value on the configuration screen.
The valid characters are listed here.
Note: The proper abbreviation for month is “MM”, not “mm”
Typical values are:
-
Date Only:
Format String: YYYYMMDD
Example Data: 20211225
-
Date/Time (UTC time-zone):
Format String: yyyy-MM-dd'T'HH:mm:ssX
Example Data: 2021-06-25T13:55:42Z
Validate Import Using Status File
When an import job finishes, the imported file is moved to the processed folder and a status.txt file is created. The first line contains the result, either “SUCCESS” or “ERROR”. Subsequent lines contain a human-readable message with more details about the results of the import.
Success Example:
SUCCESS
4155 records were uploaded
Error Example:
ERROR
Parsing Errors:[
       Unknown PX Column: 'flantana_carteret',
       Missing required Column: 'id'
]
Validate Import Using Status Endpoint
You can provide an optional HTTP endpoint for receiving notifications from PX when jobs are finished (errors or success).
- Example Endpoint: https://www.example.com/prd/data-export
- Method: POST
- Authentication: x-api-key header with api key provided by customer
- Body: { folder_path: “{path to processed folder}”, success: {true|false}, message: “{load result details}” }
- Response: 200 okay, body: String
Data Validation
The contents of the file are validated with the following rules:
- The CSV column headers are compared to the existing attributes defined for the entity type (user or account). All the columns are expected to correspond to an existing attribute.
- The id column is mandatory.
- Column data values are checked to make sure they are parsable to fill the given attribute type (string, number, boolean, or date) in PX.
- A maximum of 350,000 rows are allowed in each input file.
Error Handling
If any of the above validations fail, the file is skipped. The errors are listed in the status.txt file. For more information, refer to the Validate Import Using Status File section.