User Management
This article explains the User Management page in PX that gives you role-based access control to provide fine-grained access to relevant features.
Overview
The User Management page empowers you to regulate user access to features. Within a collaborative application, you have the ability to assign various roles to users. These roles grant precise permissions for tasks such as content creation, publishing, application mapping, analytics tool usage, and other feature areas.
Example Business Usecase: Consider a scenario where you would like a user to create engagements in PX, but not have the access to launch the engagement in production environment. This can be achieved by providing the user with the Editor role for engagements, while restricting the Production Launcher role only to users that should have launch access.
Role-Based Access Control in Gainsight PX
PX uses role-based access controls to manage who can access and manage parts of the application. The permissions and limitations of a user are determined by their assigned role. Using the User Management page, you can effectively govern access to datasets in Gainsight PX and exert control over their utilization.
Prerequisite: The User Management page can only be edited by users with administrator privileges.
Add a New User
The User Management page allows you to manage your subscription where you can add a new user, edit user roles, remove a user and so on.
| Try it on the PX application: US Customers, EU Customers |
To add a new user:
- From the main menu, navigate to Administration > User Management.
- Click Add User.
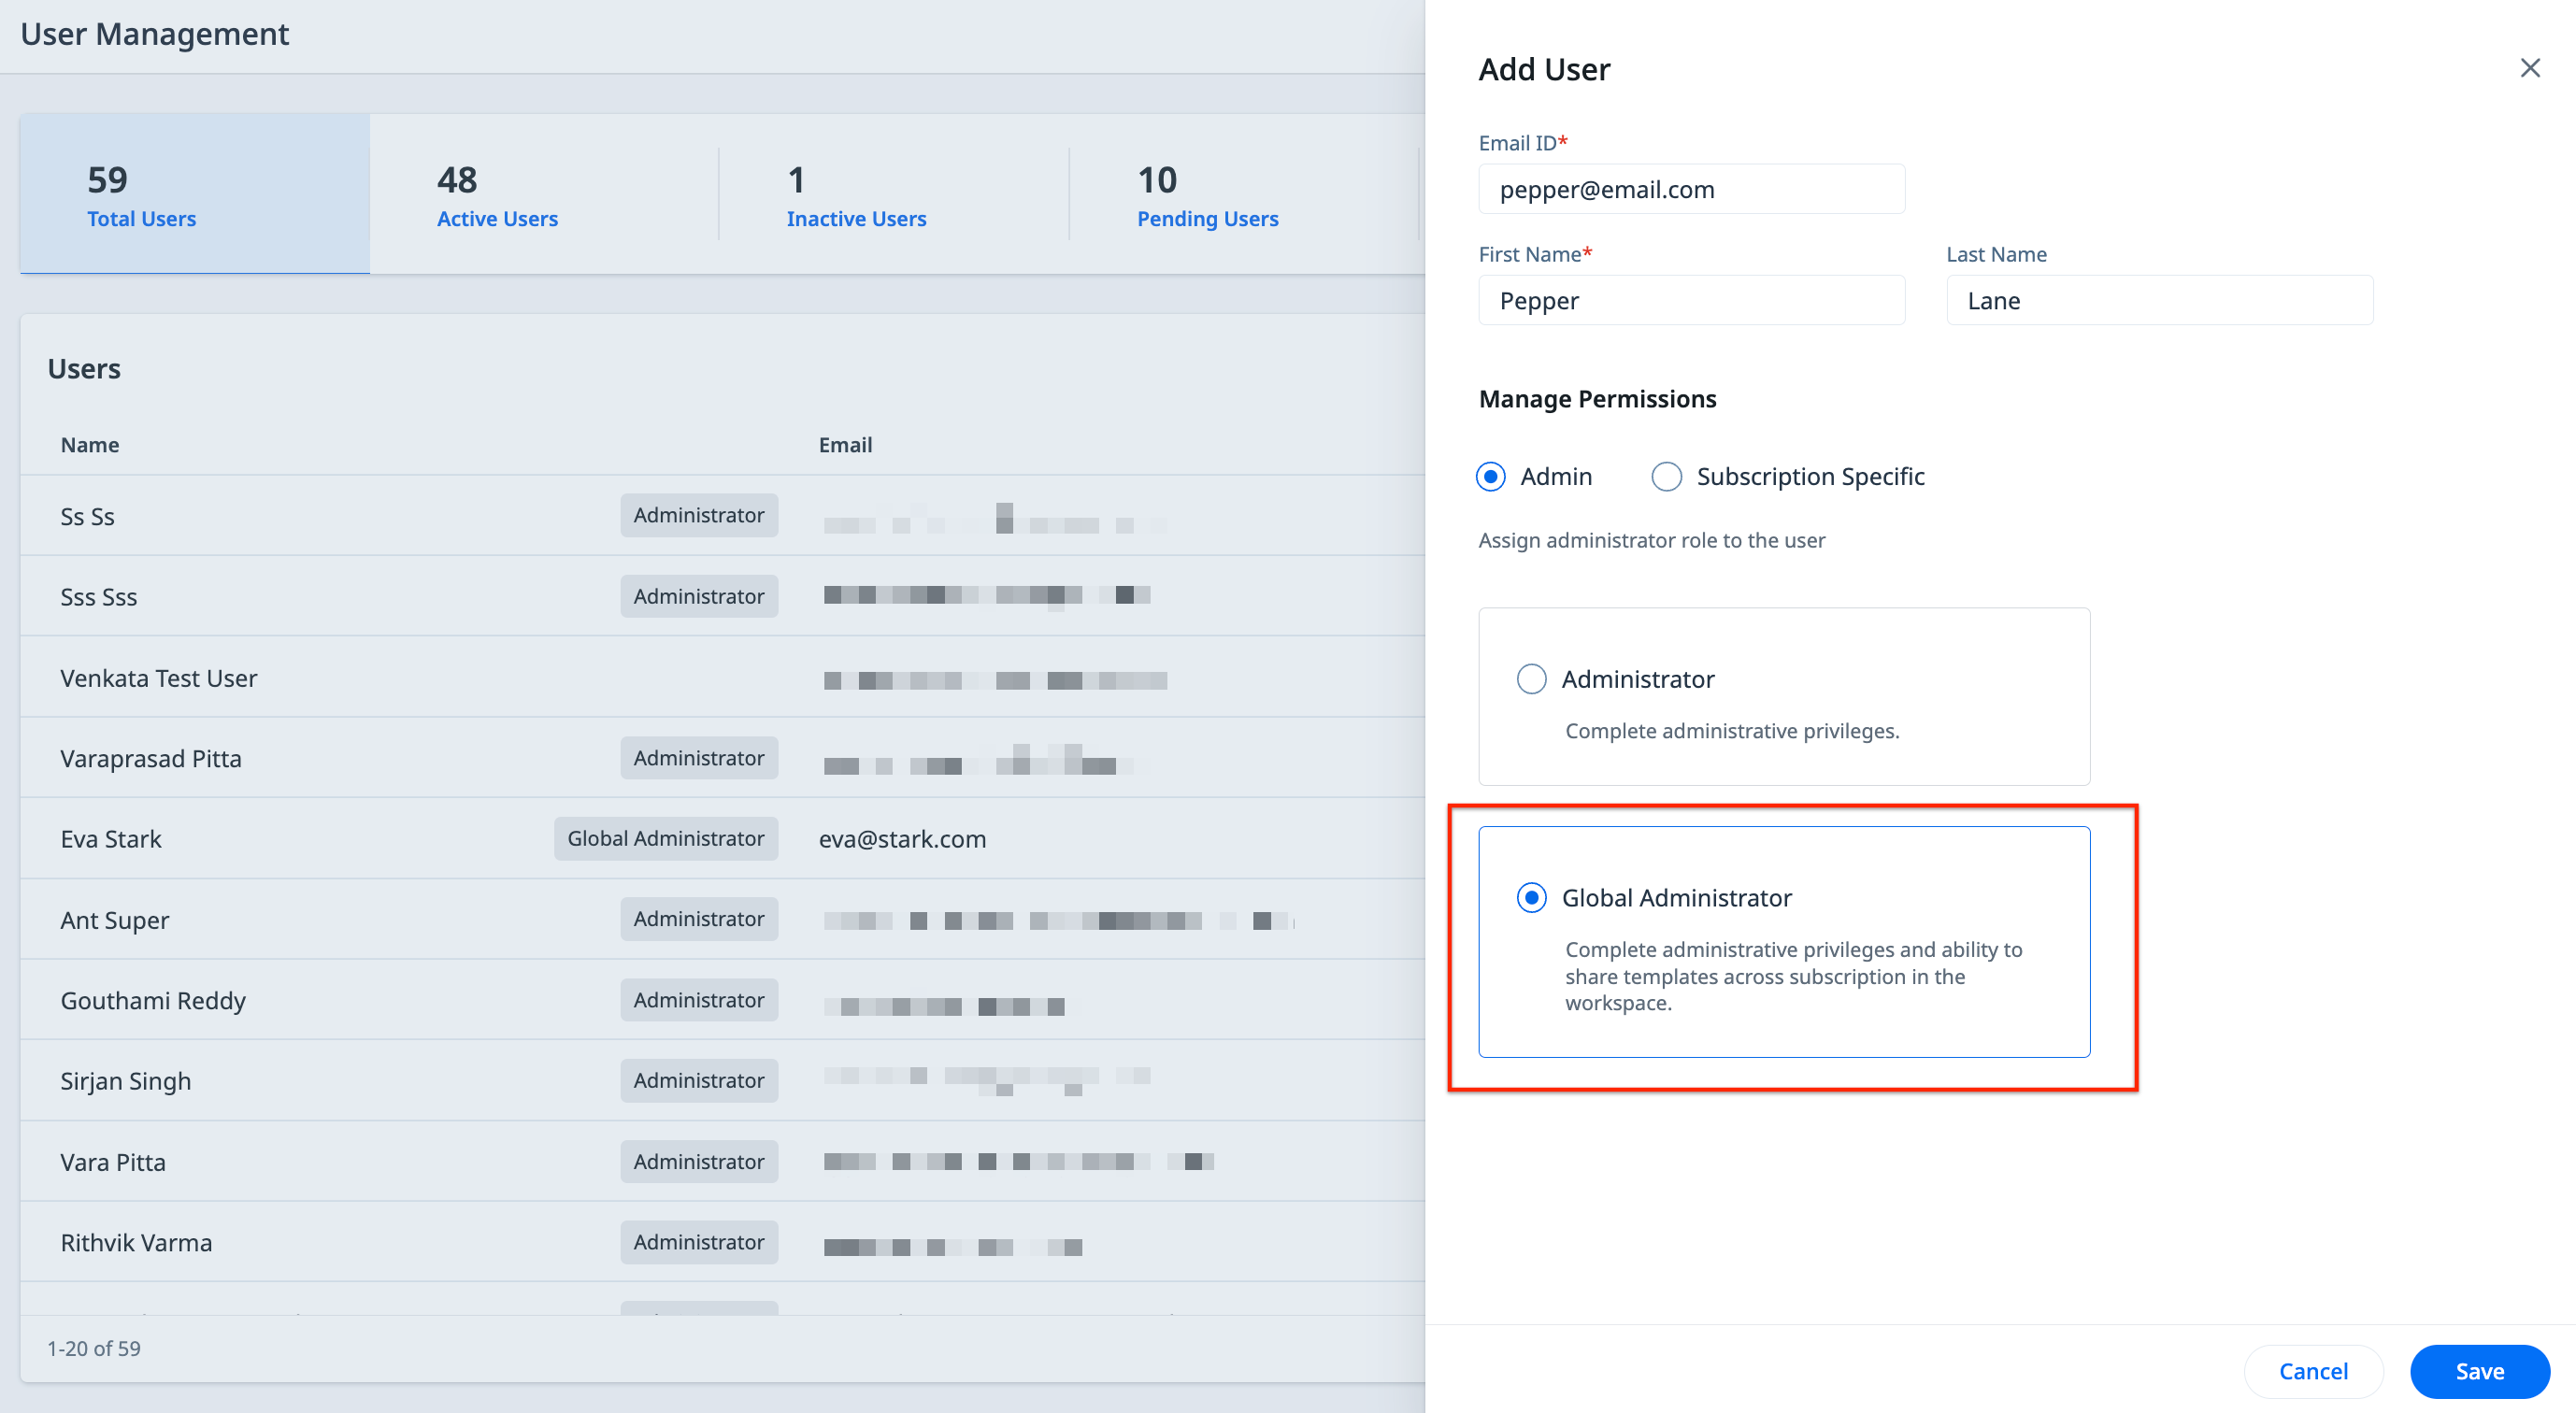
- In the Add User slide-out panel, enter the following information:
- Email ID
- First Name
- Last Name
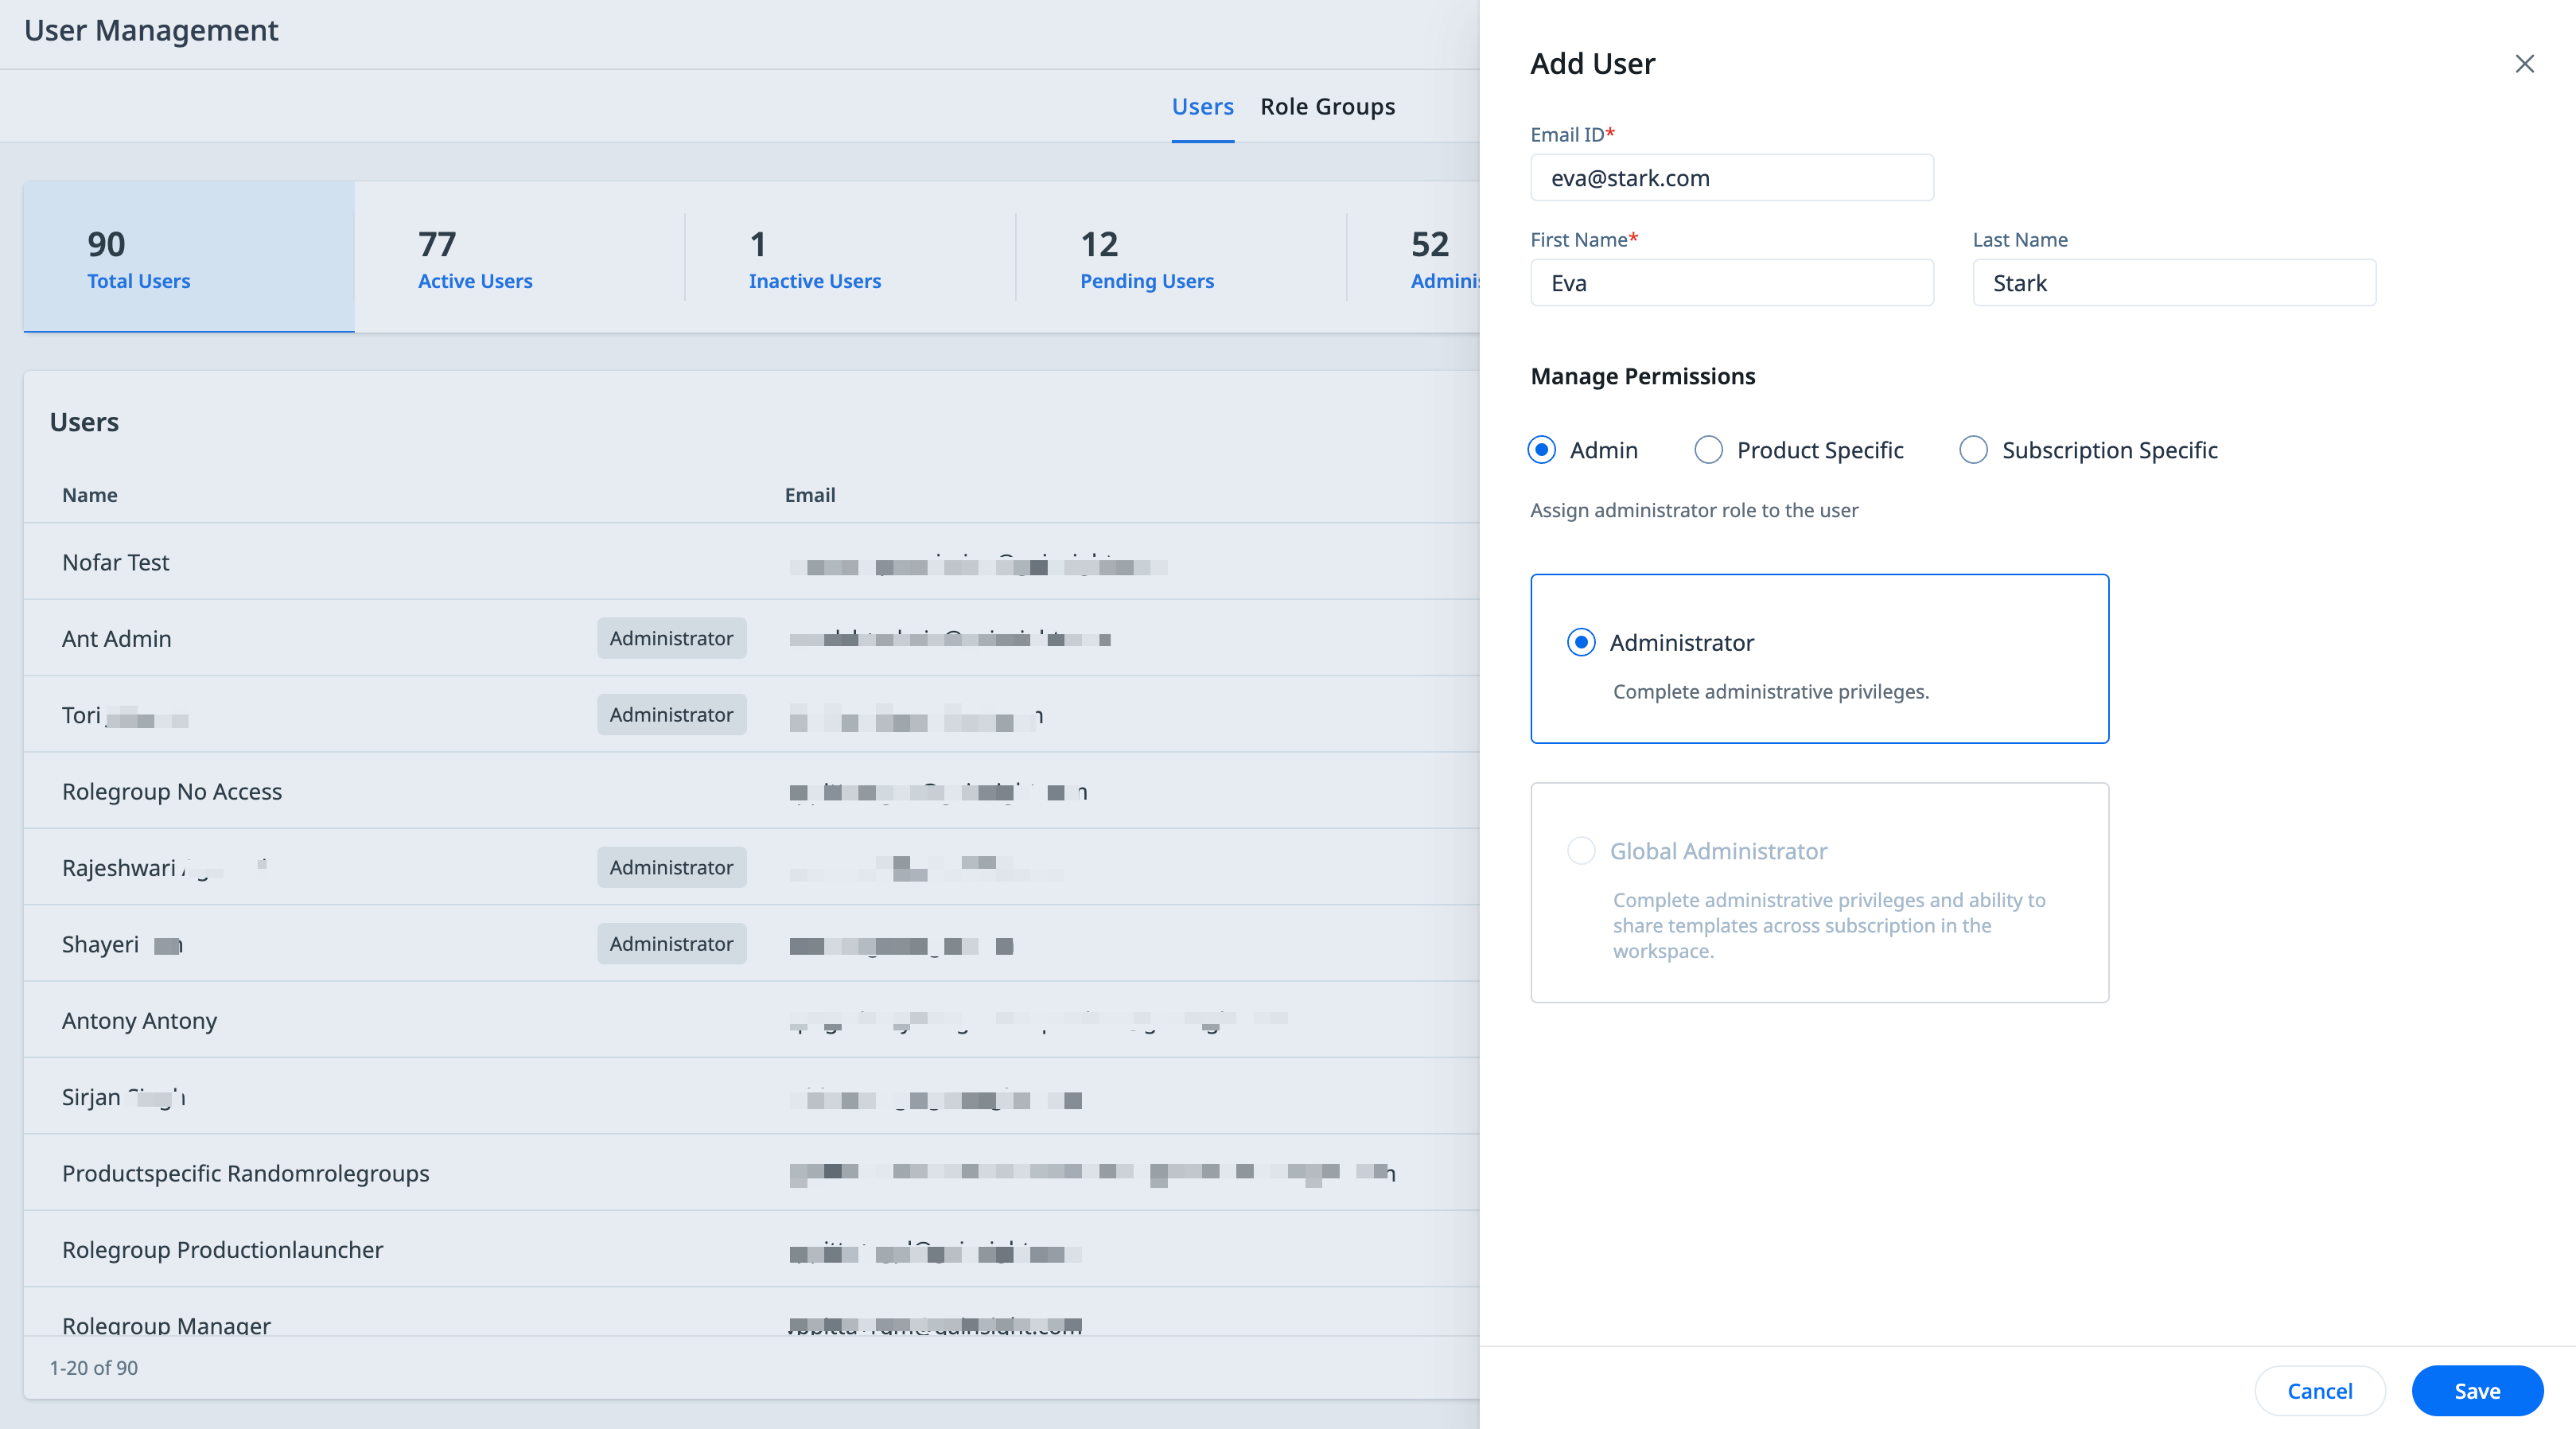
- In the Manage Permissions section, select the type of access from the following options:
- Admin: Assign complete administrative rights to the user for the subscription.
- Product Specific: Assign role groups to products, and provide product-specific permissions to sets of users. For more information, refer to the Product Specific Access in PX section.
- Subscription Specific: Assign custom roles and permissions to view, edit, or manage one or multiple parts of PX. For more information on the various permissions available in PX, refer to the Roles and Permissions in PX section.
- Click Save. The user is added and an invitation email containing a sign up link is sent to the user.
Notes:
- The sign up link is only valid for seven days since the receipt.
- Users that have received the welcome email but haven’t completed the sign up process will be in the Pending status.
Roles and Permissions in PX
Gainsight PX provides the following type of users:
- Global Administrator: Complete administrative permissions for the subscription, including sharing templates across subscriptions.
Note: The Global Admin permission is only available for subscriptions that are part of a workspace. - Administrator: Administrative permissions for the specific subscription, including adding new users and subscription admins.
- Viewer: Read-only access to the selected features.
- Editor: Viewer role + edit access to the selected features.
- Manager: Editor role + launch access in non-production environments.
- Production Launcher: Manager role + launch access in the production environment.
By default, all users in PX have view access to the following pages:
- Company & Timezone
- Attributes
- Localization
- Admin Console (Integration Monitoring)
- Rest API
- Throttling
- Engagements Security
The following table describes the various feature-wise permissions that can be provided to a PX user:
| Feature | User Type | |||
| Viewer | Editor | Manager | Production Launcher | |
| Engagements |
|
|
Launch access in non-production environments. | Launch engagements in the production environment. |
| Knowledge Center | View KC bots and articles. |
|
KC launch access in non-production environments. | Launch bots in the production environment. |
| Segments | View segments. | NA | Create, edit, and delete segments. | NA |
| Audience |
|
NA | Manage the audience and account data, create bookmarks, and arrange columns. | NA |
| Analytics |
|
NA | Create and manage various reports and analysis mechanisms. | NA |
| Product Mapper | View Product Feature Tree and the underlying features and modules. | NA | Map features or modules and create Product Feature Tree using Manual Mapper, Suggestion Mode, or In-App Mapper. | NA |
| Templates | View default templates while creating engagements. | NA | Create templates. | NA |
| Account Settings |
View access to
|
NA |
View access
Edit access
|
NA |
| Labels | View label information in engagements. | NA | Create and manage labels in engagements. | NA |
Admin-Only Access
In addition to the above permissions, users with Administrator access can view and make changes to the following pages:
- User Management
- Integrations
- Data Exports
- SSO/SAML
- Identity Verification
- Rest API
Product Specific Access in PX
PX offers you the flexibility to finely control access to its features, tailoring permissions based on user associations with specific products. This is achieved using Role Groups, an easy and efficient mechanism that helps you define product-specific permissions to different areas of PX.
Example Business Usecase: Consider a scenario where a company has multiple products, and users from one product must not access features and data of another product. To ensure access control, you can use Role Groups to create custom permission sets for individual products, and assign the required users.
Notes:
- Gainsight provides four role groups by default (System Role Group), that are available in all subscriptions and cannot be edited.
- You can create up to 20 personalized role groups (Custom Role Group) in a subscription.
To assign product-specific permissions to a user PX:
Add a New Role Group
A role group is a permission set in PX that allows you to assign specific permissions to feature areas accessible to users. Using role groups, these permissions can then be assigned to users to grant or restrict access to the PX application.
To create a role group:
- Navigate to User Management > Role Groups tab.
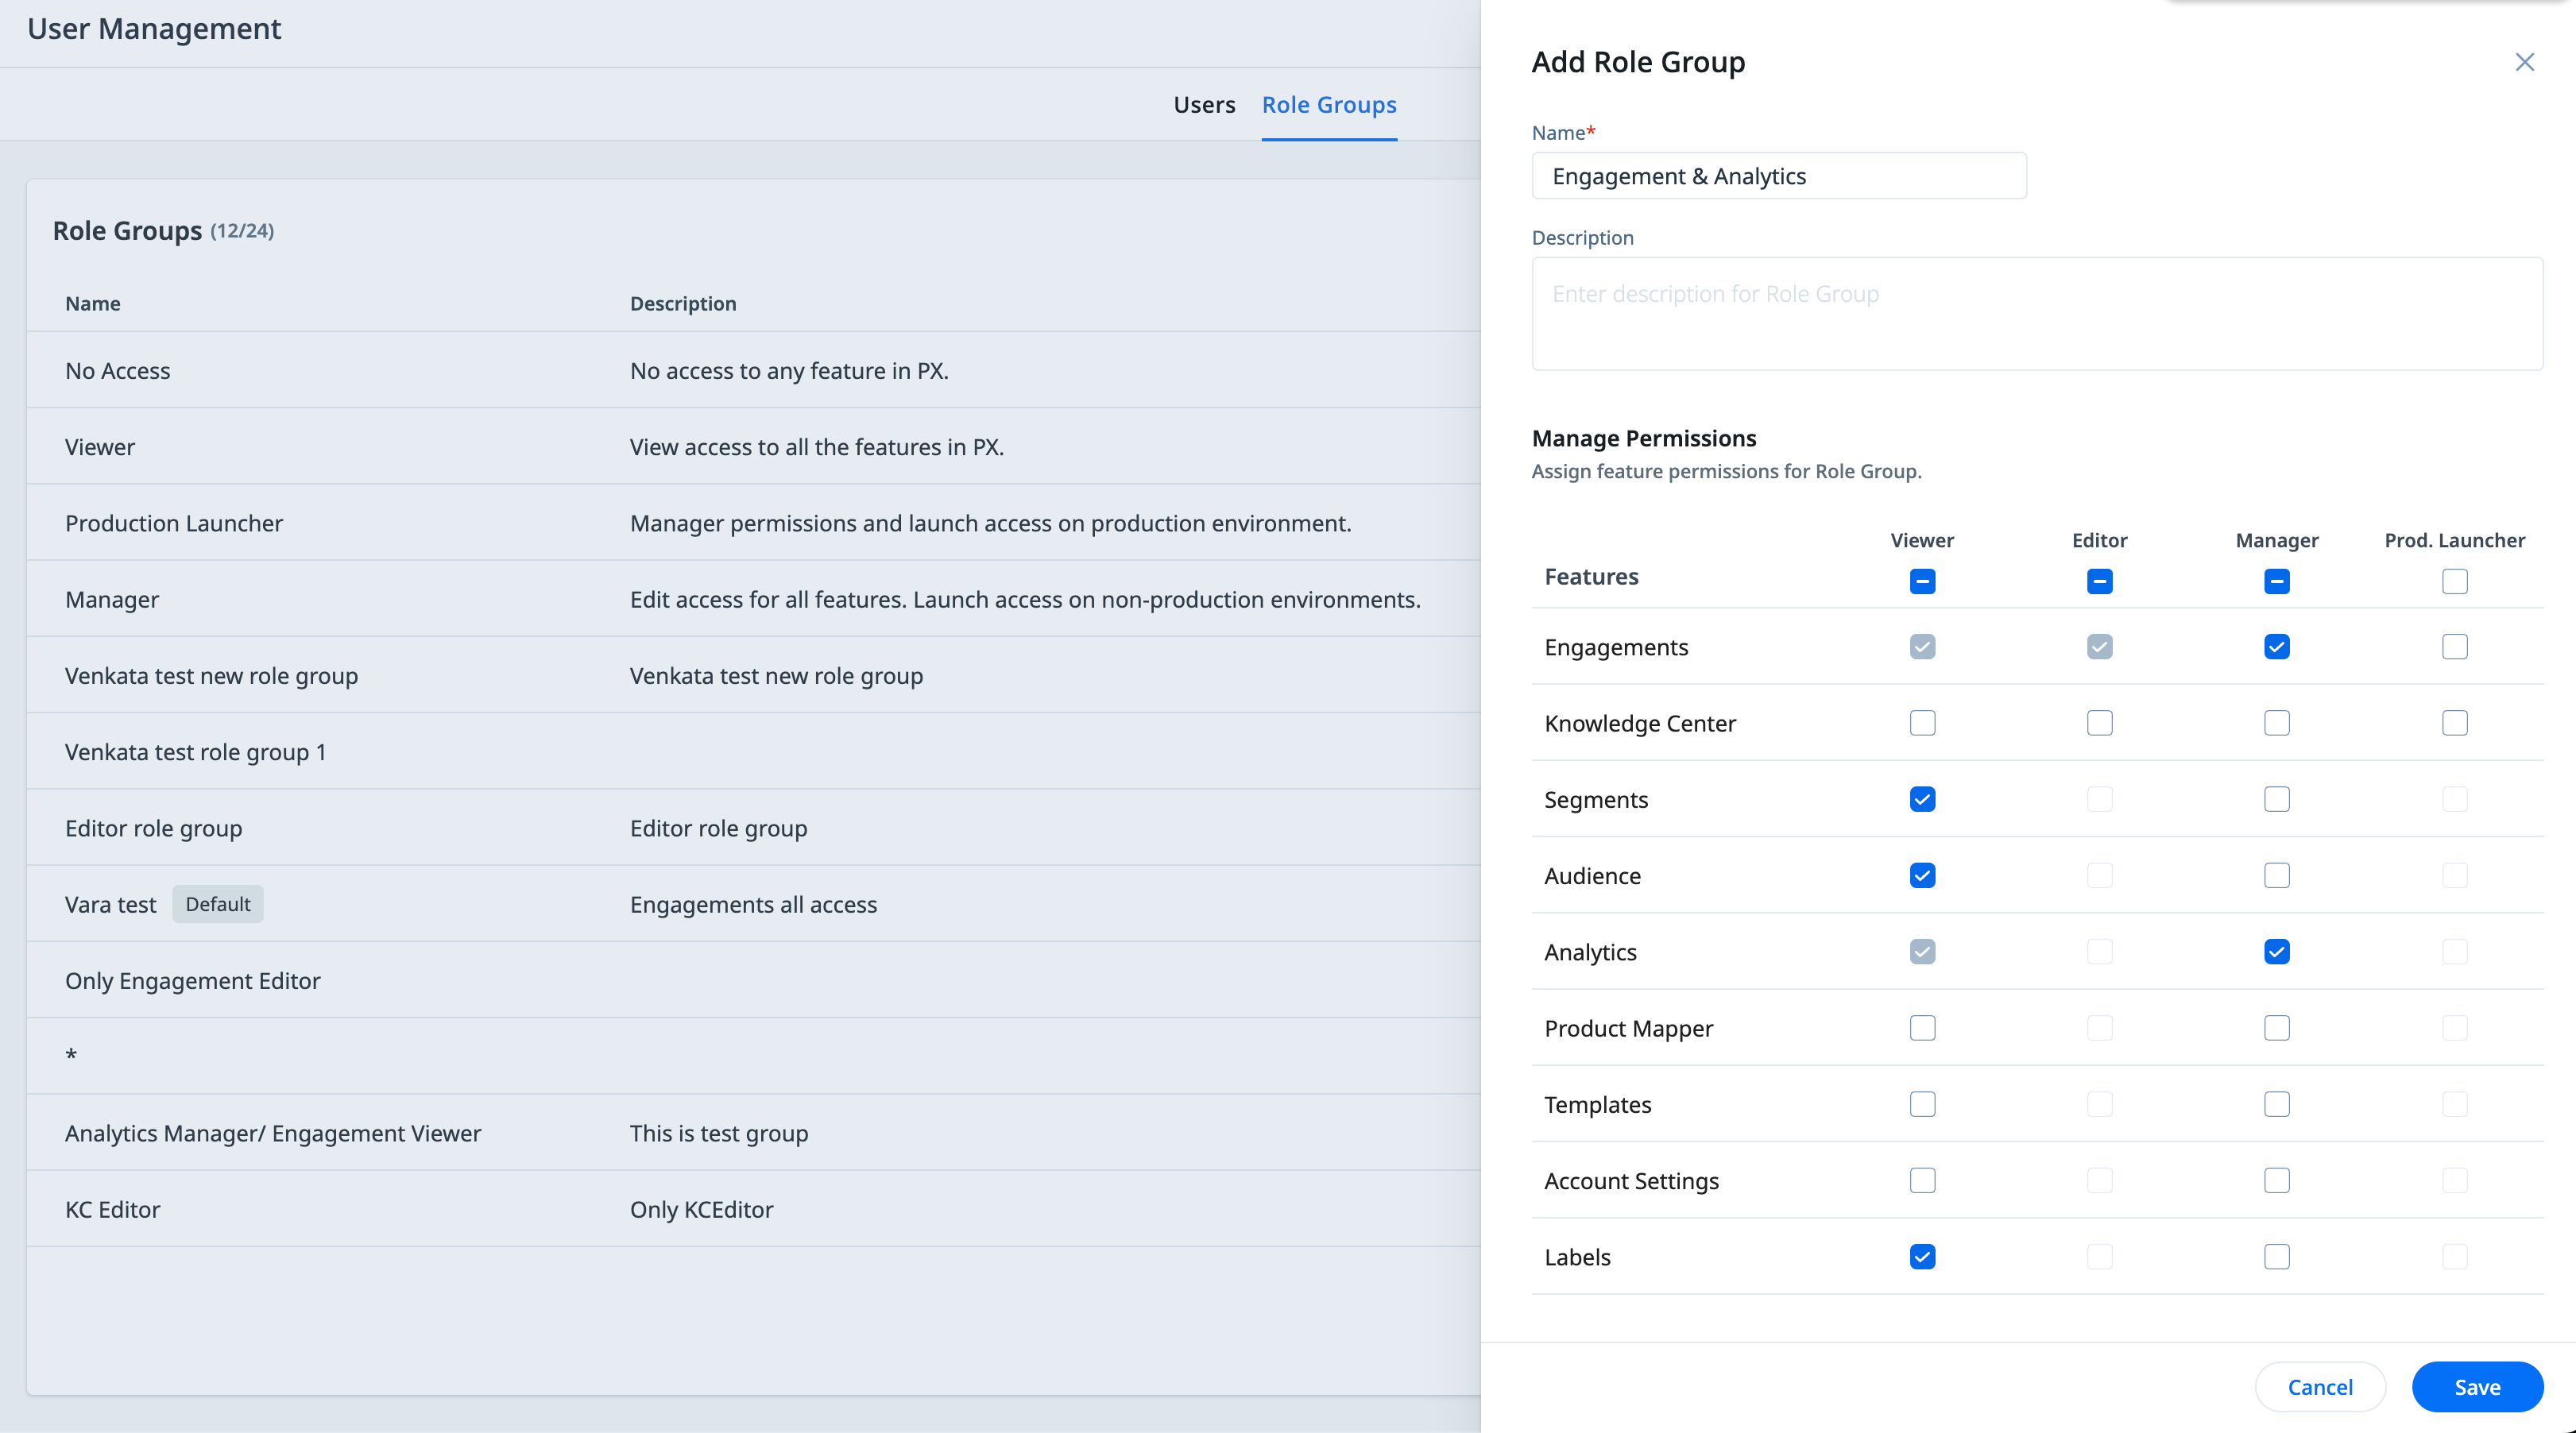
- Click Add Role Group. The Add Role Group slide-out panel appears.
- In the Name field, enter a name for the role group.
- In the Manage Permissions section, specify the required Viewer, Editor, Manager, or Prod. Launcher access across the various PX features.
- Click Save.
Note: Two role groups cannot share the same name or permission configuration.
Assign Role Group to a User
Once you have created the required role groups, you can then assign them to a user while creating or editing the user.
To assign a role group while creating or editing a user:
- In the Manage Permissions section, select Product Specific.
- For each listed product, select the applicable role group.
- (Optional) Click the Apply to all option if you want to assign the first role group to all products.
- Click Save.

Manage Users and Role Groups
The User Management page is your administrative control center to manage user access and controls. To access the User Management page navigate to Administration > User Management.
The User Management page allows you to:
Manage Users
The User Management page is your administrative control center to manage user access and controls.
To access the User Management page navigate to Administration > User Management.

The User Management page provides the following options:
- User Summary: Displays an overview of user counts, including active, inactive, and pending users, among others. Select a metric to filter and view users corresponding to that specific category.
- Total Users: Count of users who have been added by internal teams to the PX subscription.
- Active Users: Users who have successfully registered to the subscription, and have access to PX.
- Inactive Users: Users who have temporarily been deactivated by the admin, and do not have access to PX.
- Pending Users: Users who have received the invitation email, but are yet to accept them and register on PX.
- Administrators: Users with administrative permissions for the subscription.
- Global Administrators: Users with administrative privileges in the subscription and can share templates across subscriptions in that workspace.
- User List: View user details, including their names, email addresses, status, last modified date, and the type of admin role, if applicable.
- Search: Search for users with name or email address.
- Export: Export a list of users and the corresponding permissions.
- Add User: Add new users to PX. For more information on adding users, refer to the Add a New User section.
- Manage Users:
- Edit User: Update user information and permissions.
- Delete User: Remove a user permanently from PX.
- Deactivate User: Suspend access for a user temporarily, until reactivated.
- Resend Email: Resend the invitation email to users in the Pending status.
- Transfer Ownership: Assume ownership of another user’s assets such as reports, dashboards, filters, and so on.
Manage Role Groups
The Role Groups tab on the User Management page provides the following options:
- Role Groups List: View role group details, including the name, description, type, date of creation, and number of users assigned to the role group.
- Search: Search for role groups with names.
- Add Role Group: Add new role groups to PX. For more information on adding users, refer to the Add a New Role Group section.
- Filter: Filter role groups based on the role assigned (viewer, editor, manager, or production launcher), or PX feature areas.
- Export: Export the list of role groups and the assigned permissions.
- Manage Role Groups:
- Edit: Update role group information and permissions.
- Delete: Remove a role group from PX.
- Mark as Default: The role group marked as default is auto assigned to users that belonged to a role group that was deleted.
Manage Users as a Global Administrator
Global Admins are users with complete administrative privileges in that subscription and can share templates across the subscriptions in that workspace. As a Global Admin, you can view, add, and manage Global Admins for that subscription.
Note: Global administrators are not automatically generated when a workspace is created. To get the global administrator access for the first time, the subscription administrator must contact the support team.
Add Global Admin
To add a user as a Global Admin, select the Global Admin radio button while adding the new user.