Data Steward : Person
This article explains how admins can merge duplicate records, explore matches, move records, deactivate records, and edit Unified Records in the Data Steward feature.
Note: Before proceeding further we recommend you to go through the Unification Overview article for a better understanding of the Unification feature.
Overview
To make the process of unifying data from multiple sources the most efficient, it is crucial to ensure that the final data does not include duplicate, incomplete, or inaccurate records. The Unification feature solves this problem automatically at scale.
The Unification feature provides a standard Person Unification project in the Gainsight instance that identifies duplicate records based on the Resolution Key defined by the admin and creates a Unified Record.
However, there can be some actions that require the manual expertise of admins, or some instances where the admins may wish to undo the changes in Gainsight made by the Unification feature. In these cases, admins can use the Data Steward feature to manually intervene over Unification’s results. The Data Steward feature helps to attain the highest quality data for accurate analysis by Gainsight.
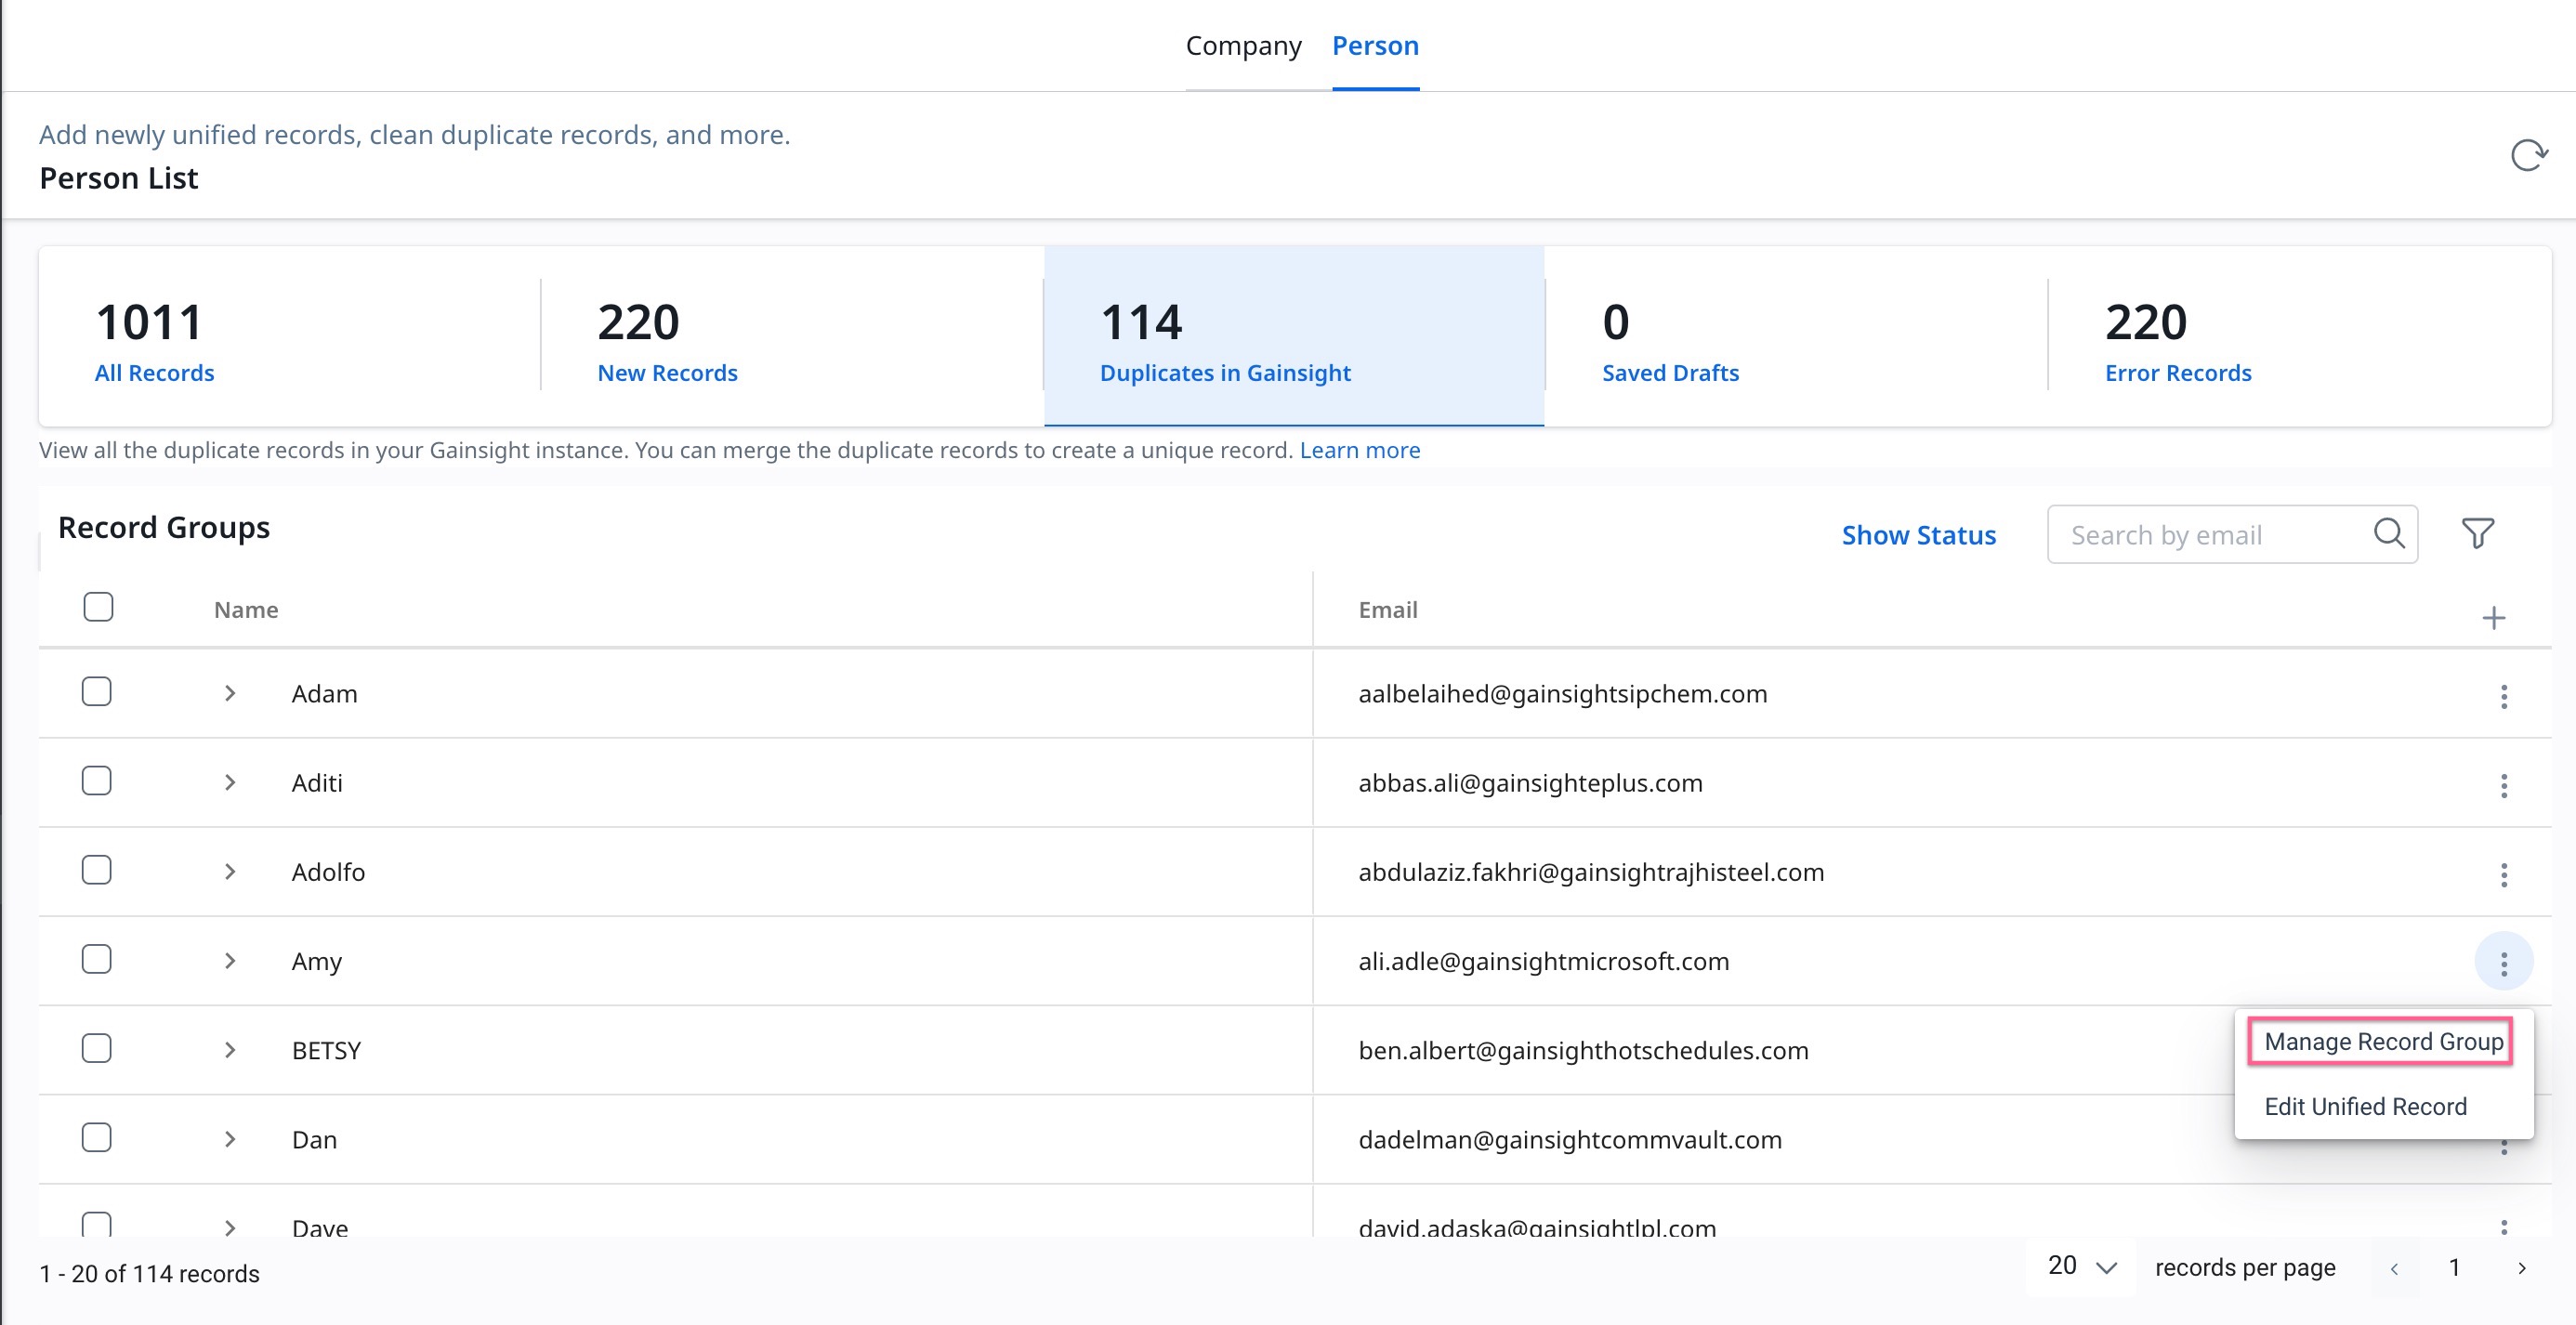
Actionable Summary Ribbon
As an admin you can access Data Steward, by navigating to Administration > Data Steward.
Note: Duplicates in Gainsight tab is selected by default.
Admins can view the summary of records in the Unification project. Click on any count displayed in the ribbon to filter by the specific use case as listed below.
- All Records: Unified records from all sources.
- New Records: Unified records that are yet to be inserted into the Person object.
- Duplicates in Gainsight: Unified Records that have at least two duplicate records in the Person object, and should be merged.
- Saved Drafts: Unified Records with draft changes that are yet to be updated in the Person object.
- Error Records: Unified Records that encountered errors during the Unification process.

Merge Duplicate Records
You can merge duplicate records from the Record Group page.
Note: The merge operation could take a few minutes, therefore Gainsight recommends that you do not perform more activities on the Record Group until that time. Please wait until the merge operation is completed and the winning record is displayed on the Data Steward page.
To merge duplicate records:
- Navigate to Administration > Customer Data > Data Steward.
- The Duplicates in Gainsight section appears by default on the Data Steward page.
- Select the record that needs to be merged. Two options are available:
Note: Gainsight recommends to get familiar with Initiate Merge first and then use Quick Merge once the process is known.
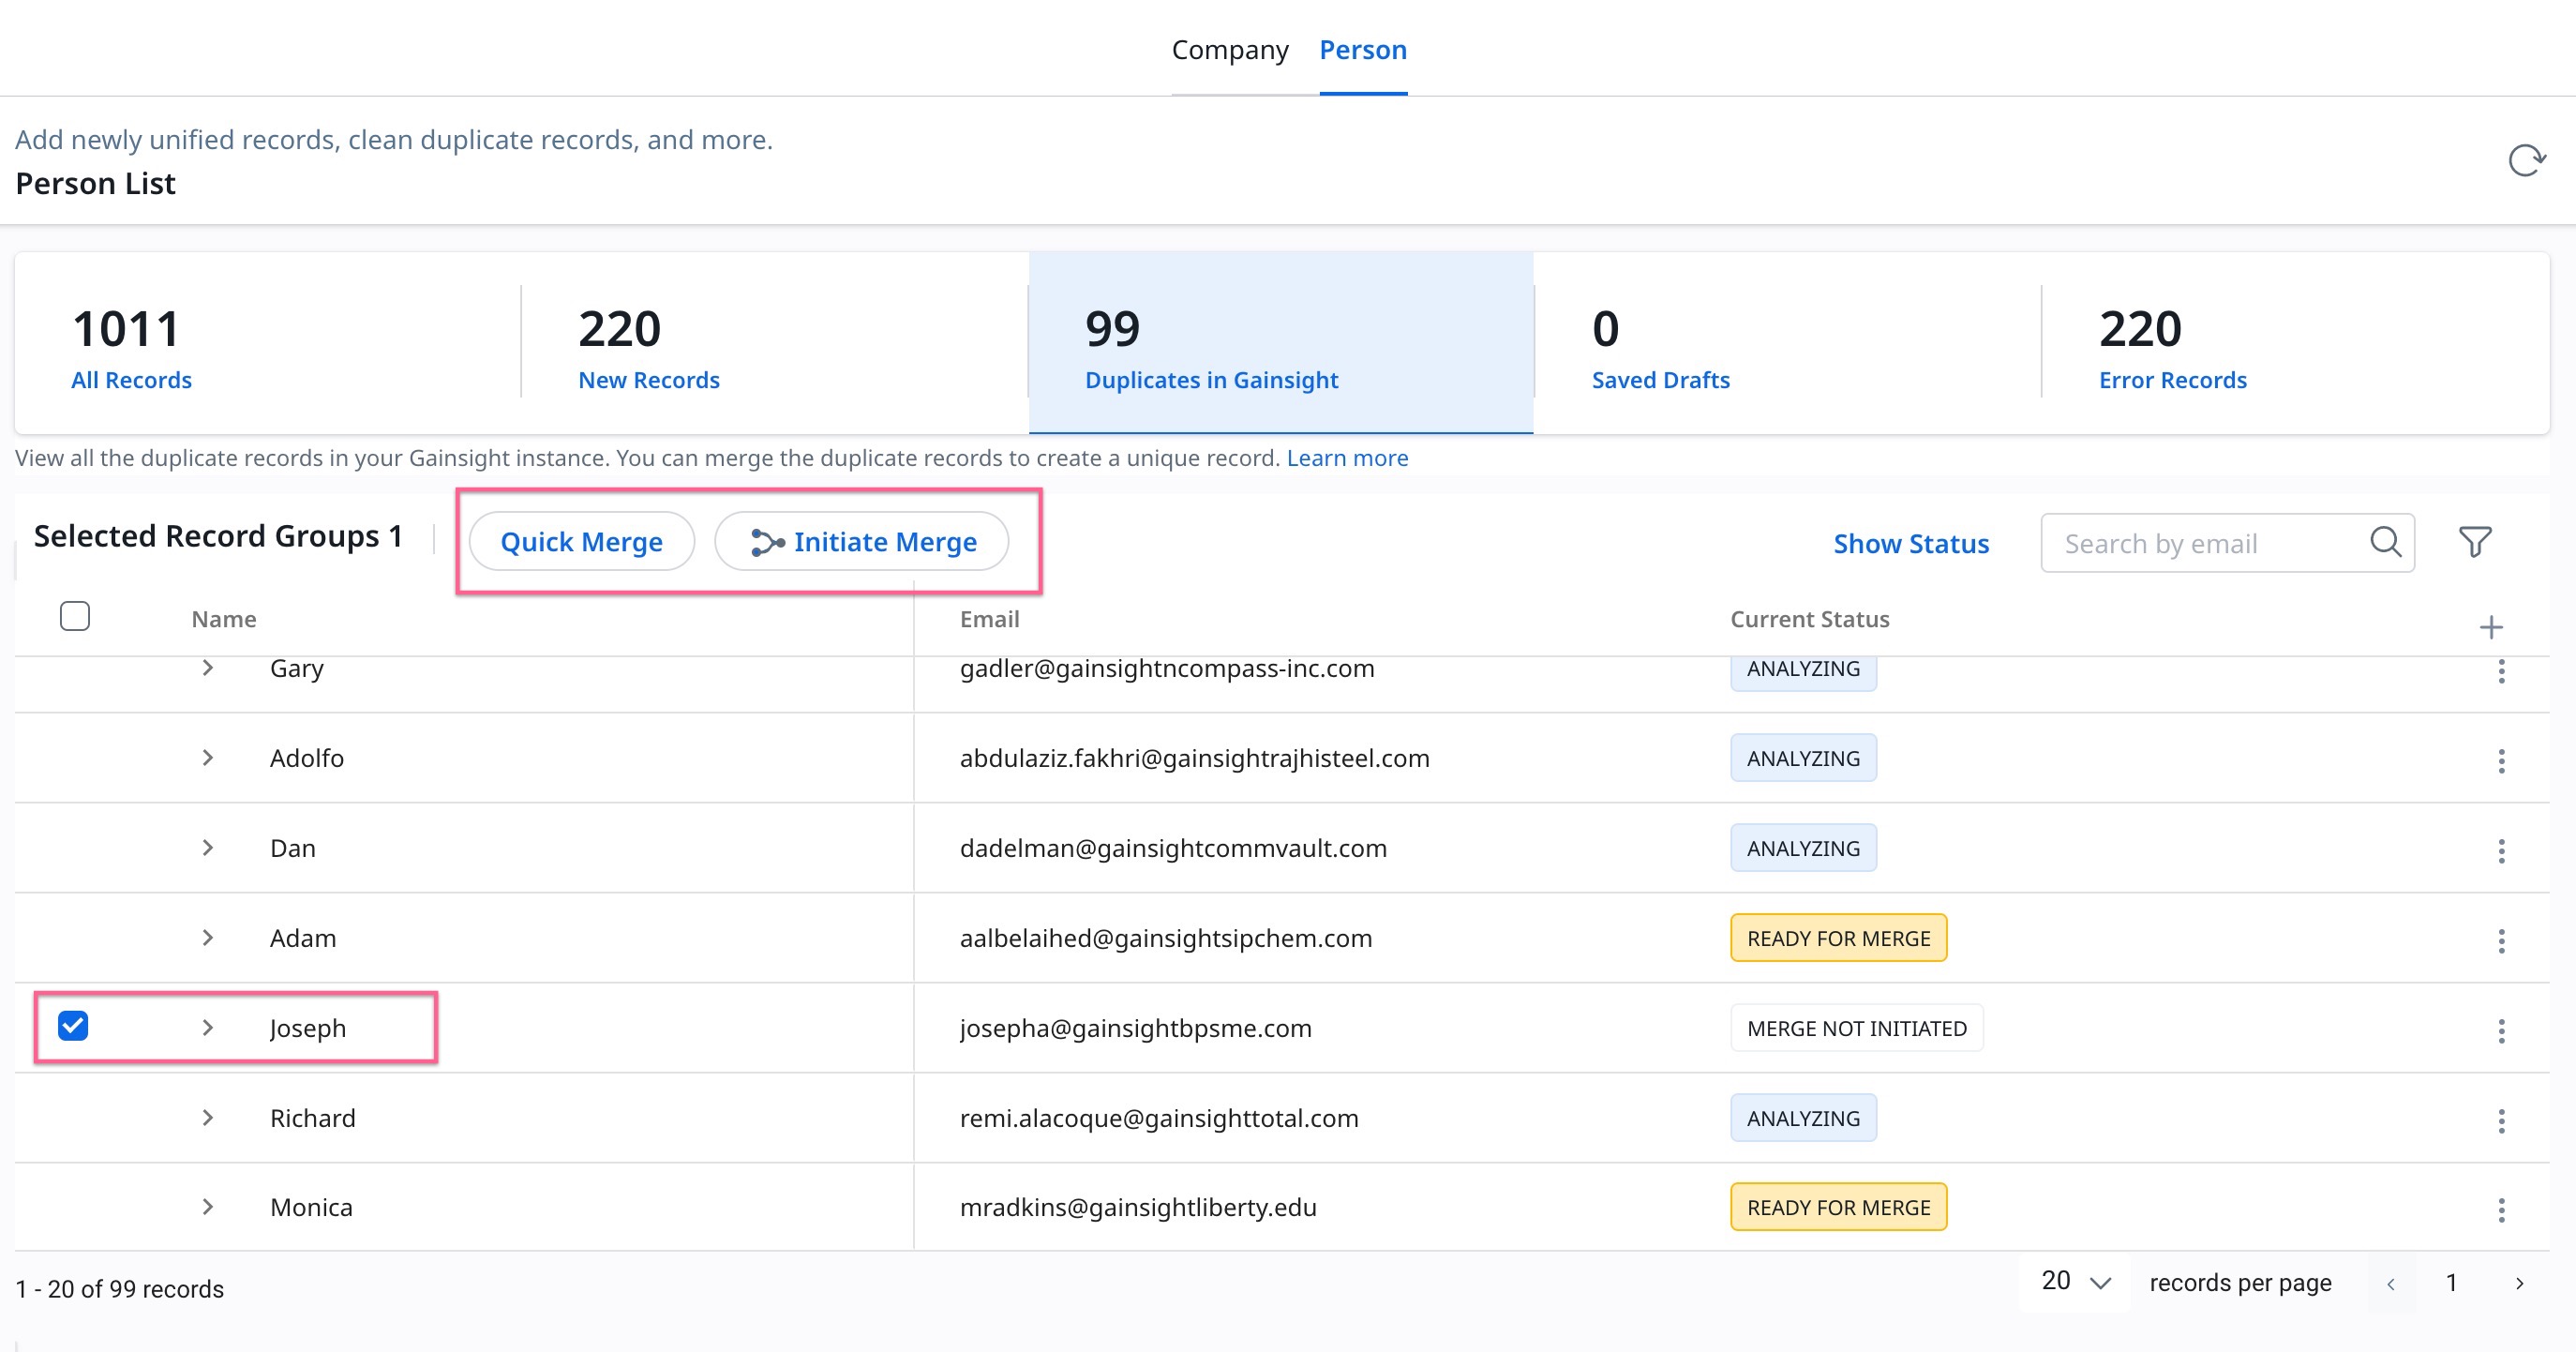
Initiate Merge
Once the record is selected, admins can use either Quick Merge or Initiate Merge to merge the duplicate records.
Initiate Merge sends the selected records for the Merge Analysis process. The Person record is updated with all the values, and admins need to select the winning records manually to be added as a unified record.
To merge records using Initiate Merge:
- Select the record to be merged.
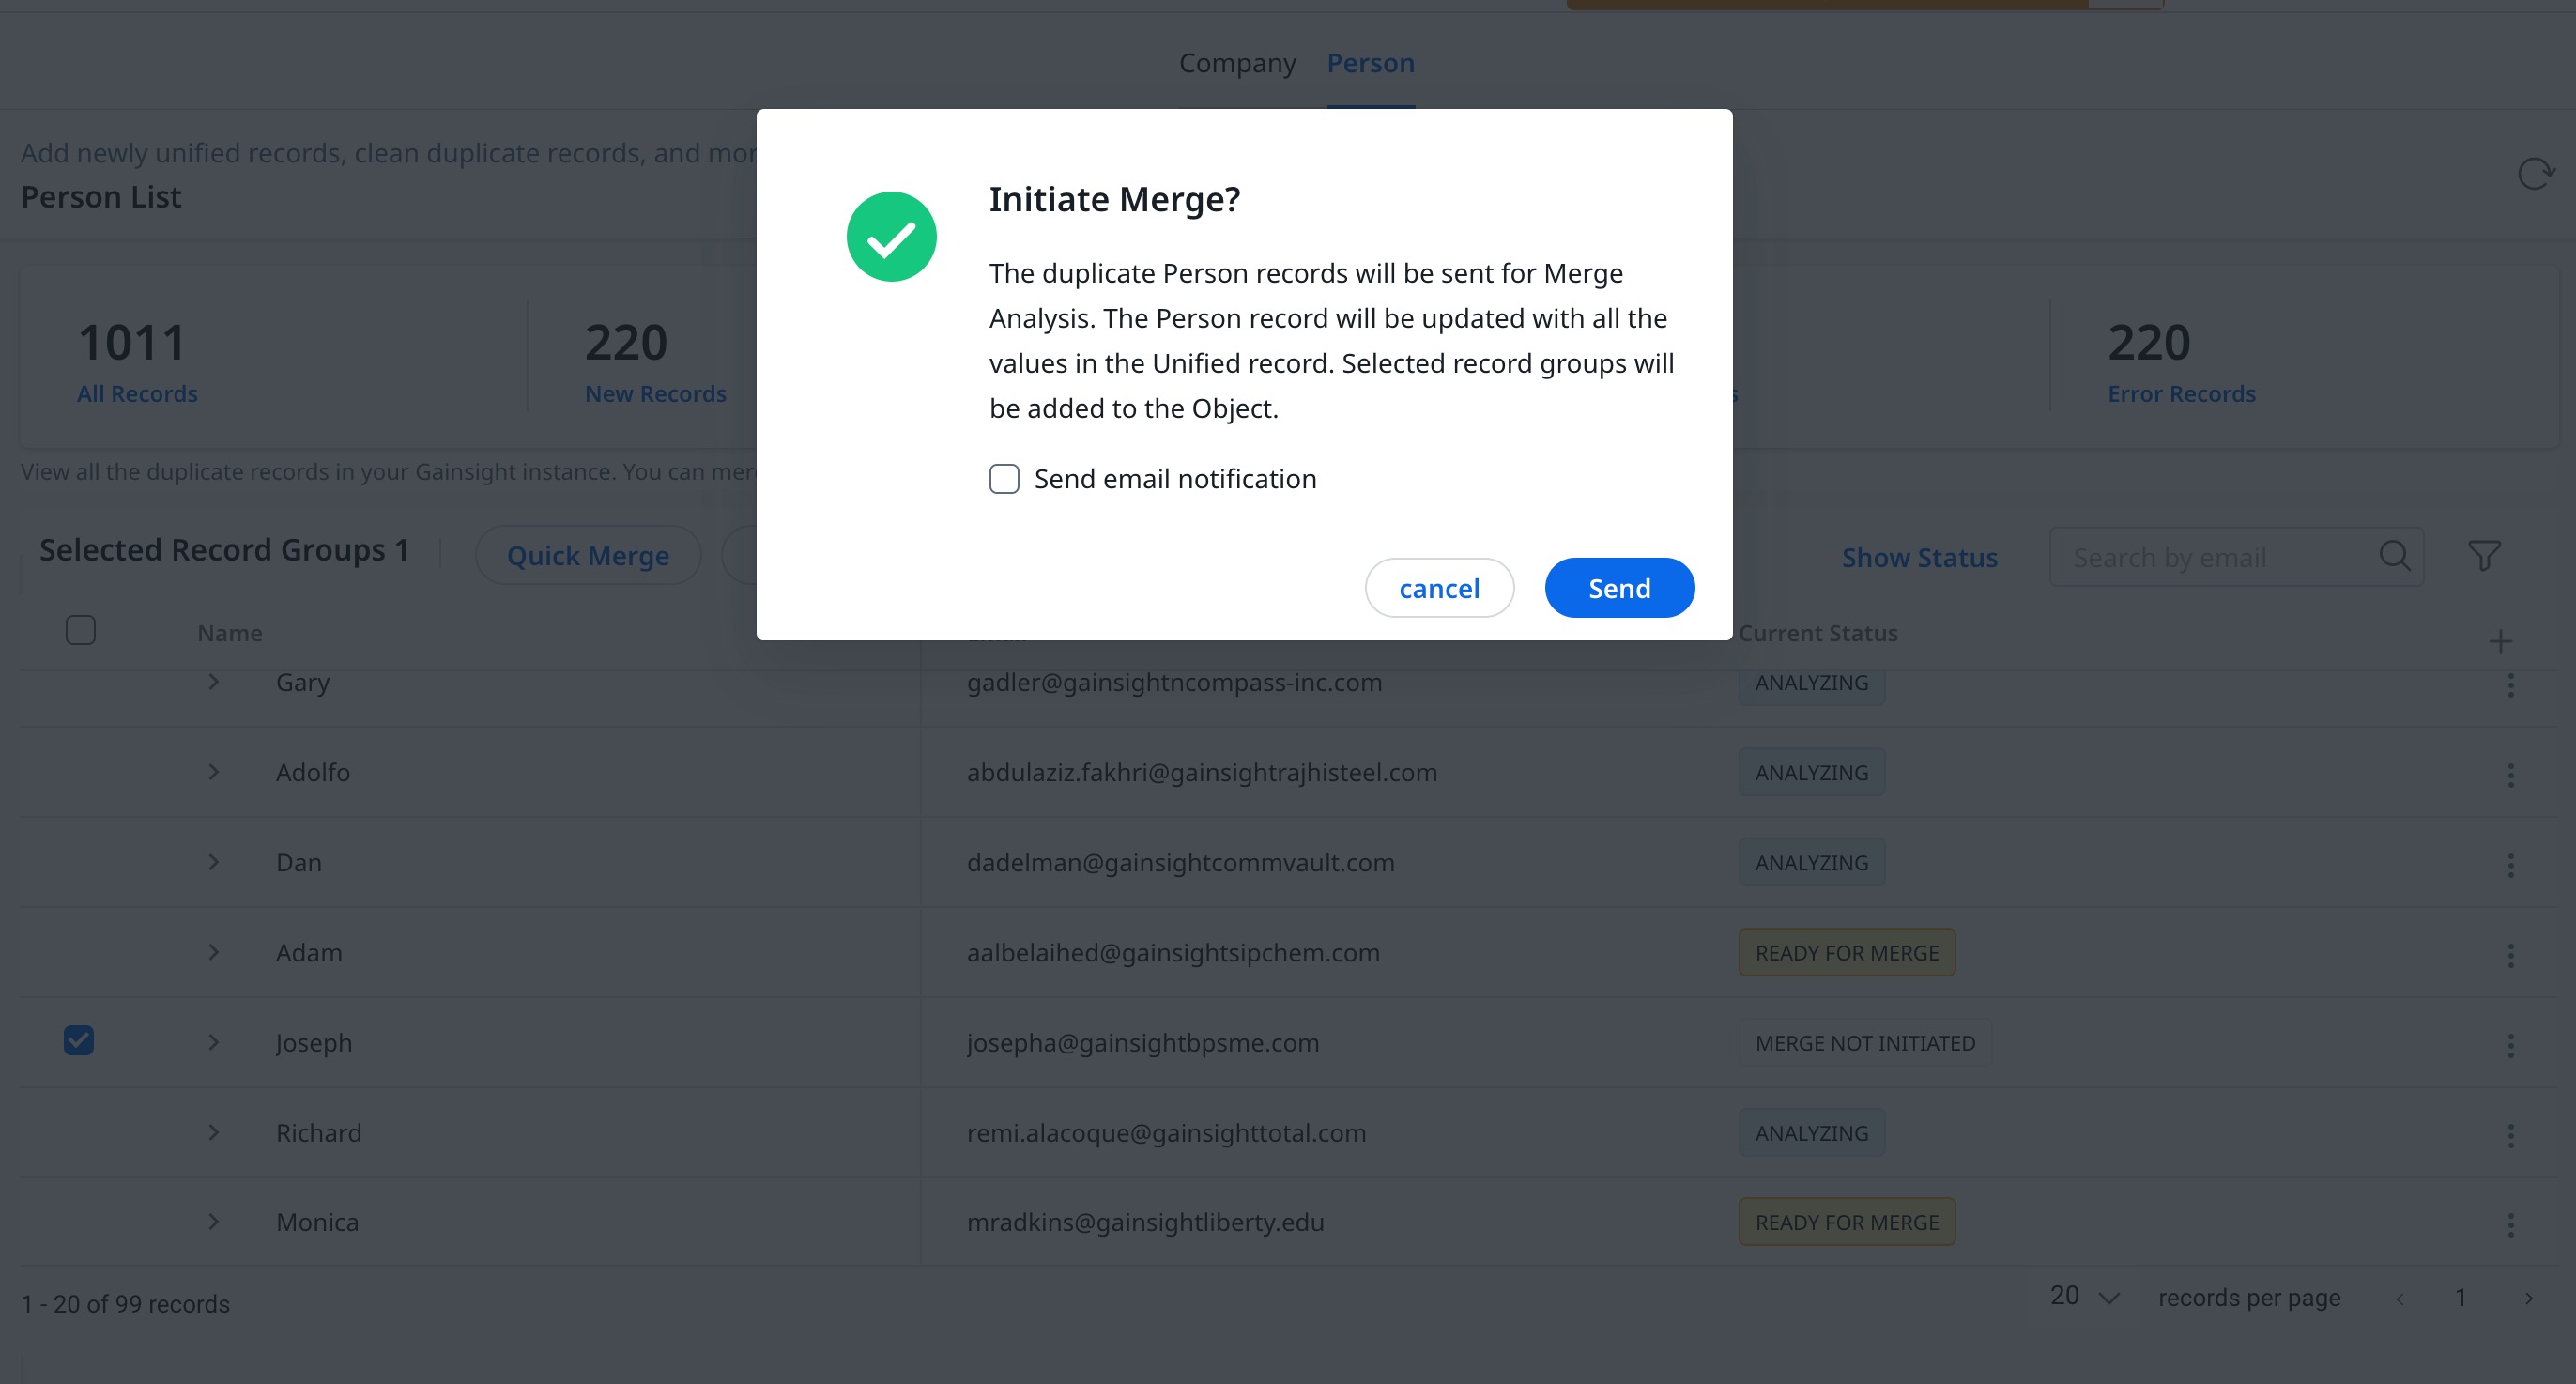
- Click Initiate Merge. A confirmation window appears.
- Click Send.
Note: Select the Send Email notification checkbox to receive updates on the merged analysis.
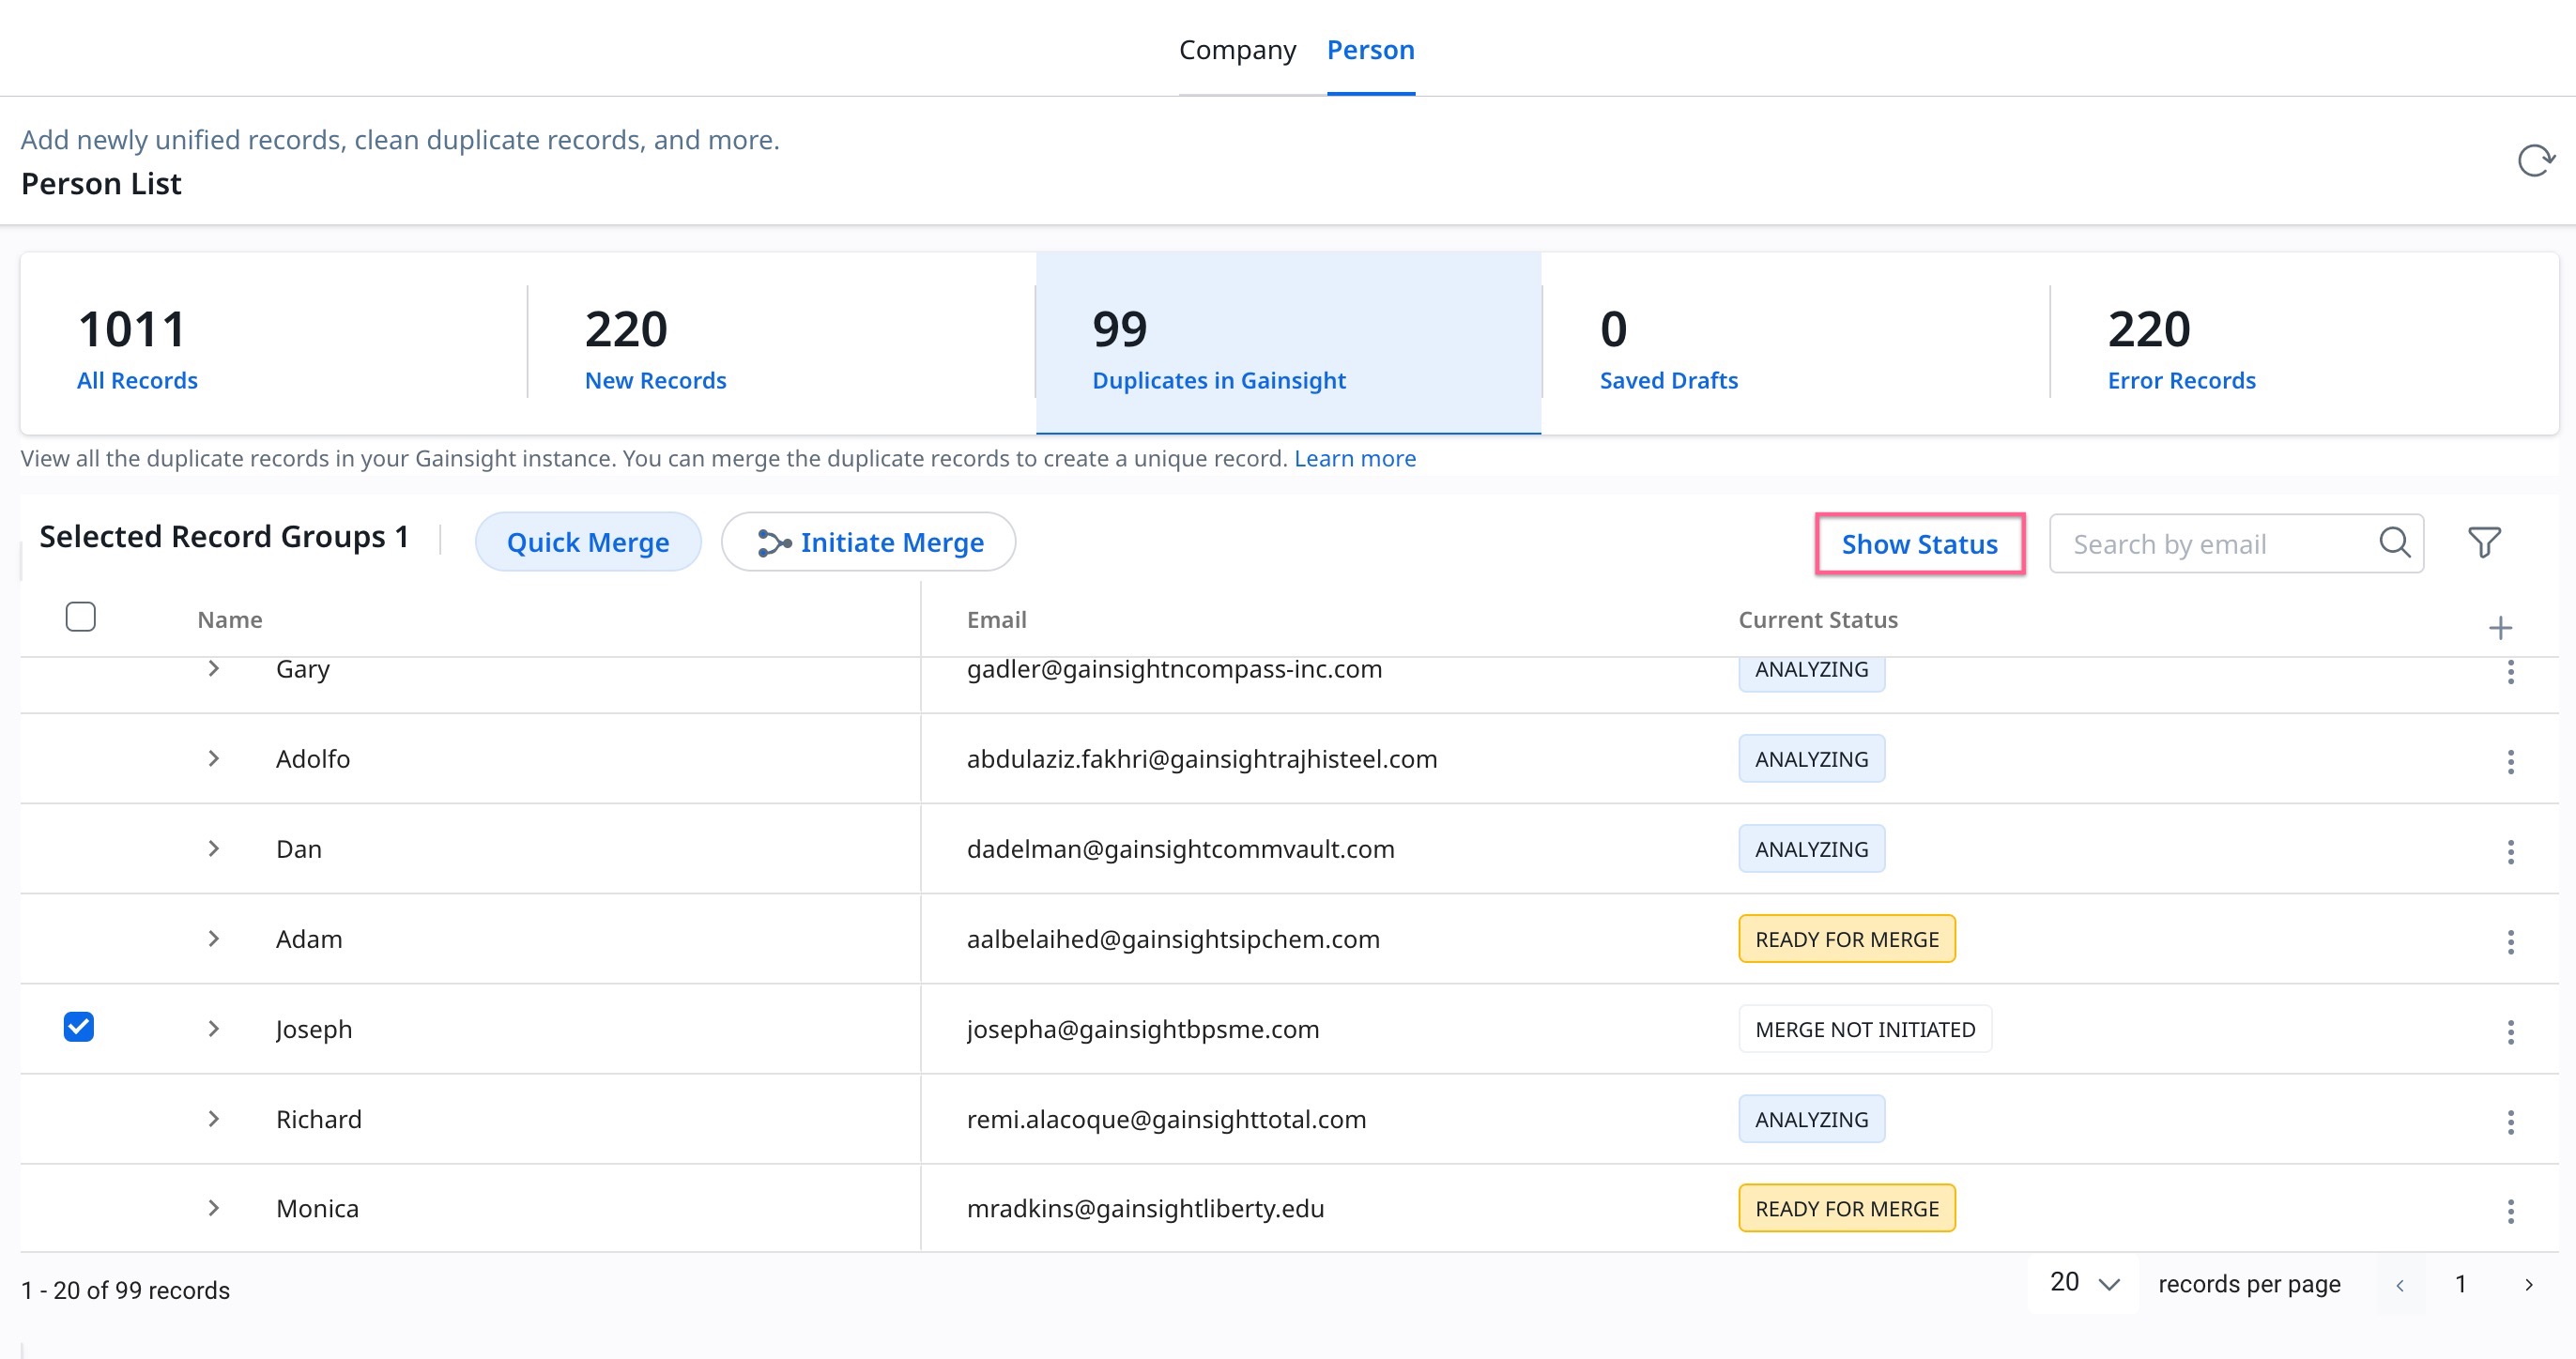
The status of the merge process can be viewed from the Current Status column on the Records Group page.
To review and complete the merge process, click Show Status. You will be navigated to the People > Person Merge tab.
Review Merge Analysis and Enrich Person Records
In the People > Person Merge tab, admins can review and enrich person records.
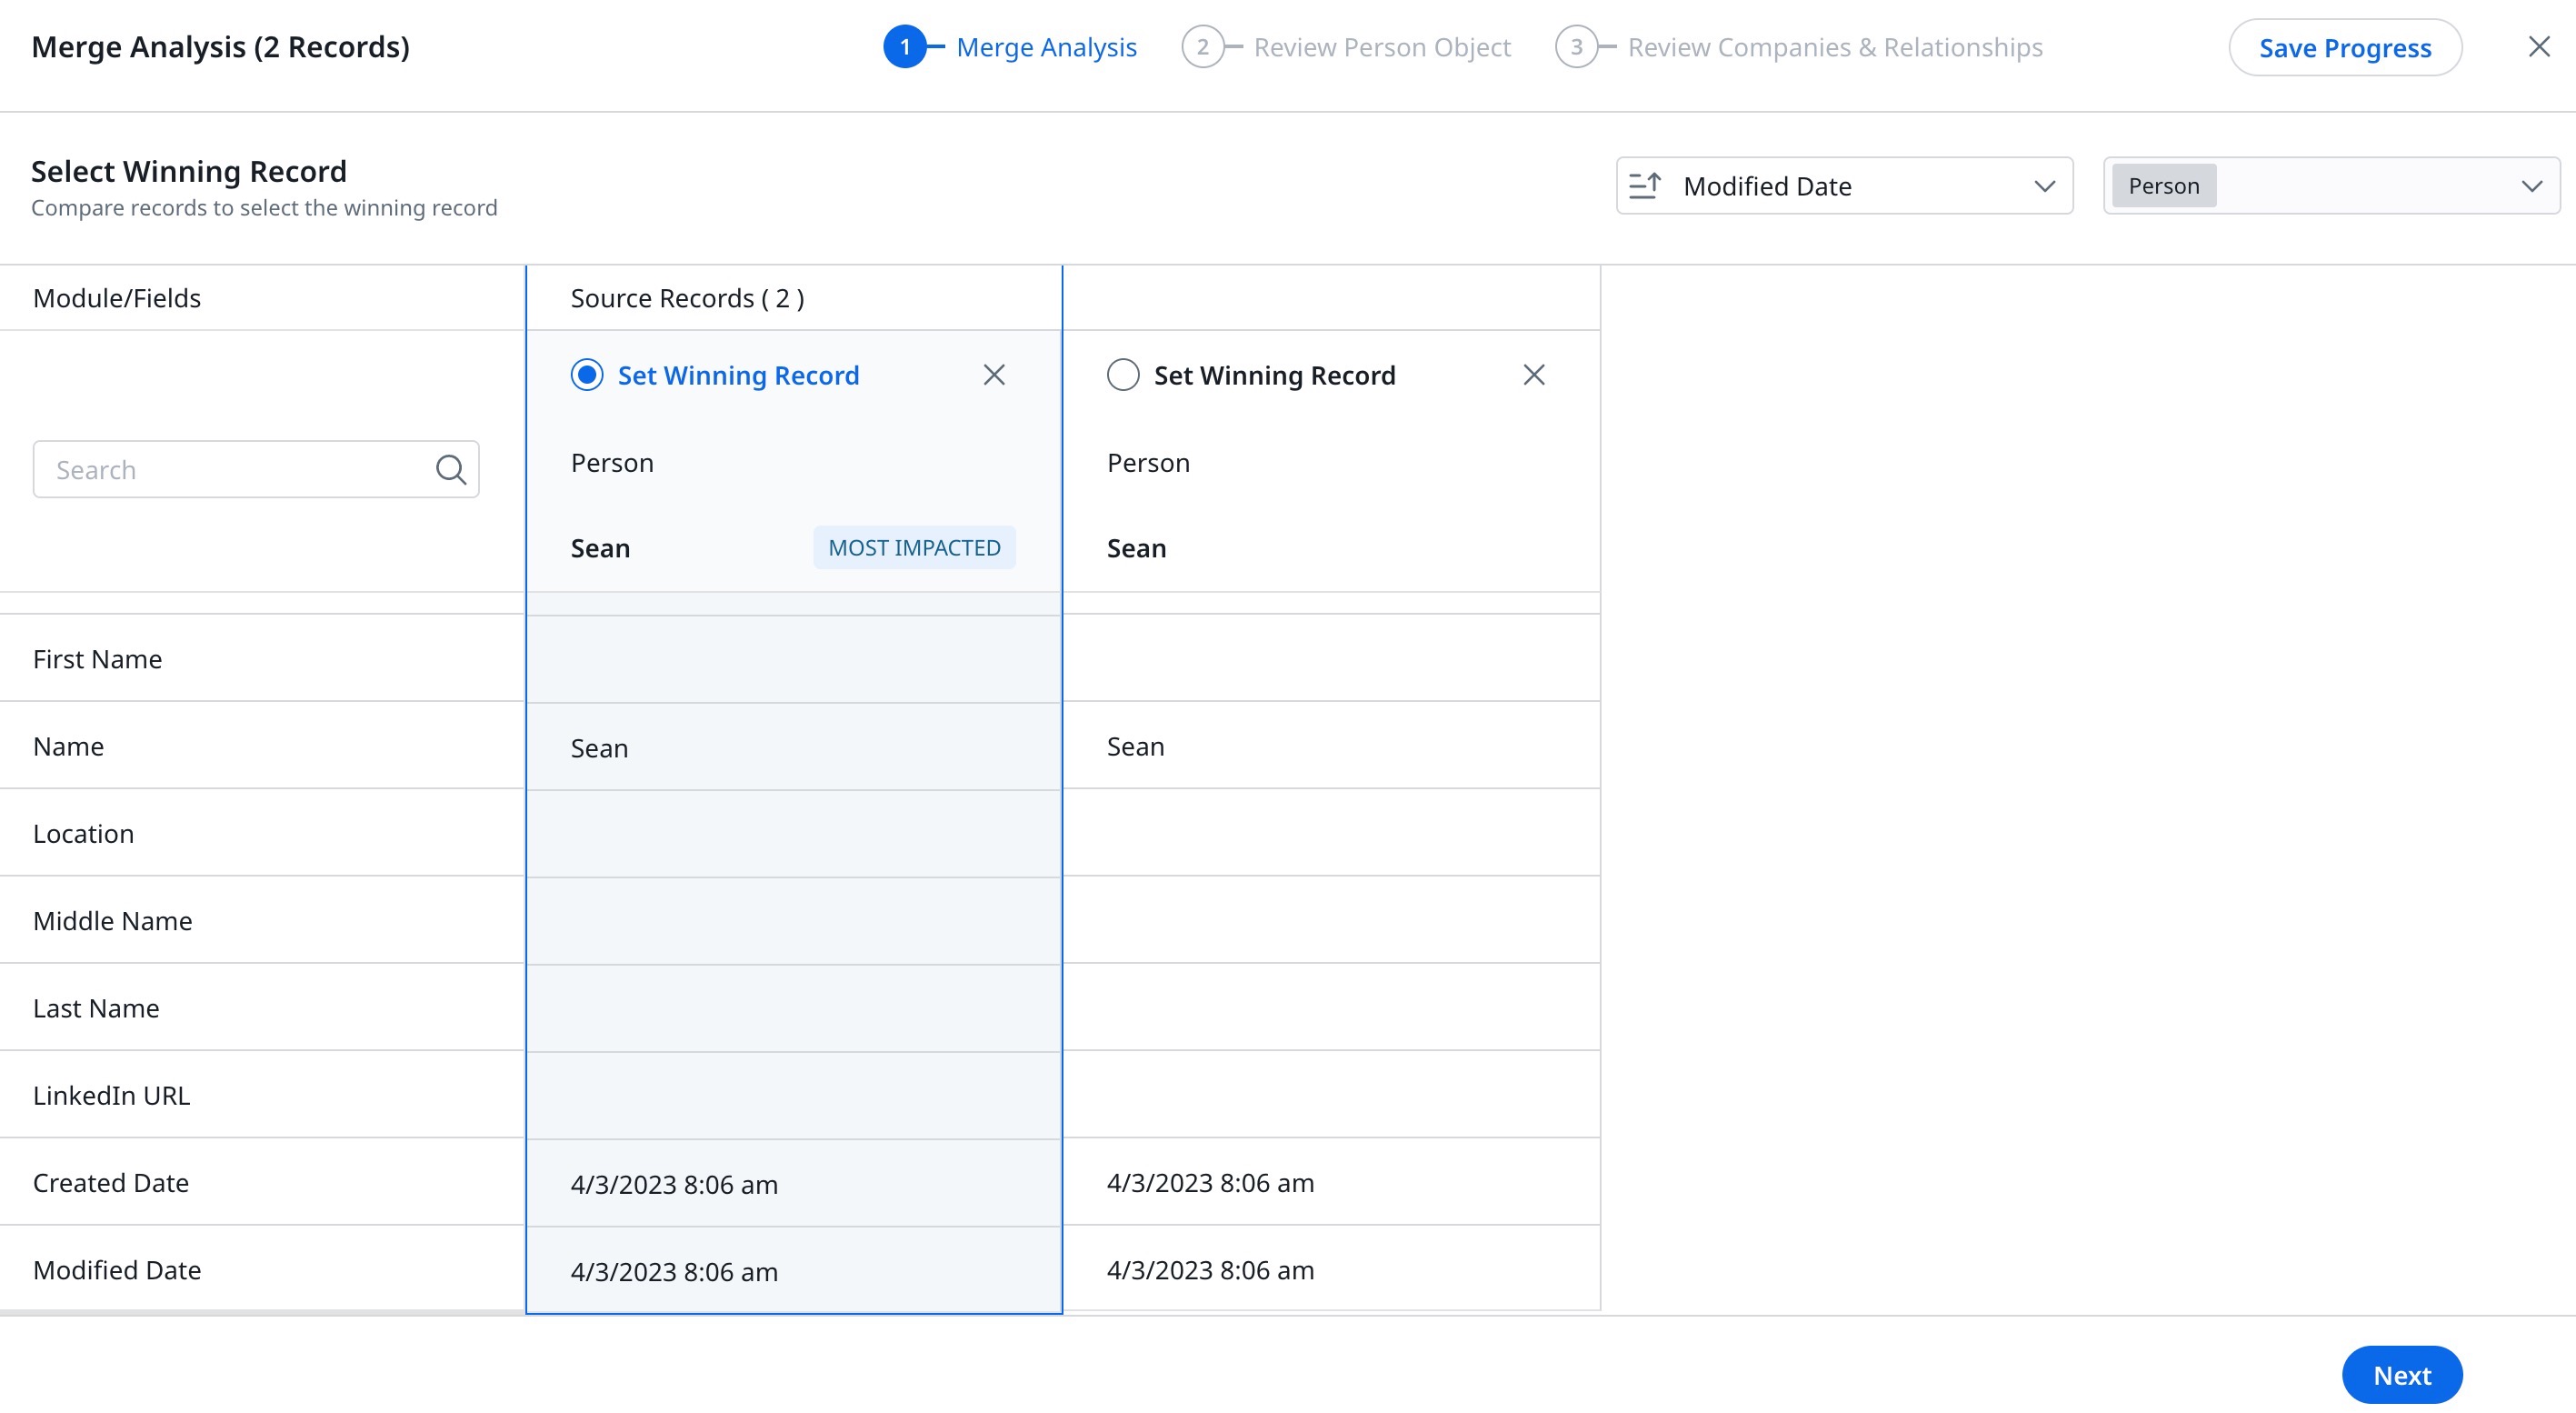
In the merge analysis report, the system lists all the person records that are selected for the merge process along with the Gainsight suggested winning record. You can change or enrich the winning record based on the merge analysis report.
- Perform the following steps to change or enrich the winning record:
- Merge Analysis: All the person records selected for the merge process are listed along with the system set winning records. You can also view the dependent modules in which these person records are found. This aims to improve the enrichment of the record. Click Next after selecting your winning record.
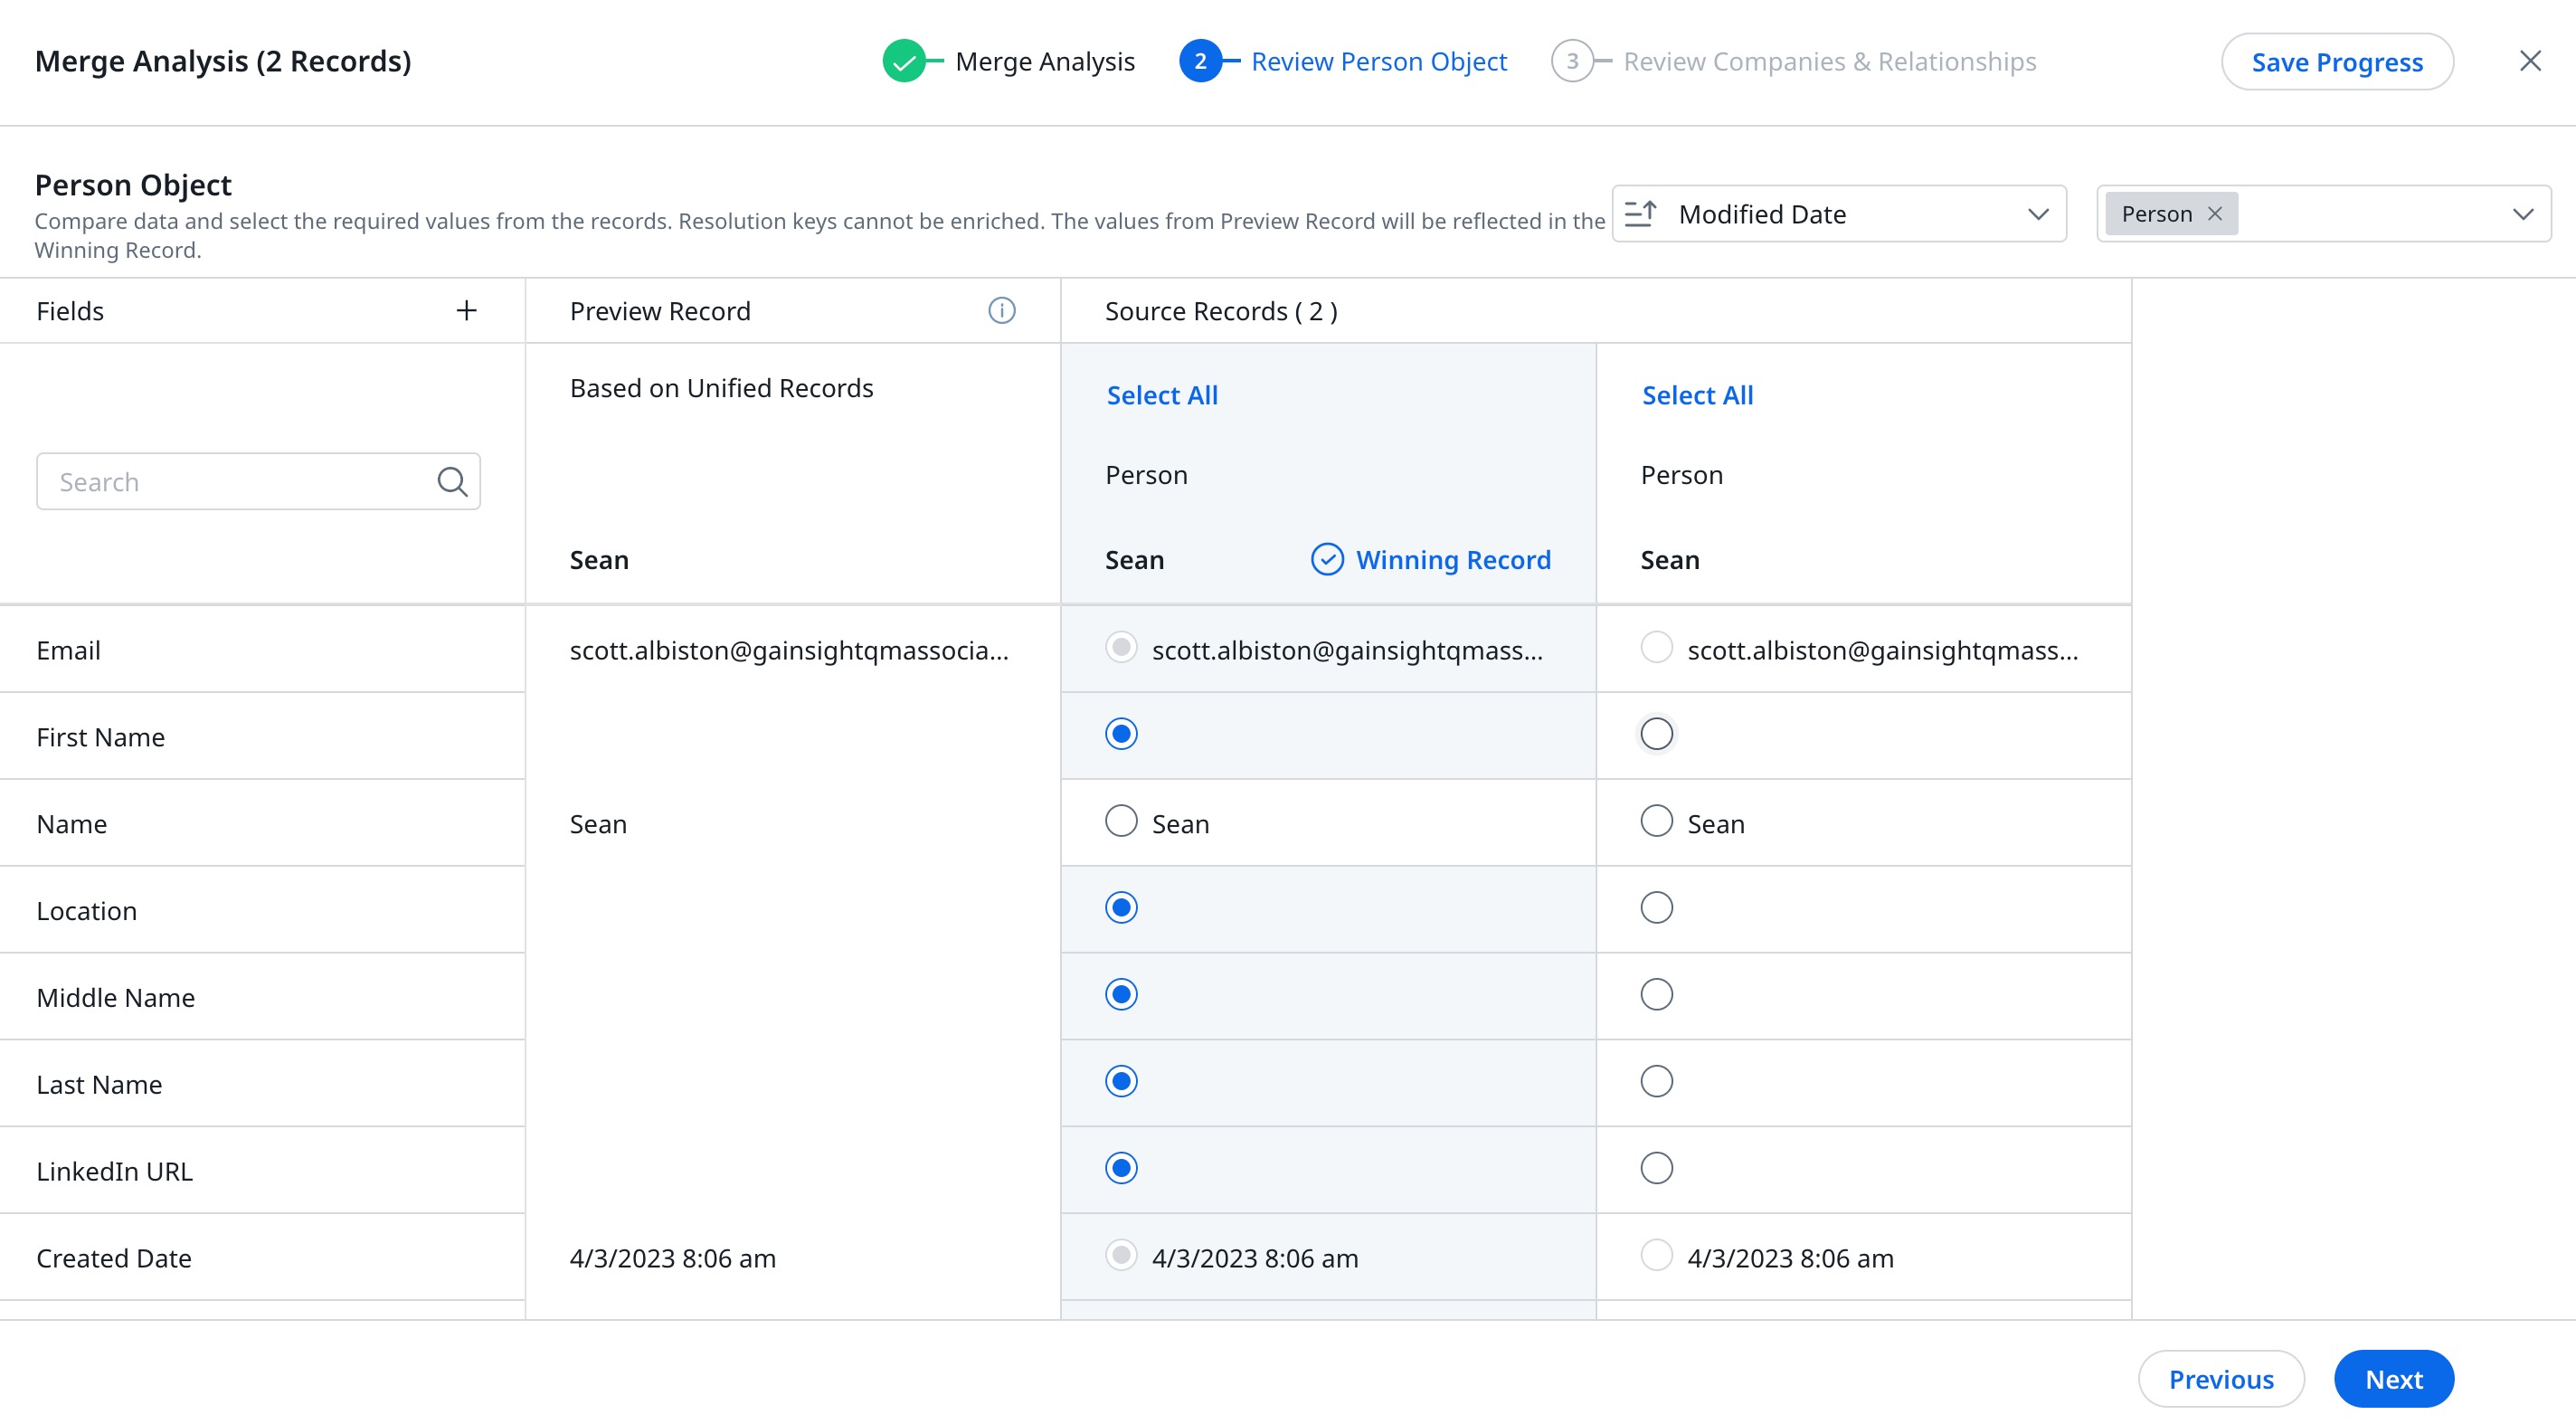
- Review Person Object: Only a few default fields of the person object are available for review. Select the fields of your choice using a column picker. All fields of the winning record, that can be changed or enriched, are selected by default. Click Next after selecting the fields for your winning record.
Note: You cannot enrich the SFDCContactID, SFDCAccountID, and PXUserID fields.
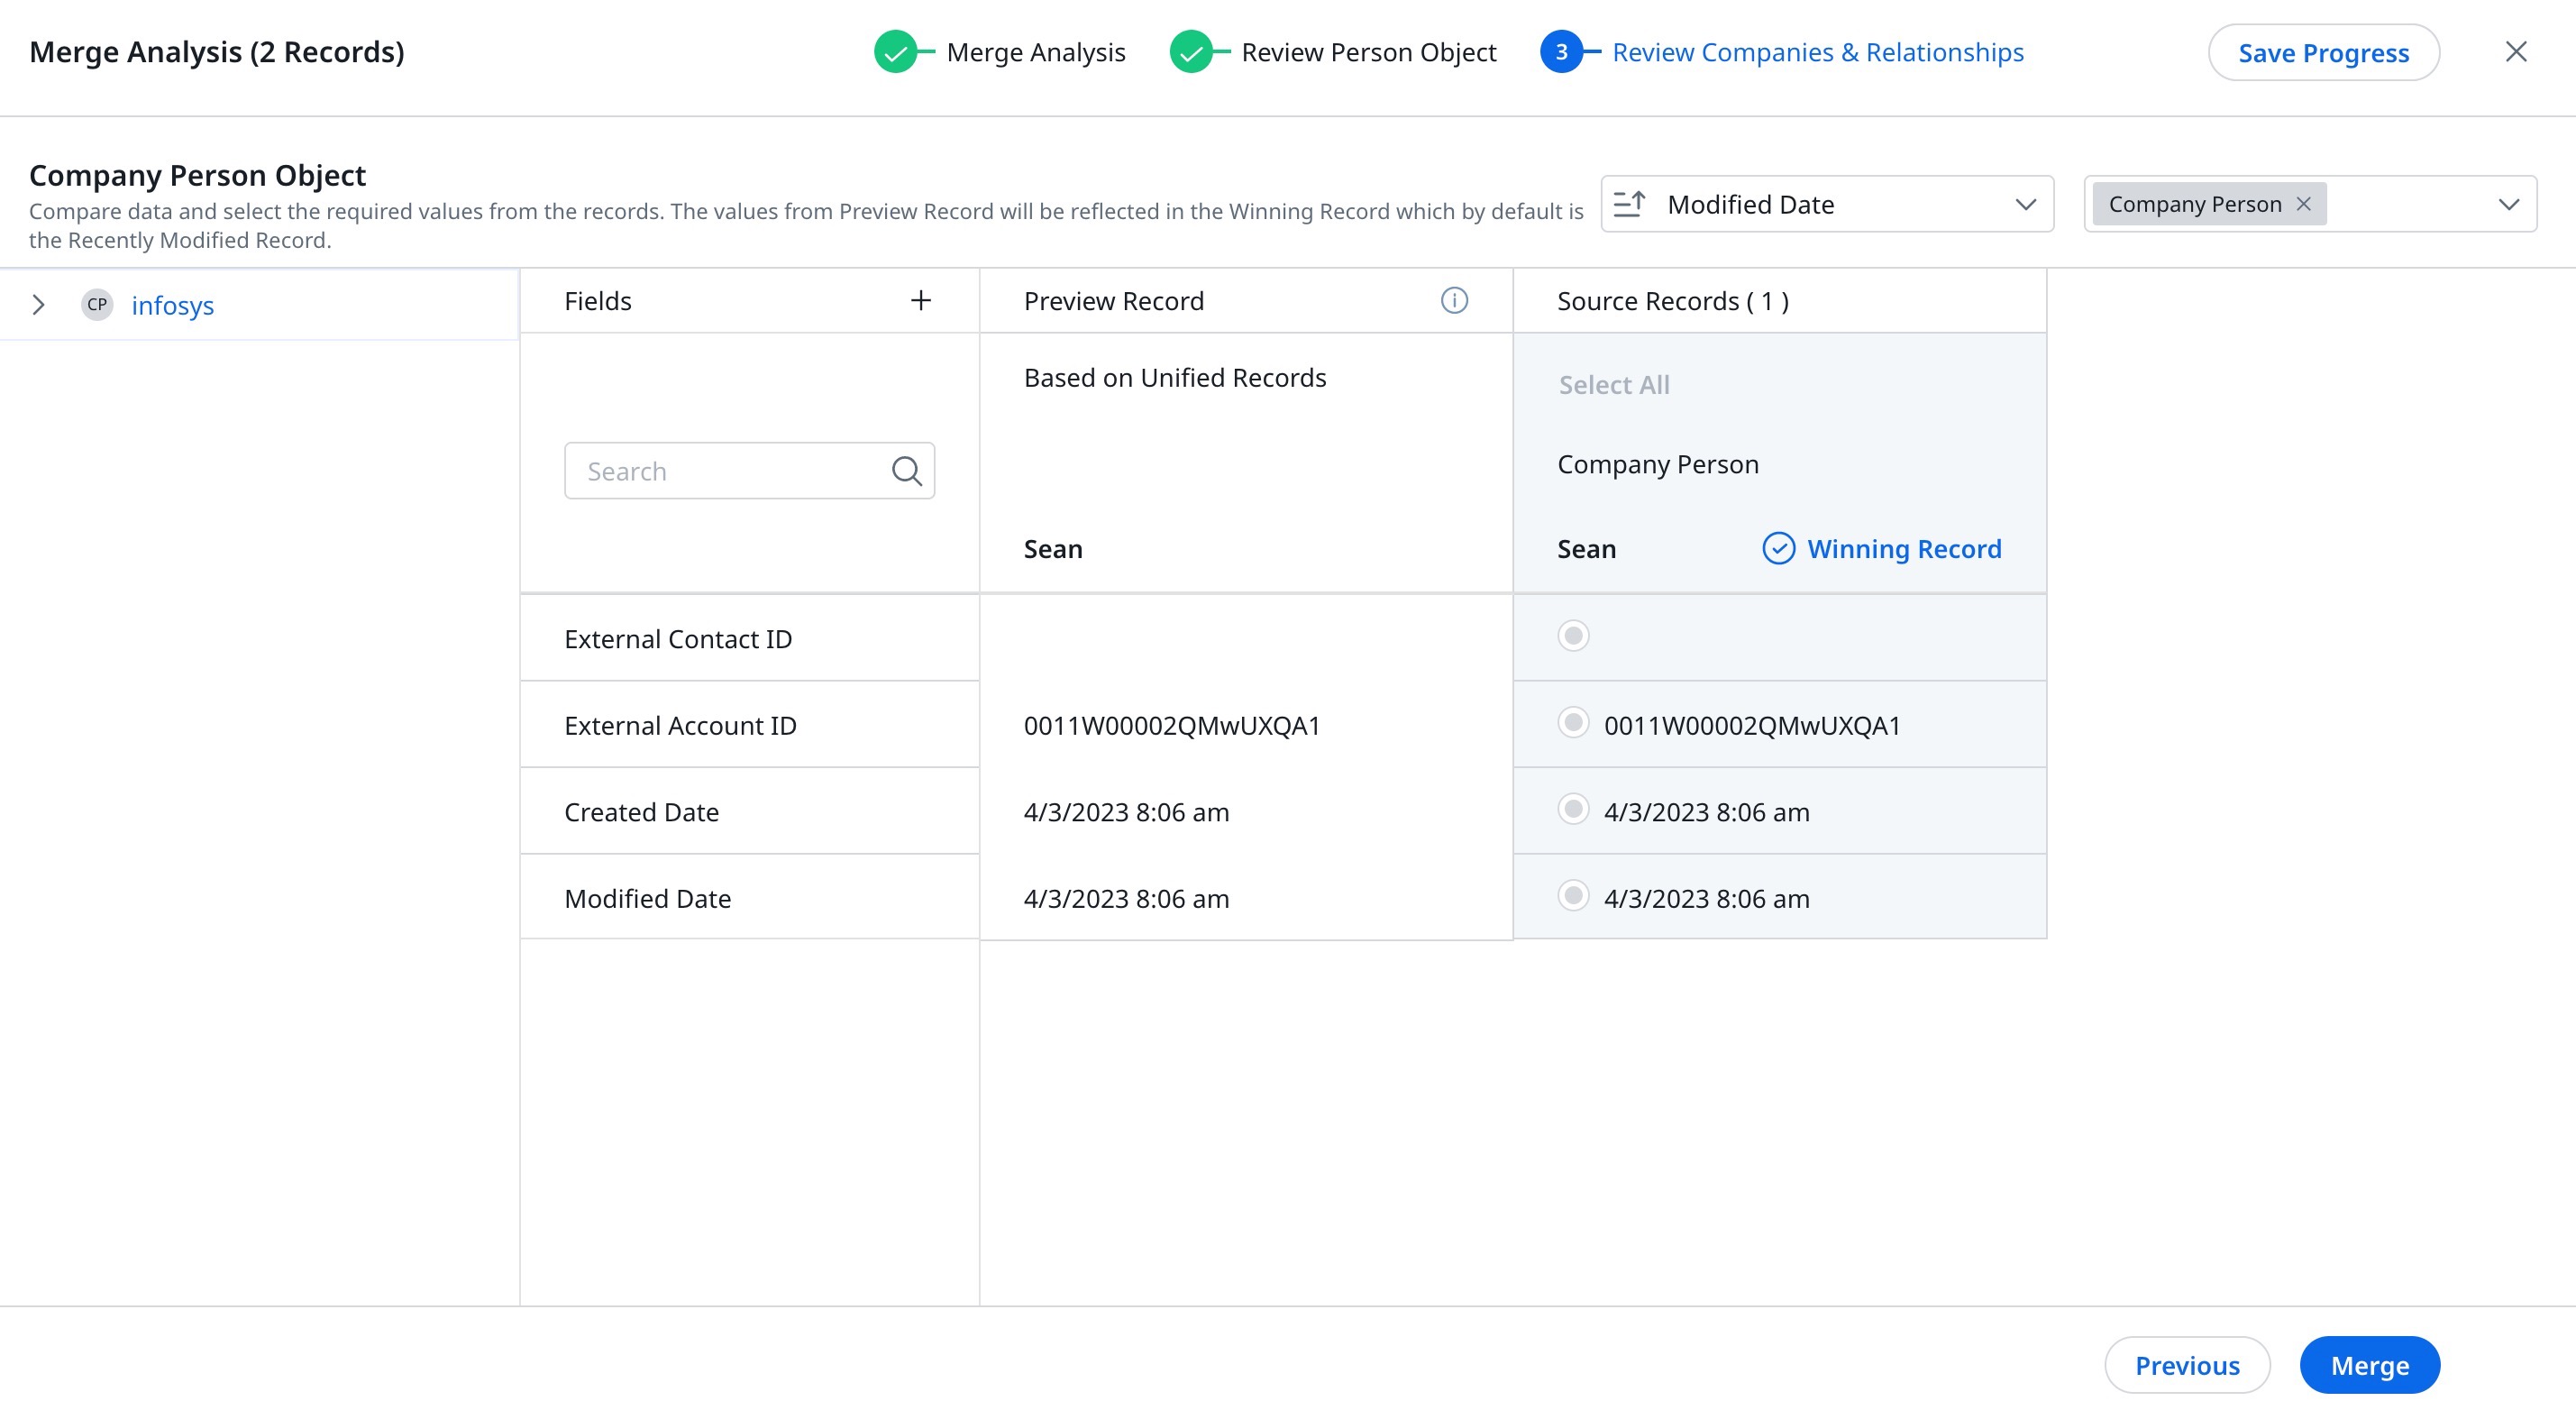
- Review Companies & Relationships: All fields of the company person winning record, that can be changed and enriched, are selected by default. The same is applicable to relationships as well.
Note: Winning record in the Company Person and the Relationship Person objects are chosen based on the last modified date.
- Merge Analysis: All the person records selected for the merge process are listed along with the system set winning records. You can also view the dependent modules in which these person records are found. This aims to improve the enrichment of the record. Click Next after selecting your winning record.
- Click Merge. The Sending for Merge pop-up message appears.
- Click Merge to continue with the merge process.
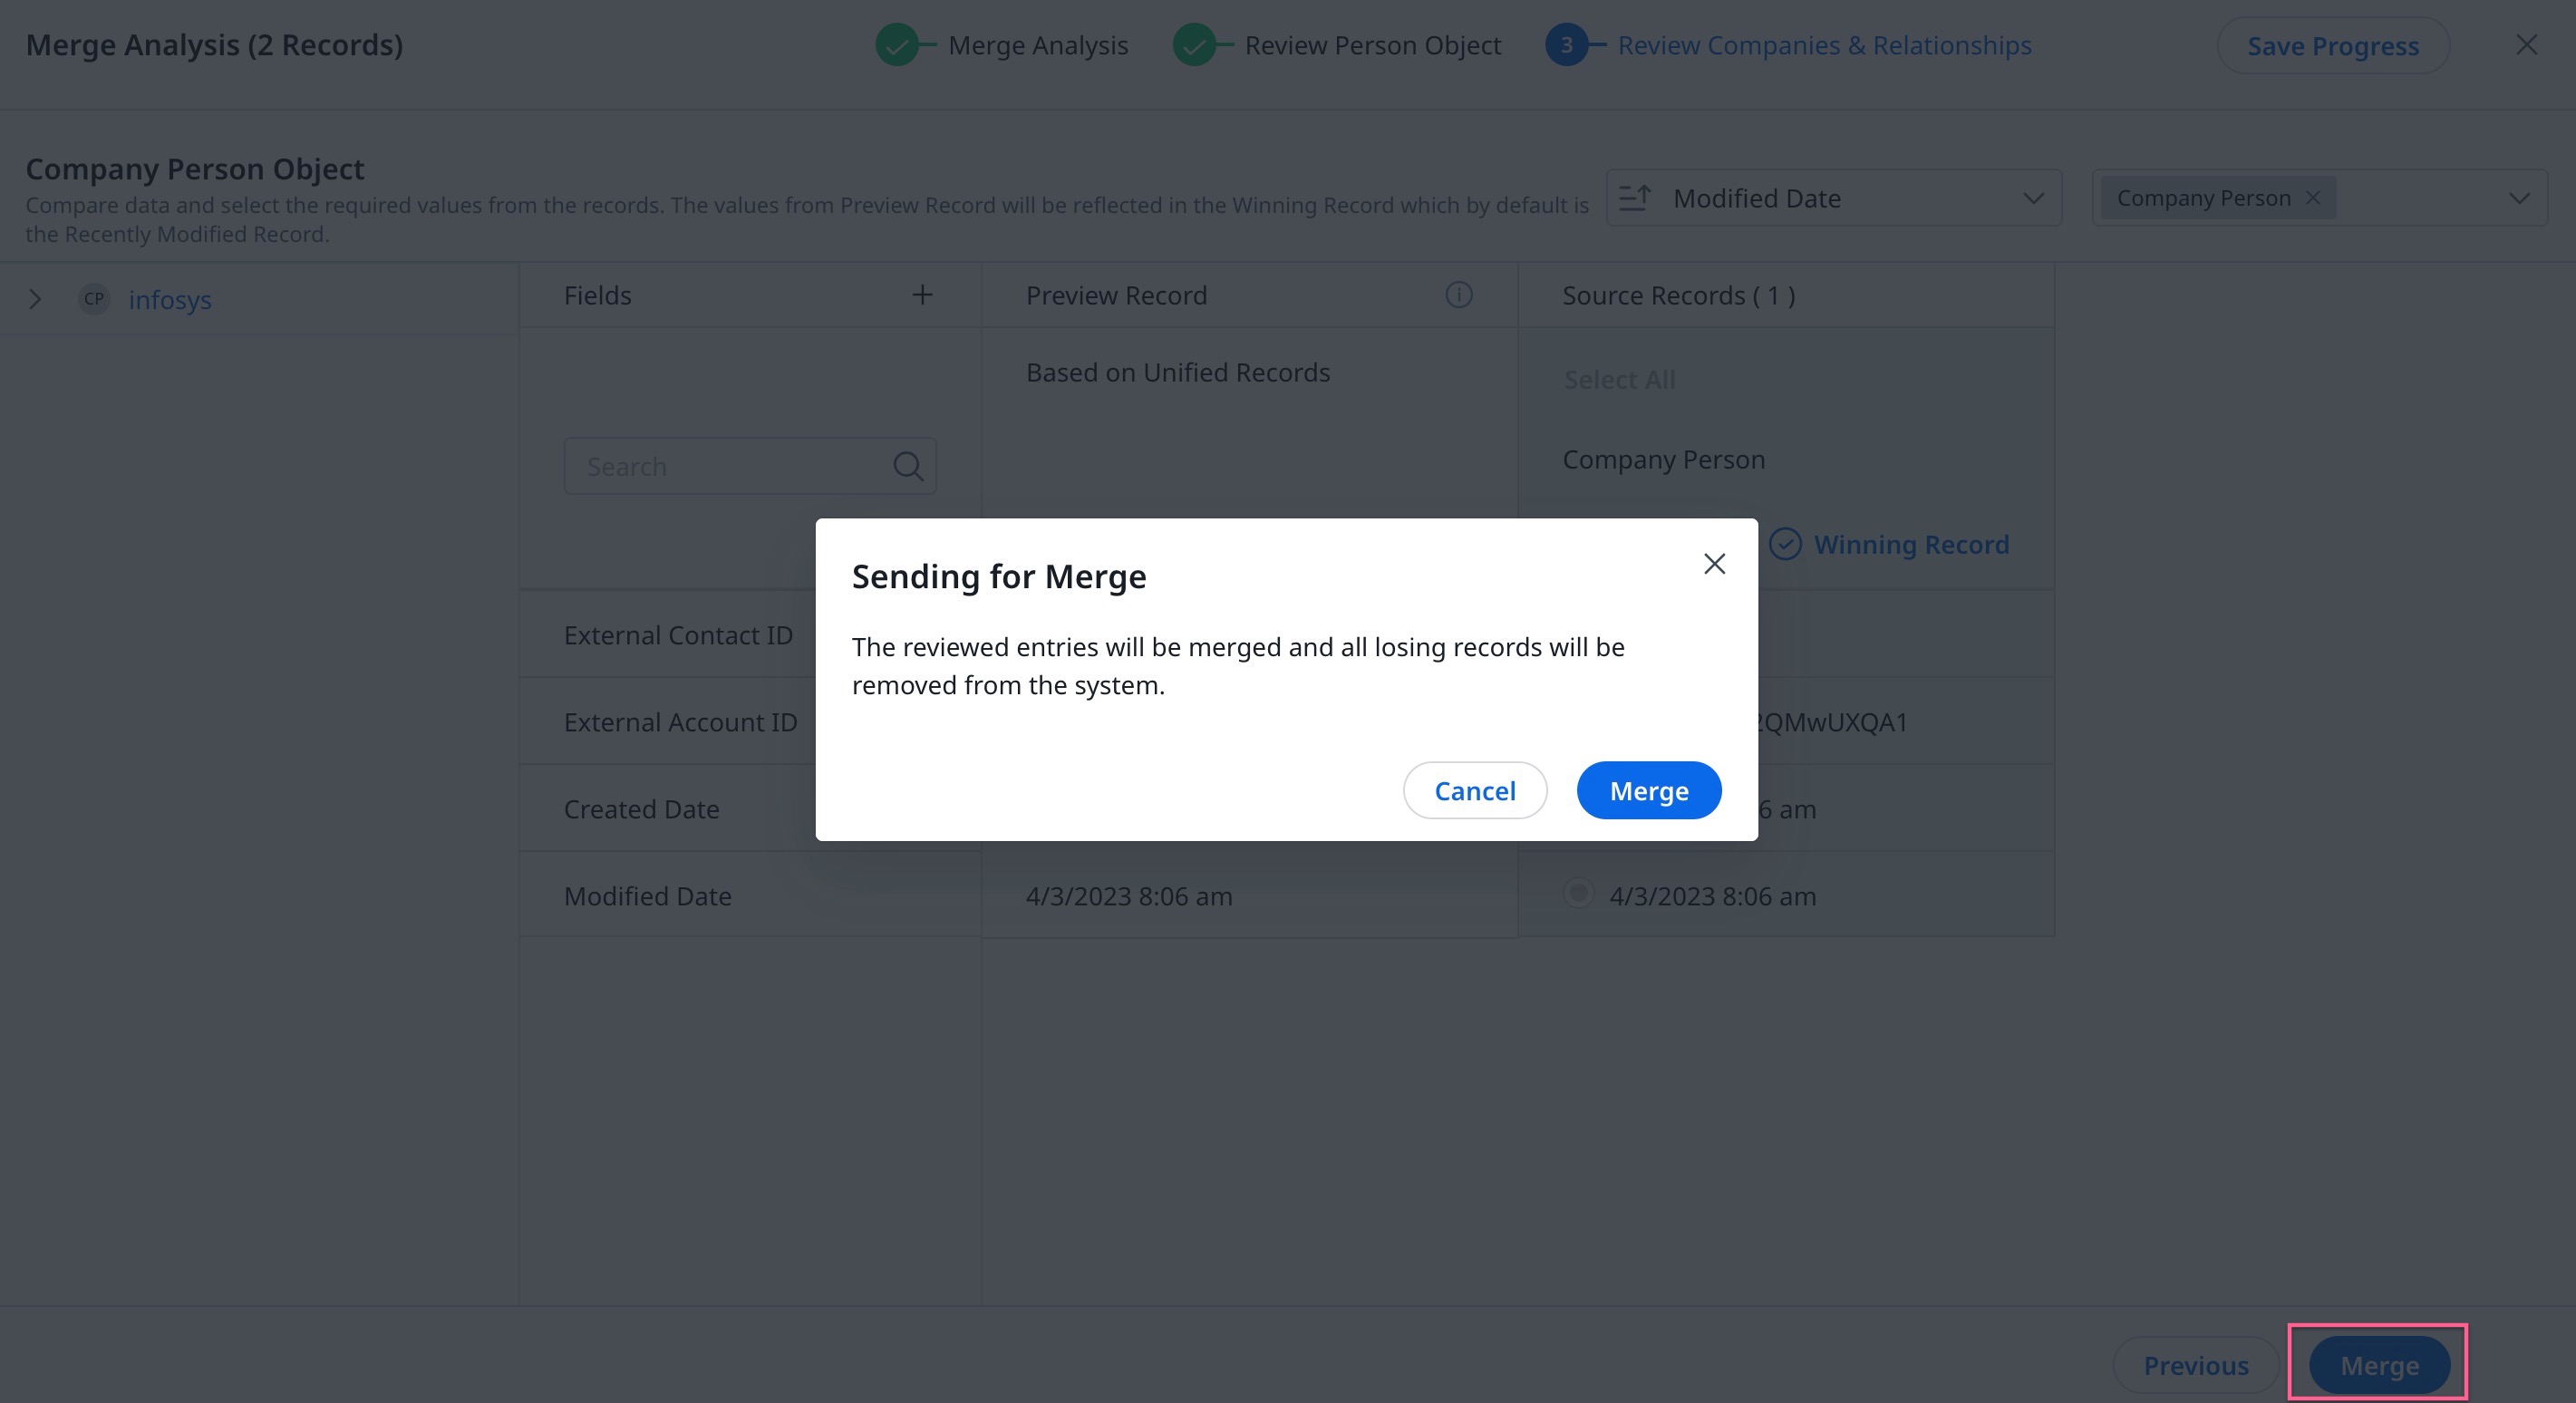
Note: The duplicate records from the merge process are deleted and only the winning record is retained.
Quick Merge
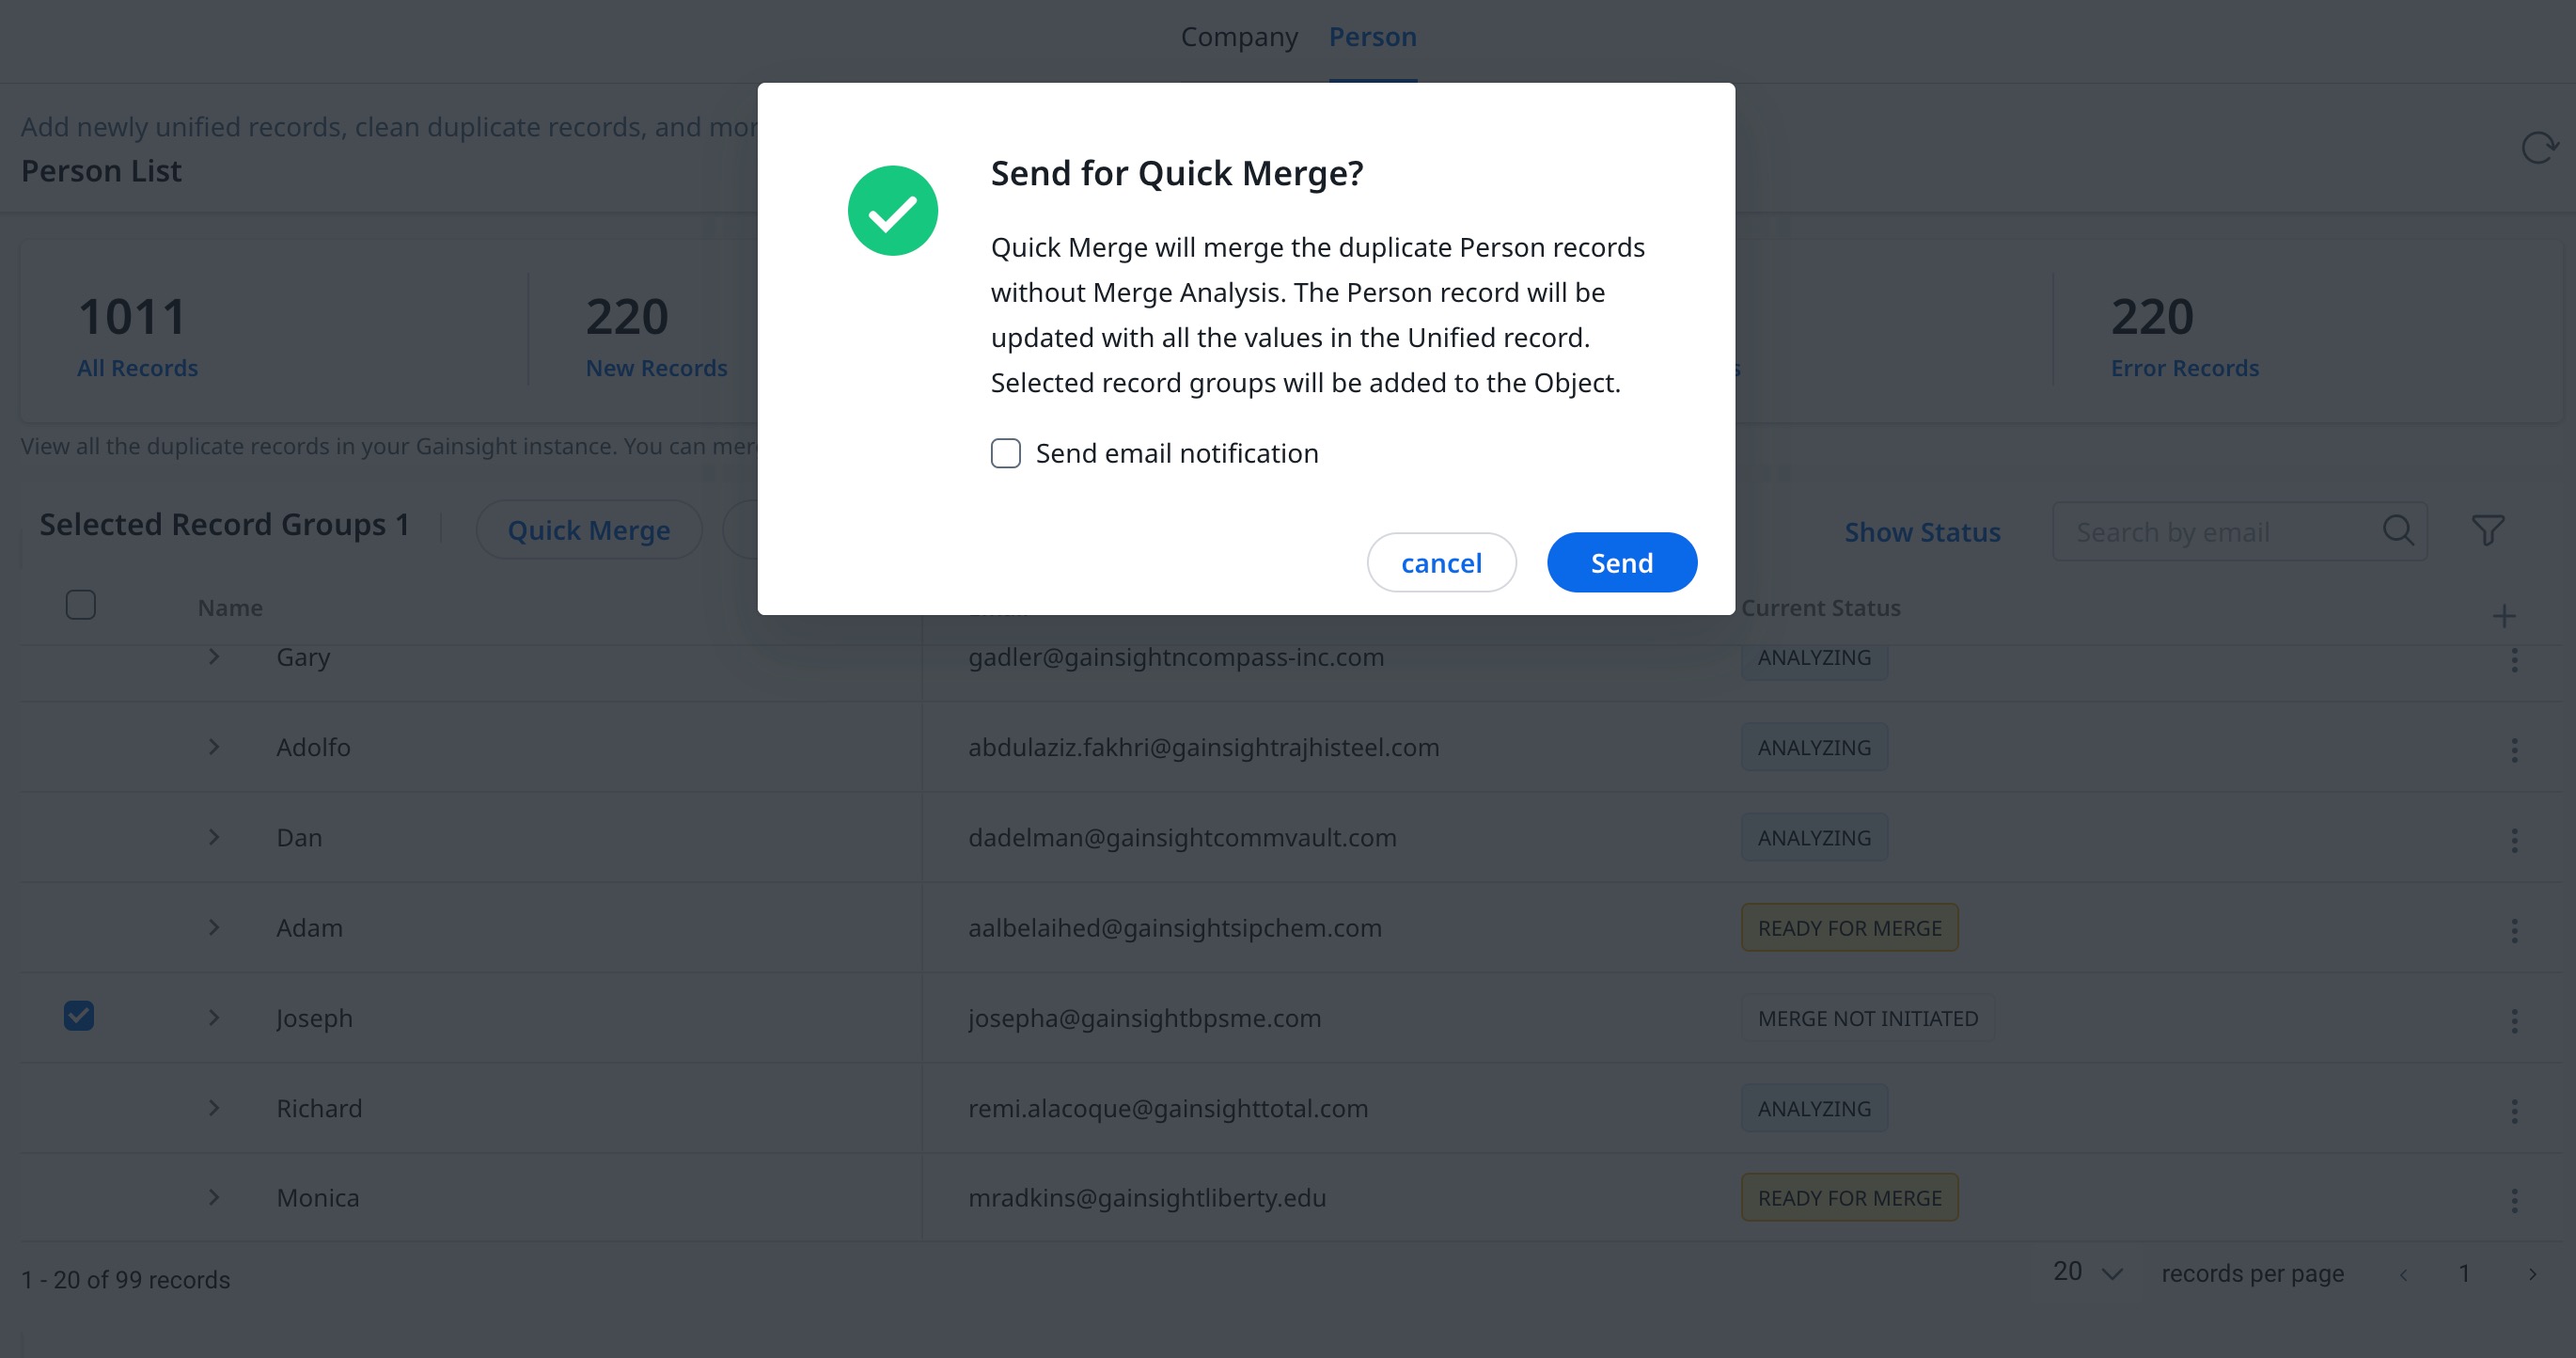
Once you get familiar with the above process of Initiate Merge, you can use Quick Merge to skip the process of analysis and directly create the Winning Record.
To send records for Quick Merge:
- Select the record to be merged.
- Click Quick Merge. A confirmation window appears.
- Click Send.
Note: Select the Send Email notification checkbox to receive updates on the merge.
Manage Record Group
Modify Record Groups to explore matching criteria, move records, and disable records.
To edit a Record Group:
- Navigate to Administration > Customer Data > Data Steward.
- Click the three vertical dots menu of a record group and select Manage Record Group. The Manage Record Group page appears.
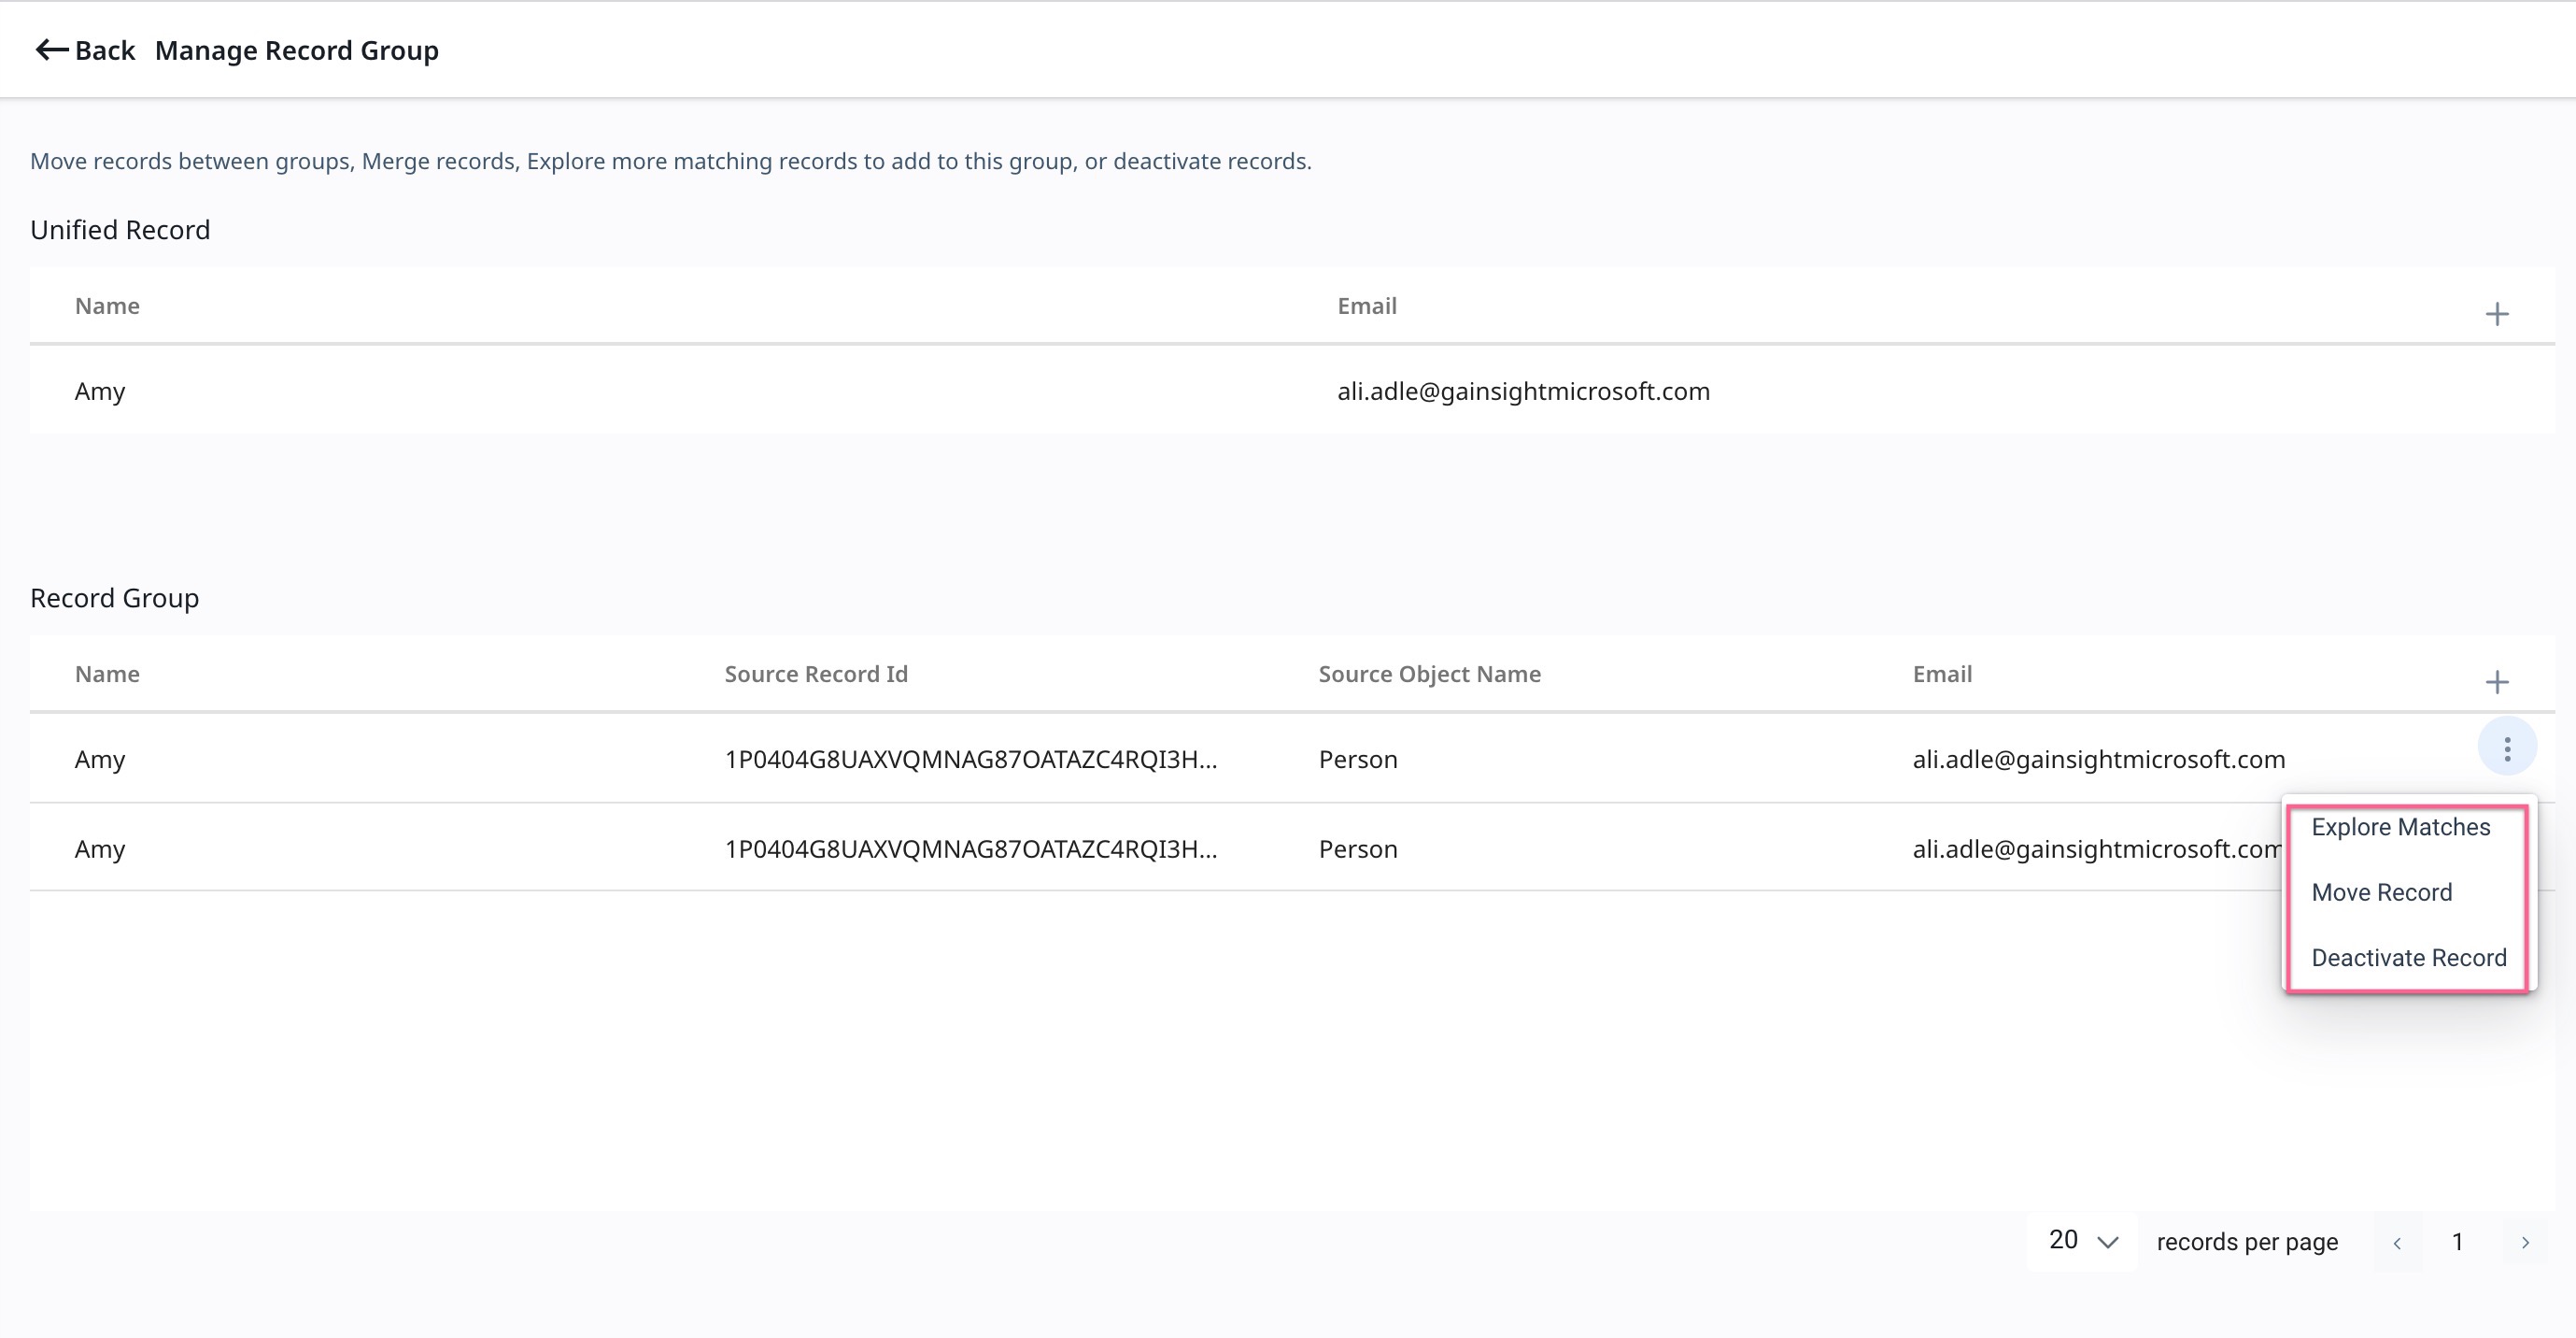
- Click the three vertical dots menu of a record and select any of the following:
- Explore Matches: To find and add the matching records to the current Record Group.
- Move Record: To move records to an existing Record Group or to a new Record Group.
- Deactivate Record: To deactivate a record so that it never gets updated through the Unification feature.
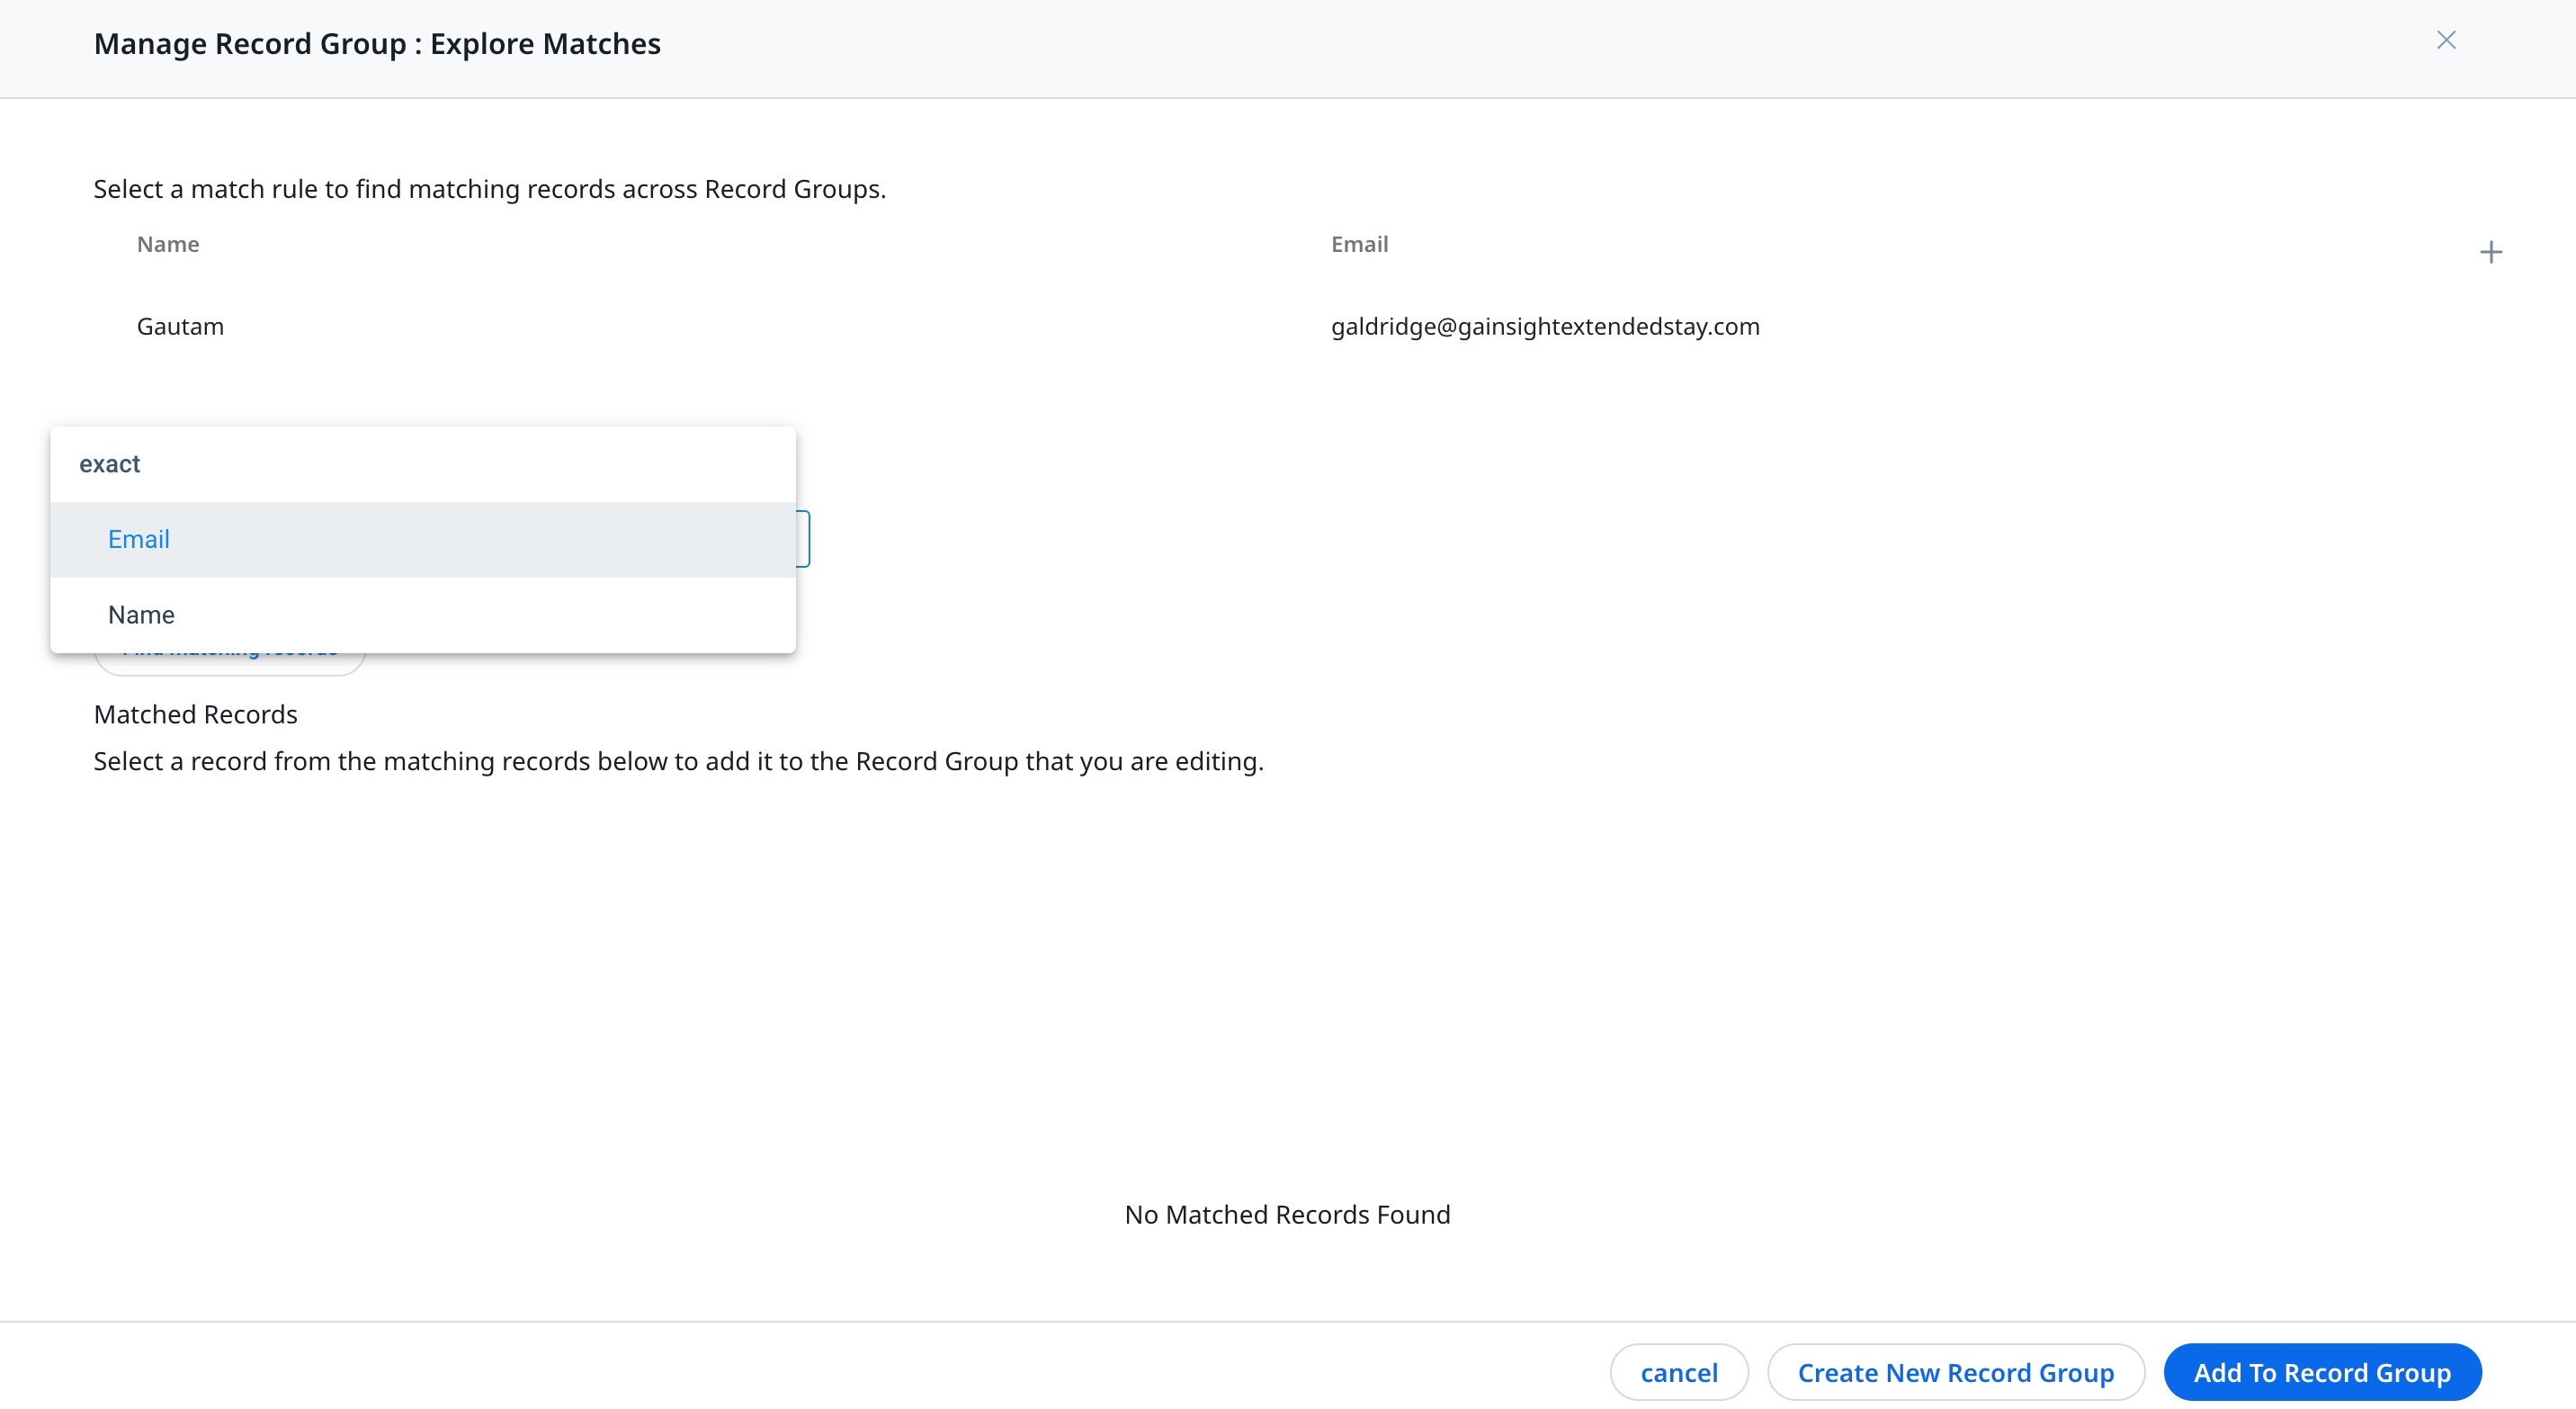
Explore Matches
Admins can select a match Criteria to find matching records across Record Groups, and then add all of the similar records to the current Record Group.
To explore matches on the Edit Record Group page:
- In the Manage Record Group page, click the three vertical dots menu of a record and select Explore Matches.
- From the Select a Match Criteria dropdown, select a field as a match criteria type.
- Click Find Matching Records.
- Select a record from the list of matching records found.
Note: If you do not find any matching records, then click Create Record Group to create a new Record Group and add the existing record to it.
-
Click Add to Record Group. A confirmation dialog is displayed.
-
Click Yes. A record group is created based on the selected match criteria.
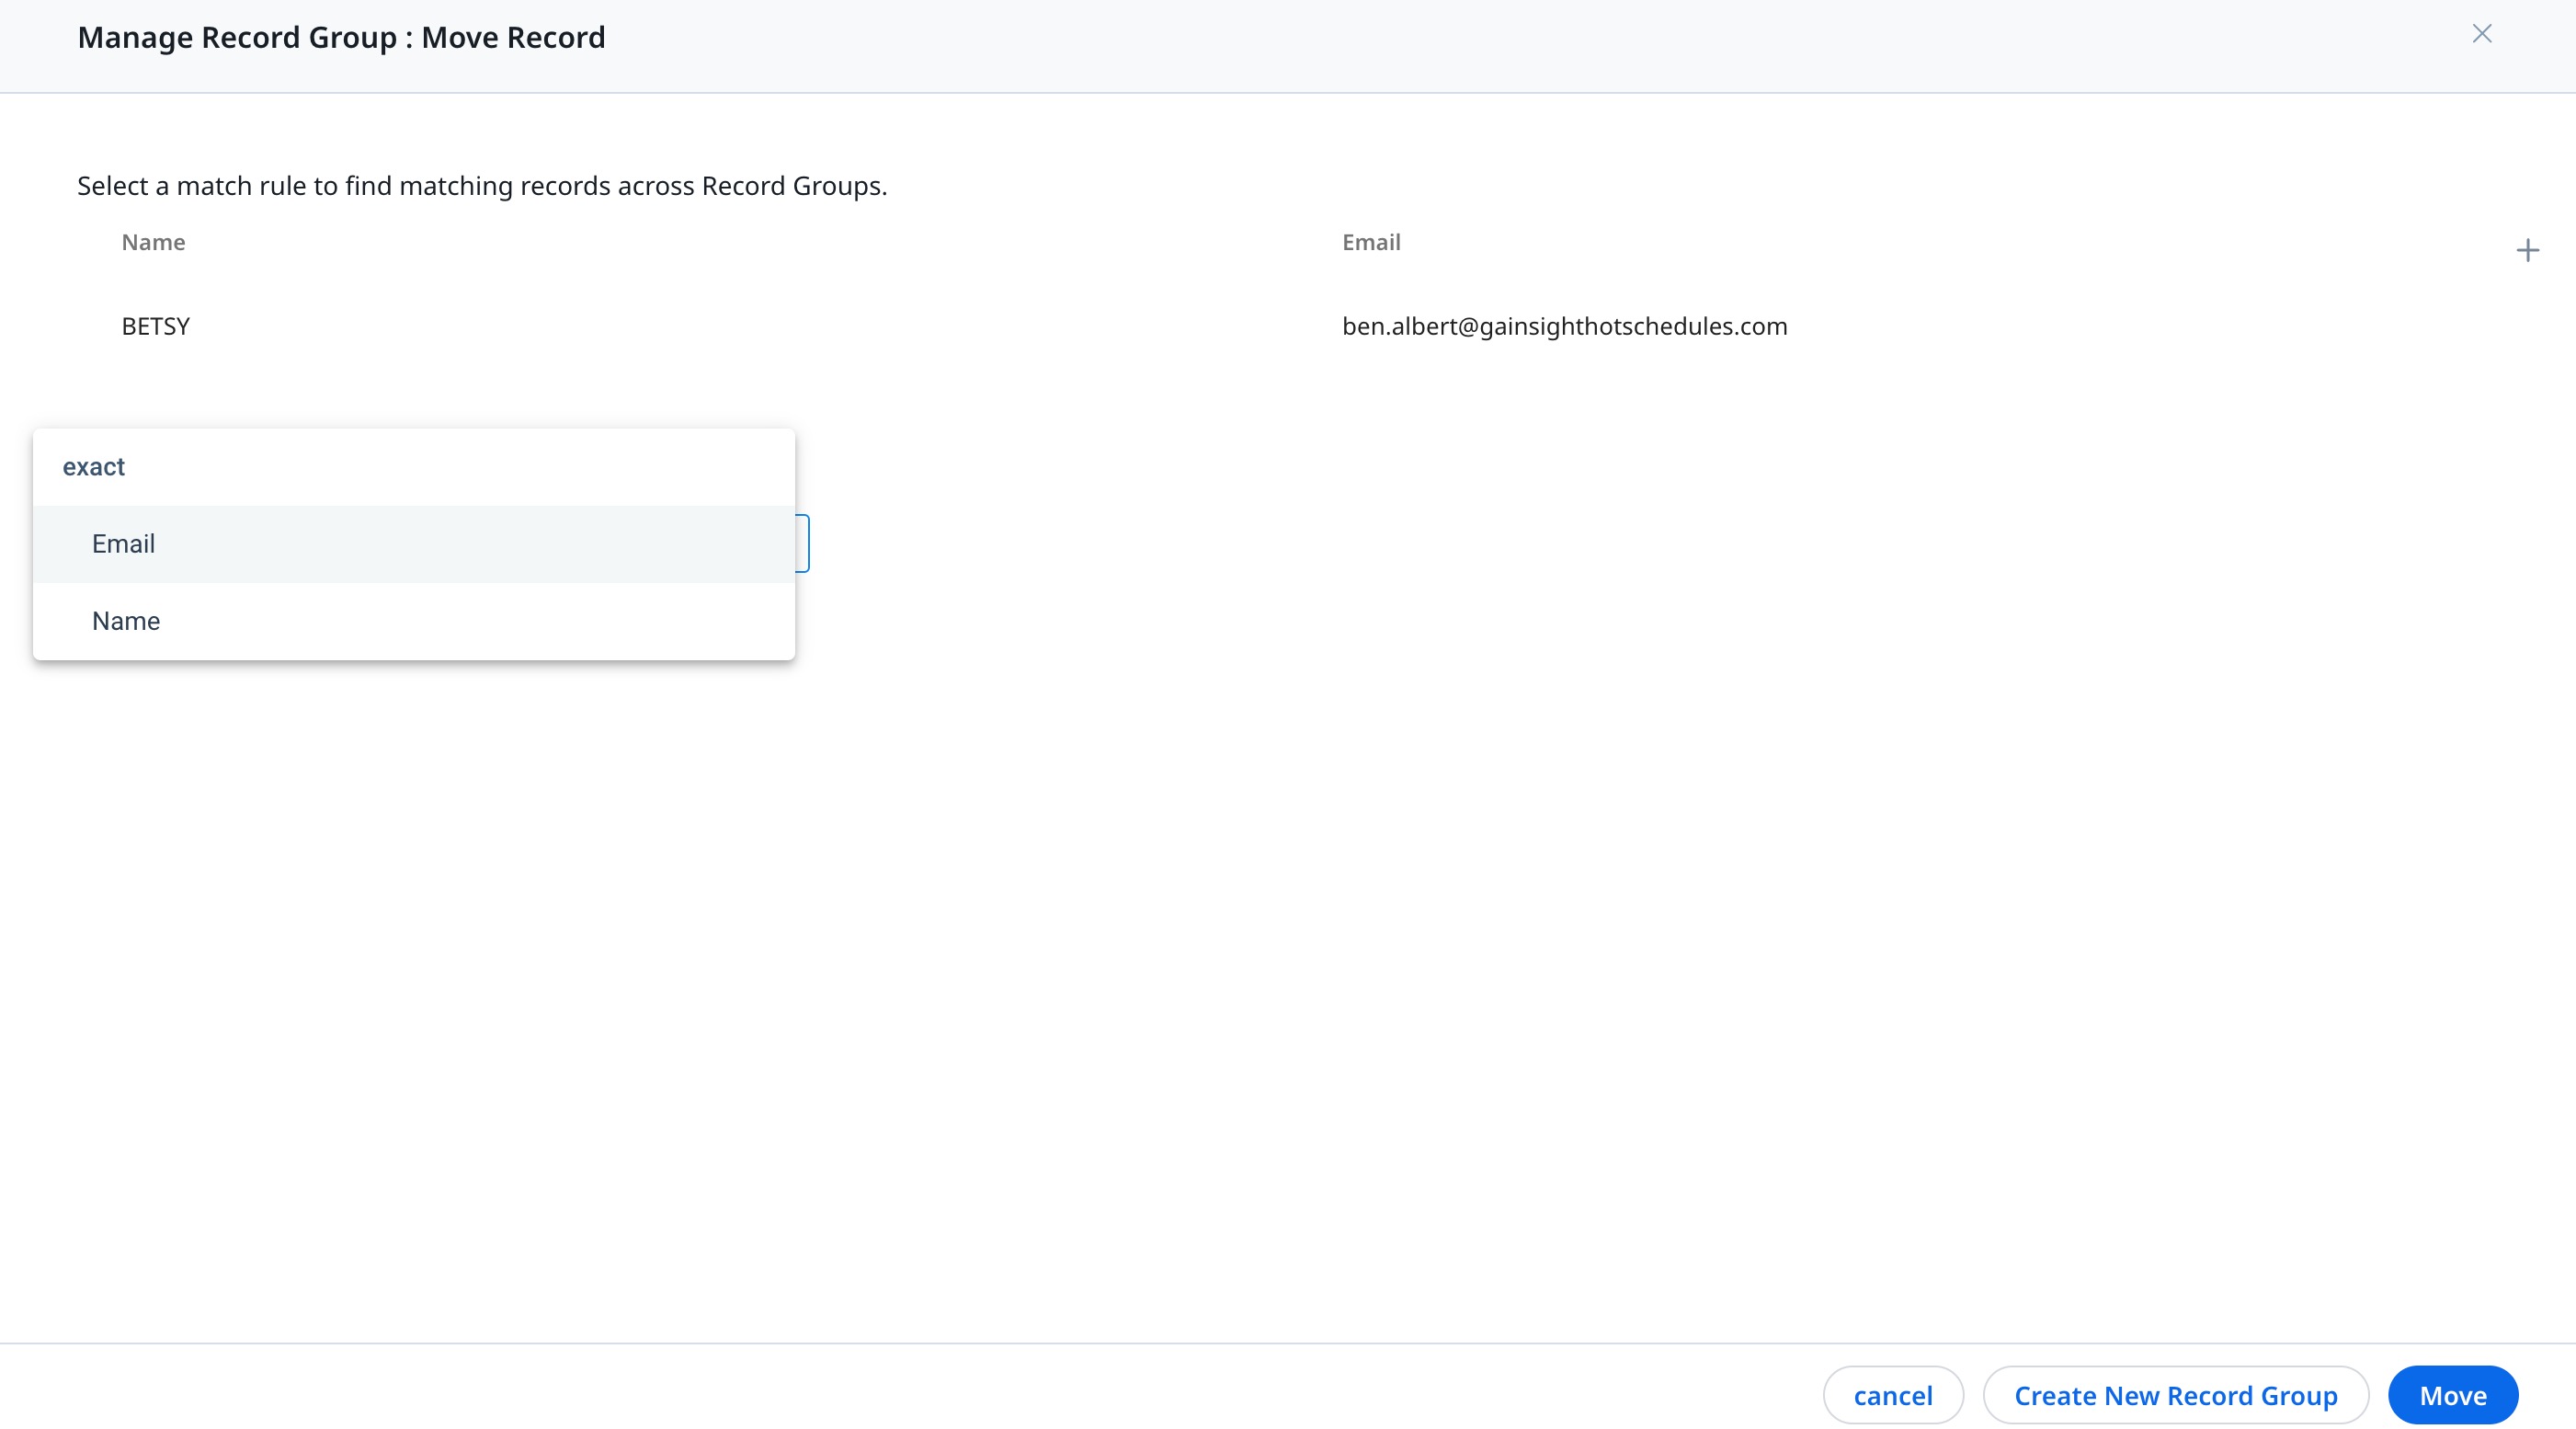
Move Record
Admins can select a match Criteria to find matching records across Record Groups, and move the records to an existing Record Group or to a new Record Group.
To move records in the Edit Record Group page:
- In the Manage Record Group page, click the three vertical dots menu of a record and select Move Records.
- From the Select a Match Criteria dropdown, select a field as a match criteria type.
- Click Find Matching Records.
- Select a Record Group from the matching records.
Note: If you do not find any matching records, then click Create New Record Group to create a new Record Group and add the existing record to it. - Click Move. A confirmation dialog is displayed.
- Click Yes.
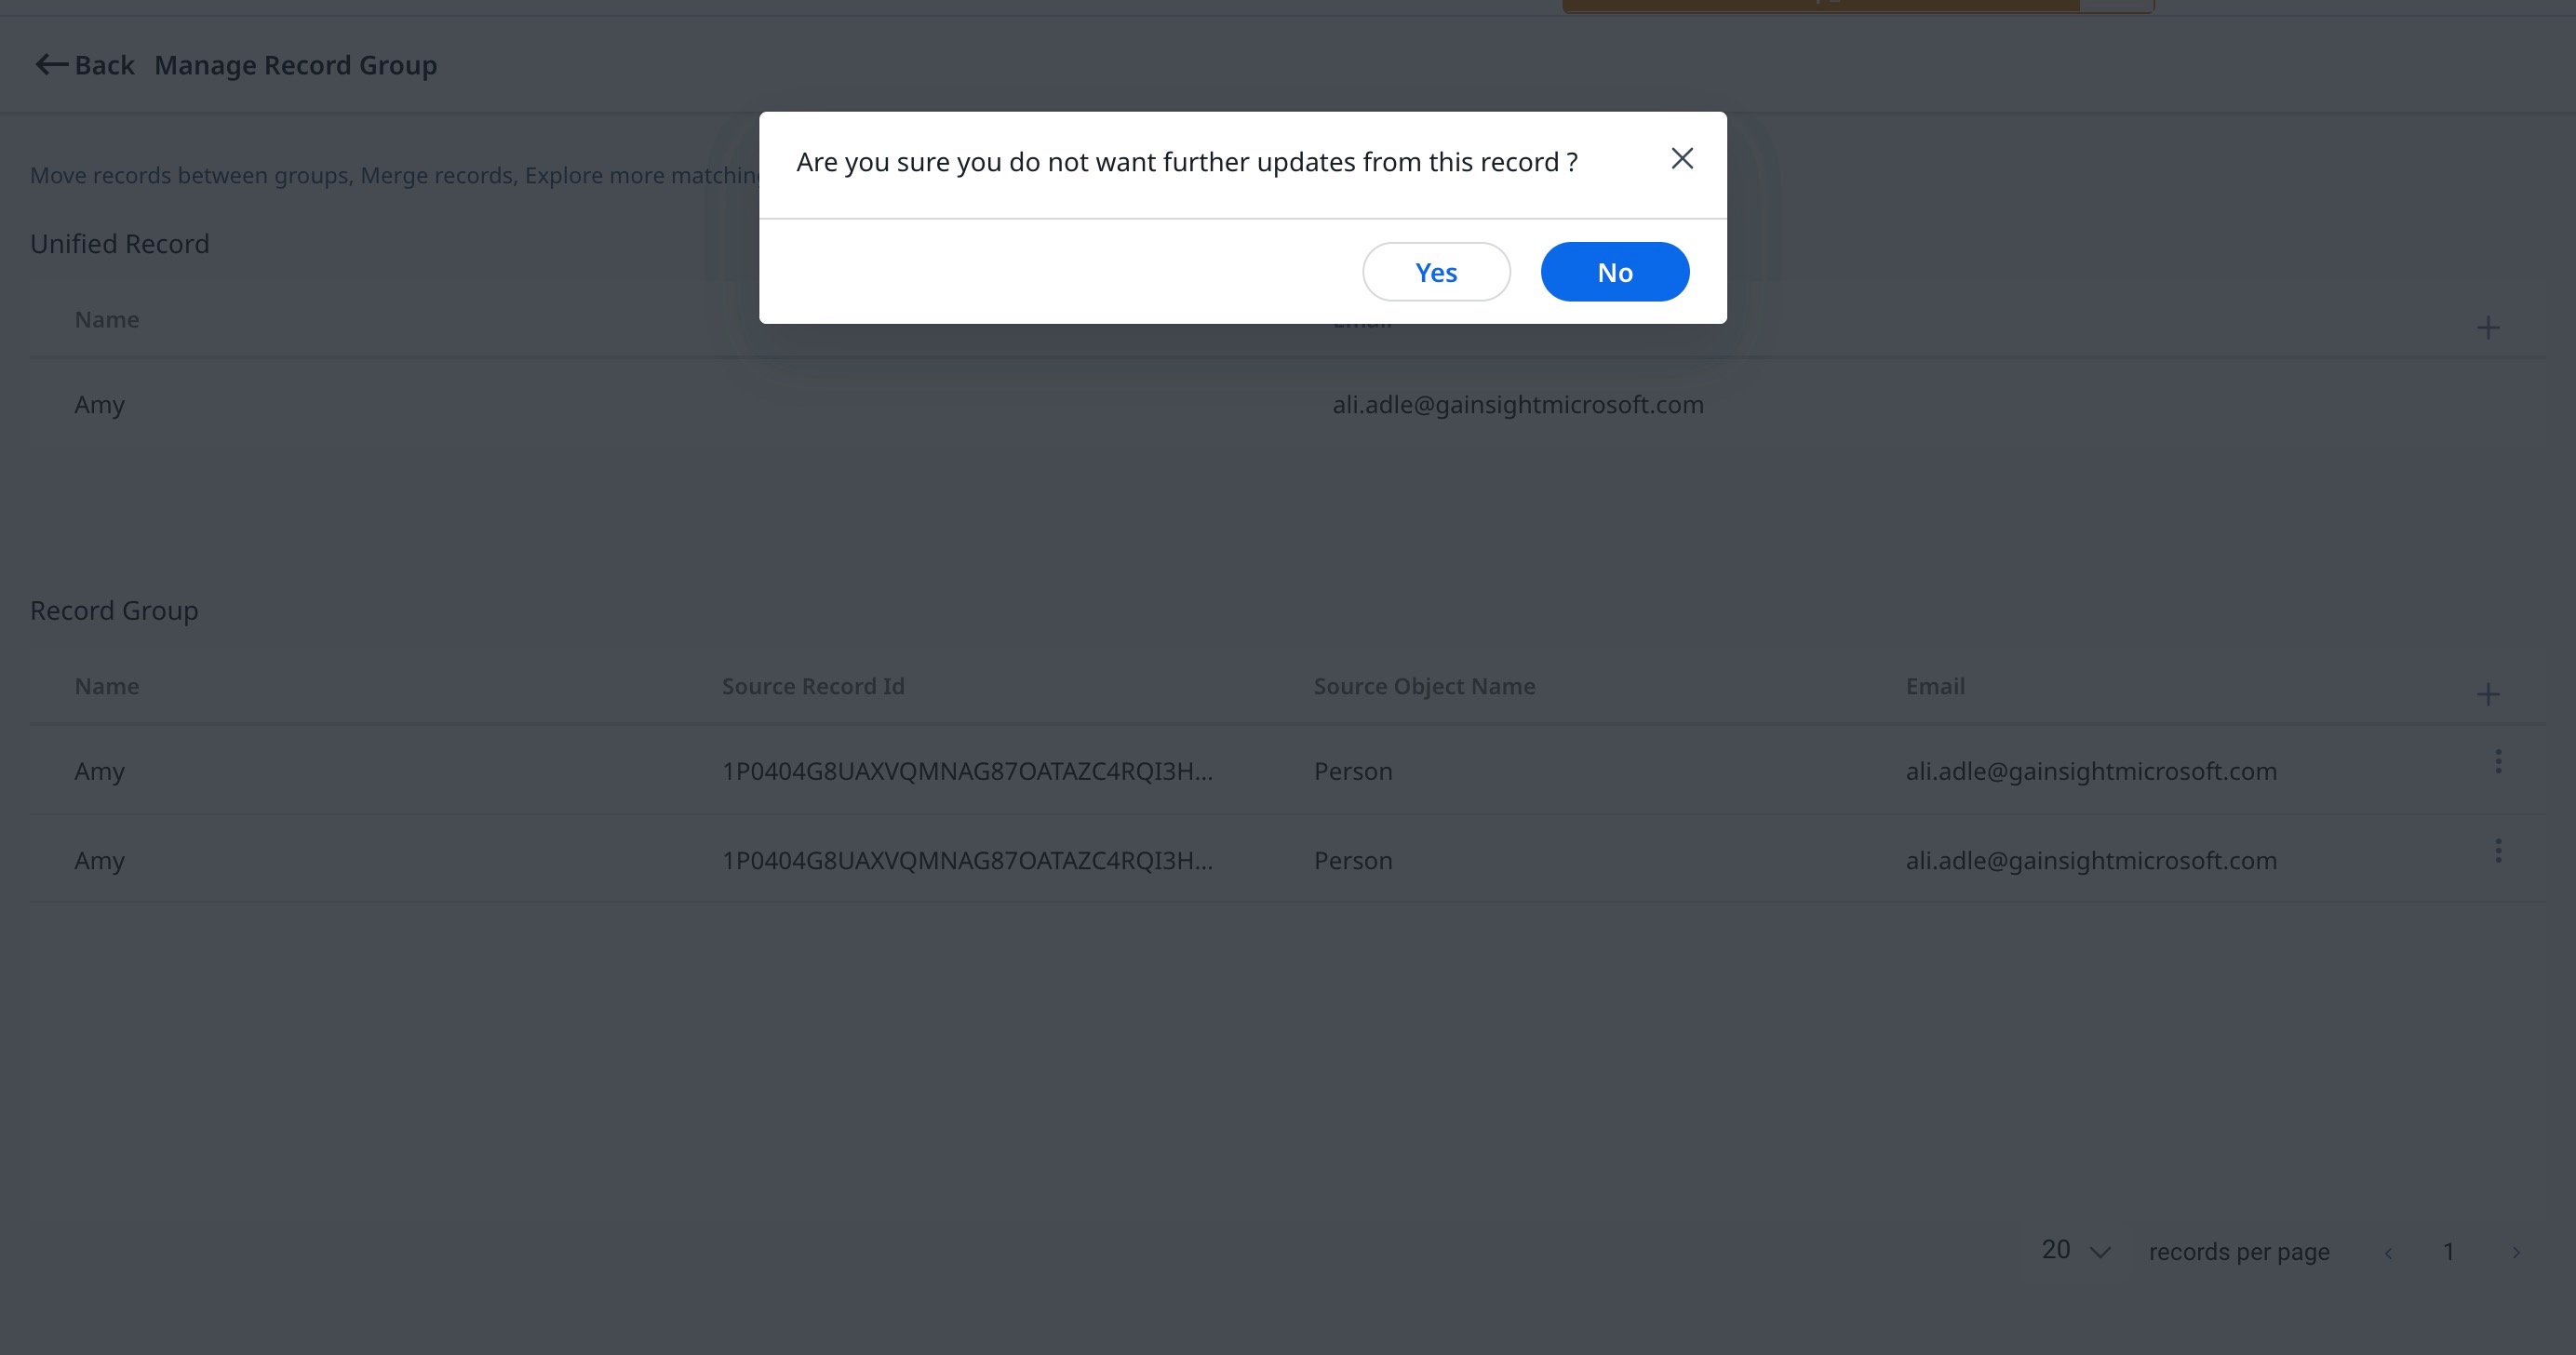
Deactivate Record
Admins can deactivate a record so that it never gets updated through the Unification feature. After you deactivate a record, you cannot explore matches or move it to another Record Group until you activate it again. If a record is active, then it is automatically updated through the unification process.
To deactivate a record:
-
In the Manage Record Group page, click the three vertical dots menu of a record and select Deactivate Records. A confirmation dialog is displayed.
-
Click Yes.
Note: You can activate a deactivated record by repeating the process.
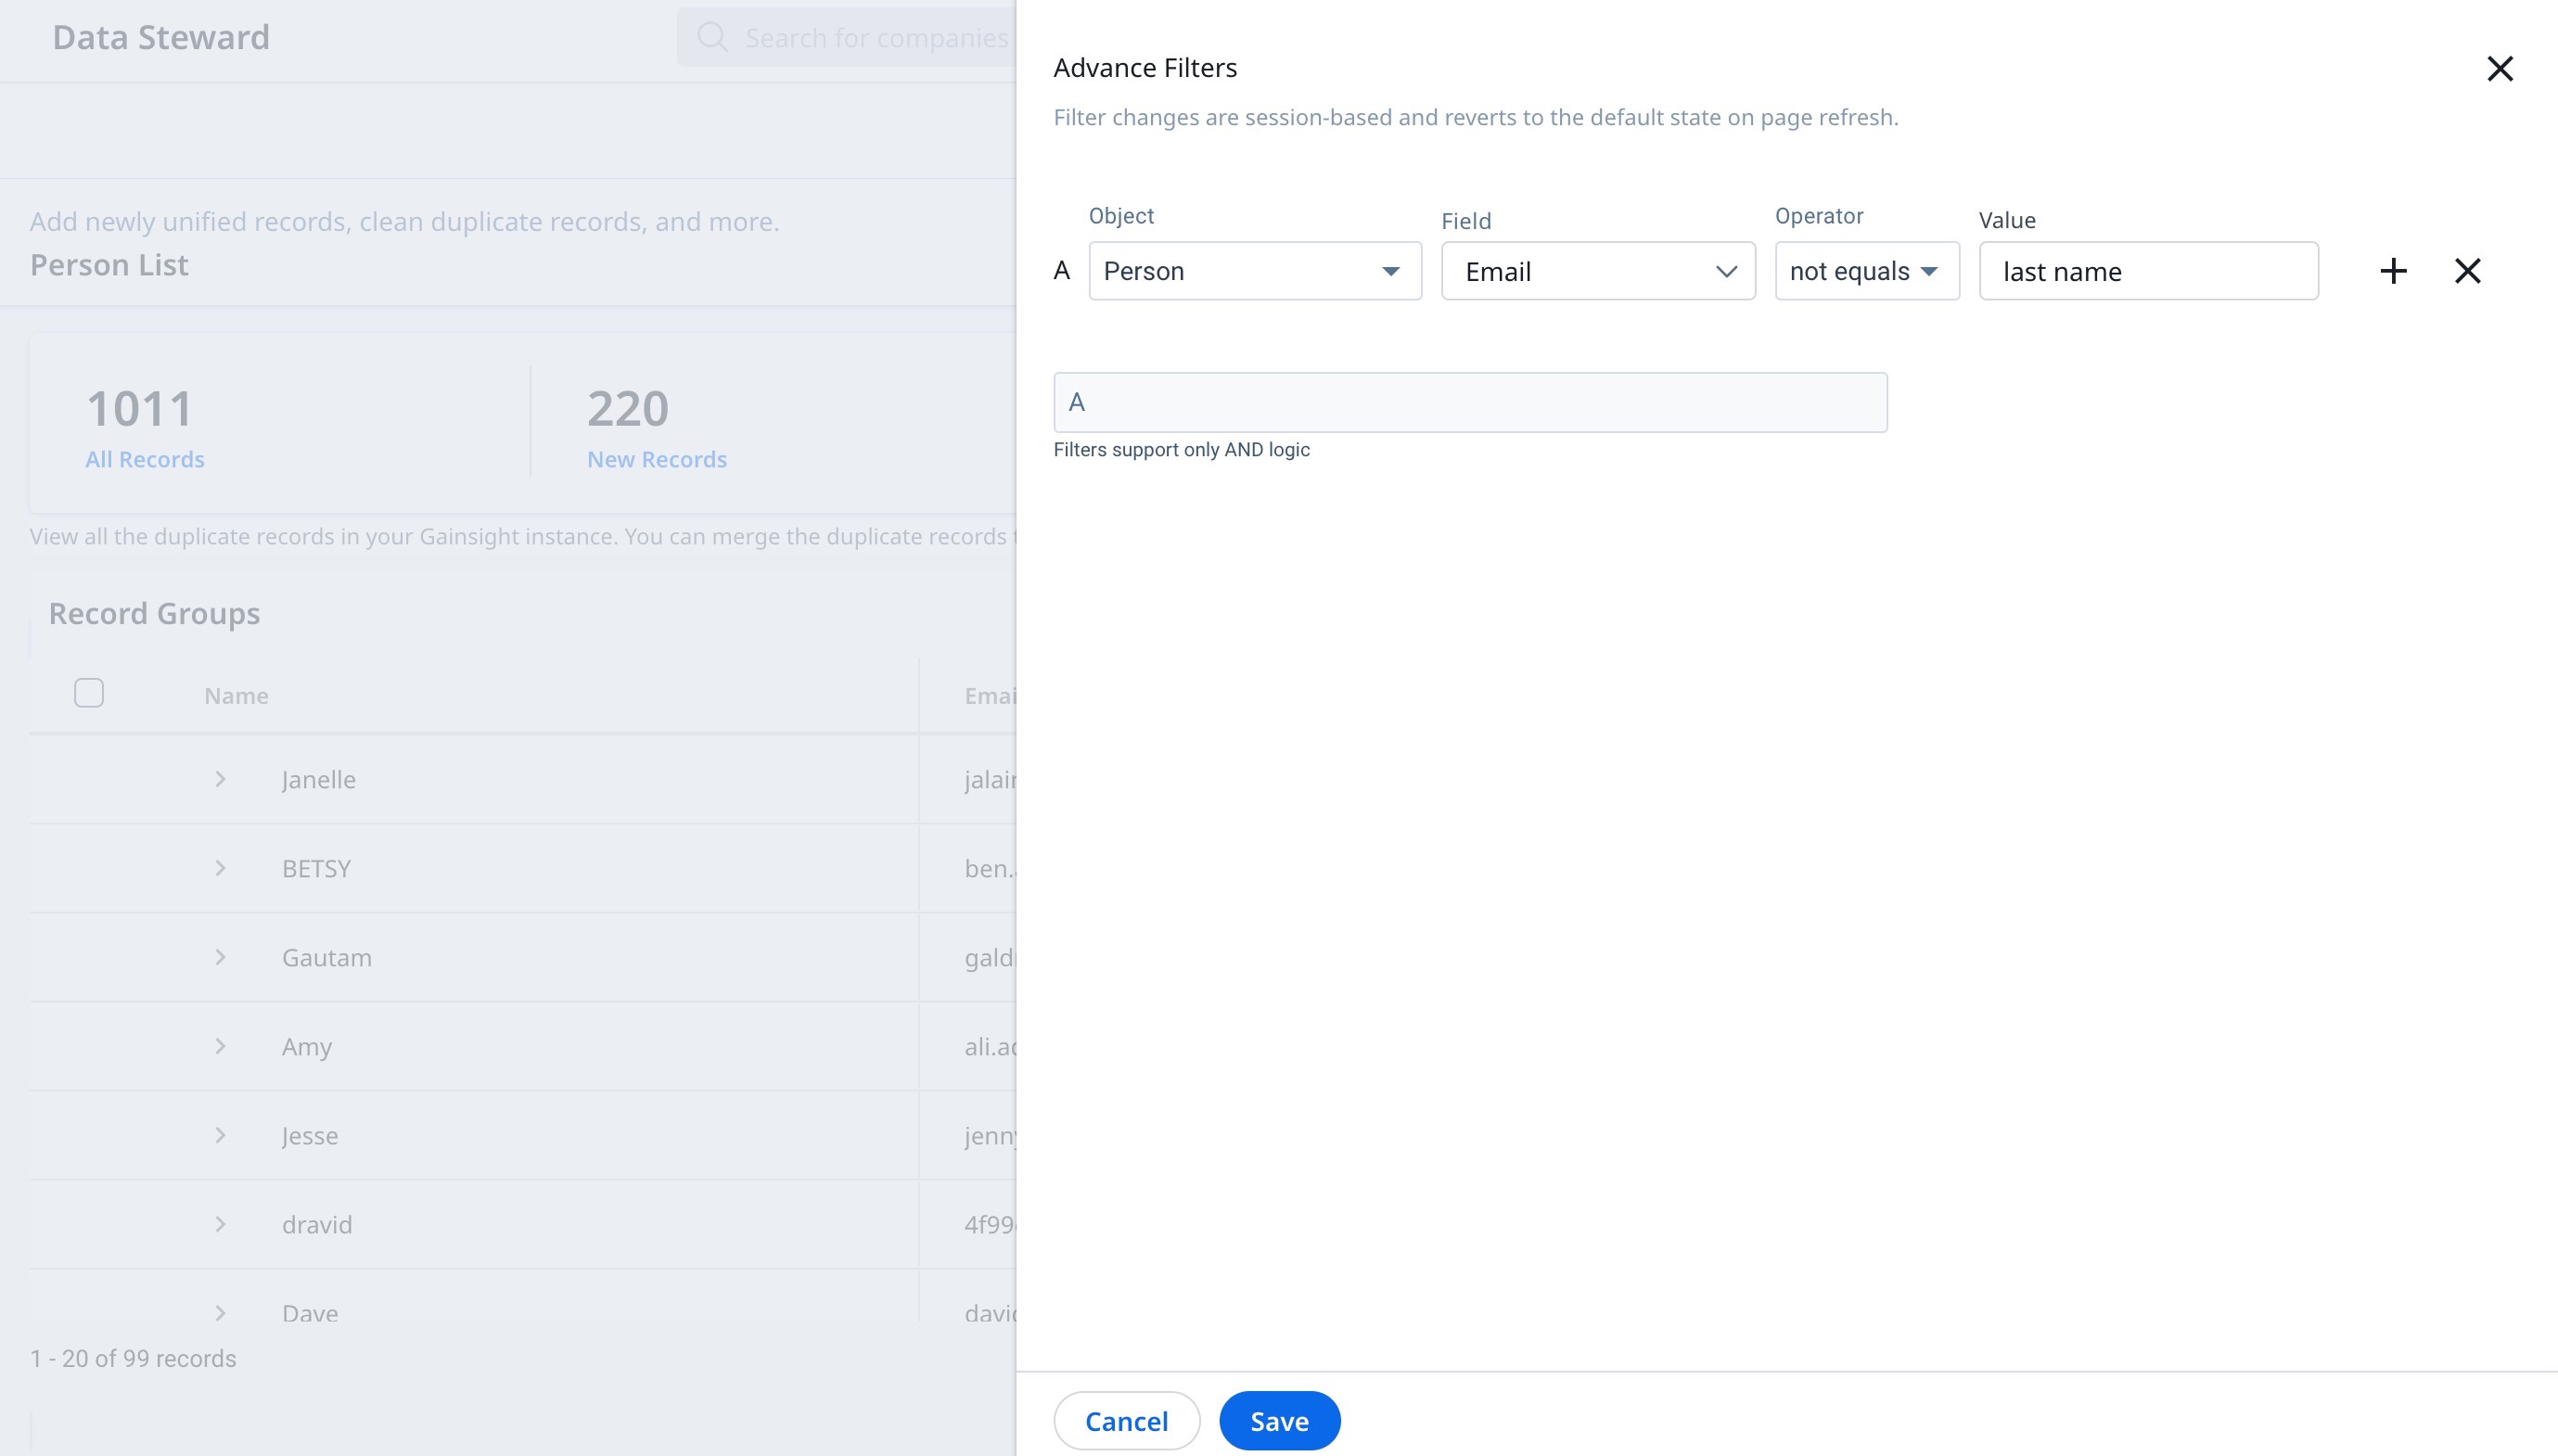
Apply Filters
In addition to filtering using the summary ribbon, admins can filter the Unified Records using the Person attributes and Unification Columns to list the duplicate records. For example, you can filter by Name, GSID, Record Group Id, etc.
To apply filters to the Record Groups:
- Navigate to Administration > Customer Data > Data Steward.
- Click the Filter icon. The Advance Filters page appears.
- Click Add Filter.
- From the Object dropdown, select Person or Unification Columns.
- From the Field dropdown, select any of the following values that are automatically populated based on the previous field selection
- From the Operator dropdown, select an Operator.
- (Optional) Click the Plus icon to add more filter criteria.
- From the Value/Select Date/Select Items, enter or select the appropriate value.
- Click Save.
Edit Unified Records
You can edit Unified Records. This helps you to update the changes made by the Unification feature in each record.
To edit a Unified Record:
- Navigate to Administration > Customer Data > Data Steward.
- Click the three vertical dots menu of a record group and select Edit Unified Record. The Edit Unified Record page appears.
- Select the preferred source from where you want the value of the record to be inserted in Gainsight.
- Click Save Draft to save the records and insert them later in the person object.
- Click Save & Promote to save the records and insert them in the person object.
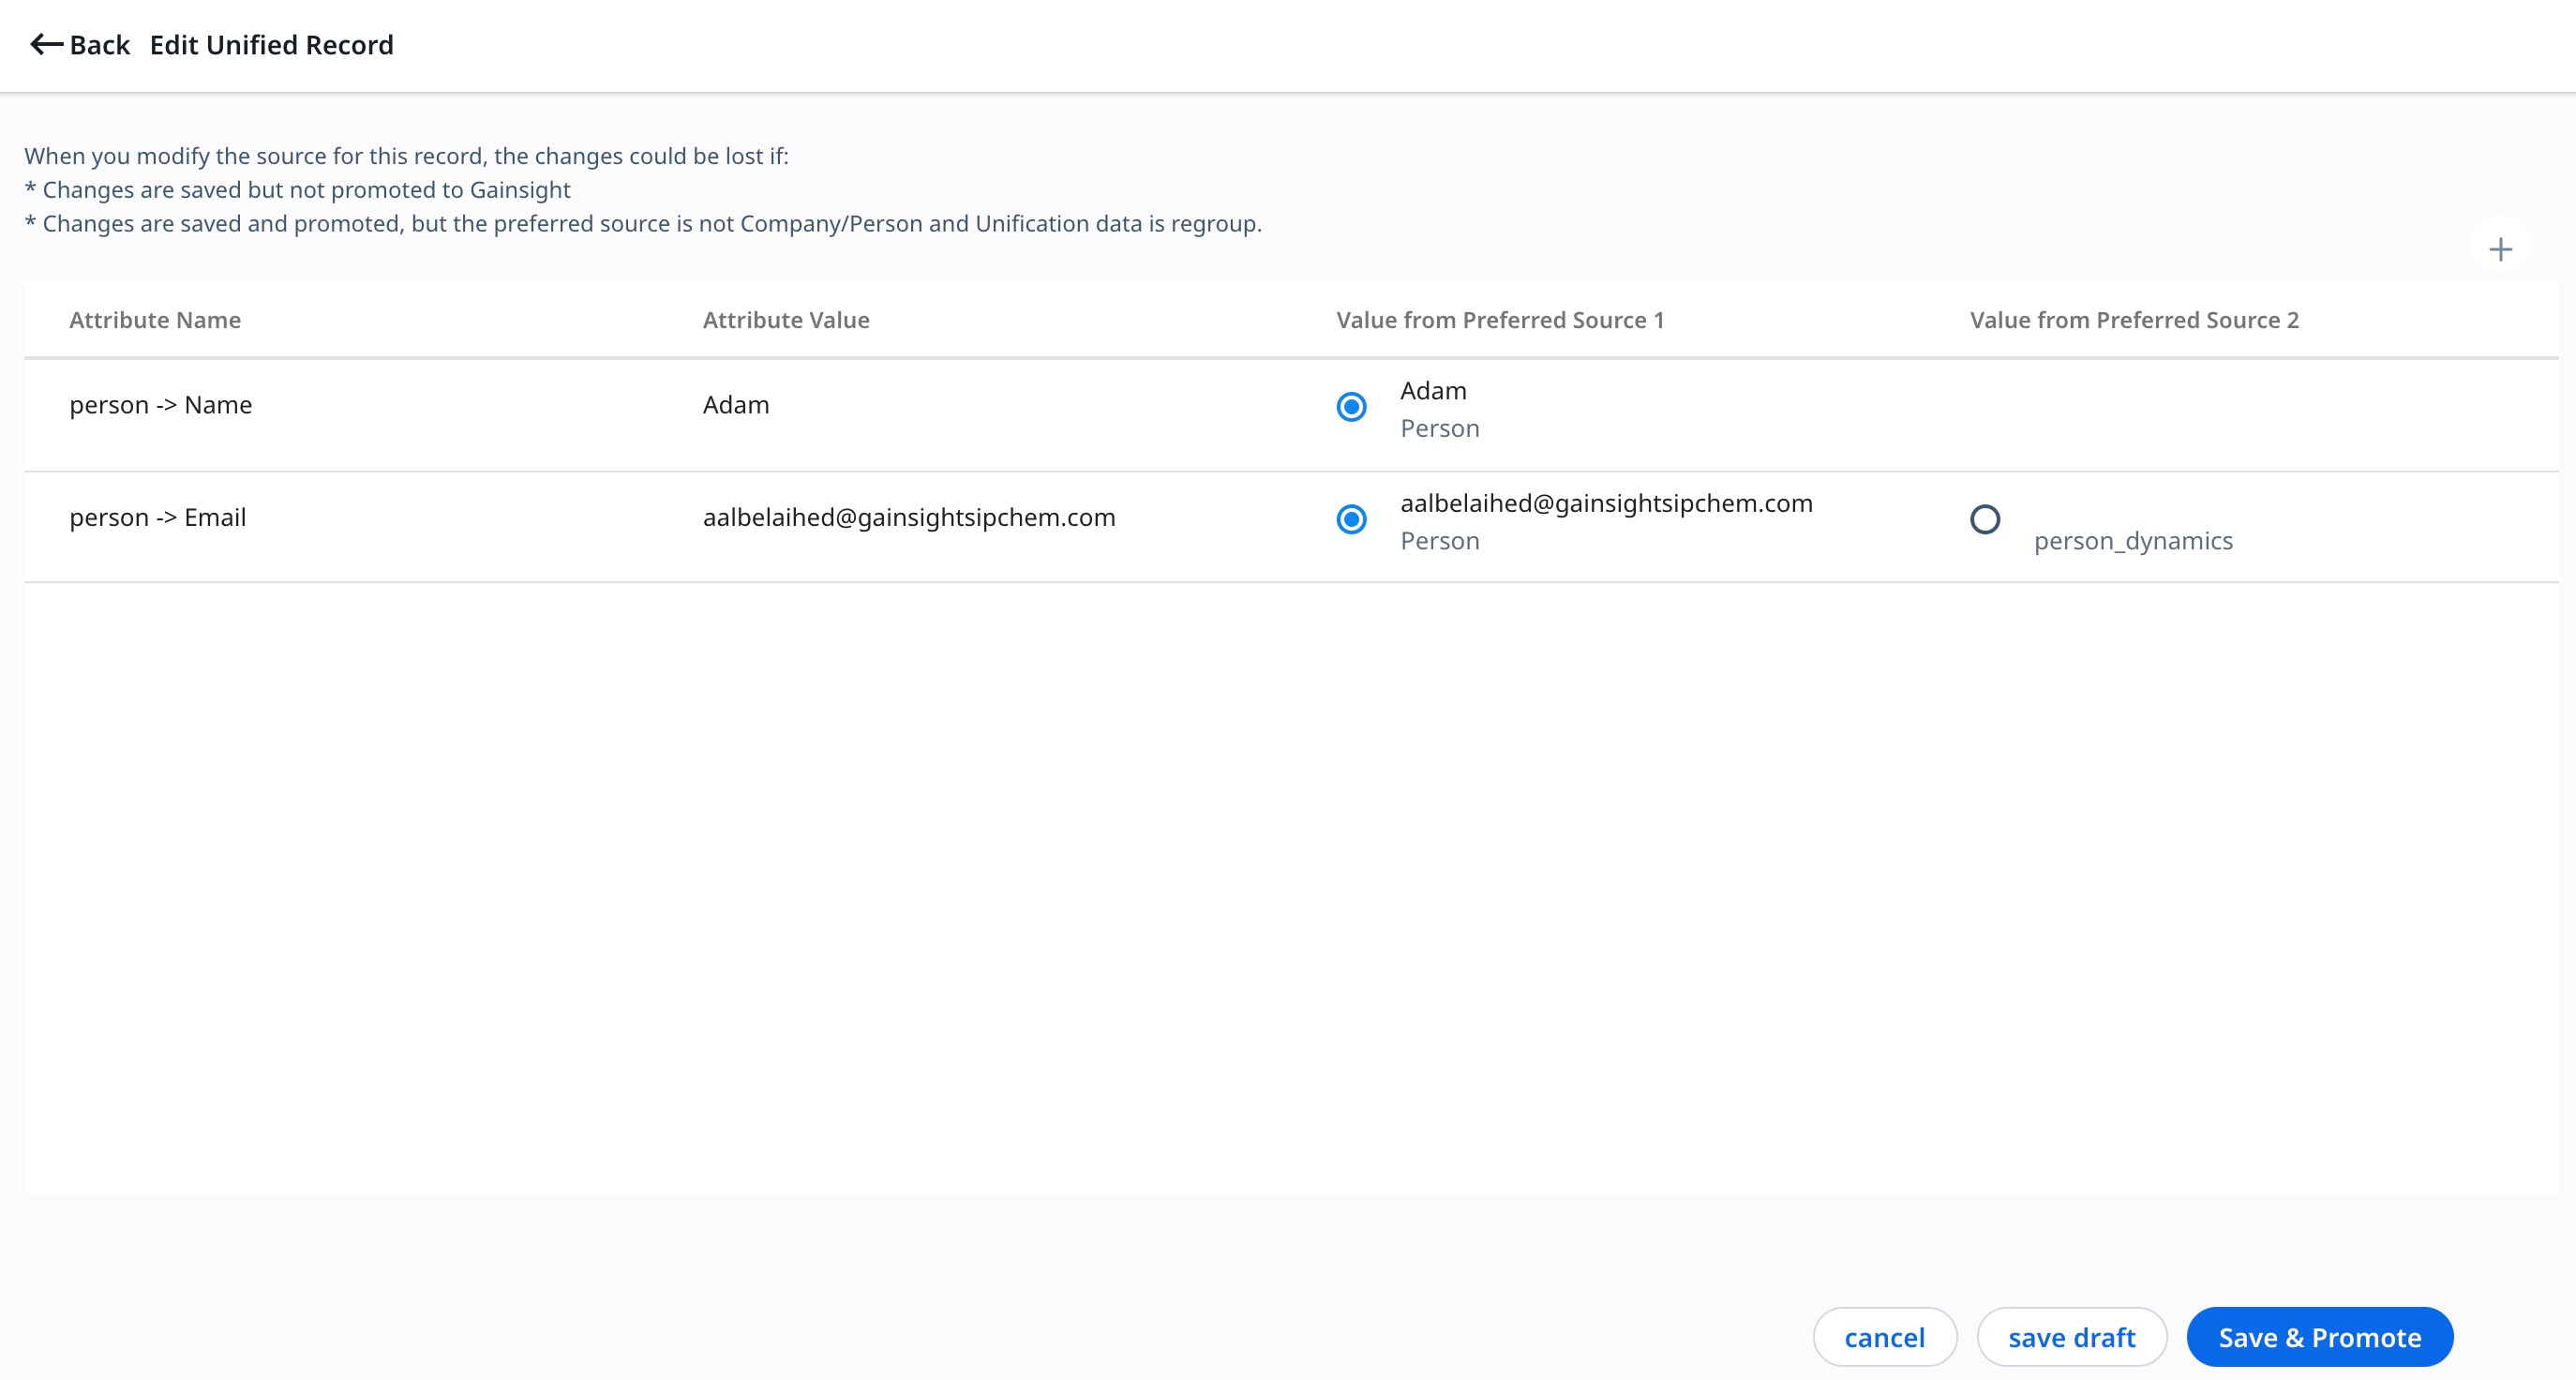
Notes:
- You can directly edit records in the Attributes Value column to insert them into Company / Person.
- If there are duplicate records in a source, you can select the required value to be promoted from the dropdown list.