Configure Preference Order for Data Sources
This article explains how admins can configure and set up the preference order for Data Sources to create a single, comprehensive record.
Overview
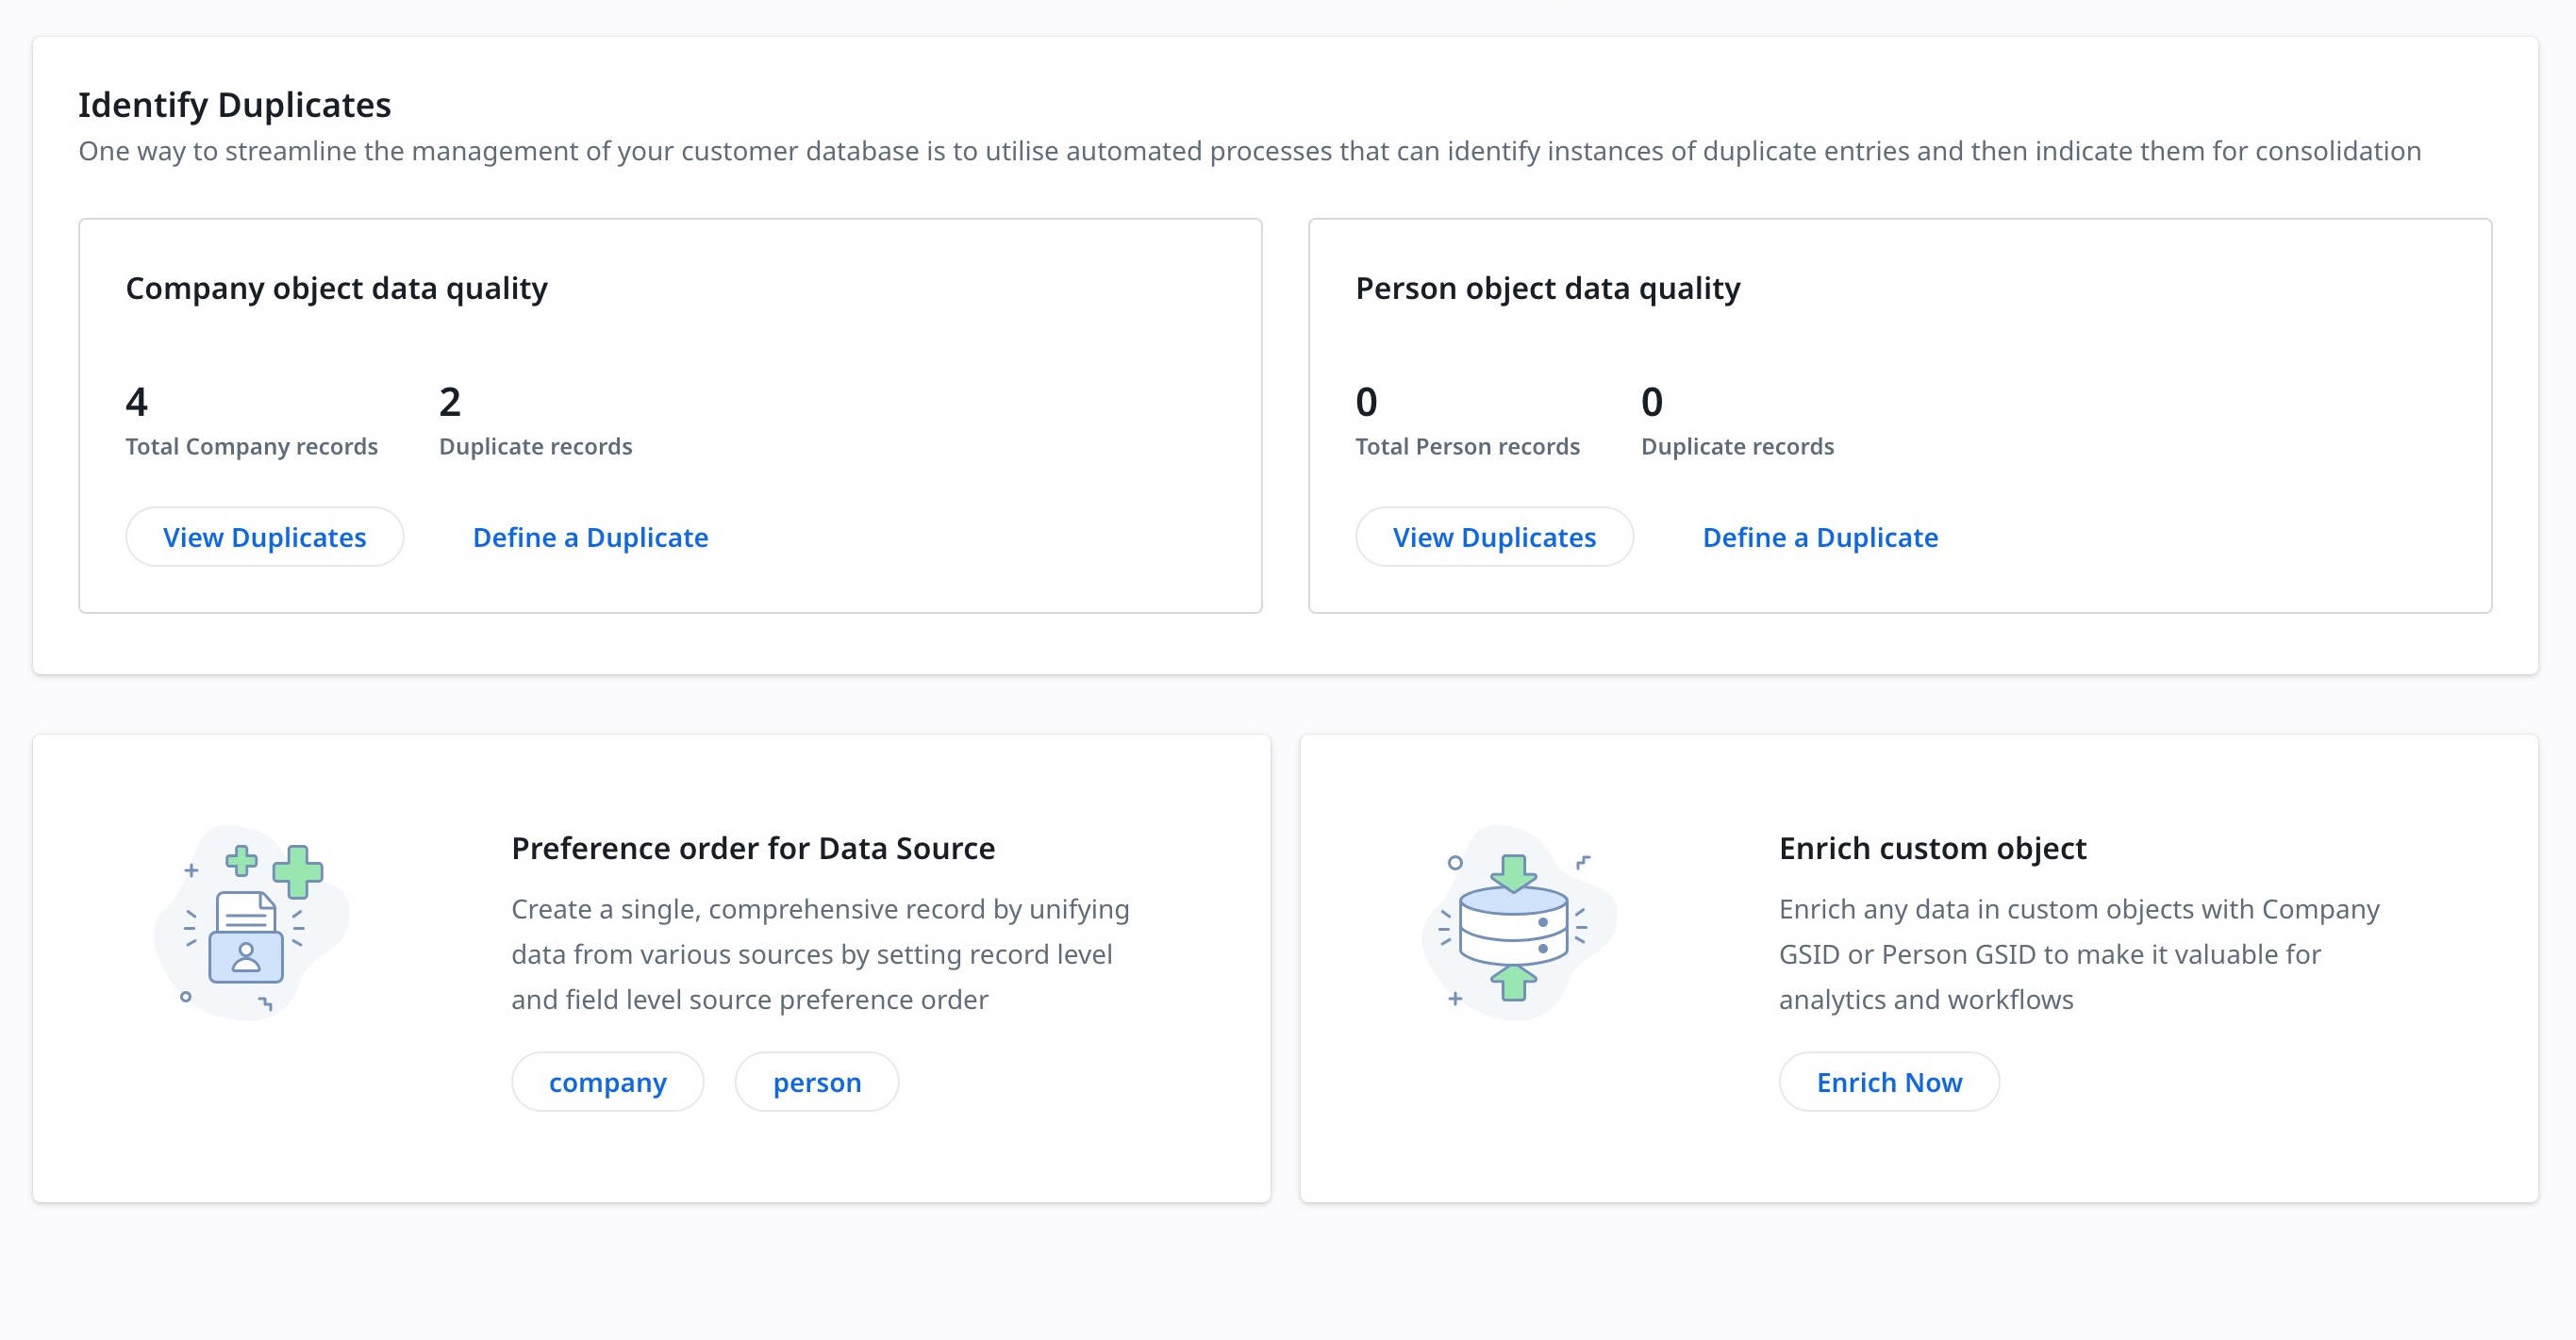
The Preference Order for Data Source section allows admins to add and prioritize multiple sources and ingest data into Company or Person objects to create a single comprehensive record. The Standard and Custom objects are selected as sources for identifying the company records. Admins can also prioritze the data at field level to select the winning record.
Data sources can be added for both the Company and the Person individually. To add preferences for data sources, navigate to Administration > Unification. The Unification page appears.
Company Data Source
With the ability to ingest data from multiple sources, the admin can use unification to add and prioritize data sources from where the data needs to be ingested.
Note: The company object is automatically included in the project, and its attribute mapping is also created by default. This helps admins identify duplicates as per the definition in Define Company duplicates.
To add a new data source:
- Click Company in the Preference Order for Data Source. The Add and Prioritize Sources page appears.
- Select one of the following options to load the data:
- Multiple sources: To add different sources and arrange their preference order.
- Field Level Preference: To add fields from the selected sources and arrange their preference order.
- Same source: To select which records to retain if the data ingested is from the existing source
- Multiple sources: To add different sources and arrange their preference order.
Multiple Sources
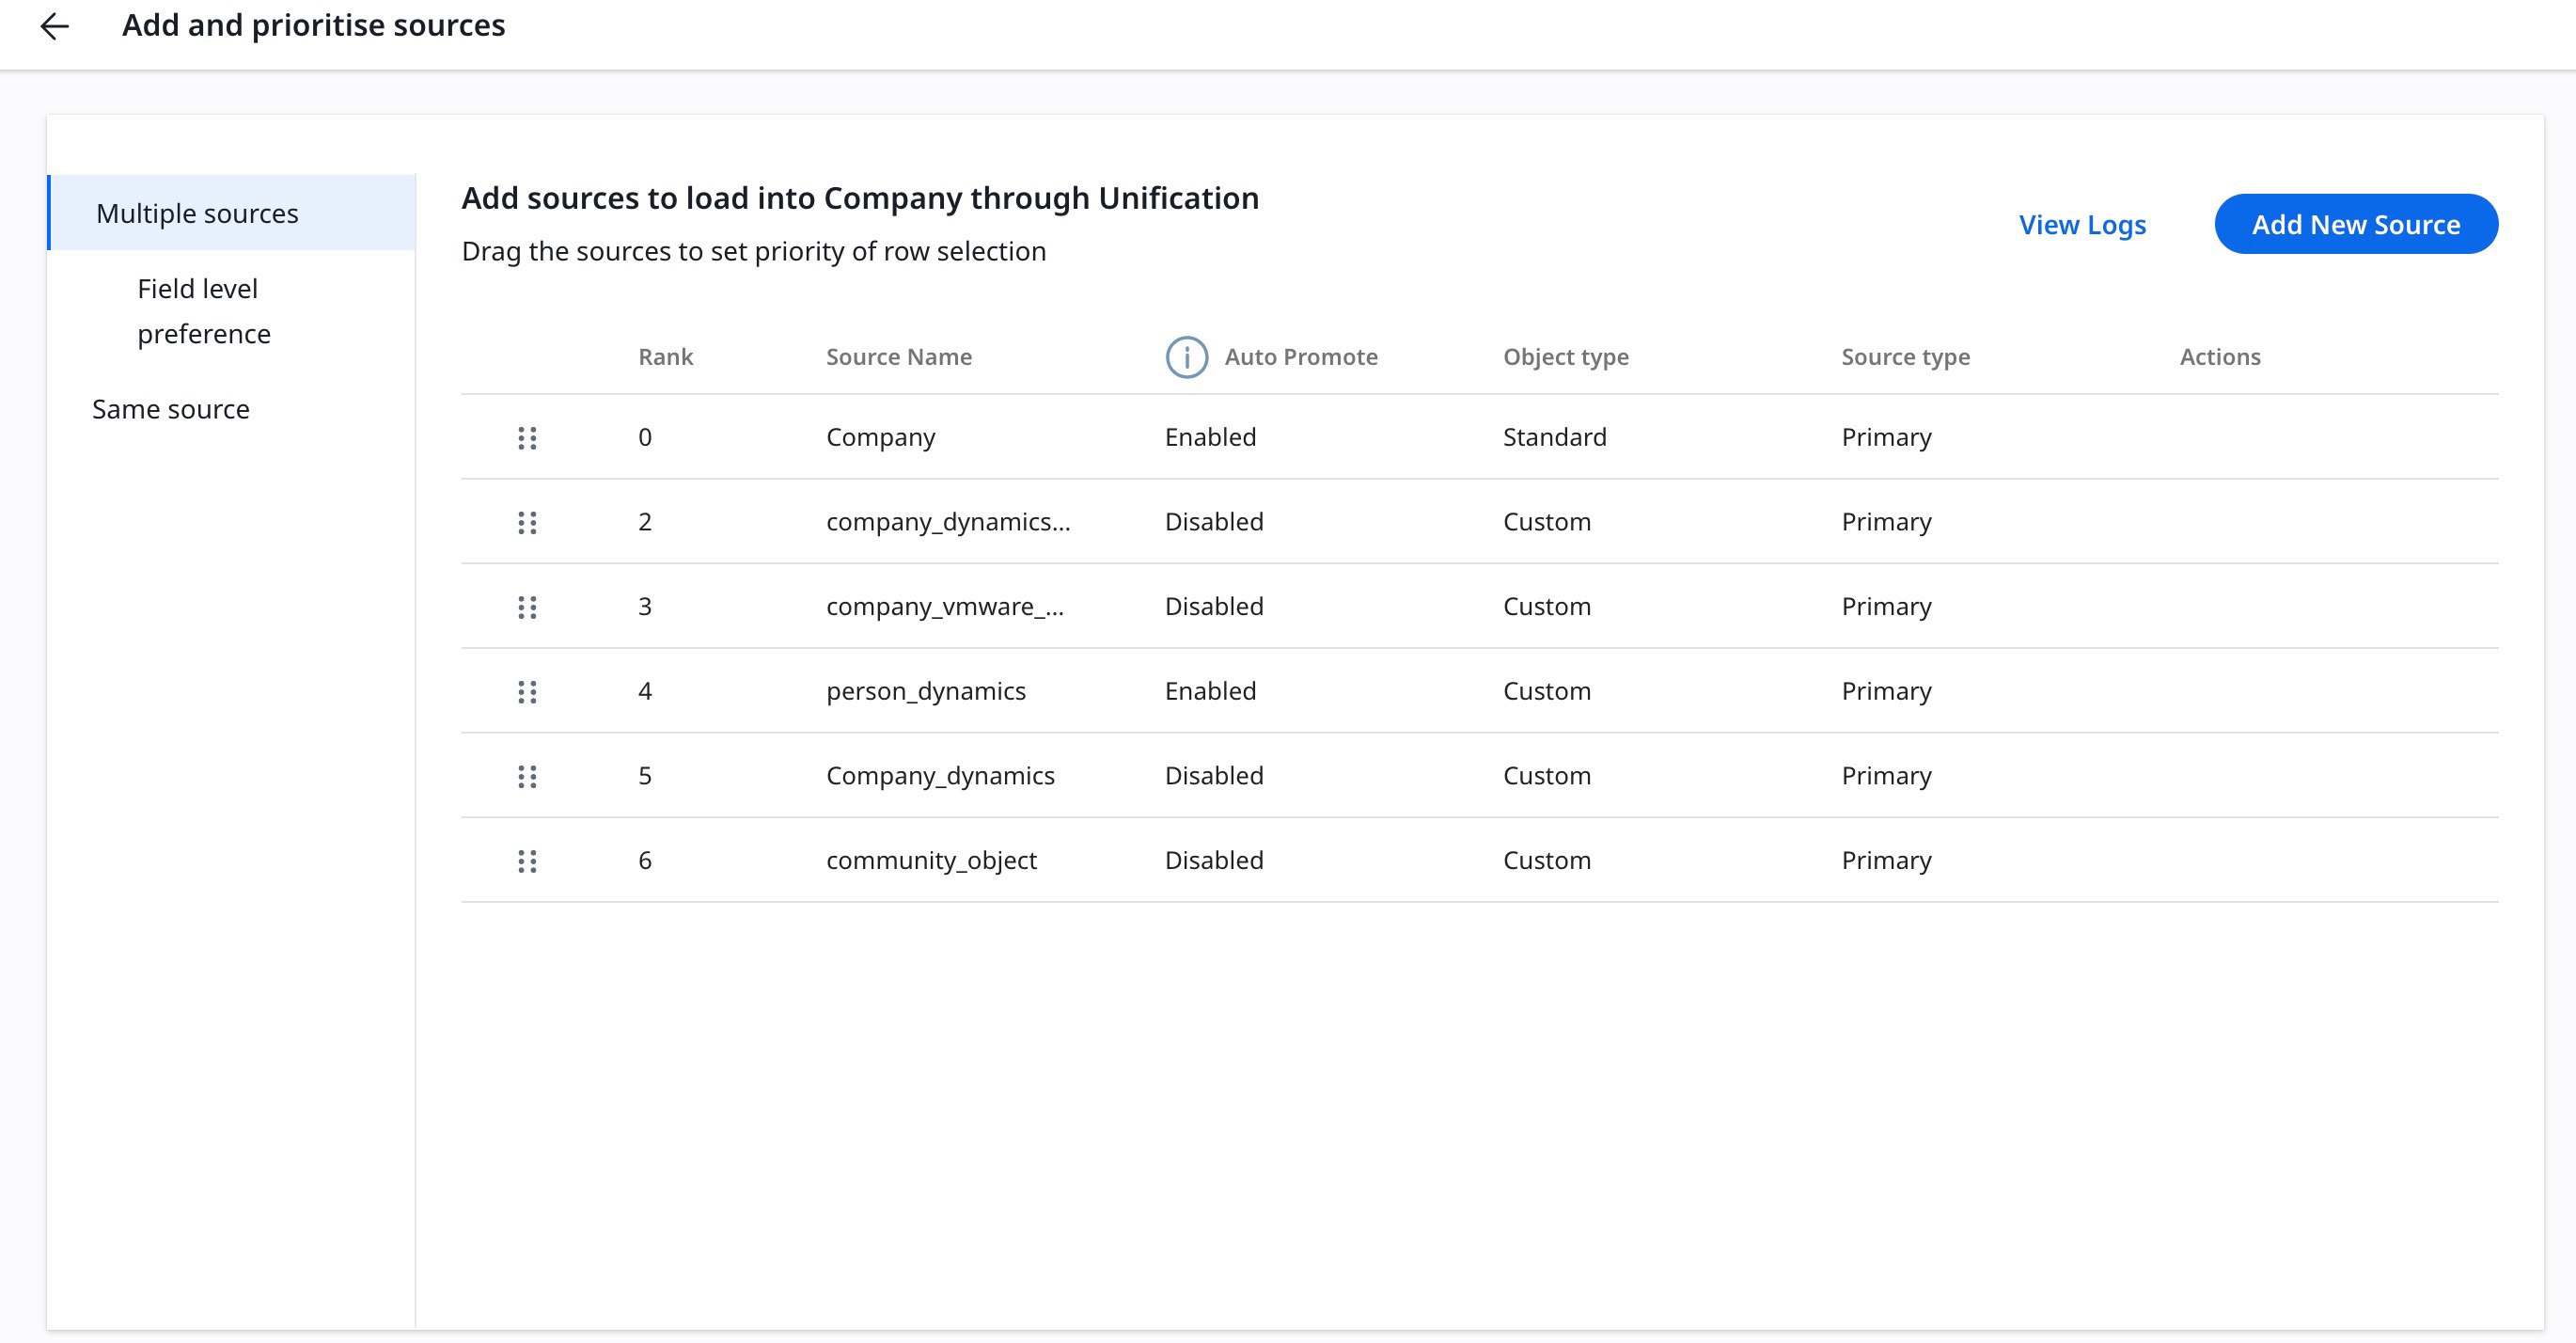
The Multiple Sources option allows you to add various sources to load data into the Company using Unification.
To add data sources:
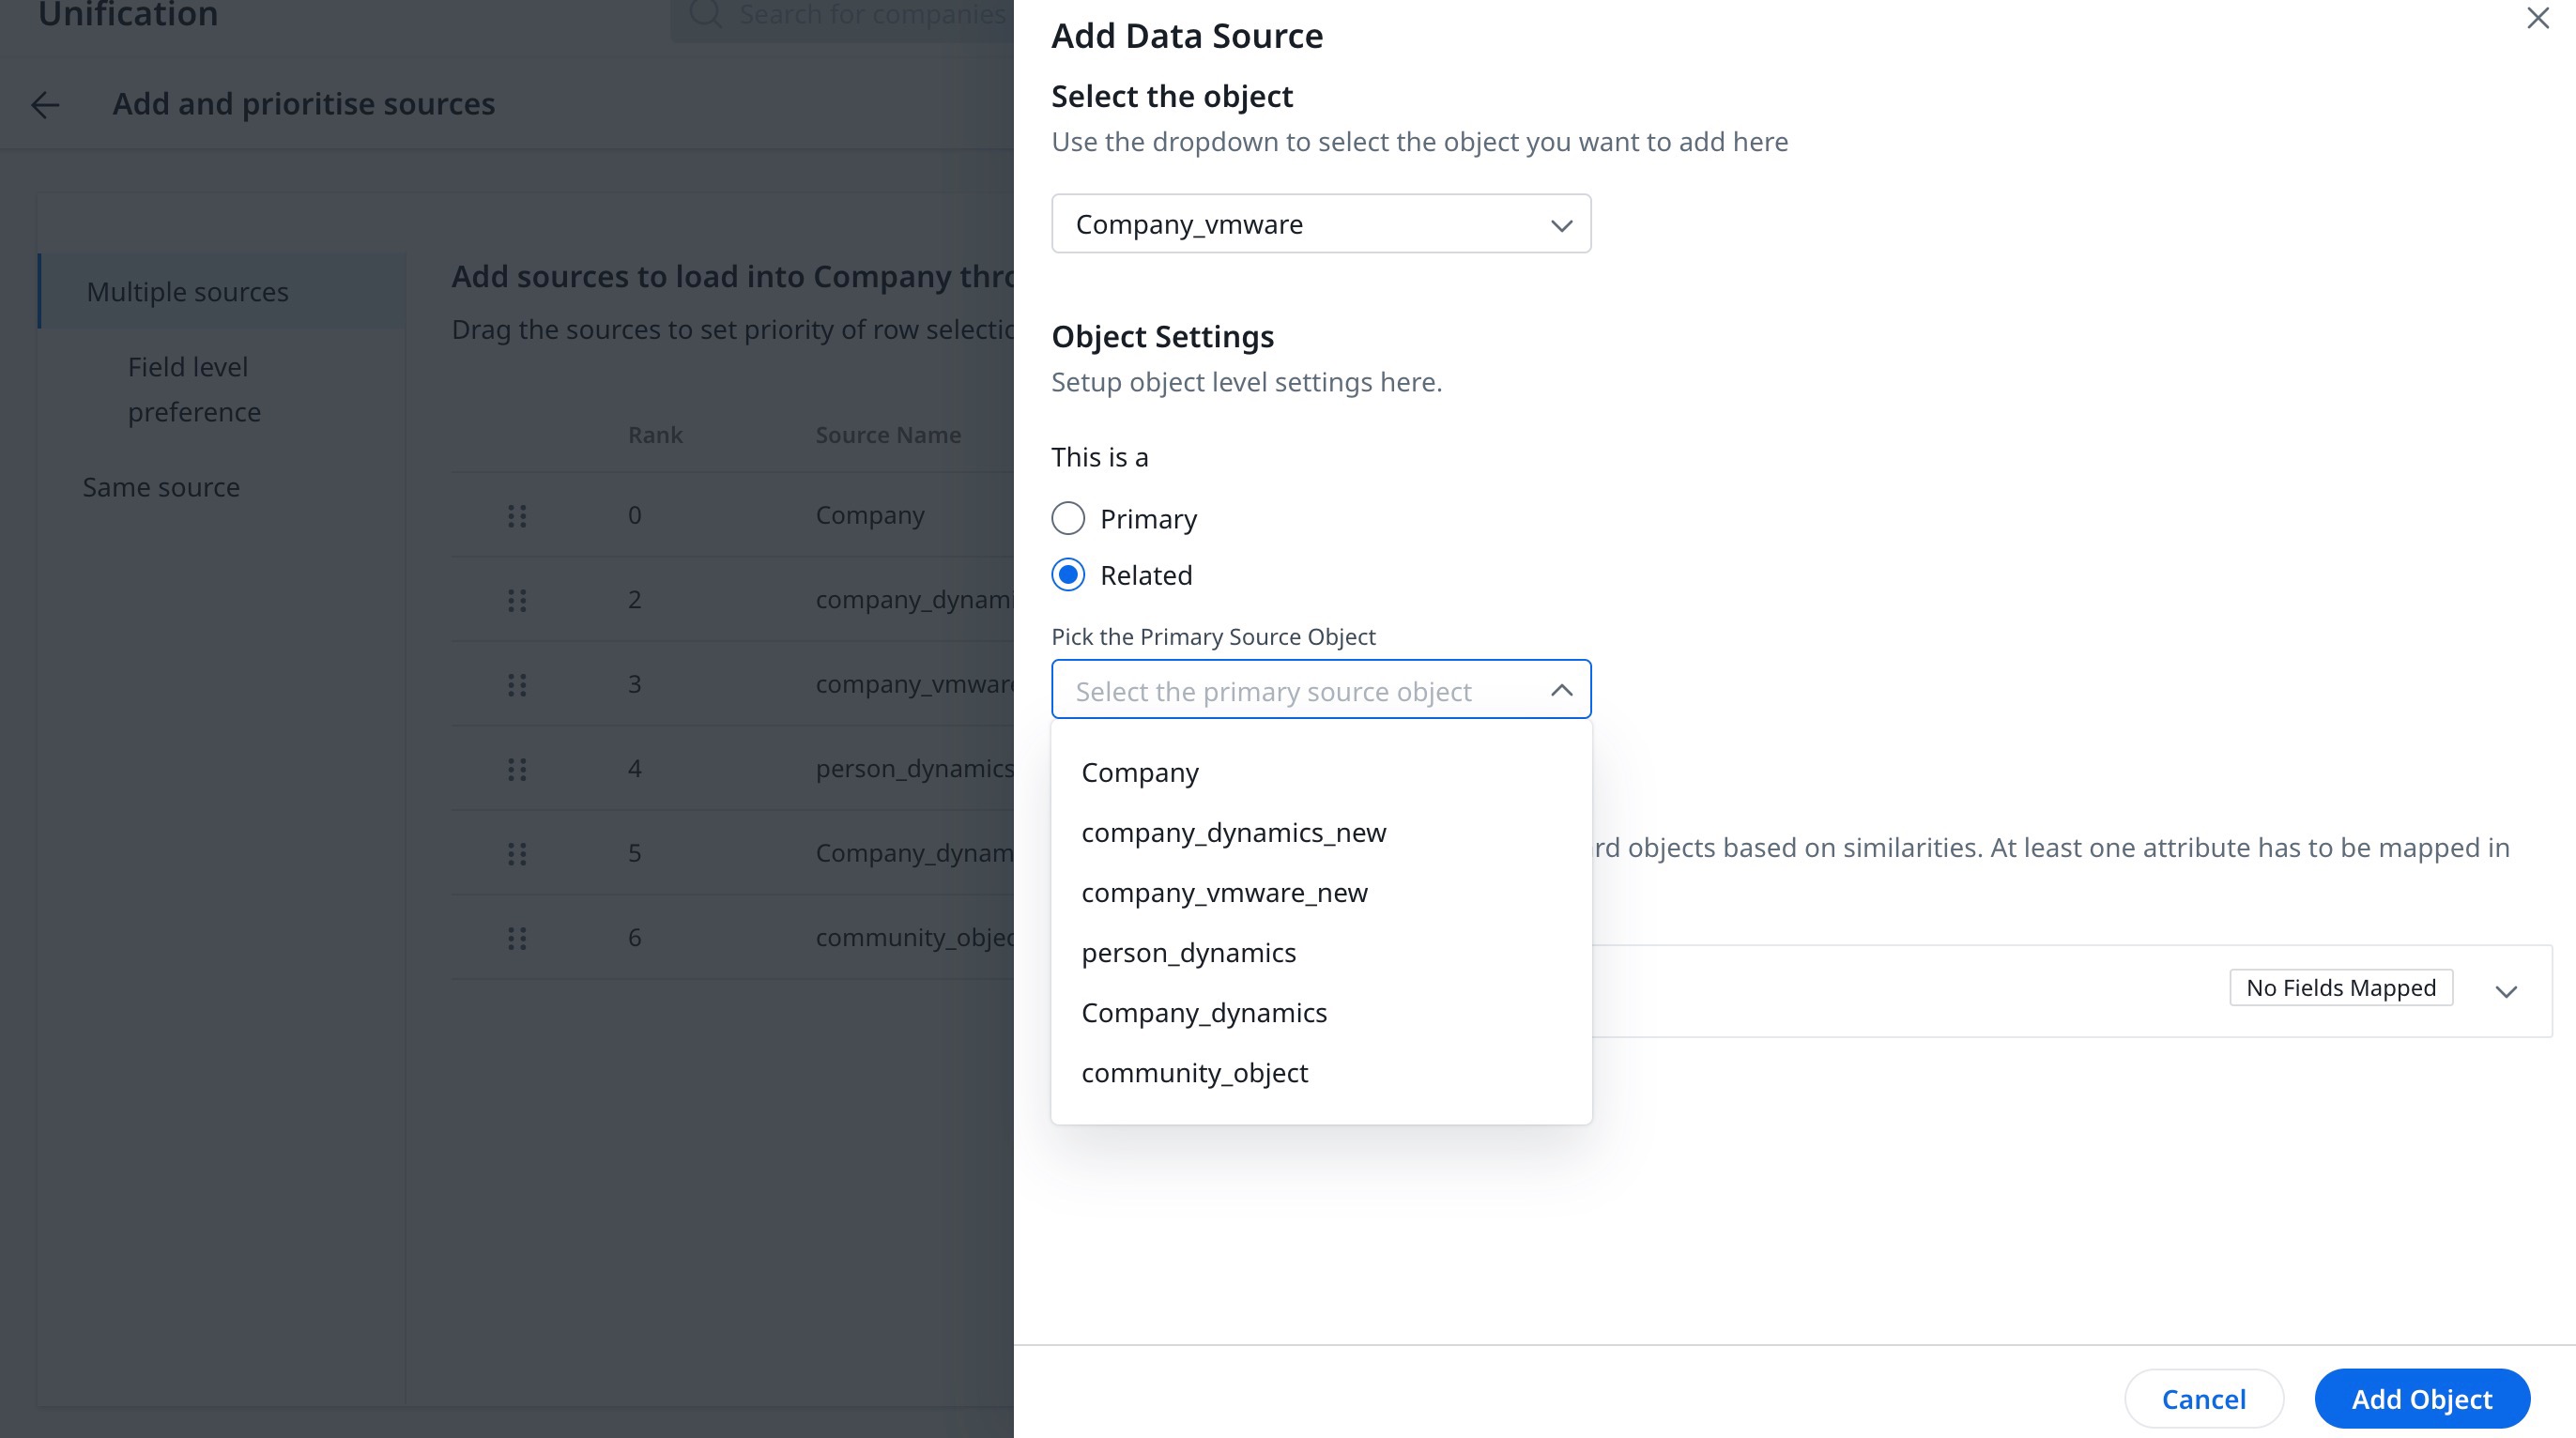
- Click Add New Source. The Add Data Source slide-out panel appears.
- From the Select the object dropdown, select the source.
- In the Object Settings section, select either of the following options:
- Primary: If the data being ingested is from the primary source.
- (Optional) Switch on the toggle Create new Company Records if a new Company record needs to be created from this source.
- Select if the source has only Company data or both Company and Relationship data.
- Proceed to Field Mapping.

- Related: If the data being ingested is from a secondary source.
- From the Pick the Primary Source Object dropdown, select the primary source associated with the Related data source. This can be a Standard or Custom source.
- From the Pick the Primary Source Object dropdown, select the primary source associated with the Related data source. This can be a Standard or Custom source.
- Primary: If the data being ingested is from the primary source.
- Field Mapping: Map attributes based on Company and Relationship Objects.
- Company Object Attribute:
- Hover over Add Field and select Add select new fields. The Select Fields slide-out panel appears
- Select the Source fields to be added.
- Click Select.
- From the Target dropdown, select the target field to be mapped.
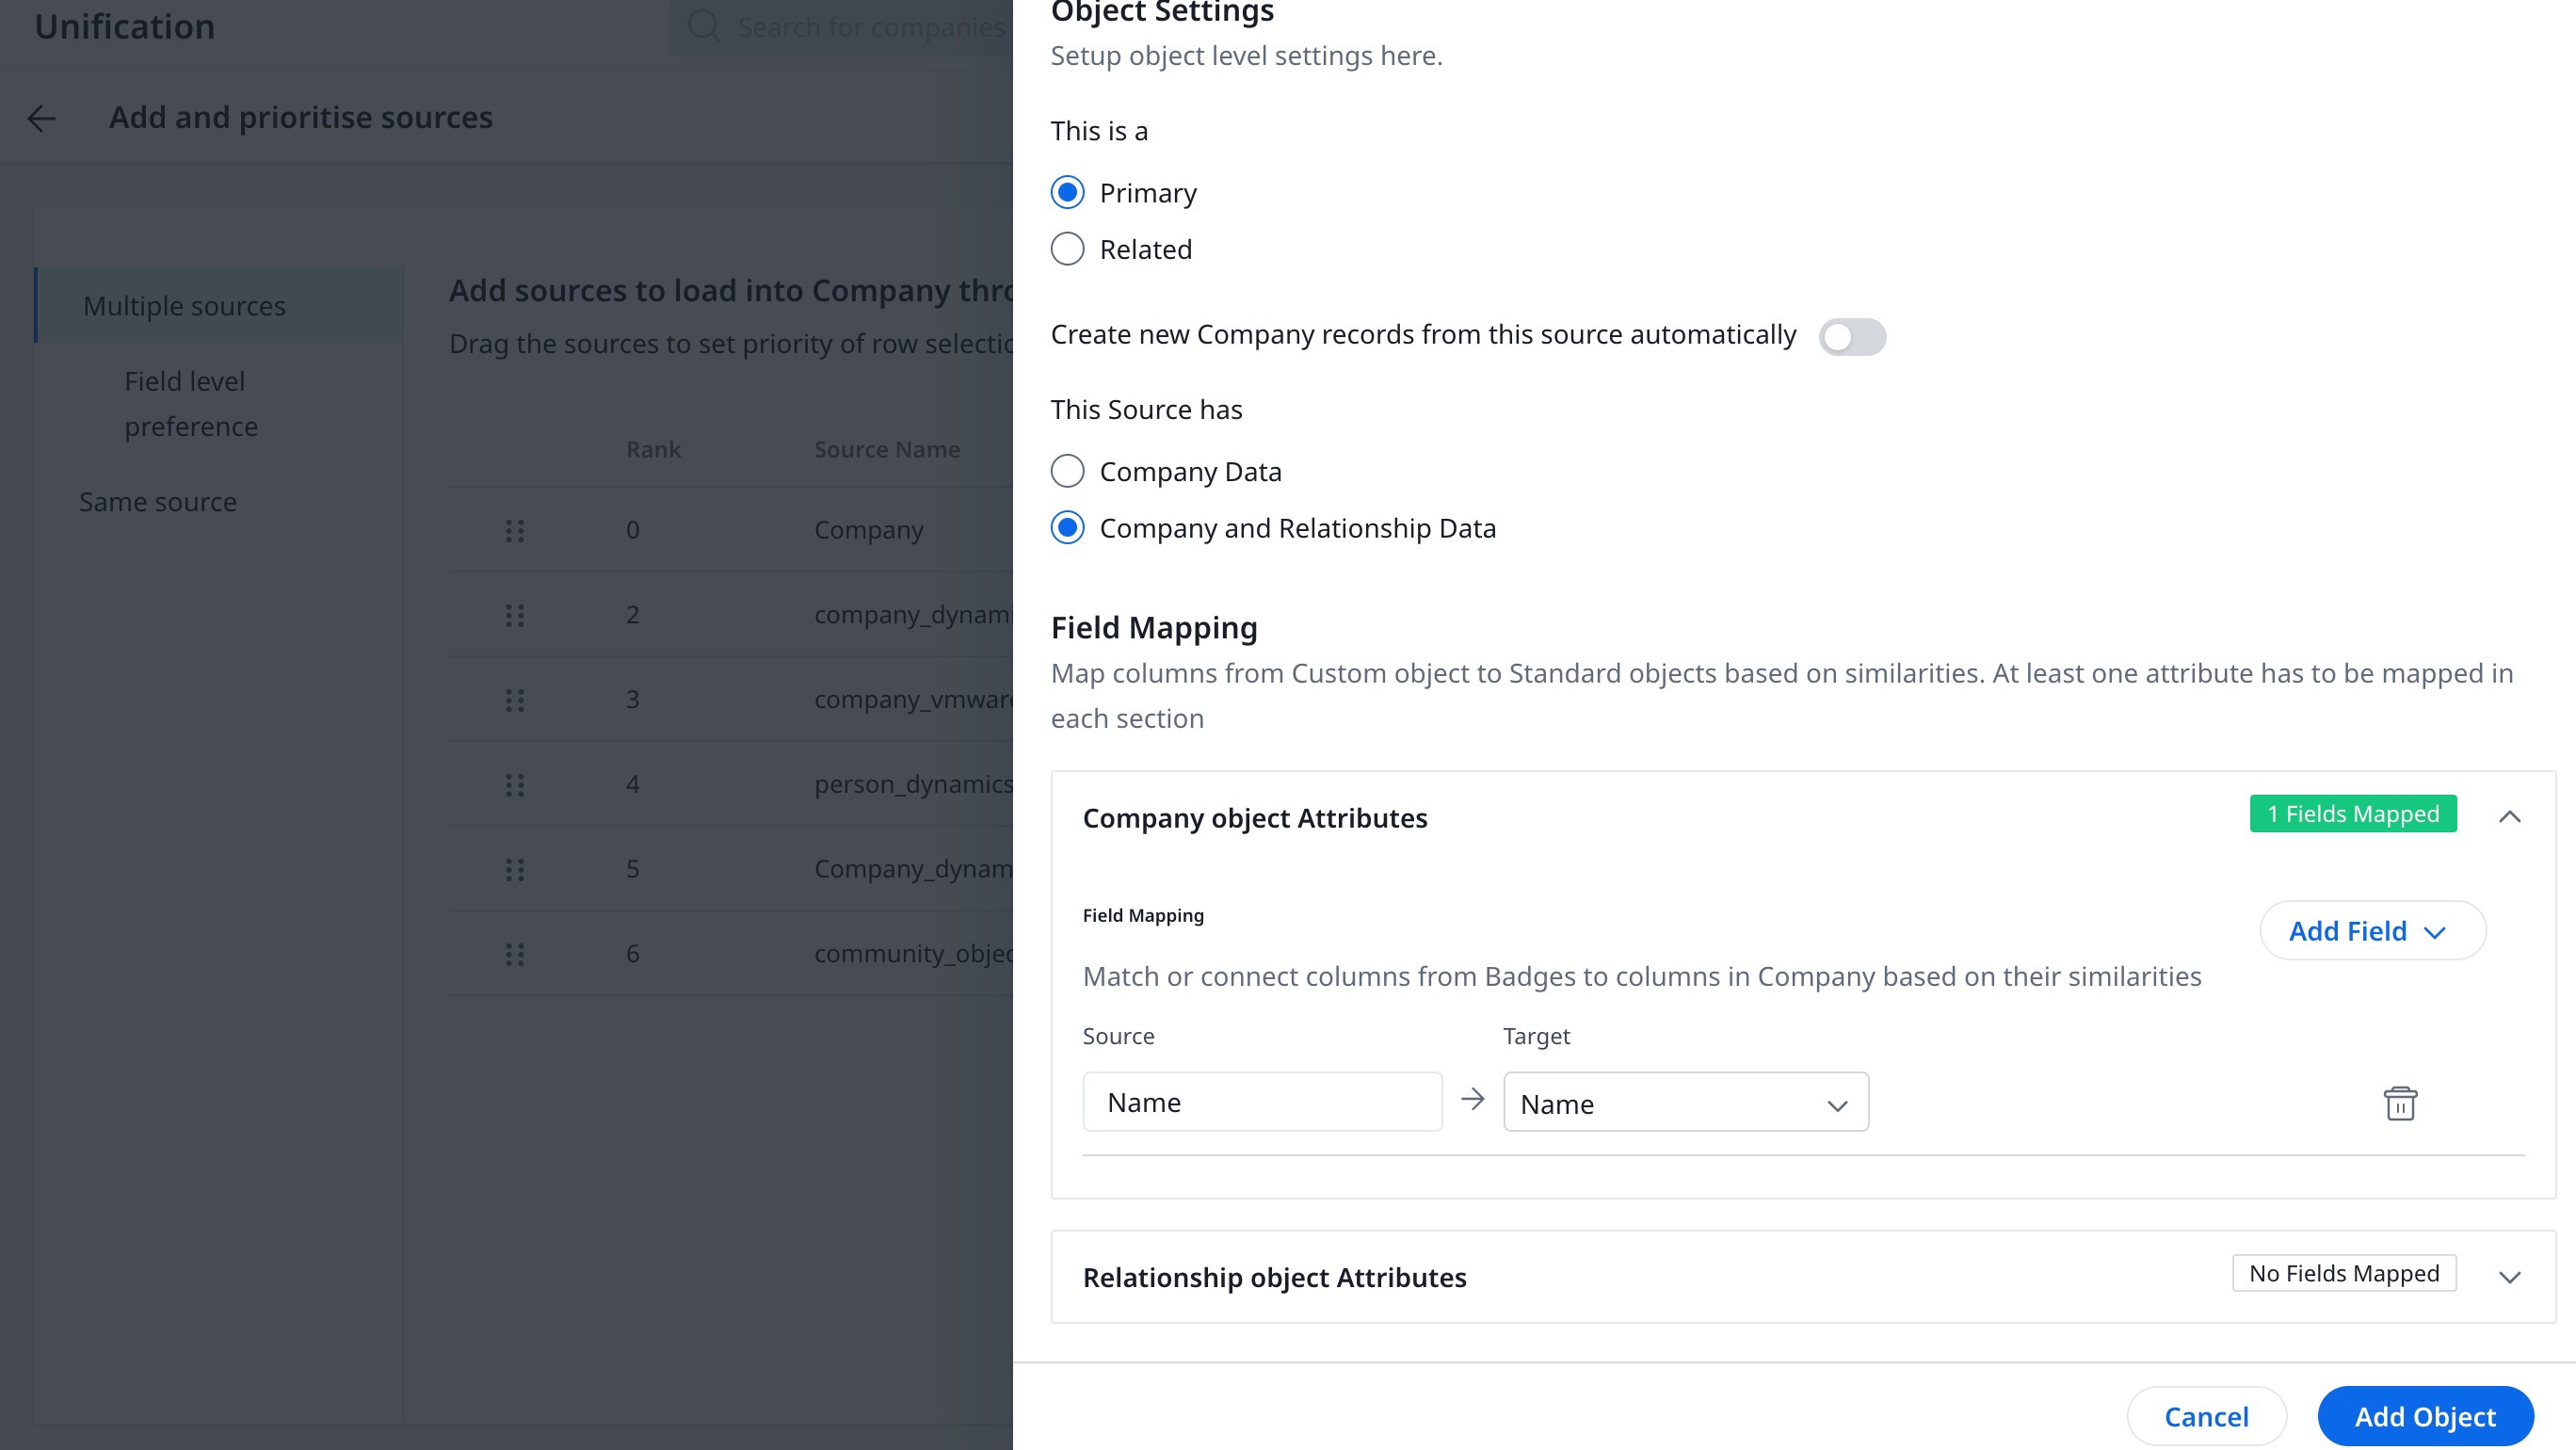
- Relationship Object Attribute: Repeat the steps above to map fields in the Relationship object attribute.
- Company Object Attribute:
- Click Add Object to add this source.
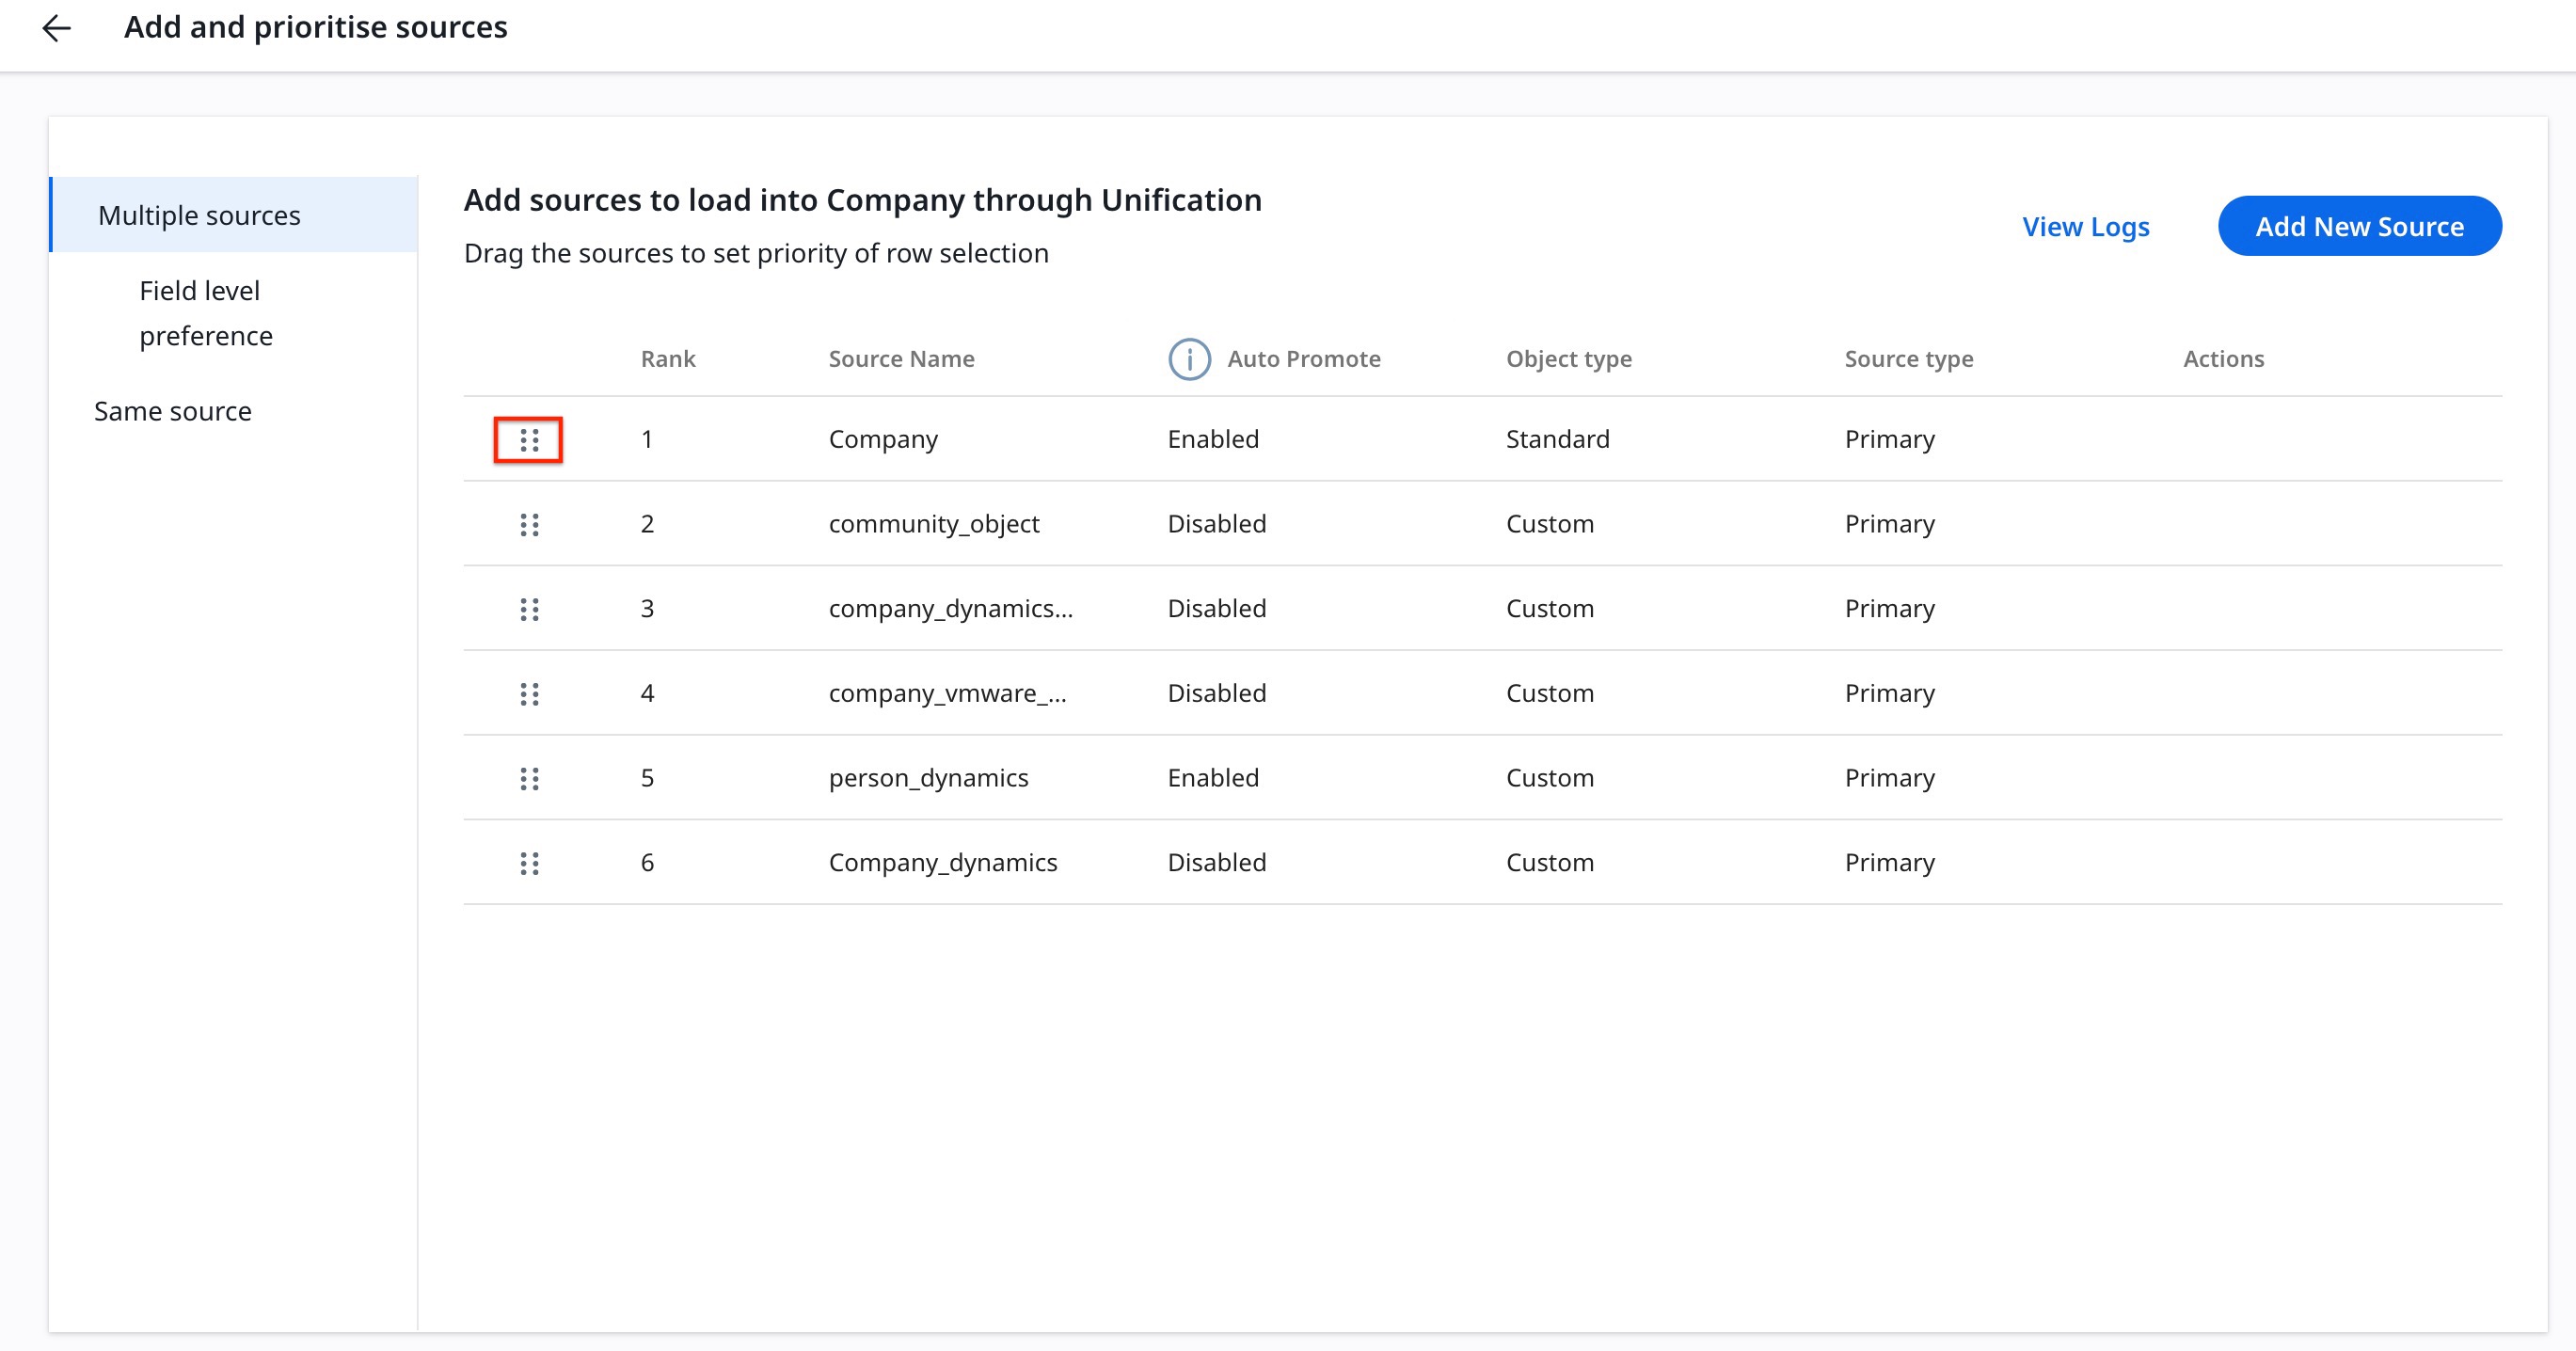
Repeat the steps above to add various sources for loading data into the Company records. The Multiple Source tab now lists all the sources added, ready to be ranked according to their preference.
To rank the sources, hover over the three-vertical-dots menu next to each source and drag them to rearrange as per the ranking.
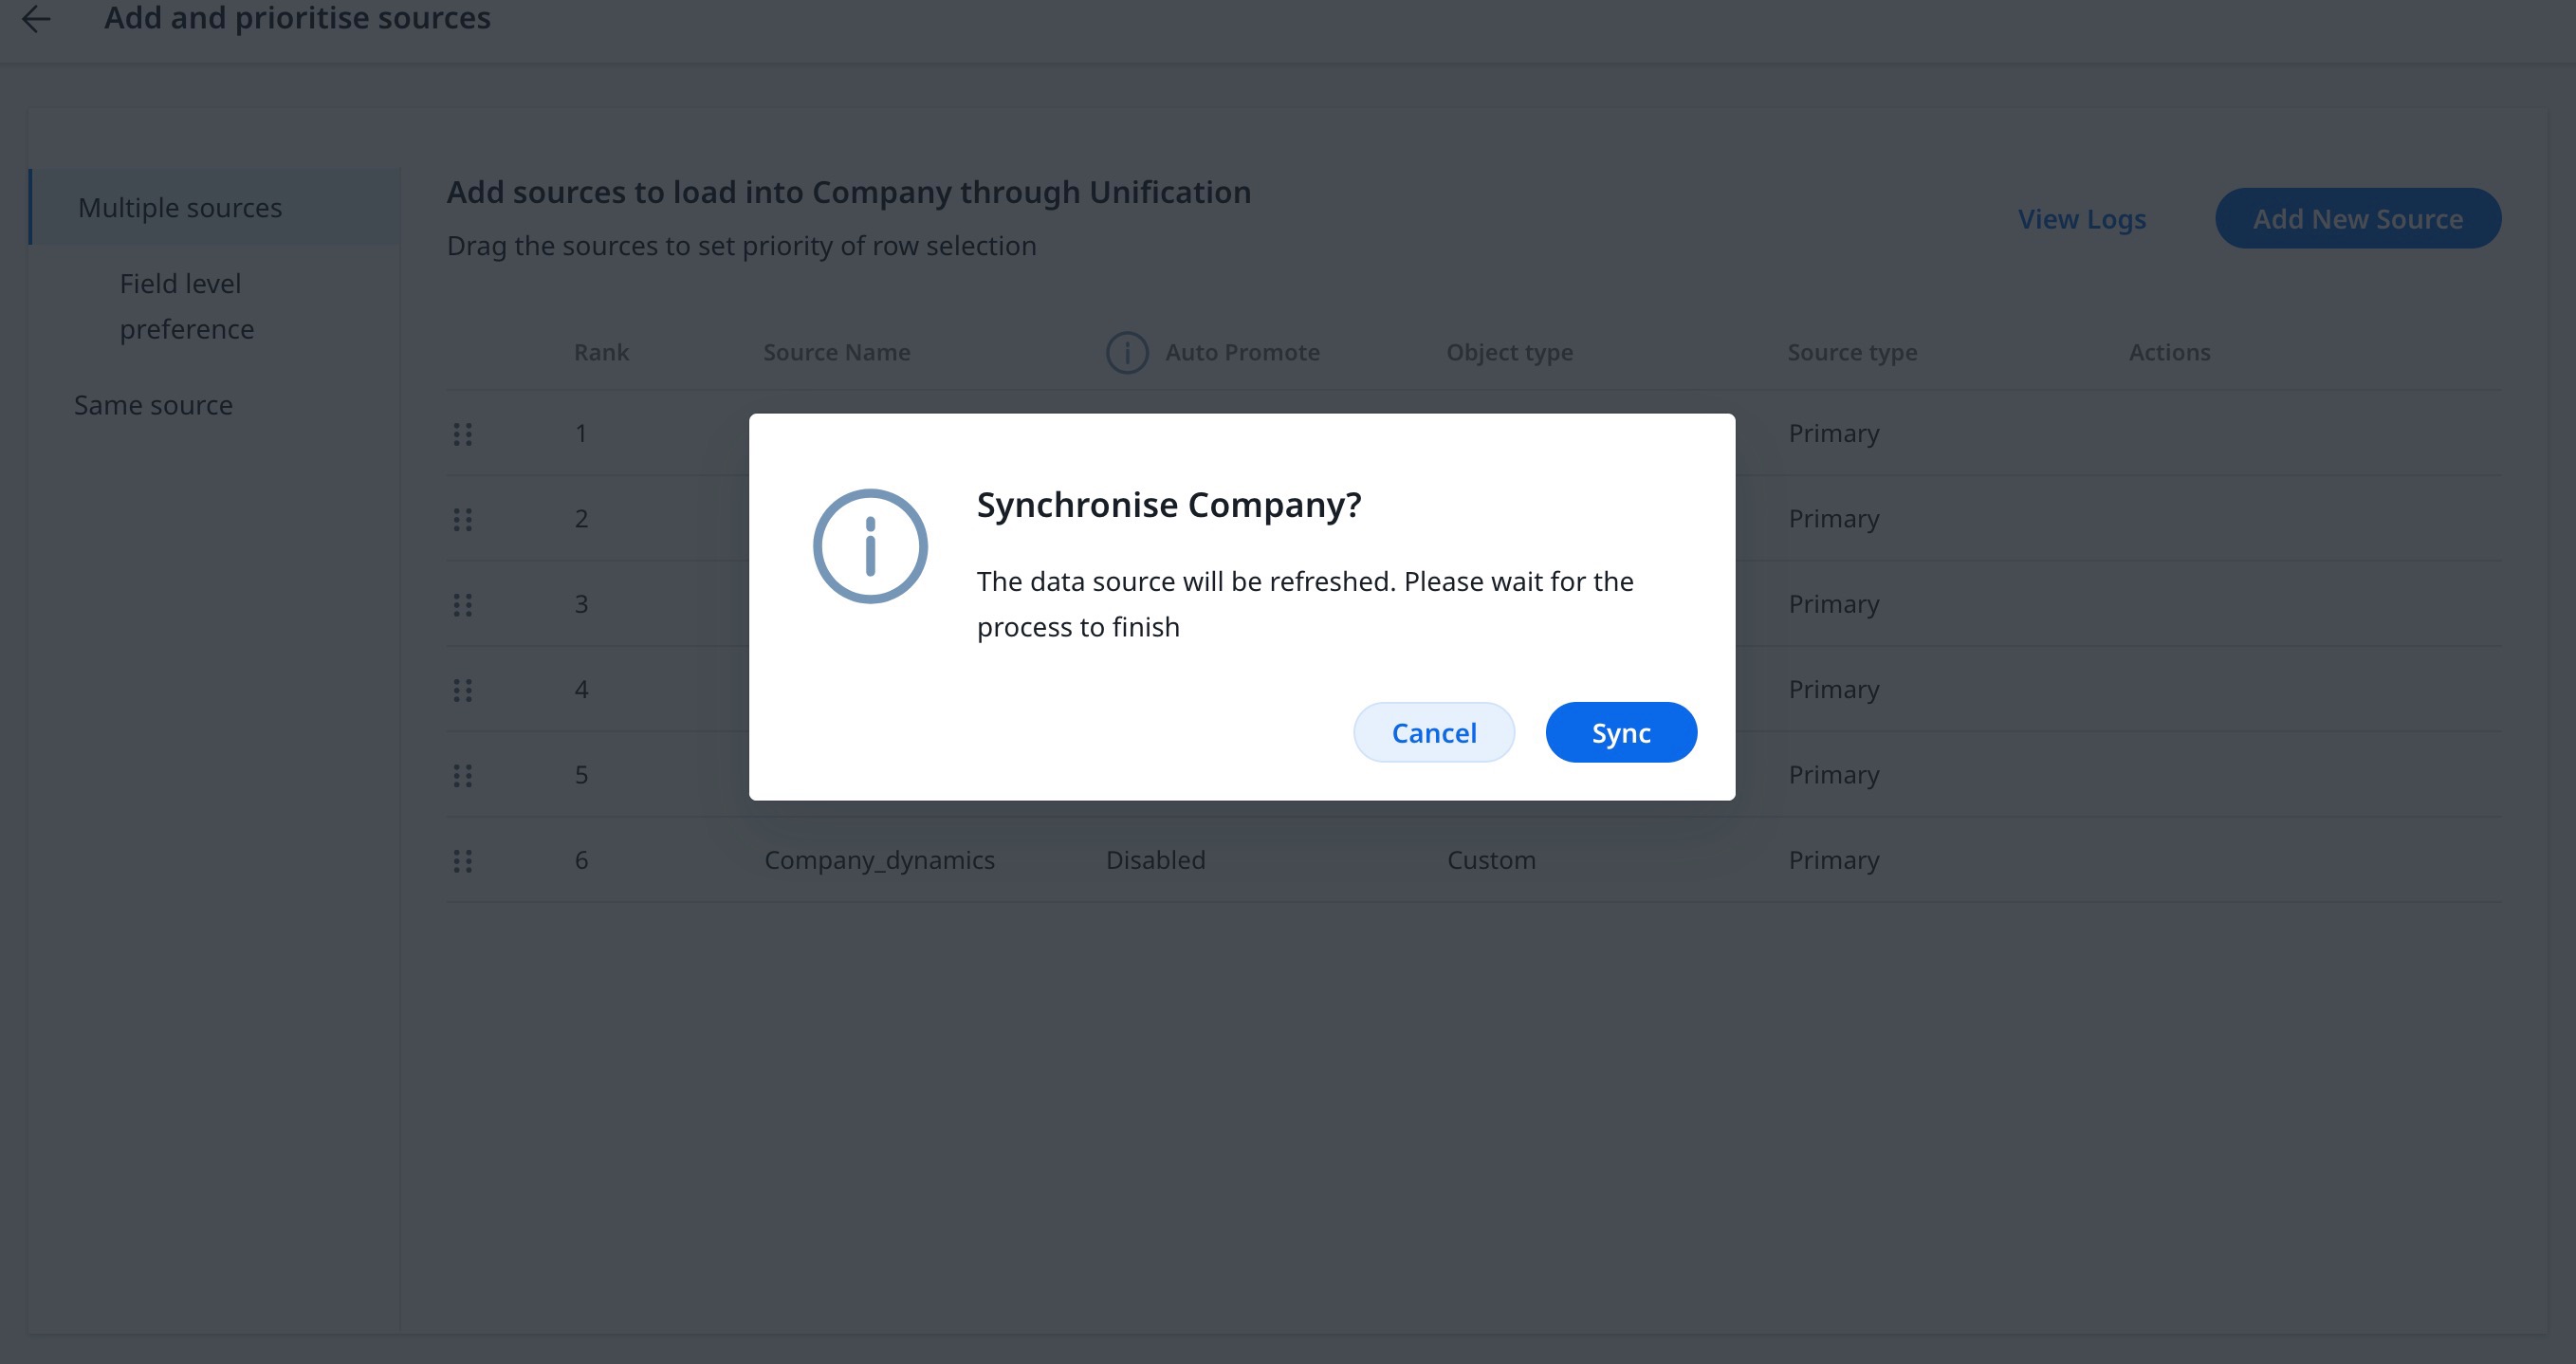
Sync Sources
After the company project setup is complete, the Sync Source option allows you to retrieve the latest data from staging objects to Record Groups in Gainsight, initiating the unification process for that source.
To sync the sources:
- Under the Action column, click Sync. The Synchronize Company confirmation window appears.
- To complete the process, click Sync.
Field Level Preference
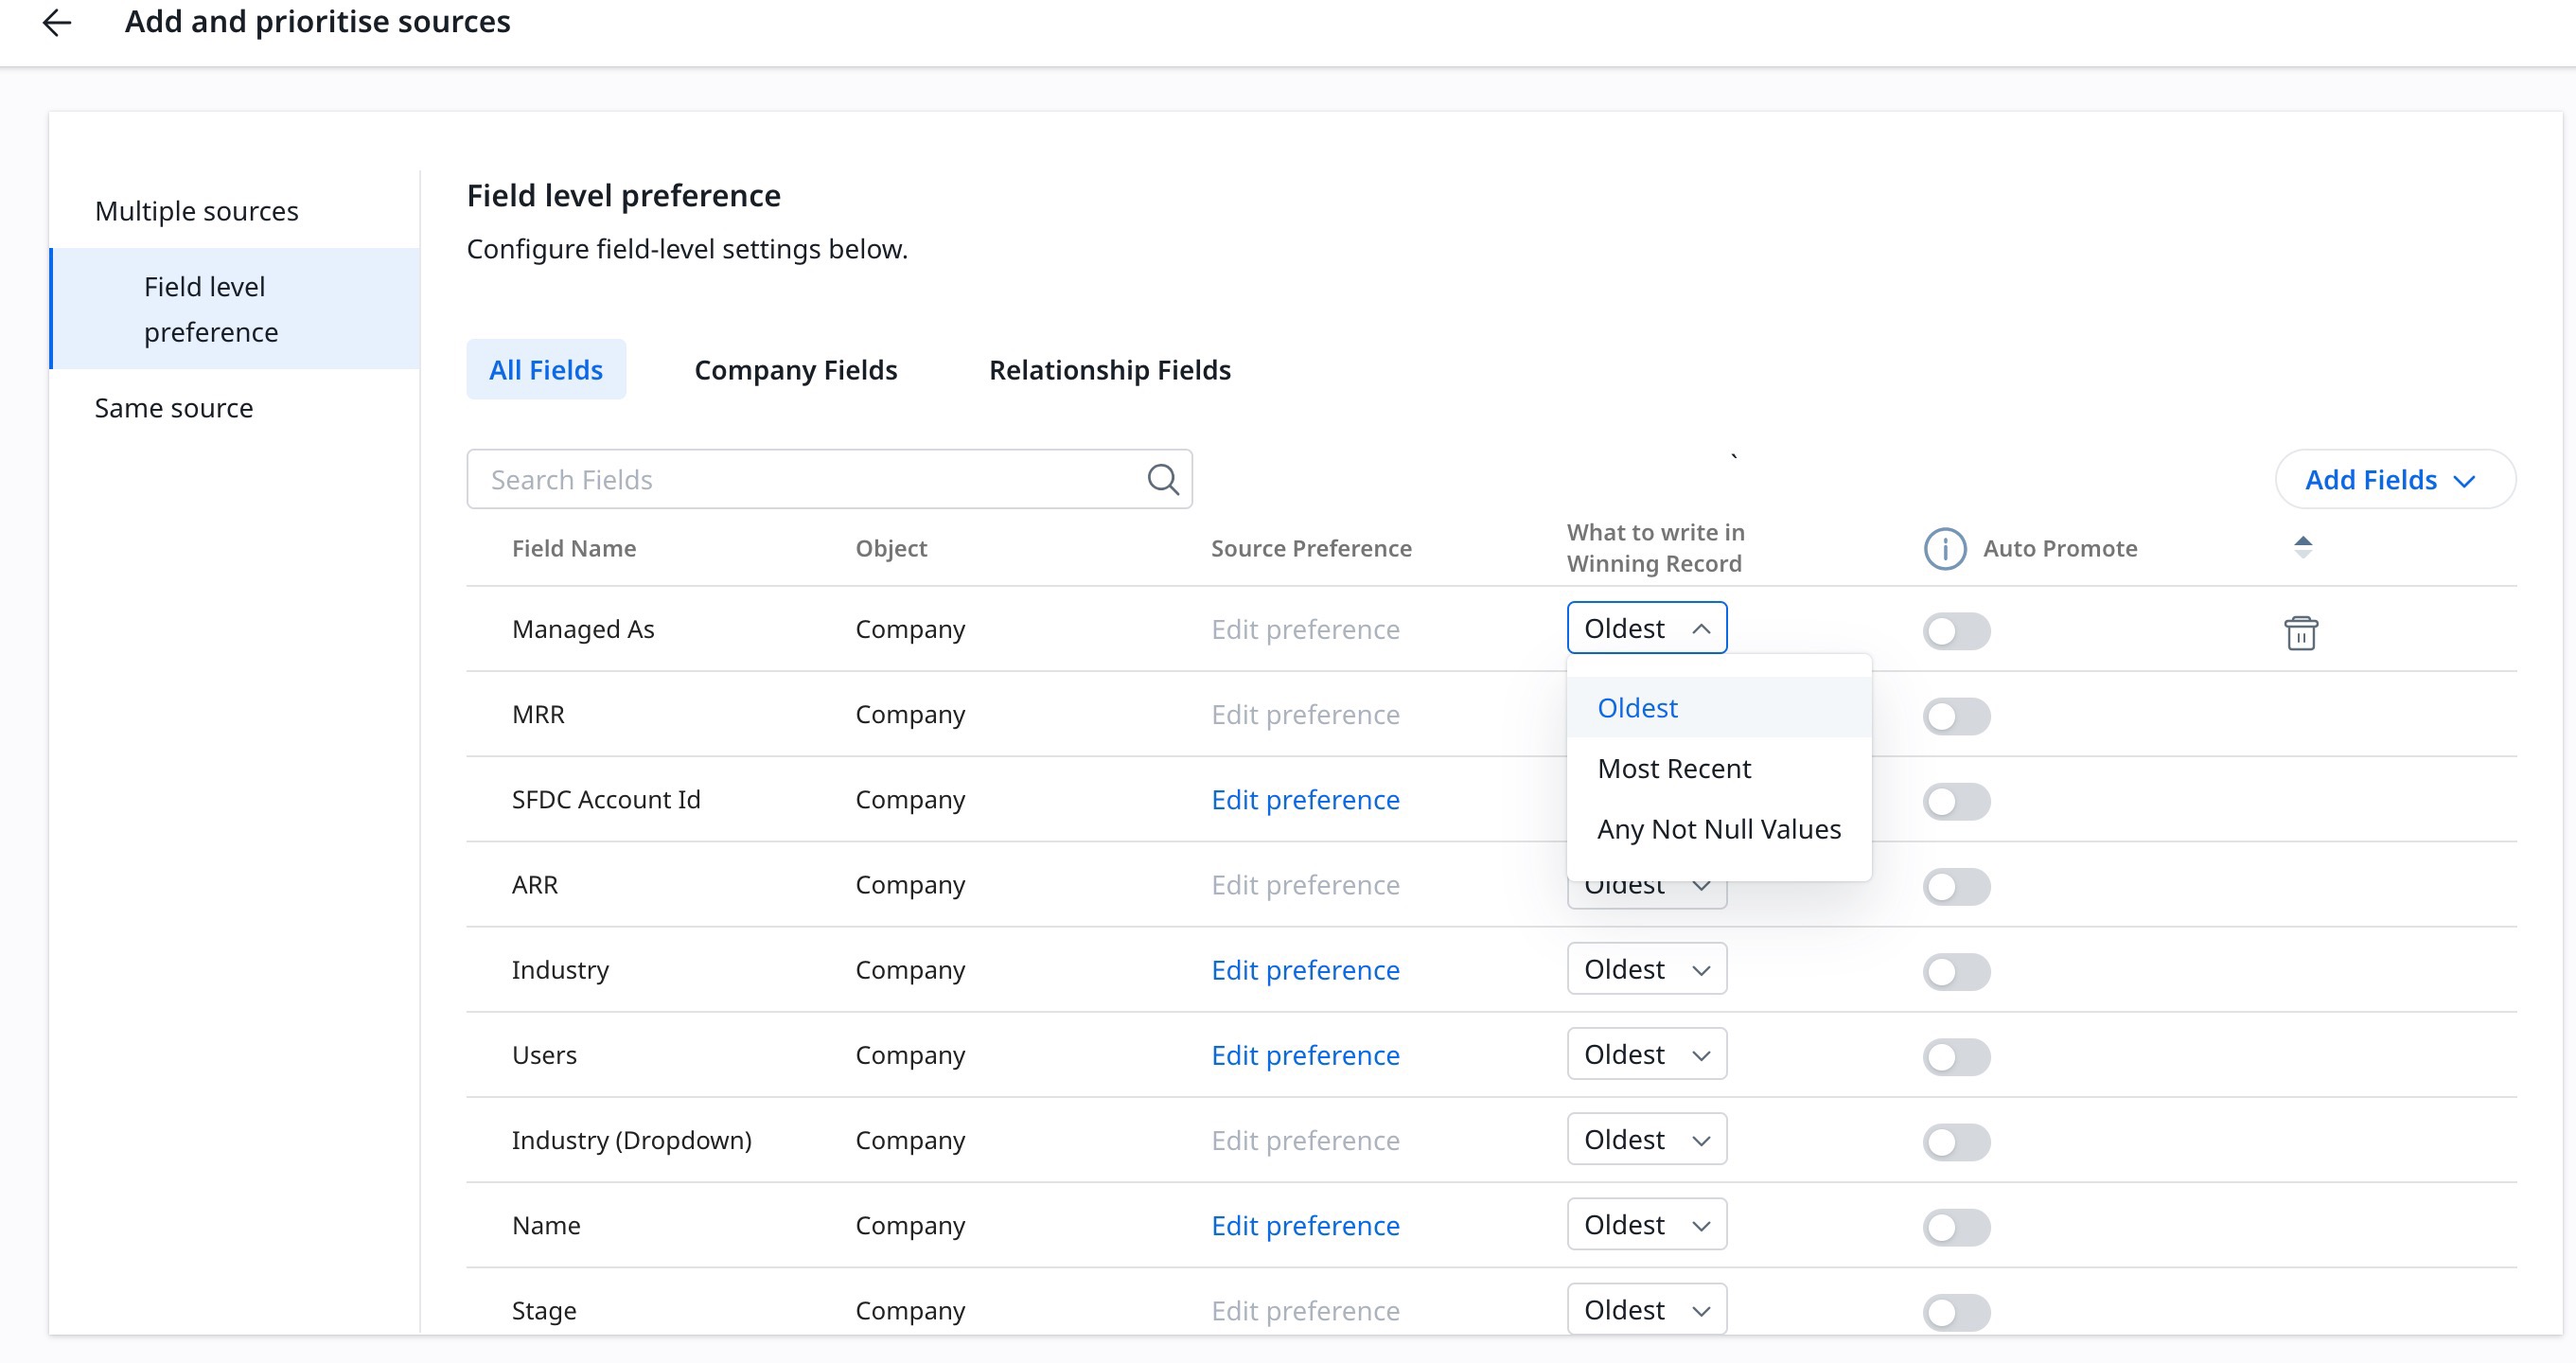
After adding the sources to load data, the next step is to configure field-level settings for each source from Field Level Preference.
The Field Level Preference page displays the list of all the fields that are added from the sources selected in the above section.
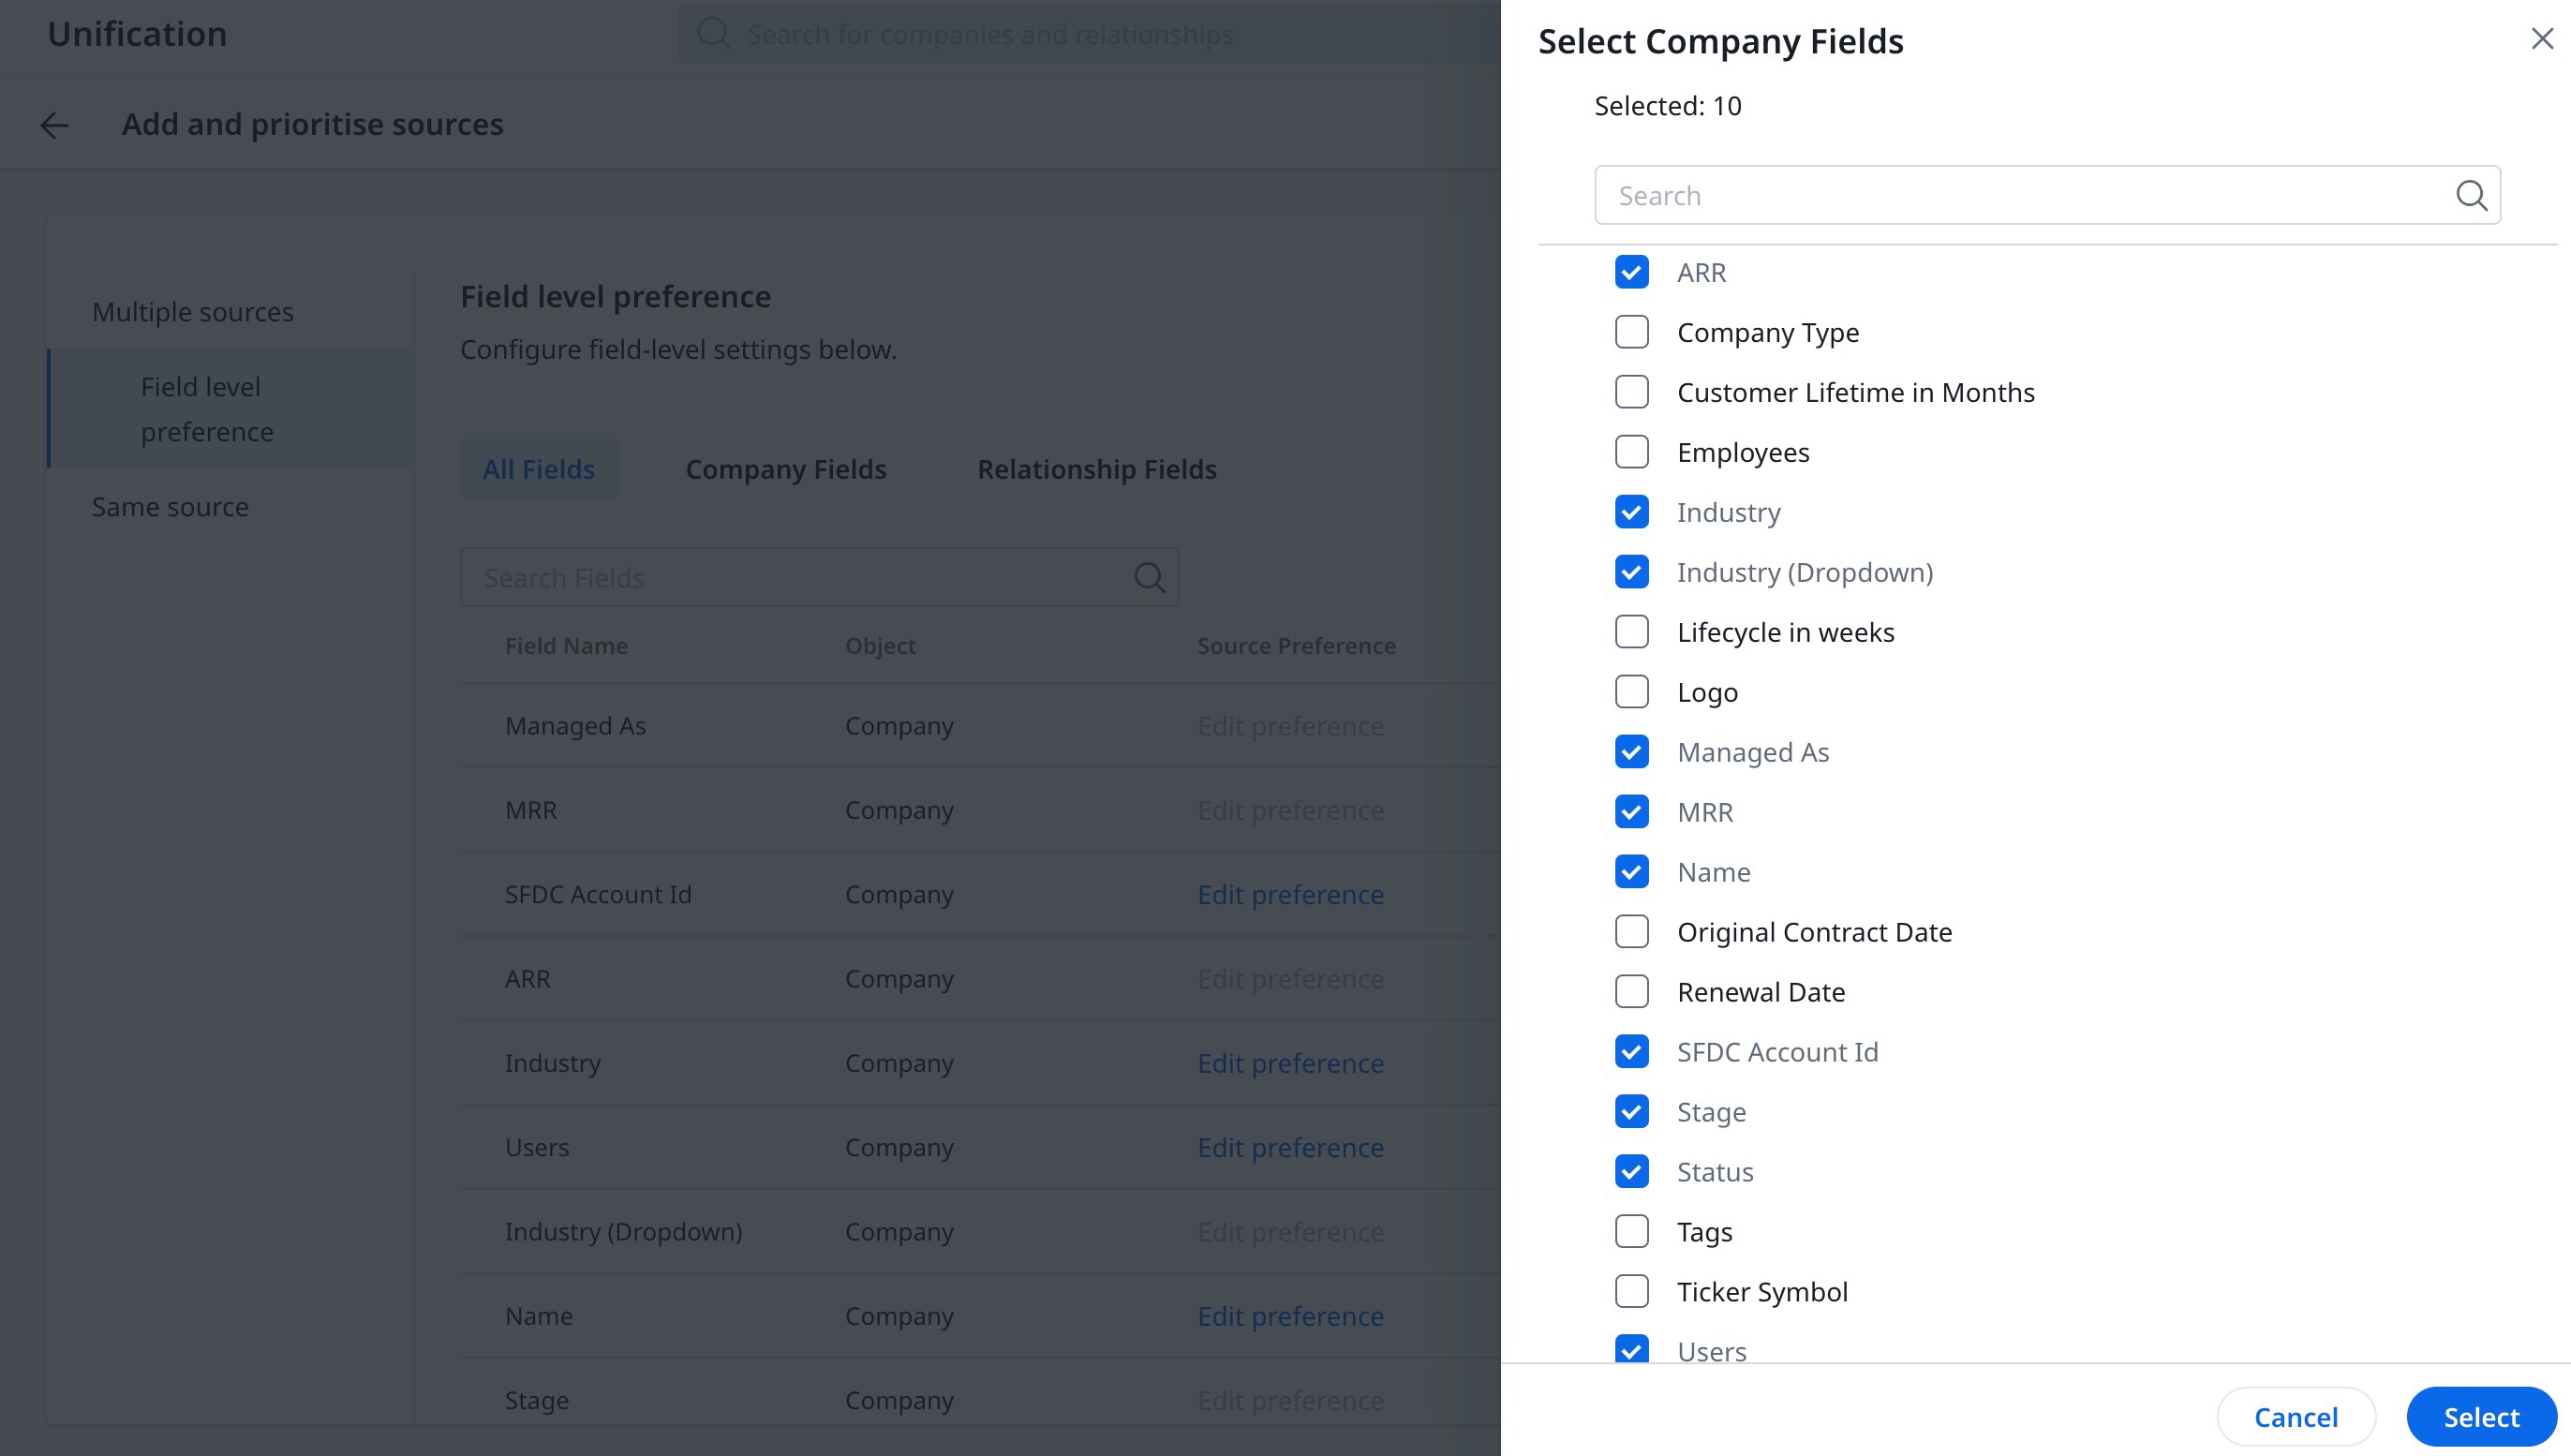
To add new fields:
- From the Field Level Preference page, click Add Fields.
- Select a Company or Relationship Field. The Select Fields slide-out panel appears.
- Select the fields to be added. Click Select.
For the fields added, if a particular field is linked to multiple sources, you can select the preference for each of these fields from which data needs to be ingested.
To edit preference:
- Click Edit Preference next to the field whose sources need to be prioritized. The Source Preference Order dialog box appears. Re-order the source as required.
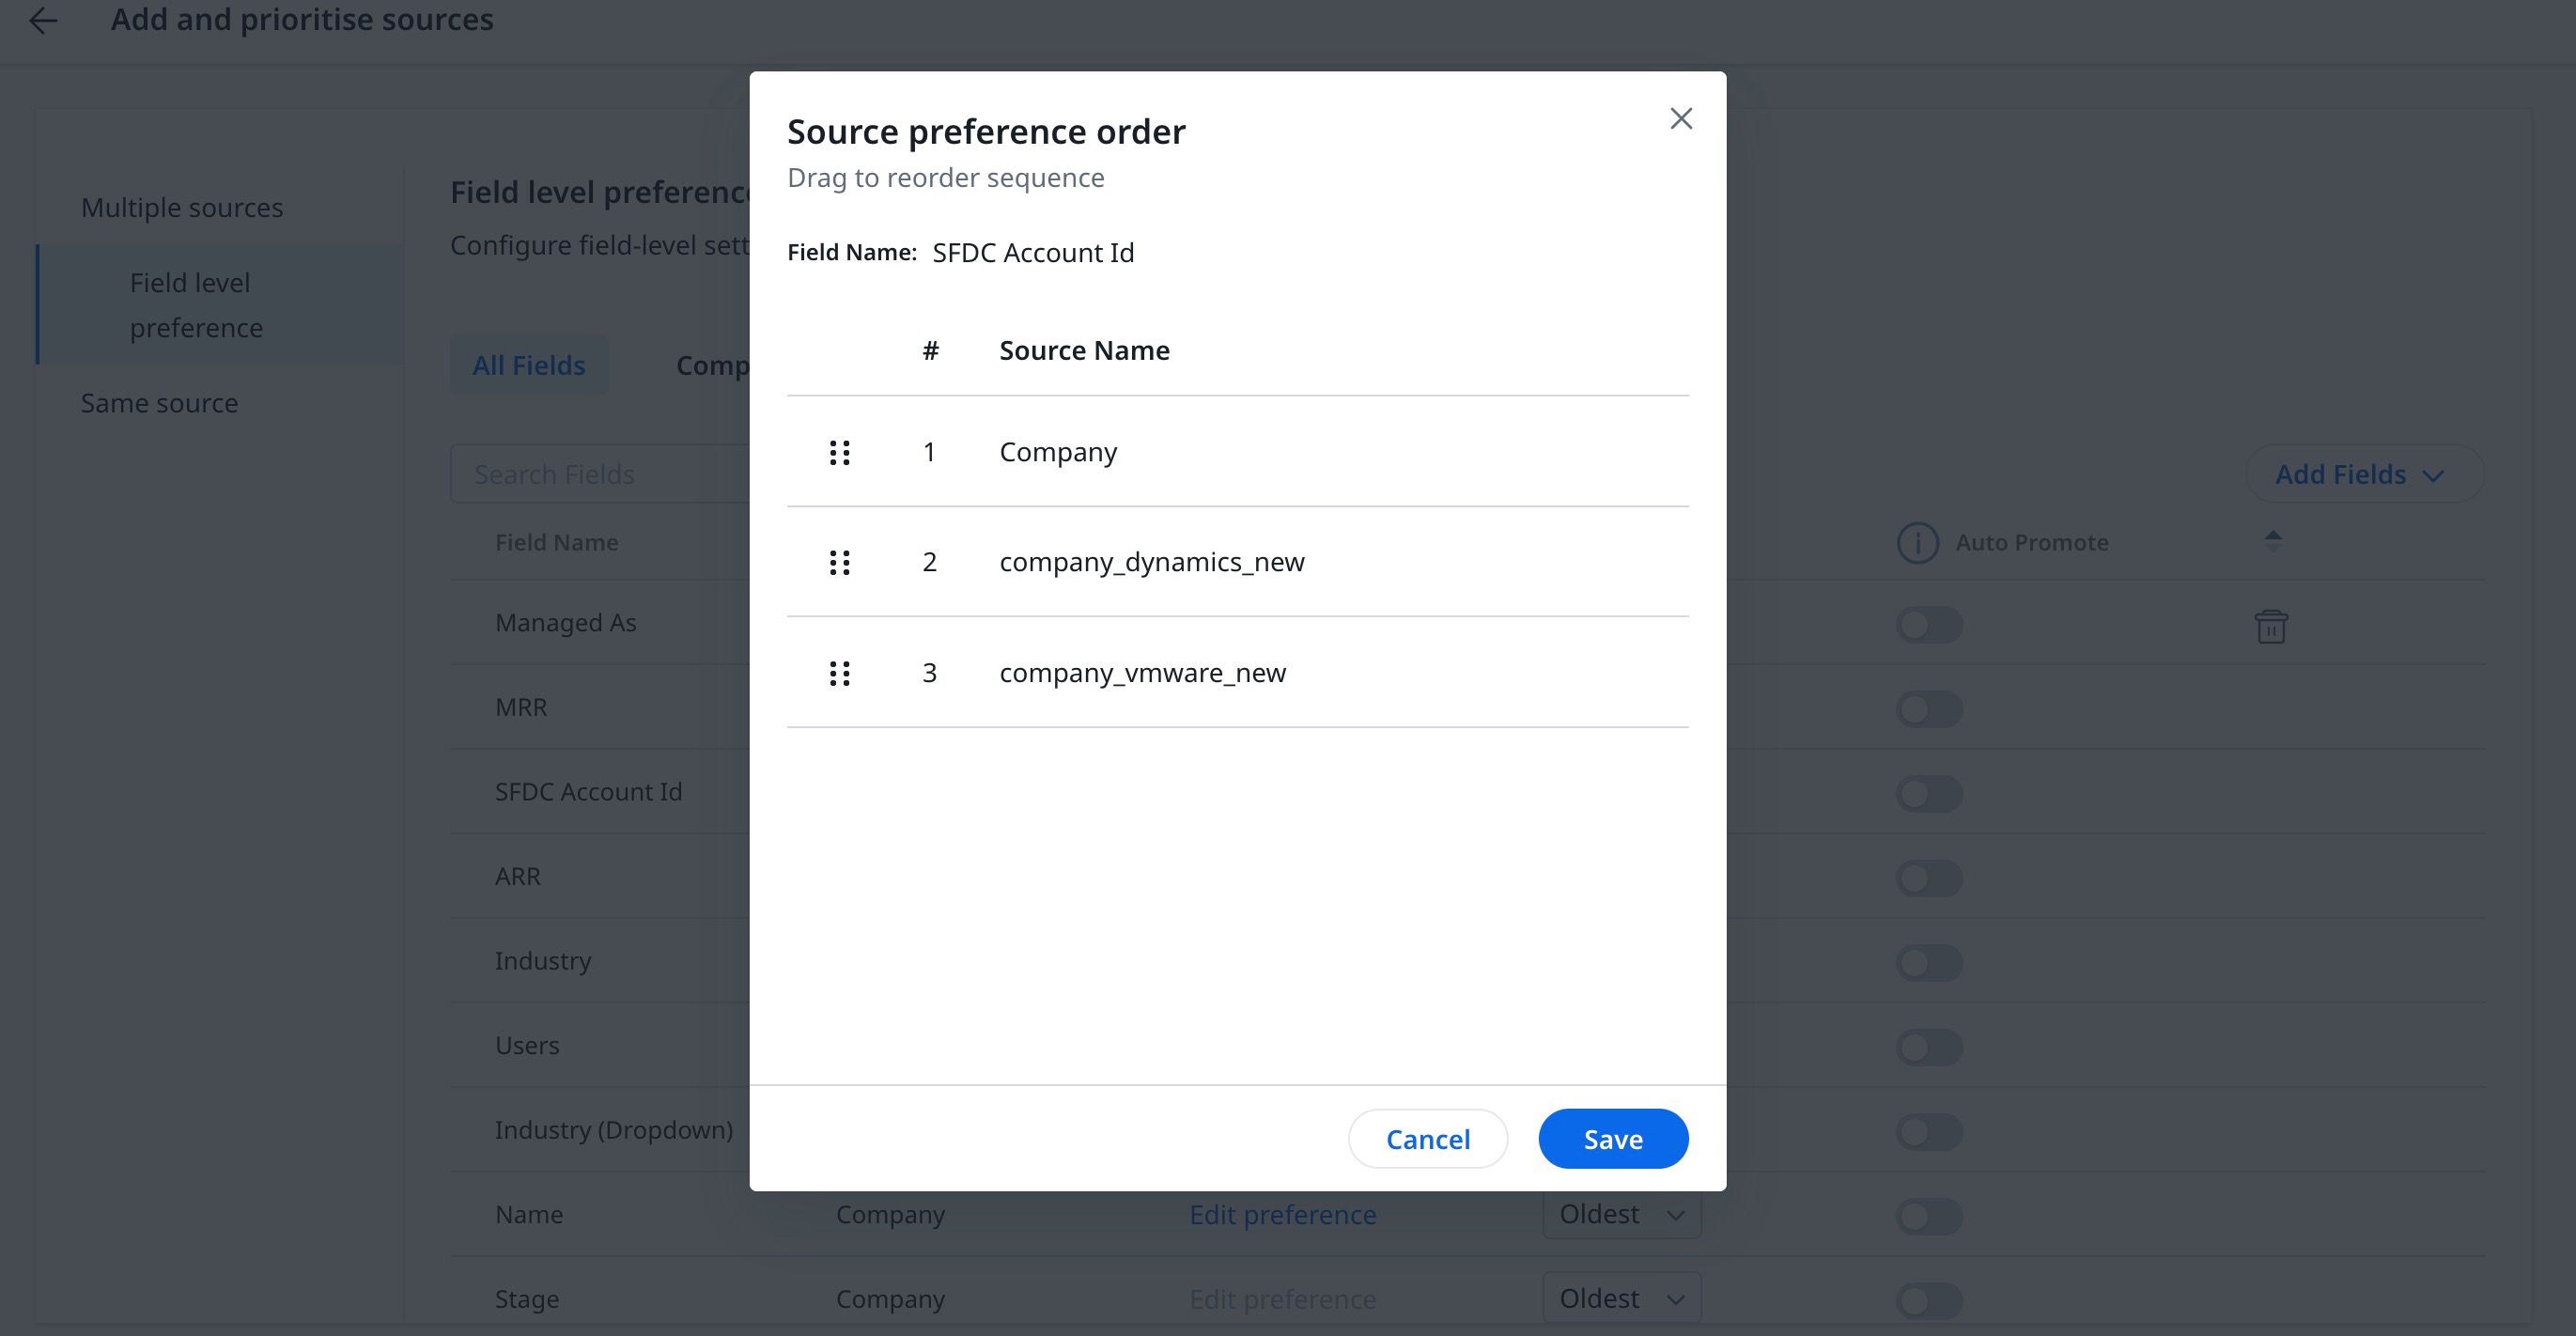
In case duplicate records are found, you can select the following options for the record to be considered as the winning record:
- Oldest
- Most Recent
- Null Value
Note: Toggle the Auto Promote option to automatically update the data when it changes in the preferred source.
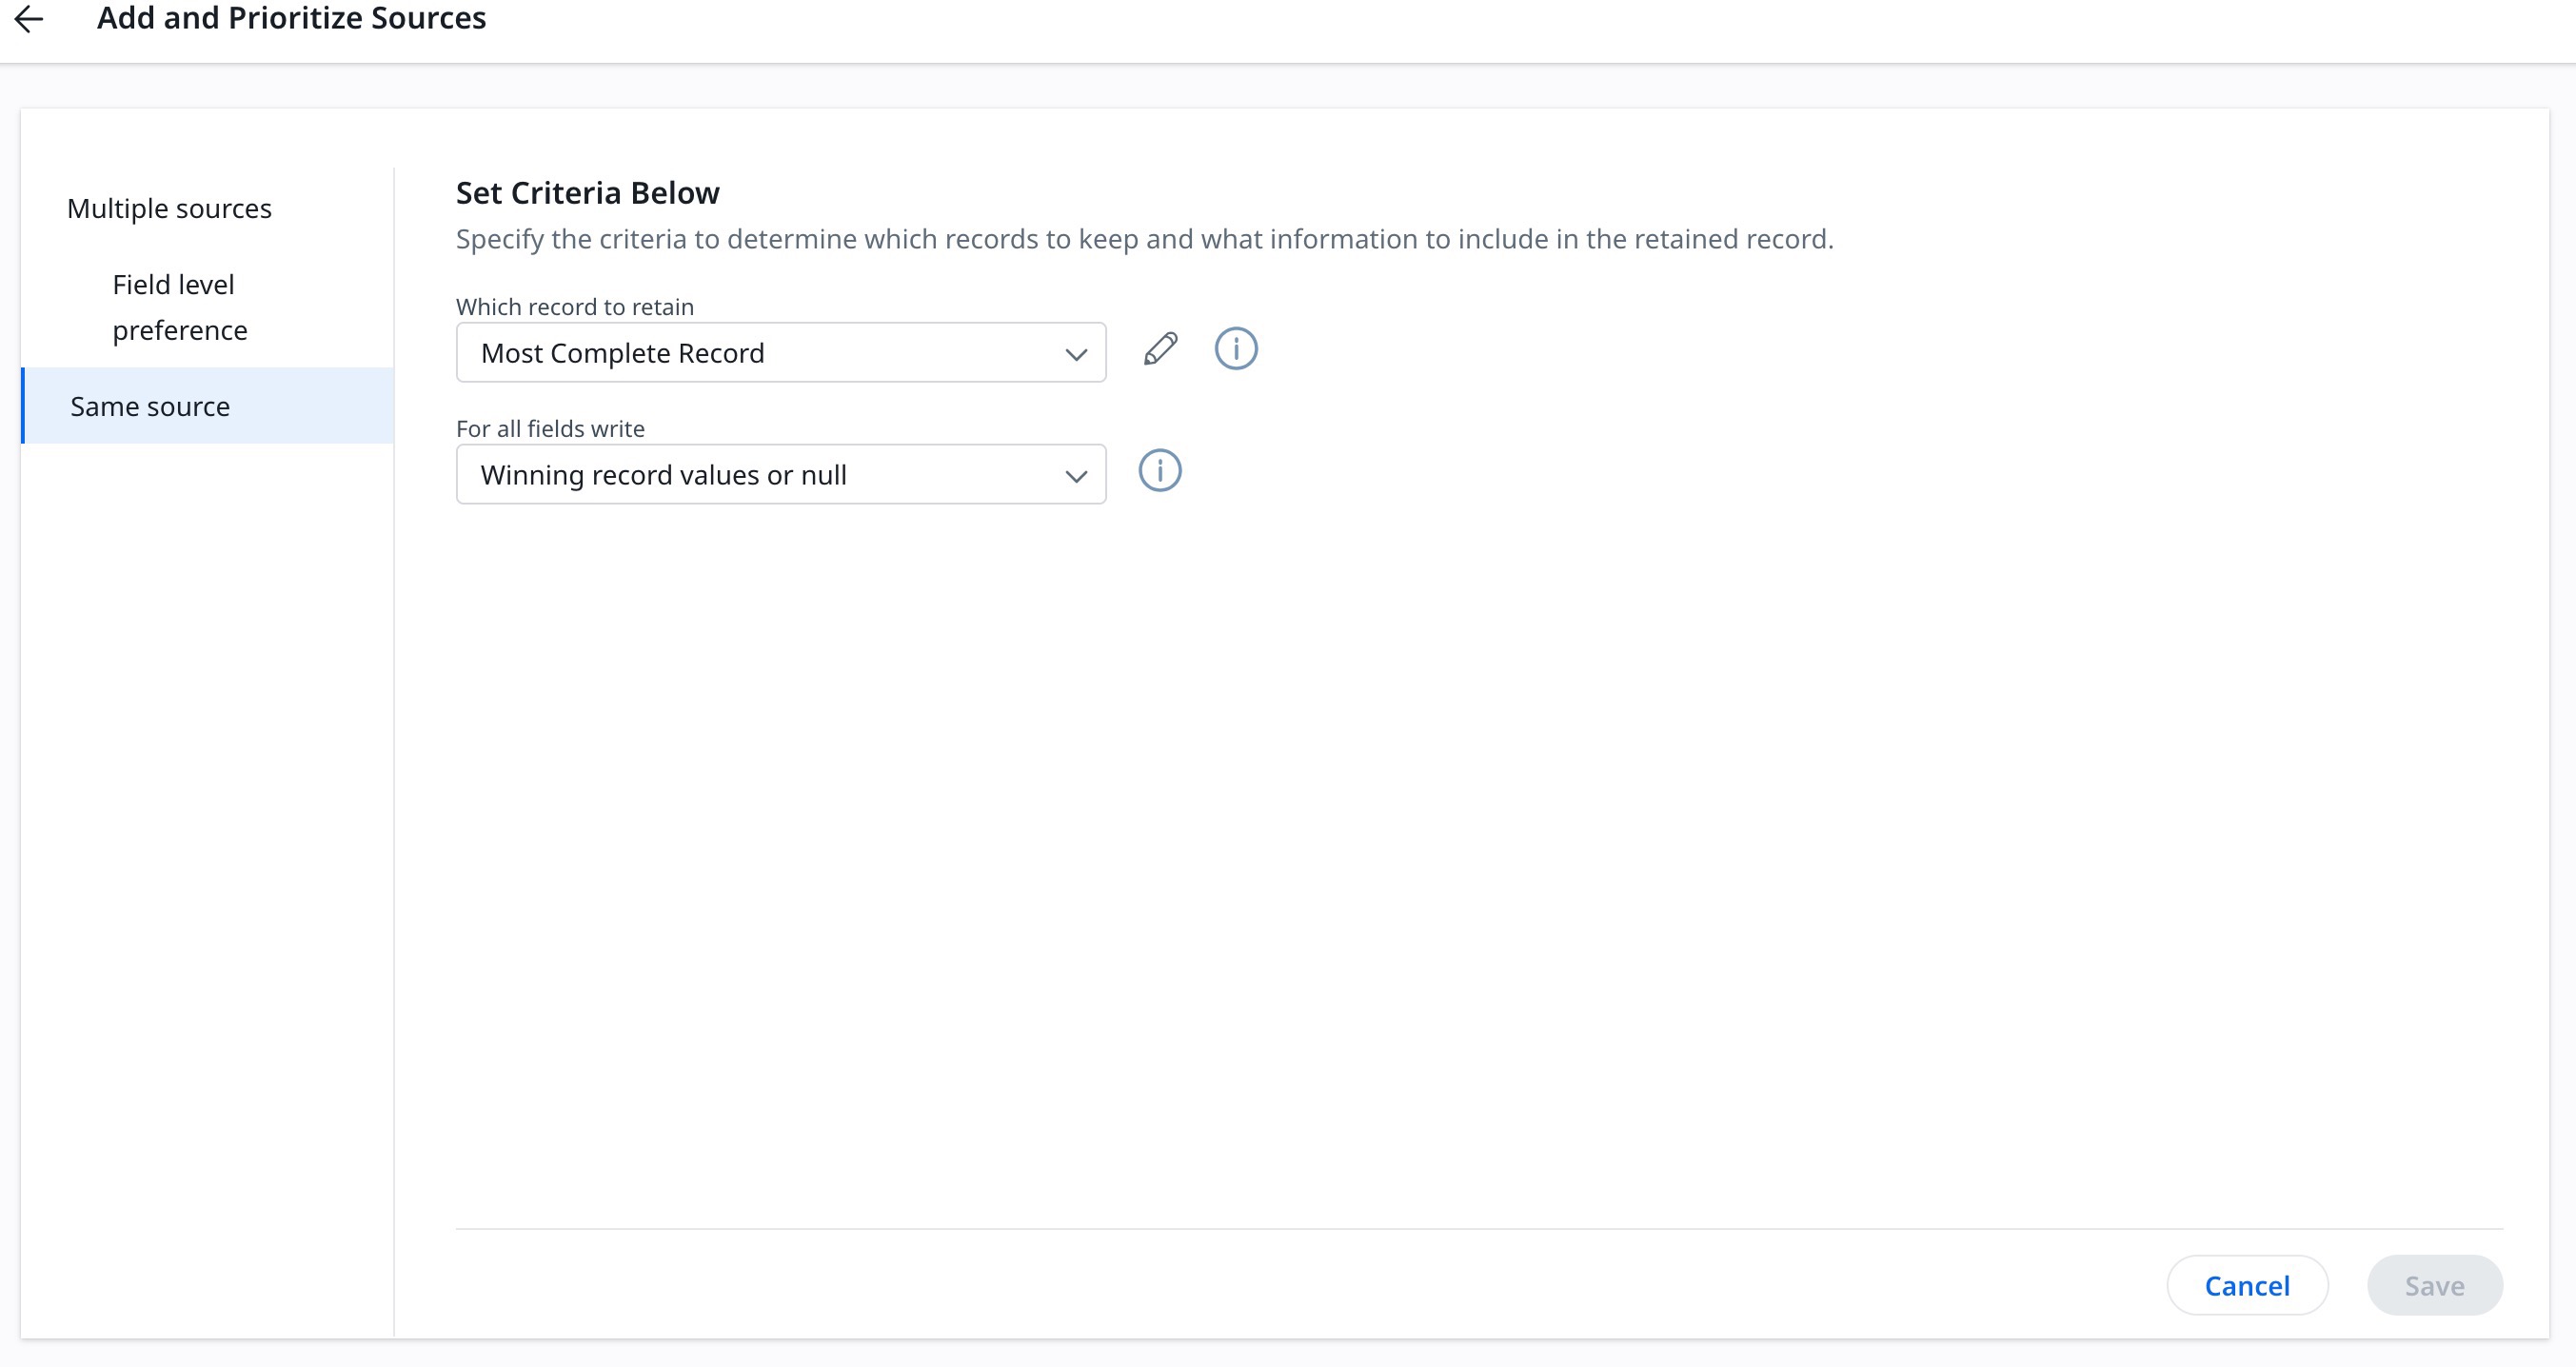
Same Source
When ingesting data from the Same Source, you can set the criteria for maintaining the records.
To set the criteria:
- From the Which record to retain dropdown, select either of these options:
- Oldest
- Most Recent
- Most Complete Record
- From the From all fields write dropdown, select either of these options:
- Winning records values or best match
- Winning record values or null
- Click Save.
Person Data Source
Unification allows you to select data sources from where the data needs to be ingested.
Note: Person object is added by default to the project and the mapping of attributes of the company object is also created by default.
To add a new data source:
- In the Preference Order for Data Source, click Person. The Add and Prioritize Sources page appears.
- Select one of the following options to load the data.
- Multiple sources: To add different sources and arrange their preference order.
- Field Level Preference: To add fields from the selected sources and arrange their preference order.
- Same source: To select which records to retain if the data ingested is from the same source.
- Multiple sources: To add different sources and arrange their preference order.
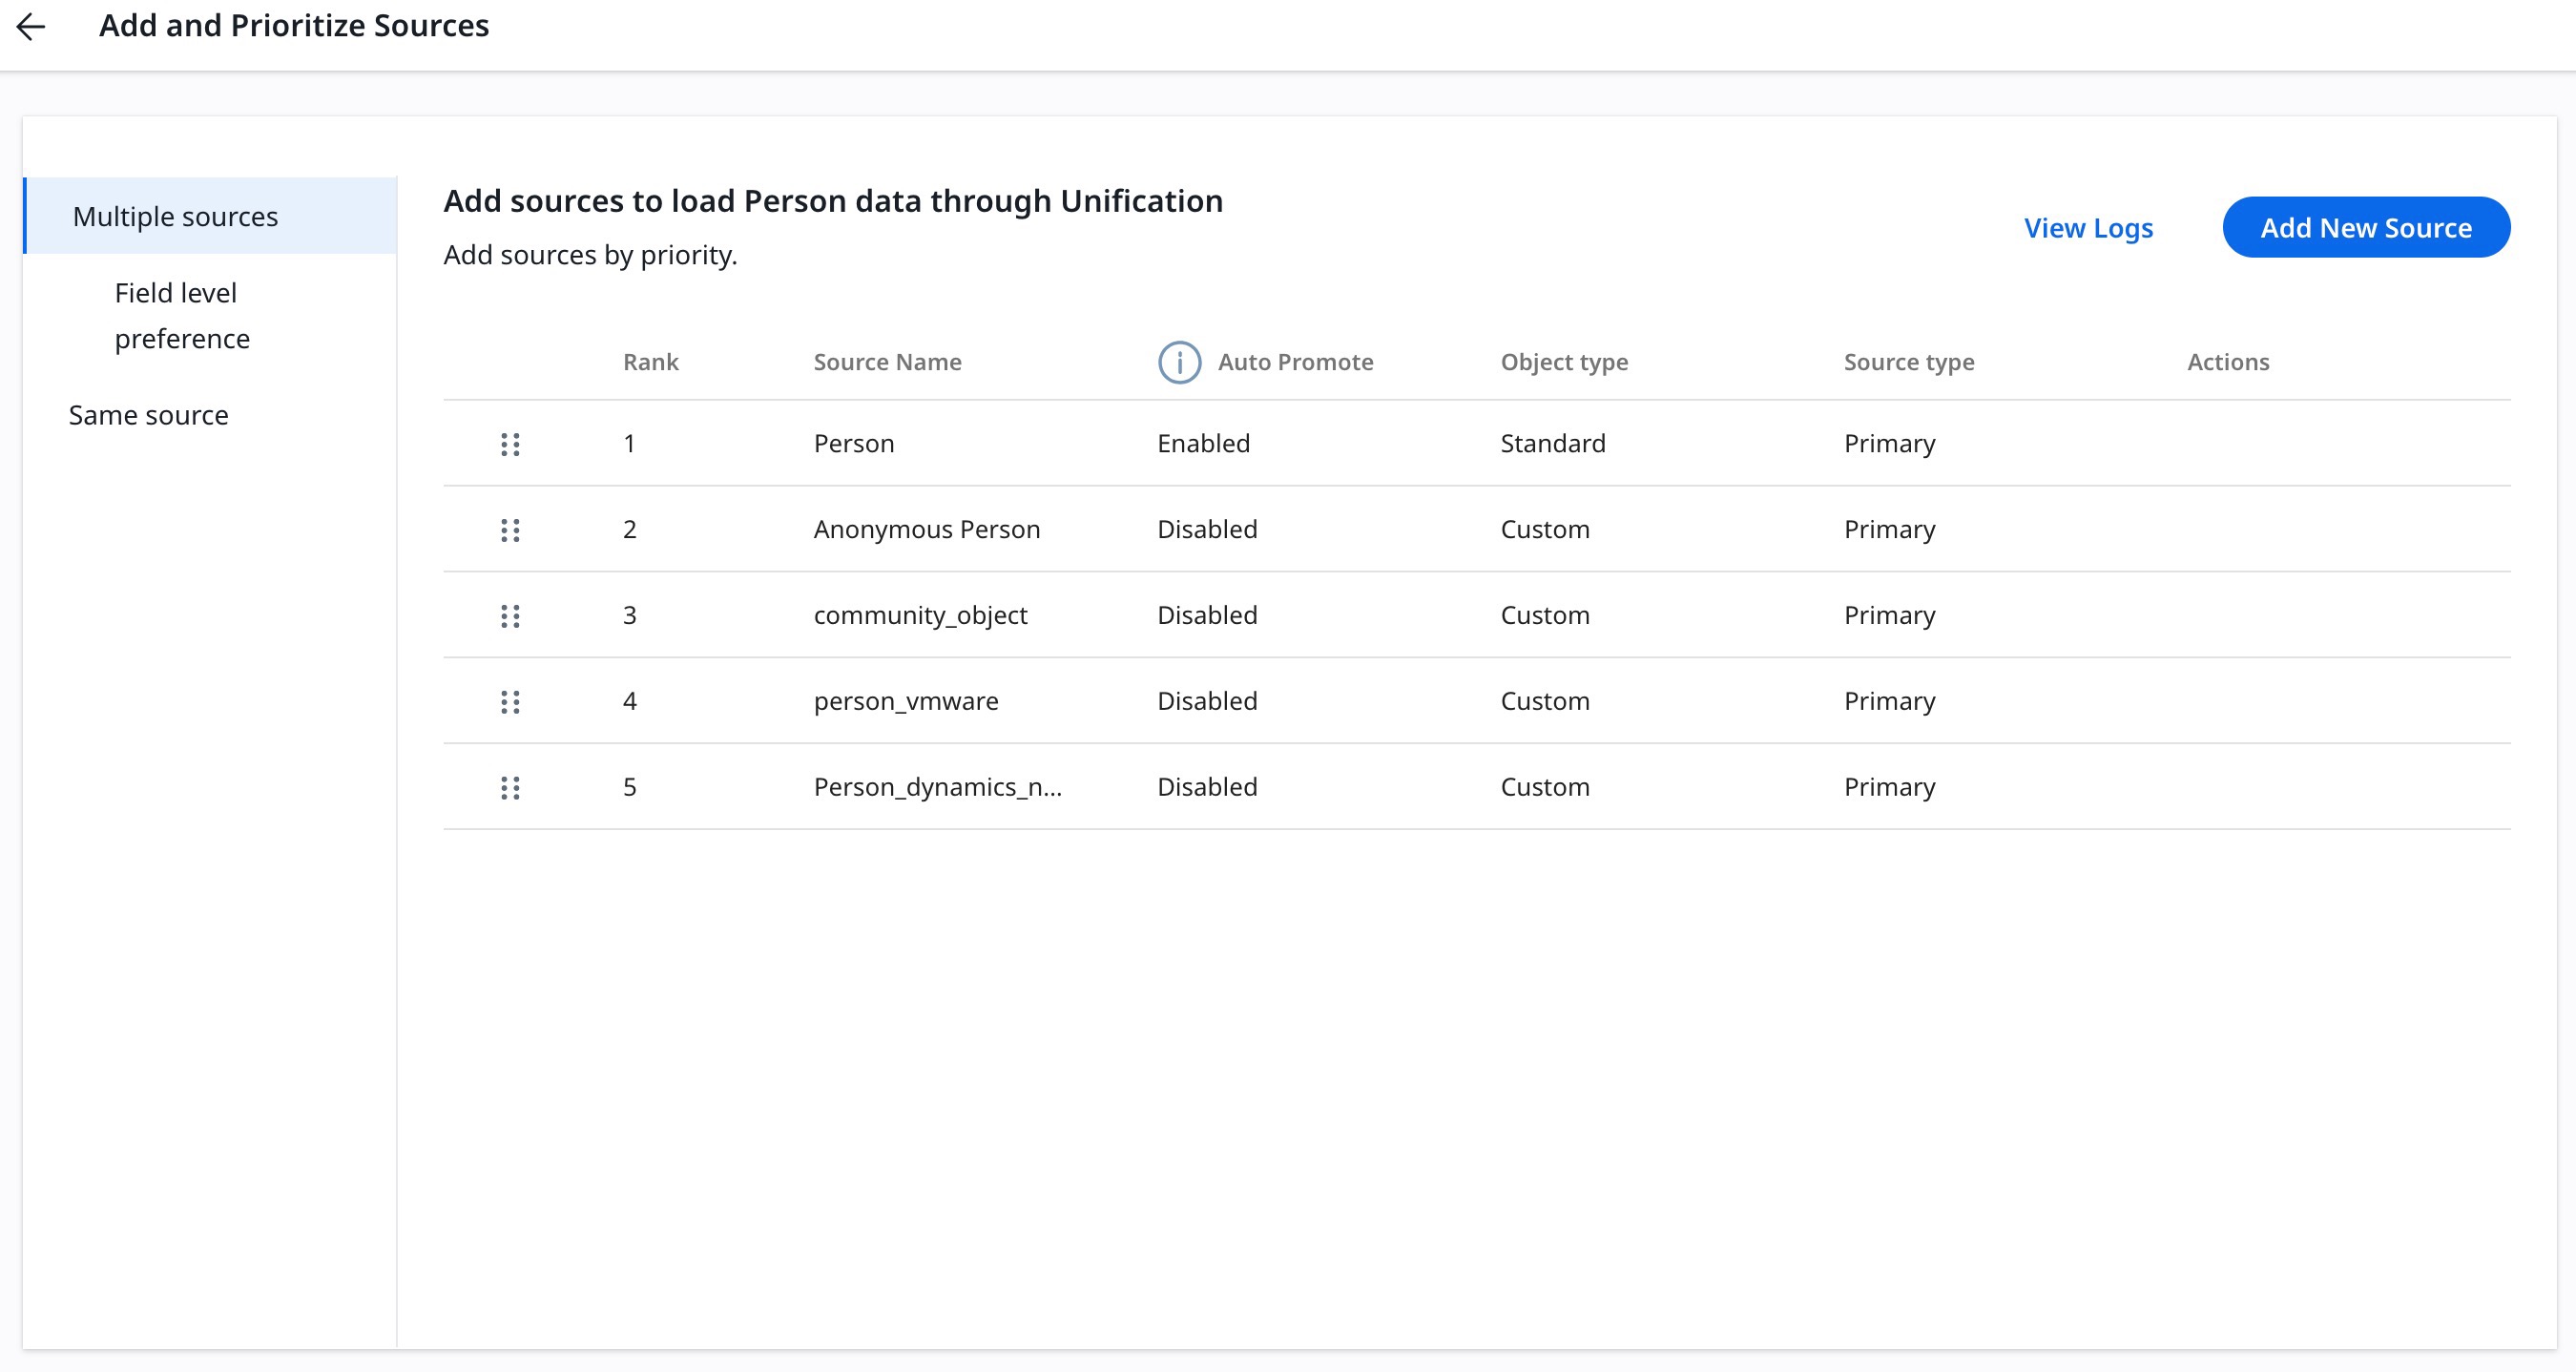
Multiple Sources
The Multiple Sources option allows you to add various sources to load data into the Person using Unification.
To add data sources:
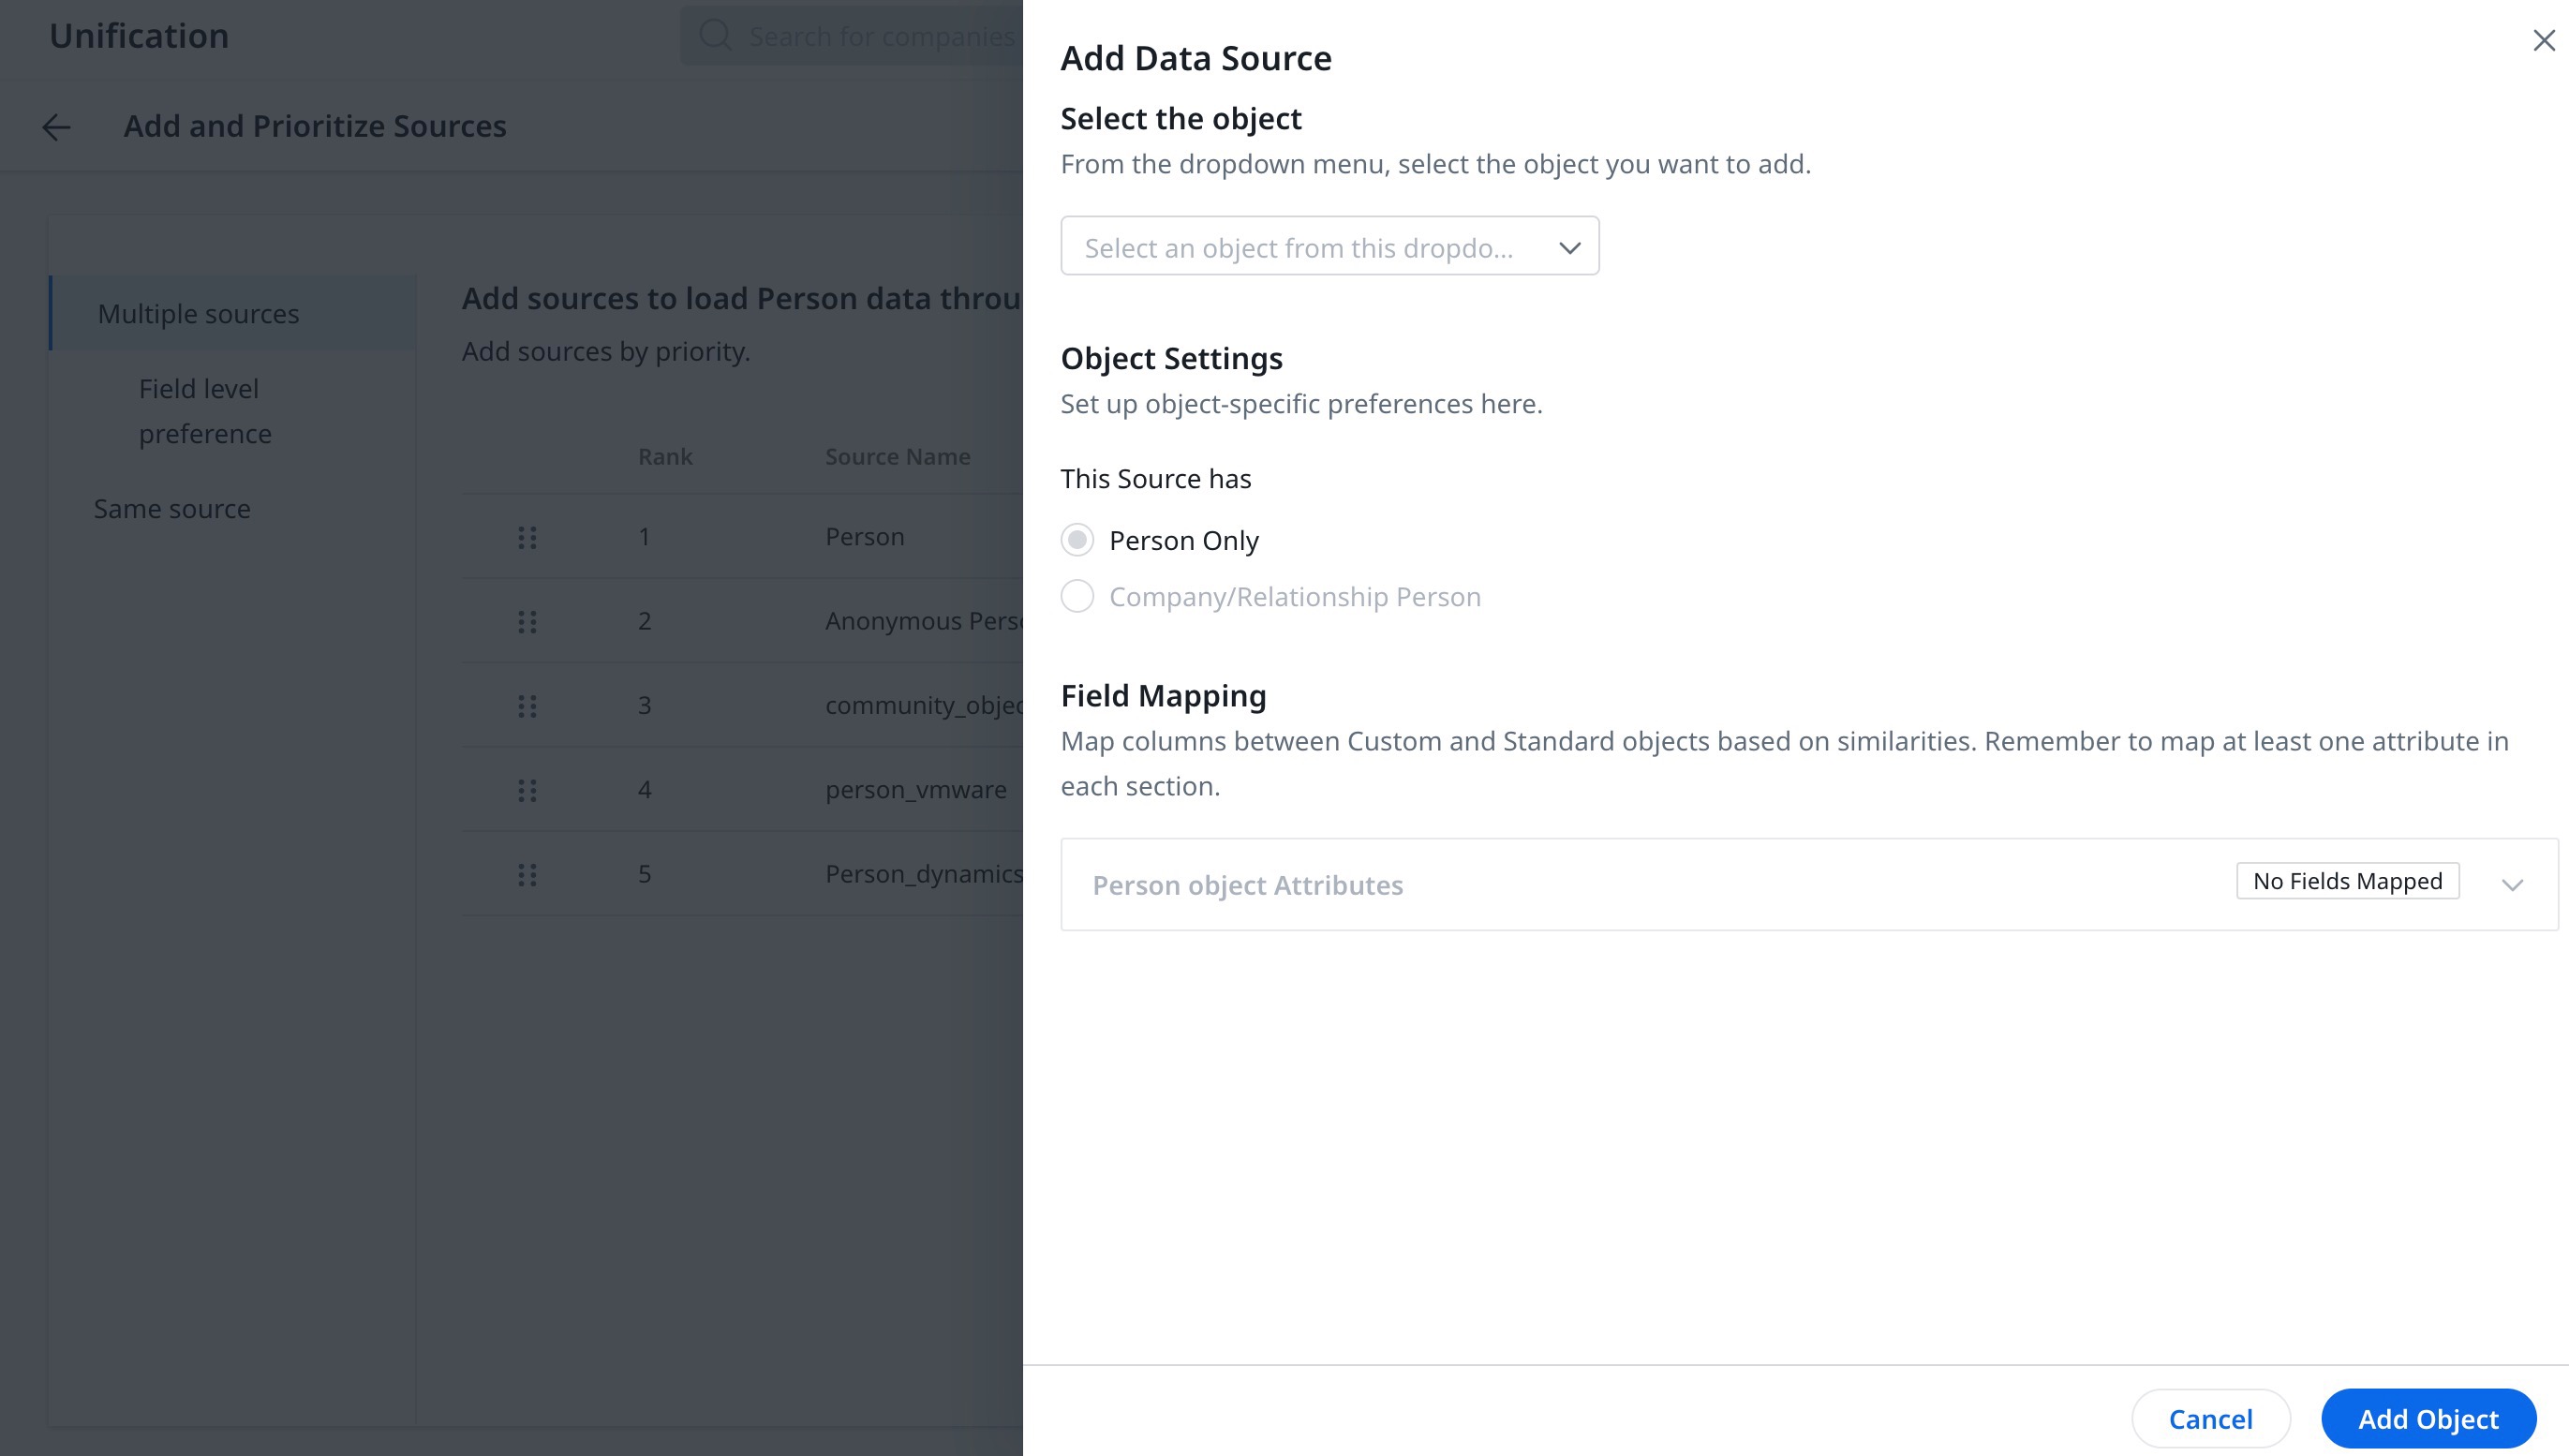
- Click Add New Source. The Add Data Source slide-out panel appears.
- From the Select the object dropdown, select the source to add.
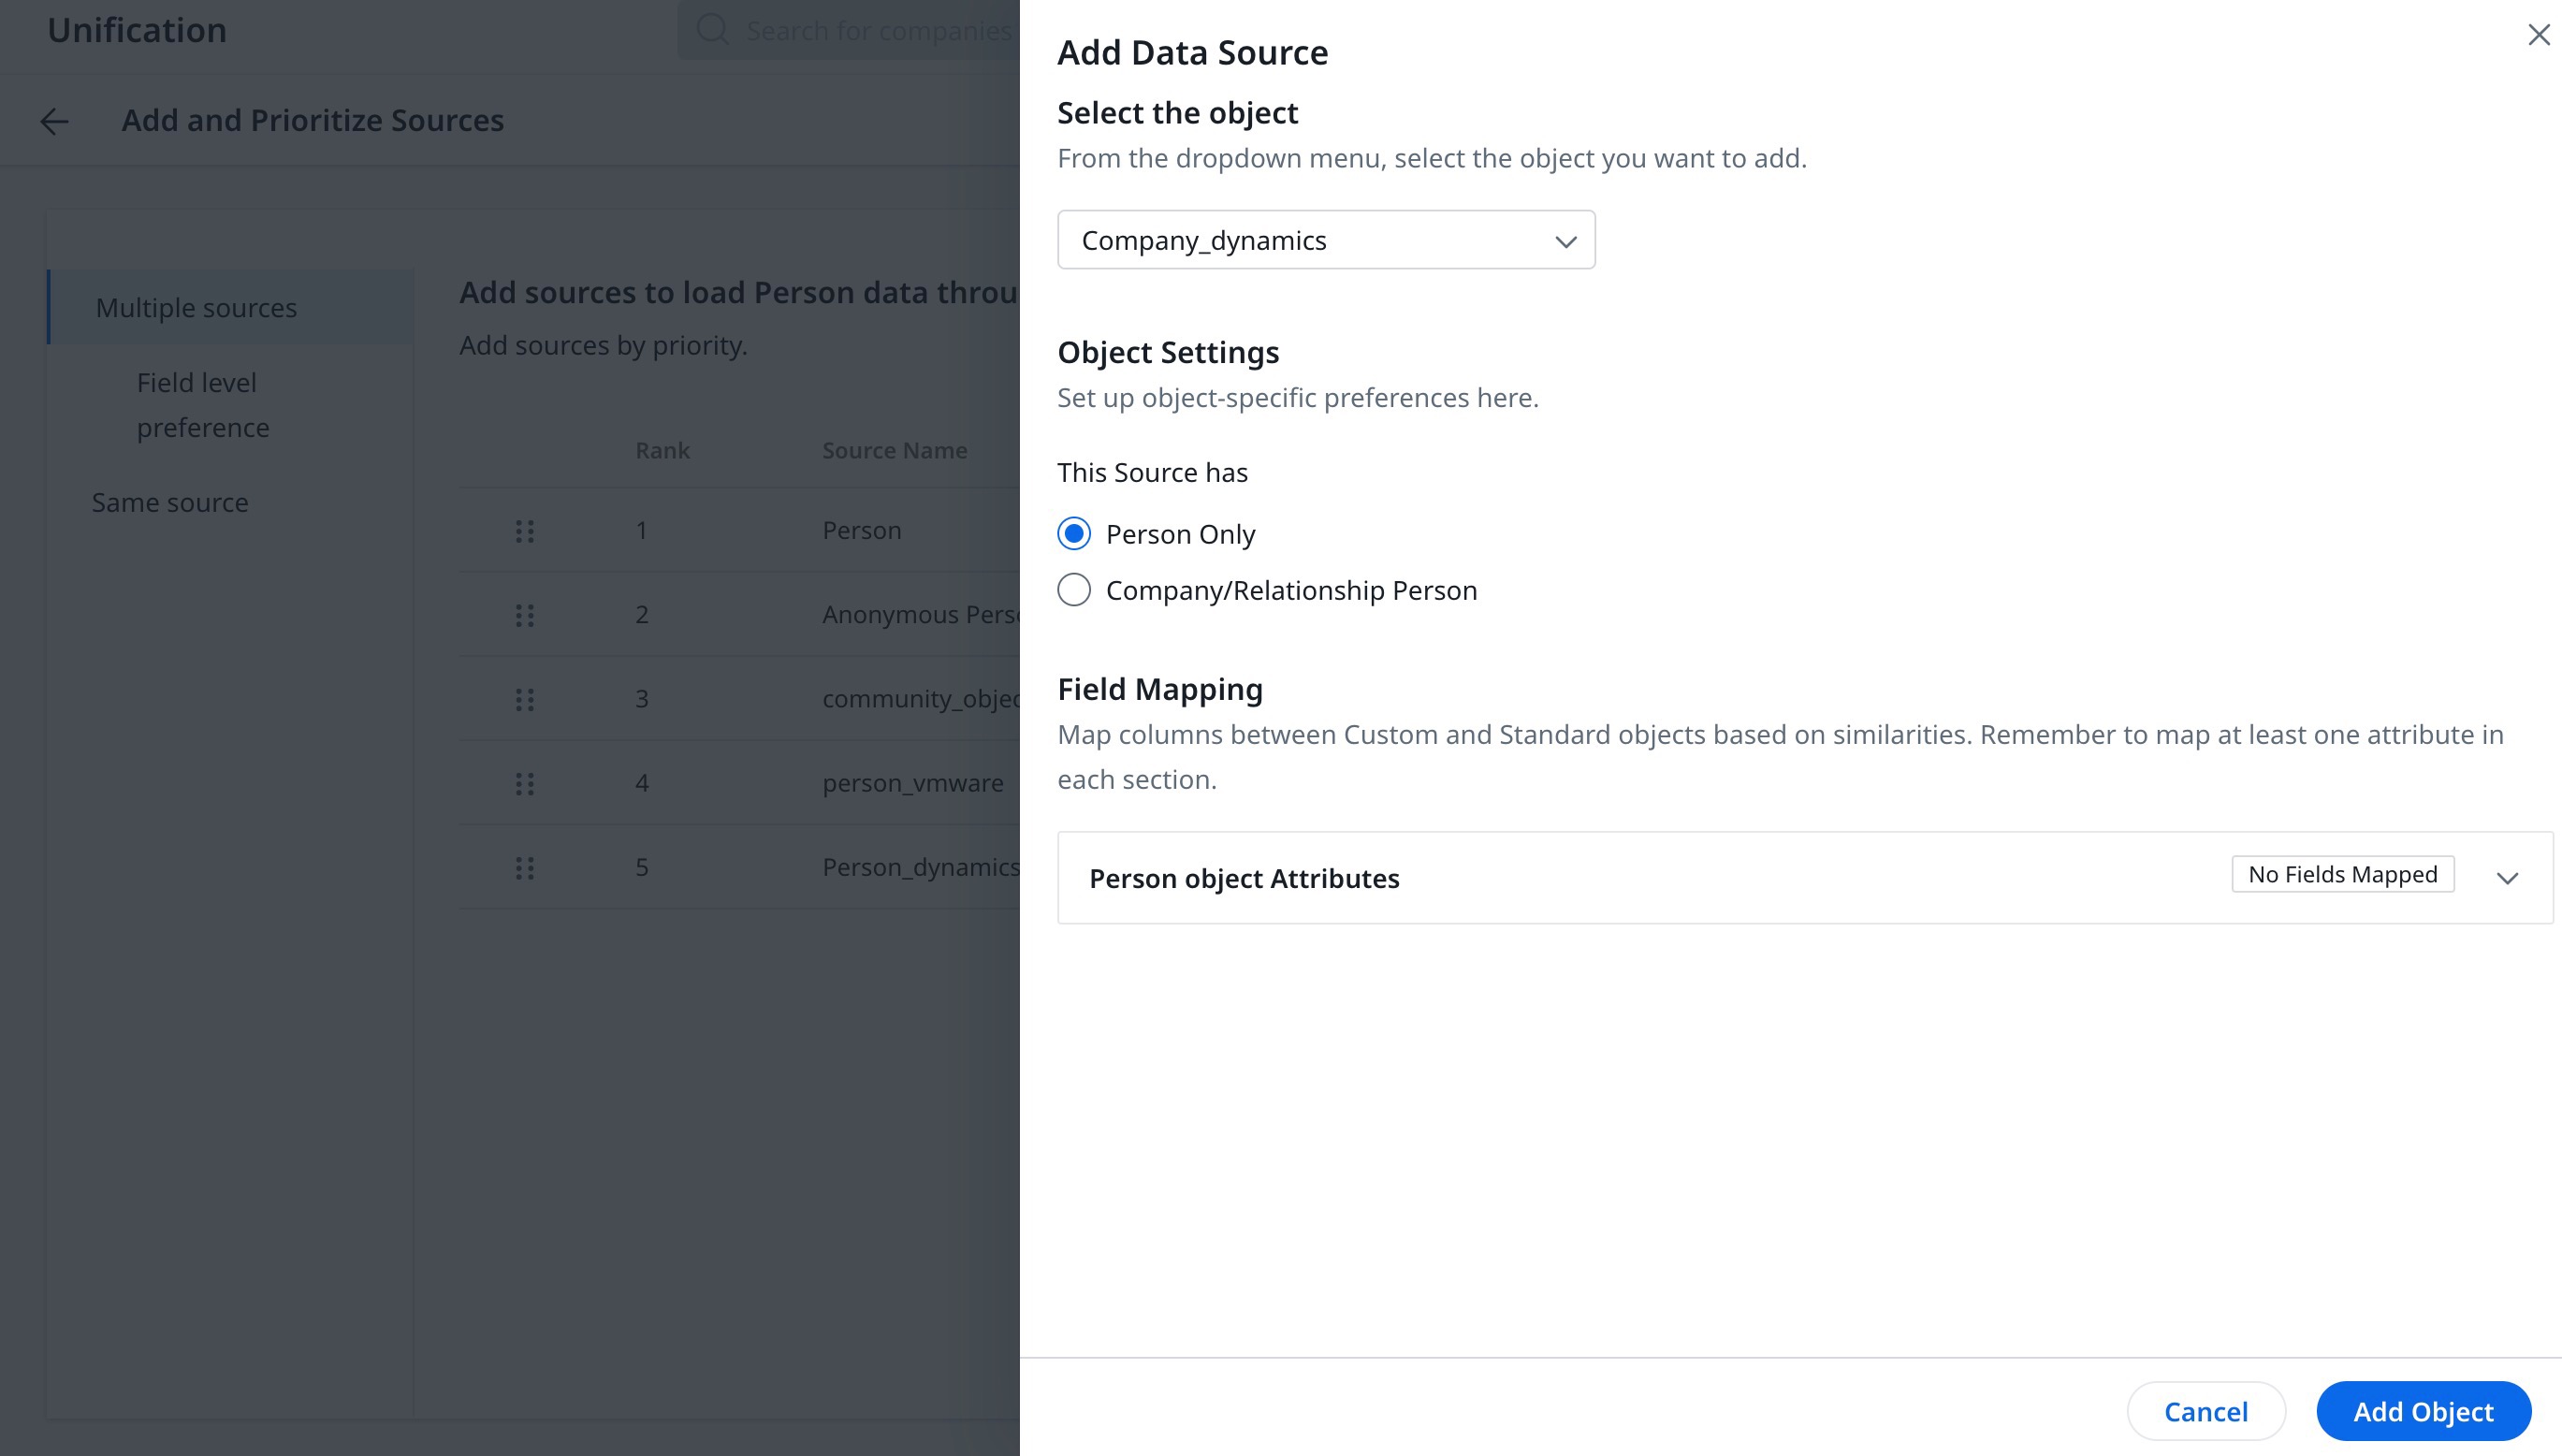
- In the Object Settings section, select either of the following options:
- Person Only: If the data being ingested contains only Person data.
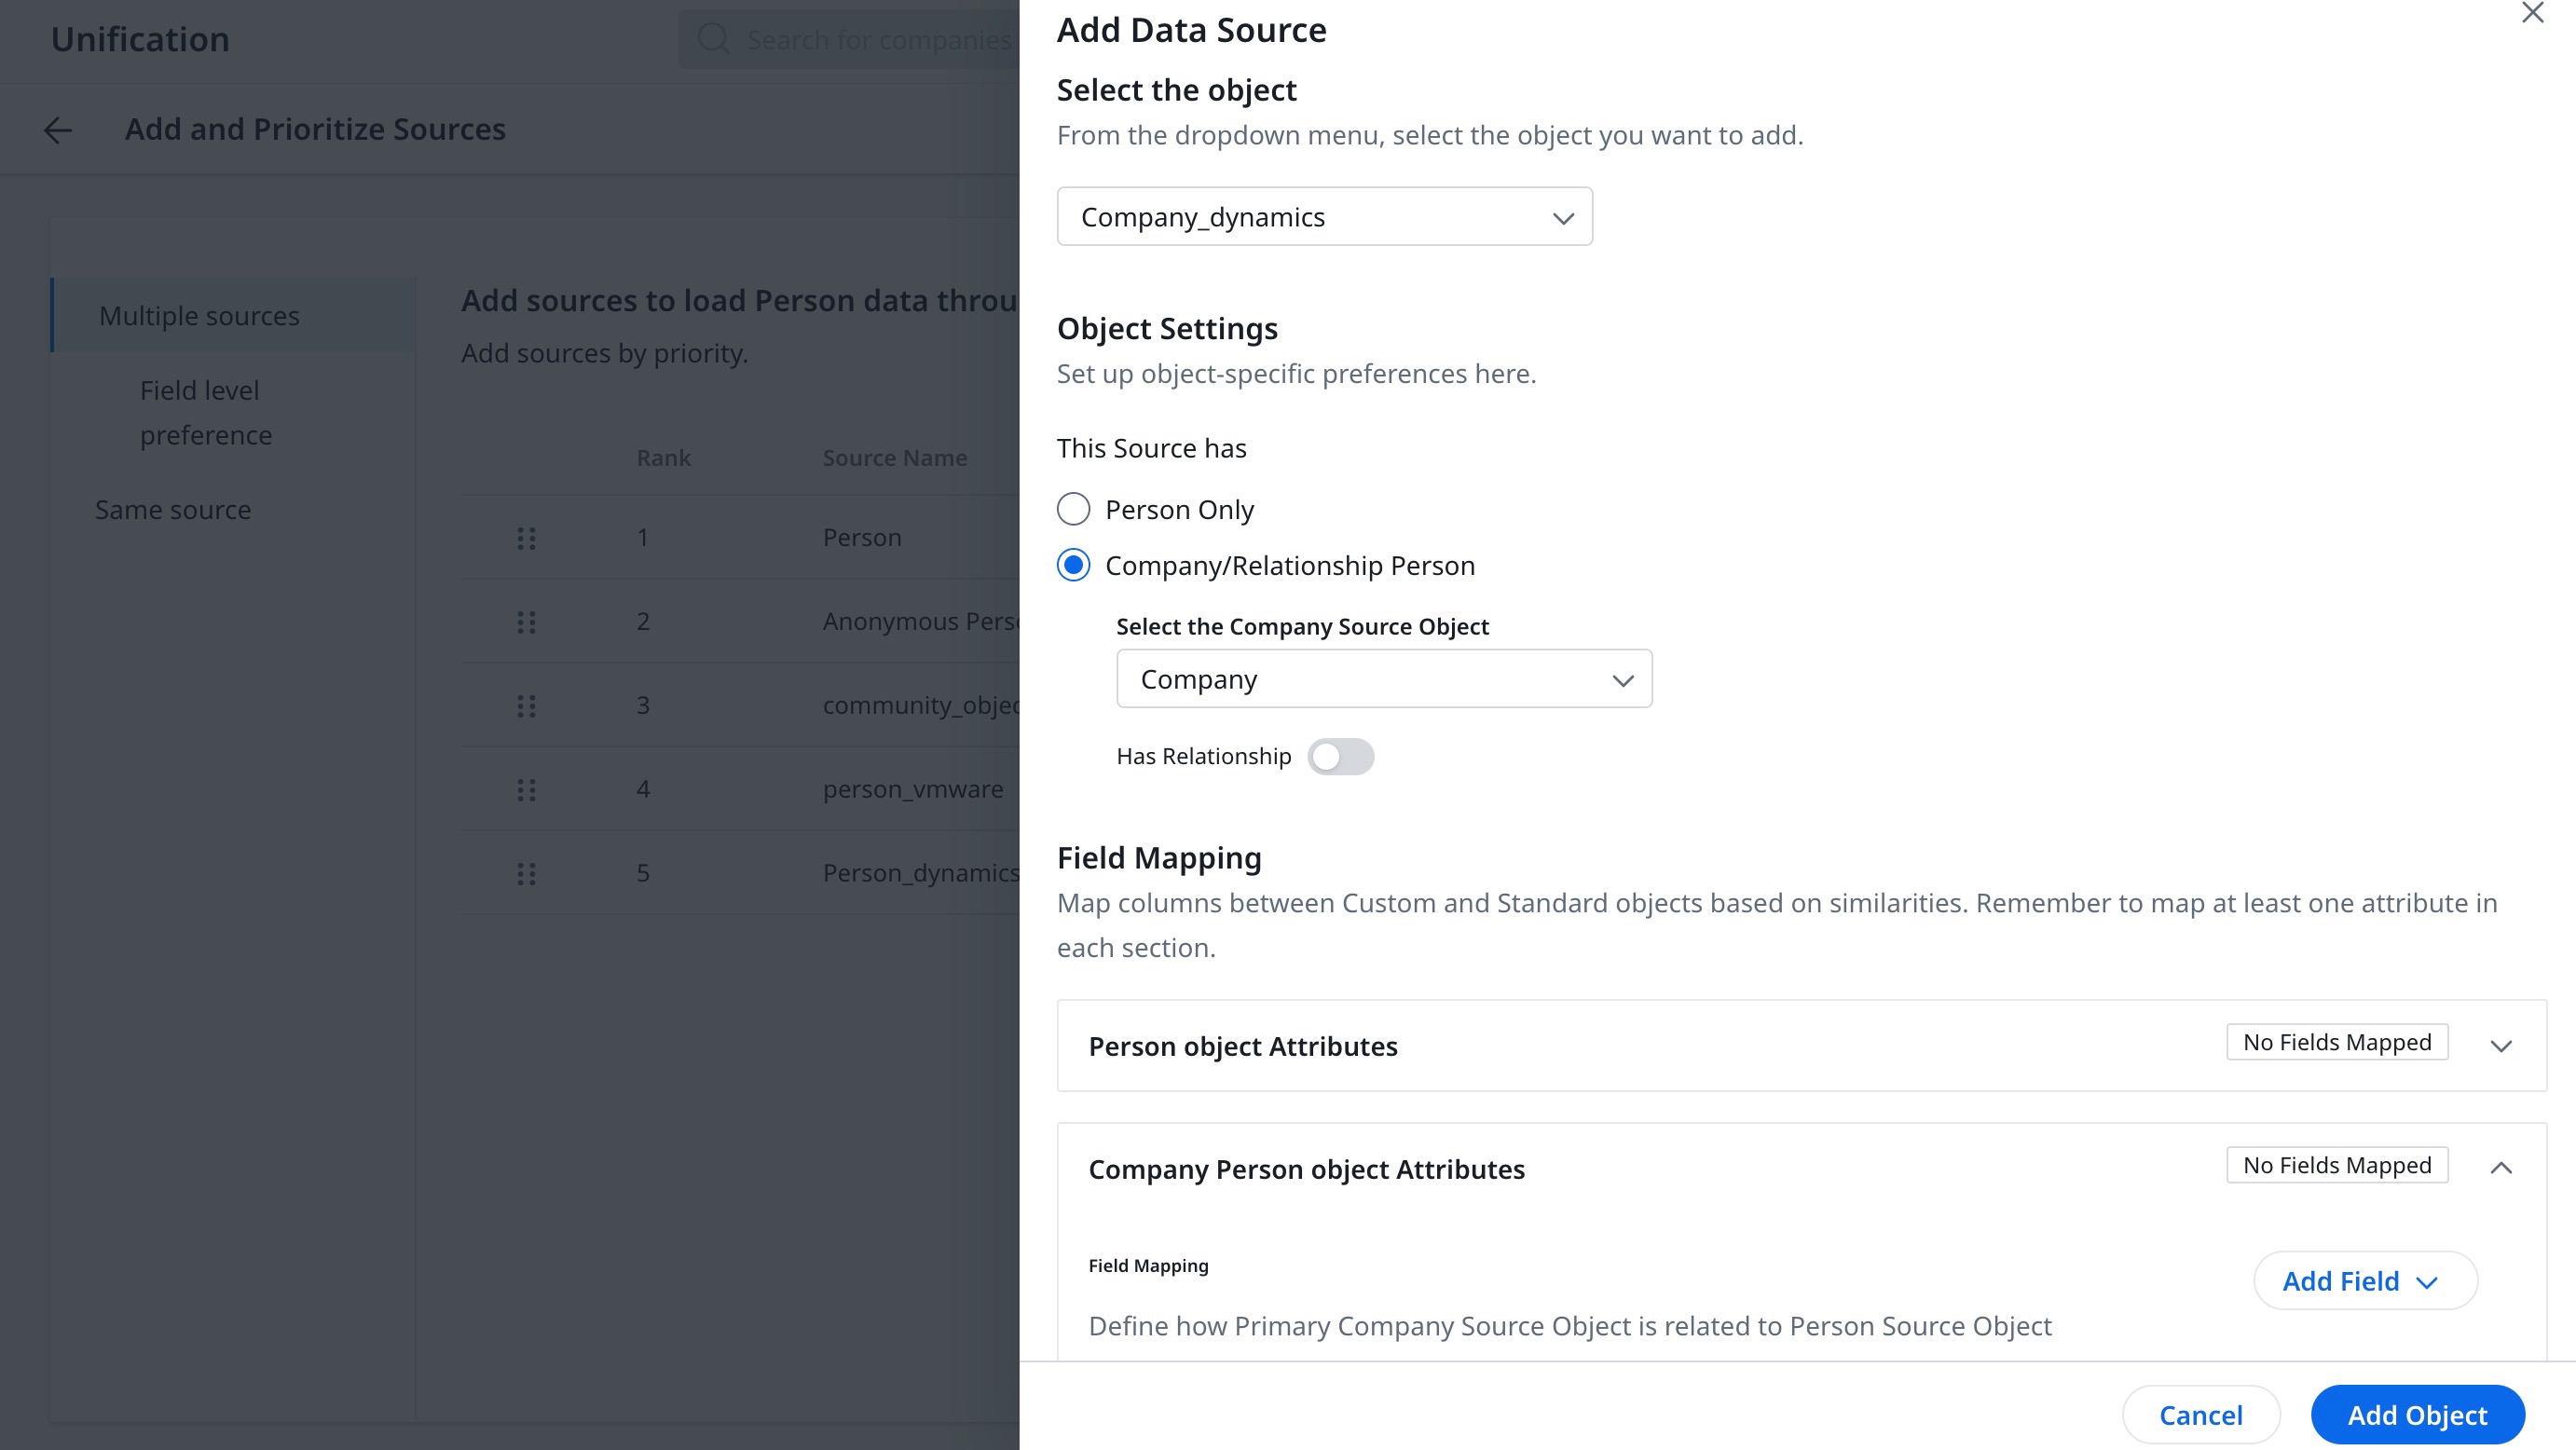
- Company / Relationship Person: If the source contains Company or Relationship data.
- From the Select the Company Source Object, select the company source.
- (Optional) Turn ON the Has Relationship toggle if the data has Relationship information.
IMPORTANT:- For ingestion and creation of Person records from Customer Communities (CC) and Customer Education (CE), turn on the toggle Create new Person records from this source automatically.
- This configuration is default set with the toggle off for Customer Communities (CC) / Customer Education (CE) integration as soon as one-click integration is done.

- Field Mappings: Map attributes based on Person, Company, and Relationship Object.
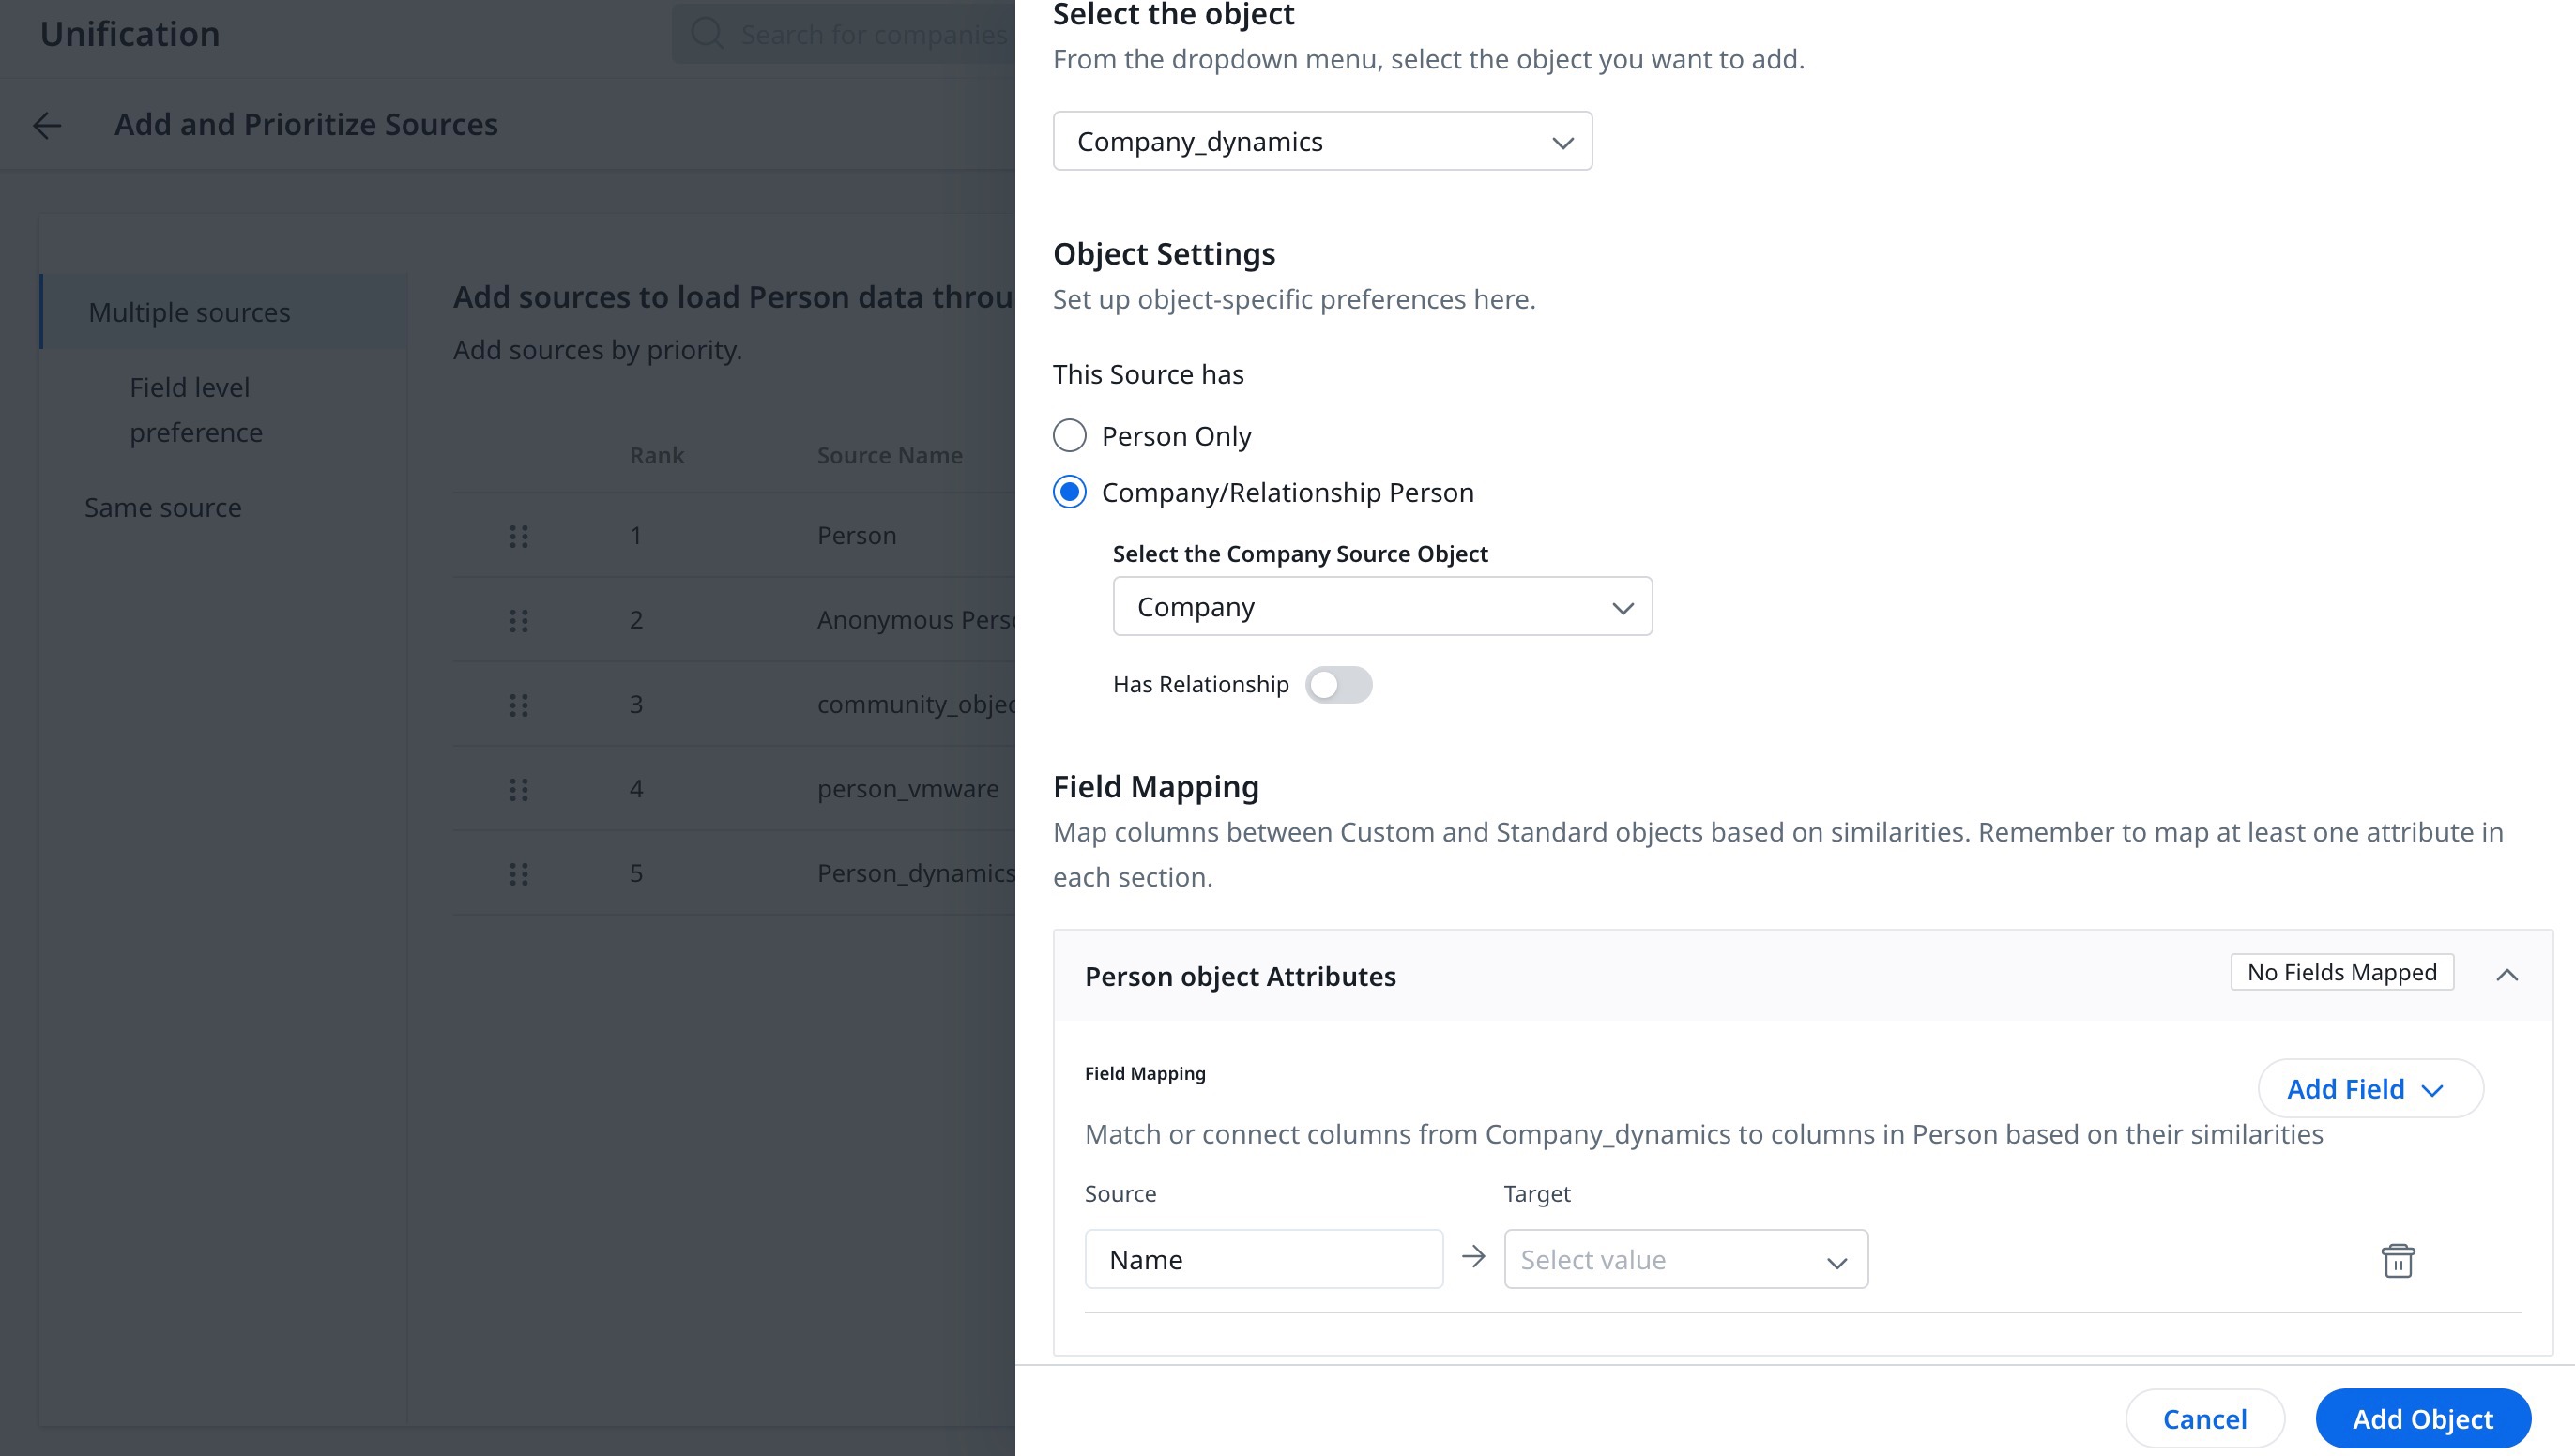
- Person Object Attribute:
- Hover over Add Field and select Add select new fields. The Select Fields slide-out panel appears.
- Select the Source fields to be added.
- Click Select.
- From the Target dropdown, select the target field to be mapped.
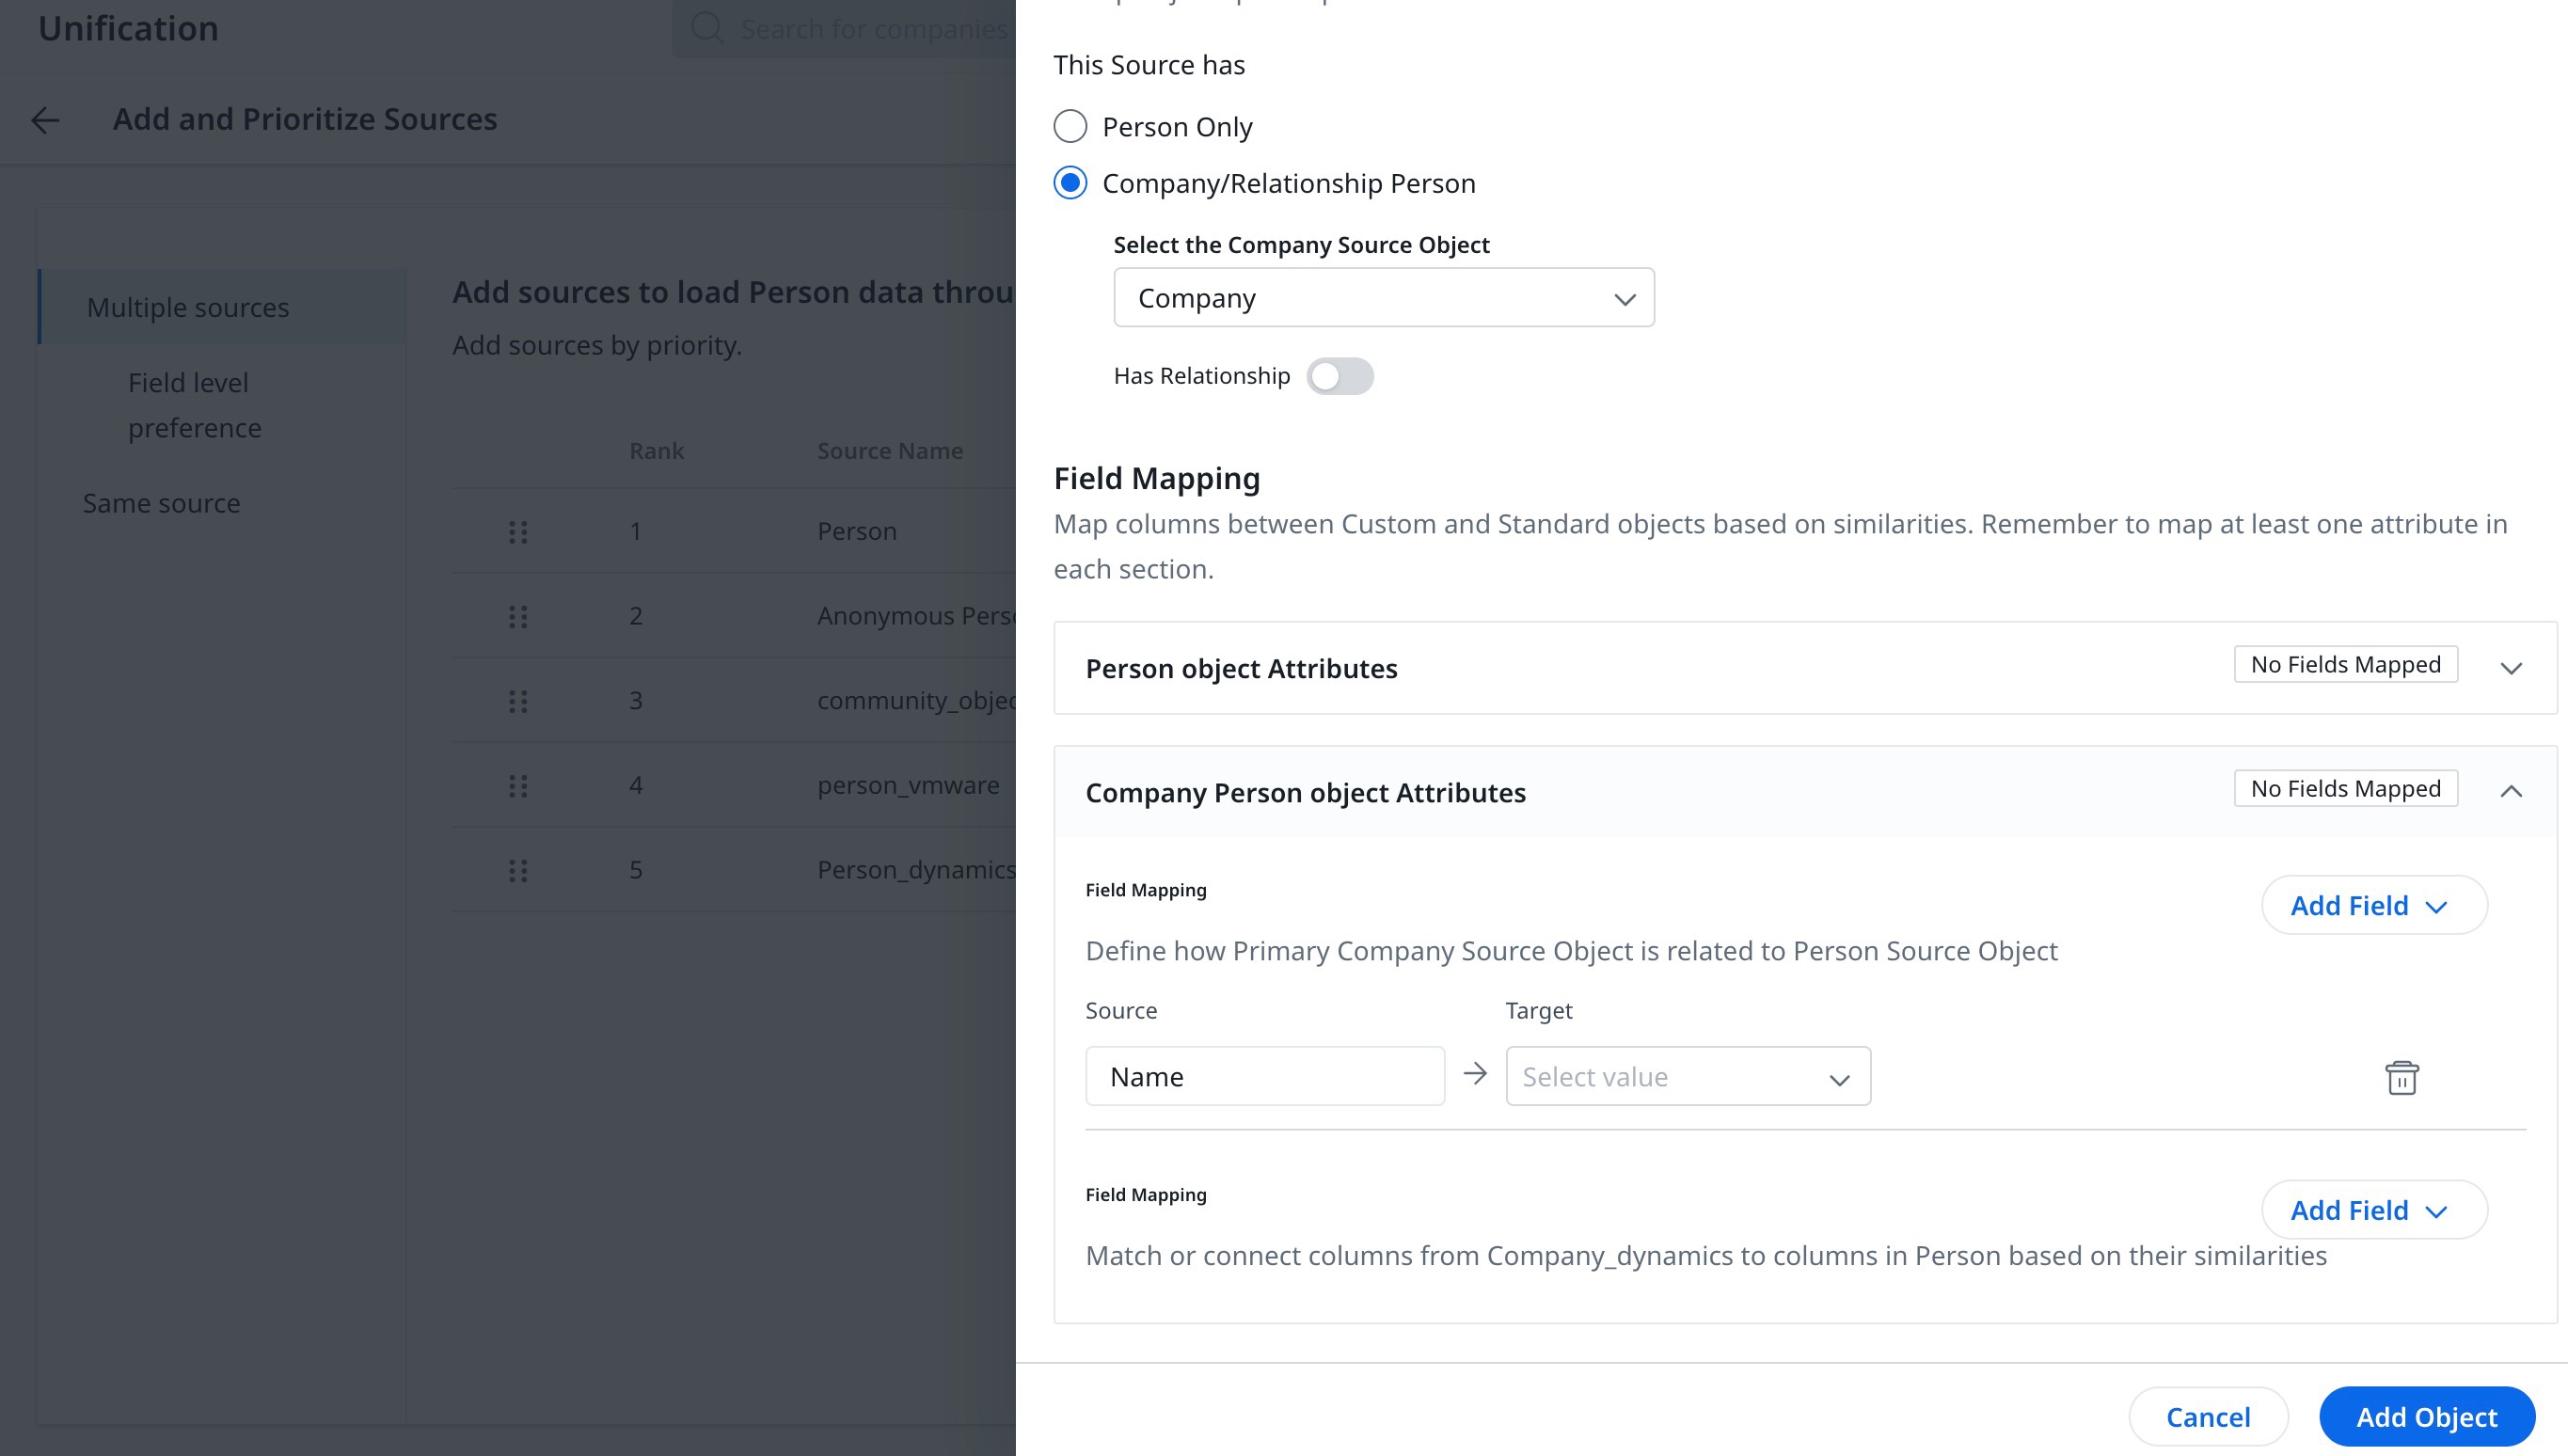
- Company Person Object Attribute:
- Hover over Add Field and select Add select new fields. The Select Fields slide-out panel appears.
- Select the Source fields to be added.
- Click Select.
- From the Target dropdown, select the field to be mapped to.
- Relationship Object Attribute: Repeat the steps above to map fields in the Relationship object attribute.
Note: Relationship Object attribute is available only when the Has Relationship toggle is turned on.
- Person Object Attribute:
- Click Add Object to add this source.
Repeat the above steps to add various sources to load data from and into the Person records. The Multiple Source tab now lists all the sources added, ready to be ranked by preference.
To rank the sources, hover over the three-vertical-dots menu next to each source and drag them to re-order as per the ranking.
Sync Sources
After the person project setup is complete, use the Sync Source option to retrieve the latest data from staging objects to Record Groups in Gainsight, initiating the unification process for that source.
To sync the sources:
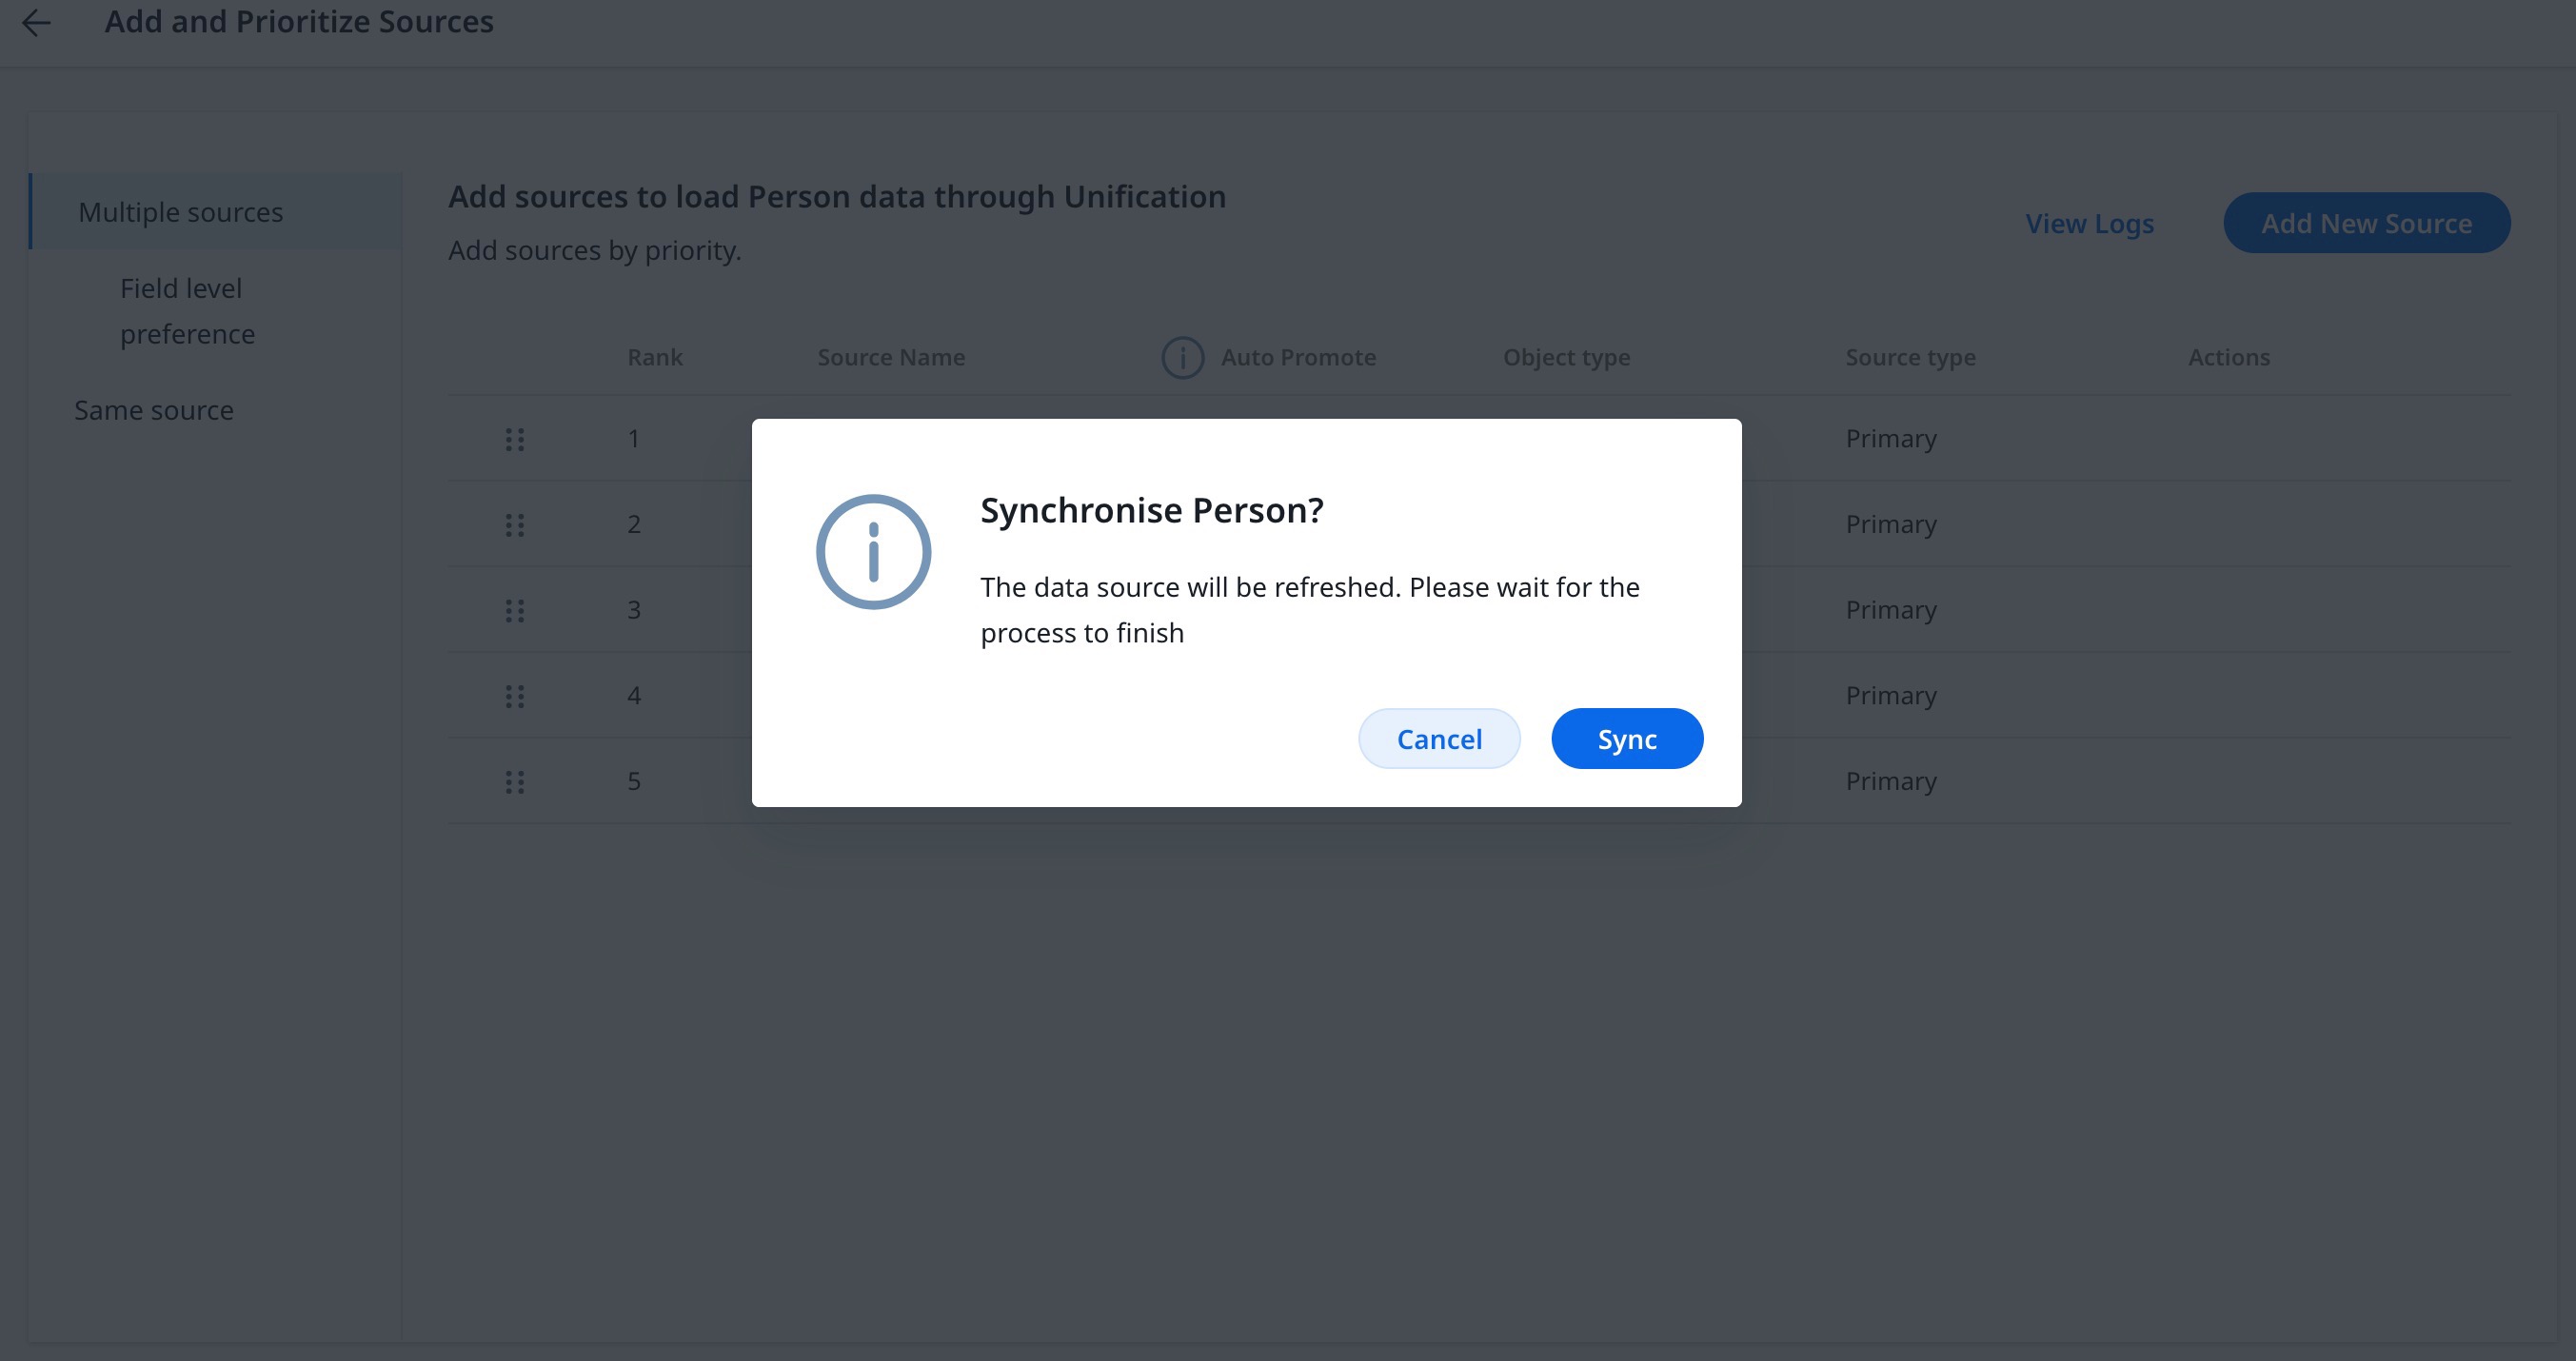
- Under the Action column, click Sync. The Synchronize Person confirmation window appears.
- To complete the process, click Sync.
Field Level Preference
After adding the sources to load data, you must configure field-level settings for each source from Field Level Preference.
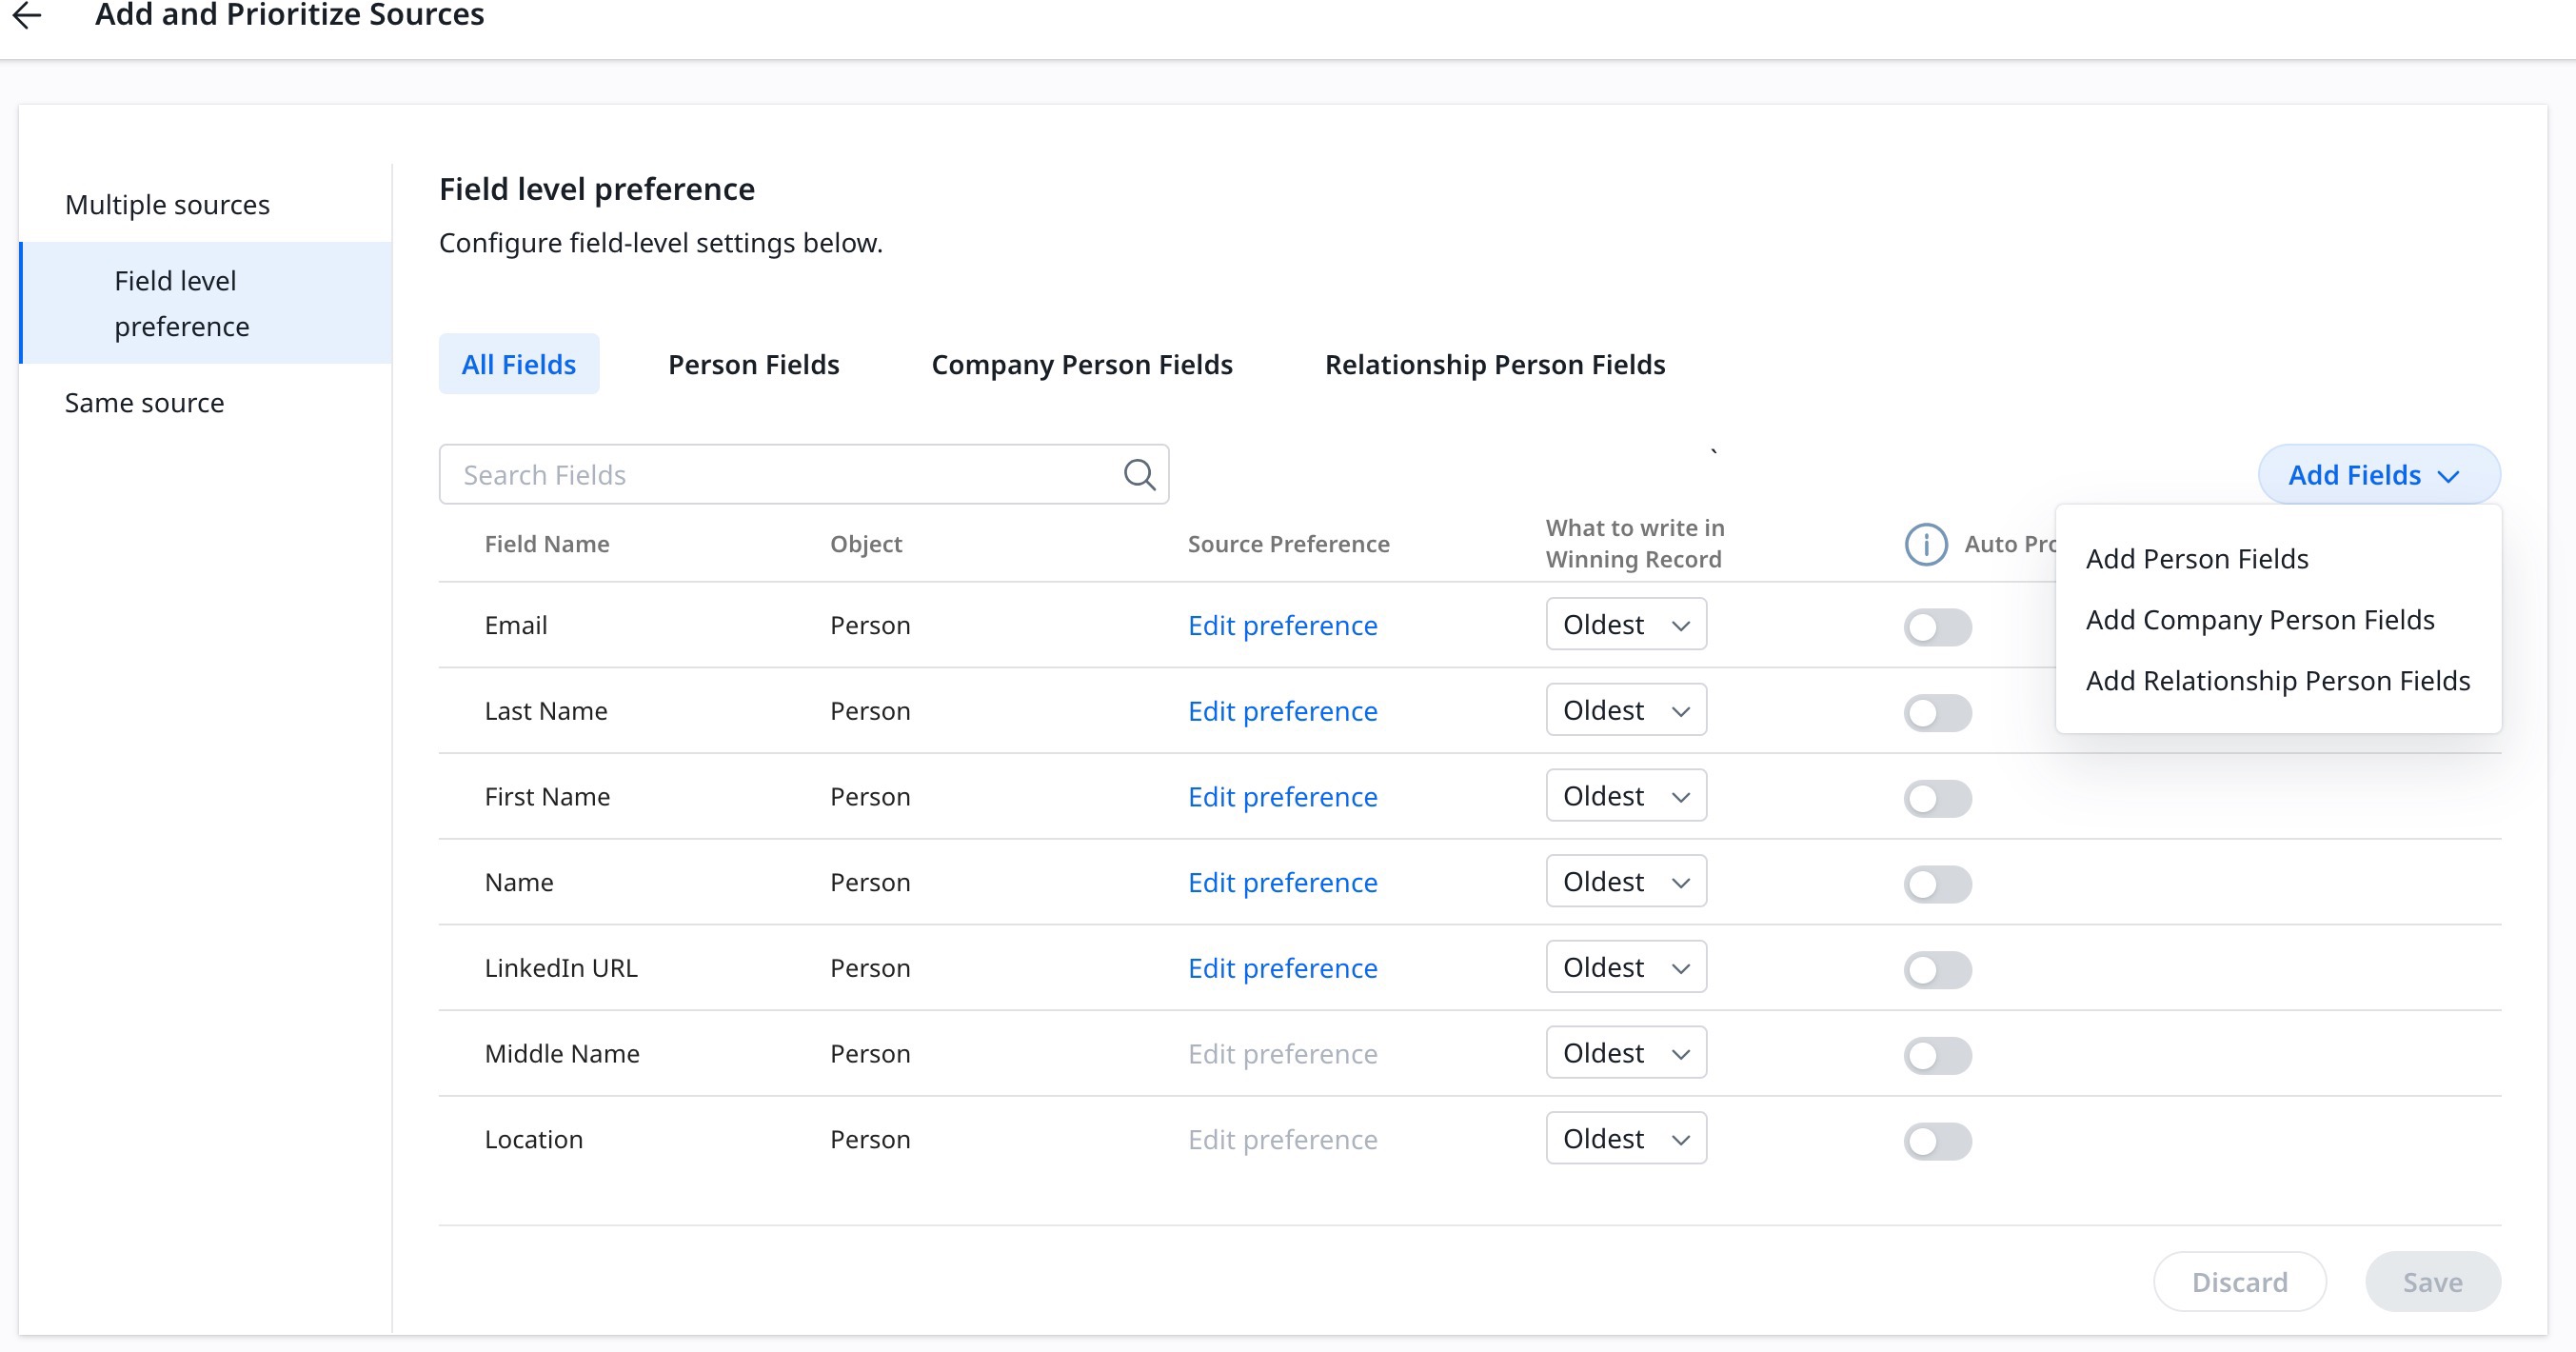
The Field Level Preference page displays the list of all the fields that are added from the sources selected in the above section.
Add fields from the selected data sources from any of the following options:
- Add Person Fields
- Add Company Person Fields
- Add Relationship Person Fields
To add new fields:
- From the Field Level Preference page, click Add Fields.
- Select a Person, Company Person, or Relationship Person Field. The Select Fields slide-out panel appears.
- Select the fields to be added. Click Select.
Same Source
When ingesting data from the same source, you must set the criteria for maintaining the records.
To set the criteria:
- From the Which record to retain dropdown, select either of these options:
- Oldest
- Most Recent
- Most Complete Record
- From the From all fields write dropdown, select either of these options:
- Winning records values or best match
- Winning record values or null
- Click Save.
Additional Resources
- Unification Overview
- Define Company Duplicates
- Define Person Duplicates
- Enrich Custom Objects
- Data Steward: Company
- Data Steward: Person