Configure Aliases in Reports
Gainsight NXT
Introduction
This article walks through how to rename or customize your labels in chart visualizations, to make them more contextual to the target audience. For example, when you are sharing a report to your director, and your director may not be aware of the jargon used in the report, you can rename labels in the reports to make the charts/reports more contextual.
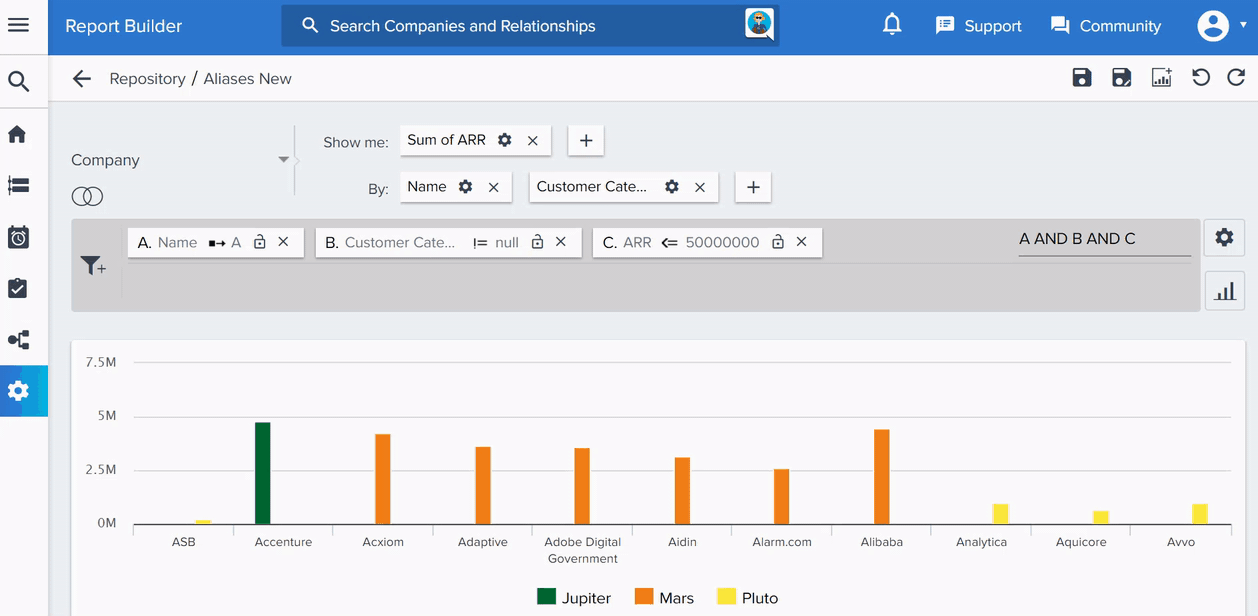
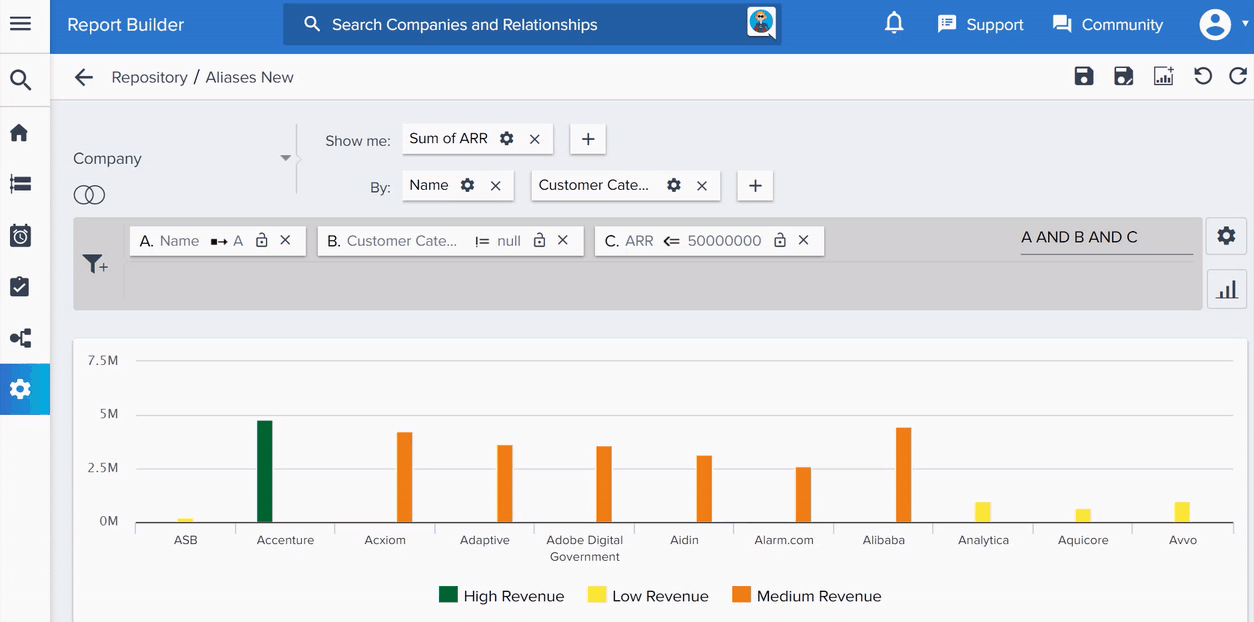
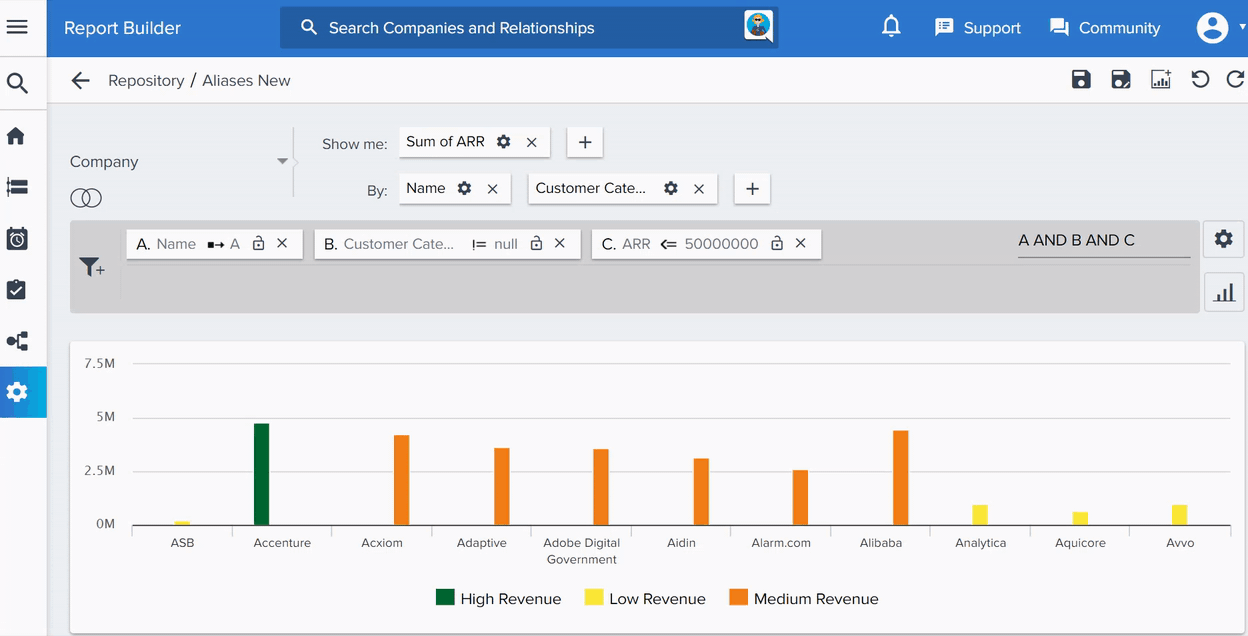
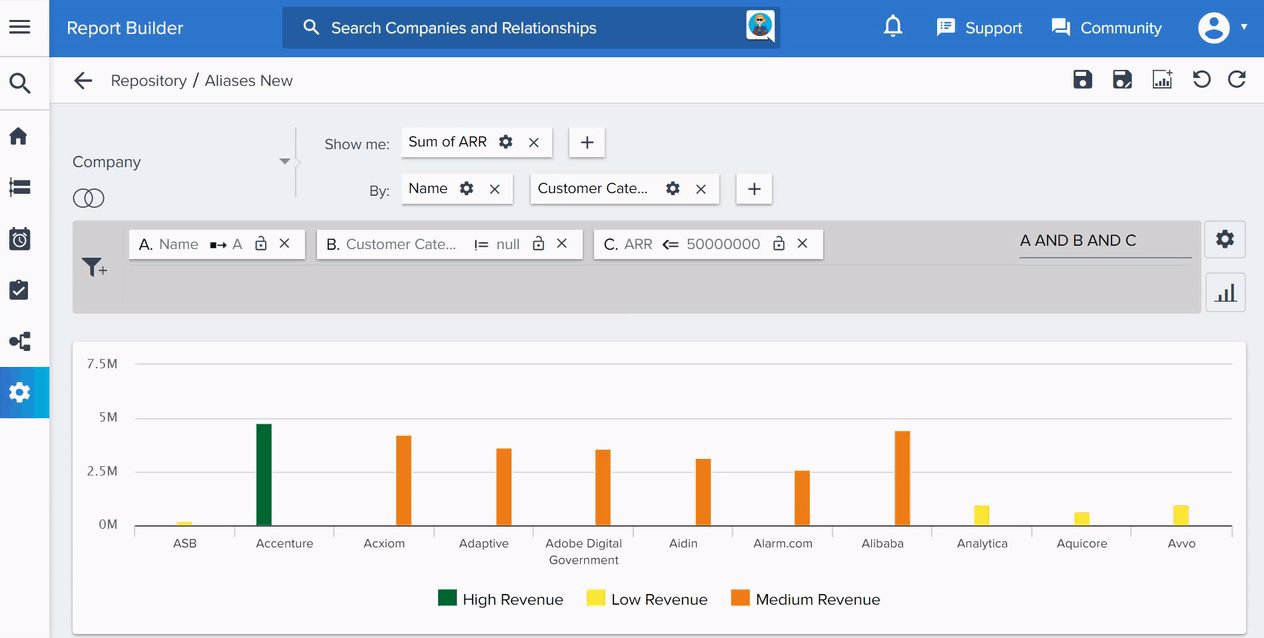
Use Case: For instance, as a CSM, you may want to present a report to your Sales Director on the customer categories defined as per their annual revenue. You can build a report on the customer categories defined as per business requirement, for example, here the customers may be categorized into three categories, namely: Jupiter, Mars and Pluto. But, your Sales Director may not understand this jargon, so to simplify this, you can use Aliases to rename Jupiter customers generate High Revenue, Mars as Medium Revenue and Pluto as Low Revenue, to make the report more contextual and understandable.
Aliases can be configured only for the following data types:
- String
- Picklist
- Boolean
Configure Aliases
To configure Aliases in Reports:
- Navigate to Administration > Report Builder > + REPORT.
- Select an object from the dropdown list.
- Add the required fields to Show me, and By.
- Click Select Visualization Type and choose the required chart visualization, and run the report.
Notes:
- You can configure Aliases only after you RUN the report.
- You cannot apply Pivot on the reports in which the labels are already configured with Aliases.
- Click the Settings/Gear icon the By field.
- Click CONFIGURE ALIASES. The Edit Aliases dialog-box is displayed.
- Enter the Alias Name you would like to assign for a value.
Notes:
- You can enter a maximum of 40 characters in the Alias Name.
- You cannot configure/enter the original and duplicate values in the Aliases.
- Click UPDATE and RUN the report to see the Alias Names assigned in the previous step.
Note: Configuring aliases will not have any impact on your original data.
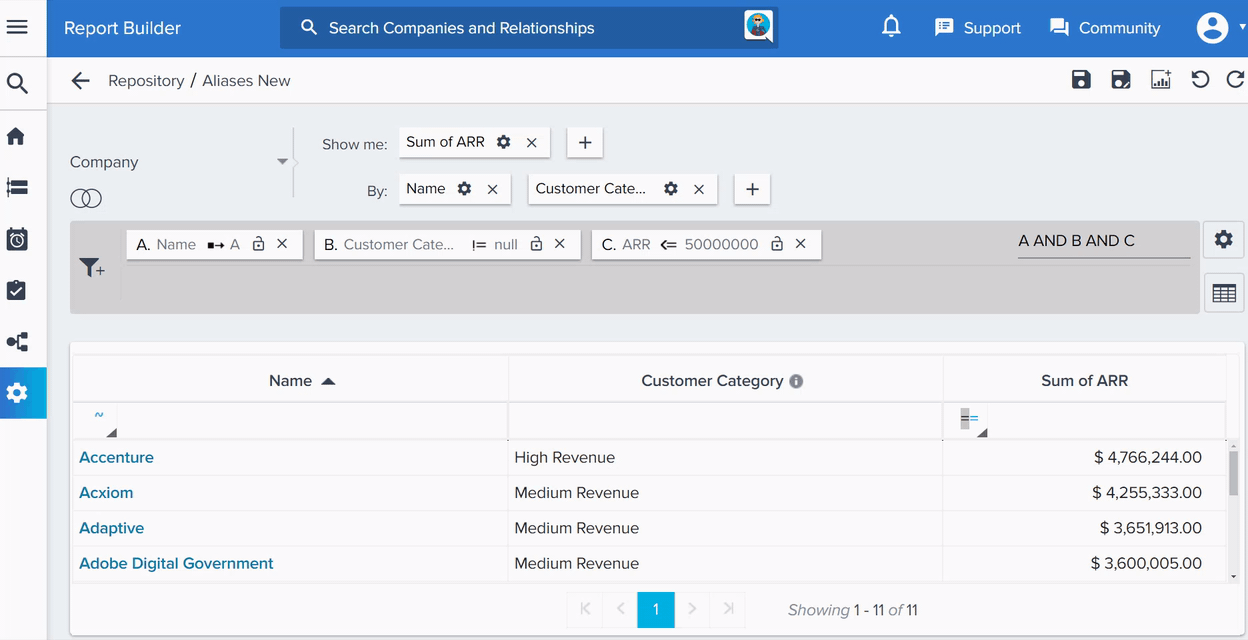
After configuring Aliases, in the chart area, on hover, you can see both aliased and original names.
- Aliased <Name>: Aliased value
- Original <Name>: Original value
Post Configuration of Aliases
Visualizations:
- You can change the visualization type and the Aliases will persist.
- You can see the aliased data in the table visualization, but you will not be able to search and sort the aliased column.
Drill Down Reports:
Aliased values persist and are shown in drill down reports upon clicking the visualizations.
Success Snapshot and Dashboard exports: Aliased values persist in both Table reports and charts.
Custom Colors: Custom colors applied on original data are not impacted by Aliases.
Dashboard External Sharing: Aliased values persist on both normal and shared dashboards.
Limitations
- Aliases cannot be configured for the reports enabled with Pivot.
- Aliases can only be configured for fields with 30 or less distinct values.
- In a report, for a field, you can configure a maximum of 30 aliases.
- Ranking is disabled for aliased labels (fields).
- All Filters, including Global Filters work on the original values.
- CSV exports the original data and the aliased values will not persist.