Email Reports through Simple Program
Gainsight NXT
This article explains how admins can embed a report in an email using simple programs.
Overview
Admins can configure reports and attach a maximum of five files in an email. Once a Simple Program is created, you can configure reports and send them to participants using emails in Simple Programs.
Note: To embed a report, the admin must first create an email template with a report.
For more information on how to create Simple Programs, refer to the Journey Orchestrator's New List View article from the Additional Resources section.
Select an Email Template
Once participants are synced to the program, you can select an email template which you have created prior to simple programs. For more information on how to create email templates, refer to the Create Journey Orchestrator Email Templates article from the Additional Resources section.
To select an email template:
- Navigate to the Journey Orchestrator > Program.
- Select the program.
- Click Action tab.
- Select Email.
- From the Choose Template dropdown, select the email template.
- Click Done.
Create a Program Action
The reports incorporated in the email body are configured, and reports are attached. This sets up an action for the newly created program. You can specify the number of rows and columns from the report that should be included in the email.
Following are the steps that need to be performed to create a program action:
Add Headers
The Headers section allows you to add the standard fields such as the recipient email address, company name, and so on.
To add headers:
- Navigate to the Digital Journey > Programs.
- Select the program.
- Click Action tab.
- In the To field, enter the recipients email address.
- In the From field, enter the sender’s email address.
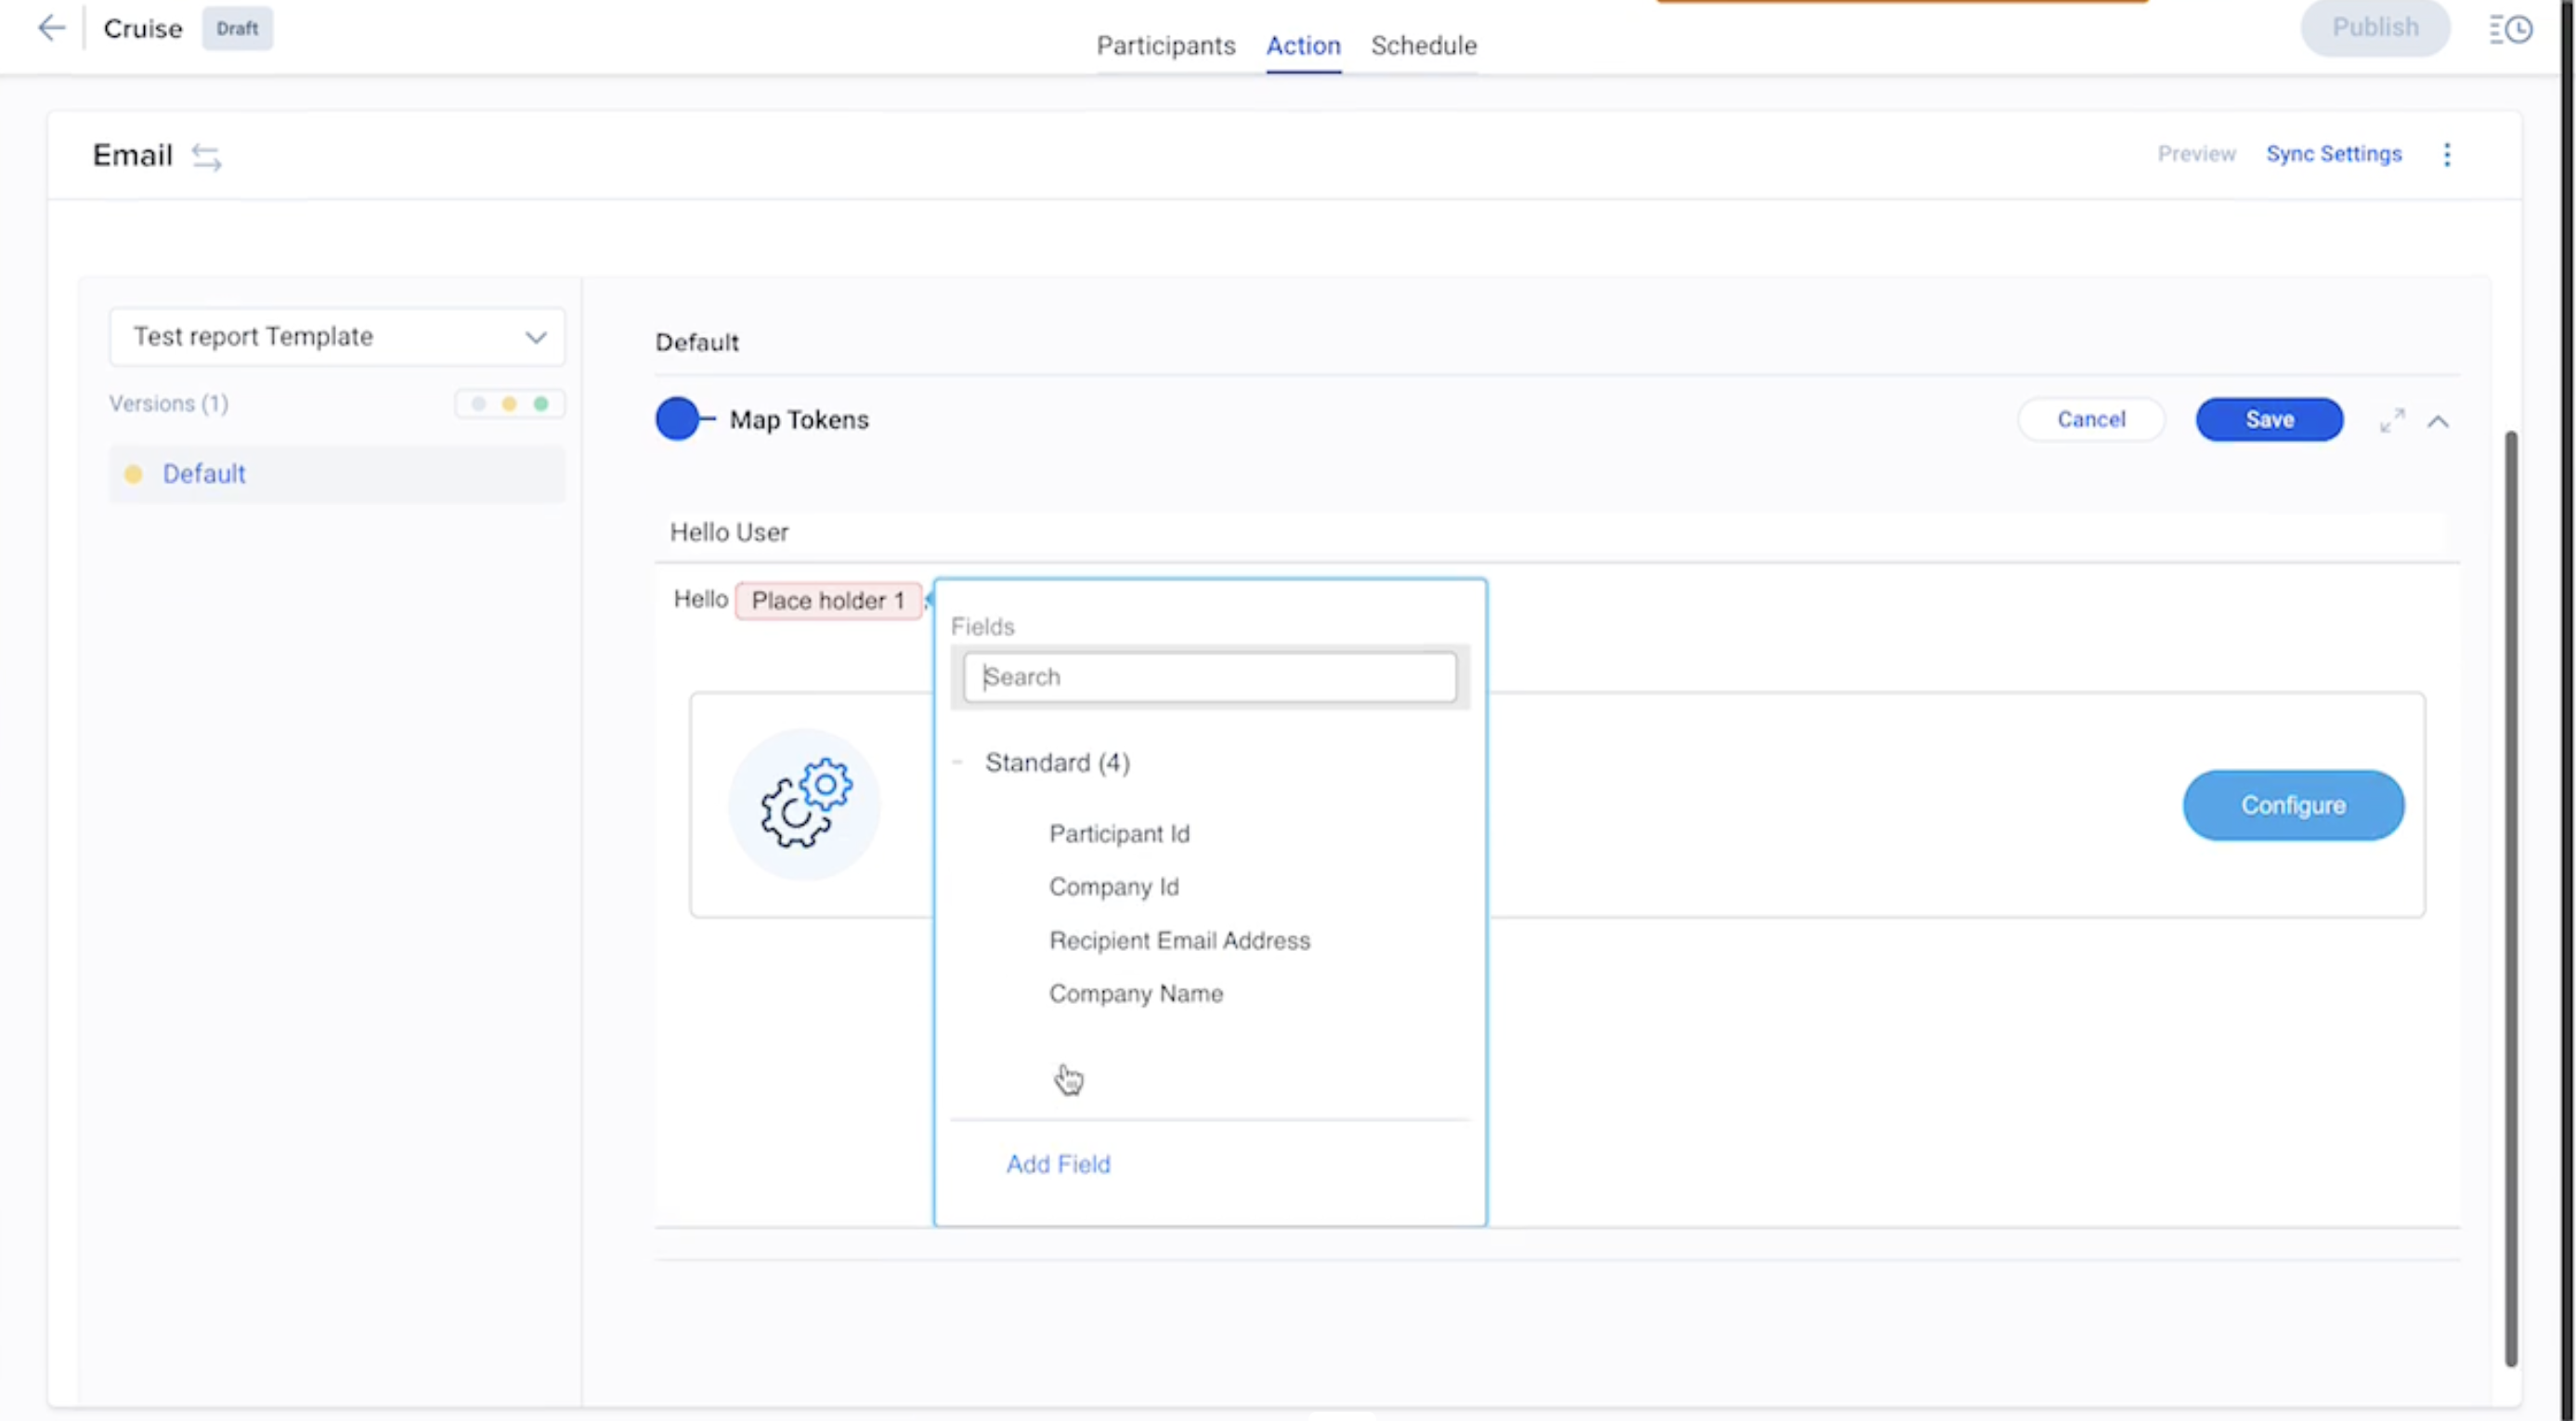
Map Tokens
Once the standard information is updated in the Headers section, the next step is to map the token to the standard field.
To map token:
- Navigate to the Digital Journey > Programs.
- Select the program.
- Click Action tab.
- Hover over the name Placeholder.
- Click the token mapping button. The list of standard fields appears.
- Select the Standard field.
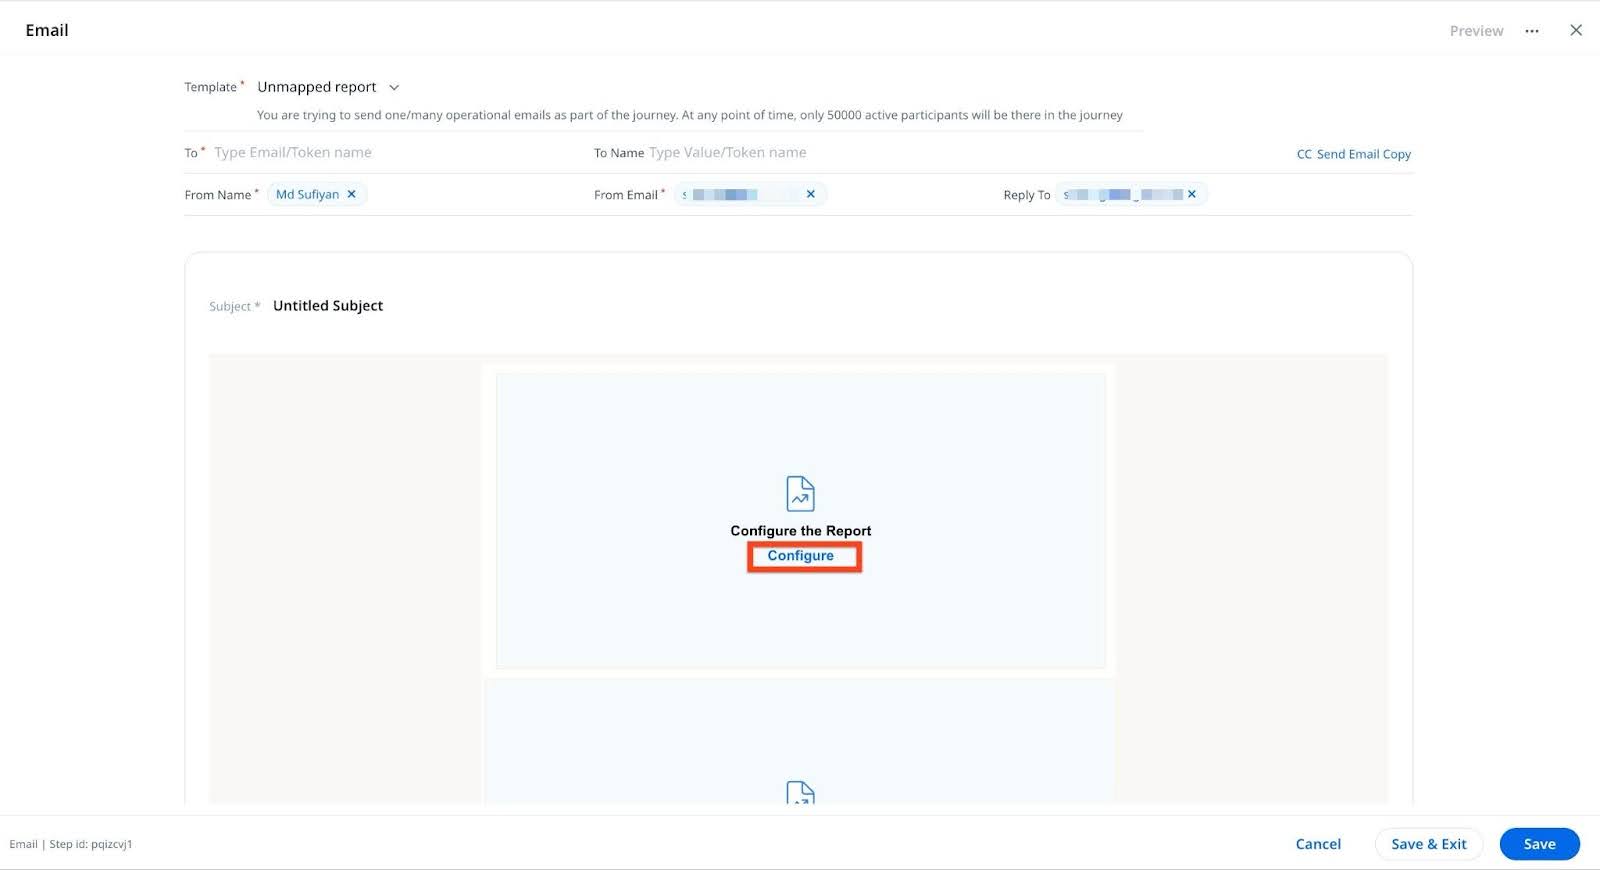
Configure the Embedded Reports
Admins can configure tabular and non tabular reports in the Email. It is designed to share simple reports with a low volume of data to avoid display issues. Admins can choose the columns and the number of rows they want for a report to be displayed in the Email.
To configure the embedded reports:
- Navigate to the Digital Journey > Programs.
- Select the program.
- Click Action tab.
- Click Configure. The Edit Report window appears.
- From the Select Report dropdown list, select a report.

Note:
- Currently, the configured Row Height for a report is not applied in emails sent from Cockpit, P360, or Journey Orchestrator.
- Only the first five parameters from the Show Me column are displayed in the email body.

- Select the number of rows from the rows dropdown.By default it is 20.You can select 50 or 100 as well.
- Click Save Report. The Action tab appears with the Configured Report embedded in the email body.

Note: The desired number of rows can only be adjusted for Configure reports; this feature is not relevant for attachments because they contain all the data without any filters.
- Click the Save button.
- Click the Publish button.
For more information on how a program is published, refer to the Publish a Simple Program section in the Journey Orchestrator's New List View article from the Additional Resources section.
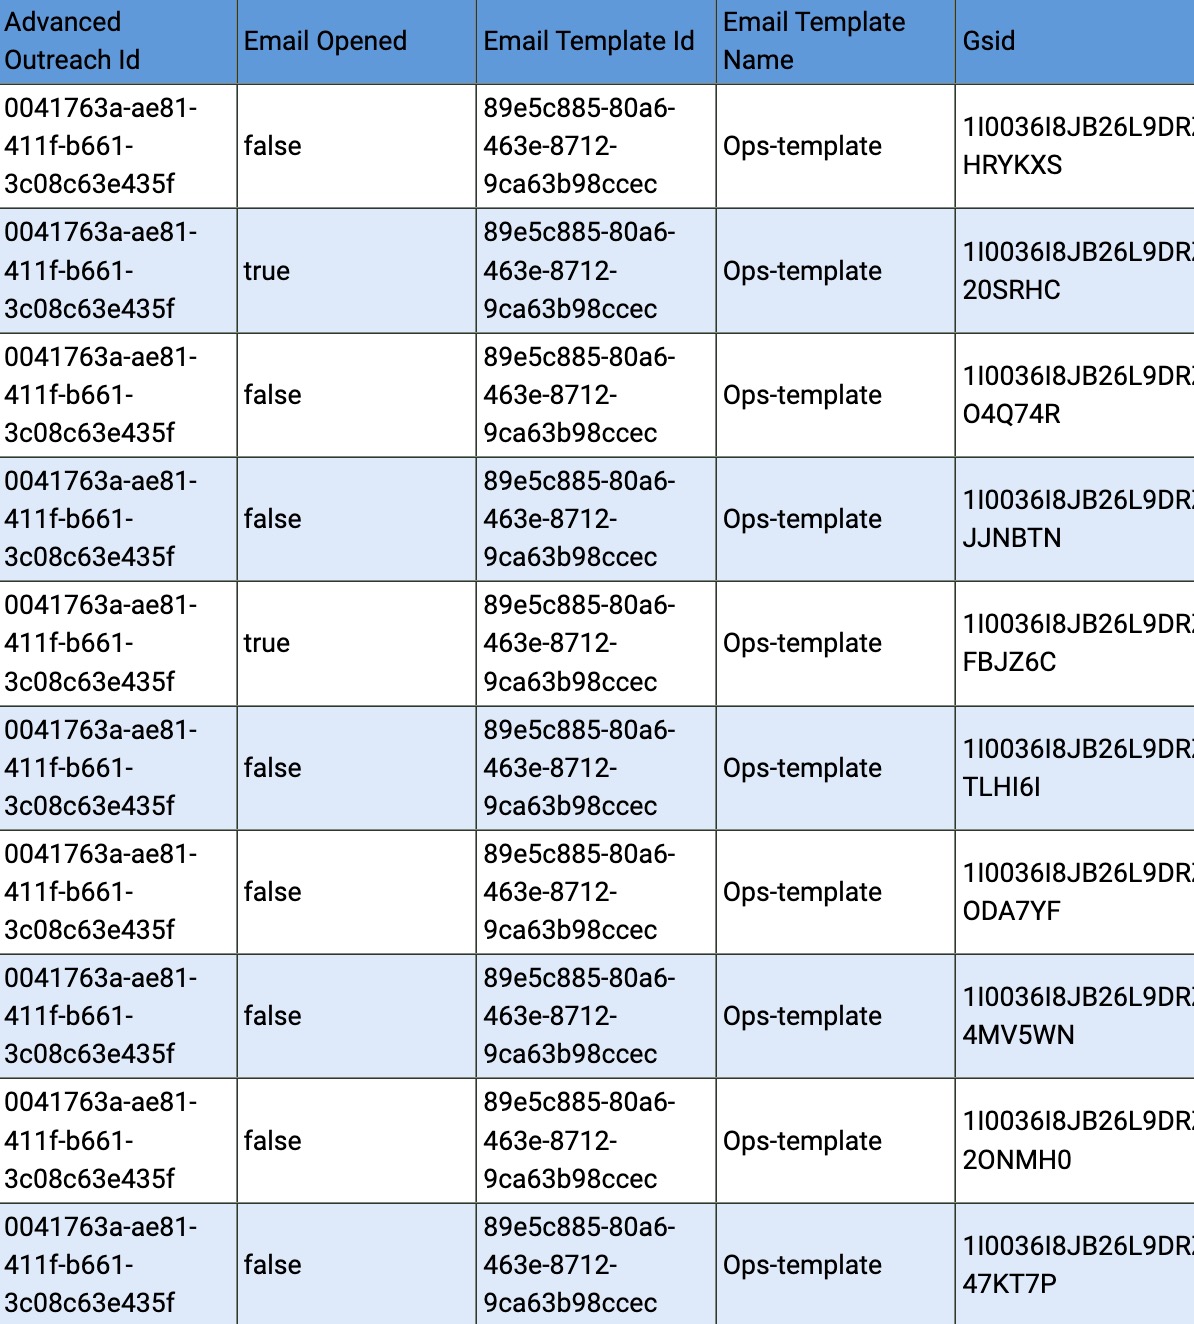
The email is sent to the recipient with the embedded report as shown in the following image
Additional Resources