Segments
Gainsight NXT
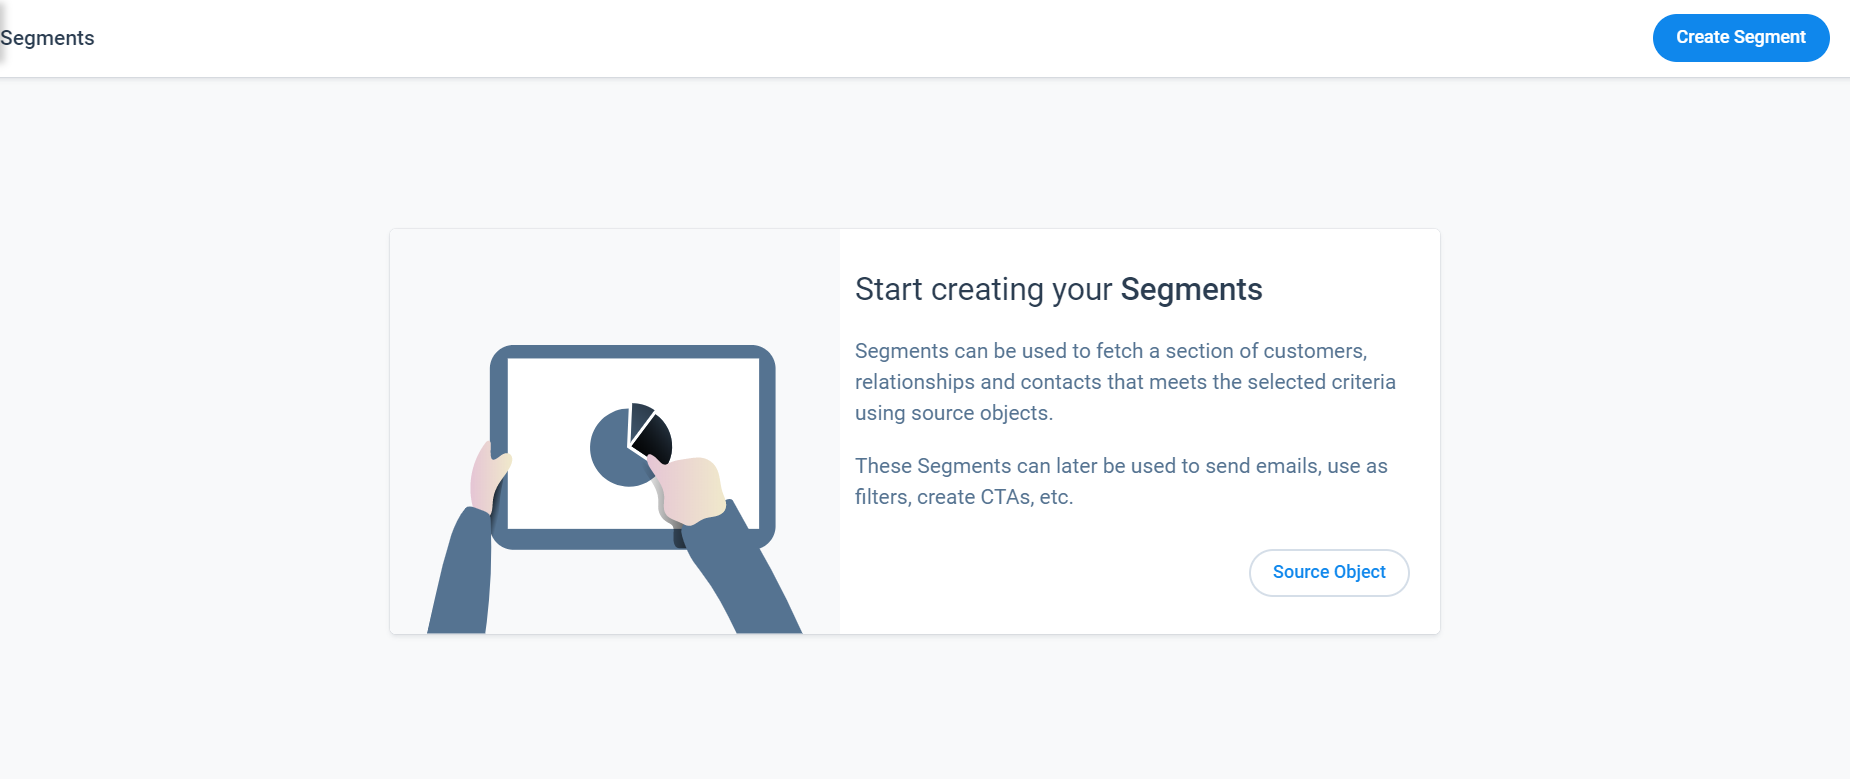
This article explains how to create Segments of customers, relationships, and contacts. This list can be used to send emails, use as filters, and create CTAs.
Overview
Segments can be created to fetch a sub-group of customers, relationships, and contacts that meet your selected criteria using source objects. These Segments can later be used as one of the Source types, to add participants in Programs.
Note: Segments will also be available for use in Reports and Rules in future releases.
Business Use Case
-
Programs: Customers want a simple and intuitive way to query a source where they can get the data from one object and quickly join it with standard objects like Company, Relationship or Person (Person here is Company Person or Relationship Person based on the selected type), without performing heavy merge or transformation operations.
Below are the following example use cases:- Get the list of all customers who have logged a support ticket in the last 30 days and send surveys to the admins of these customers.
- Get the list of all customers who have added the annual conference and send emails to all contacts of these customers.
- Send emails to all admins of enterprise customers.
- Send NPS® surveys to all customers renewing next quarter.
You can view the Segments List View page by navigating to Administration > Segments. The list view displays all of the segments that are created and they can also be searched by Segments Name. For more information on how to create a Segment, refer to the Create Segment section.
With Segments, users can create a simple list/segment of their customer base so that they can simply plug them into a program. For more information on how to use Segments in Programs, refer to the Add Participants to a Program article.
Note: The number of Segments that can be created per tenant is 500. It can be increased as per request.
Segments List View
Users can view the Segments List View by navigating to Administration > Segments. The list view displays all of the segments that are created and users can also search the Segments by Name.
Segments are listed in the Segments page with the following columns, and they all can be used for sorting:
- Name: The name of the Segment to be created.
- Status: Status of the segment whether it is ACTIVE or DRAFT.
- DRAFT: Draft is when segment creation is in progress.
- ACTIVE: Active is when a segment is created.
-
Type: It is the type of entity used to fetch data in Segments. There are four types of entities:
- Relationship: This type of entity is used to create a list of relationships. It joins the data from a selected object with Relationship object and the output will be a list of Relationships. For example, create a list of all relationships which have a renewal in the next 30 days.
- Company: This type of entity is used to create a list of companies. We will join the data from a selected object with company object and the output will be a list of companies. For example, create a list of all enterprise customers.
- Relationship Person: This type of entity is used to fetch a relationship person that meets your criteria. It joins the data from a selected object with RelationshipPerson object and the output will be a list of relationship persons. In this case, a Person identifier is not mandatory. If a Person identifier is available, then the final list will be the exact match of RelationshipPerson. If a Person identifier is not selected, then the output will be the list of all contacts from the selected relationships. For example, fetch contacts from relationships who have seen a drop in health score.
- Company Person: This type of entity is used to fetch the company person that meets your criteria. It joins the data from the selected object with CompanyPerson object and the output will be a list of company persons. In this case, a Person identifier is not mandatory. If a Person identifier is available, then the final list will be the exact match of the companyPerson. If the person identifier is not selected, then the output will be the list of all contacts from the selected companies. For example, fetch company person from companies due for renewal in the next 30 days and fetch company person who has opened a support ticket in the last 30 days.
- Used In: Admins can view in which Programs a particular Segment is used from the Segments List View page.
To view the list of dependencies of a particular Segment:
- Navigate to the Administration > Segments. The Segments List View page appears.
- In the Used In column of the Segments list view, click the number adjacent to a particular Segment. The Dependencies screen of the selected Segment appears and Admins can view a list of all the Programs in which the particular Segment is used.
Note: Admins can click the particular Program to navigate to the respective page, and also search for a Program in the Search field. - Click the Close icon to close the dependencies screen.
- Modified By: The name of the person who last modified the segment.
- Modified Date: The date on which the segment was last modified.
- Last Run Status: The last run status of the segment. It can be:
- Successful: It indicates that the Segment run is successfully completed.
- Running: It indicates that the Segment run is under process.
- Failed: It indicates that the Segment run is failed due to some errors.
- Aborted: It indicates that the Segment run is terminated before it is completed.

Folders
Users can create folders in Segments pages to organize their segments accordingly. All the folders are displayed in the left pane on the respective page. If you click any particular folder name, all the segments included in that folder are displayed in the right pane. Gainsight provides a default folder called Uncategorized. You cannot modify the name of this folder or delete it.
To create a new folder in Segments page:
- Click the Add New Folder icon.
- (Optional) In Add Folder dialog, select the folder under which you want to nest a new folder.
- In the Folder Name field, enter a name for the folder.
- Click SAVE.
Users also have provision to Edit or Delete the existing folders apart from the default Uncategorized folder.
Additional Options
Click the three dots for a Segment to view the following additional options:
- Execution History
- View Records
- Run Now
- Edit
- Clone
- Delete
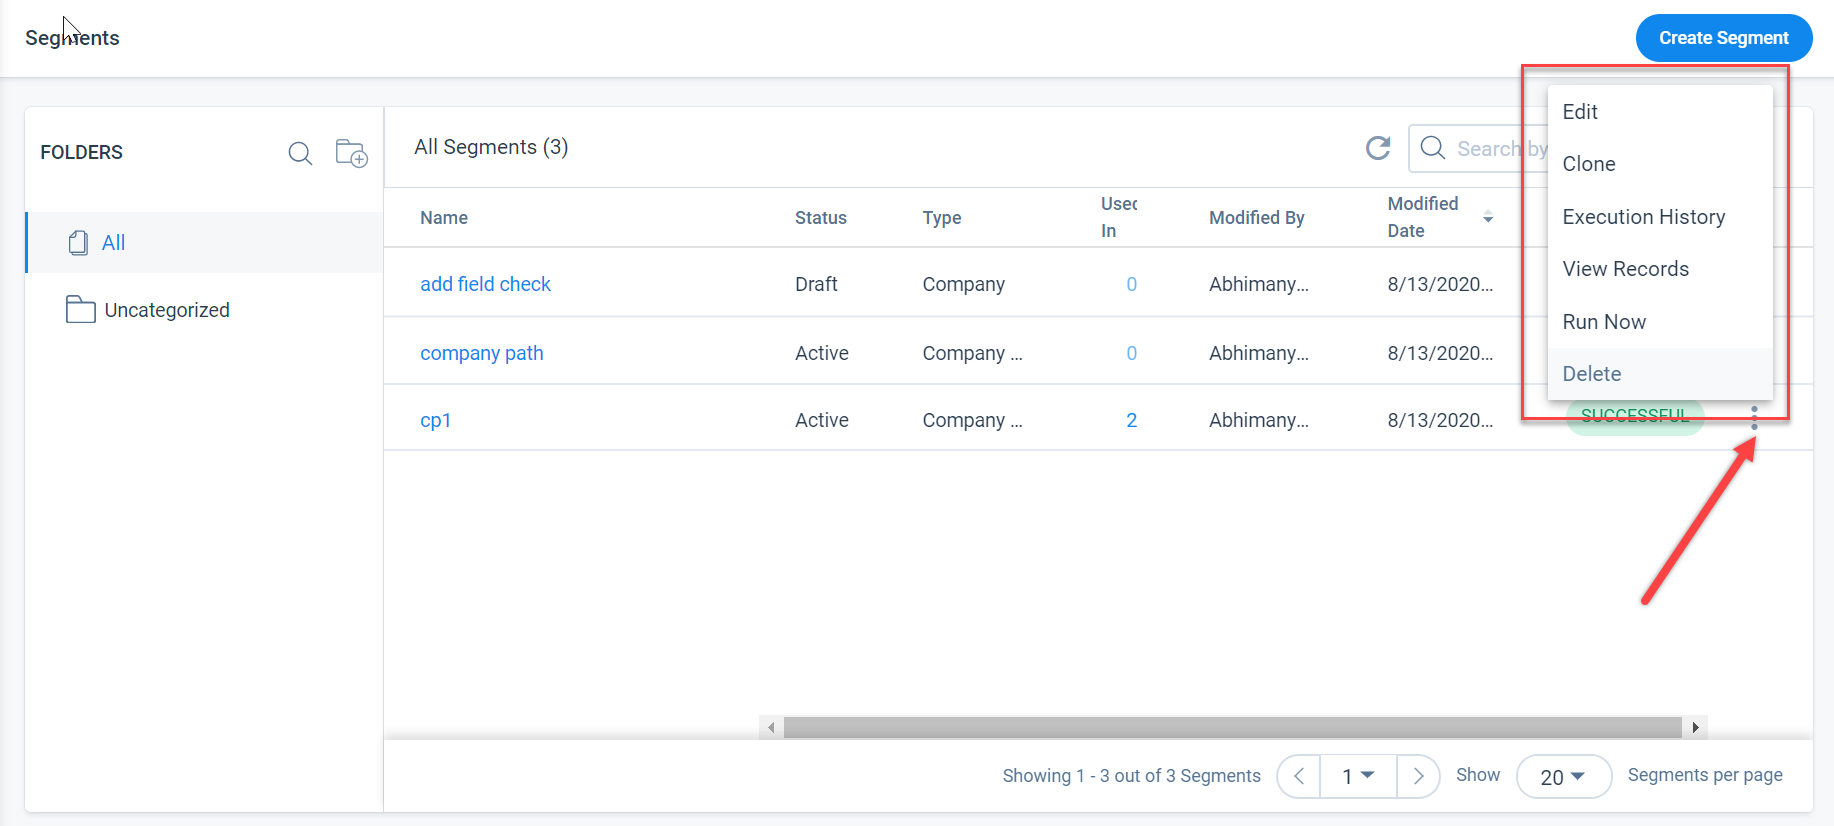
Note: Only Edit, Clone, and Delete options are displayed for the Segments which are in DRAFT status.
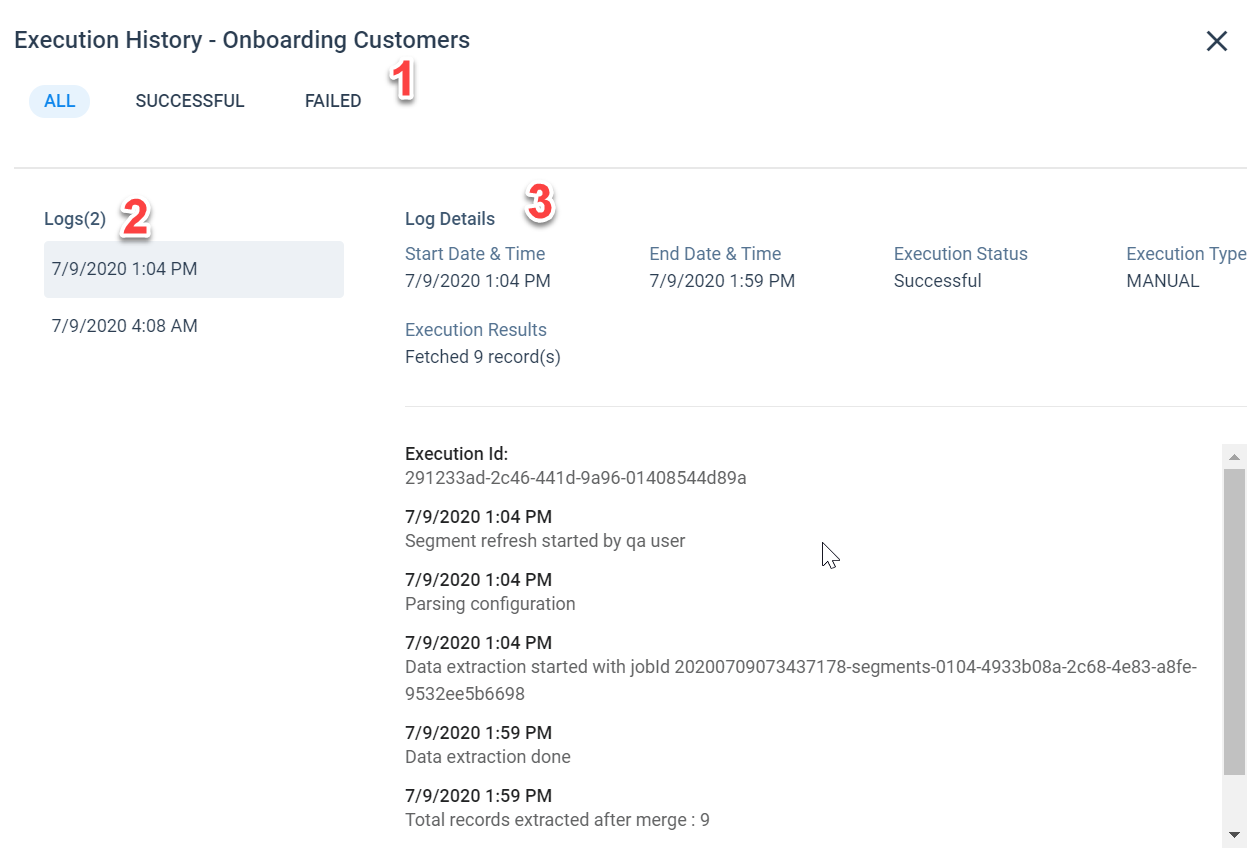
Execution History
To view the execution history of a Segment, click the Execution History option. The Execution History of a particular segment appears with the following sections:
-
Execution History Tabs: The execution of a segment is categorized into the following tabs for easy readability:
- ALL: This tab contains all the execution history logs of a Segment irrespective of Success or Failure.
- SUCCESSFUL: This tab contains all the logs of a Segment that ran successfully.
- FAILED: This tab contains all the logs of a Segment that failed to complete the execution.
-
Logs: The list is arranged in descending order by the latest execution details at the top. You can click on the Date and Time stamp to view Log details of that execution of Segment.
-
Log Details: It contains the following details of execution:
- Start Date and Time: The date and time details at which the Segment execution has started.
- End Date and Time: The date and time details at which the Segment execution has completed.
- Status: The status of the execution of the Segment. It can be Successful, Failed, or Aborted.
- Type: The segment type that has been used for the creation of the Segment.
- Execution Results: The number of records that are fetched using the Segment along with full details of execution.
Note: Users time zone is used to display all the above logs.
View Records
This option allows users to view the fetched data records under the Segment Records tab. Users can also preview the summary of the complete configuration added in segments under the Properties tab as well as edit the configuration of the segment.
Note: The number of records that can be fetched using a Segment is one lakh. It can be increased as per request.
Segment Records
From the Segment Records tab, users have a provision to search the data as per their requirement using the various filter operators in the Search bar.
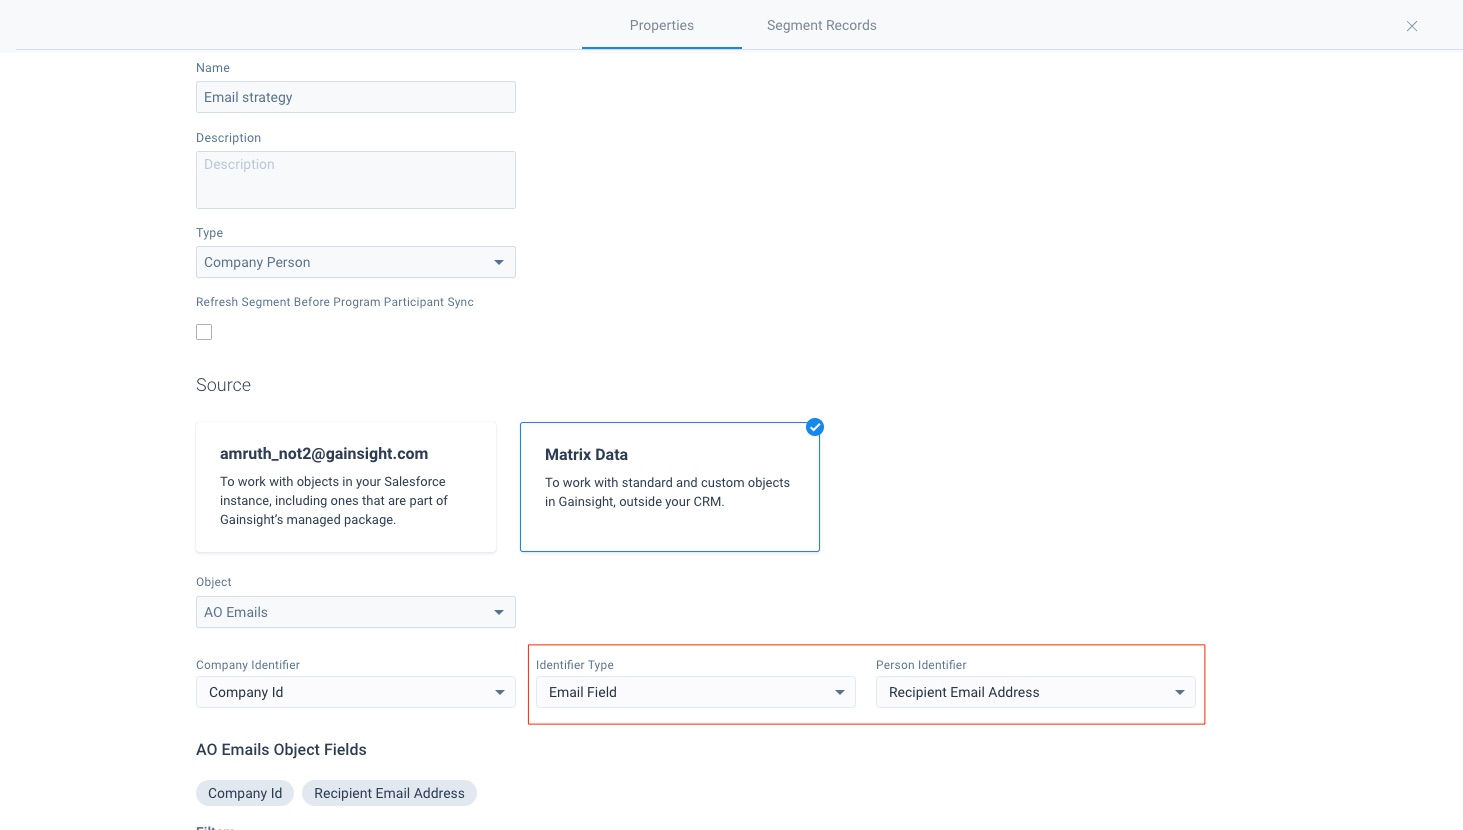
Properties
From the Properties tab, users can click the Edit option to edit the configuration of the Segment.
Note: The Properties tab can also be viewed by clicking on a segment in the list view.

Admins can configure the "Identifier Type" and "Person Identifier" fields to select a unique identifier for participants based on the Segment's source object.
Run Now
This option allows users to run the Segment manually to fetch the customers, relationships, and contacts that meet the selected criteria.
Edit
This option allows users to edit the configuration of segments.
Clone
This option allows users to create a copy of the segment with the same configurations. If a Segment is cloned, the Schedule details are not copied to the cloned Segment, and the status of the cloned Segment will be DRAFT.
Delete
This option allows users to delete the Segment permanently.
Note: Segments cannot be deleted if they are used in programs.
Create Segment
To configure a new Segment:
- Navigate to Administration > Segments. You can see the existing list of segments, and edit them as needed. For more information on the Segments List page and Options, refer to the Segments List View section.
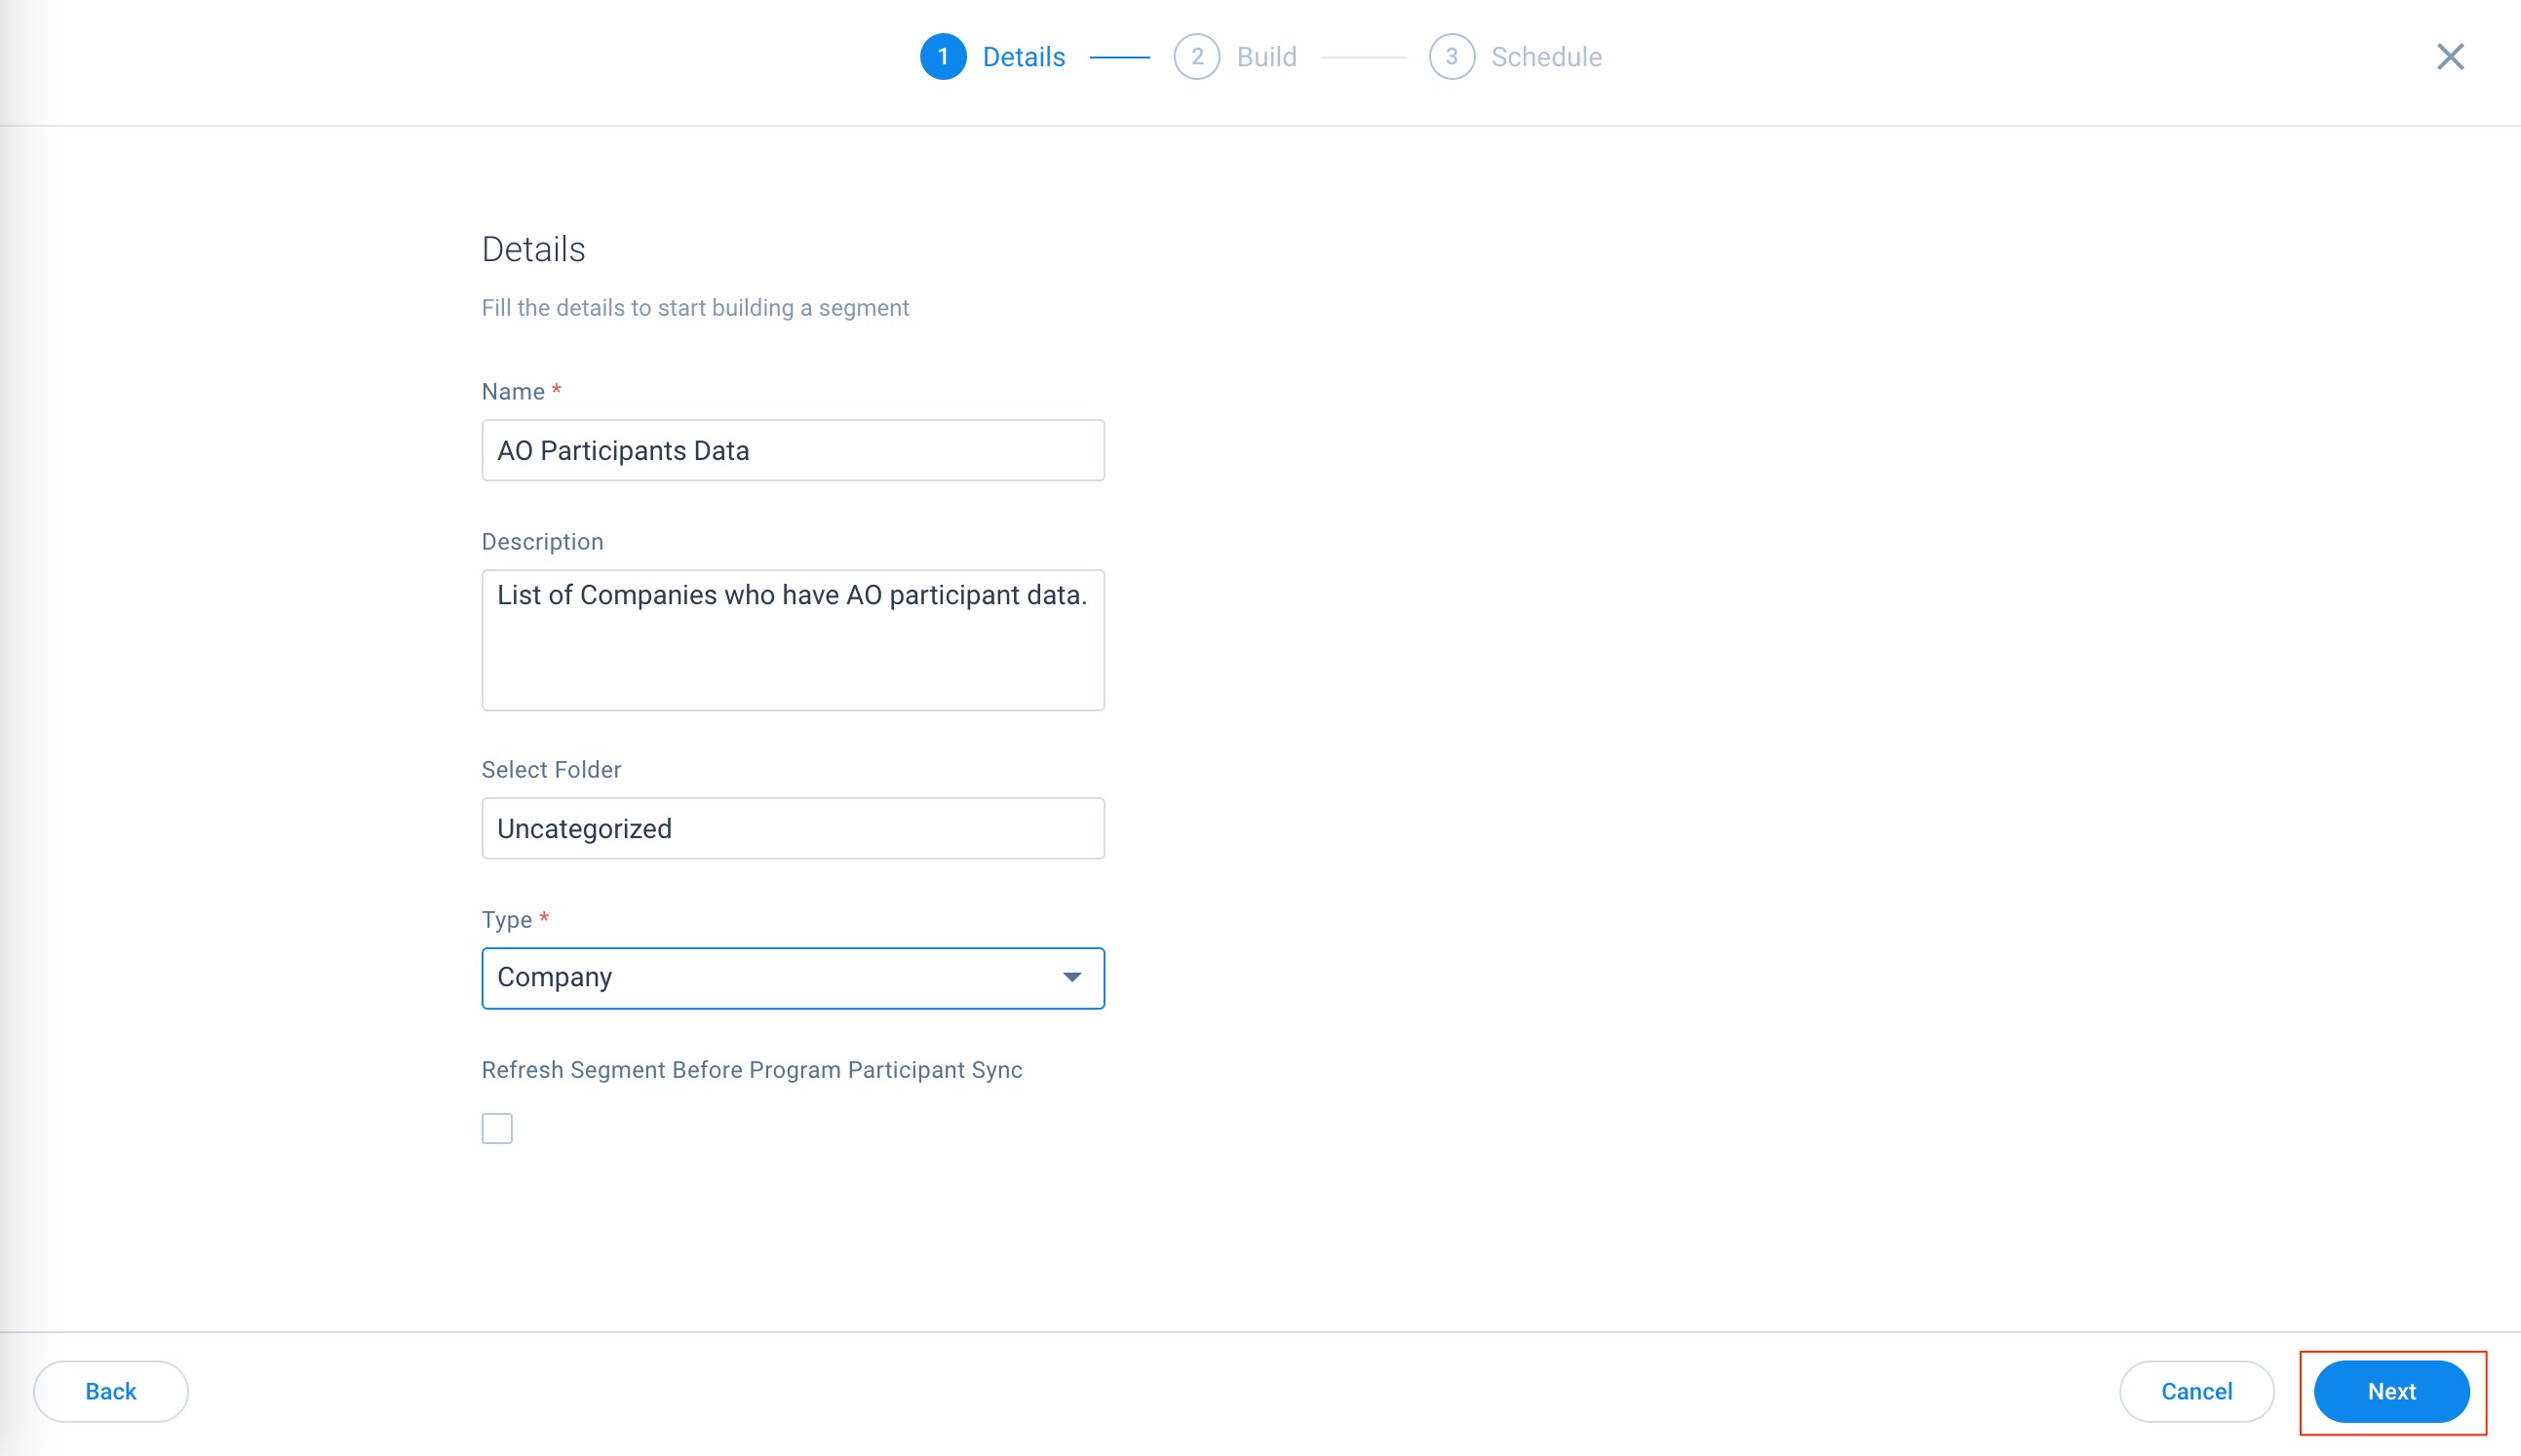
- Click New Segment. A new page appears, where you can see the following three tabs:
- Details
- Build
- Schedule
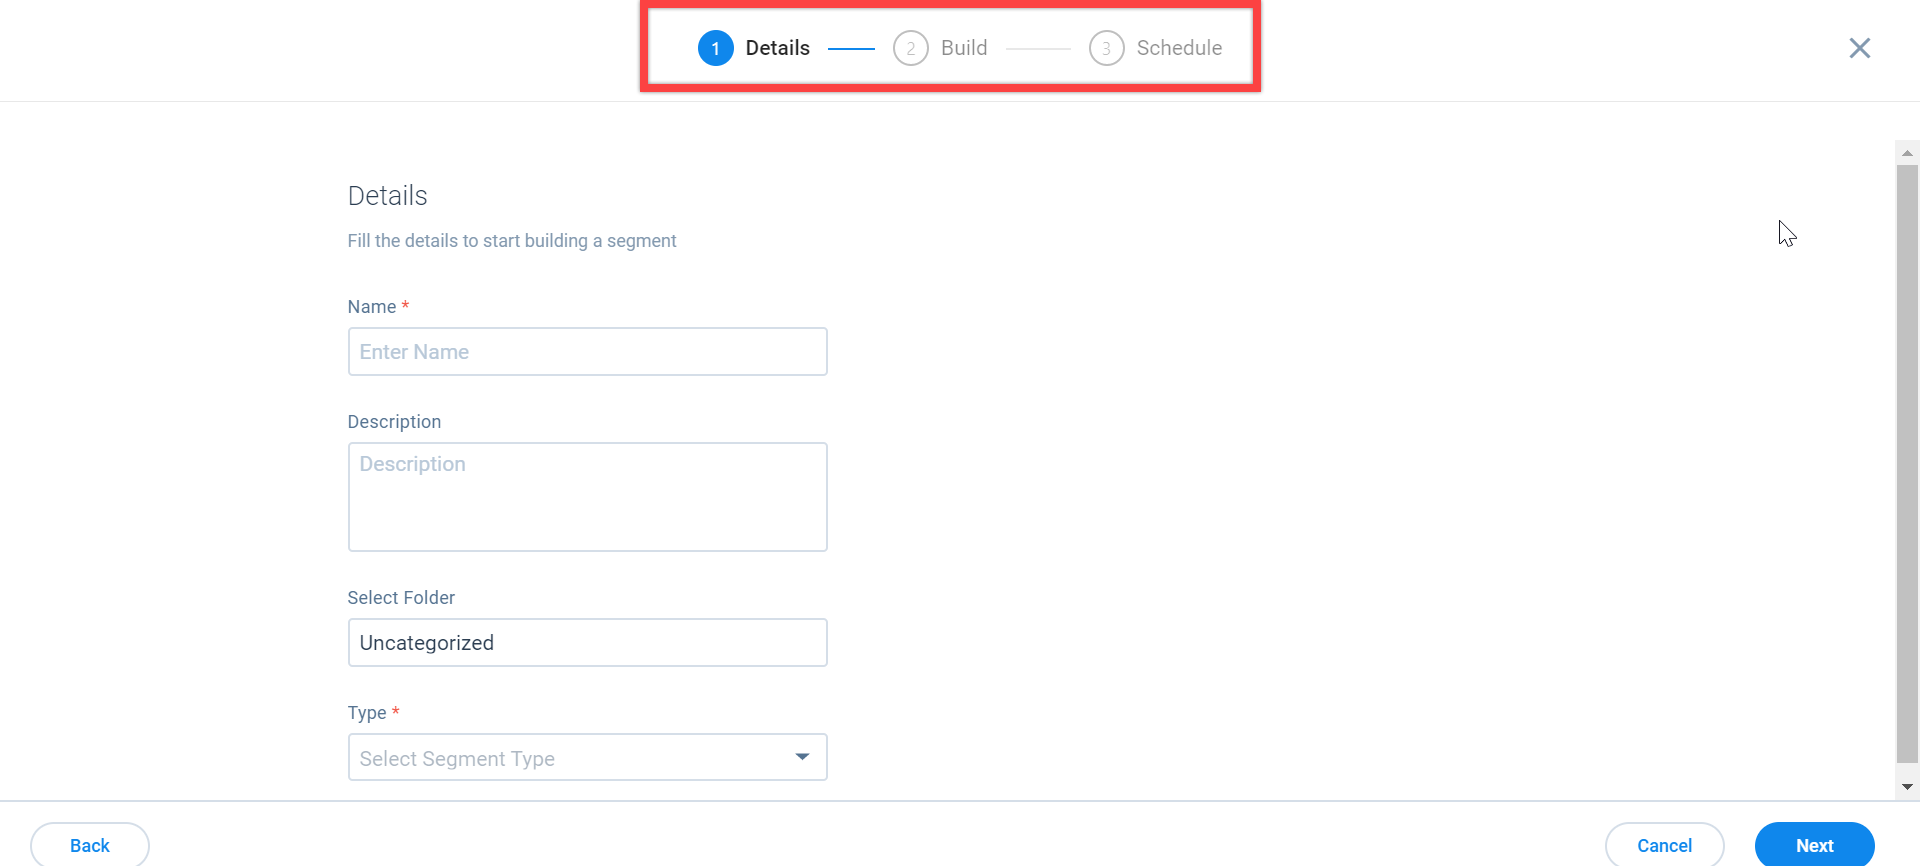
Details Tab
Enter the following information in the Details tab. In this use case, the following information is used:
- Name: AO Participant Data.
- (Optional) Description: List of Companies who have AO participant data.
- Select Folder: Select the folder in which you want to add this segment, or, by default, the segment will be saved in the Uncategorized folder. For more information on how to create new folders, refer to the Folders section.
- Type: Companies. For more information on entity types, refer to the Segments List View section.
- Refresh Segment Before Program Participant Sync: Select this configuration to trigger a Segment refresh immediately before a Program using the Segment syncs participants. This option can make it easier to keep Segment sources up-to-date.
- Click Next to save the segment and navigate to the Build tab.
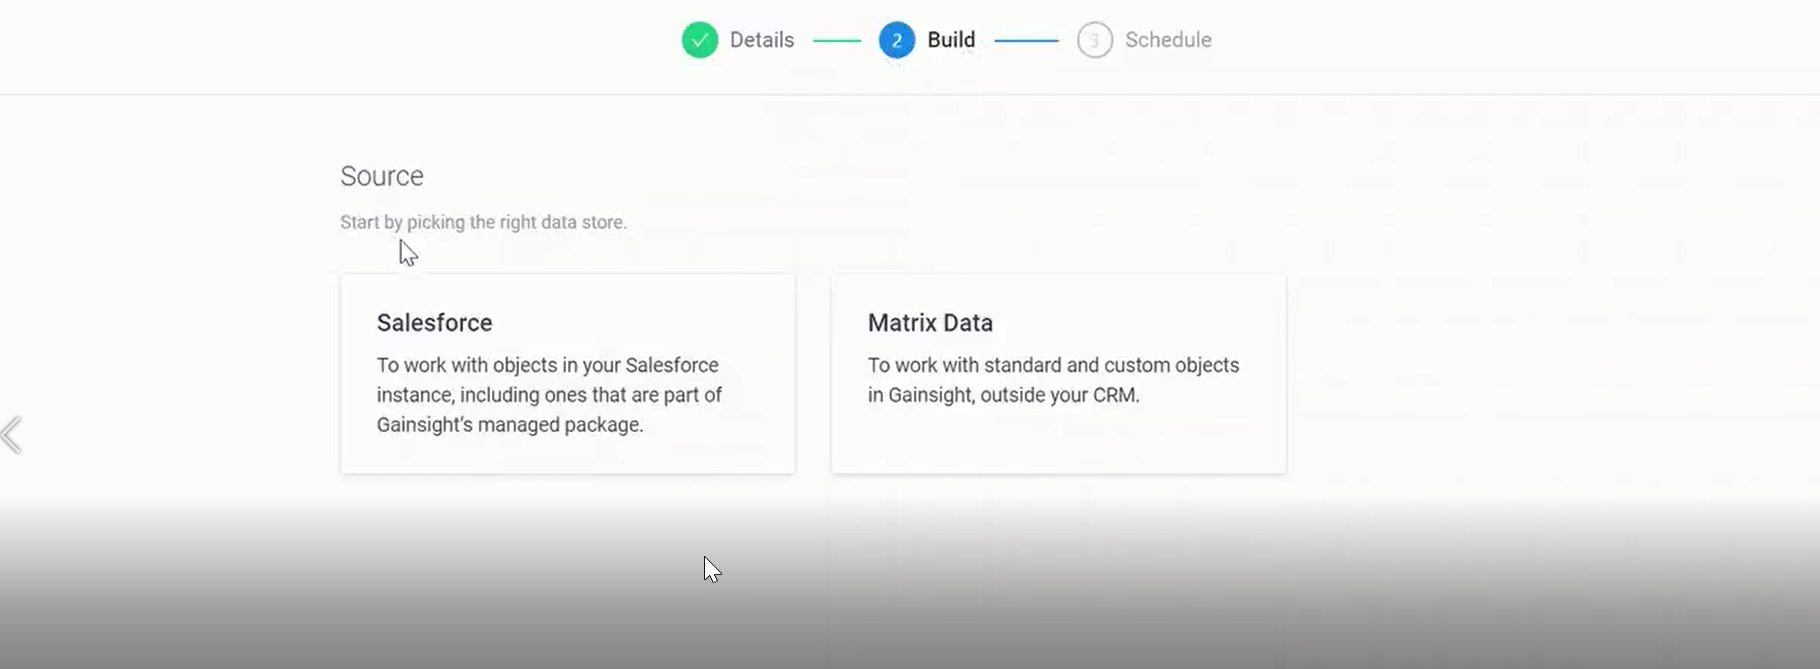
Build Tab
To build the Segment:
Gainsight NXT in Salesforce CRMContent in this section supports Gainsight NXT accessing through Salesforce Login. To learn more about Gainsight NXT in Salesforce, click here.
- Click here to expand for more information on how to build a Segment by selecting Data Source type for Hybrid users
-
- Select the Data Source type either SFDC or Matrix Data.
- SFDC: The Salesforce objects are database tables that allow storing data specific to the organization in Salesforce. If you select this option, it fetches the Objects that are available in Salesforce.
- Matrix Data: The Matrix Data Architecture (MDA) is Gainsight’s proprietary back end infrastructure that serves as the foundation for any instance of Gainsight. If you select this option, it fetches the Objects that are available in Gainsight.
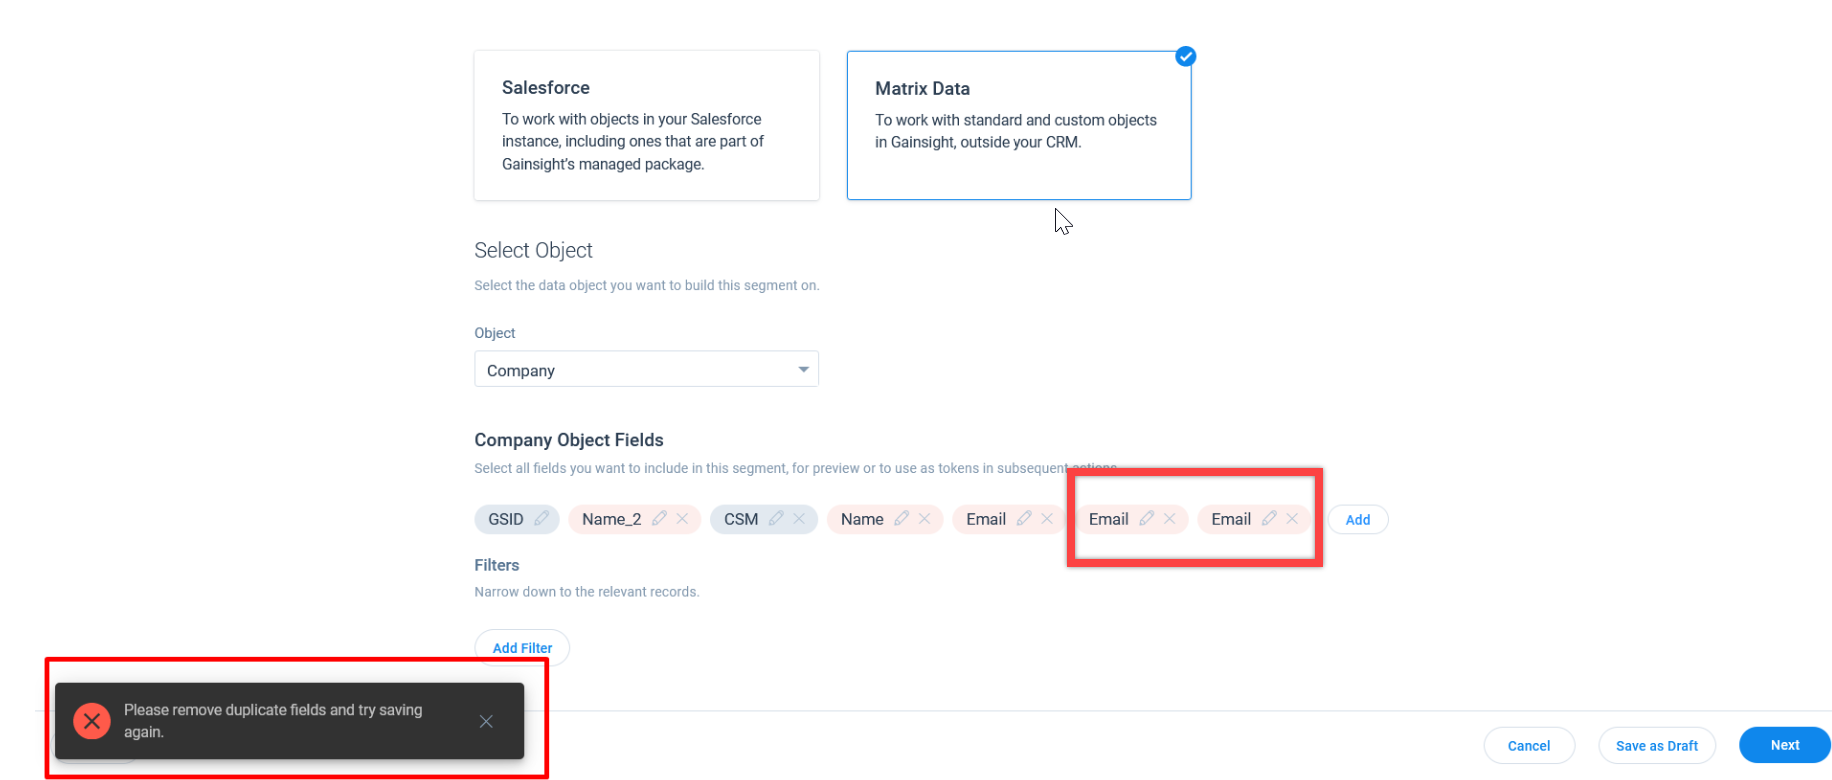
- In the Object dropdown option, select the object on which you want to fetch the data for the Segment. In this use case, select the AO Participant object. The AO Participants object and Company object fields sections appear for adding show fields and filters.
Note: By default, some fields are auto-populated based on the selection of Objects and you cannot delete auto-populated fields. - In the Company Identifier field, select the Company Identifier as Company ID.
An identifier is a unique ID of each record in Gainsight and SFDC. It is important to know the exact ID for standard fields like Company ID or Person ID to help in associating the right company with each record in the selected object.
Note: Additional options are added in the Company Identifier field to select all Company/Relationship Person records for the selected Company/Relationships.
- In the AO Participant Object Show Fields section, add or edit Show fields to be used in a Segment for the selected object, which is later used to resolve tokens if this segment is used as a Source.
- In Filters, add filters to fetch data based on the fields of the selected source object.
- In the Company Show Fields section, add or edit Show fields to be used in a Segment for the selected object, which is later used to resolve tokens if this segment is used as a Source.
- In Filters, add filters to fetch data based on the fields of the selected source object.
Note: Users can also edit the added field names if required.
- Click Save as Draft to save this segment and edit later.
- Click Next to save the segment and navigate to the Schedule tab.
- In the Object dropdown option, select the object on which you want to fetch the data for the Segment. In this use case, select the AO Participant object. The AO Participants object and Company object fields sections appear for adding show fields and filters.
Note: By default, some fields are auto-populated based on the selection of Objects and you cannot delete auto-populated fields. -
In the Company Identifier field, select the Company Identifier as a Company ID.
An identifier is a unique ID of each record in Gainsight and SFDC. It is important to know the exact ID for standard fields like Company ID or Person ID to help in associating the right company with each record in the selected object.
Note: Additional options are added in the Company Identifier field to select all Company/Relationship Person records for the selected Company/Relationships.
- In the AO Participant Object Show Fields section, add or edit Show fields to be used in a Segment for the selected object, which is later used to resolve tokens if this segment is used as a Source.
- In Filters, add filters to fetch data based on the fields of the selected source object.
- In the Company Show Fields section, add or edit Show fields to be used in a Segment for the selected object, which is later used to resolve tokens if this segment is used as a Source.
- In Filters, add filters to fetch data based on the fields of the selected source object.
Notes:
- Users can also edit the added field names if required.
- Users cannot save the Segment if the duplicate fields are added in the show fields section. If added, duplicate fields are displayed in red color.
- Click Save as Draft to save this segment and edit later.
- Click Next to save the segment and navigate to the Schedule tab.
Limitations:
The following are the limitations that can be configured in Segments:
- The number of fields permitted to be added in the Show me fields is 50. It can be increased as per request.
- The number of filters permitted to be added in the Filters section is 26.
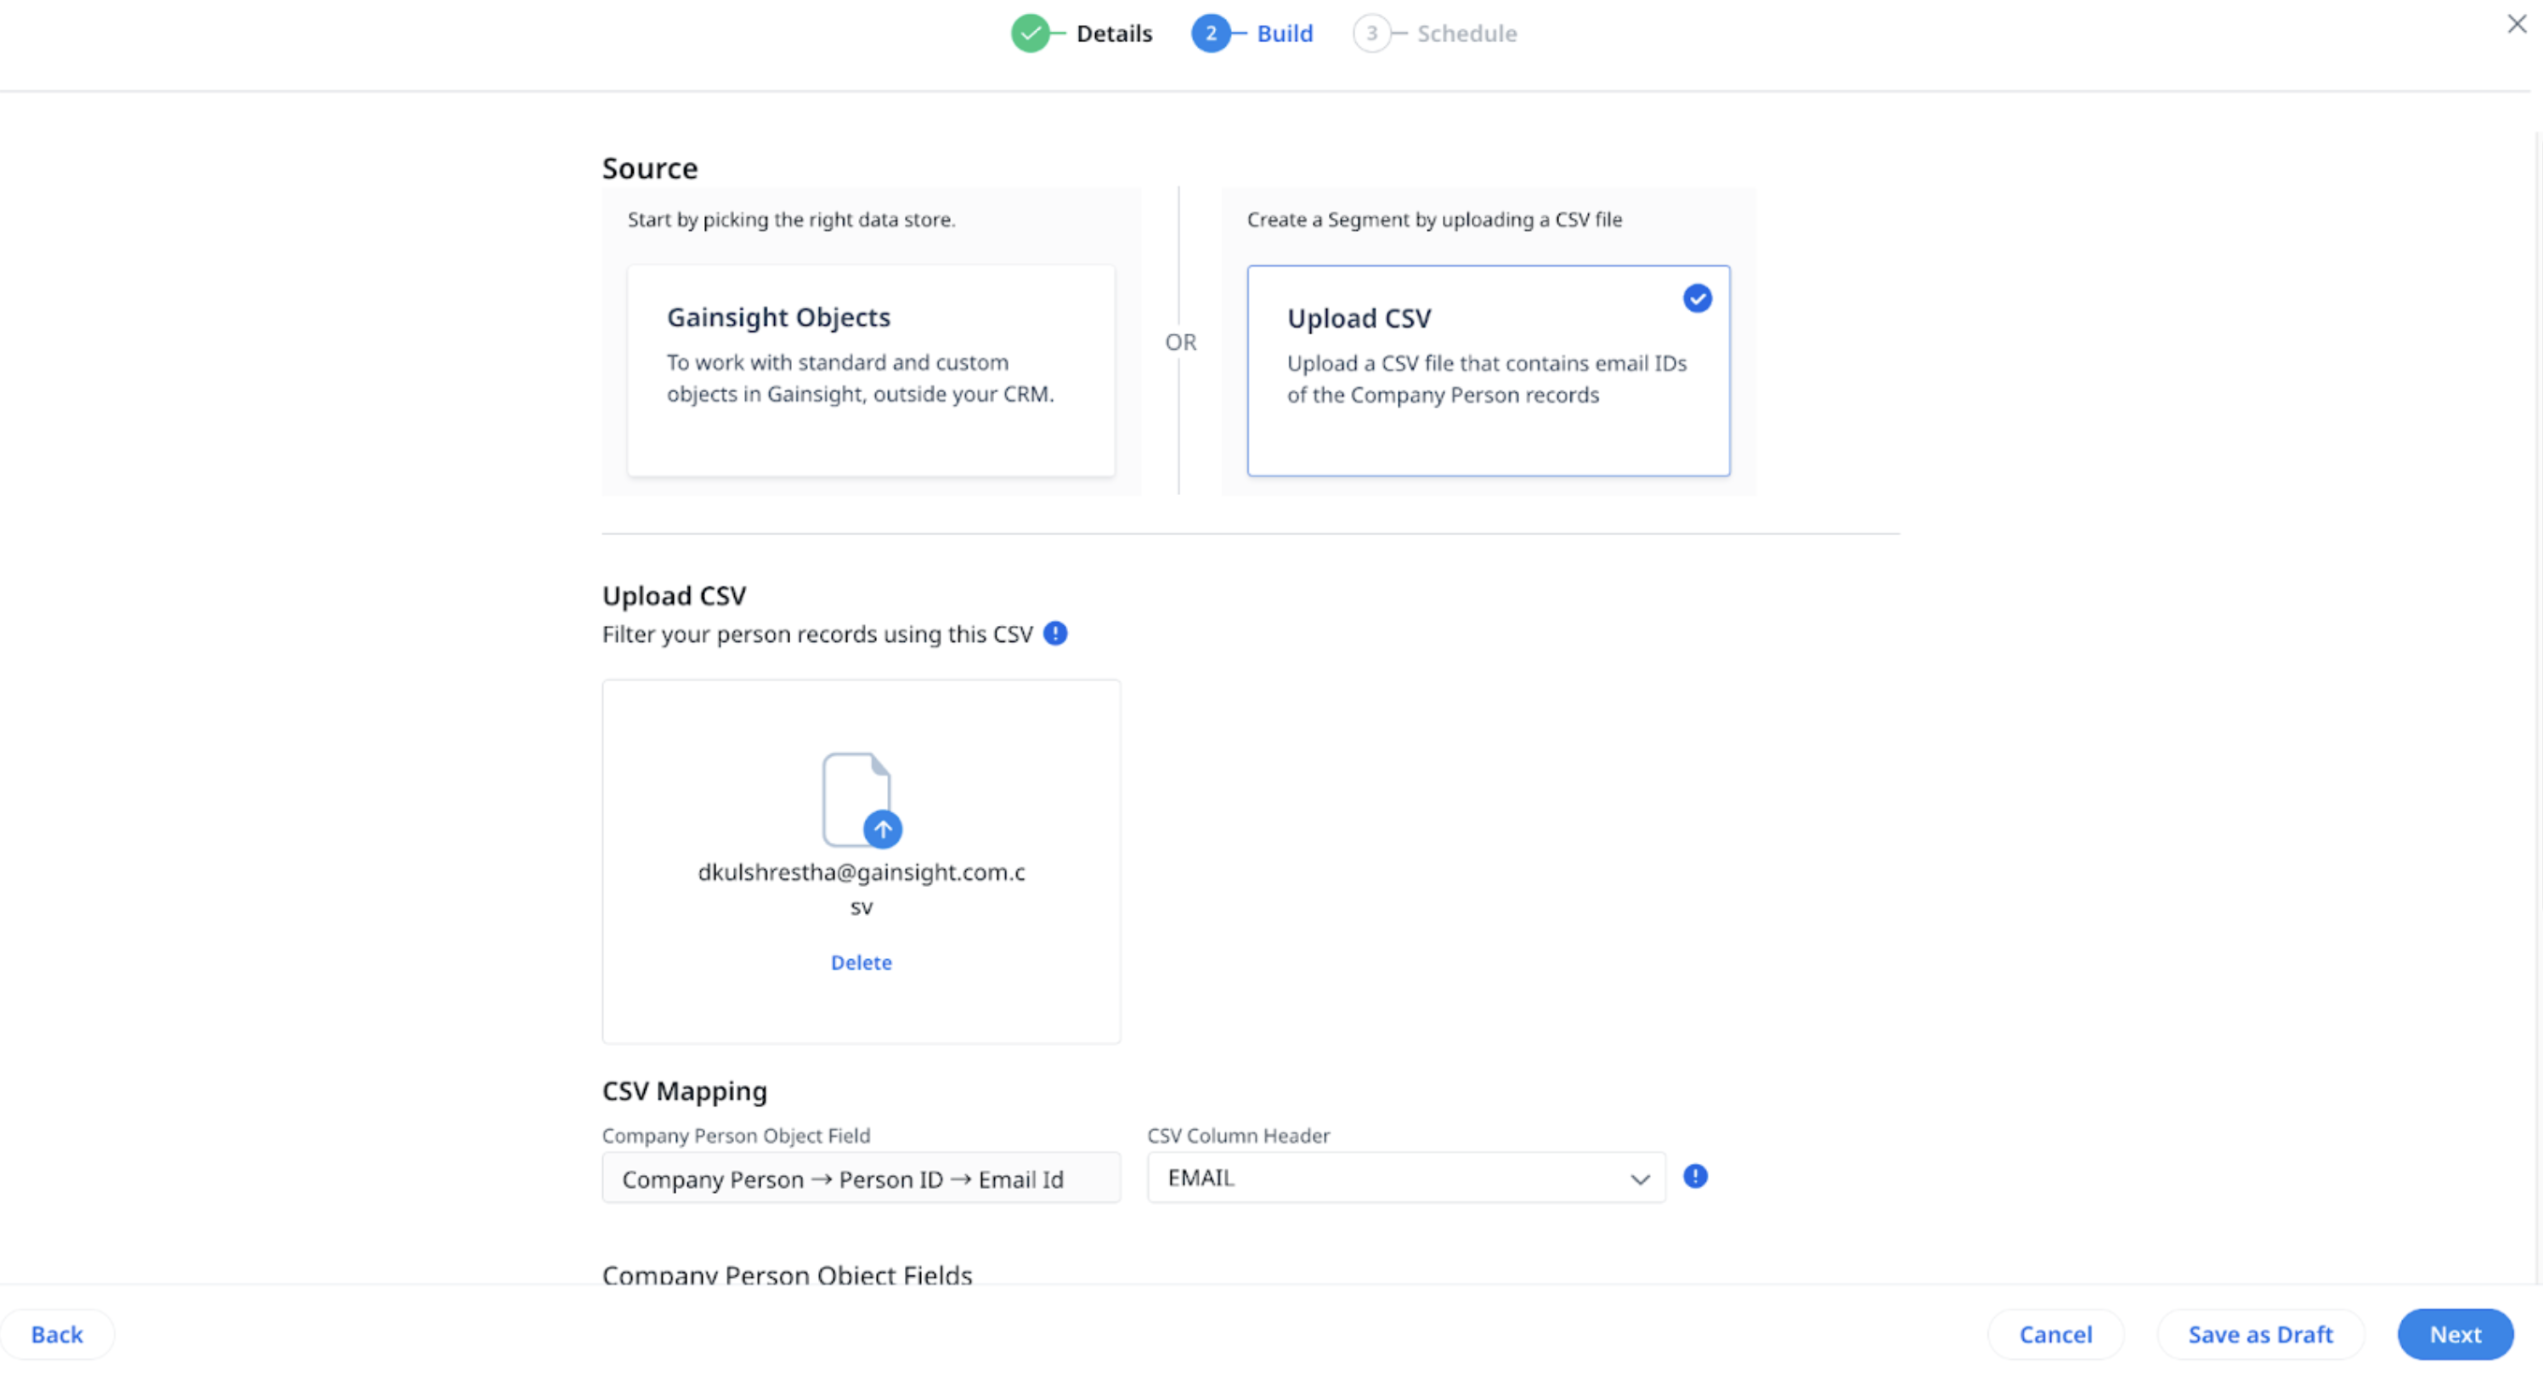
Upload CSV
The Upload CSV option enables admins to upload a CSV file to create new segments or update the existing segments of Company Persons or Relationship Persons records. Admins can download both successful and unsuccessful segment records from the Execution History option.
Note: This feature is available only when you select the Company Person or Relationship Person Segment Type.
To upload a CSV:
- Navigate to Administration > Segments.
- In the Name field on the Details tab, enter the segment name.
- In the Type field, select either Company Person or Relationship Person.
Note: For more information on segment Type, refer to the Segment List View section. - Click Next. The Build tab appears.
- Click the Upload CSV option. The browse file option appears.
- Drag and drop or click browse to upload a file.
Notes:
- The extension of the file must be .csv.
- The uploaded CSV file must contain a column with the email addresses of company persons or relationship persons. Adding columns with other details is optional.
- The maximum file size that can be uploaded is 3 MB.
- After the successful upload of the file, the CSV Mapping section appears.
- From the CSV Column Header dropdown, select the CSV header column name that contains the Email IDs.
Note: A segment record is created when the email IDs of Relationship Persons or Company Persons in Gainsight match the email addresses in the CSV file, while other email IDs are excluded. - Click Next to schedule a segment.
Schedule Tab
Select the toggle switch, if you want to refresh this segment at frequent intervals. If not selected, it will run only once.
Select any of the following radio-buttons to set the frequency for the segment to run:
-
Daily: The following options are available when you select the Daily tab:
- Every Weekday (MON-FRI): Select this option to run the segment only on weekdays.
- Every Day: Select this option to run the segment every day.
- Weekly: Select the day of the week on which the segment must run on the Weekly tab.
- Monthly: The following options are available when you select the Monthly tab:
- On Day: Select the day of the month on which the segment must run.
- On the: Select the number of any weekday in a Month on which the segment must run.
- Start Date: Select the start date from which the segment execution starts.
- End Date: Select the end date after which the segment execution ends.
- Start Time: Select the preferred start time in hours and minutes.
- Time Zone: This is set automatically depending on the Timezone selected in the Application Settings > Default Time Zone field. You can also change the timezone based on your preference.
Click Done to complete the configuration of a segment and navigate to the Segments List page.
Note: The segment will start the Run when you click Done for the first time while creating it. But, for the subsequent saves, RUN must be executed explicitly from the Segments List View page.
Limitations
The following are some of the limitations of this feature:
- Currently, users can only create Segments using Objects.
- The Record Delete functionality for Segments data is not honored. If a person, company person, relationship person is deleted, then the records from the segment are not deleted.
- Company Merge functionality is not supported for Segments Data.
- Multi-currency functionality is not supported in Segments. If the currency code is available in show fields then it displays the data whatever user loads into the object or whatever data is present in that object.
- Segment is refreshed only based on the schedule configured while creating a Segment. It is not refreshed while syncing the segment source in Program.
- Support of multi picklist search in Grid is not possible.
- It is not possible for the users to refresh the last run and execution history data on the Segments List View page.
- Filtering and Sorting Segments by Type and Status in the list view is not possible.
- Any user who has access to the Administration tab can create a Segment. They are no separate permissions to be provided.
| Net Promoter®, NPS®, NPS Prism®, and the NPS-related emoticons are registered trademarks of Bain & Company, Inc., NICE Systems, Inc., and Fred Reichheld. Net Promoter ScoreSM and Net Promoter SystemSM are service marks of Bain & Company, Inc., NICE Systems, Inc., and Fred Reichheld. |