Configure Text Analytics
Gainsight NXT
Overview
This article walks you through the process of how to configure the Feedback Data and Topic tabs in the Text Analytics Admin page, and also explains how to configure the sources and topics for text analytics purposes.
Here, you can also select the time frame, sources, revenue information and add topics and keywords to capture and provide better analytics on a particular topic.
Business Use Case
As a CX User, you want to understand customer sentiment based on Survey feedback and Timeline feeds coming from various categories. For example, you may want to analyze Onboarding feedback and the likelihood of Renewal for the next quarter, so your admin can define these topics in the Text Analytics to analyze the customer sentiment. With Text Analytics, you can derive insights such as:
- Trend analysis on your data to examine how customer sentiments are changing over time (eg. quarter to quarter).
- For deeper insights, you may want to drill down into specific Surveys like NPS®, CSAT or Timeline entries for EBRs, to identify the topics/keywords that are most important and see how they are related to your customer sentiments.
To configure Text Analytics:
- Navigate to Administration > Text Analytics.
- Click Get Started.
Note: There are three sections: Source, Customer Topics, and Key Driver Analysis
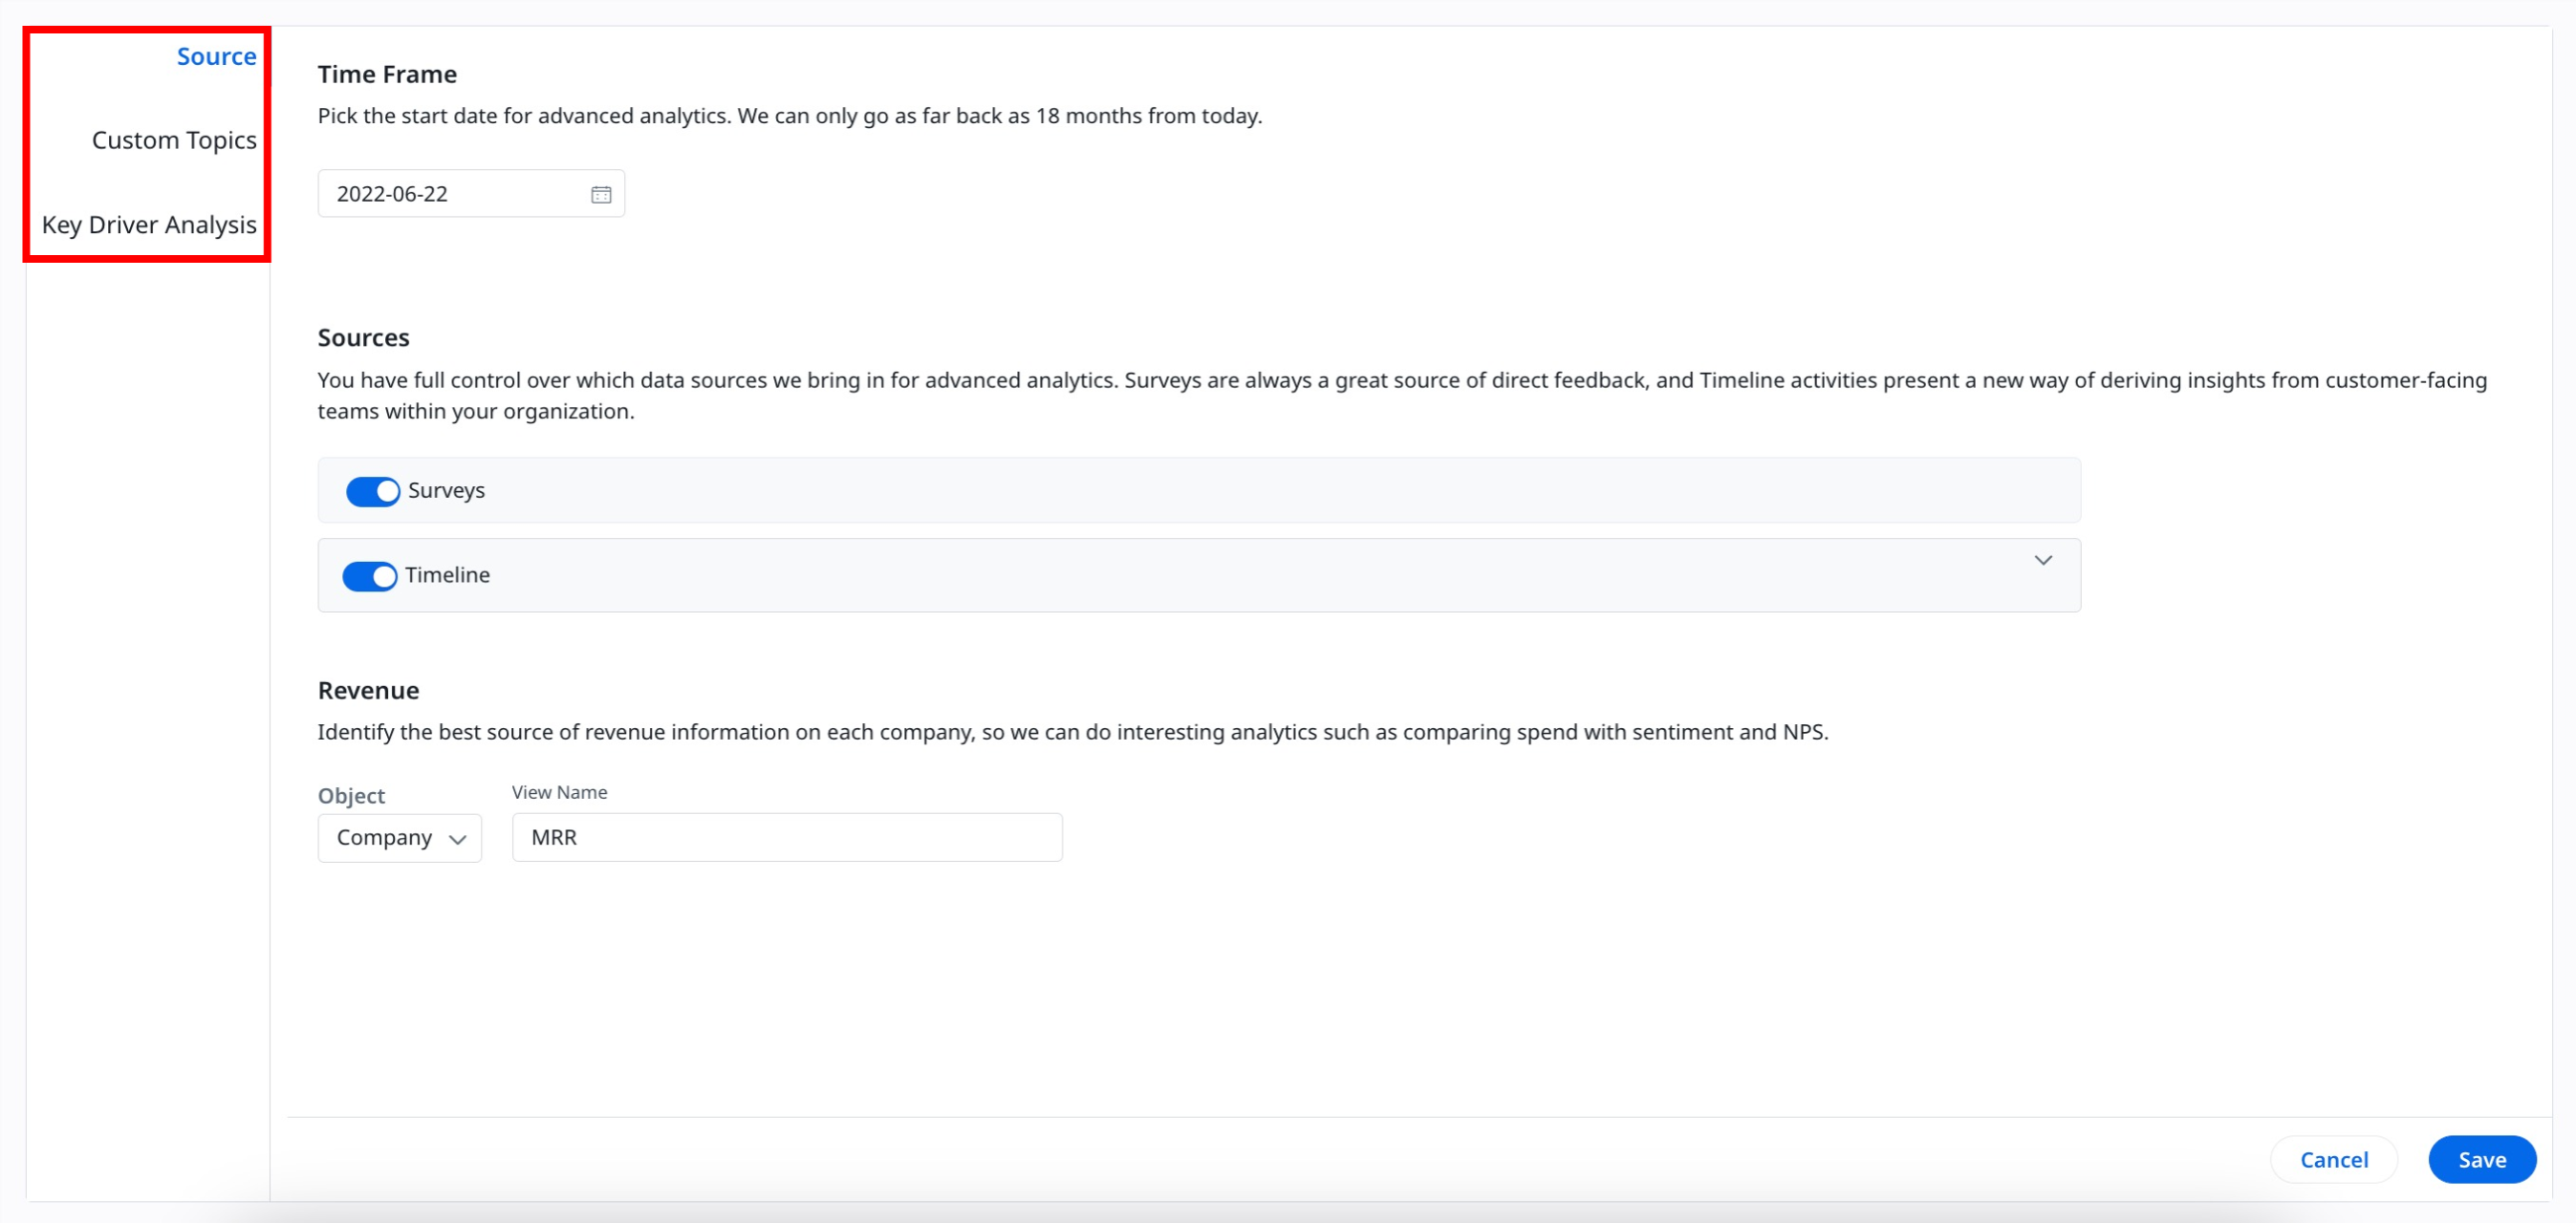
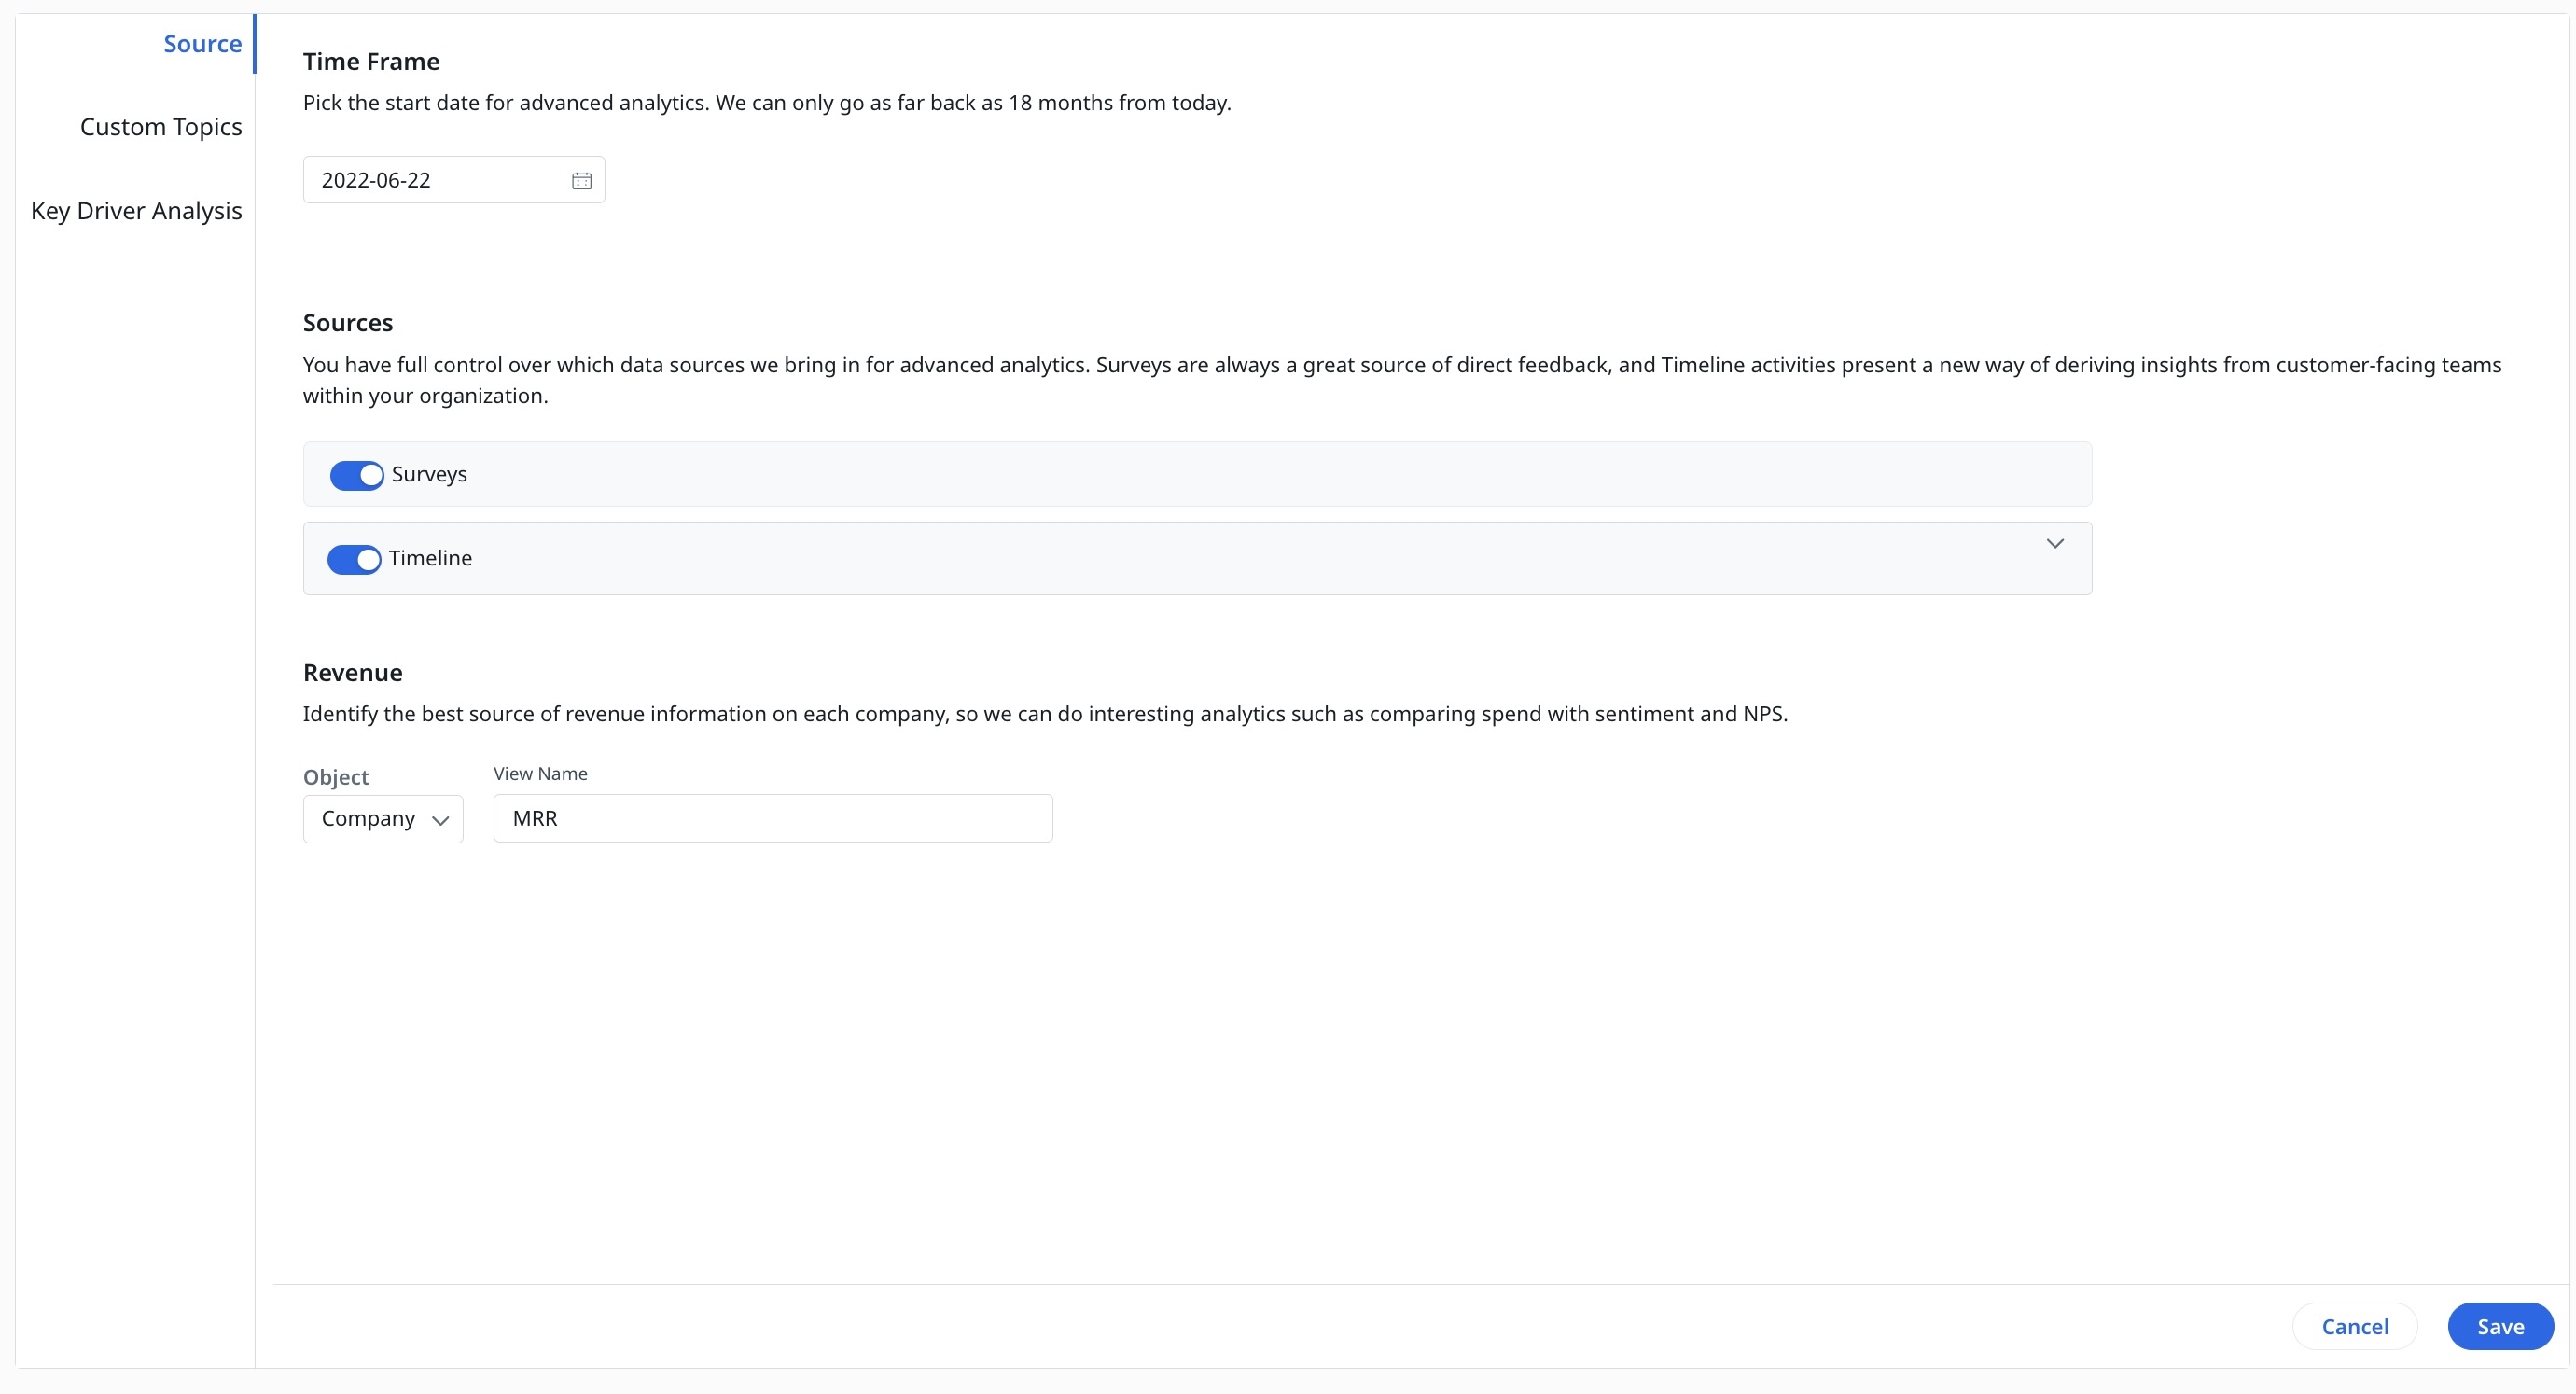
Source
To configure Feedback Data:
- Time Frame: Select the required date to fetch data for advanced analytics.
Note: You can only select a maximum of 18 months historical data. - Source: Select the required source(s) from the available sources: Surveys and Timeline. Once the source is selected, Text Analytics collects the feedback data, performs the text analysis, and provides sentiment scores.
- Surveys: Fetches entire response data from Surveys.
- Timeline: You can select the required timeline activities to fetch the data.
- Revenue: From the Company object, you can select the required Currency field. In the Text Analytics page, the selected Currency field is displayed in all the widgets that contain revenue information.
IMPORTANT: The Text Analytics with Survey data is now available for all users. An add-on for Text Analytics is also available that extends data accessibility to include multi-channel sources such as Timeline.
Custom Topics
You can add Topics and Keywords to get better results based on your requirement. Once you add Topics and Keywords, all the associated topic names and keywords in the text feedback data is analyzed, sorted and displayed under the configured topic. By default, Text Analytics ships few OOTB topics and keywords. These are standard topics and keywords which are most commonly used in SaaS and Customer Success platforms. Hence, Text Analytics provided these topics and keywords for easy access. You can Edit or Delete these topics and keywords as required.
Listed below are the OOTB topics and keywords:
| Topics | Keywords |
|---|---|
| Competitors | competition, compete, differentiator, differentiation, other vendor |
| Action Items | follow up, revert, get back, find out, send over, hear back, help, guidance, feedback, suggestion |
| Ease of Use | ui, ux, clicks, effort, design, configure, configuration, maintain, manage, setup, intuitive, un-intuitive, simplify |
| Support | ticket, issue, bug, request, blocker, resolve |
| Onboarding | implement, implementation, launch, roll-out, roll out, deploy, deployment, delivery, onboard, integrate, integration, connect, enablement, training, induction, services |
| Price | cost, costly, cheap, expensive, inexpensive, investment, pricing, discount, fee, license, licensing, contract, roi |
In the Topics page, you can see the following options:
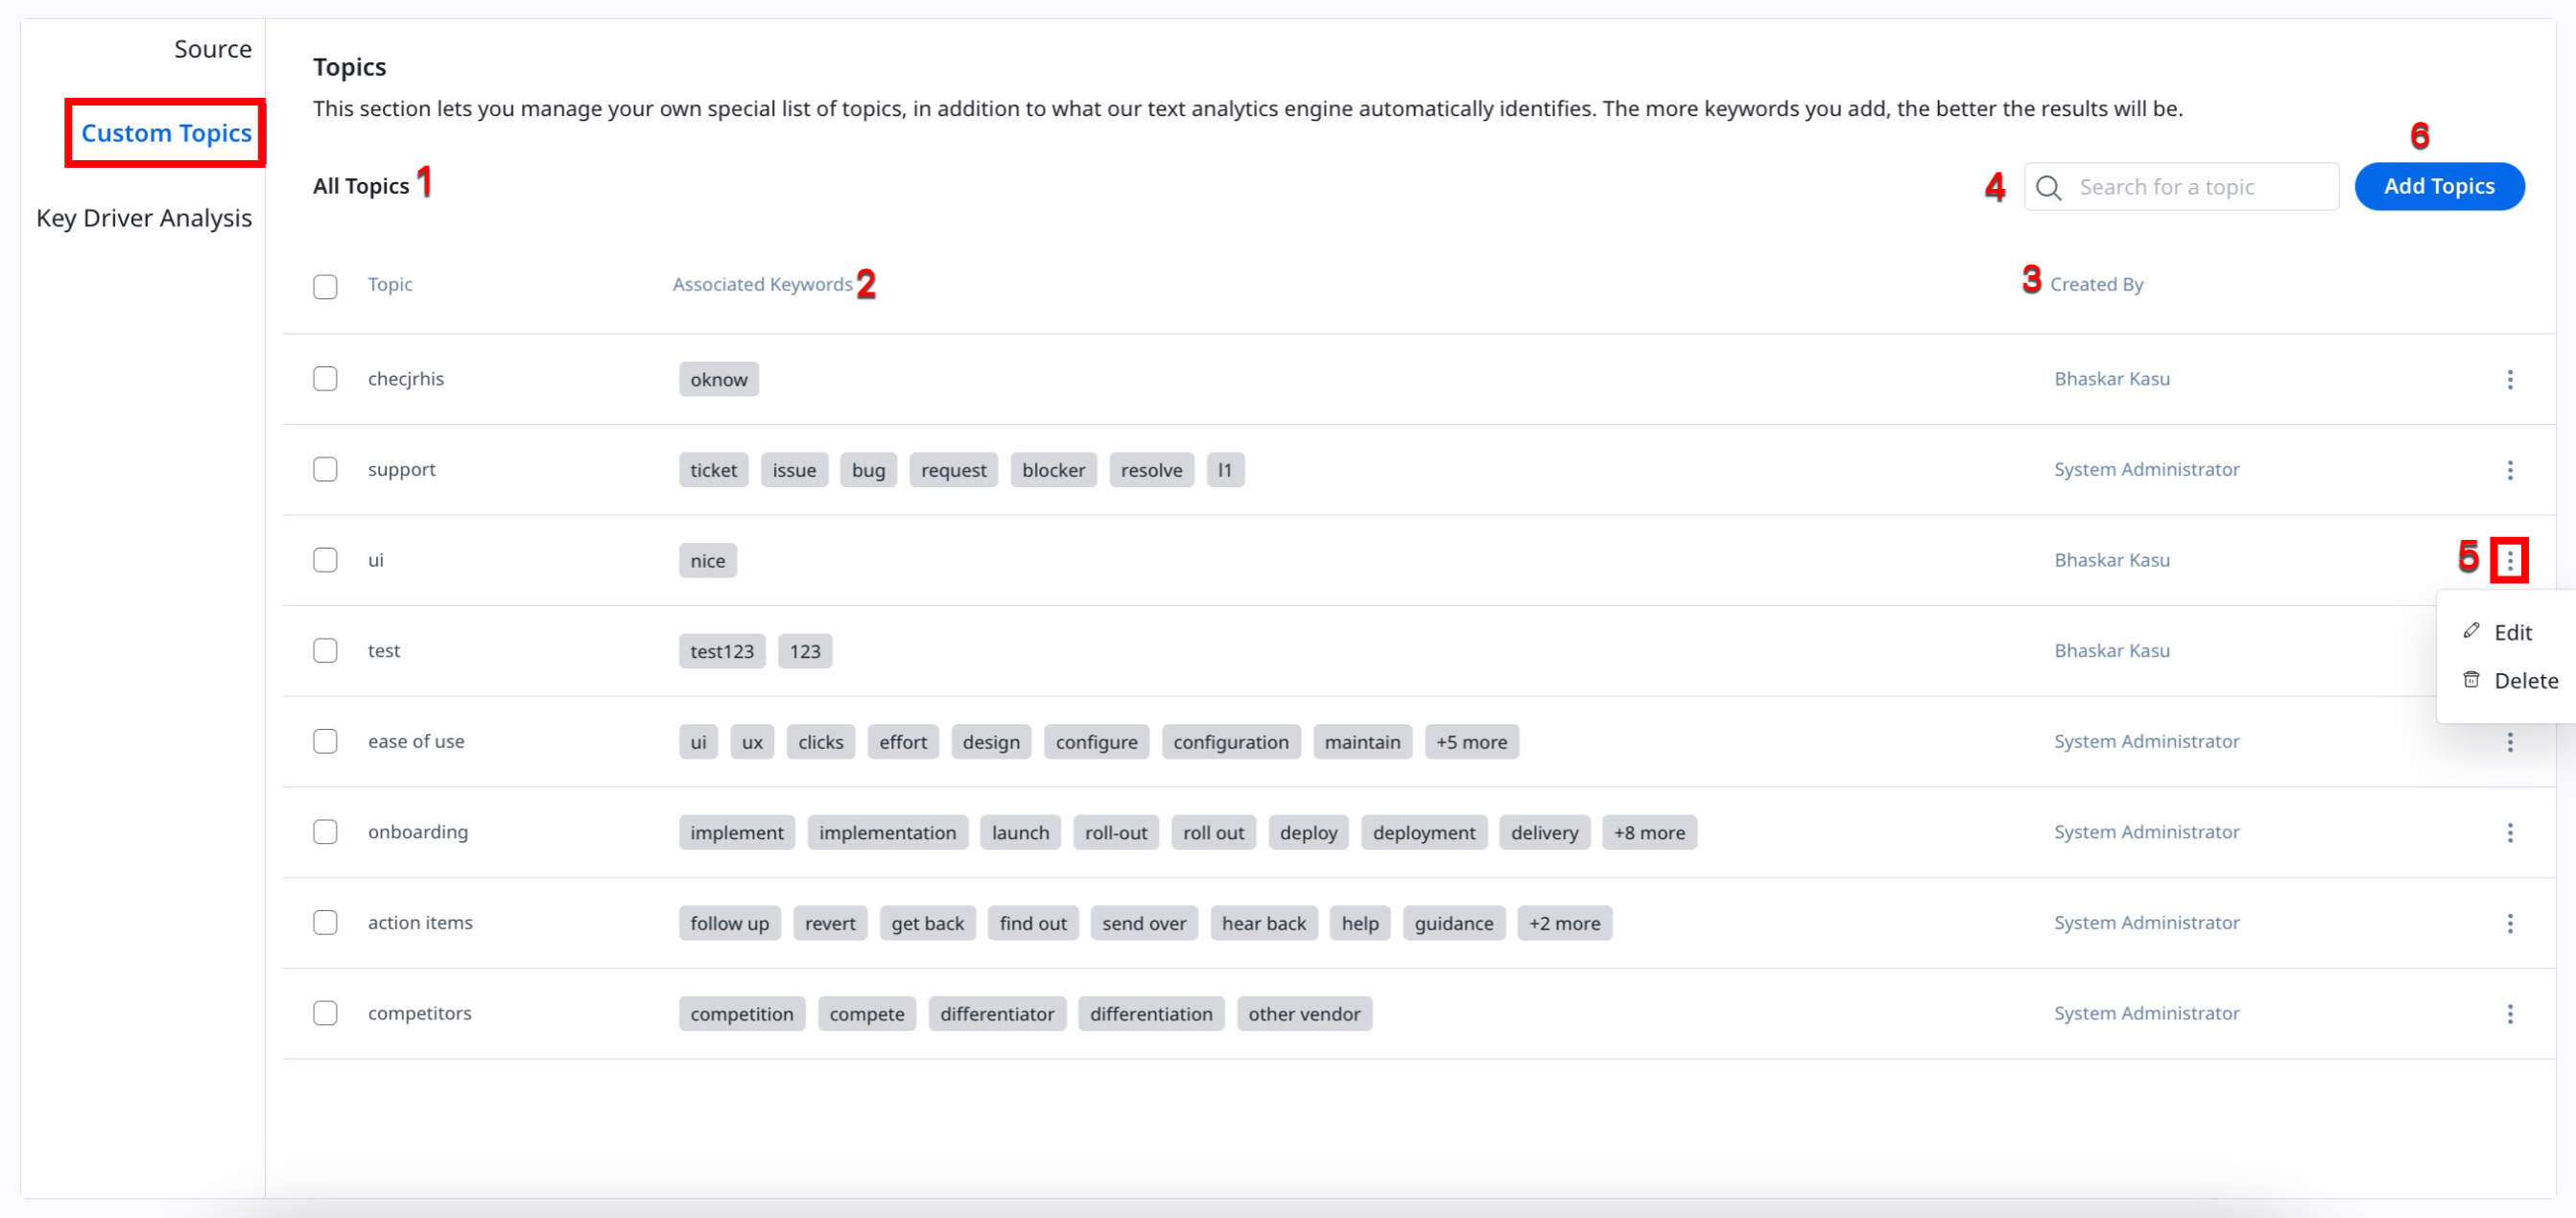
- Topic: Displays the name of the Topic.
- Associated Keywords: Displays all the Keywords associated with that particular Topic.
- Created By: Displays the name of the user who created the topic.
- Search Topic: Type-in the Topic Name to display the search results.
- Context Menu: Click the Context Menu icon to view the following actions:
- Edit: Allows you to Edit the selected topic.
- Delete: Allows you to Delete the selected topic.
- Note: To delete multiple topics at once, select the Topic checkbox and click Delete Topics.
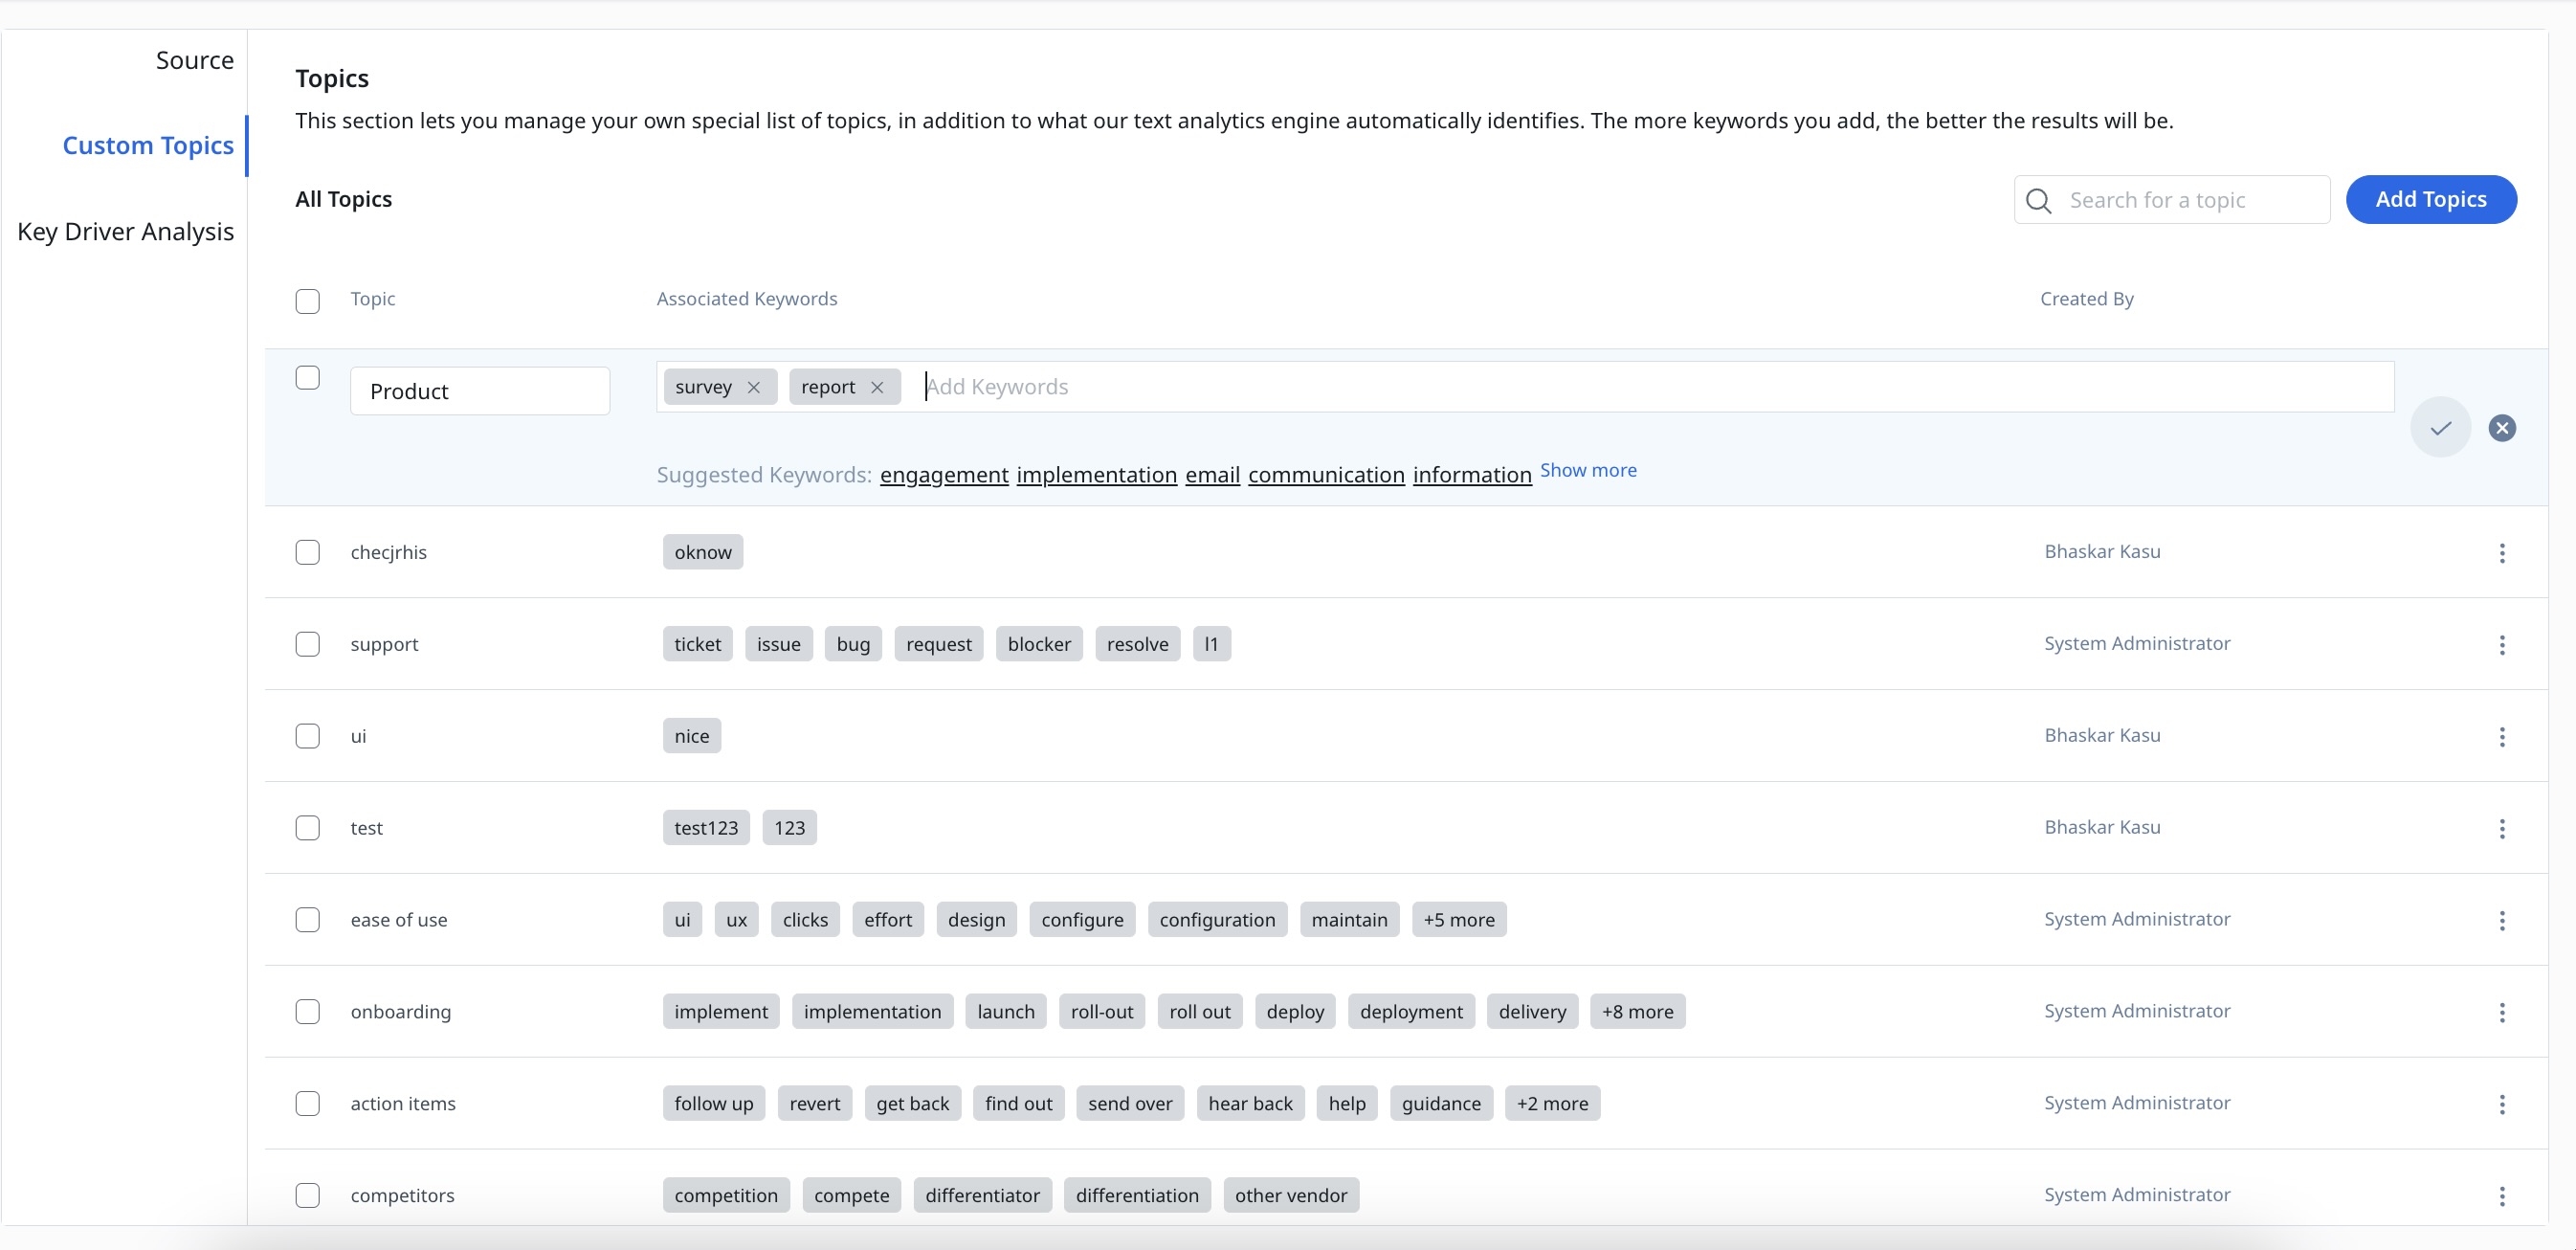
- Add Topic: Click Add Topic to create a new topic.
- Type-in the Topic name in the Enter Topic text box.
- Type-in the Keyword in the Add Keywords text box. Press Tab to enter more Keywords.
- Notes:
- You can also select the Keywords from the suggestions.
- Suggestions are basically derived based on the similarity as determined by Natural Language Processing AI. Suggestions start appearing once the very first text processing has been completed.
- Click ✓ to save.
Once the configuration is saved, in every 4 hours interval, Text Analytics fetches the data for text analysis, processes the text and then users can see the customer sentiments on the Text Analytics home page. For information on how to explore analytics, refer to the Text Analytics Home article.
Notes:
- Text processing takes time and directly depends on the volume of data.
- Text Analytics doesn’t support native NLP for non-English text. User needs to ensure that the Topics and Associated Keywords configured are in English.