Load to PX Action Type
Gainsight NXT
This article explains how admins can use the Load to PX Action Type to load data into PX Account and User entities.
Overview
Admins can push data to Gainsight PX entities using Rules Engine. Gainsight PX has an Account entity and a User entity. With the Load to PX Action type, admins can build Rules to load values into standard and custom attributes of the Gainsight PX Account and User entities. This makes the CS - PX integration a bidirectional data sync combined with the PX connector.
Gainsight recommends reading the configuration of the Rules Details, Data Setup, and Schedule steps before reading this article. For more information, refer to the Create New Rule section of the Rules Engine Horizon Experience Overview article.
IMPORTANT: Contact Gainsight Support to get the Action Types enabled to use the Load to PX Action type.
Example Business Use Cases:
-
With Load to PX Action, admins can push CS health scores into PX. This allows to filter PX reports by health score and helps to target PX Engagements differently for Red vs Green accounts.
-
The Company Stage attribute, which enables admins to determine if a client Account is in the Onboarding stage or the Adopting stage, can be synced from CS to PX. This is quite helpful for analyzing usage data in PX and identifying target PX Engagements at various phases.
-
Admins can use the calculation capabilities in CS to add value to PX. Gainsight PX is optimized for fast on-the-fly queries whereas the Rules Engine is a batch processing tool that can handle complicated data processing and calculations. One way to manifest this capability is to use the Rules Engine to periodically bring PX Users into various categories. For example, you could define a 'premium user' as someone who has exceeded a threshold of activity in your product in at least four of the previous six months.
-
CS has access to useful data like support cases. Admins could define a 'negative support user' as someone who filed a critical case that has been open for more than a week. Using Load to PX Action to mark these users in PX can help with both interpreting usage data and guiding users with PX Engagements.
Prerequisite
The prerequisite for Load to PX action is that Gainsight PX Connector must be configured. For more information on how to configure the PX Connector in the Gainsight application and the associated data sync jobs with PX connector, refer to the Gainsight PX Connector article.
Configure Load To PX Action
To ingest data into the PX Account entity from a Company object in CS.
- In the Action Setup step, hover on the dataset. The Add Action icon appears.
- Click the Add Action icon. The Add Criteria slide-out panel appears.
- (Optional) Click Add Criteria to define a filter criteria for the dataset.
- Click Continue to navigate to the Add Actions step.
- From the Create Action drop-down list, select the Load to PX action type.
- In the Load to PX Action section, provide the following details:
-
In the Connection drop-down list, verify if the PX connector that is configured is pre-selected. This connector integrates the given instance of Gainsight with the PX subscription into which the data needs to be pushed.
-
From the Object Name drop-down list, select one of the following:
-
Account: It includes the data from a Company Person object in CS.
-
-
Key Configurations for Accounts:
- Id mapping updates the record with the corresponding ID.
- Parent Group ID mapping updates each record with the same Parent Group ID.
- Either map Id or Parent Group ID for updating the Account entity. Both Id and Parent Group ID cannot be mapped simultaneously.
- User: It includes the data from a Company Person object in CS.
Key Configurations for Users:
- Id mapping updates the record with the corresponding ID.
- Both Id and Aptrinsic Id cannot be mapped simultaneously.
- From the Operation drop-down list, select one of the following:
- Insert: It creates new records.
- Update: Updates the existing record as per the chosen identifier.
- Upsert: Updates any matching records and if no matching records are found, new records are created.
Note: Update operation helps to update the existing records in PX. No new record is created.
- In the Description field, enter a description for the rule action.
7. In the Field Mapping section,Select the Target Fields.
Note: The Source fields get auto populated in the Field Mapping section once the Object Name is selected.
8. (Mandatory) Select at least one Include in Identifiers checkbox. It helps to avoid data duplication.
- Custom Field: This option lets you provide a custom static value to the target field in the GS Lead object.
-
Click Custom Field.
-
From the drop-down list, select Target Fields.
-
Enter the value that should be loaded in the selected target fields.
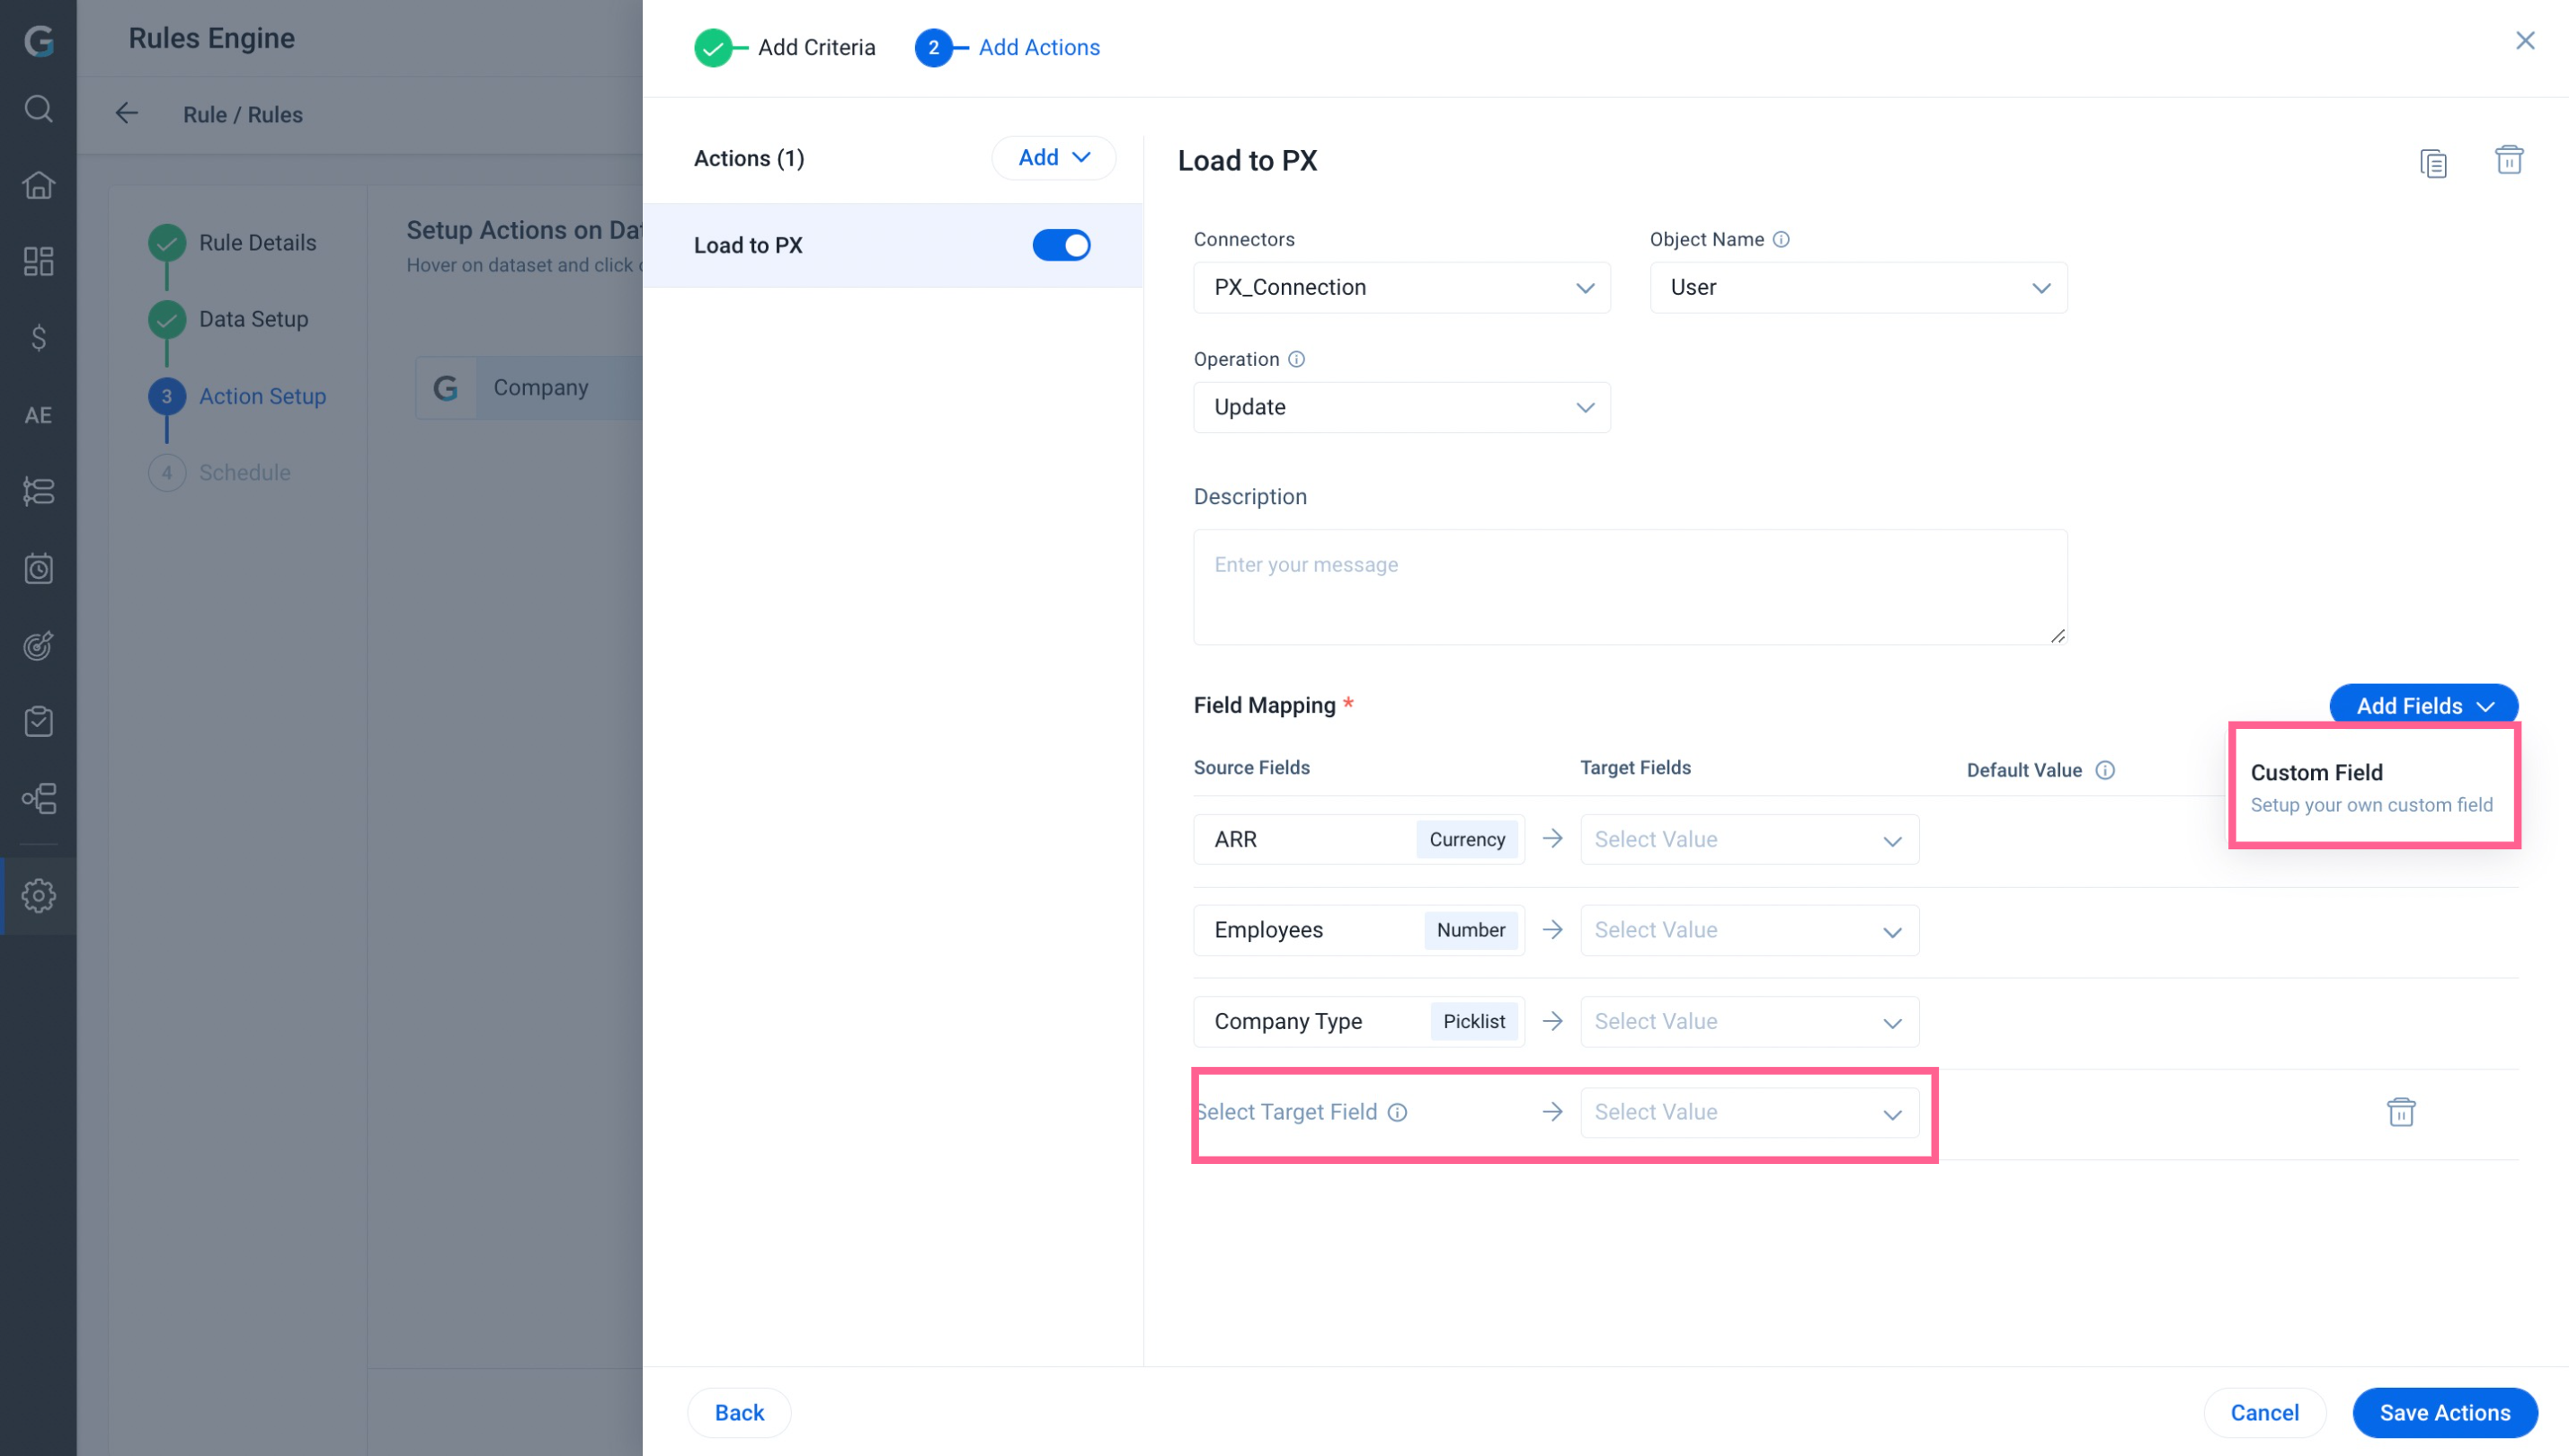
- Click Save Actions.
Note: Once the rule is run, navigate to Accounts Explorer in PX to view the updated record.