Configure Load to SFDC Objects Action Type
Gainsight NXT
This article explains how admins can configure the Load to SFDC Action Type in Rules Engine.
Overview
Admins can configure Load to SFDC Action Type to sync Gainsight data with Salesforce. The data loads data into standard and custom Salesforce objects.
Gainsight recommends reading the configuration of the Rules Details, Data Setup, and Schedule steps before reading this article. For more information, refer to the Create New Rule section of the Rules Engine Horizon Experience Overview article.
Example Business Use Cases:
- Consider that admins want to load data from a Person object into a Contact object to keep the object updated. Using the Load to SFDC Action Type, admins can load data into the Person object through a CSV file, as the data is not present in the Contact object. Hence Person data is loaded to the Contact object to keep both the objects on the same page.
- The Email address is unique for each contact object.
Prerequisite
Admins must configure the Permissions - Rules Load Actions to select the Salesforce objects and fields to load the data.
Configure Rule Load Actions
To configure Rule Load Actions:
- Navigate to Administration > Rules Engine.
- Click Rules Settings.
- Click Permissions - Rules Load Actions. The Permissions - Rules Load Actions page appears.
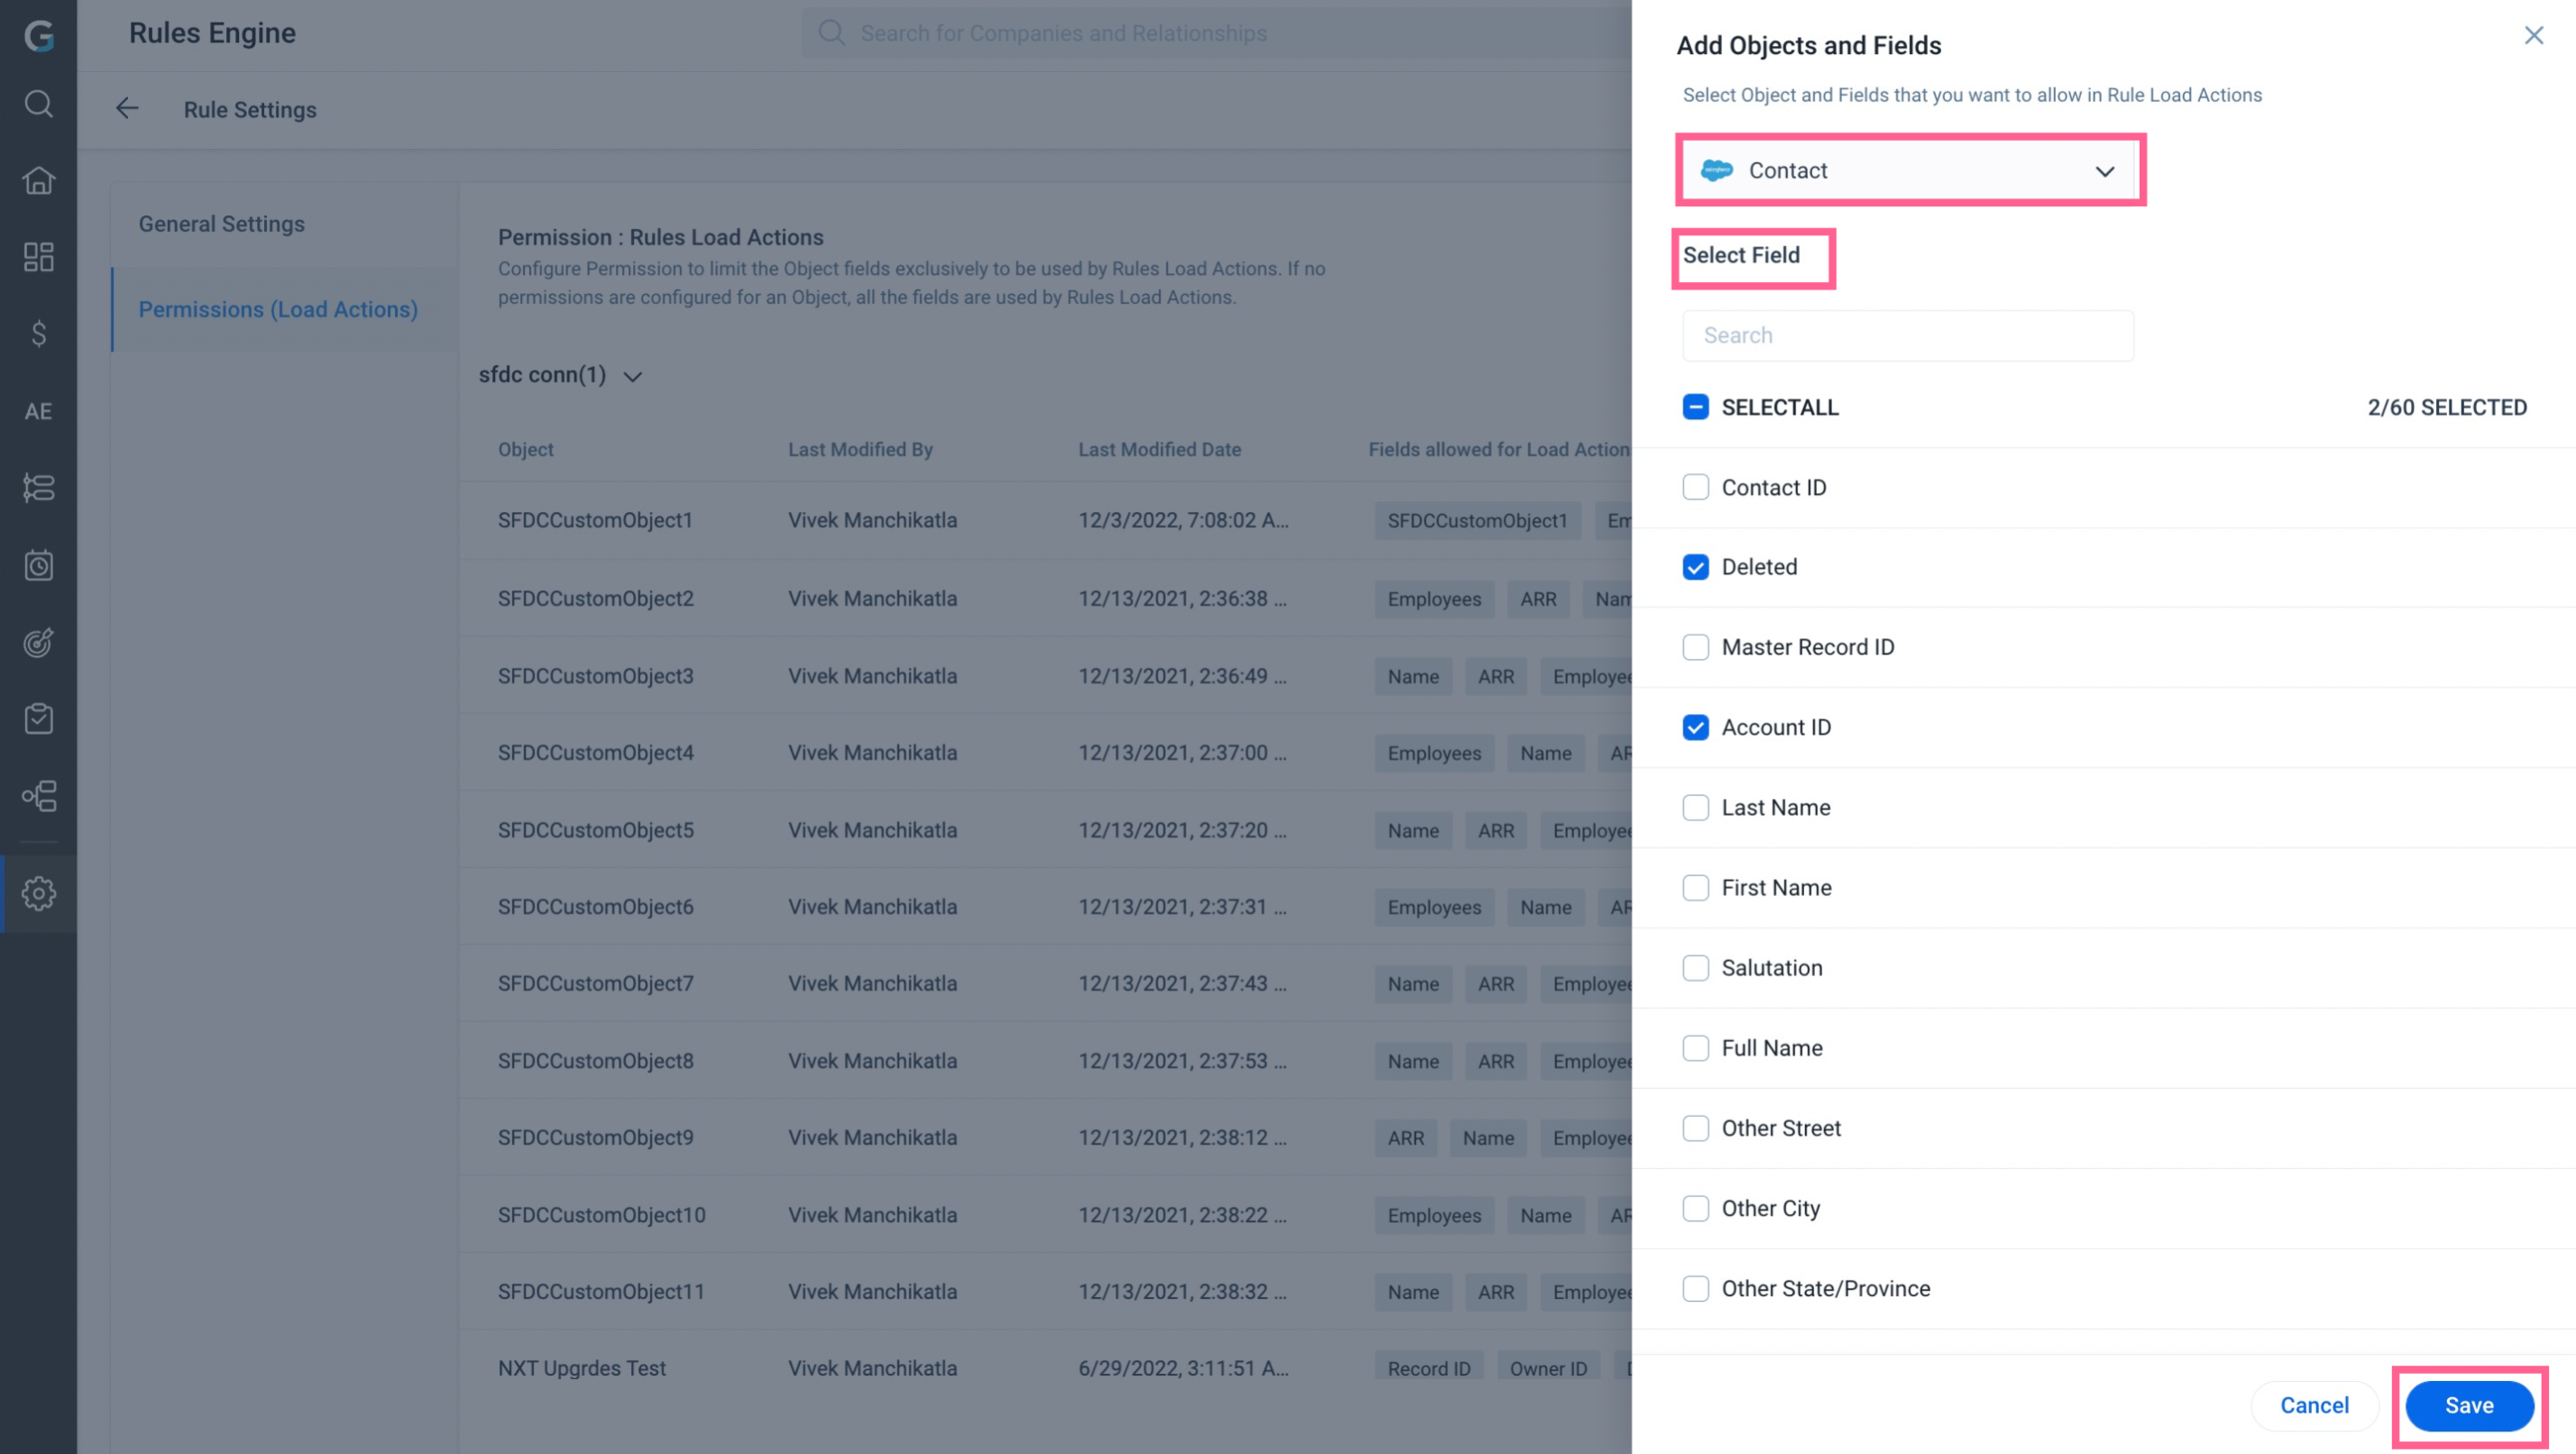
- Click Add Object.
- From the Select Object drop-down list, search and select the required object.
- Select the checkbox beside the required object fields.
- Click Save. The selected fields are added to the object.
Configure Load to SFDC Action
To configure Load to SFDC Action Type:
- In the Action Setup step, hover on the dataset. The Add Action icon appears.
- Click the Add Action icon. The Add Criteria slide-out panel appears.
- (Optional) Click Add Criteria to define a filter criteria for the dataset.
- Click Continue to navigate to the Add Actions step.
- From the Create Action drop-down list, select the Load to SFDC Object action type. The Load to SFDC Object slide-out panel appears.
- In the Load to SFDC Object section, provide the following details:
- From the Connection drop-down list, select the SFDC connection.
- From the Object name drop-down list, select an object.
Note: The objects selected in the Configure Rule Load Actions section are displayed here.
- From the Operation drop-down list, select one of the following:
- Insert: It creates new records.
- Update: Updates the existing record as per the chosen identifier.
- Upsert: Updates any matching records and if no matching records are found, new records are created.
- Enter a Description for the rule action.
Note: We cannot perform Insert or Update operations on formula fields. However, in Bionic Rules, you can map a formula field as a string, number, and so on. If you run the Bionic Rules with a formula field mapped as the target field, it will fail.
-
From the Add Fields drop-down list, select from the following types of fields to add to the action.
- Source Field: This option lets you select source field(s) from the source object and map it to the target field in the SFDC object action.
- Click Source Field. The Select Fields slide-out panel appears.
- In the Select Fields slide-out panel, provide the following details:
-
Select the checkbox of the source fields.
-
Click Select. The selected source fields are added to the Field Mappings section.
- Select the Target Fields.
- (Mandatory) Select at least one Include in Identifiers checkbox to avoid data duplication.
- Custom Field: This option lets you provide a custom value to the target field in the GS Lead object.
- Click Custom Field.
- From the drop-down list, select Target Fields.
- Enter the value that should be loaded in the selected target fields.
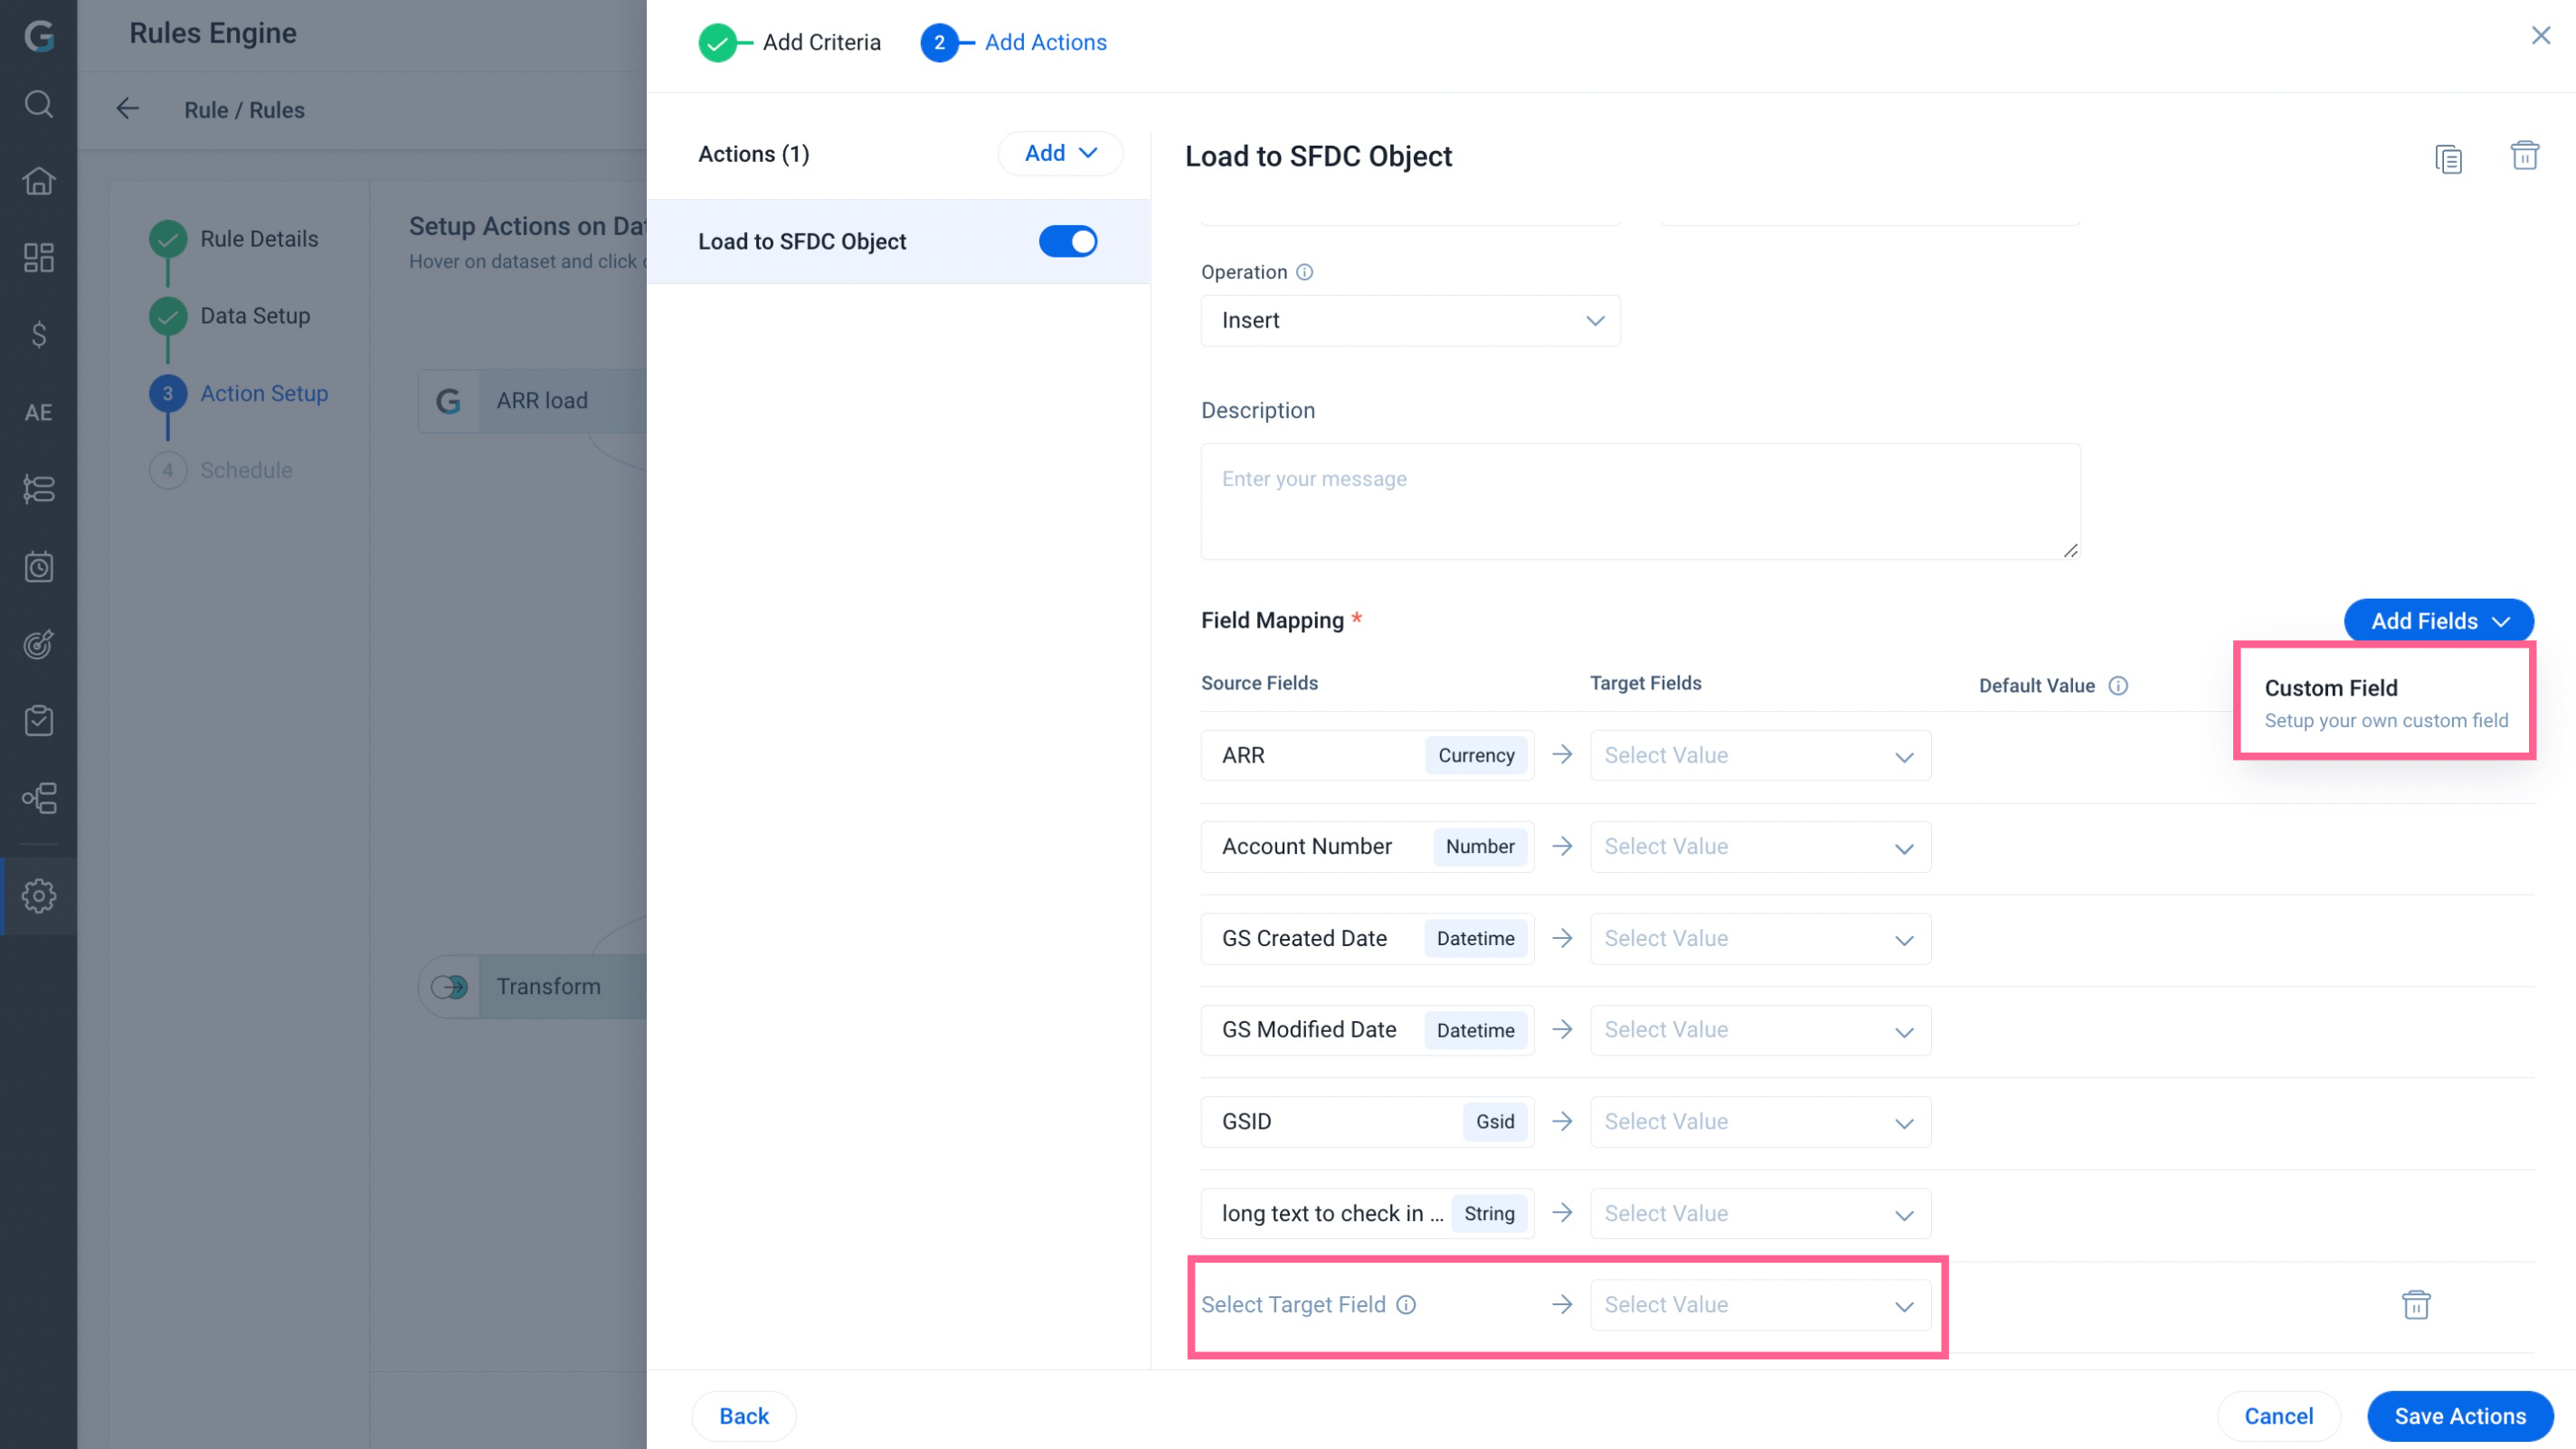
- Click Save Actions. The Load to SFDC Object Action Type is saved successfully.