Update Contacts with Email Opt-Out Configurations
Gainsight NXT in Salesforce CRM
This article supports Gainsight NXT, the next evolution of the Customer Success platform, accessing through Salesforce Login. New and upgraded customers are deployed on Gainsight NXT. To learn more about Gainsight NXT in Salesforce, click here.
If you have not upgraded and are using Gainsight Salesforce Edition, you can find supporting documentation here.
Not sure what your team is using? Click here.
Introduction
This article explains the process of updating Contacts in Salesforce with Opt-out configurations. Opt-out settings refer to the email communications from Gainsight which a customer has opted not to receive.
Implementation
This section describes the high-level steps involved in creating an Opt-Out rule.
-
Ensure that a new custom field Email Opt-out Category is added on the SFDC Contact object. For more information, refer to the Salesforce article.
-
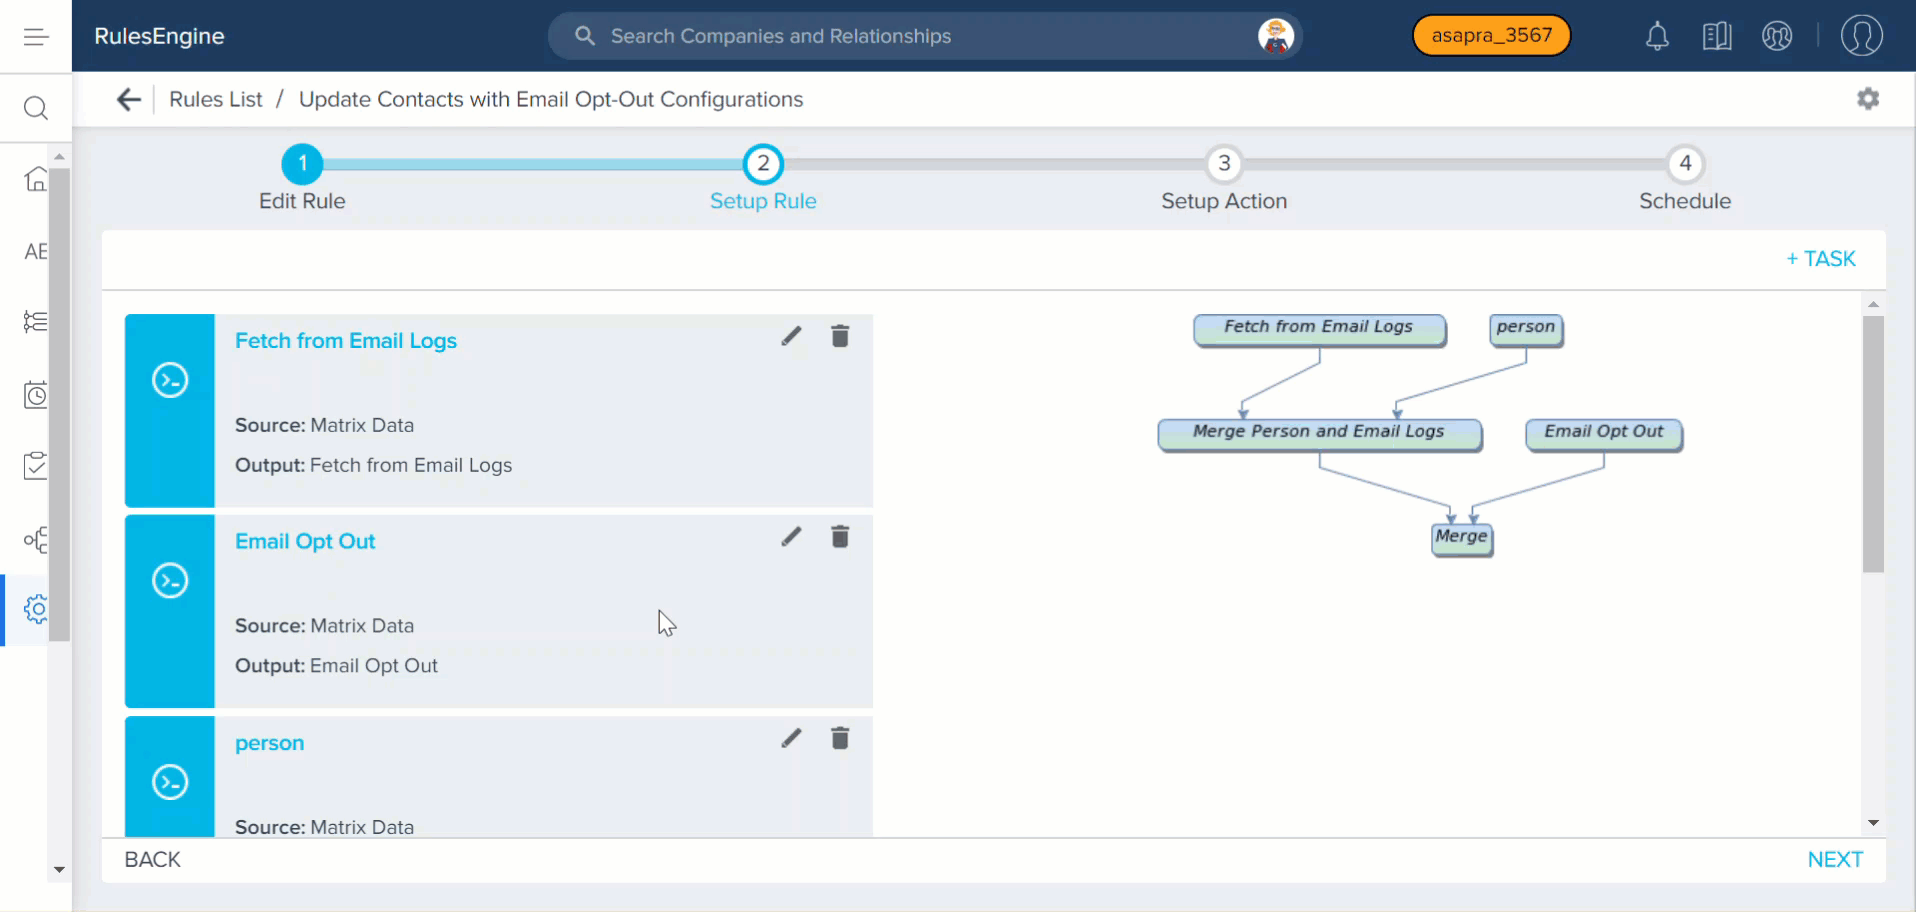
After creating a connection, a rule is created using three datasets.
-
The first dataset is created on the Email Logs object and fetches the list of customers who have opted out of emails from Gainsight.
-
The second dataset is created on the Person object and fetches the list of customers who have external ID.
-
The third dataset is created on the Opt-Out Email object which determines the category of mail for which the contact has opted-out.
-
The Load to SFDC Objects action type is used to load this data to the Contact object.
Create First Dataset
This dataset is created on the Email Logs object and determines if a customer has opted out of emails.
To create the first dataset:
-
Navigate to Administration > Operations > Rules Engine.
-
Click Create Rule.
-
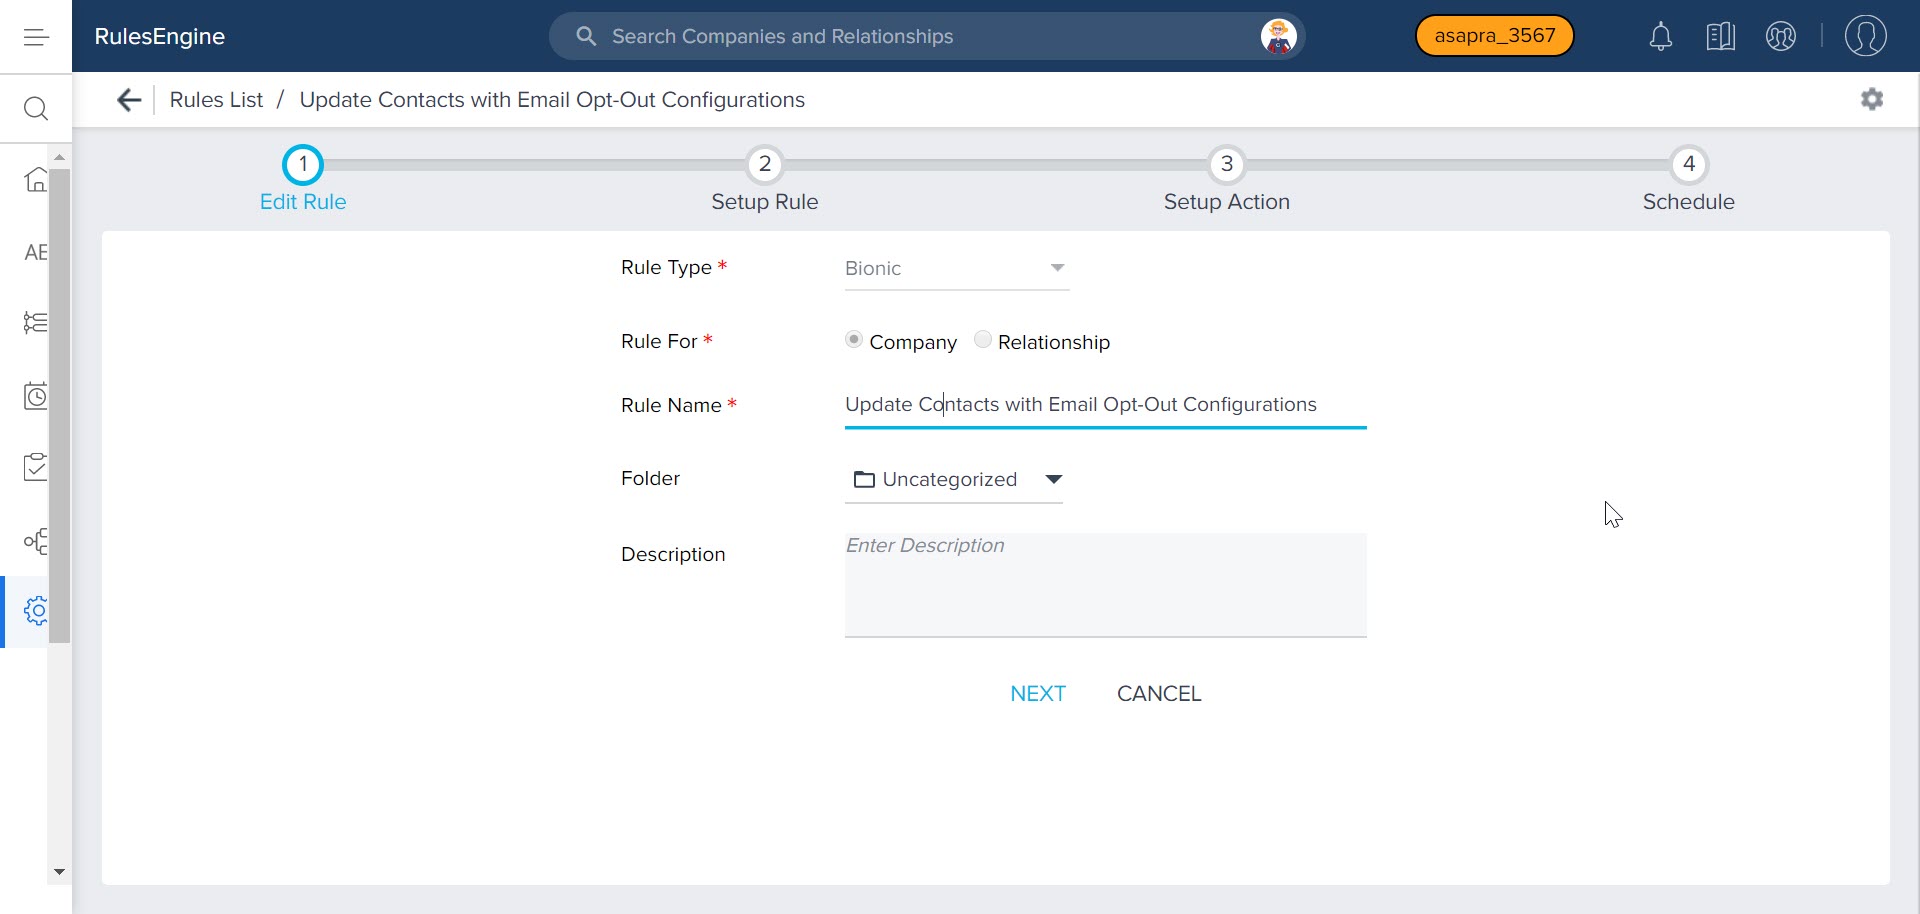
Enter the following details:
-
Rule For: Company.
-
Rule Name: Enter a name.
-
Folder: Select a folder for the rule.
-
(Optional) Description: Enter a description for the rule.
-
Click NEXT.
-
-
Click DATASET.
-
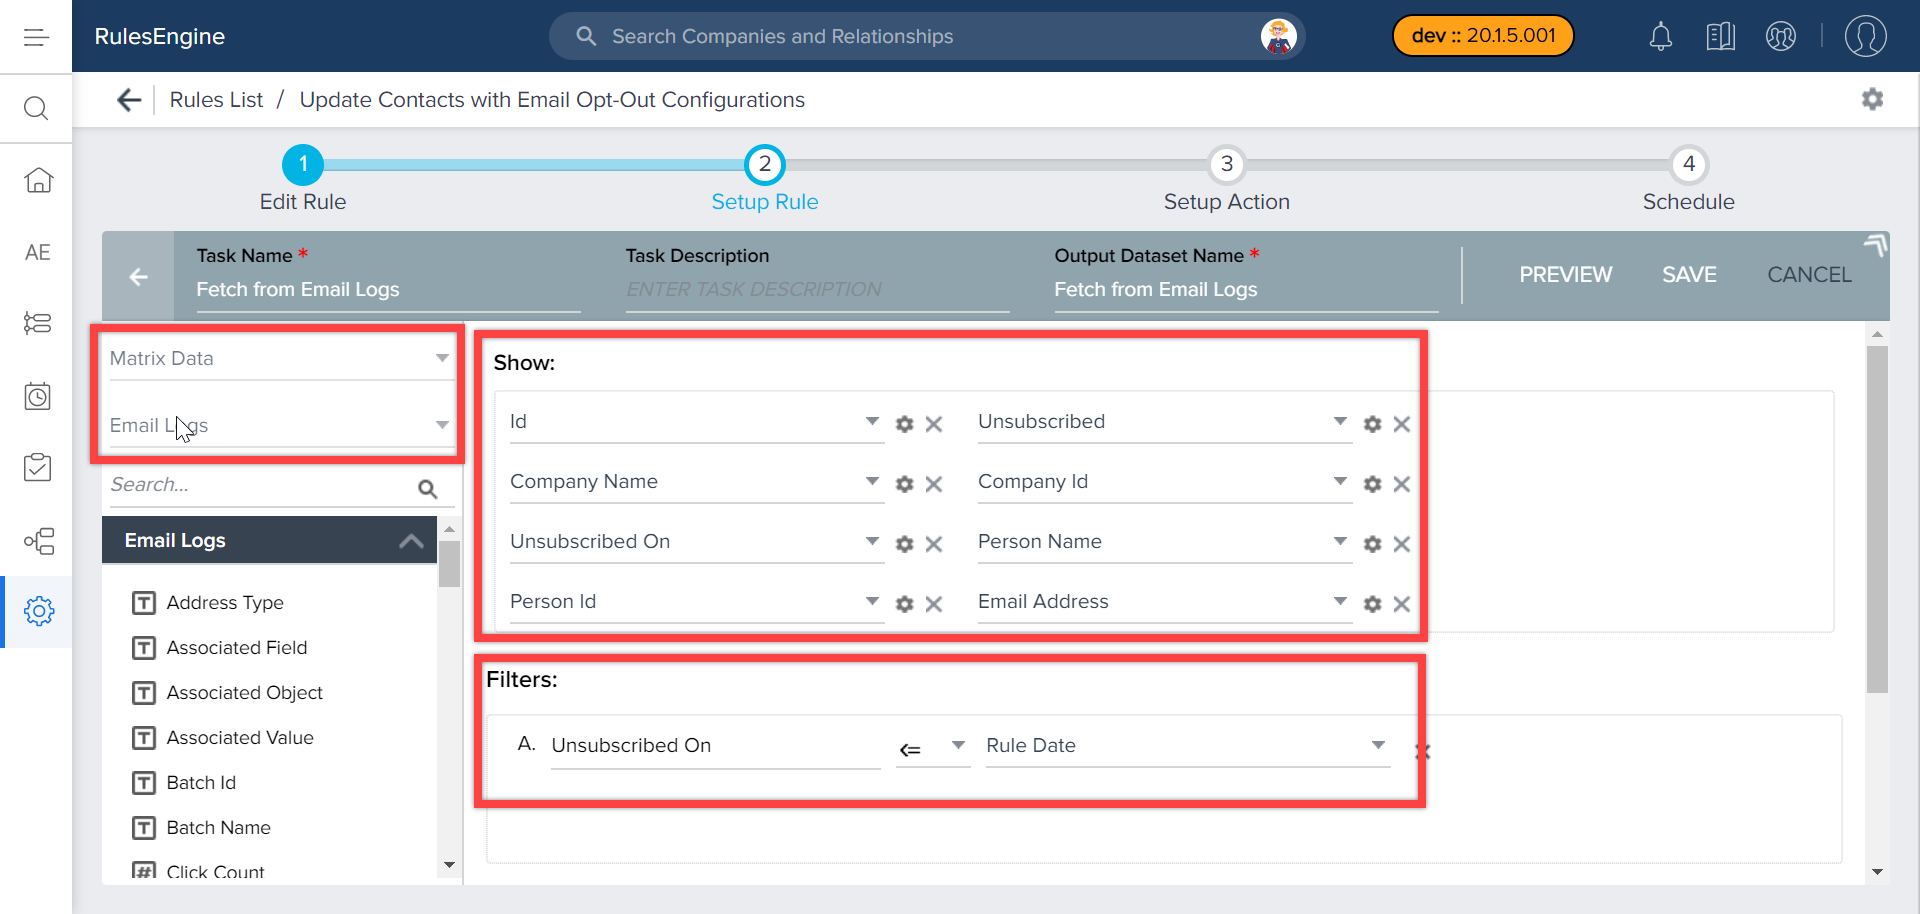
Select Matrix Data as the source
-
Select the Email Logs object.
-
Drag and drop the following fields to the Show section.
-
Id
-
Unsubscribed
-
Company Name
-
Company Id
-
Unsubscribed On
-
Person Name
-
Person Id
-
Email Address
-
In the Filters section, select the Unsubscribed On field and set the value to less than or equal to the Rule Date. This filter extracts the records that are unsubscribed on or before the rule is run.
-
Click SAVE.
-
Click <-.
Create Second Dataset
This dataset is created on the Person object and fetches the list of records that have an external ID. This dataset is required to help identify the records in the SFDC Contact object which have associated Contact Ids stored in Gainsight.
To create the second dataset:
-
Click + TASK and select Dataset.
-
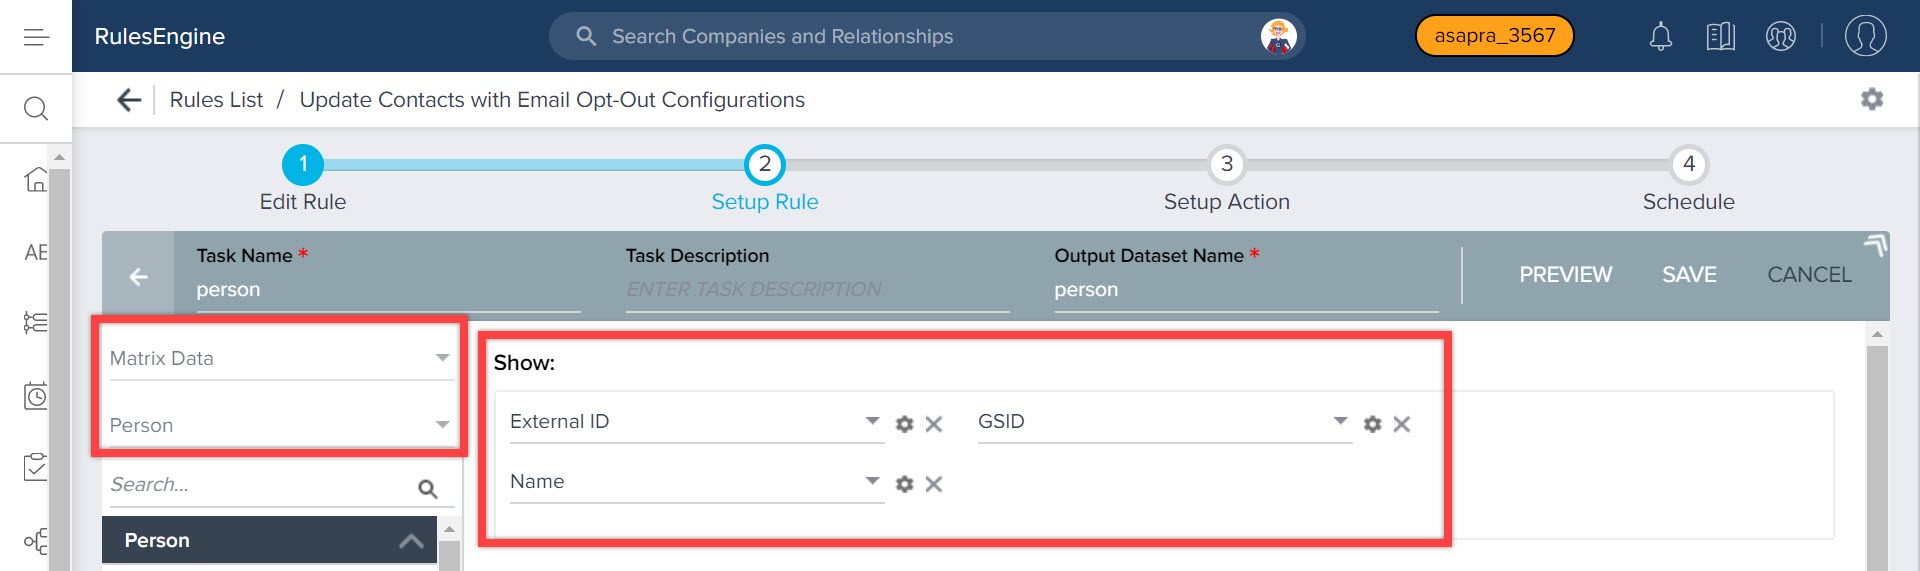
Select Matrix Data as the source.
-
Select Person as the source object.
-
Drag and drop the following fields to the Show section.
-
External ID
-
GSID
-
Name
-
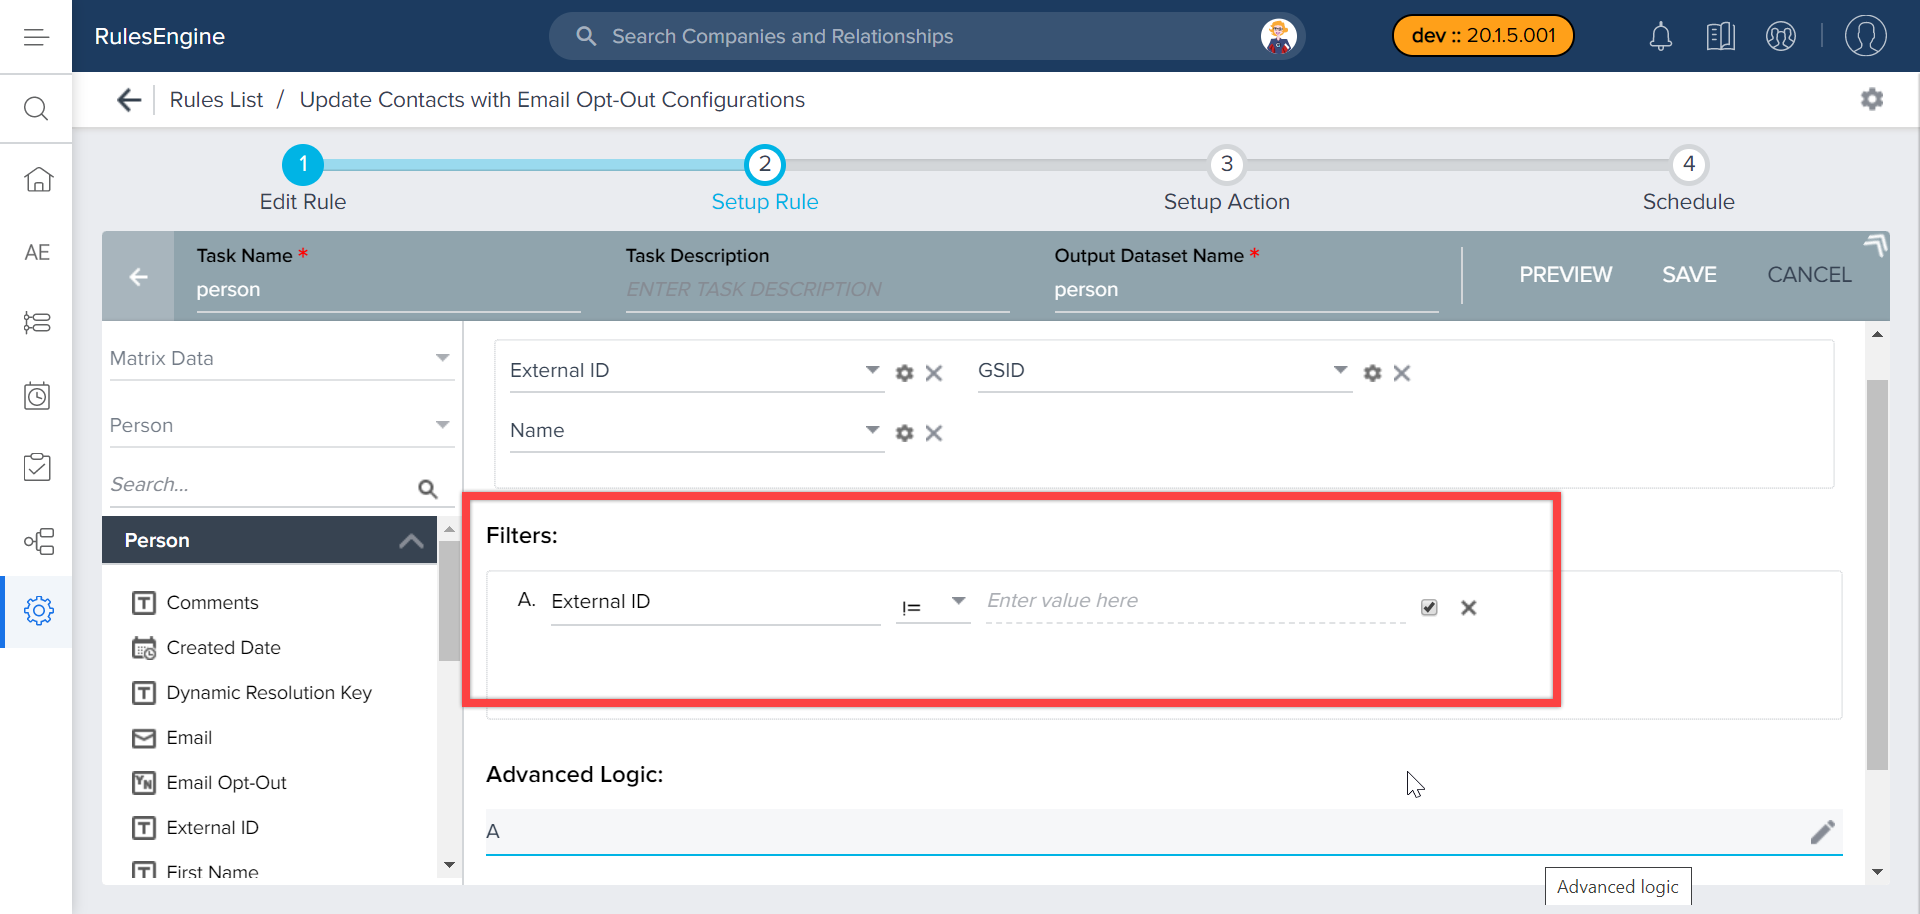
In the Filters section, select the External ID field and set the value to Null. This filter setting excludes the person records not having External Id.
-
Click SAVE.
-
Click <-.
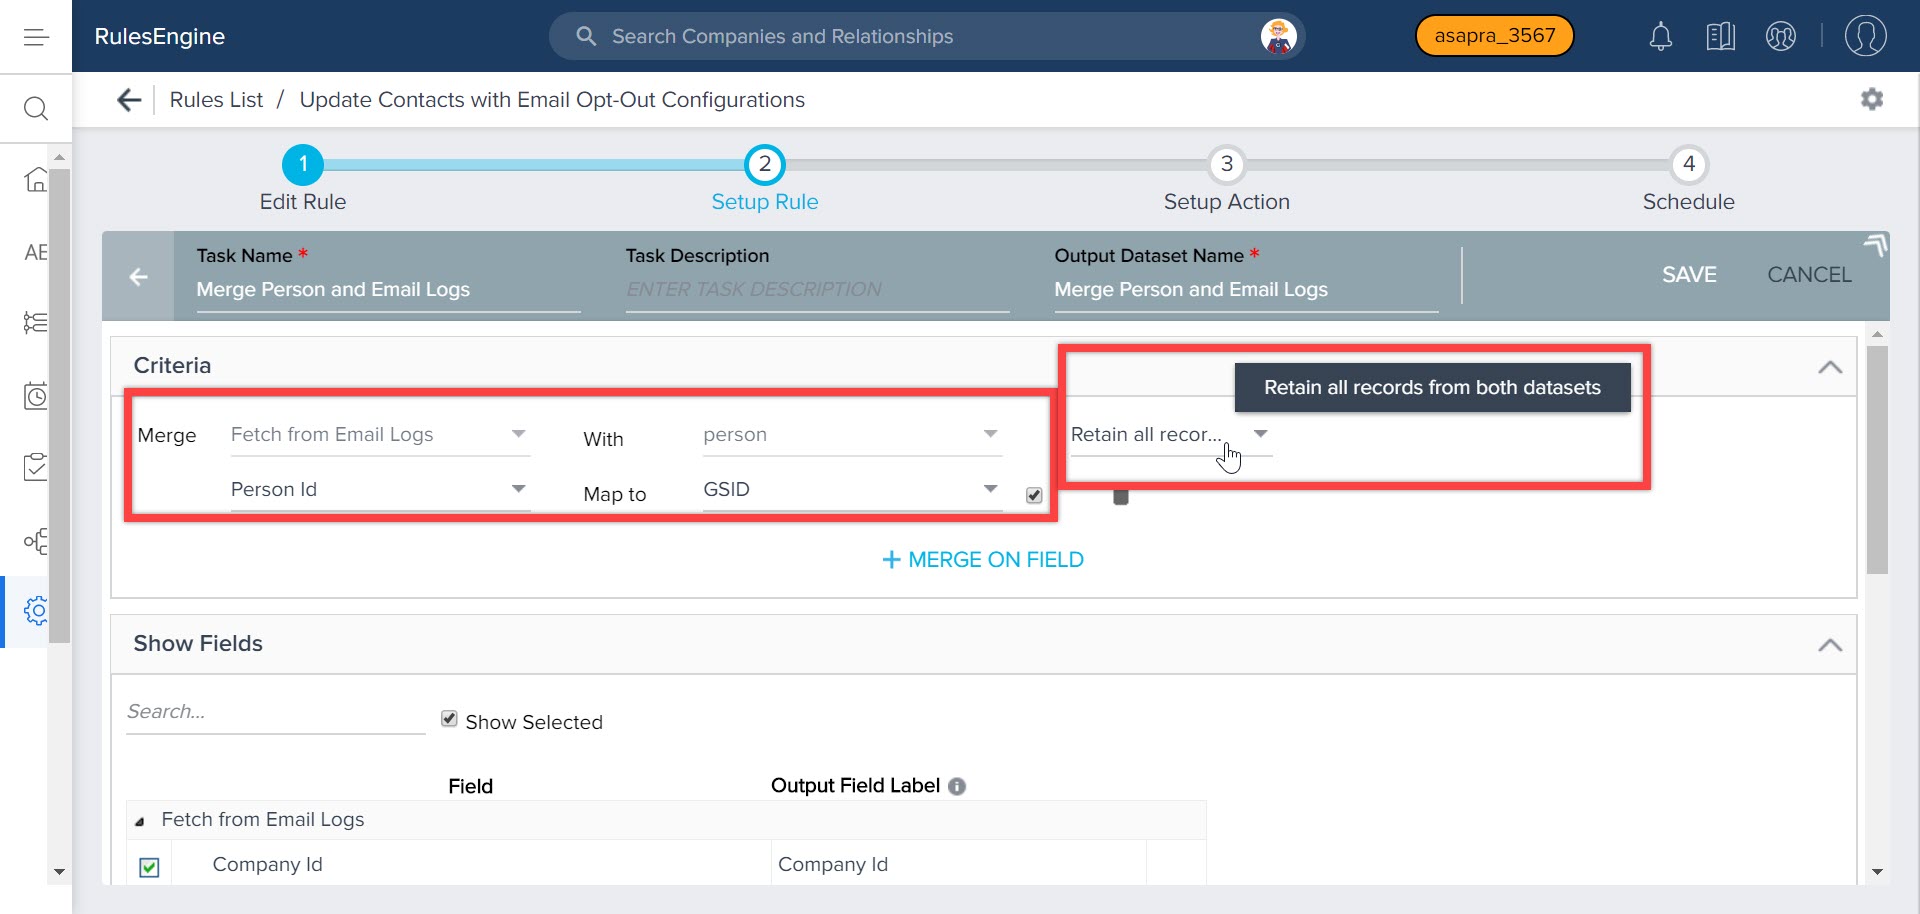
Create Merge Task on Email Logs and Person Datasets
This task combines the above datasets based on the Person Id and GSID fields from the respective datasets.
To create a merge task:
-
Click + TASK and select Merge.
-
Enter a Task Name and Output Dataset Name.
-
Select both the Datasets.
-
Select Retain common records from both datasets as merge type. This configuration extracts the common records that are having the same Person Ids.
-
Select Person Id field from Email Logs object and GSID field from Person object as matching criteria for the join.
-
Click SAVE.
Create Third Dataset
This dataset is created on the Opt-Out Emails object and determines the category of emails, for which the customer has opted out of.
To create the third dataset:
-
Click + TASK and select Dataset.
-
Select Matrix Data as the source.
-
Select Opt-Out Emails as the source object.
-
Drag and drop the following fields to the Show section.
-
Email Log Id
-
Company Id
-
Email Address
-
Category Id:: Code
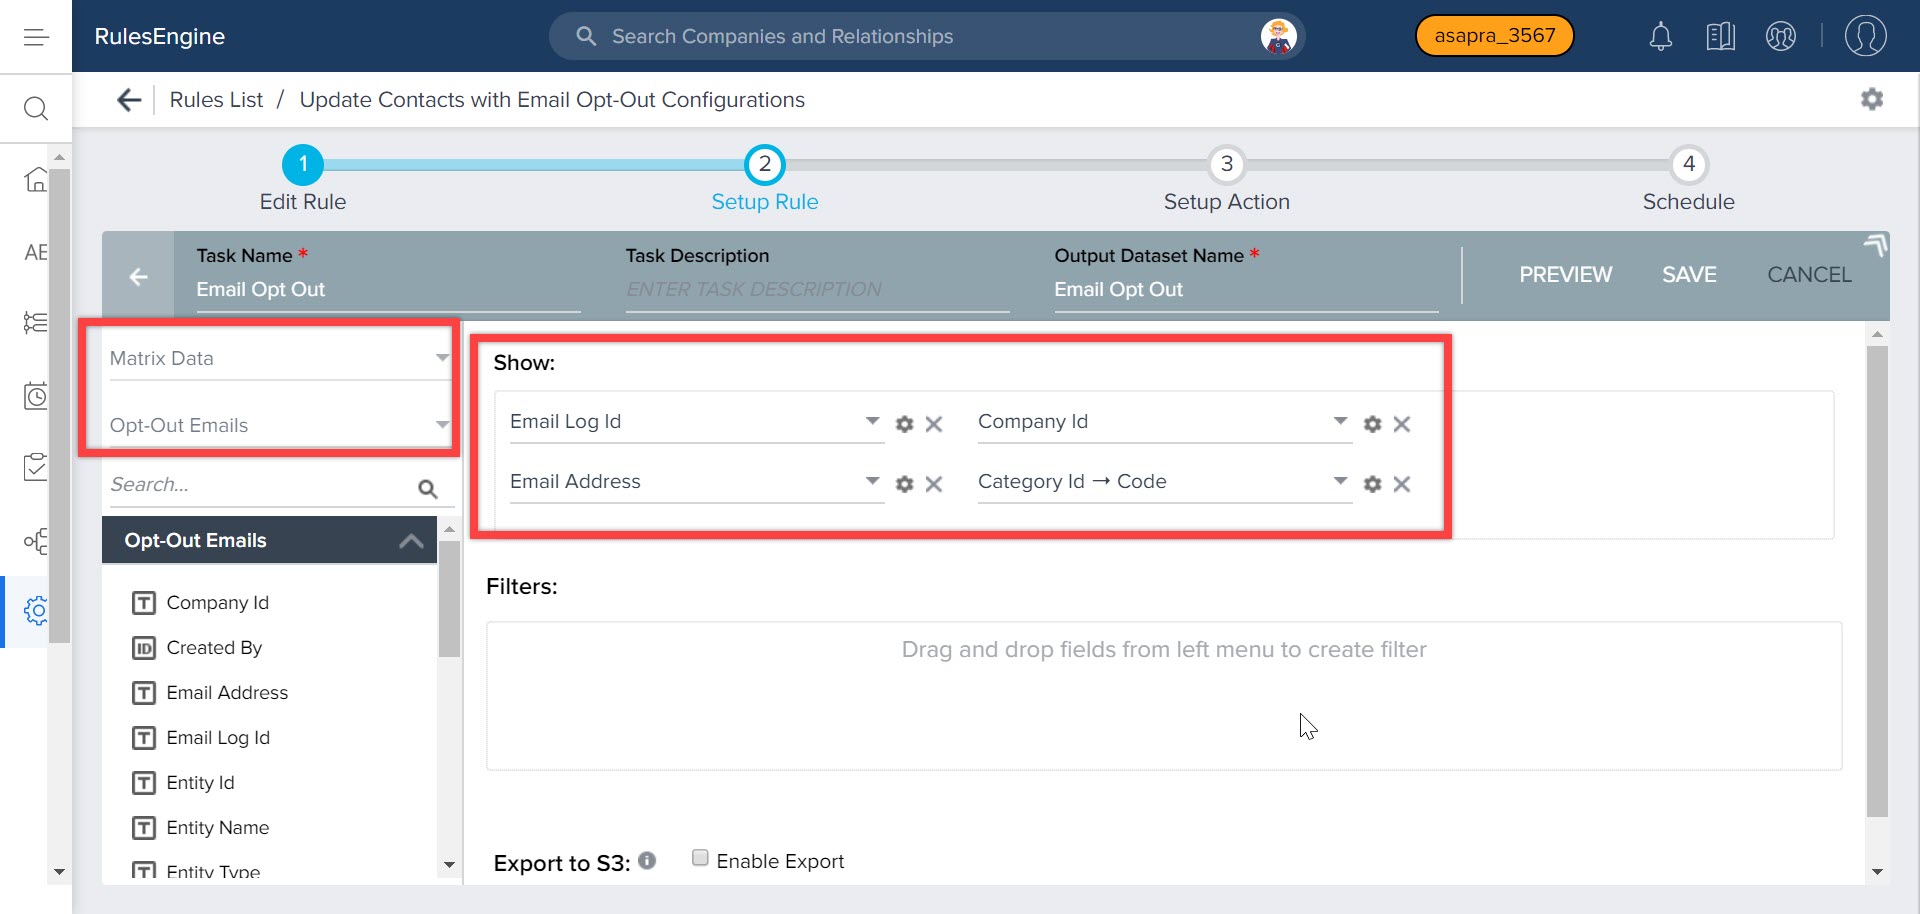
-
Click SAVE.
-
Click <-.
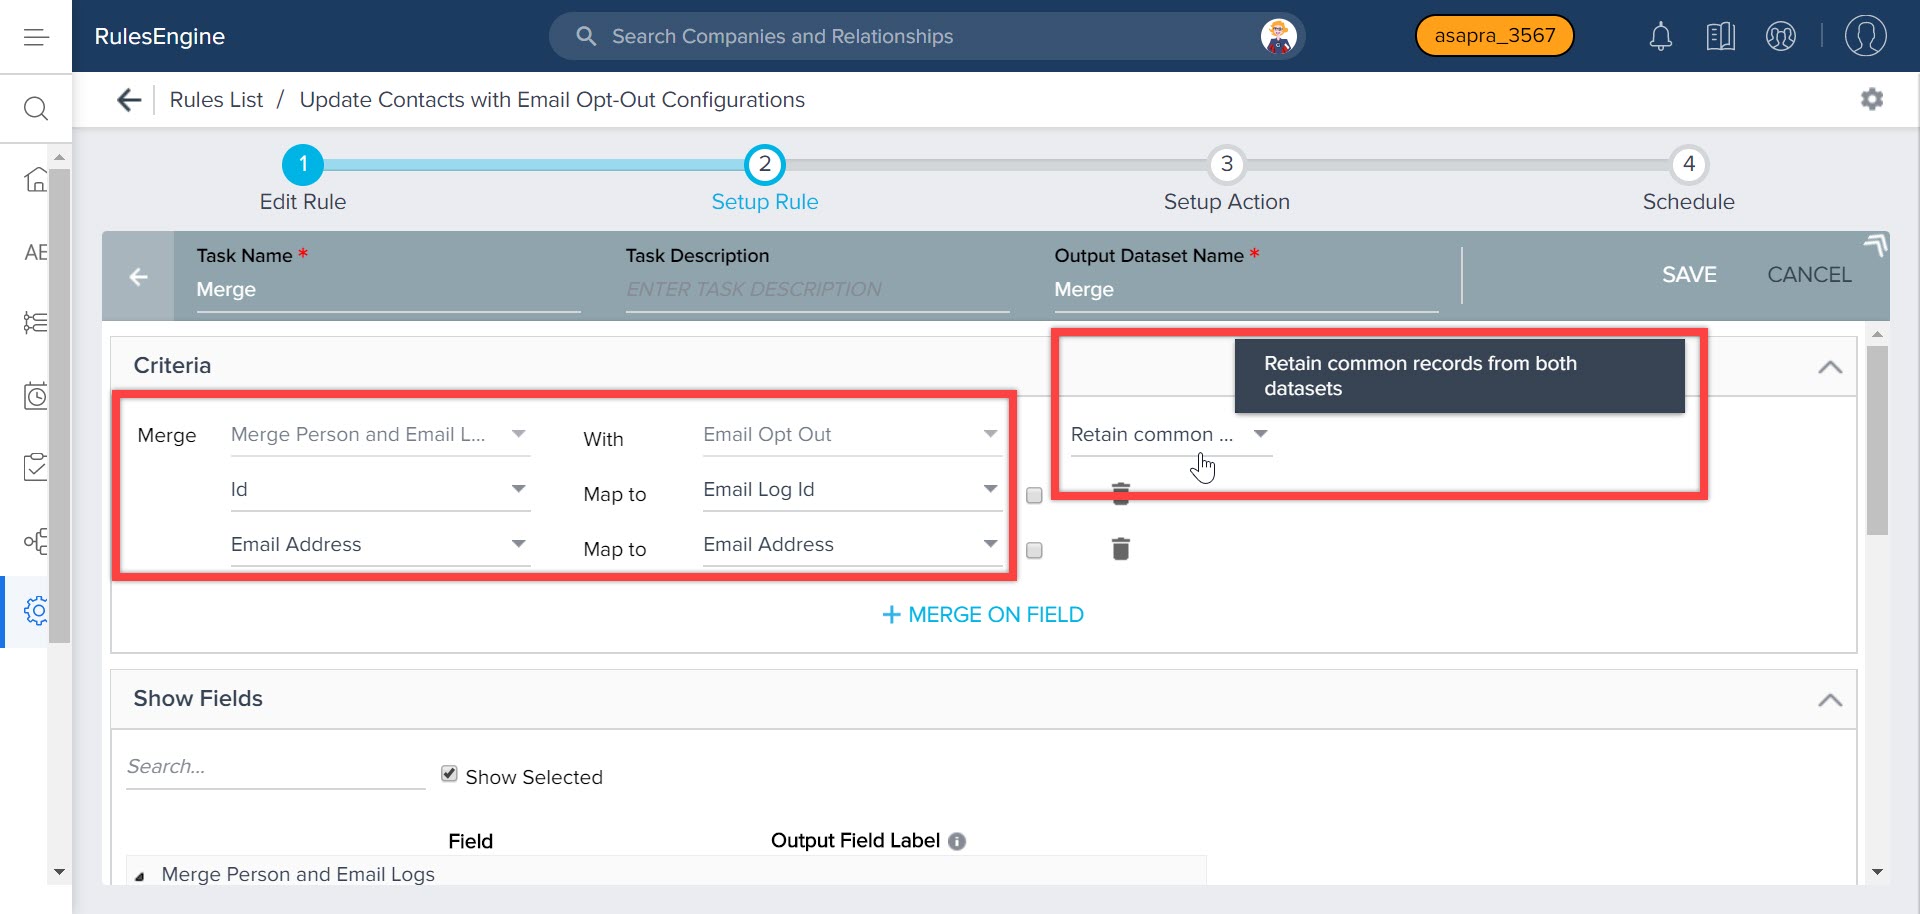
Create Merge Task
This task combines the datasets based on the above-created Email Logs and Person merge task and Email Address fields.
To create a merge task:
-
Click + TASK and select Merge.
-
Enter a Task Name.
-
Select both the Datasets.
-
Select Retain common records from both datasets as merge type. This configuration extracts the common records that are having the same Email Log Id and Email address.
-
Select Id field from Email Logs object and Email Log Id field from Opt-Out Emails object as matching criteria for the join.
-
Select Email Address from both the objects as matching criteria.
-
Click SAVE.
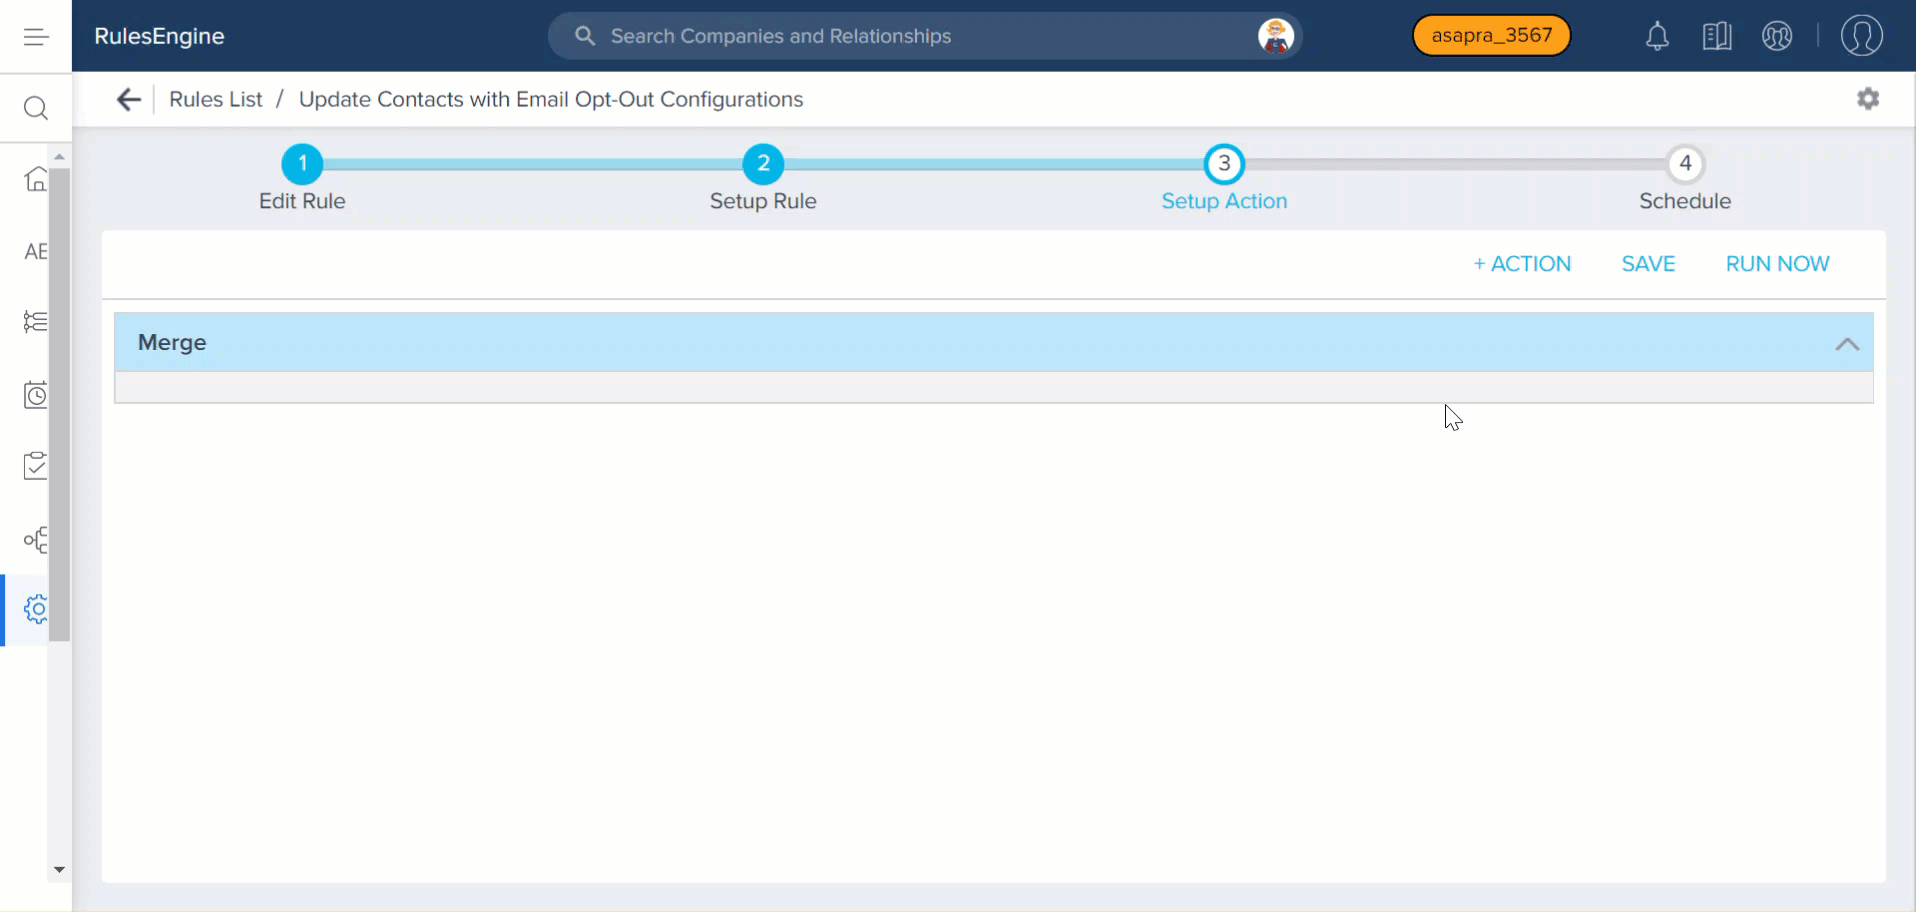
Setup Rule Action
This section describes the process of setting up the Load to SFDC Action Type. The data fetched is loaded to the SFDC Contact object.
-
Click the Settings icon and select Permissions - Rules Load Actions
-
Ensure that the Contact object is selected and all its fields are located under the Selected Fields column.
-
Click SAVE and click BACK.
-
Click Setup Action.
-
Click + ACTION and select the merge task.
-
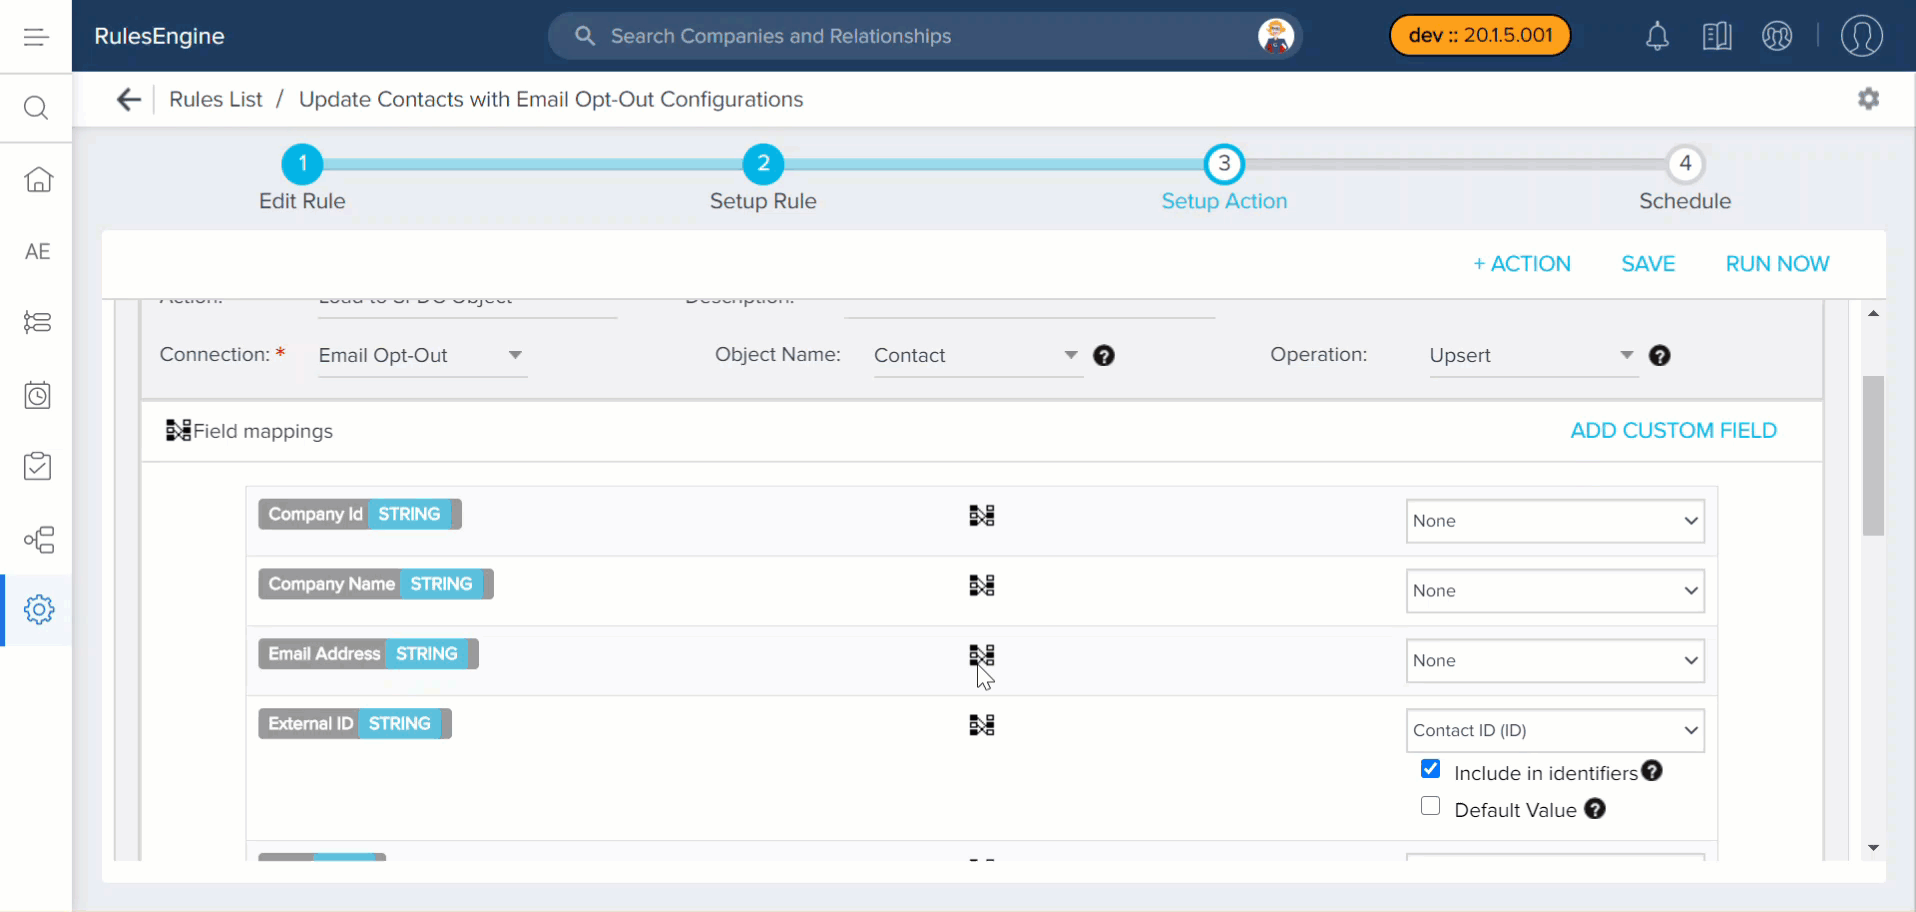
Select Load to SFDC Object as an action type.
-
Select Contact in the Object Name field.
-
Select Upsert as the operation type.
-
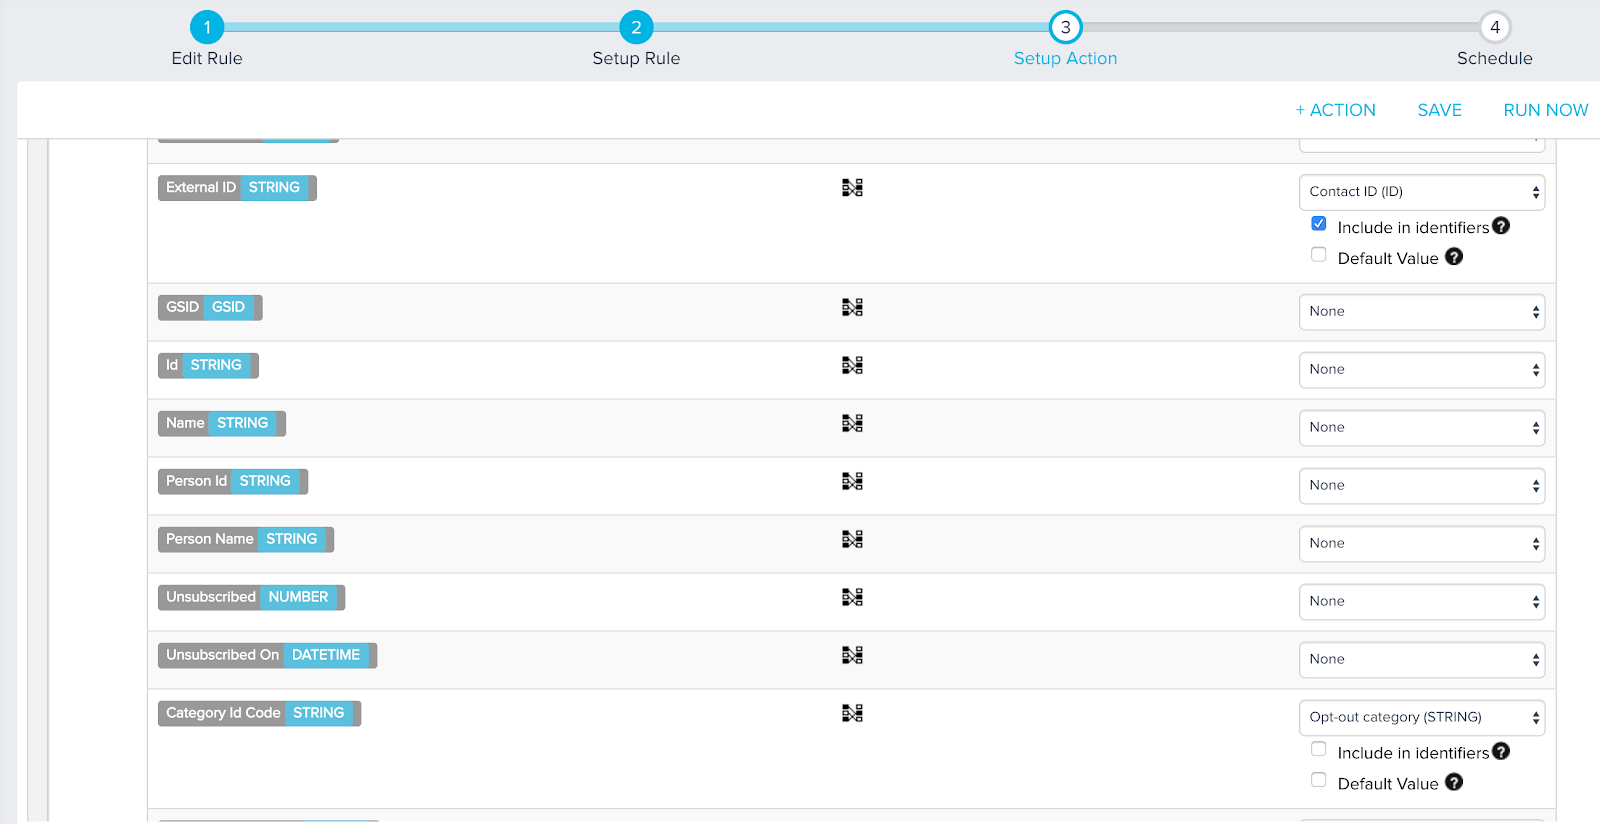
Map the External Id field to the Contact Id field and select the Include in identifiers checkbox.
-
Map the Category Id Code field with the newly created custom Opt-Out Category field in the Contact object.
-
Click ADD CUSTOM FIELD.
-
Map the Email Opt Out (Boolean) field from the right column.
-
Set the toggle button to ON in the left pane.
-
Click SAVE.
For more information on how to schedule an execution of this rule, if required, refer to the Schedule and Execute Rules article.