Upload CSV/TSV Files into S3 Bucket
Gainsight NXT
IMPORTANT NOTE: Gainsight is upgrading Connectors 2.0 with Horizon Experience. This article applies to tenants which are yet to be upgraded to the Horizon Experience of Connectors 2.0. If you are using Connectors 2.0 with Horizon Experience, you can find the documentation here.
Overview
You can upload CSV/TSV files into S3 bucket using tools such as Cyberduck. You can upload CSV/TSV files into either Gainsight Managed bucket or your custom S3 bucket. Files uploaded to S3 bucket can be consumed by the following Gainsight features:
- S3 Connector
- S3 Dataset Task in Rules
- Create Data Spaces using Data Designer
- Create Usage Reports using Adoption Explorer
Use Cyberduck Tool to upload CSV files into S3 Bucket
To upload a CSV file using Cyberduck into S3 bucket:
- Click View S3 Config in the S3 Configuration page and open the Gainsight Managed bucket details to upload CSV/TSV files into the Gainsight Managed bucket.
- Keep your custom S3 bucket details handy to upload your CSV/TSV files into your custom S3 bucket.
- Download and install the cyberduck tool from https://cyberduck.io/?l=en.
- Open the Cyberduck application and Click + at the bottom left of the page to add a bucket as a Bookmark. Add a Bookmark dialog appears.
- Enter the following details in the Add a Bookmark dialog:
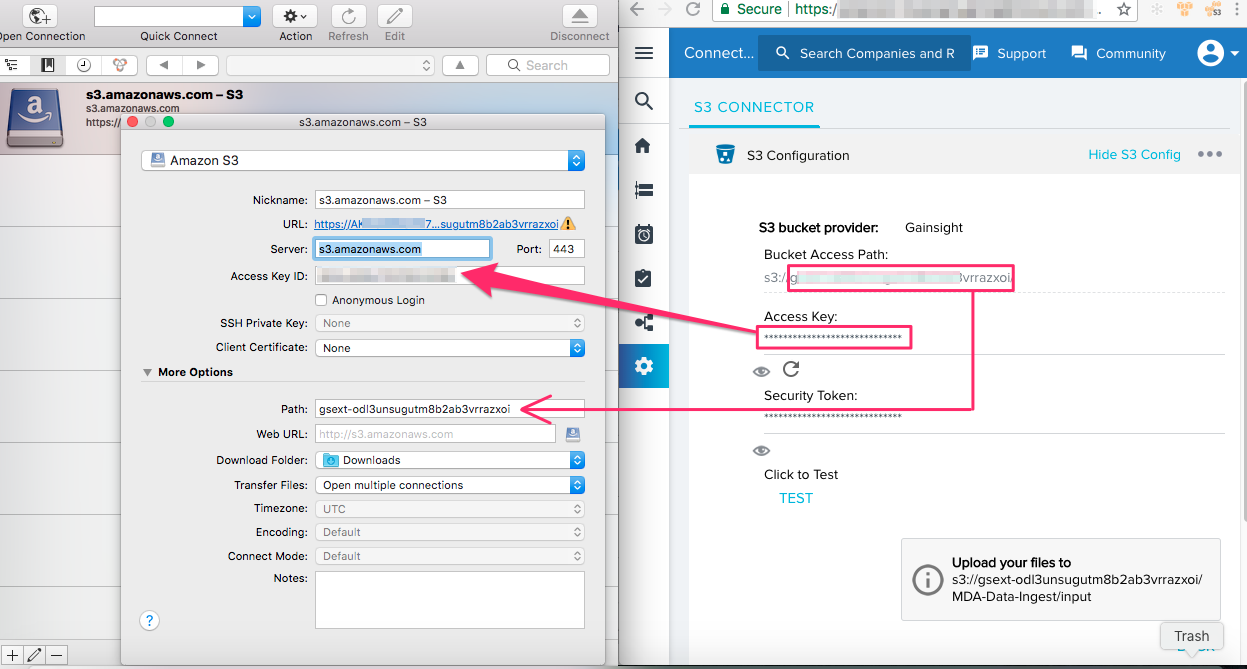
- Select Amazon S3 from the dropdown list. Nickname, Port, and URL are automatically selected.
- Copy Access Key from the S3 Configuration page and enter in the Access Key ID.
- Click More Options and copy Bucket Access Path from the S3 Configuration page and enter in the Path.
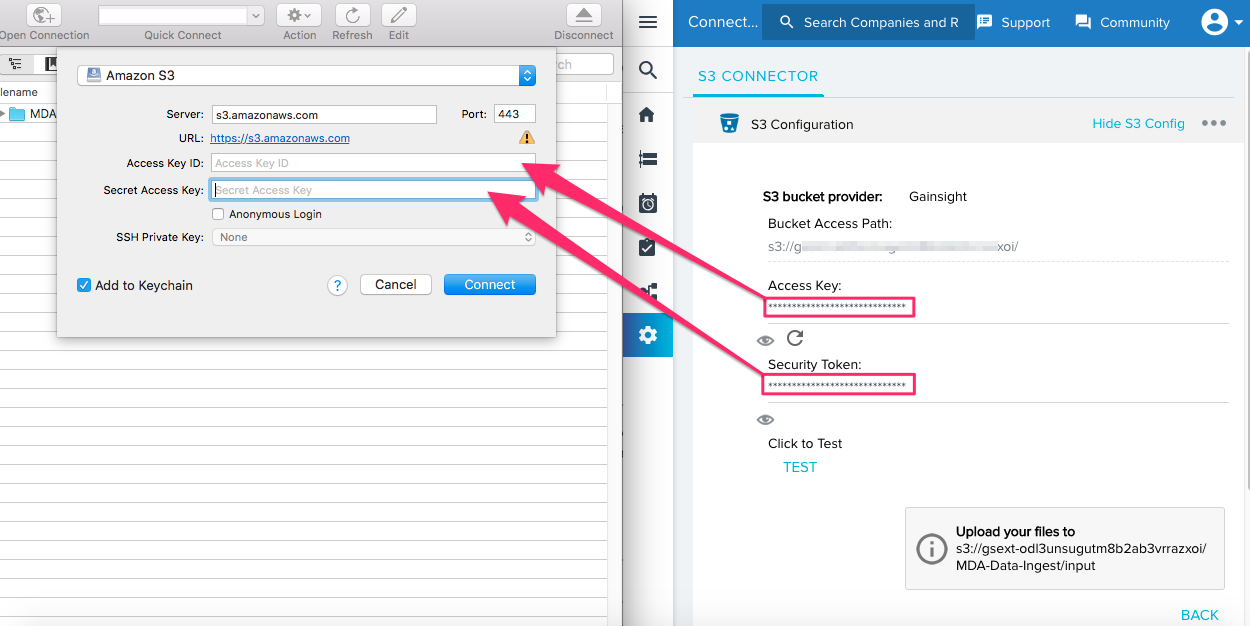
- Close the Add a Bookmark dialog. Gainsight Managed S3 Bucket is added as a bookmark.
- Click Open Connection. Copy Security Token from the S3 Configuration page and enter in the Secret Access Key and click Login.
- Enter the following details:
- Select Server: S3 (Amazon Simple Storage Service)
- Access Key ID: from the Access Key in the Gainsight S3 Configuration page.
- Secret Access Key: from the Security Token in the Gainsight S3 Configuration page and click Connect.
- Select connection type.
- Copy/Paste Access Key.
- Copy/Paste Security Token.
- Click Connect.
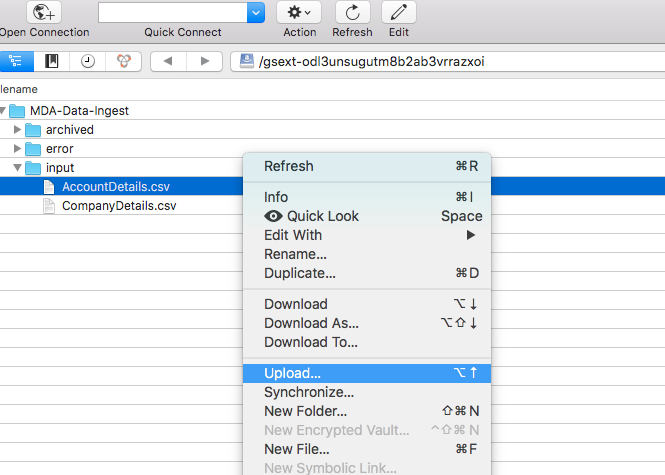
- You can see three subfolders in the MDA-Data-Ingest: input, archived, and error.
- Navigate to the input folder and upload files into this folder by selecting the Upload option in File Menu, or right click.
Conditions
- Unique file name for post file upload: User has to specify a unique file name for all the Event Based Data Ingest jobs (Post File Upload): Also, the file name used should not be a suffix of a file name that already exists.
- 500 mb file size limitation: S3 connector supports files up to 500 MB. However, it is recommended that the file size does not exceed 200 MB.
- User has to set up the project and then upload the file: The files that exist in the bucket before setting up "post file upload" will not be picked up.
- User has to upload the file with the exact filename only: Uploading a file and renaming it to match the set file name in the project will not be ingested.
- No delay time can be configured: There is no provision to configure a delay time for "post file upload." It will be ingested immediately.
- User has to upload a new file only after the previous file processing has started, or the previous file is moved to the archive folder: If the previous file is still in the input folder, the new file will overwrite the older file.