Gainsight NXT Release Notes 6.11 February 11, 2020
Gainsight CS Release Notes Version 6.11 contains the following subsections:
- Enhancements (per module) describe improvements made in the existing product capabilities.
- Issues Addressed section contains issues which are fixed in this release and also issues reported by customers.
Enhancements
Adoption Explorer
Adoption Explorer helps manage your customer’s usage data in the Gainsight environment, and quickly surface the most relevant view of usage data across your customer base. Adoption Explorer offers powerful segmentation capabilities to manage multiple product lines, more robust control of aggregations and calculations, and totally re-imagined visualizations to surface deep insights. Customer’s usage data at Company and/or Person level can be stored at both daily and weekly level along with their entitlements. Using the ingested data, admins can define new derived fields without the need of Rules Engine.
The following enhancements were released in the 6.11.1 Patch on Feb.11, 2020.
AE Person identifier Lookup
Until now, admins can only create a lookup from AE person identifier to Person object in Gainsight. But, with this enhancement, admins can also create a lookup from AE person identifier in usage data to Company Person object in Gainsight.Business Use Case: For instance, assume a person named Andy is working with a company called ABC as a Software Engineer, and as a consultant for a company called XYZ. Assume, Andy’s record with company ABC is stored in Person object, but Andy’s record with company ABC and XYZ are stored in Company Person object. So, with the existing functionality when you create a usage report in AE that has been looked up to Person object might give you only the details of Andy’s contribution to ABC company. This enhancement helps address this issue as AE person identifier can now lookup to Company Person object. Usage reports when created can get you the actual details of the person’s usage data from each company based on the person’s Role/Title in the company.
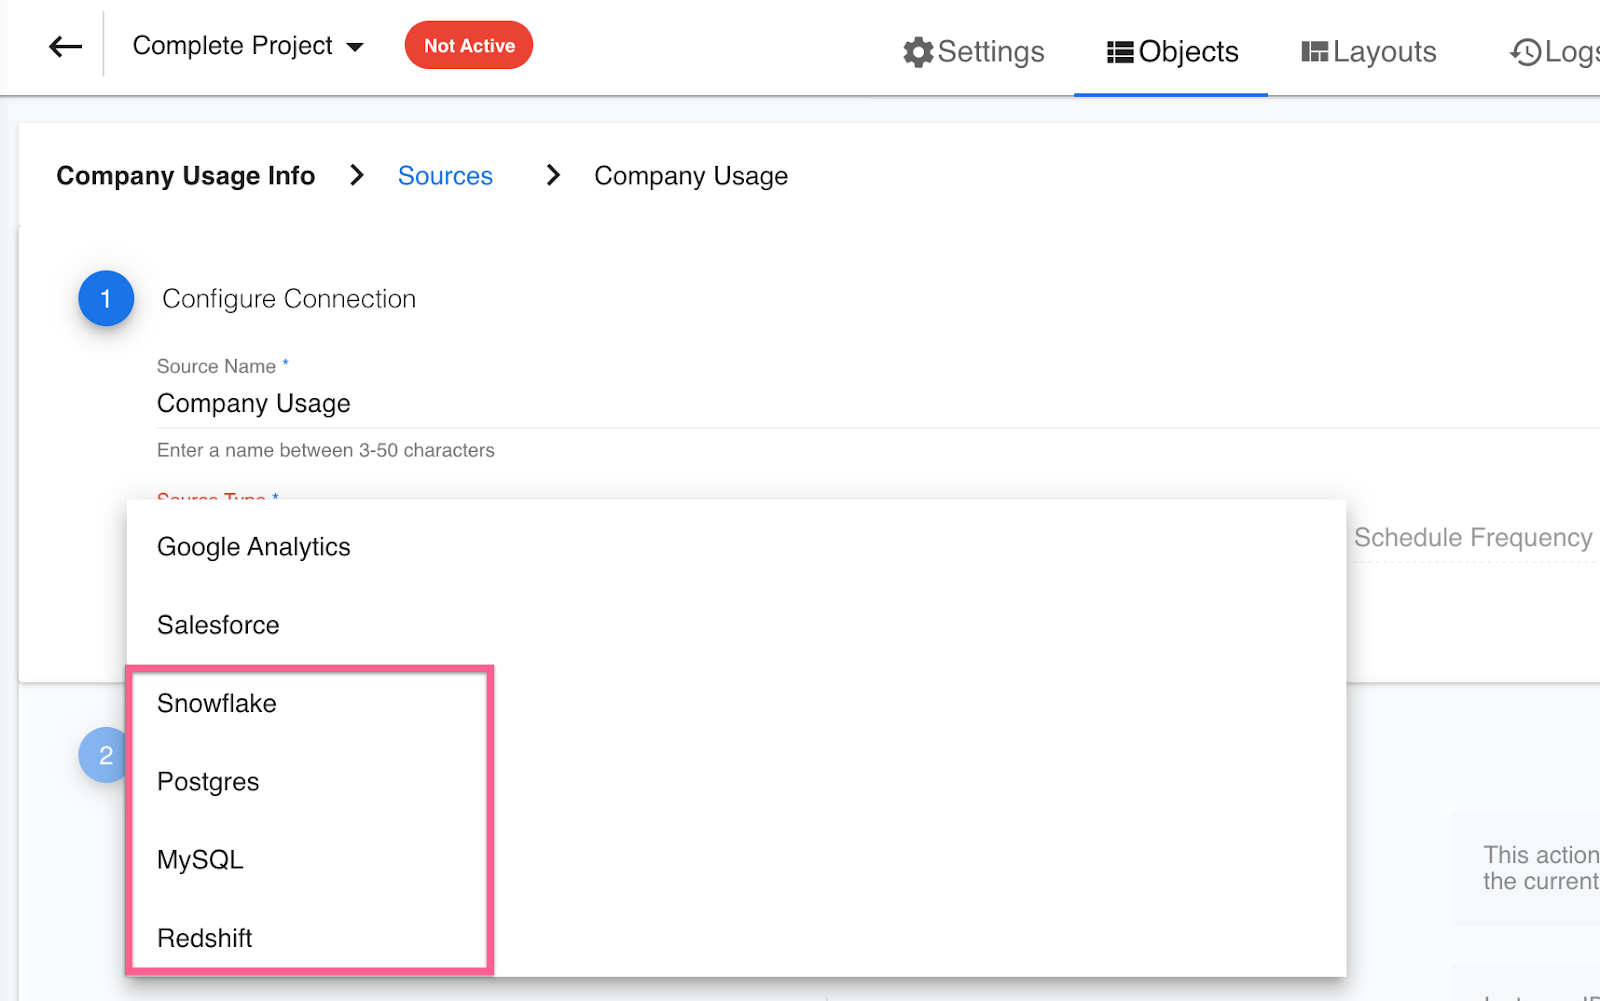
Pull real time usage data directly from Snowflake, Postgres, MySQL and Redshift
Admins can now ingest near real time usage data/telemetry data from more external sources like Snowflake, Postgres, MySQL and Redshift. Once the connection is established, you can bring the usage data from these sources to the Adoption Explorer Timeseries objects.To use this enhancement:
- Navigate to Adoption Explorer > Administration.
- Hover to the required project name and click the Objects icon and you are landed on the Objects listing page.
- Now, hover to the required object for which you want to establish a source connection and click the rounded plus (Add Source).
- Enter the Source Name of your choice.
- Select the required Source Type from the dropdown list. You can now additionally see the following new external sources:
- Snowflake
- Postgres
- MySQL
- Redshift
For more information on how to setup these source connections, refer to the Configure Adoption Explorer Objects article.
Once you setup the source connection and the project is saved, these Adoption Explorer objects are seen in the Gainsight Data Management page, prefixed with the project name. Once the data is available in Gainsight, you can use it in other areas, such as Reporting and Rules Engine.
Note: Currently, you cannot directly connect to these sources from Rules Engine and Reporting. The only way to connect to these sources is via Adoption Explorer, but once the usage data is available in Gainsight, you can explore it in Rules and Reporting.
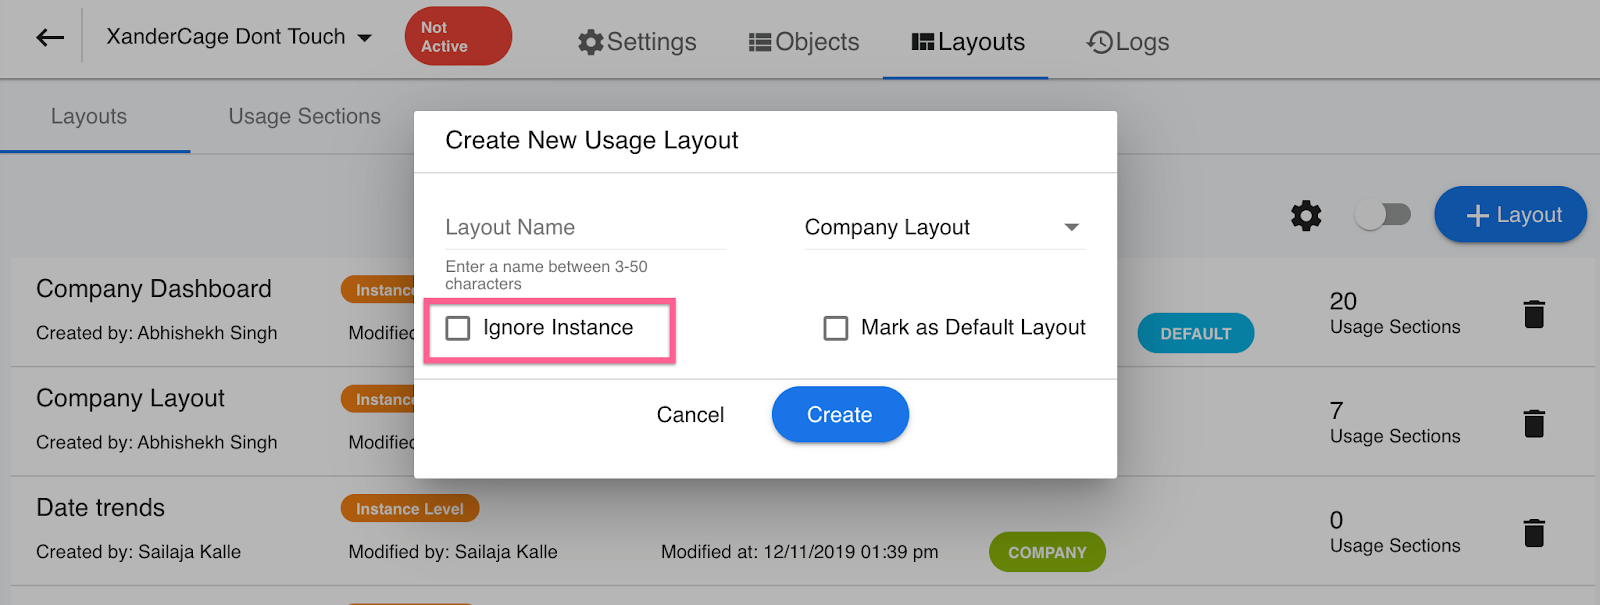
Create usage reports at Company level ignoring Instance level data
You can now create Usage reports in a Layout at the Company Level ignoring “Instance” level data.
Business Use Case: For instance, assume a company called ABC has two products namely “Product 1” and “Product 2”. With the current functionality in Gainsight, you can only create usage reports at individual product levels, either “Product 1” or “Product 2” but not at Company level. Adoption Explorer is now enhanced to address this issue, you can now create usage reports to get insights not only at individual product levels, but also at Company level ignoring instance (product level) data.
To use this enhancement:
- Navigate to Adoption Explorer > Administration.
- Hover to the required project in which you want to configure a layout. Click the Layouts icon, and you are landed on the Layouts listing page.
- Click + Layout to create a new one.
- Enter the Layout Name of your choice.
- From the Layout Type dropdown list, select the required Layout type.
- Select the Ignore Instance checkbox, if you want to create reports only at the Company level, ignoring instance level data.
For more information on how to create a Layout, refer to the Create Layouts in Adoption Explorer article.
Data Designer
Data Designer (BETA) is a new feature that makes it easier for you to discover richer, more meaningful insights from your customer data. It helps by simplifying the most time-consuming step of data analysis, preparing the data for analysis.
Faster Search functionality for field selection
While adding a field to a dataset, you can now search and find the required field much faster than before. When users type in the Field name, the search functionality now fetches the fields from the base object. To further extend your search on lookup objects, be sure to expand the lookup object before you search.
For more information on how to search and add a field to the dataset, refer to the Preparation Details in Data Designer (BETA) article.
The following image shows the enhanced Search functionality.
C360
The Customer 360 (C360) is a central hub of your customer’s business information in Gainsight. It synthesizes business data from various sources and provides you with a holistic view of your customers. This minimizes the preparation time for your customer meetings.
Whitelist Trusted IP Addresses
Previously, admins had no way to whitelist trusted IP addresses for their org. This limited their ability to control where and how their org is accessed. Now, admins can add IP address designations under the Network Access tab.
To add an IP address to whitelist, take the following steps:
- Navigate to Administration > Security Controls > Network Access.
- Click New.
- Enter the IP Address and a description of the network.
- Click Save.
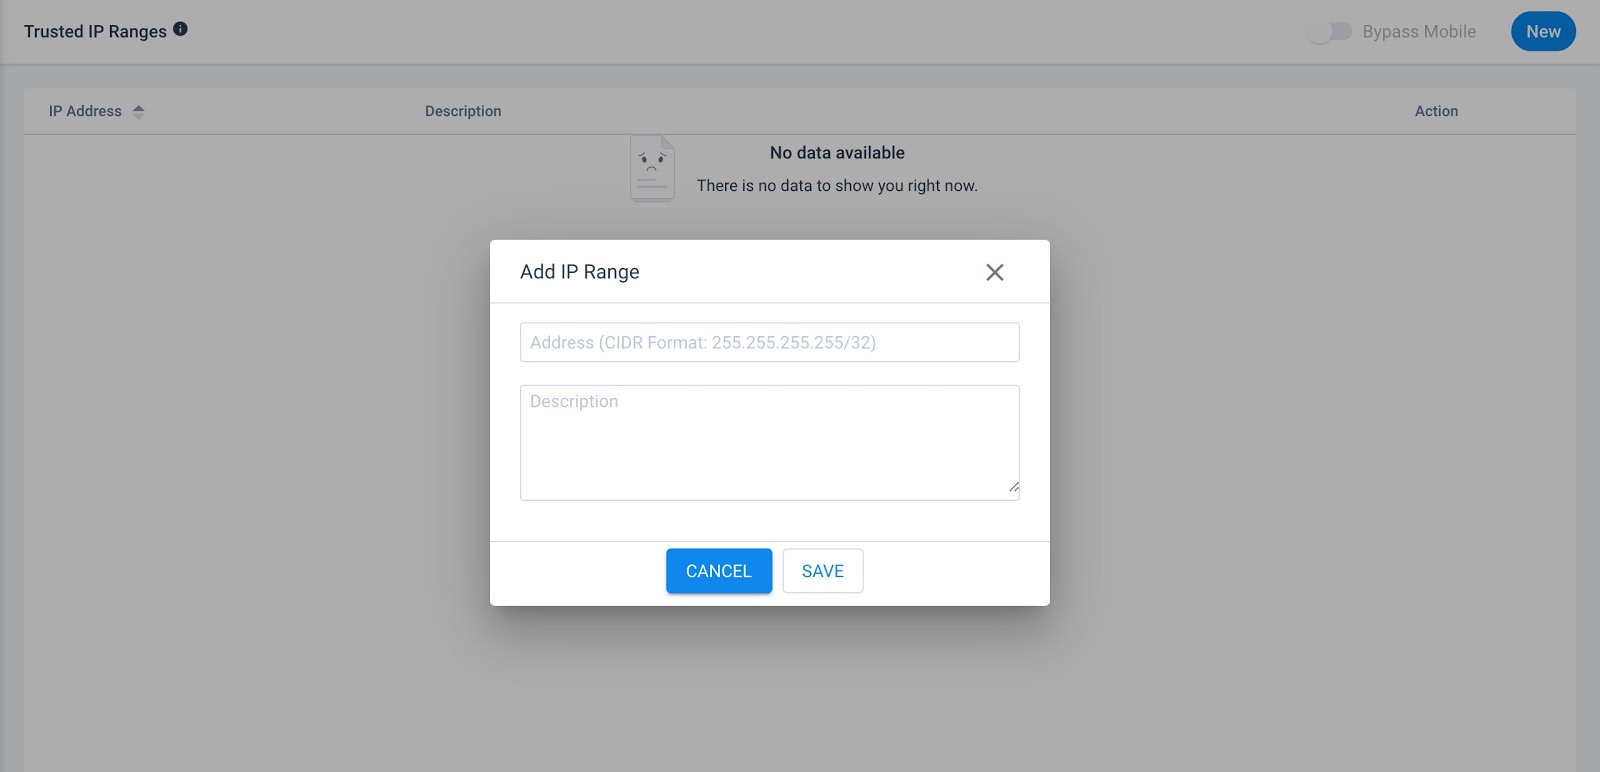
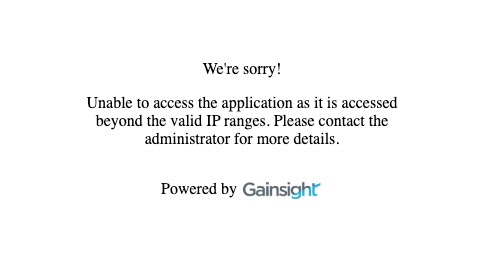
Note: When a network is added it is considered trusted. Users will be unable to access the org from outside the trusted IP address range. When someone attempts to access the org outside of the valid IP address range the following message is displayed:
Set Custom Expiration Period for Shared Layouts
Previously, admins could only choose from a pre-selected list of date ranges when configuring the expiration period of a shared setting. This limited their ability to control the amount of time their shared layouts are available. Now, admins can set the exact number of days a shared layout is available before access expires. To configure expiration settings for shared layouts navigate to Administration > Sharing > 360 Layout > select either the C360 LAYOUTS tab, or the R360 LAYOUTS tab > select the layout you wish to edit > Sharing Settings.

For more information on how to configure sharing settings for Shared 360 layouts, refer to the Sharing Settings for Share 360 article.
Person API
Person REST APIs are used for creating, updating, retrieving, and deleting a single or multiple records in the Person and Company Person, and Relationship Person objects in the Gainsight’s Matrix Data Architecture (MDA).
This enhancement was released in the 6.11.1 Patch on Feb.11, 2020.
Delete Person API
Admins/Developers can now delete the Person record(s) from Gainsight using Gainsight’s Person REST APIs. When the person record(s) are deleted through this API, their corresponding records from the Company Person, Relationship Person, and person references in other Gainsight objects are deleted.
This API helps with adherence to General Data Protection Regulation (GDPR) by deleting unwanted person records from Gainsight. GDPR states that companies should not store their customer’s unwanted personal data. Compliance requires companies to clear all Personally Identifiable Information (PII) customer data from all systems that the companies use (including Gainsight).
Person Delete API is used to delete person records from the Gainsight Person object. Every record in the Person object is identified with a unique GSID. You should pass the GSIDs that you want to delete, through the request body of this API.
Notes:
- You can pass a maximum of 5000 records per API call to delete them from the Gainsight Person object.
- You can make a maximum of 100 Delete API calls per hour.
Once the Delete API call is triggered, you will get delete request Id through API Response. There is another API called GET Delete Status API to get status of the request submitted to delete Person records from Gainsight. API Response of this request provides the status of Delete request and number of records deleted.
To learn more about the Delete Person API and GET Delete Status API, refer to the Person API Documentation.
Mobile
The enhancements below were released in the 6.11.1 Patch on Feb.11, 2020.
Timeline Comments
With Timeline Comments in mobile, you can now actively participate in conversations on important updates and events, on the go!
You can now receive the real-time push notifications, if you are @mentioned in one of the comments, or if someone adds a comment to an activity you have posted. You will always be aware of what’s going on, and can help support customers and colleagues without delay.
Note: All rich-text formatting is honored in the comments.
To post comments on a Timeline Activity:
- Tap on any of the timeline activities.
- Start typing your comment in the Type a comment text area.
Note: To mention someone in your comment, tap @ and start typing the name. - Tap SEND. Your comment is posted. Click the three dots on the right corner to Edit/Delete the comment.
You can also make use of the available formatting options, based on your requirement.
Add and Assign Inline Tasks
You can now add and assign important tasks to your team, within the activity you are logging to Timeline. Task owners can then immediately take action and close the loop from their Cockpit.
To add and assign Inline Tasks:
- Tap on any of the timeline activities.
- Scroll down to the Tasks section, and tap Add Task.
- Enter the following details:
- Task Name: Enter the task name of your choice.
- Owner: From the Owner dropdown list, select the owner.
- Due Date: Select the required Date.

Other Details:
- Select the rounded checkbox to close an task.
- Click the three dots on the right corner to Edit/Delete the task.
- For now, only the activity owners can edit the tasks.
.gif?revision=1&size=bestfit&width=267&height=462)
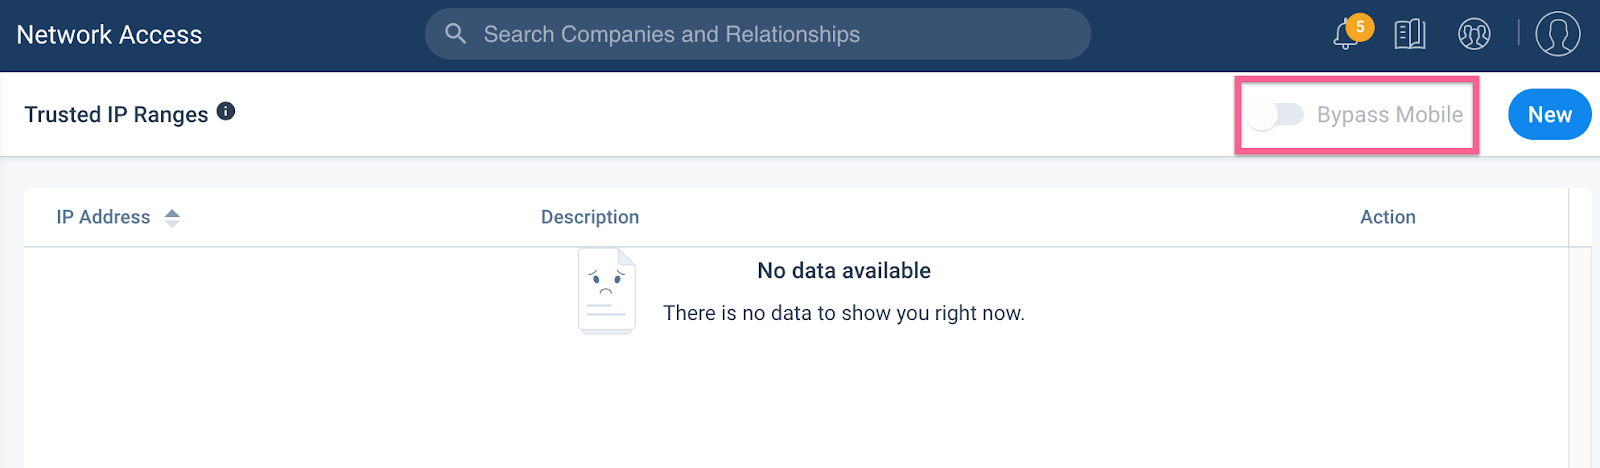
IP whitelisting Settings
IP Whitelisting Settings from the web application are now honored in Mobile. If you want to disable the IP whitelisting settings in your Mobile, turn ON the Bypass Mobile toggle button in your web application.
Note: You cannot whitelist any IP addresses from your Mobile application.
IP Whitelisting: Previously, admins had no way to whitelist trusted IP addresses for their org. This limited their ability to control where and how their org is accessed. Now, from the Gainsight web application > Administration > Security Controls > Network Access tab, admins can add IP address designations to whitelist and allow access to the org from those addresses only.
Note: When a network is added it is considered trusted. Users will not be able to access the org from outside the trusted IP address range.
When someone attempts to access the org outside of the valid IP address range the following message is displayed:
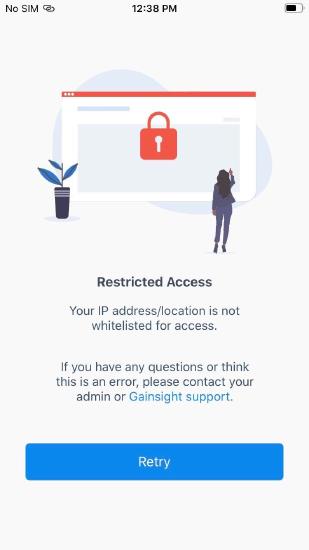
For more information on IP Whitelisting Settings, refer to Whitelist Trusted IP Addresses.
Renewal Center
Renewal Center helps quota carrying CSMs and Renewal Managers forecast and manage their book of business. By enriching Salesforce Opportunities with Customer Success insights, as well as calculating a Likelihood to Renew score for each opportunity, Renewal Center enables your team to efficiently manage and predict renewals and related upsell, recognize risks in a timely fashion, and report on key metrics.
Save of Gainsight Fields not Mapped to Salesforce Does Not Trigger Sync
With this enhancement, when you update a field that is present only in Gainsight, there is no impact on the corresponding Opportunity record in Salesforce. Specifically, the Last Activity, Last Modified By, and Last Modified Date fields are not updated in Salesforce. This enables Renewals teams and CSMs to independently manage opportunity data as needed.
IMPORTANT: This enhancement does not impact the existing behavior of fields that are mapped to Salesforce Opportunities. If you modify an Opportunity field that is mapped to Salesforce via the Salesforce Connector, the corresponding changes are synced back to Salesforce.
To use this feature:
-
Create a custom field in the GS Opportunity object.
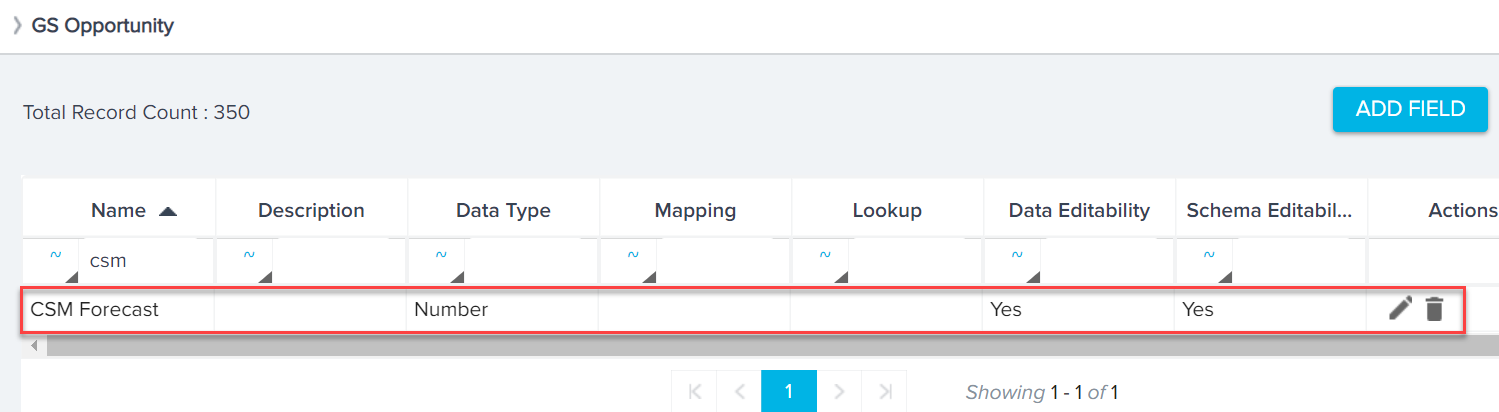
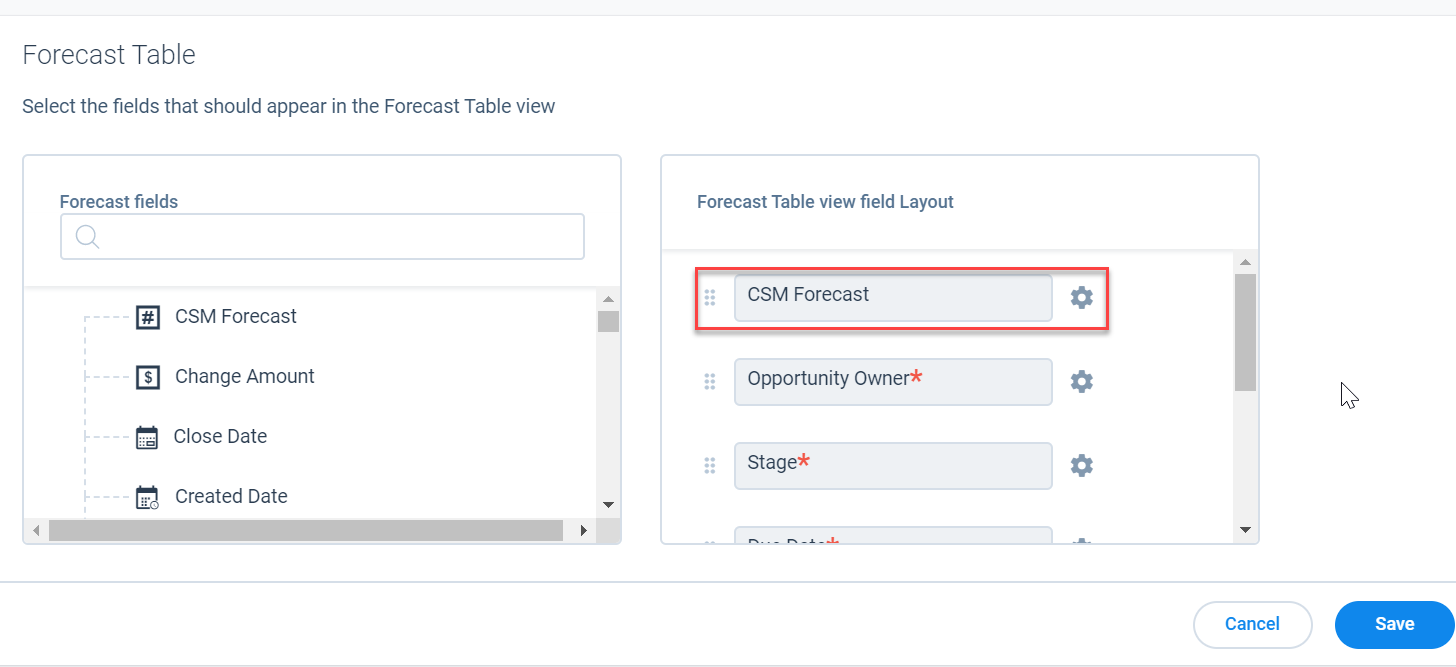
-
Add the custom field to Renewal Center’s Opportunity List view and/or Detail view layouts.
-
Modify the values of the newly created custom field from the Renewal Center user page.
-
Save the changes.
Issues Addressed
These below Issues were fixed in the 6.11.1 Patch on Feb.11, 2020. We are including it here for your awareness.
Cockpit
- Unable to Load Search UI after Clicking on Link to Existing button: Previously, when users click on the link to Existing button they were unable to load the Search UI. This issue is now resolved and the search UI is loading as expected.
- Unable to View Link in Task Detail View: Previously, users were unable to view the link that navigates to SFDC record page for synced CS tasks in Hybrid org. The same link is visible when we navigate to linked object detail view layout. This issue is now resolved and the search UI is loading as expected.
- CTA Grouping not Working: Previously, when users group CTA's and sort them by due date, the results displayed were not in expected order. This issue is now resolved.
- Misalignment of CTA name when List has Relationship CTAs: Previously, when users group CTA's and sort them by due date, the results displayed were not in expected order. This issue is now resolved.
-
Invalid Date Time Supported when CTA is Created: Previously, the system was throwing error in SFDC instance when CTA is created without any Date Time validation. This issue is now resolved.
Success Plans
- Unable to View more than 1000 Shared Success Plans in Admin Screen: Previously, the limit for viewing the shared success plans in the Manage Success Plan Sharing screen was only 1000. However, Gainsight as now increased the limit of viewing the shared success plans in the Manage Success Plan Sharing screen to 5000, with pagination which displays 100 records per page.
- Unable to Assign Template when Success Plan Owner is Inactive: Previously, users were unable to assign a template when the owner of a Success Plan is inactive. This issue is now resolved, if the Success Plan template’s objective/Playbook’s task owner is inactive it gets resolved to SP owner/CTA owner.
Rules Engine
- Custom Date Field Mappings Prevented Saving Rule Action Page: Previously, when you applied a custom date field mapping in the Rule Action page (after saving the rule once initially), the rule failed to save and returned an error. This issue is now resolved and you can now save rules after applying custom date mappings.
Salesforce Connector
- Salesforce Connector downloads error file with null data: Previously, when Admins downloaded the error file to check the failure reason for Case data sync through Salesforce Connector, the error file was generated with null data. This issue is now resolved and the error file displays the failure reason.
Dynamics Connector
- Dynamics Connector downloads blank error file: Previously, when Admins downloaded the error file to check the reason for failure of failed data jobs in Dynamics Connector, the generated error file was blank. This issue is now resolved and the error file displays the reason for failure of the respective failed jobs.
People Management
- Error while syncing dropdown list items through Salesforce Connector: Previously, syncing of dropdown list items through SFDC Connector failed. This issue is now resolved now.