Program List View and Create New Program
Gainsight NXT
This article explains how users can access program information and create new programs from the Programs Page.
Overview
The Journey Orchestrator > Programs page displays a list of existing Programs, and a calendar view of their execution schedule. Users can see basic information regarding the Program from this view, filter the list for specific programs, and create and delete programs.
| IMPORTANT: With the 6.31 January, 2022 release, the Programs page has a new UI to match the Horizon Design System. For more information on the differences between the old and new UI refer to the Program Page New Functionalities and Improvements (Horizon Experience) article. |
Available Tabs
From the Programs page, users can toggle between the list view and schedule view using the Program and Schedule tabs.
Program
The Program tab displays the Program list view. For more information on this program view, refer to the Program List View section.
Schedule
The Schedule tab displays the Program schedule view that displays scheduled Programs and Sources. For more information regarding the schedule tab, refer to the Program Schedule View section.
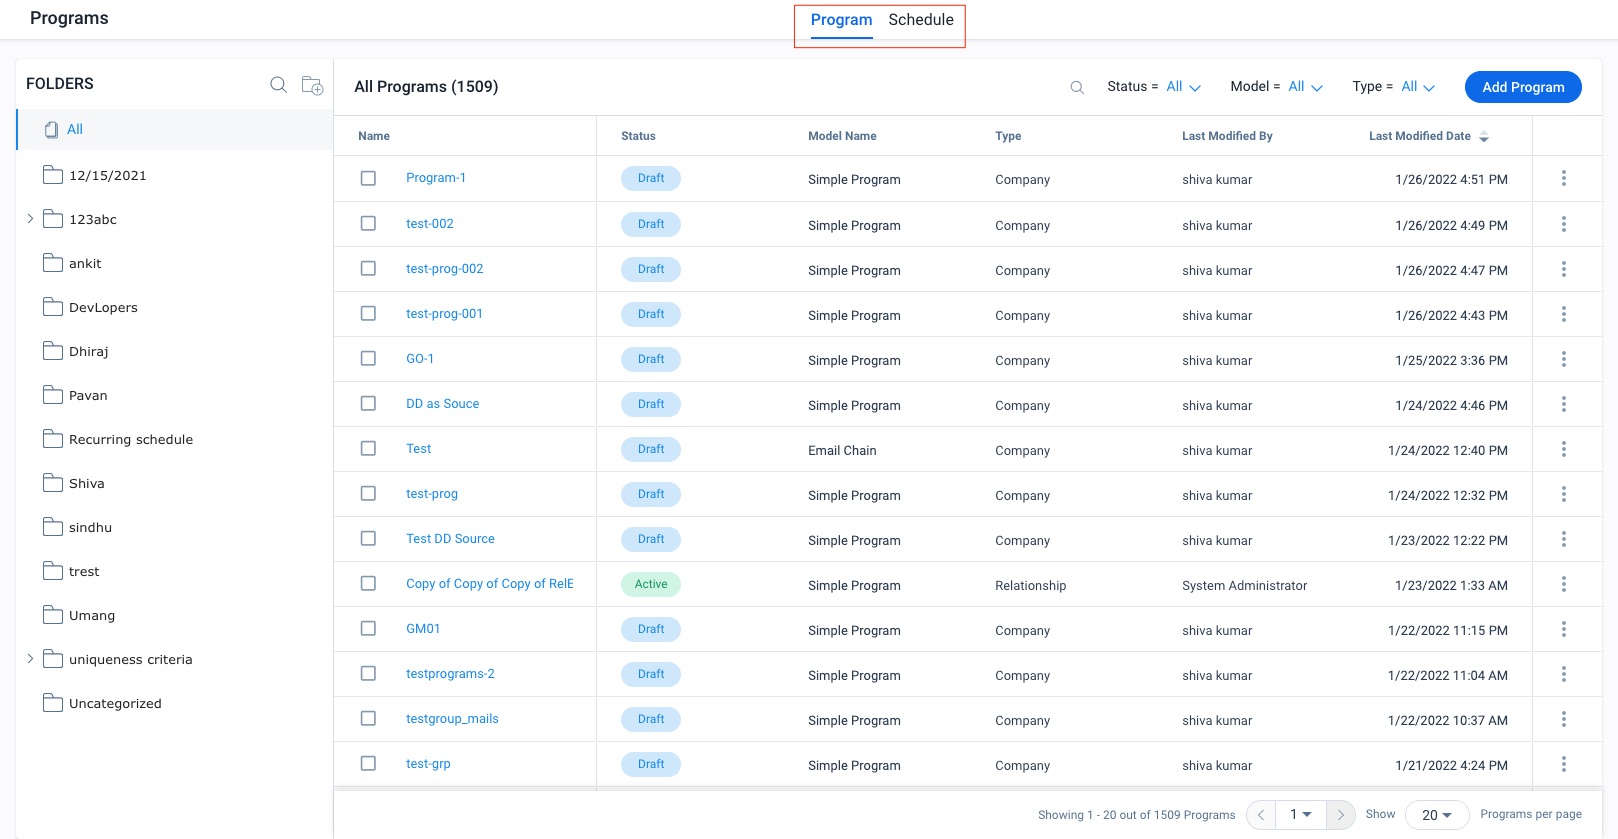
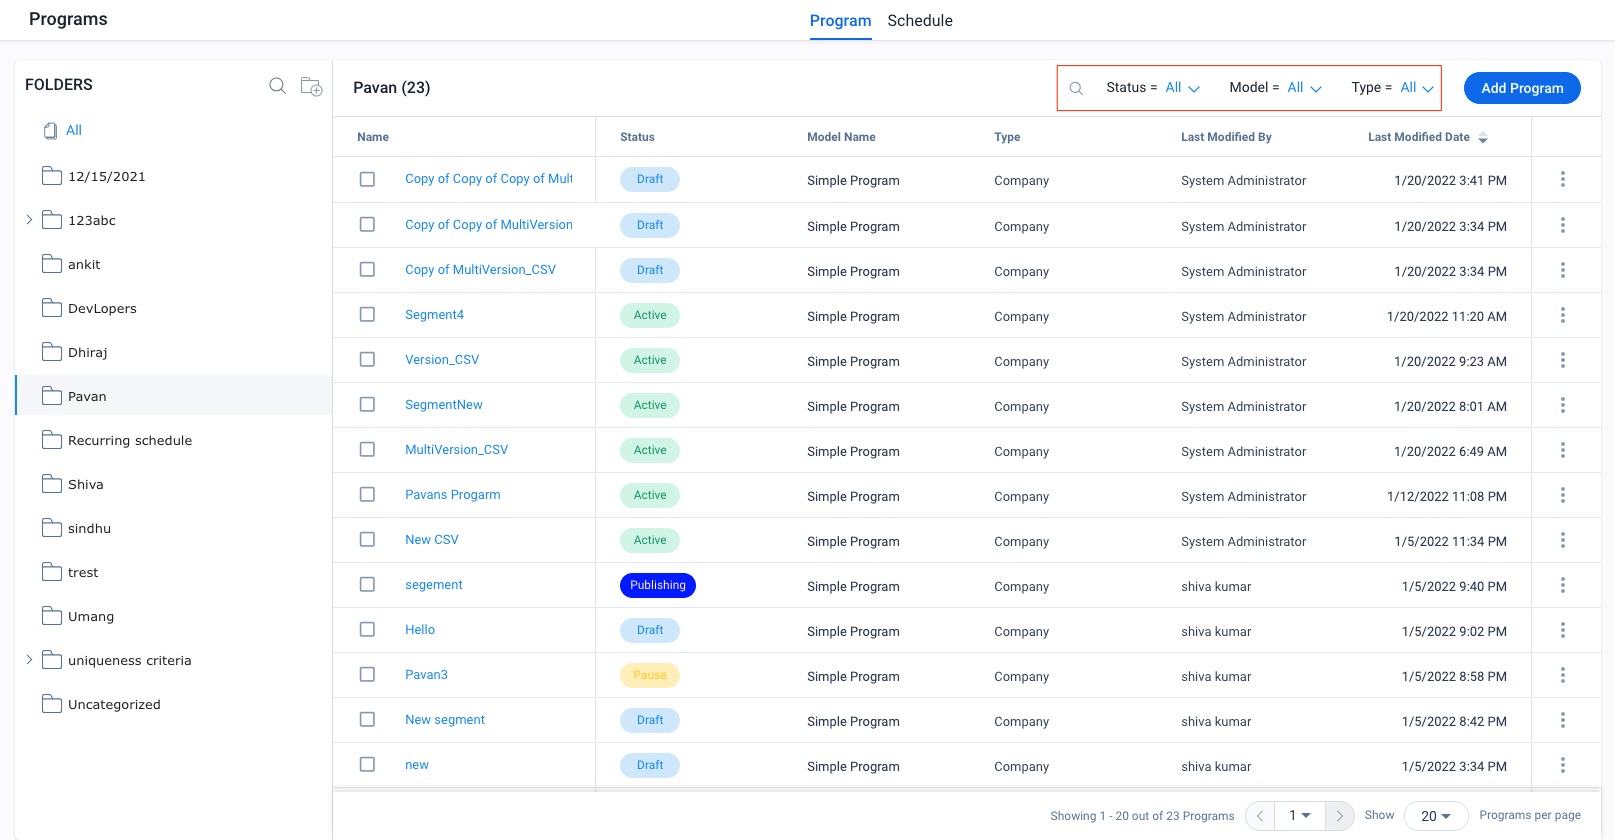
Program List View
The Programs list view page displays a list of existing programs. You can see basic information regarding the program from this view, filter the list for specific programs, and create and delete programs.
Programs are displayed on the list view page with the following columns:
- Name: This defines the name of the program. The name is hyperlinked and navigates you to the configuration page of a program.
- Status: This indicates the status of a program.
- Model Name: This indicates the type of model used to configure the programs.
- Type: This indicates either Company, Relationship, or User type of programs.
- Last Modified By: This defines the name of the person who modified the program most recently.
- Last Modified Date: This defines the date and time of when the program was last modified.
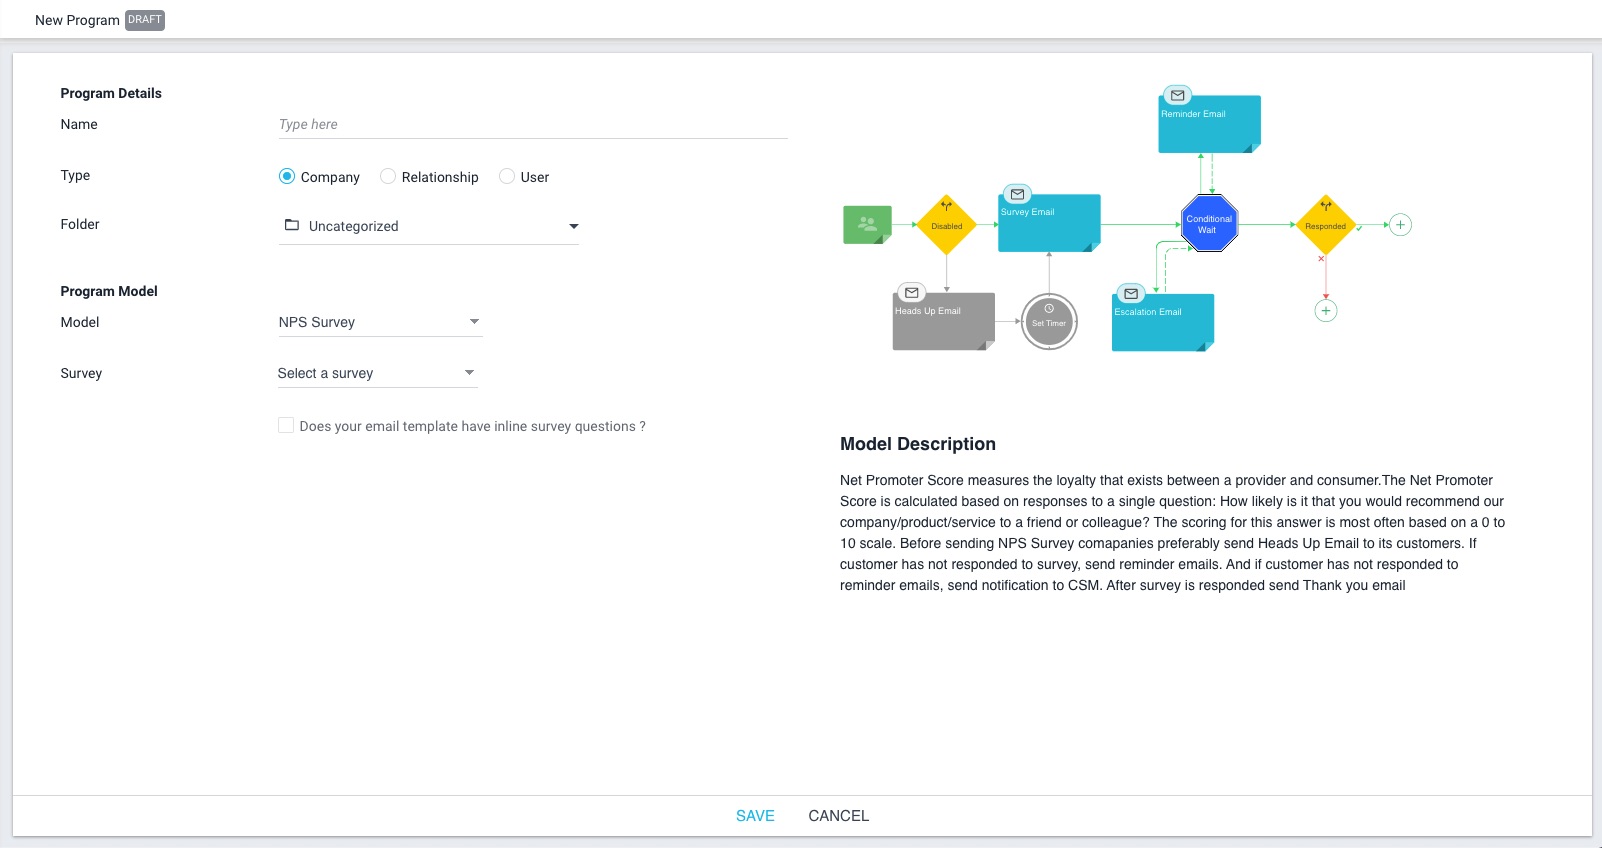
Create New Program
In the Programs list view page, take the following steps to create and configure a new program:
- Click the Add Program button. The New Program page is displayed.
- In the Name field, enter the name of the Program.
- In the Type field, select if the Program is configured for Company, Relationship or User.
Note: User type programs can only use the Email Chain program model. - (Optional) Select a folder for the new Program. If no folder is selected, the Program is moved to the Uncategorized folder. For more information on program folders, refer to the Folders section.
- Select a model to use for this Program. For more information on program models, refer to the Available Models for Programs article.
- For survey model programs, select a survey to send with the program.
- (Optional): For survey model programs, click the in-line survey checkbox to select a survey question to be used in the program email. Only single-select questions on the first page of the survey will be available for selection.
- Click SAVE.
For more information on configuring programs, refer to How to Configure Programs (path) article.
Folders
You can create folders on the Programs page to organize your programs accordingly. All the folders are displayed in the left pane of the Program List View. If you click any particular folder name, all the programs included in that folder are displayed in the right pane. Gainsight provides a default folder called Uncategorized, where all of the existing programs are stored. You cannot modify the name of this folder or delete it.
Each folder can have one level of subfolders nested beneath them. The Uncategorized folder cannot have subfolders.
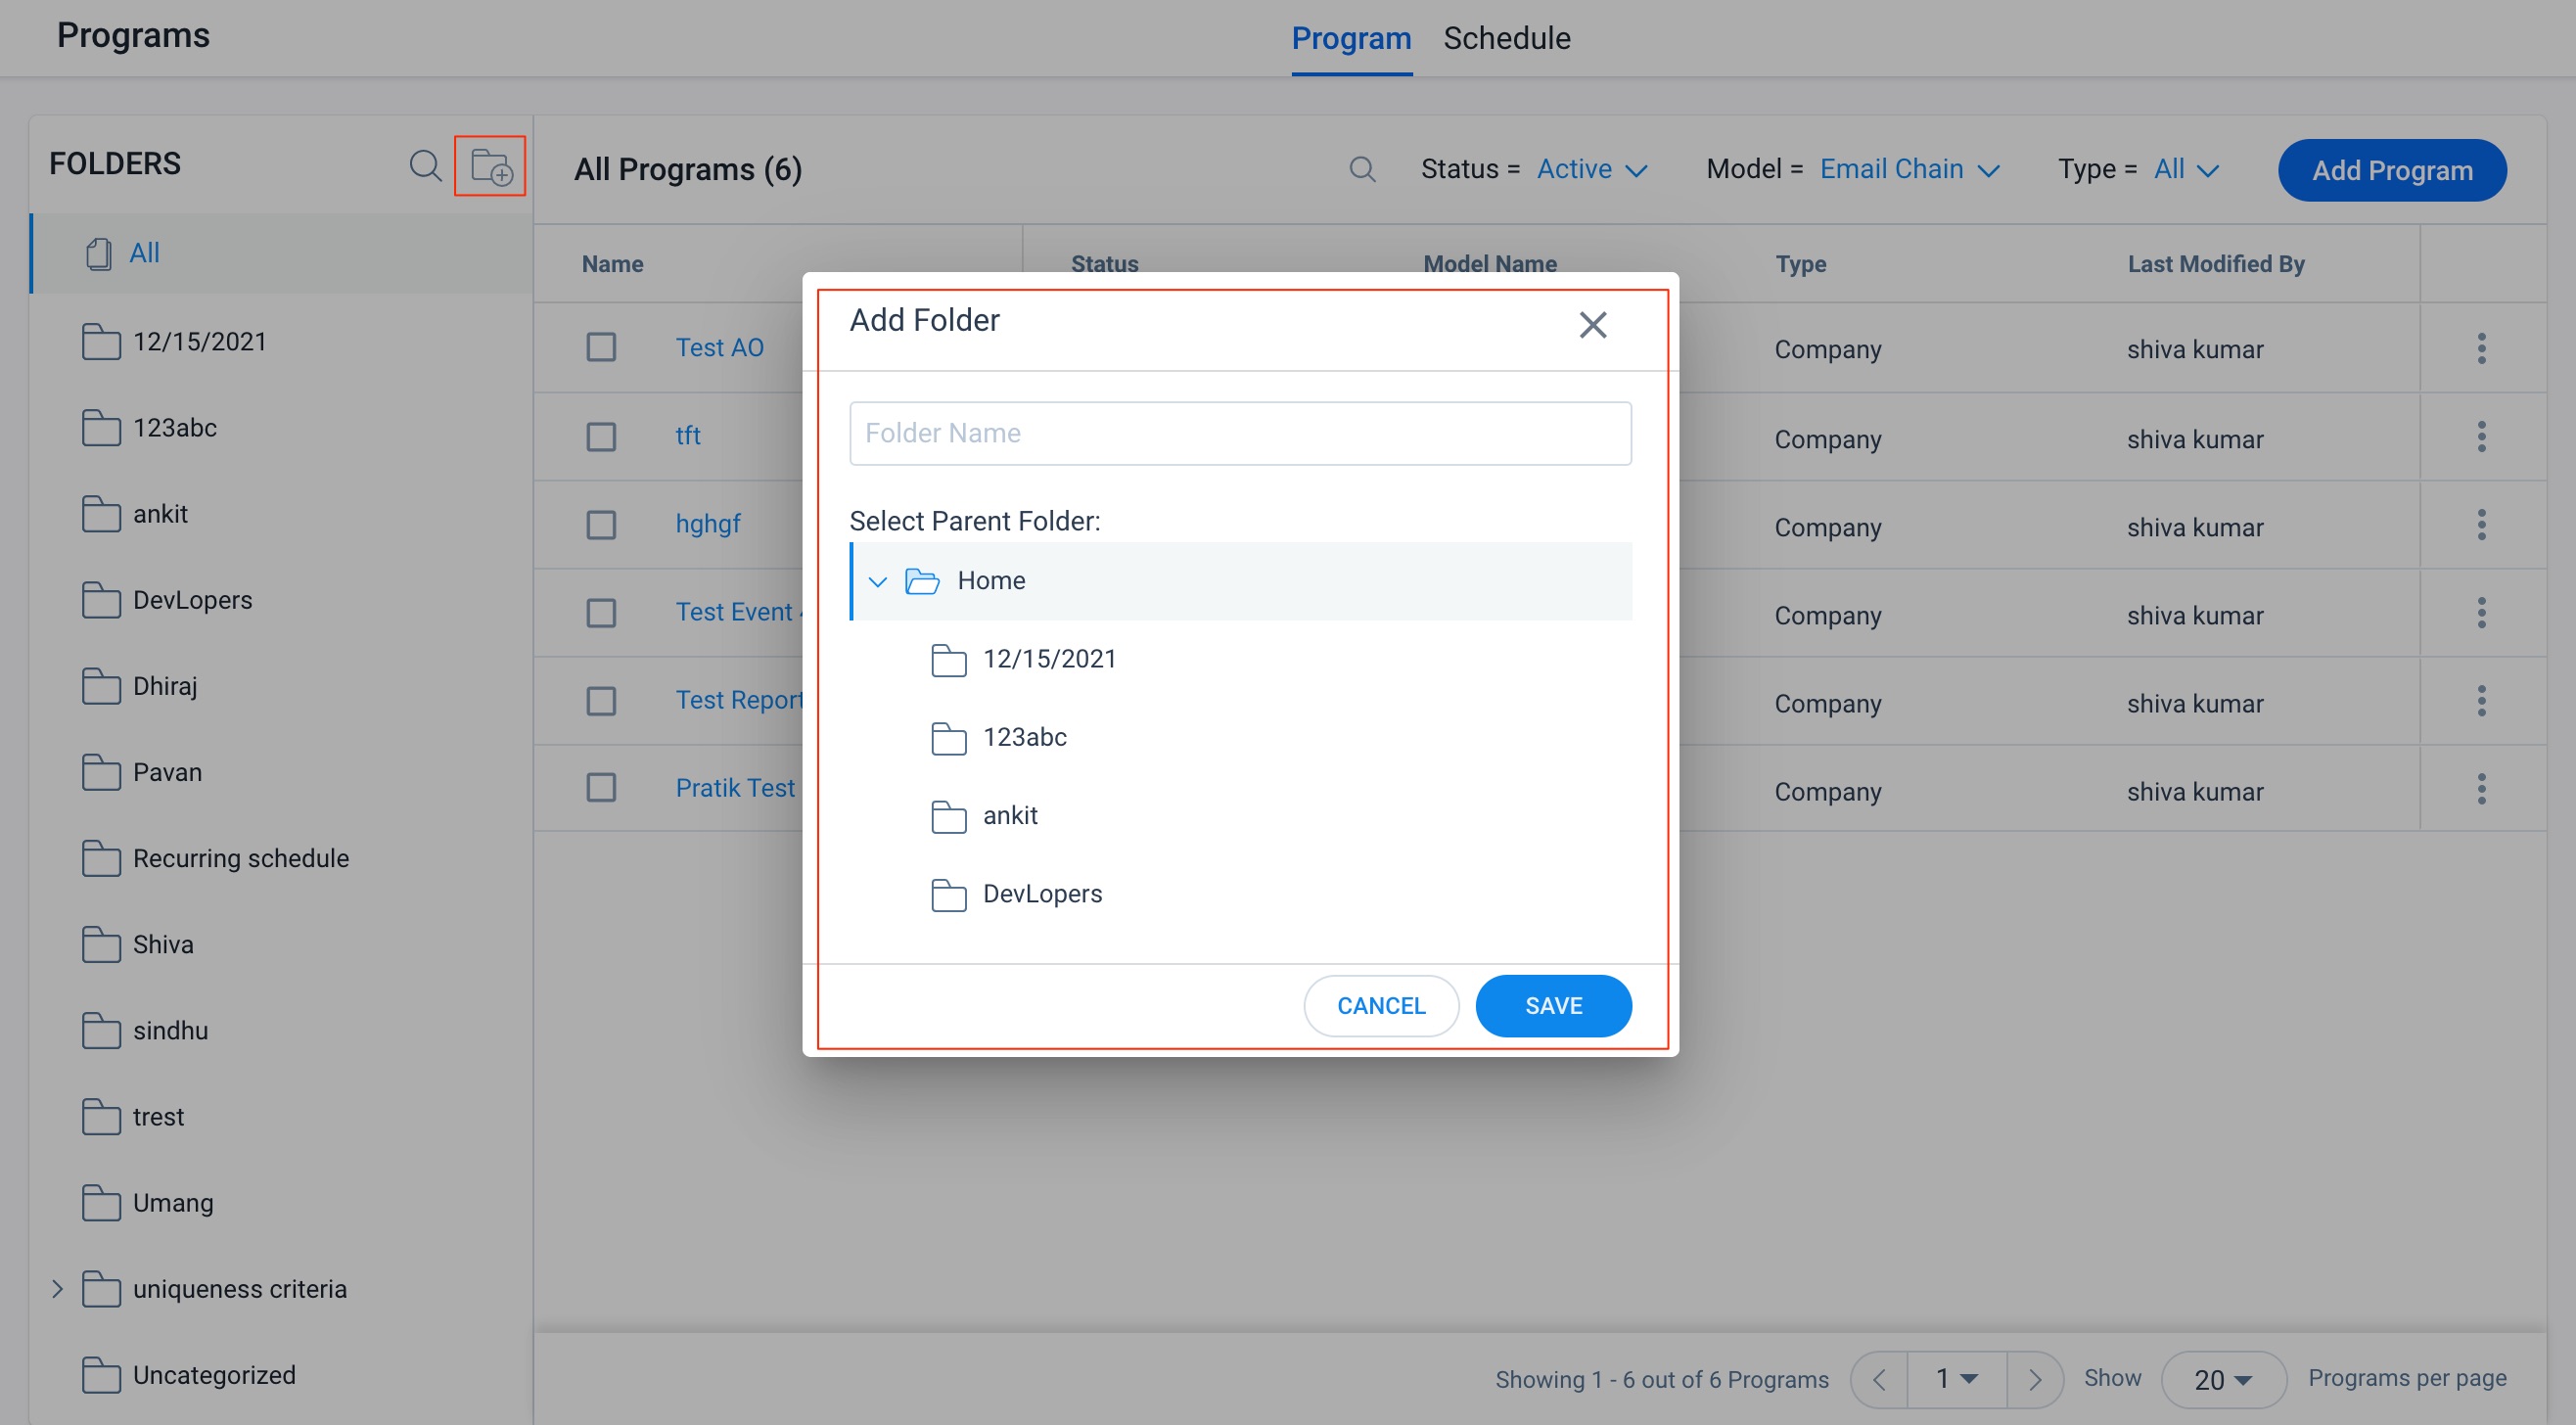
Create Folder
To create a new folder:
- Click the Add new folder icon. The Add Folder dialog is displayed.
- In the Folder Name field, enter a name for the folder.
- (Optional) Select a parent folder to nest the folder under.
- Click SAVE.
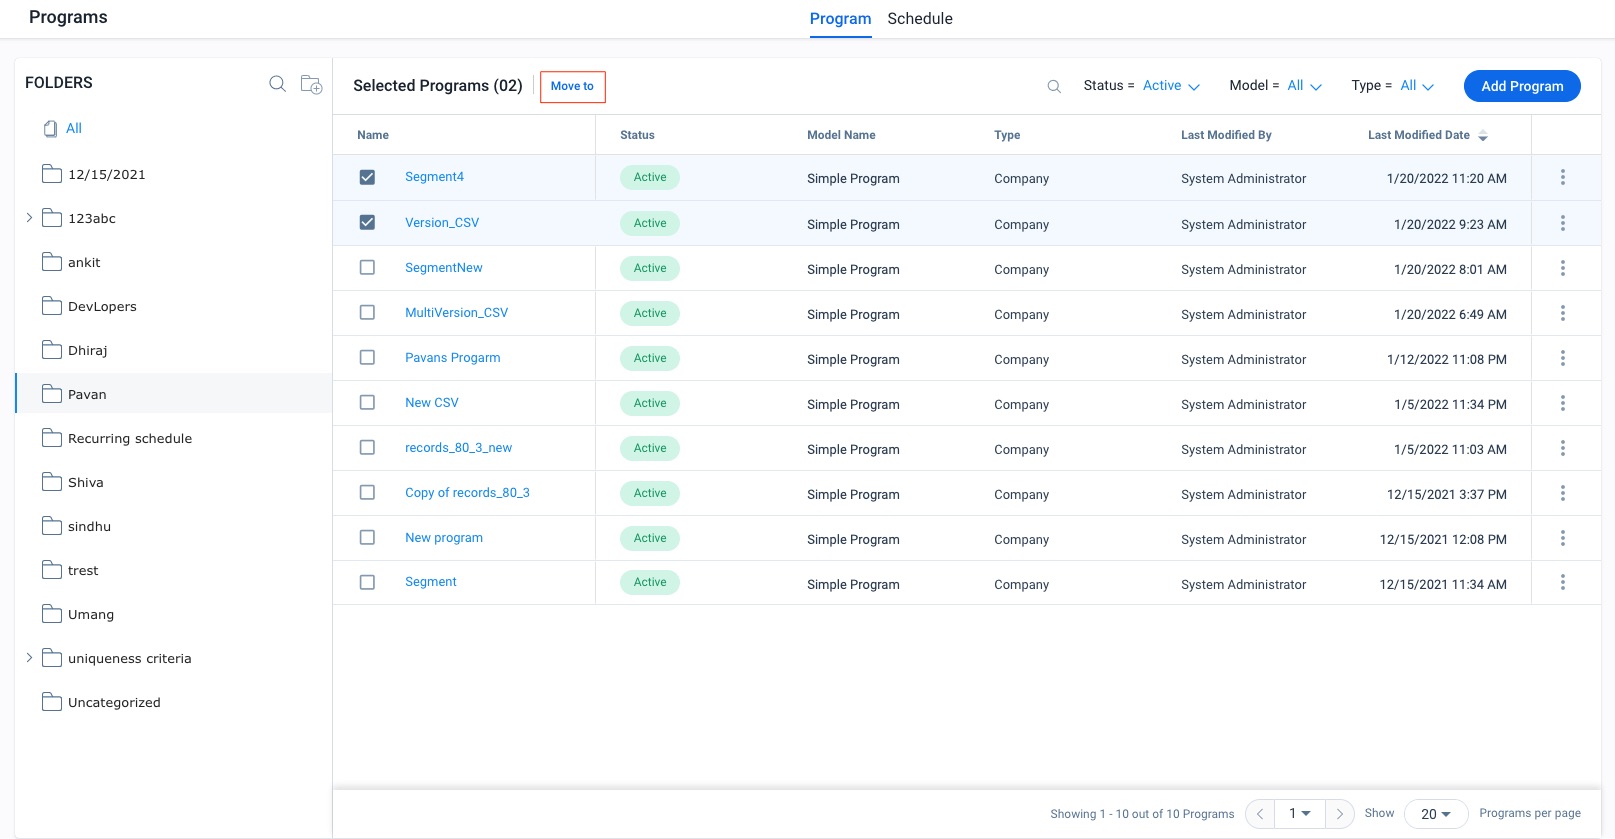
Move Programs to Folders
Once you’ve created a folder, you can move a program into it by taking the following steps:
- Select the checkbox of the relevant program(s).
- Click Move to to display the Folders dropdown.
- (Optional) Click the search icon to search for folders by name.
- Click the relevant folder to move the program(s).
Note: A single Program can only be in one folder.
Rearrange Folders
Click and drag folders to rearrange them. You can drag one folder to another to make it a nested subfolder.
Delete Folders
Users can delete folders that have no other subfolders. When folders containing programs are deleted, the program is moved to the Uncategorized folder. You cannot delete the Uncategorized folder.
To delete a folder, hover over it and click the delete icon.
Advanced Filters
You can filter the Program List View by clicking on the Status, Model, or Type dropdown fields and then selecting the relevant option. Only programs that meet the criteria for each field are displayed.
- Status: Filter the list view by Program status. Program statuses include the following:
- Draft: The program is still being configured and is not published at this time.
- Scheduled: The program is scheduled to publish at a future date and time. The schedule can be removed by changing the program to a Draft status. For more information on scheduling Programs to publish, refer to the Configure Model and Emails for Programs article.
- Active: The program is published and is currently running. When a Program is Active, Admins cannot edit beyond the following actions:
- Generate a query to pull in participants
- Modify the schedule for when the query runs
- Configure Uniqueness Criteria
- Remove Participants
- Modify Email Templates (edits will be reflected for participants going forward)
- Modify any CTA steps (edits will be reflected for participants going forward)
- Pause: The program was published and Active, but the run was Paused. While further configurations are not possible at this time, the program can be set back to the Active status. The participants’ activity status can be captured for a period of 60 days after the program is paused. You can resume the program with the updated statuses of all participants’ activities before the pause period. Moreover, you can also resume the program from it’s original state before pausing the program.
- Stop: The program was published and Active, but was Stopped and is no longer running. No new participants will be added, and all participants are moved to a the status "knocked-off". Further configurations are not possible, and the program can not be started again. For more information on how to stop Programs, refer to the Configure Model and Emails for Programs article.
- Publishing: The program is in the process of being published.
- Model: Filter the list view for Programs configured with specific model types. The available model filters are All, NPS® Survey, Generic Survey, CSAT Survey, and Email Chain. For more information on program models, refer to the Available Models for Programs article.
- Type: Filter the list view by either Company, Relationship, or User Programs.
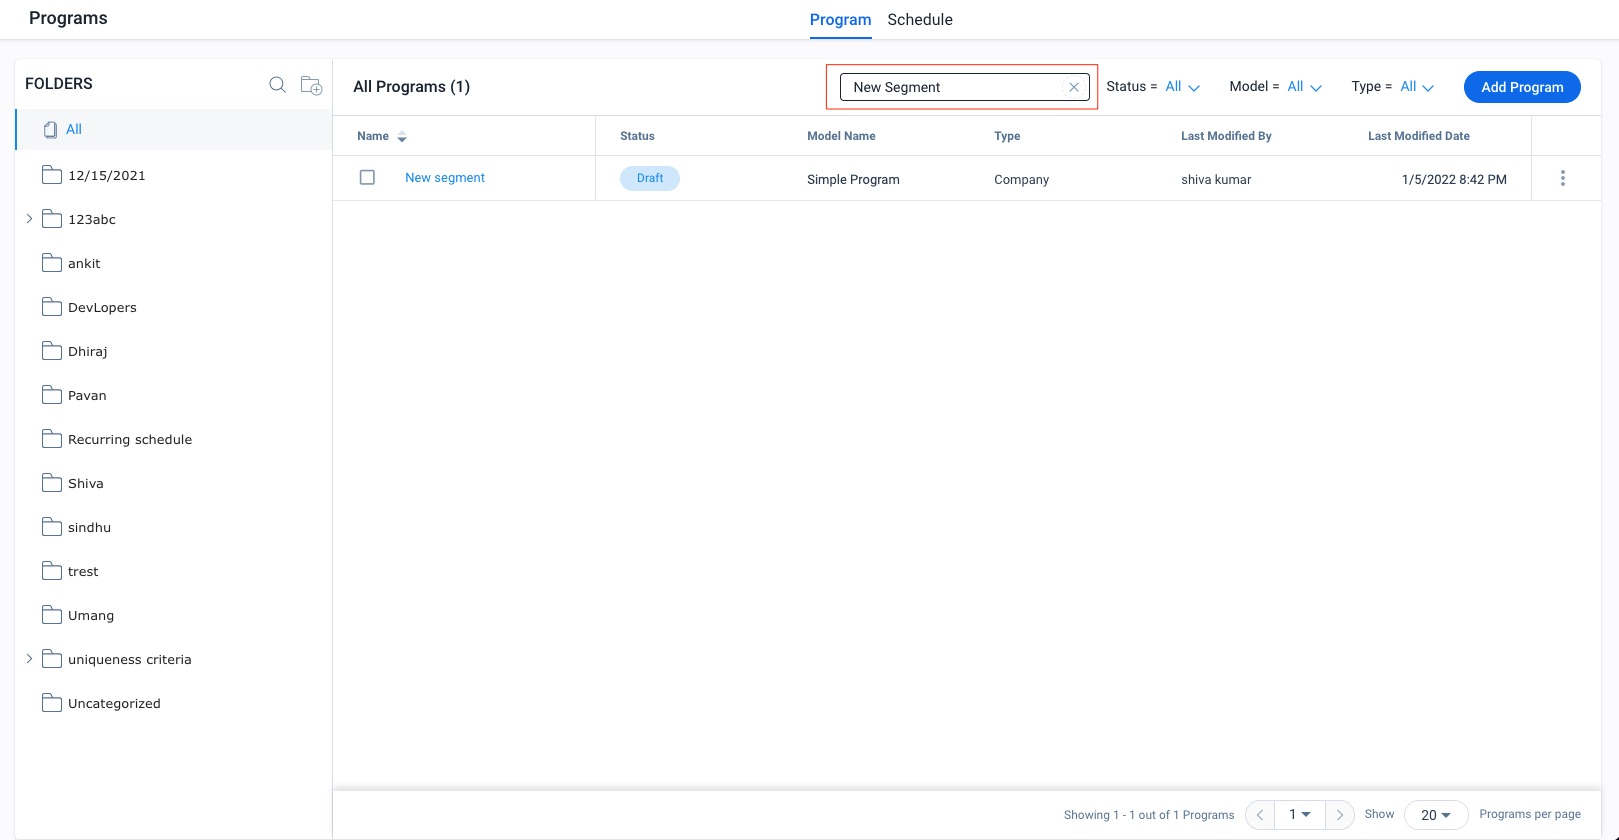
Program Search
To search for a program in the list view, take the following steps:
- Click the search icon.
- Enter the name of the program.
- Hit Enter to filter the list view for Programs with names that contain the text entered in the search bar.
Pagination
Users can control their view and navigation experience of the Program List View with the following controls at the bottom of the page.
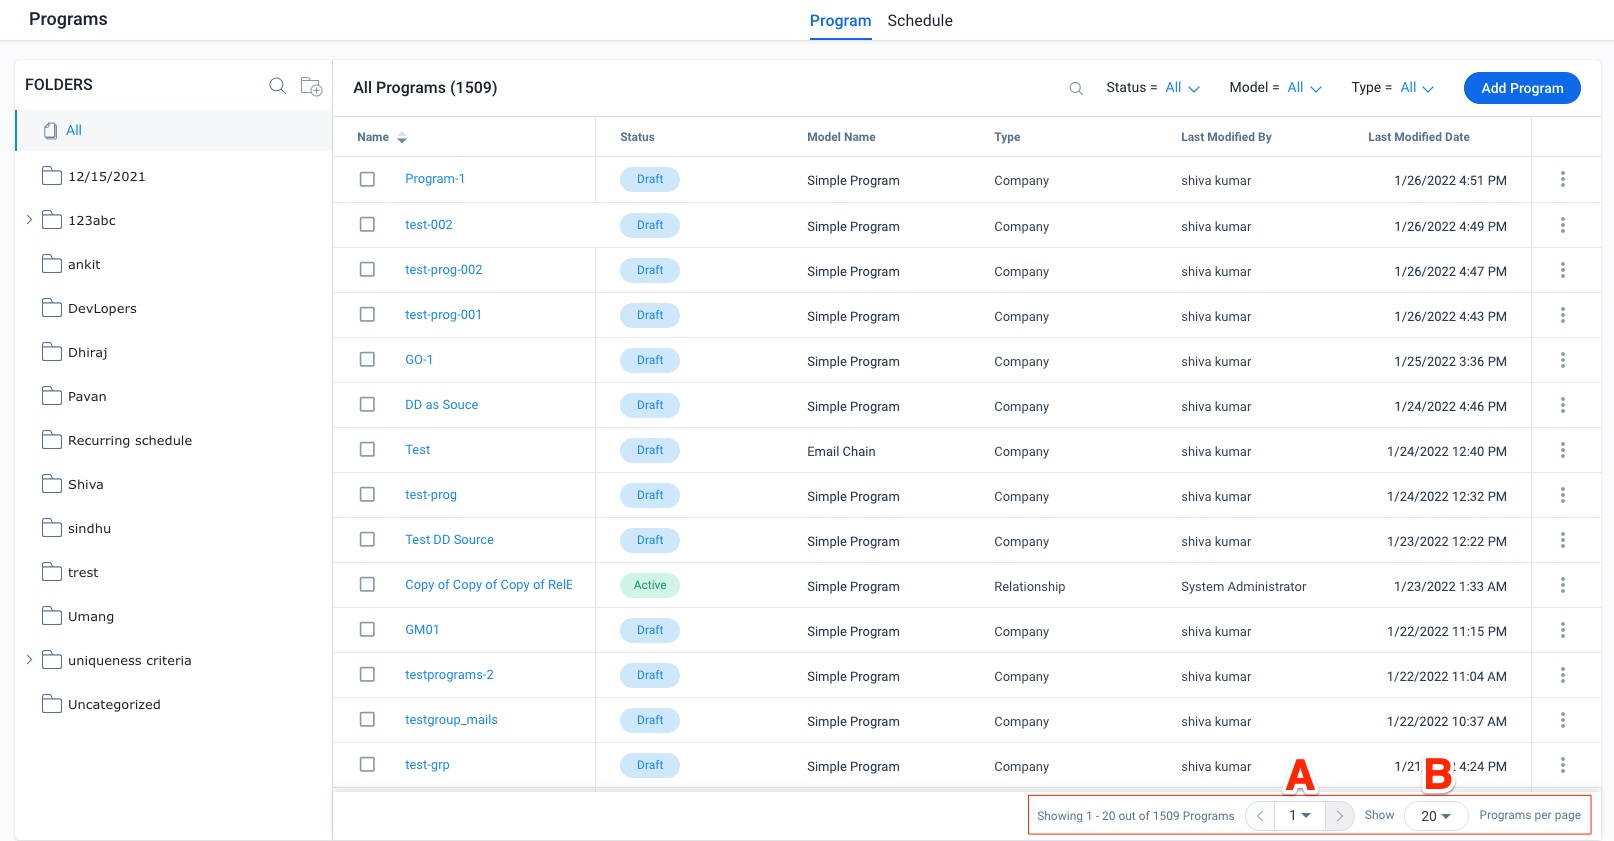
A. Page Selection: Click the page number dropdown to select any page to navigate to. Use the arrows to navigate back and forth between pages.
B. Programs per page: Click the dropdown to select to display either 20, 40, or 60 programs per page.
Additional Options
Click the context menu of any program to see additional options available for that program.
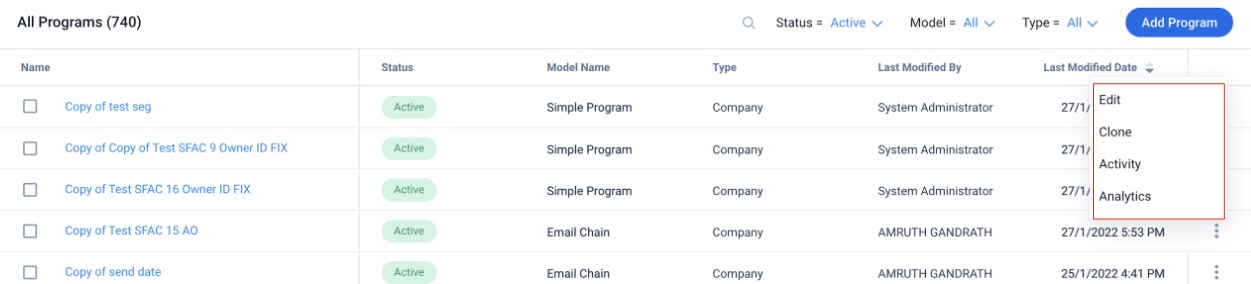
- Edit: This option allows you to edit the configuration of the program.
- Analytics: This option navigates you to the pre-built analytic reports for that specific Program. For more information on Program Analytics, refer to the Reports for a Single Program article.
- Activity: View an activity feed for each participant. The activity feed appears as a flow diagram and displays each step of the participant journey in the Program. This includes when the participant was sent an email, how long the participant waited between each step, their responses to a survey, as well as if/when the participant was dropped from the program journey, and the failure reason. For more information regarding the Activity Feed feature, refer to the Participant Activity Feed article.
- Clone: This option allows you to create a copy of the program with the same configurations. The clone will have the same sources, but you still need to sync participants and publish the program to make it active. The application does not allow you to edit the cloned program until the cloning has completed.
- Delete: Click this option to delete a program.
Program Schedule View
The Program schedule view displays a calendar of engagement schedules for programs and participant sources. Users can take the following actions from the schedule view:
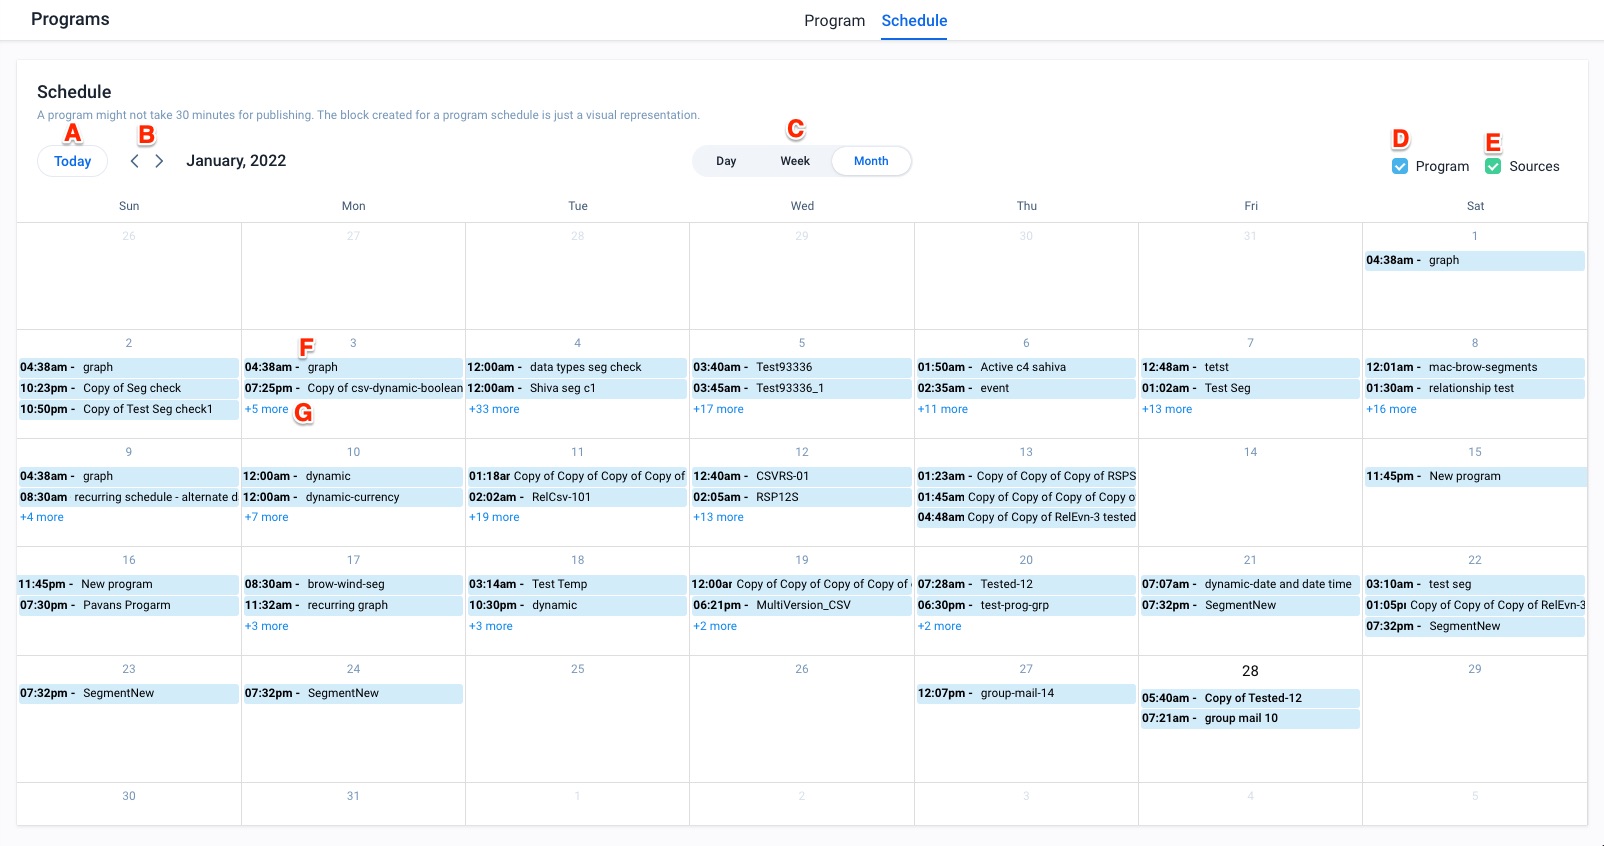
A. Today Button: Click this button to navigate to a time period that displays today’s date.
B. Time Period Navigation: Click the arrows to navigate back and forth between different periods of time.
C. Time Frame Selection: Select either Day, Week, or Month as the time frame for the schedule view.
D. Program Checkbox: Select this checkbox to display scheduled programs. For more information on scheduling Programs, refer to the Configure Model and Emails for Programs article.
E. Source Checkbox: Select this checkbox to display scheduled sources. For more information on configuring Program sources, refer to the Add Participants to a Program article.
F. Schedule Block: Click a schedule block to display a summary of the scheduled item as a pop-up window.
G. Full Schedule List: Click + more to view the full list of scheduled items for that day.
| NPS, Net Promoter, and Net Promoter Score are registered trademarks of Satmetrix Systems, Inc., Bain & Company and Fred Reichheld. |