Journey Orchestrator Permissions
Gainsight NXT
Overview
This article explains how to assign permissions to control Journey Orchestrator module.
Journey Orchestrator permissions framework helps Admins to assign module level permissions to users. Therefore, manages which user can access Journey Orchestrator and perform relevant actions. As part of JO provisioning, the following four out of the box permission sets are available:
- Design: Will have access to Properties, Design.
- Distribute: Will have access to Sync/run Power lists, Manual run/schedule Outreaches, and Publish/Schedule the programs.
- Analyze: Will have access to view Outreach Analytics, Individual program analytics from program page and Program Analytics (J360).
- Admin: By default, the users of "Admin" type will have Journey Orchestrator Module Admin enabled with Delete permissions (along with Design, Distribute and Analyze permissions).
For each permission set, the admin must be able to access and add/remove users from the permission list.
Module Level Permissions
Module-level permissions for Journey Orchestrator are controlled through Permission Groups. With Permission Groups, you can create bundles of users and assign permissions to the entire bundle. To assign module level permissions, you must create a bundle and then assign permissions and users to the bundle.
Note: By default, some permissions bundles are present but not assigned to any user. Only Super Admins, who have access to all the permissions, can assign permissions to users accordingly.
Create Bundle
To create a Bundle in Permission Groups:
- Navigate to Administration > Permission Bundles.
- Click +BUNDLE.
- Specify the following details:
- Name of the Bundle
- (Optional) Description
- Click CREATE.
Assign Permissions to Bundle
To assign Permissions to Bundle:
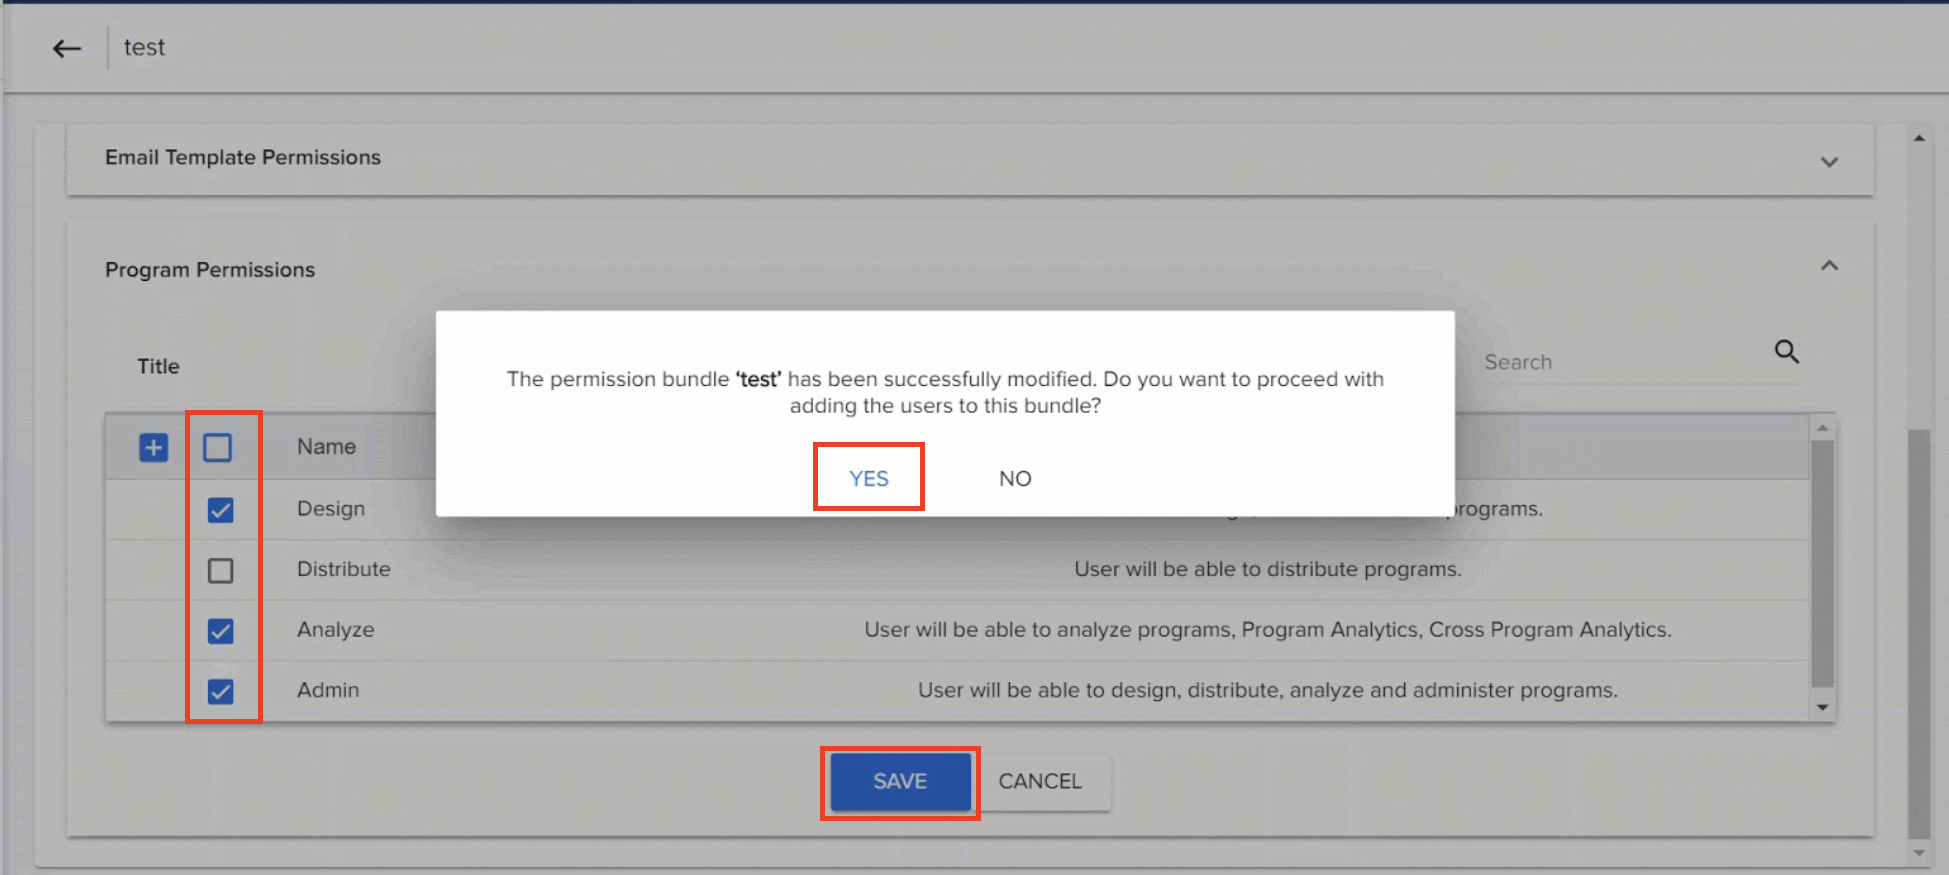
- Click the Bundle you want to modify.
- Click the checkboxes of the module permissions you want to assign to the bundle. The permissions will be granted to users added to the Bundle.
- Click SAVE.
Assign Users to Bundle
To assign users to Bundle:
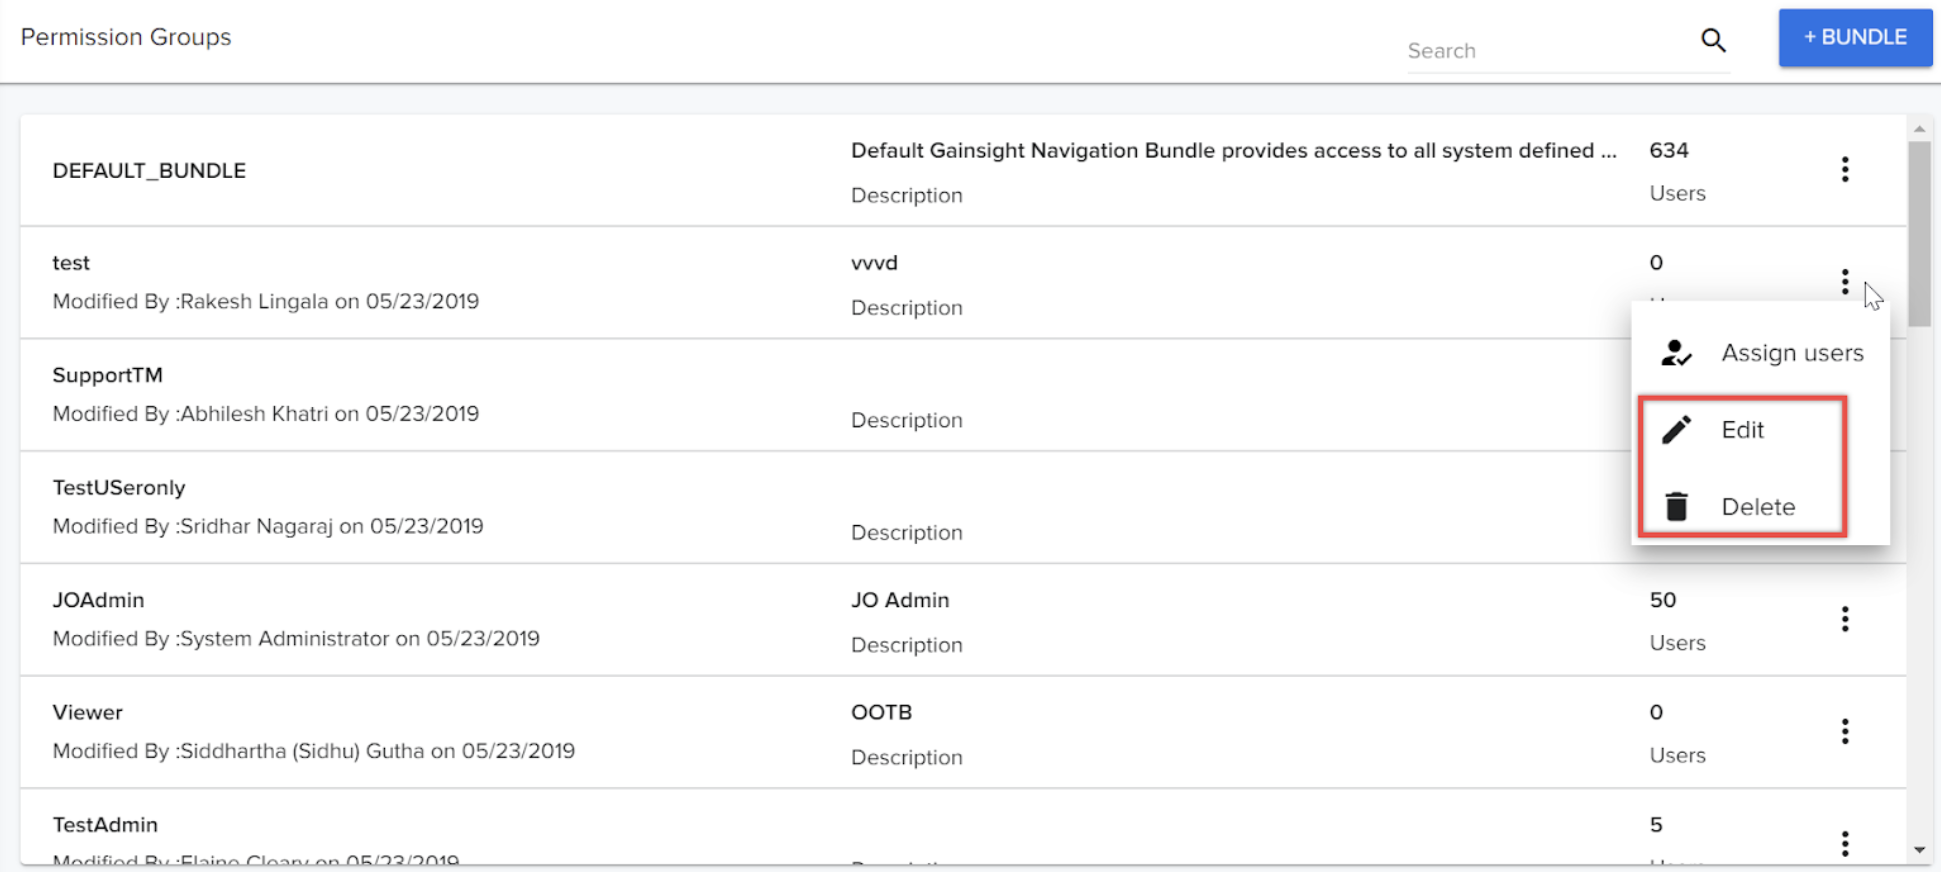
- Click the three dots button of the Bundle you want to modify.
- Click Assign Users.
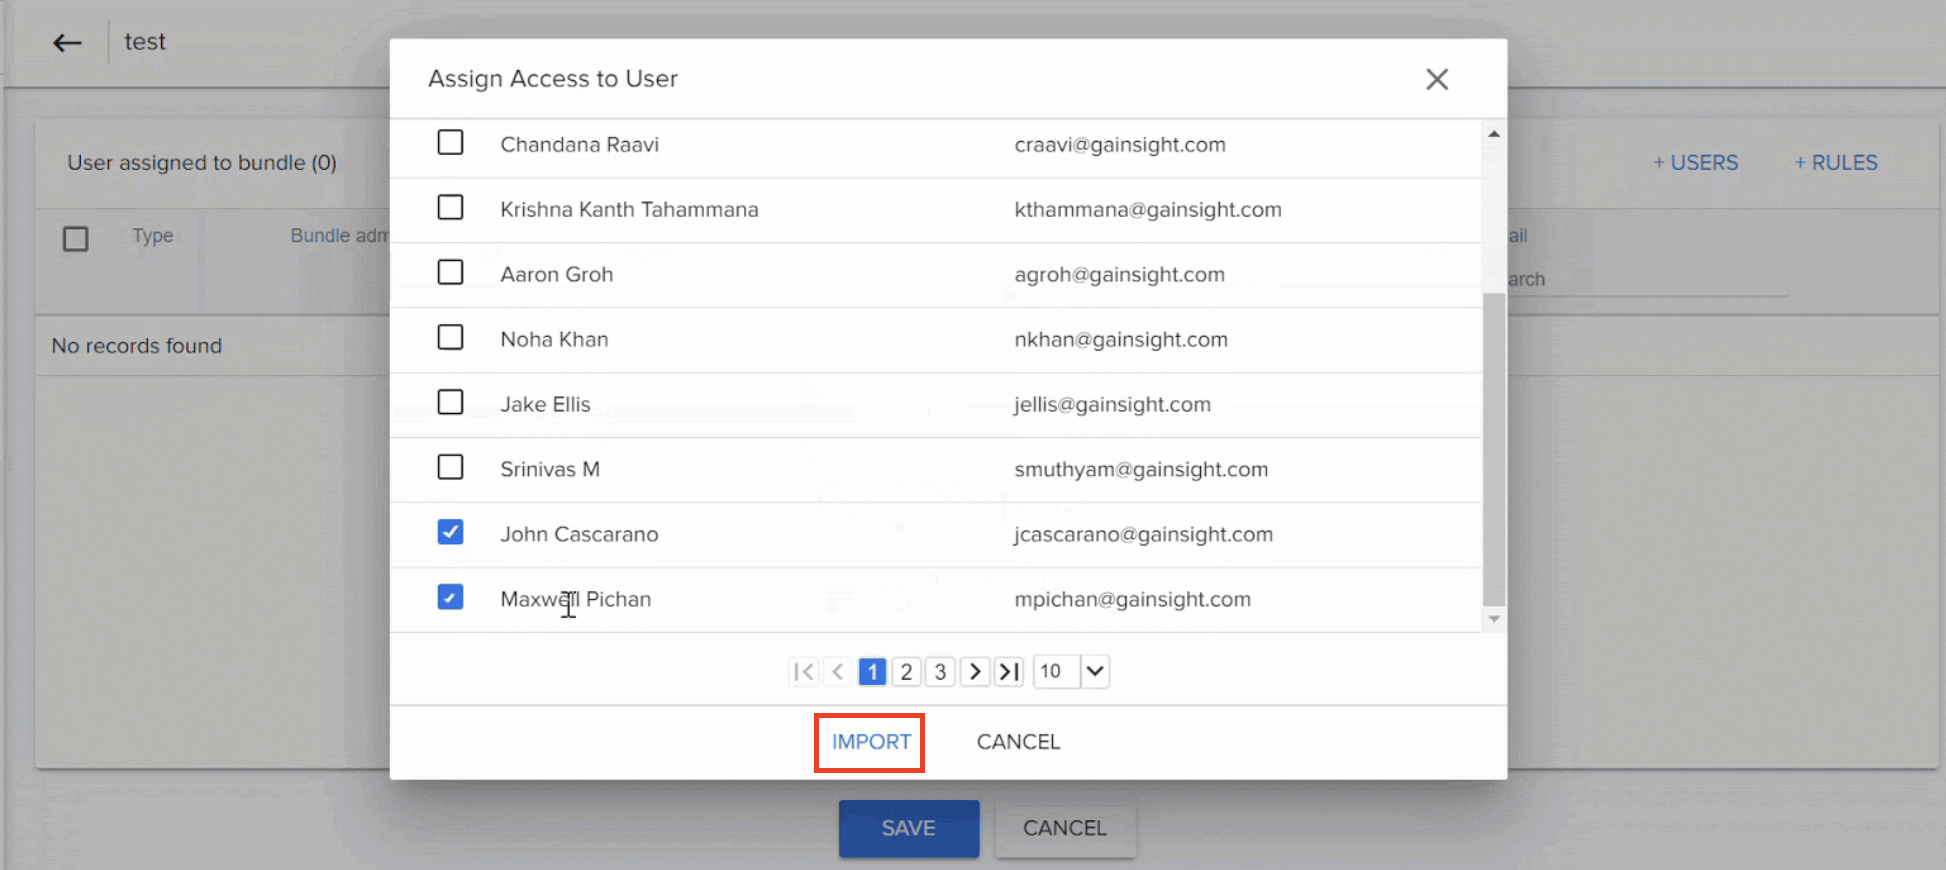
- Click +USERS.
- Select the checkboxes of the users you want to add. You can use the search box to search for specific users.
- Click IMPORT, after adding all the required users.
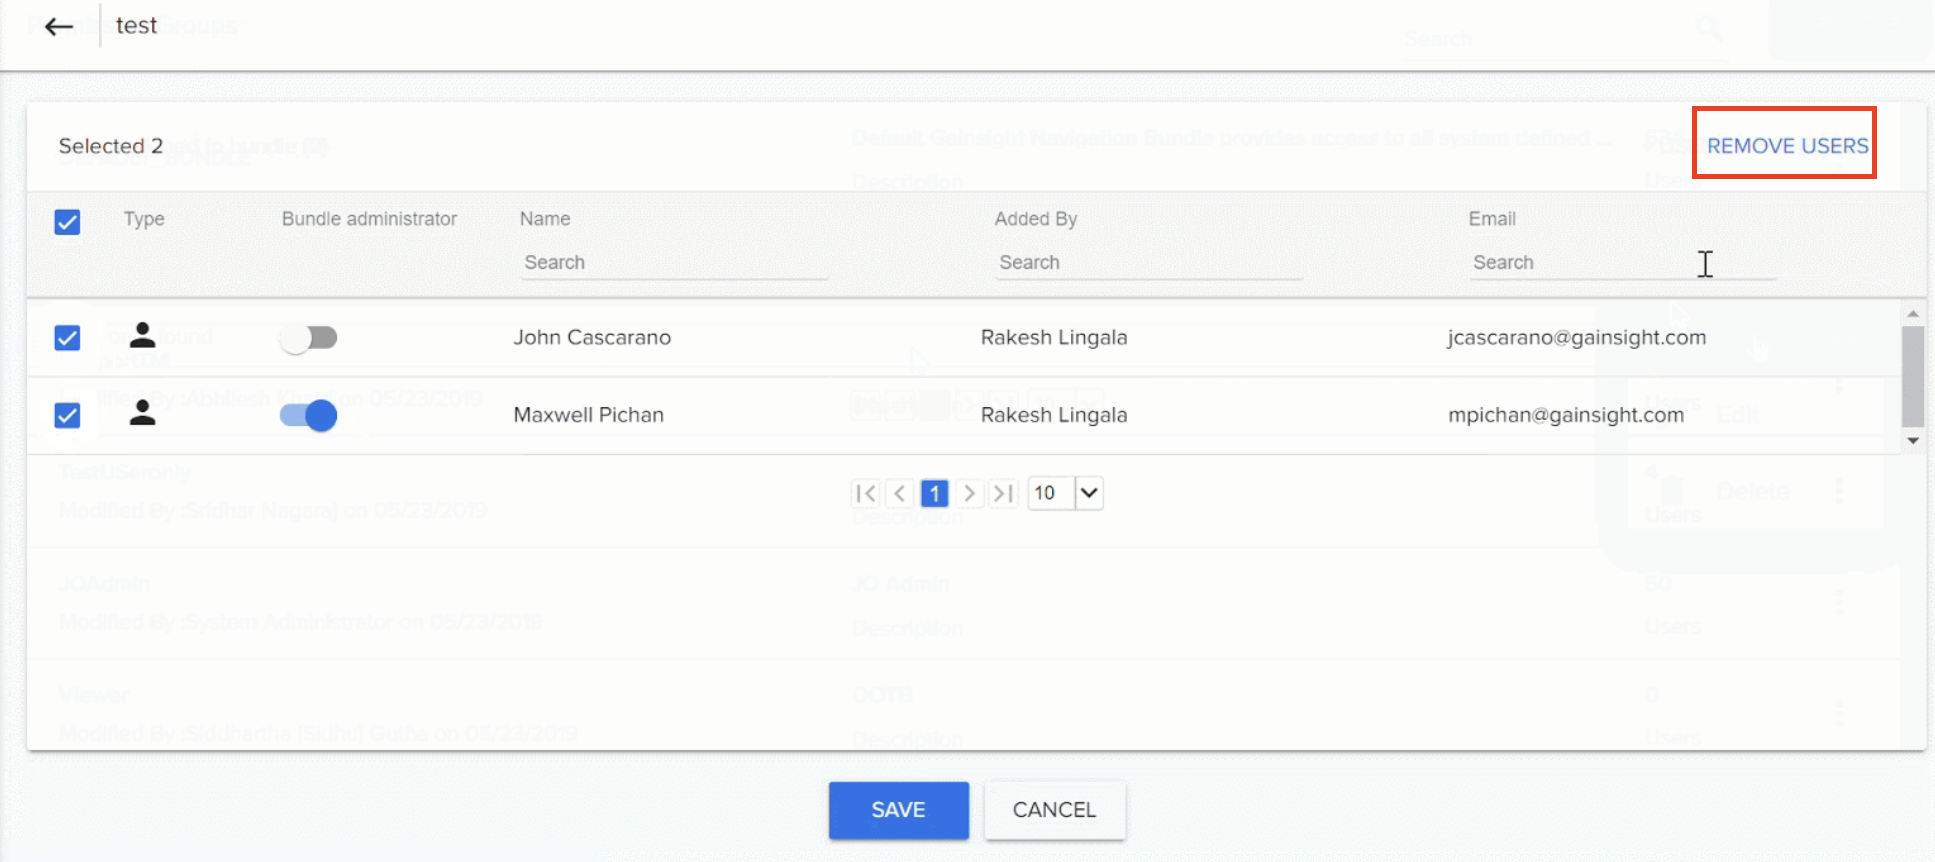
- (Optional) You can grant Administrator access to the user(s) by turning on the Bundle Administrator toggle switch. If a user is granted Admin rights for a bundle, the user can add or delete other users from the bundle.
- Click SAVE.
Revoking Users to Bundle
To revoke users to Bundle:
- Click the three dots button of the Bundle you want to modify.
- Click Assign Users.
- Select the checkboxes of the users you want to revoke. You can use the search box to search for specific users.
- Click REMOVE USERS.
- Click SAVE.
Note: Admin can also modify and delete the permission group bundles by clicking Edit and Delete options respectively.