Product Experience (PX) Integration
This article explains how admins can integrate Gainsight Customer Success (CS) with Product Experience (PX) for efficient data management. This guide focuses on the quick and simplified process for integrating data flow into Gainsight CS.
Note: Applicable for new PX connections; existing connections remain unaffected.
Overview
Gainsight Product Experience (PX) is a powerful tool designed to enhance user engagement within web applications. It enables the setup of in-app messages and the collection of valuable analytics. When integrated with Gainsight Customer Success (CS), PX facilitates a streamlined data flow, enhancing customer insights and engagement strategies. This integration, achievable with a single click, simplifies the process, making it both efficient and user-friendly, thereby providing a comprehensive view of customer interactions and behaviors within the applications.
Key Benefits
- Integrated Data Insights: Syncing PX data with Gainsight CS offers advanced data visualization and real-time analytics
- Enhanced Engagement with JO and PX: Integrating Gainsight's Journey Orchestrator (JO) and PX for dynamic in-app engagements can be used for the following use cases:
- Onboarding: Send welcome emails with CS application walkthroughs using PX.
- Product Updates: Automatically trigger release update videos in-app through JO Programs.
- Customer Feedback: Deploy Net Promoter Score (NPS®) surveys using PX, followed by email reminders, if needed.
- Post-Support Feedback: Send CSAT surveys after closing support tickets.
Connectors
Connectors allow you to integrate Product Experience with Customer Success for data insights. To access this feature, navigate to Administration > Connectors 2.0, which leads to the Connectors landing page. This page is divided into two sections:
- Gainsight Connections: Displays Gainsight products you own, along with other Gainsight products - Product Experience, Customer Communities, and Customer Education.
- External Connections: Displays your established connections with external systems that are not part of Gainsight products.
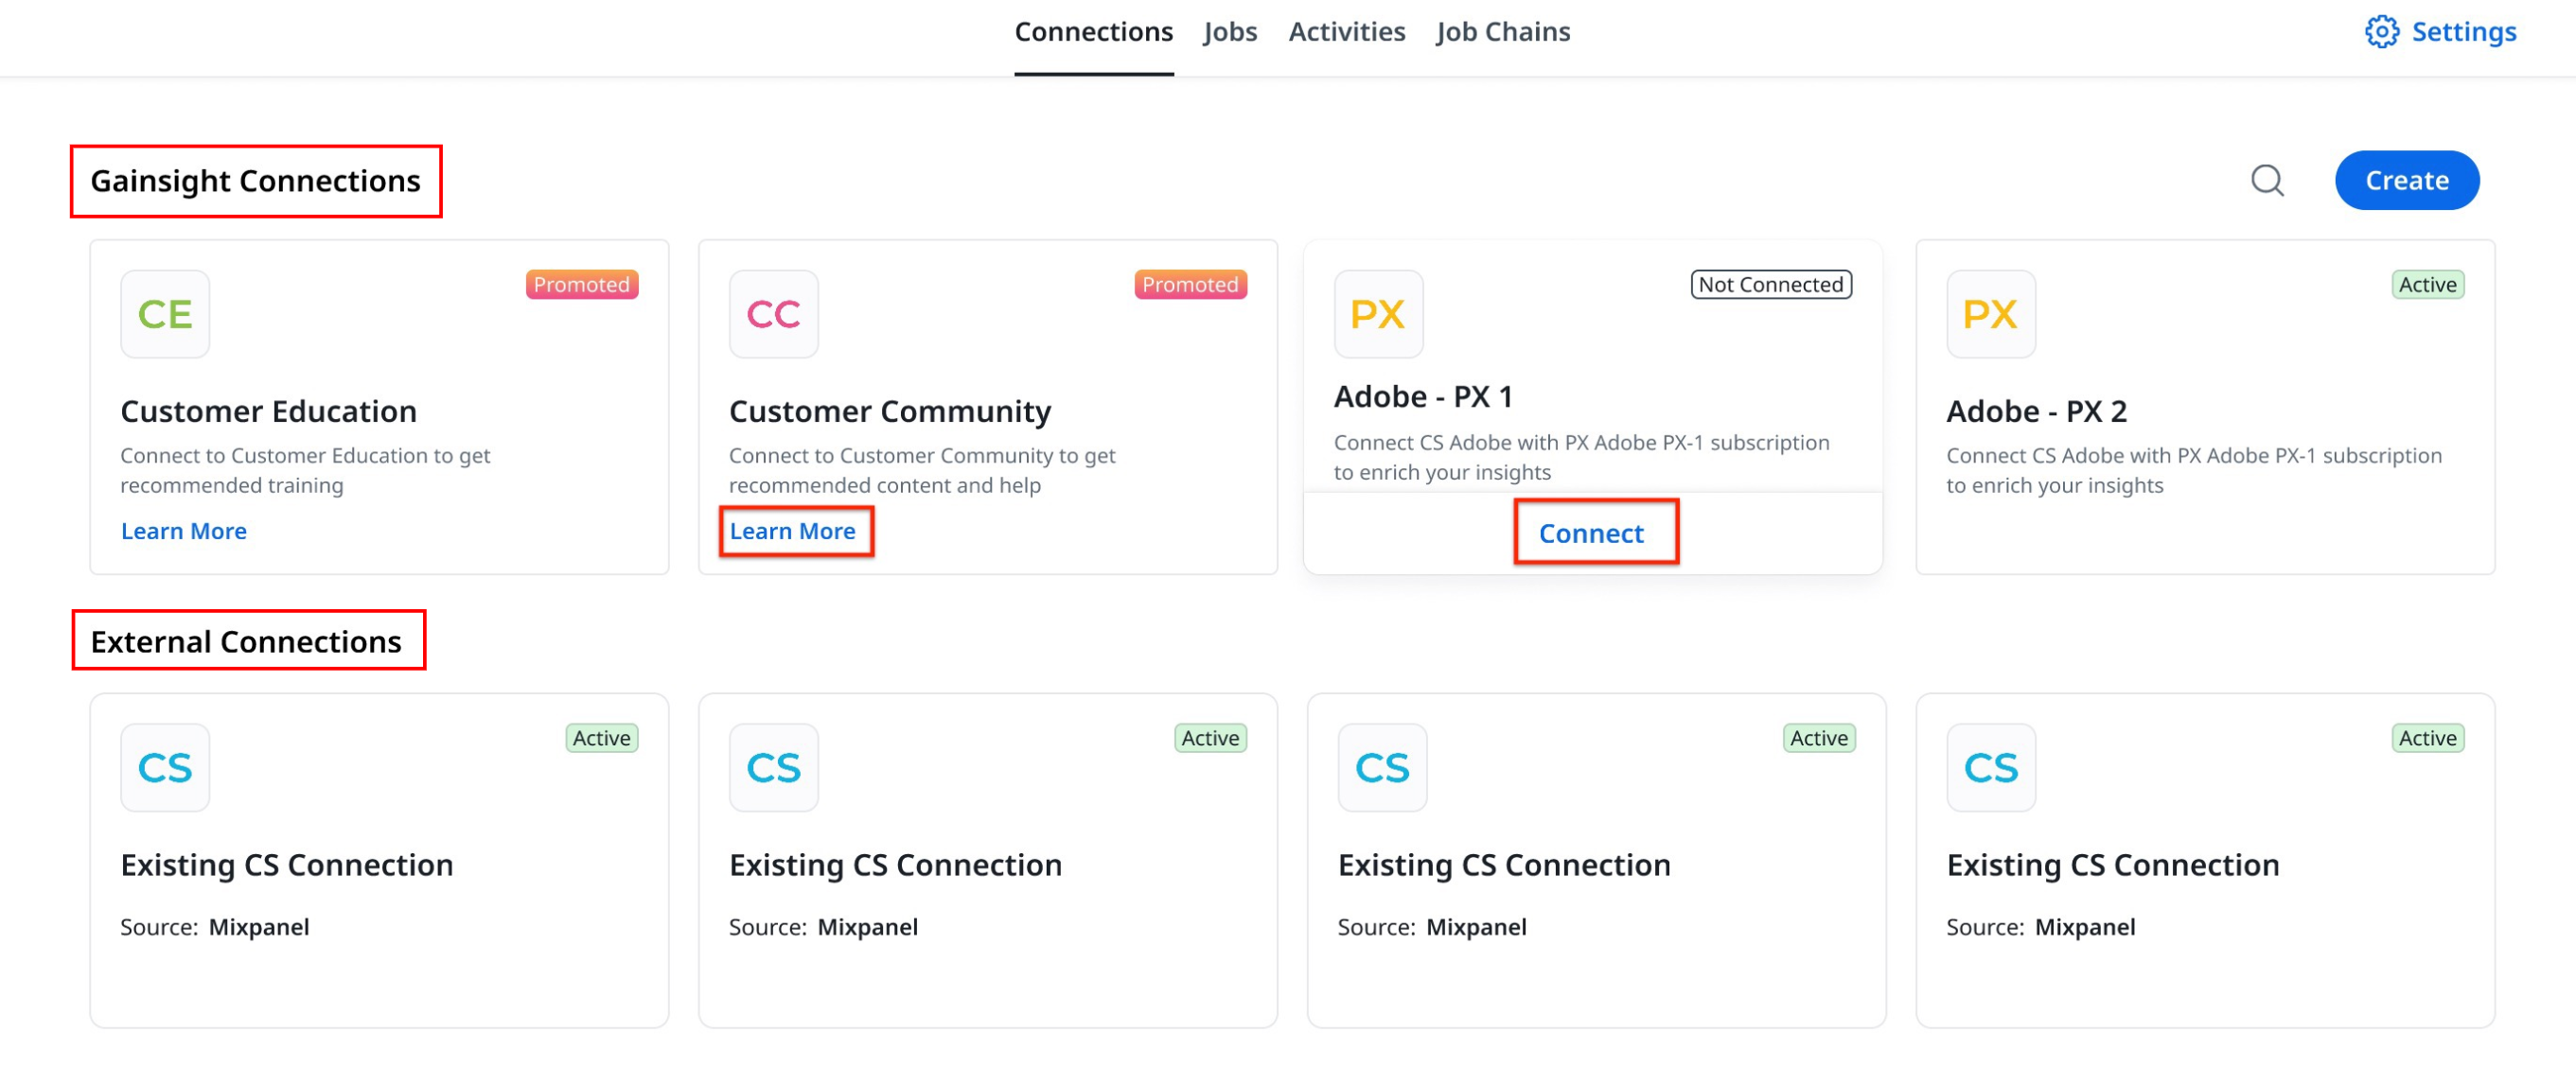
For products that are not purchased, click Learn More. You are redirected to the product page.
For products that are already purchased, click Connect for easy integration.
Create Connection
On the Connectors page, you can create a connection between Gainsight CS and other Gainsight connectors. To integrate PX data into CS:
- Navigate to Administration > Connectors 2.0.
- Click Connect on the PX Connector card. The Confirmation window appears.
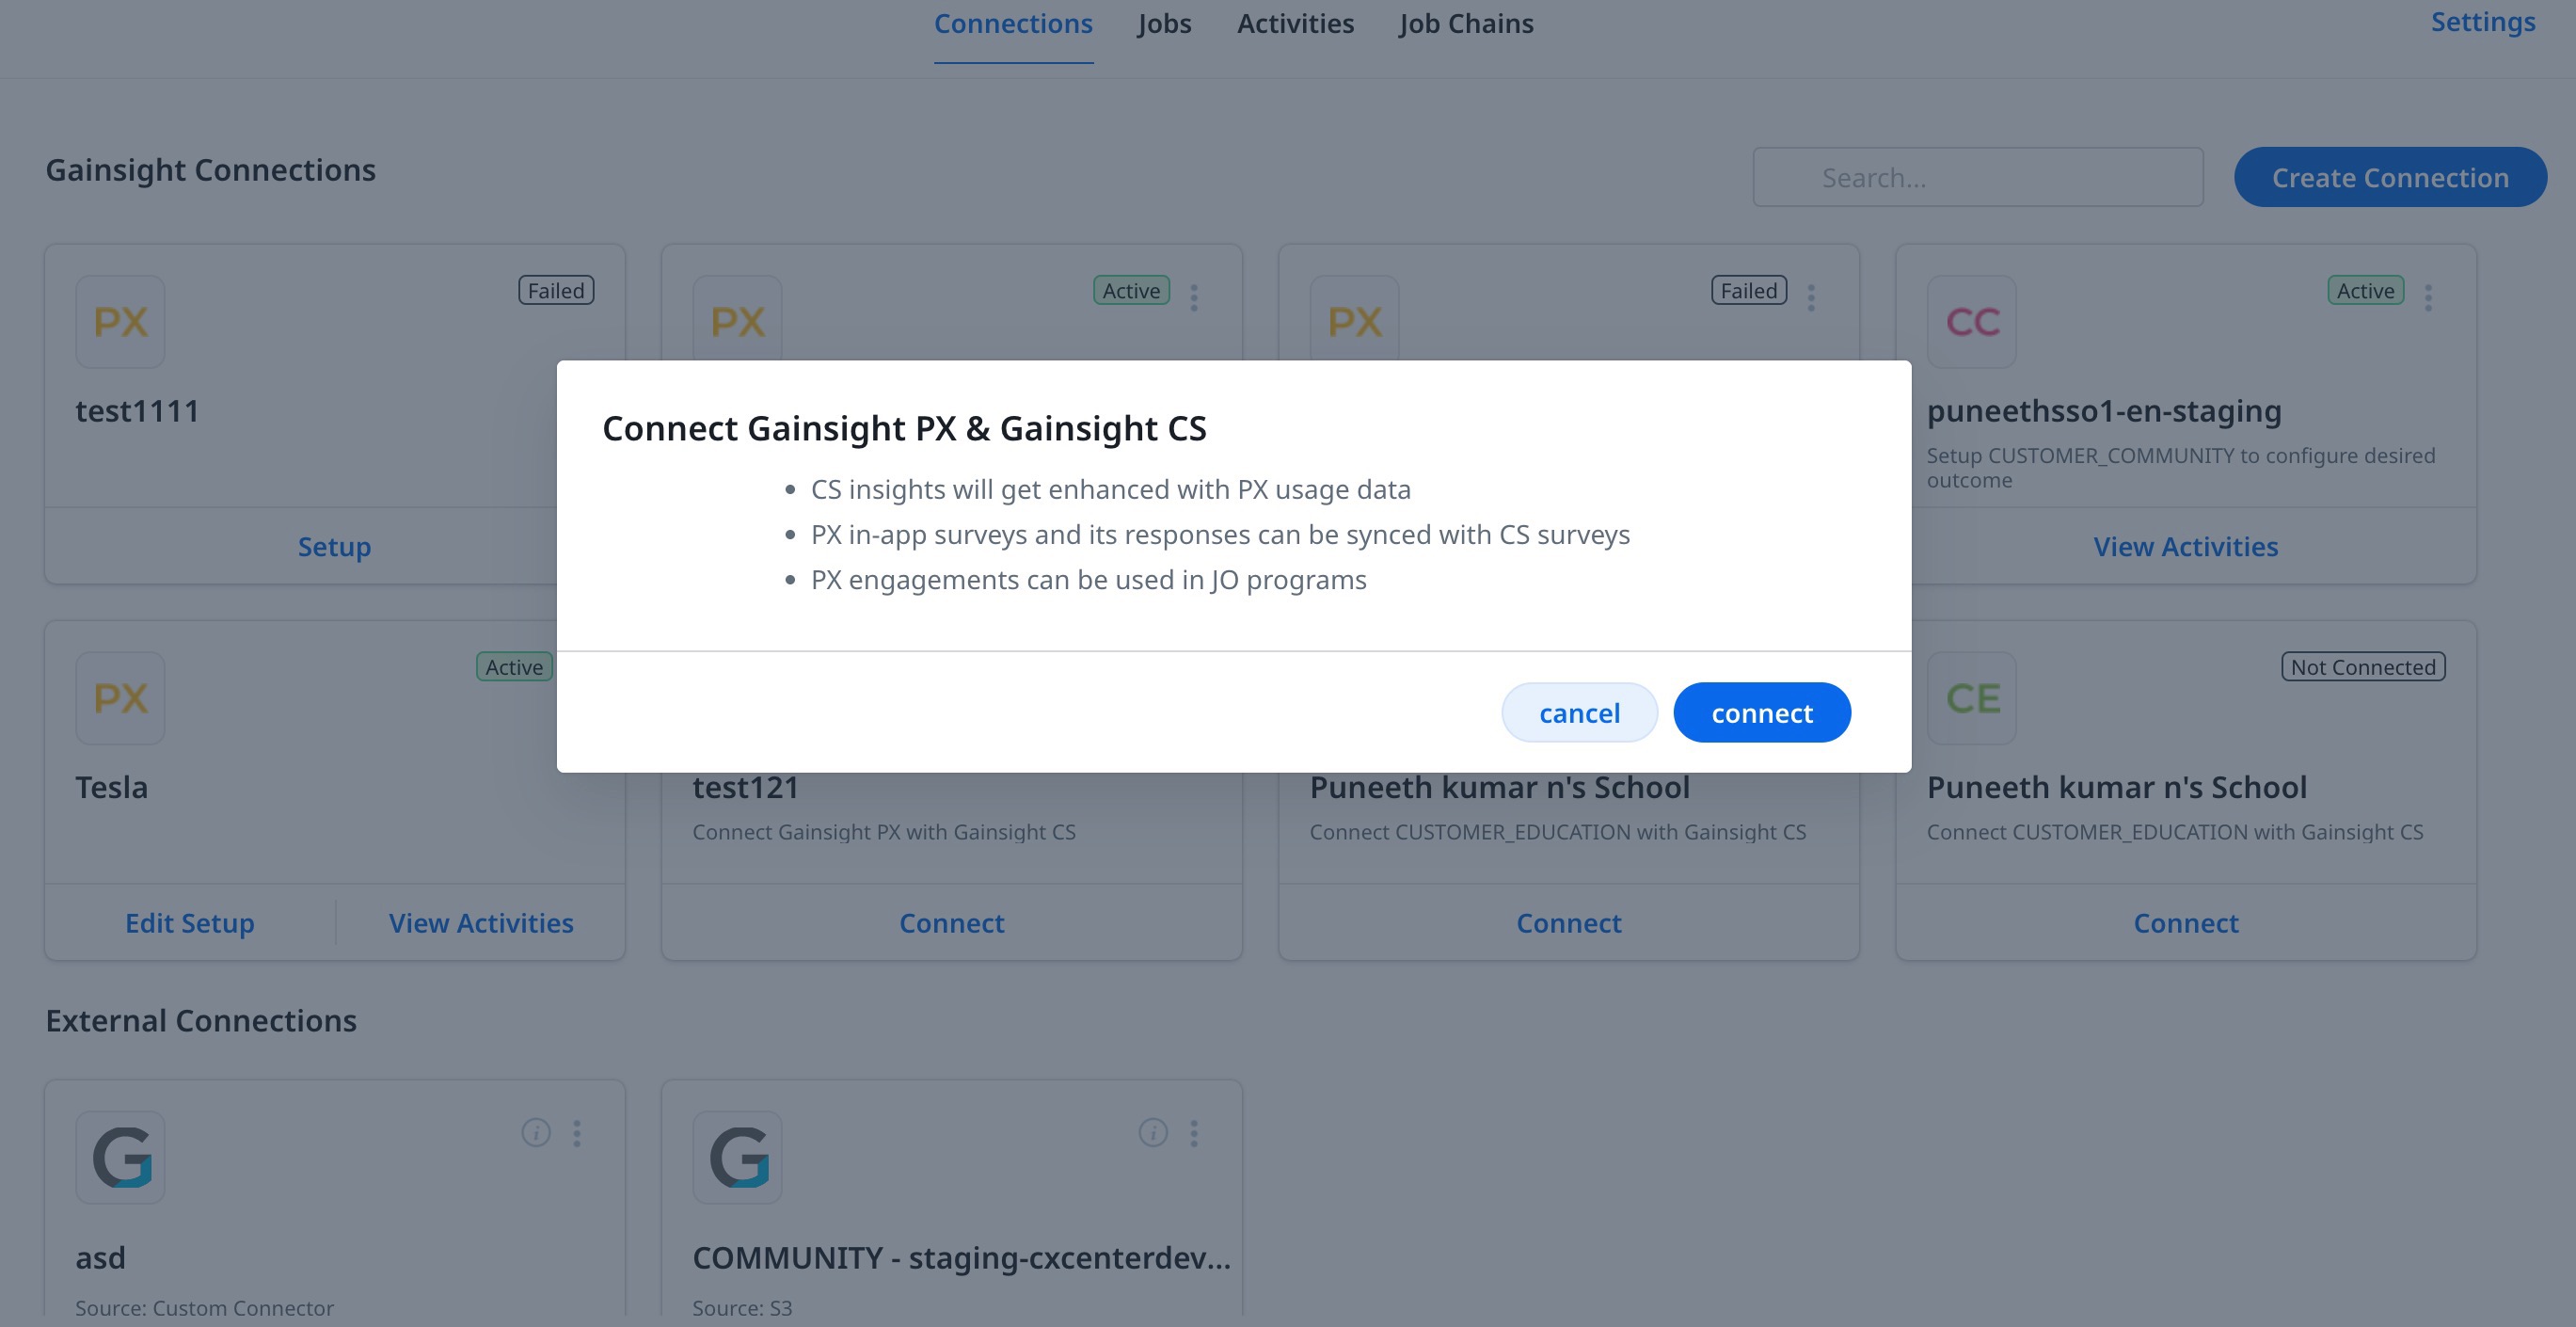
- Click Connect to continue. The setup for the Data Flow page appears.
Note: The Gainsight PX card appears in the dashboard if both PX and CS are configured with Single Sign-On (SSO). If it's not visible, use the Create Connection option for a manual integration between Product Experience and Gainsight CS.
For more information on how to manually connect PX, refer to the Create a Connection section of the Gainsight PX Connector article.
Setup Data Flow
As an admin, you need to perform the field mapping between PX Account and CS Company objects and also PX Users with CS Person objects to uniquely identify a customer. This process ensures seamless integration and data synchronization between the two products. The mapping also ensures that usage data is attributed to the right Company and populates in the right C/R 360 page, and the in-app engagements from JO, survey engagement responses from PX is displayed for the right Person in CS.
It is recommended to first view the provided sample data as a reference, to understand how these associations work in practice. This association is crucial for creating a cohesive customer profile, enhancing data accuracy, and enabling more effective customer engagement strategies by leveraging insights from both PX and CS platforms.
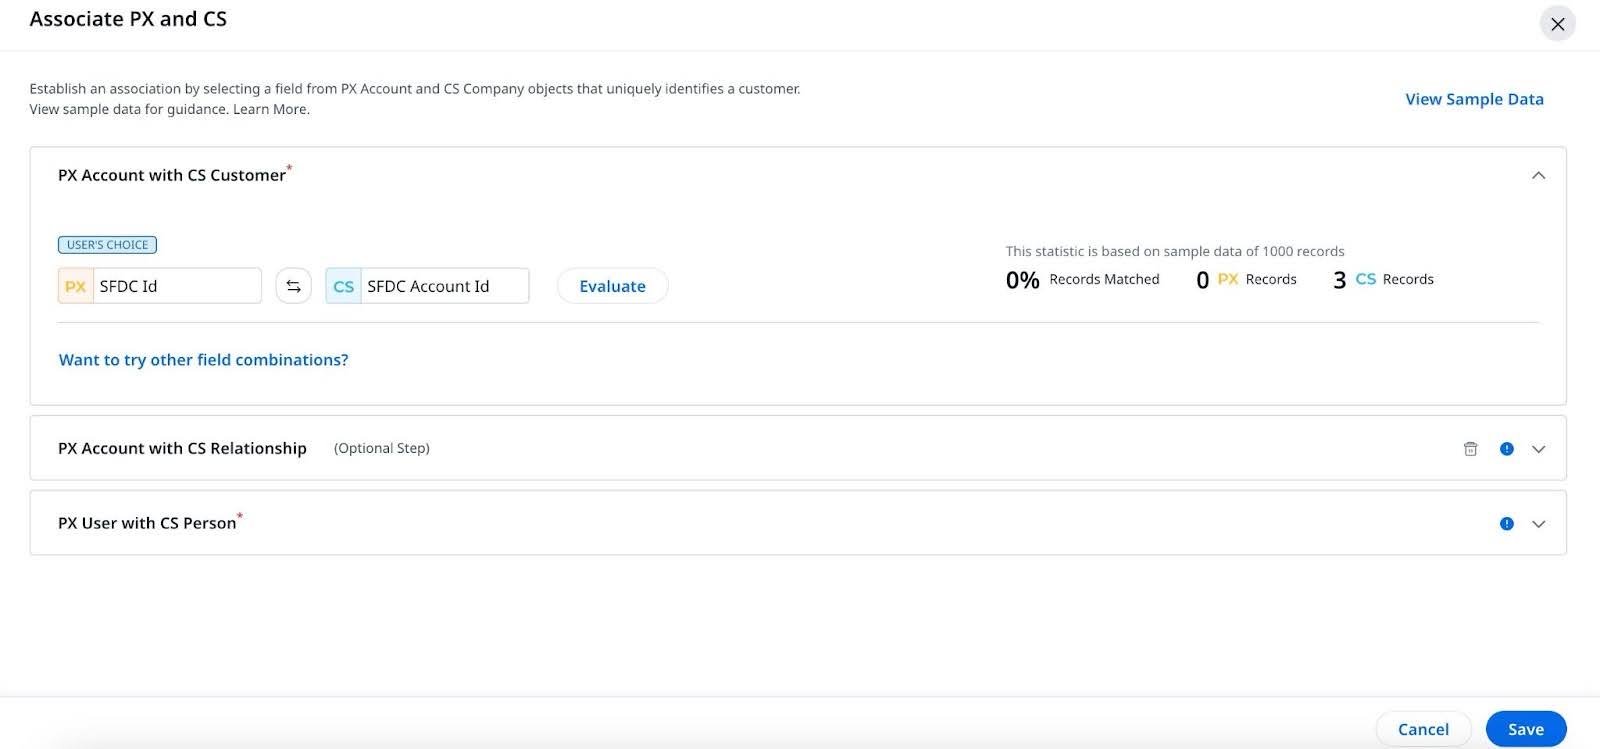
Perform the following mapping steps to achieve association between CS and PX and click Save:
- PX Account with CS Company: Select one field each from PX Account and CS Company to identify the customer and click Evaluate. The statistics with the percentage of records matched, and the number of CS and PX records matched are displayed. Optionally, you can click Want to try other fields combinations and click Evaluate to find the best match.
- PX Account with CS Relationship: This is an optional step and applicable only to the customers who have defined relationships in PX for their tenant. If applicable, you need to select the respective fields from CS and PX and perform the mapping between PX Account and CS Relationships.
- PX User with CS Person: Select one field each from PX User and CS Person to identify the person/user record and click Evaluate.
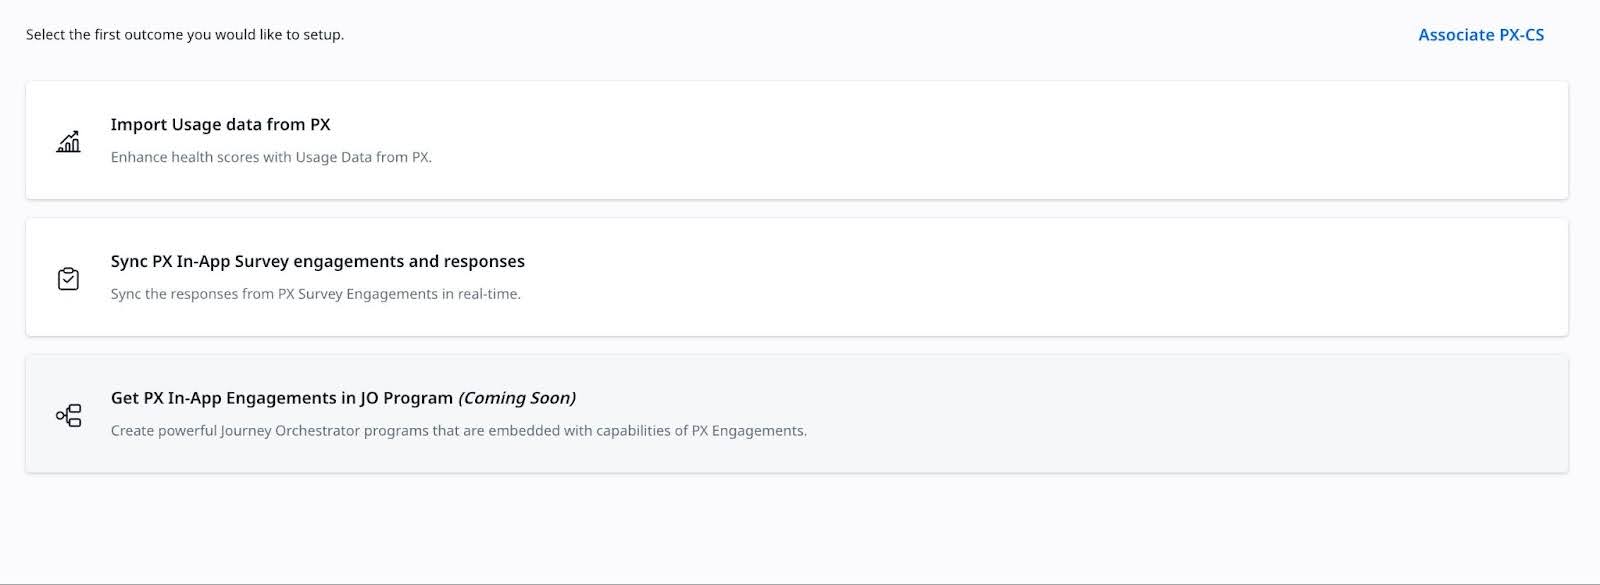
Configure Outcomes
Once you complete associating the Company with PX Account and Person with PX User, you can then start leveraging PX-CS connection for the following usecases (or outcomes). The following outcomes are available:
- Import Usage Data from PX
- Sync PX In-App Survey engagements and responses
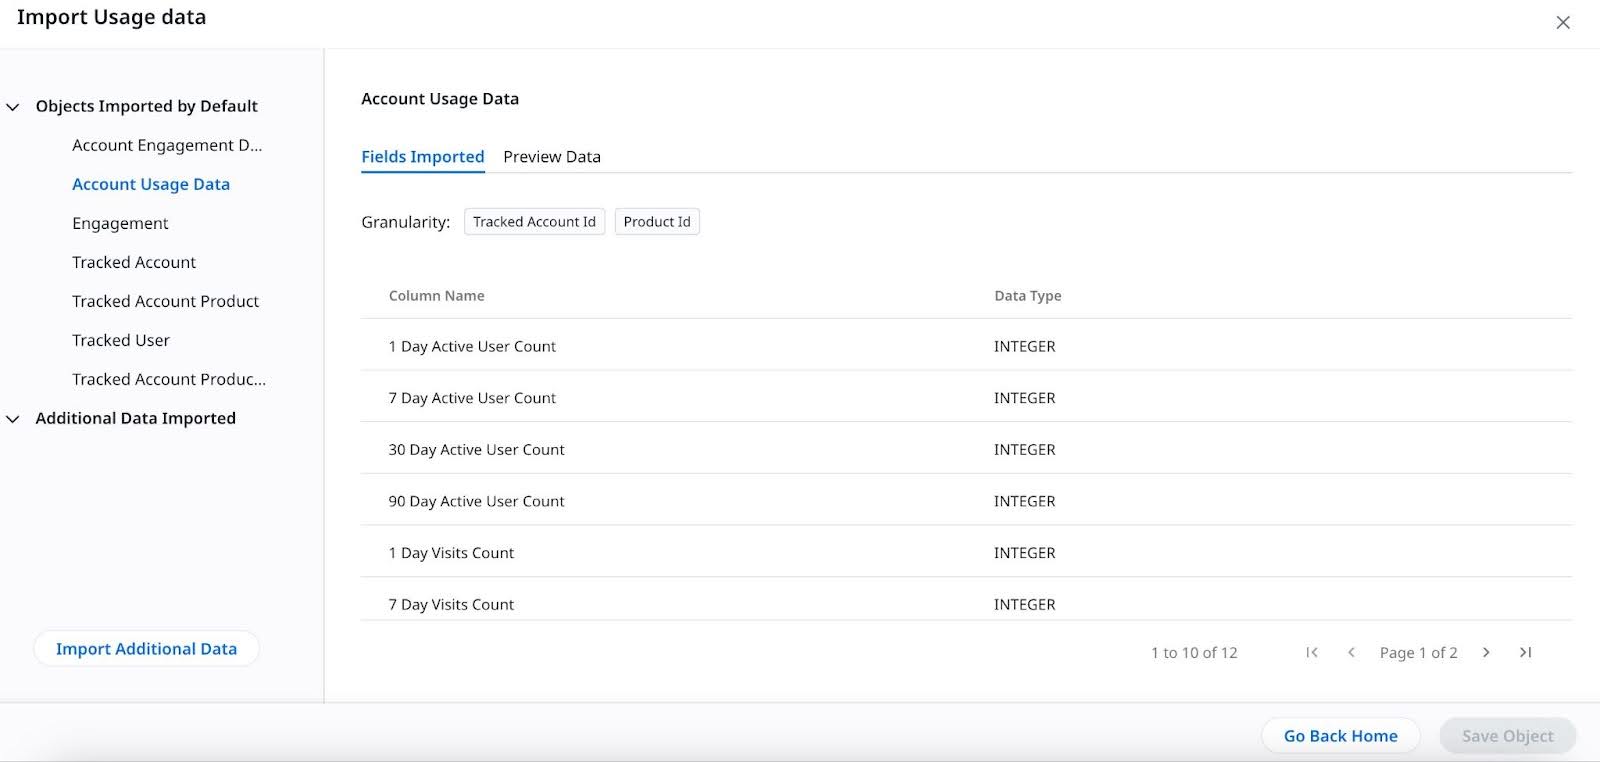
Import Usage Data
You can import usage data from PX to CS using a set of standard objects that are populated by default and a set of custom fields using the Import Additional Data step. Currently, Gainsight only supports Company setup, Relationship setup is coming soon.
Gainsight provides the following standard objects:
- Account Engagement Data
- Account Usage Data
- Engagement
- Tracked Account
- Tracked Account Product (Coming Soon)
- Tracked User
- Tracked Account Product User (Coming Soon)
To import usage data:
- Click each object to view the associated fields and preview the fields data. The fields are non editable.
- Click Save Object.
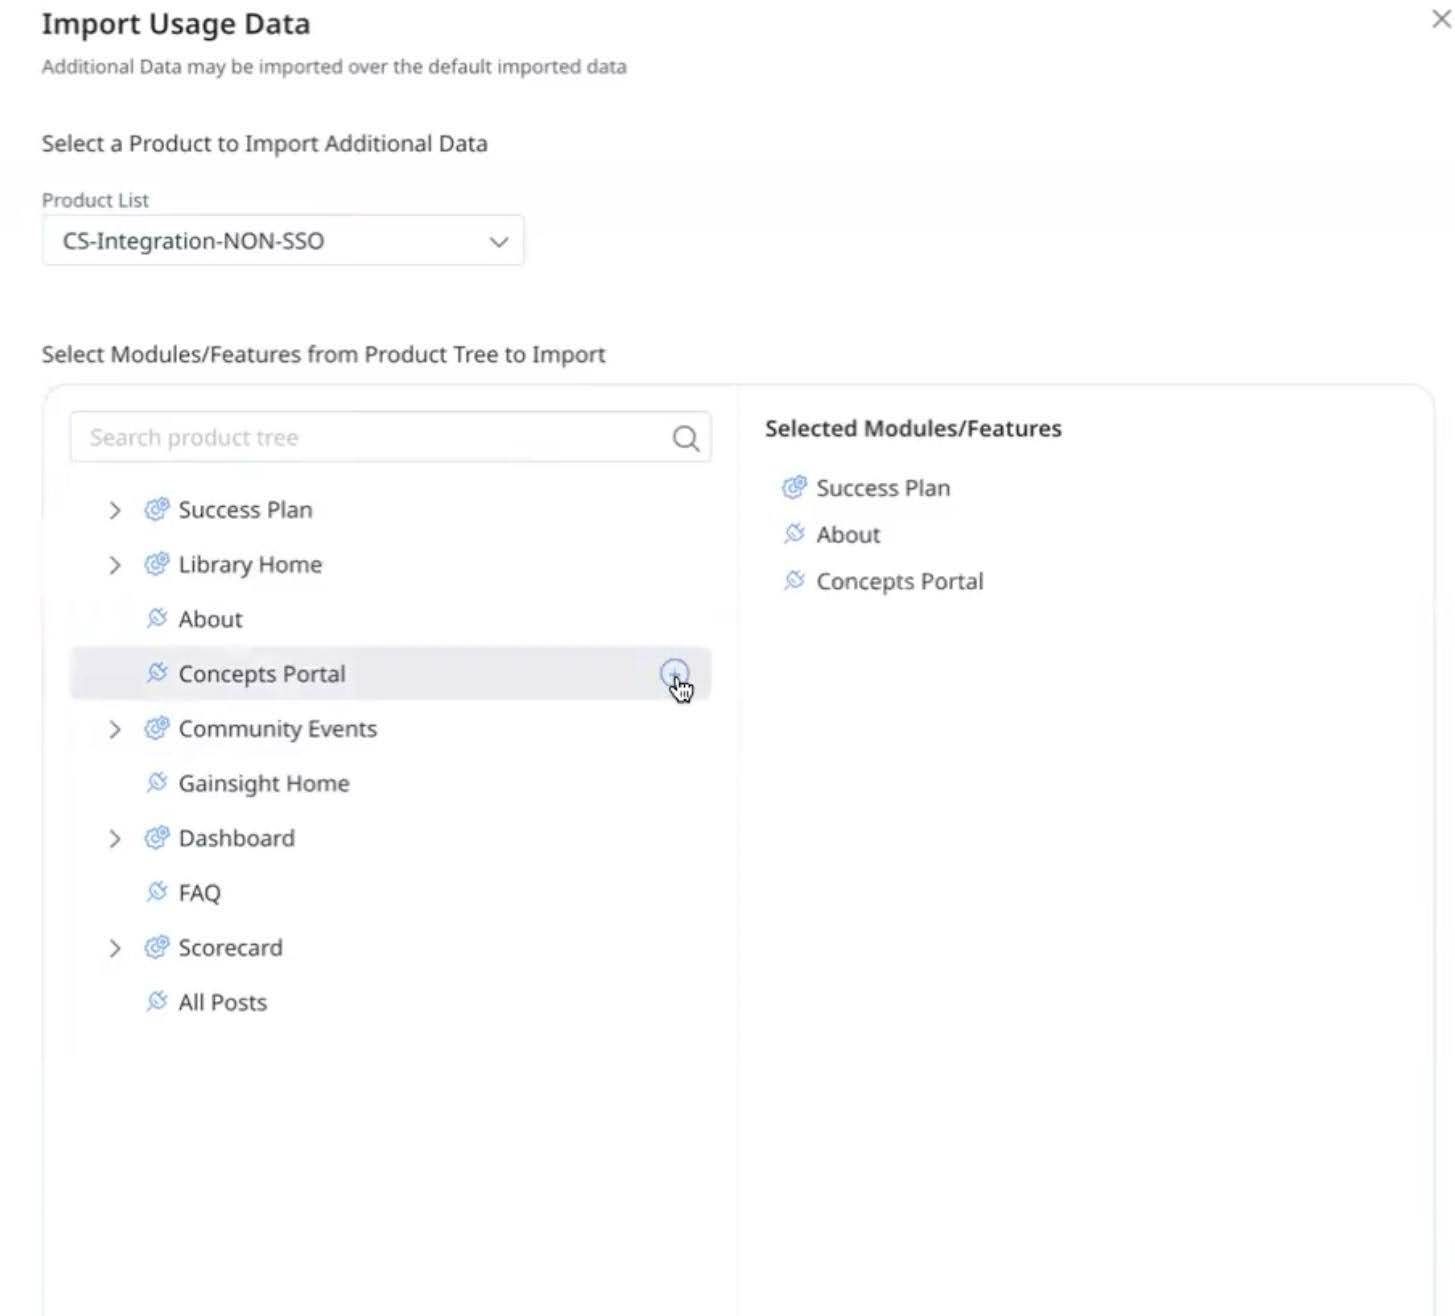
Import Additional Usage Data
In addition to the default objects available, you can import additional usage data by selecting custom fields from the modules or features from the Product Tree built in PX.
To import additional data:
- From the Product List dropdown, select the product to import additional data.
- From the product tree menu, select the features or modules for which you want to pick the fields.
- Click Add Granularity to further add fields to filter data.
- Select Metrics to define the time period to filter data.
- Click Save Object.
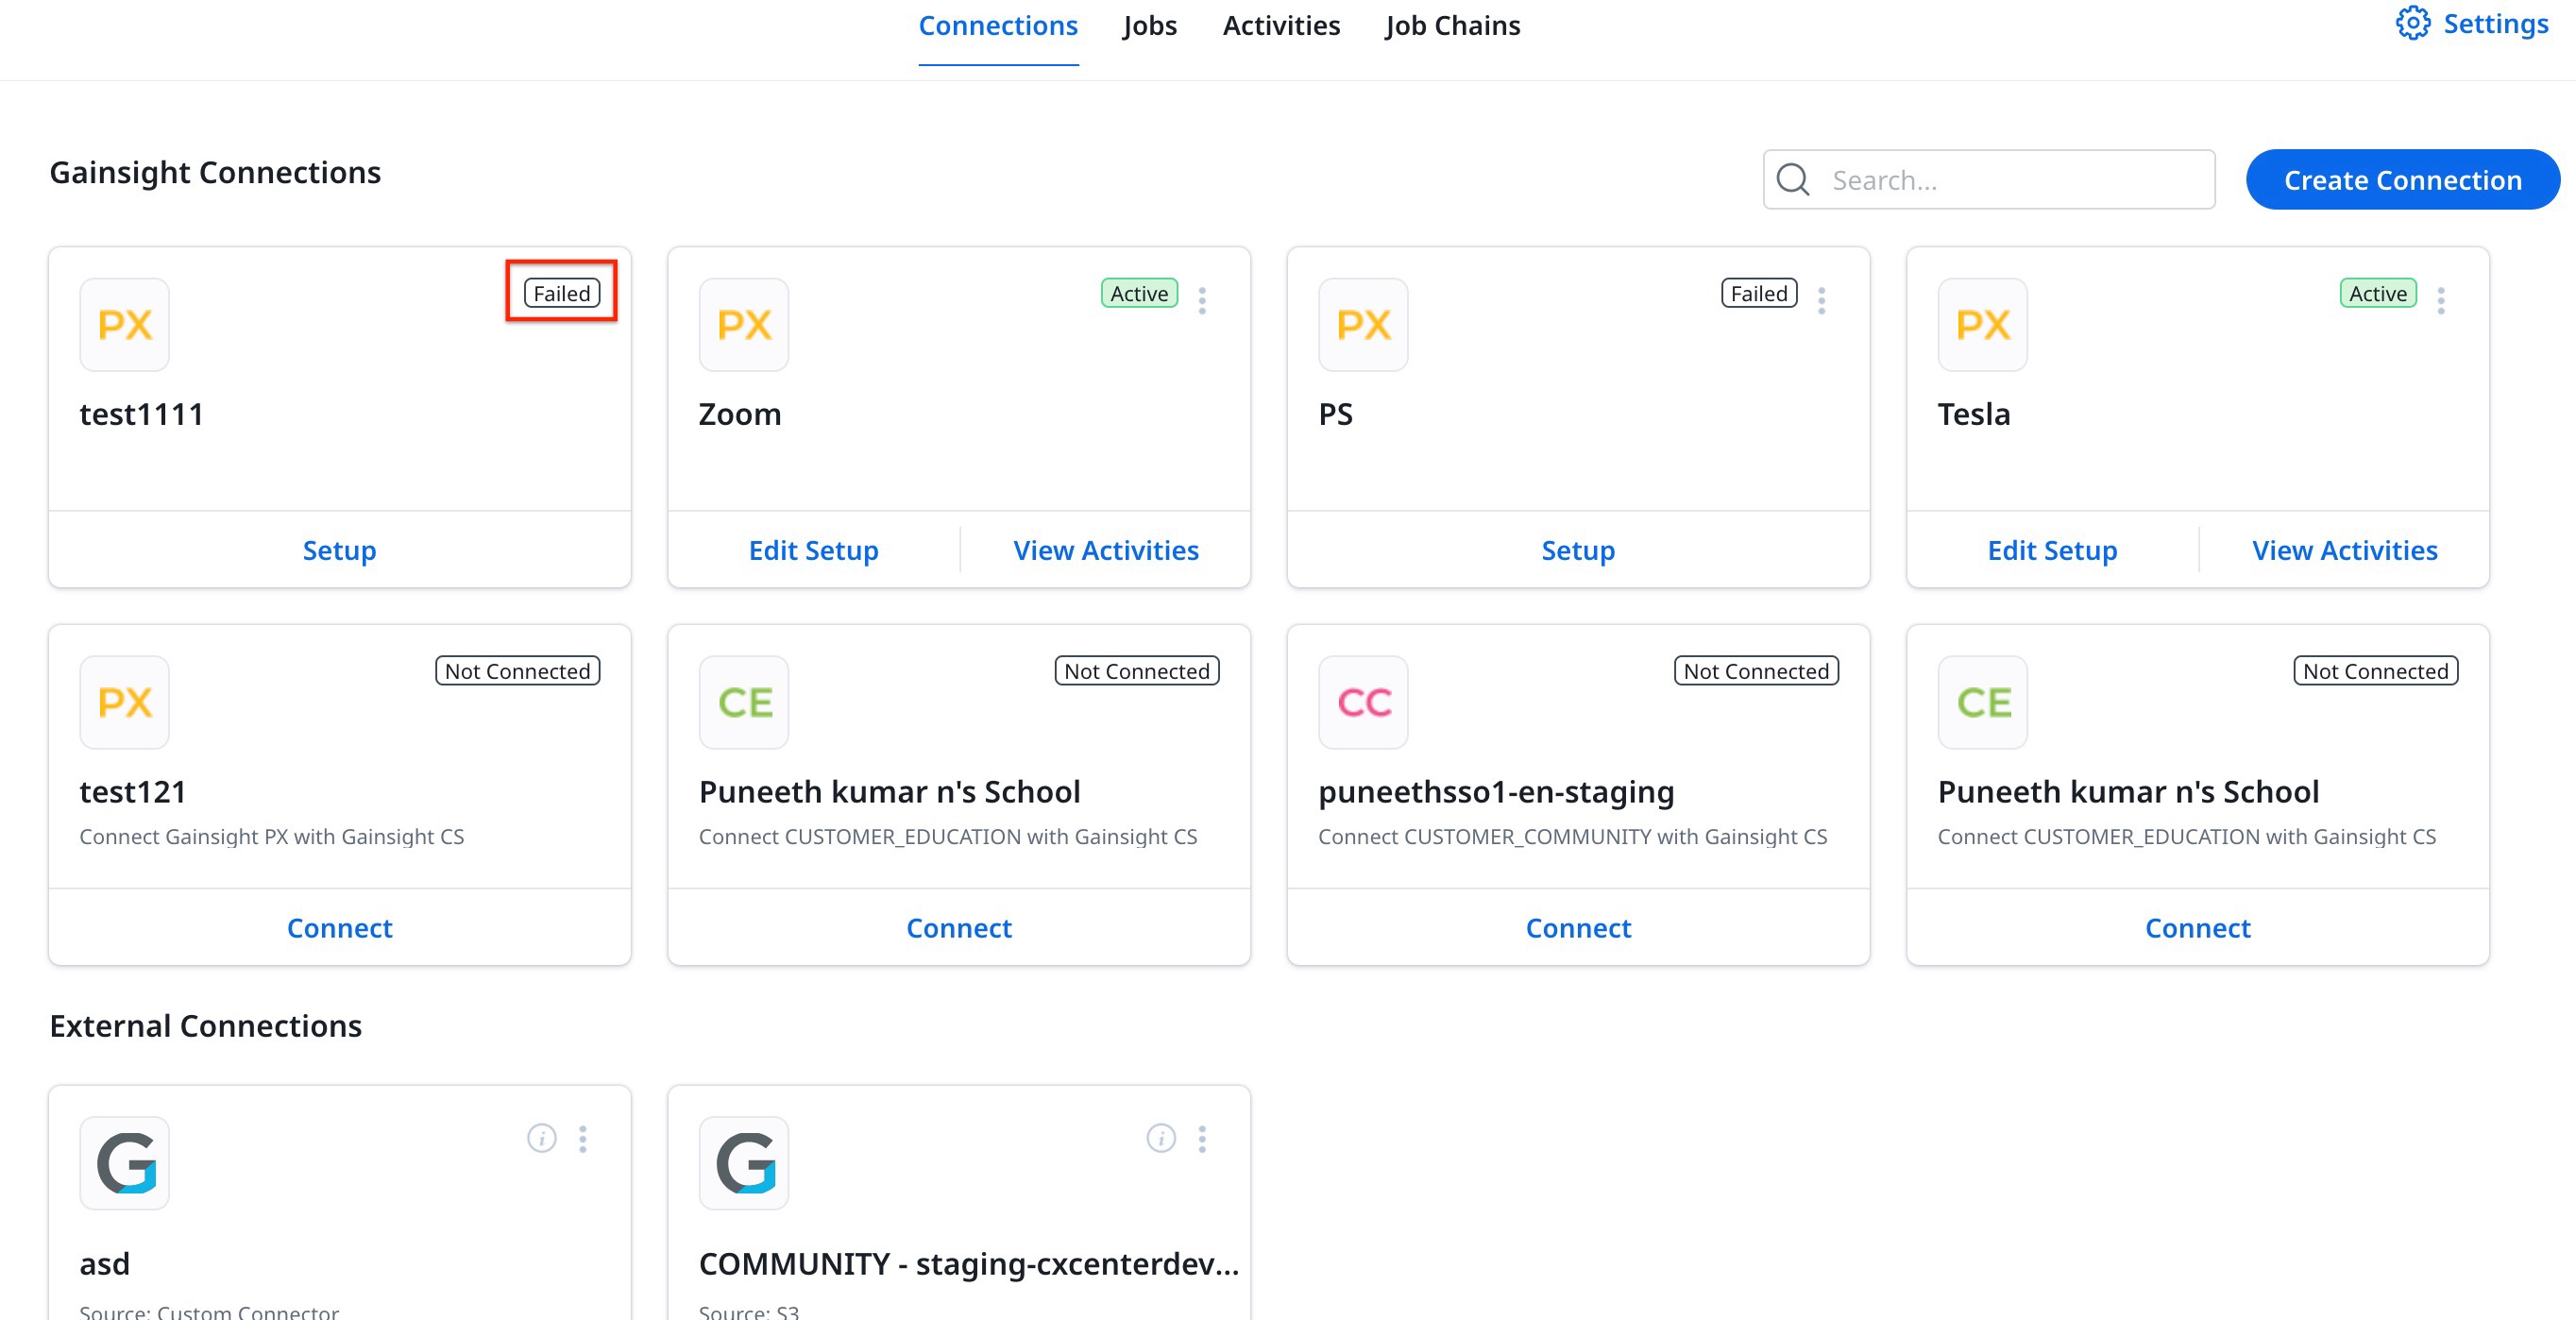
Once the setup is completed successfully, the PX card displays an Active tag.
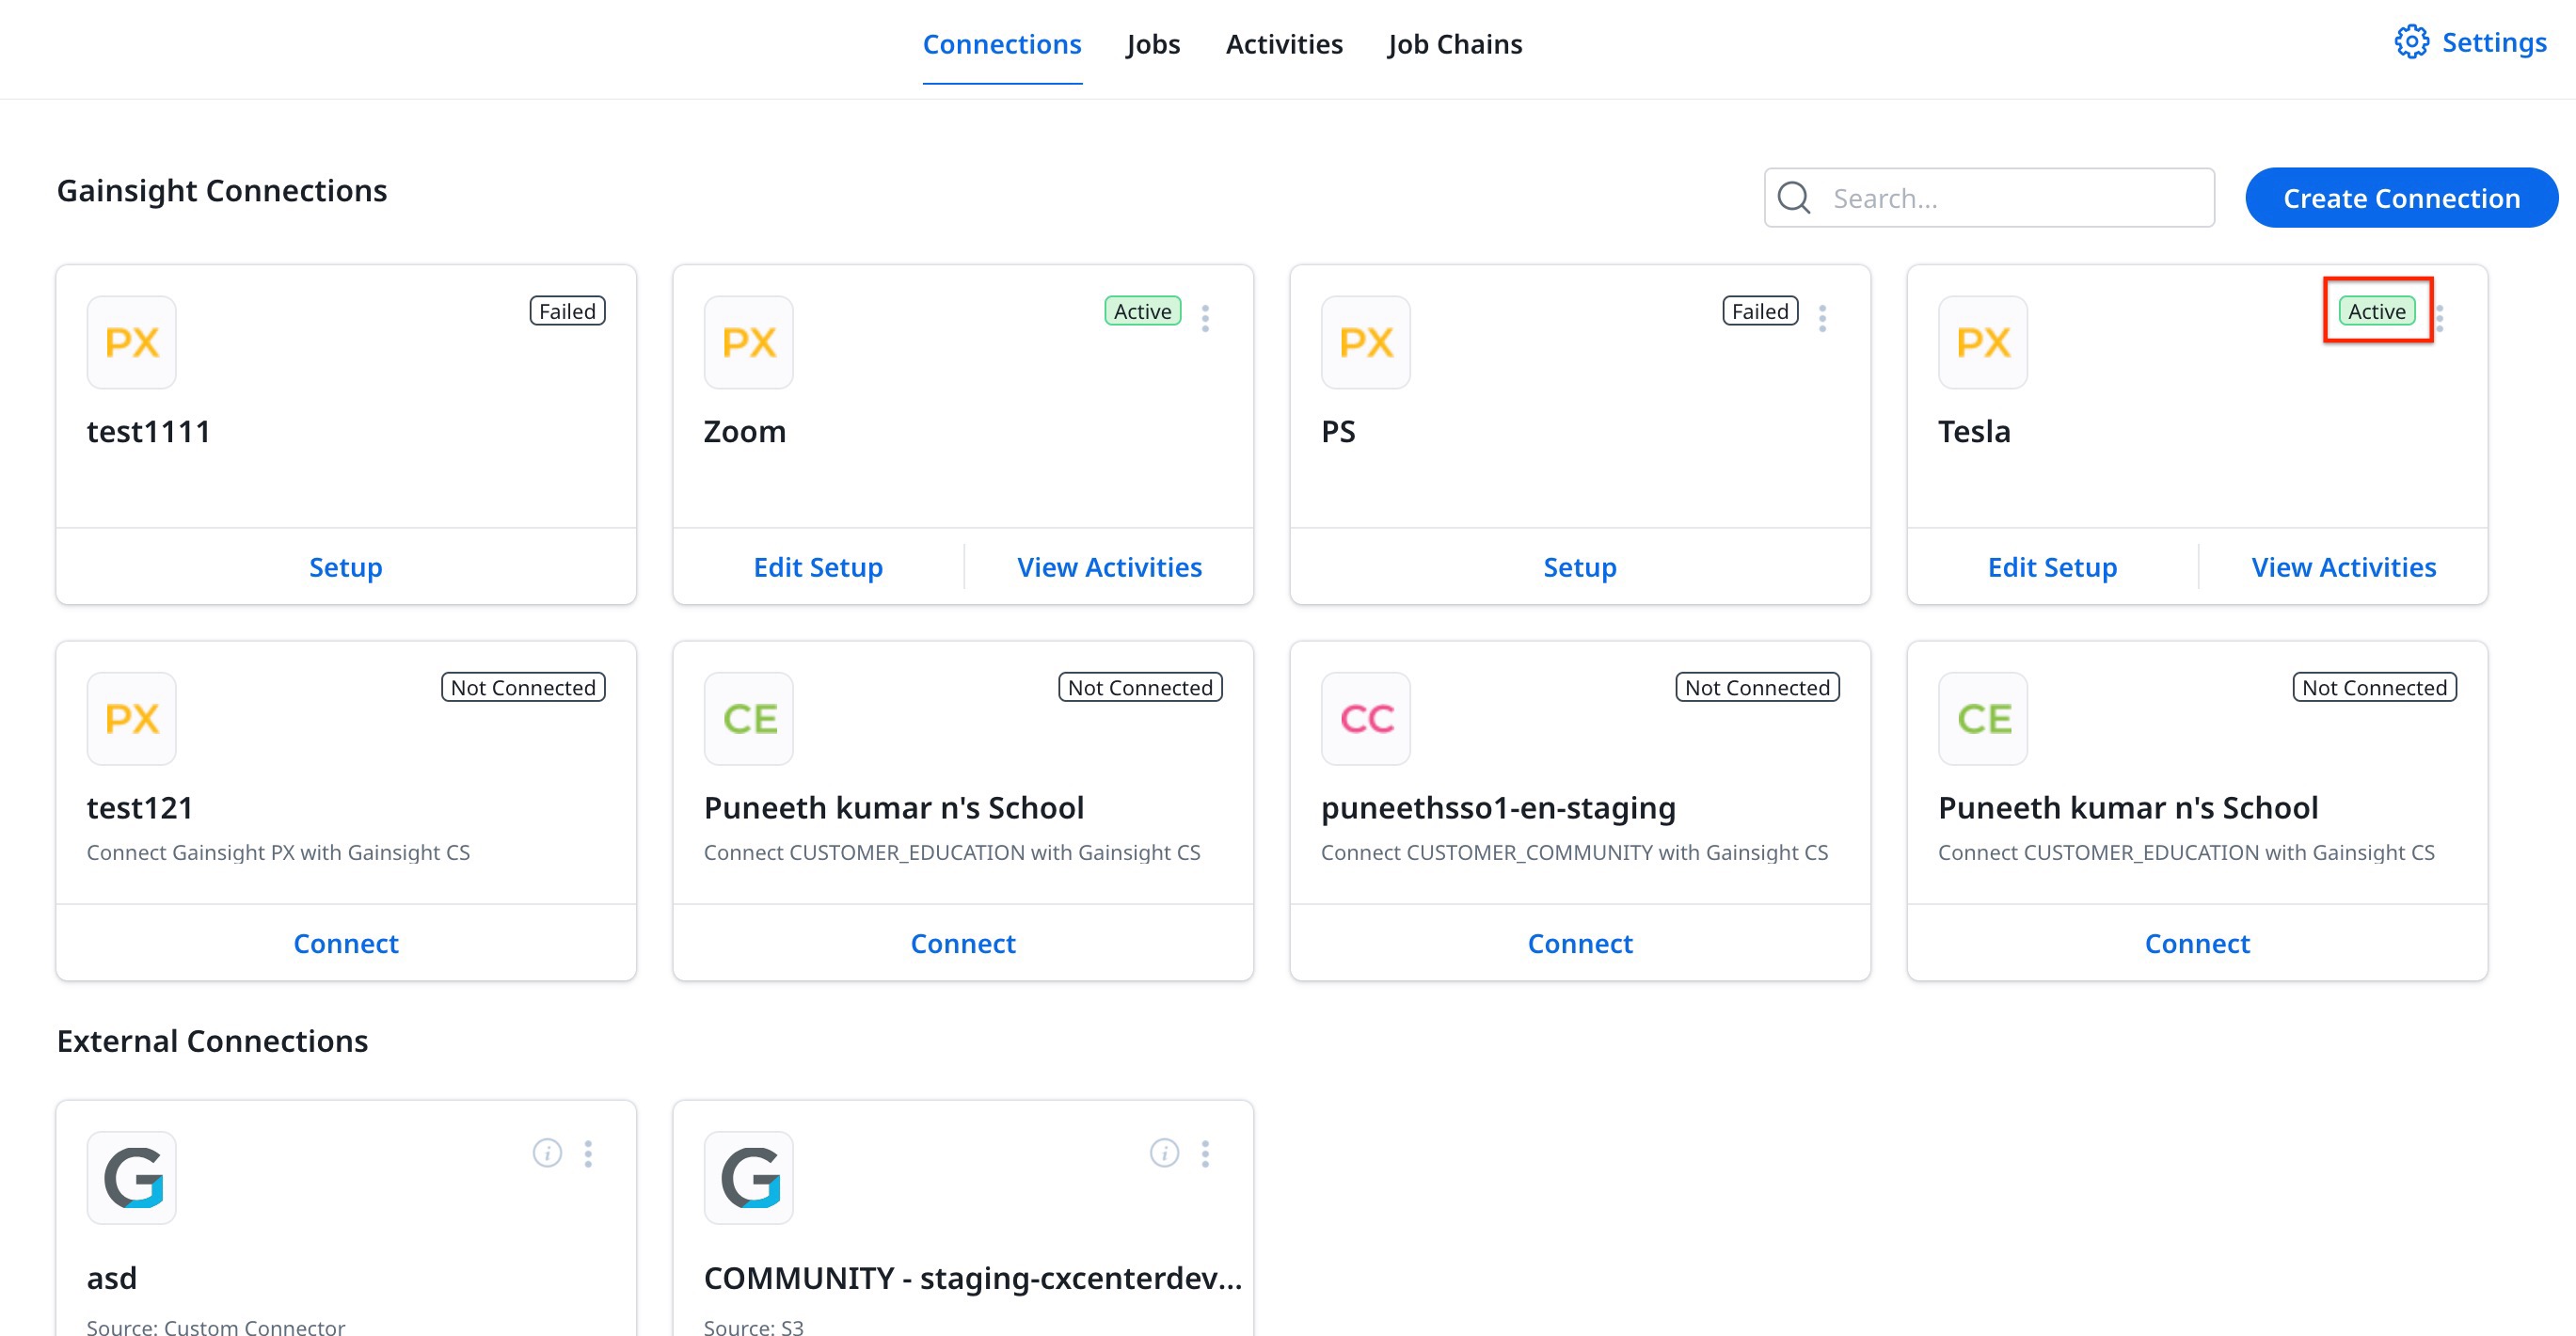
Note: In case a connection is not established, the card displays a Failed tag. Gainsight recommends reaching out to Gainsight Support for further assistance.
Edit Setup
You can view and edit the field mapping before every data import if required, using the Edit Setup button on the connection card.
Manage Connections
Connection Statuses
PX Connectors can have the following statuses:
- Not Connected: This appears when the PX card is purchased, but the connection is not established.
- Active: This appears when the connection is successfully connected.
- Failed: This appears when the connection is not successful.
- Paused: This appears when the connection is paused.
Note: A connection when paused, temporarily stops the data flow and current running jobs.
Edit Connection
You can edit the established connection for any changes required. To edit the connection:
Note: The edit option is available only when the connection is created manually.
- Click the three vertical dot menu.
- Click Edit Connection. The Edit Connection dialog appears.
- (Optional) Make necessary edits and click Test Connection.
- Click Save to save the changes made.
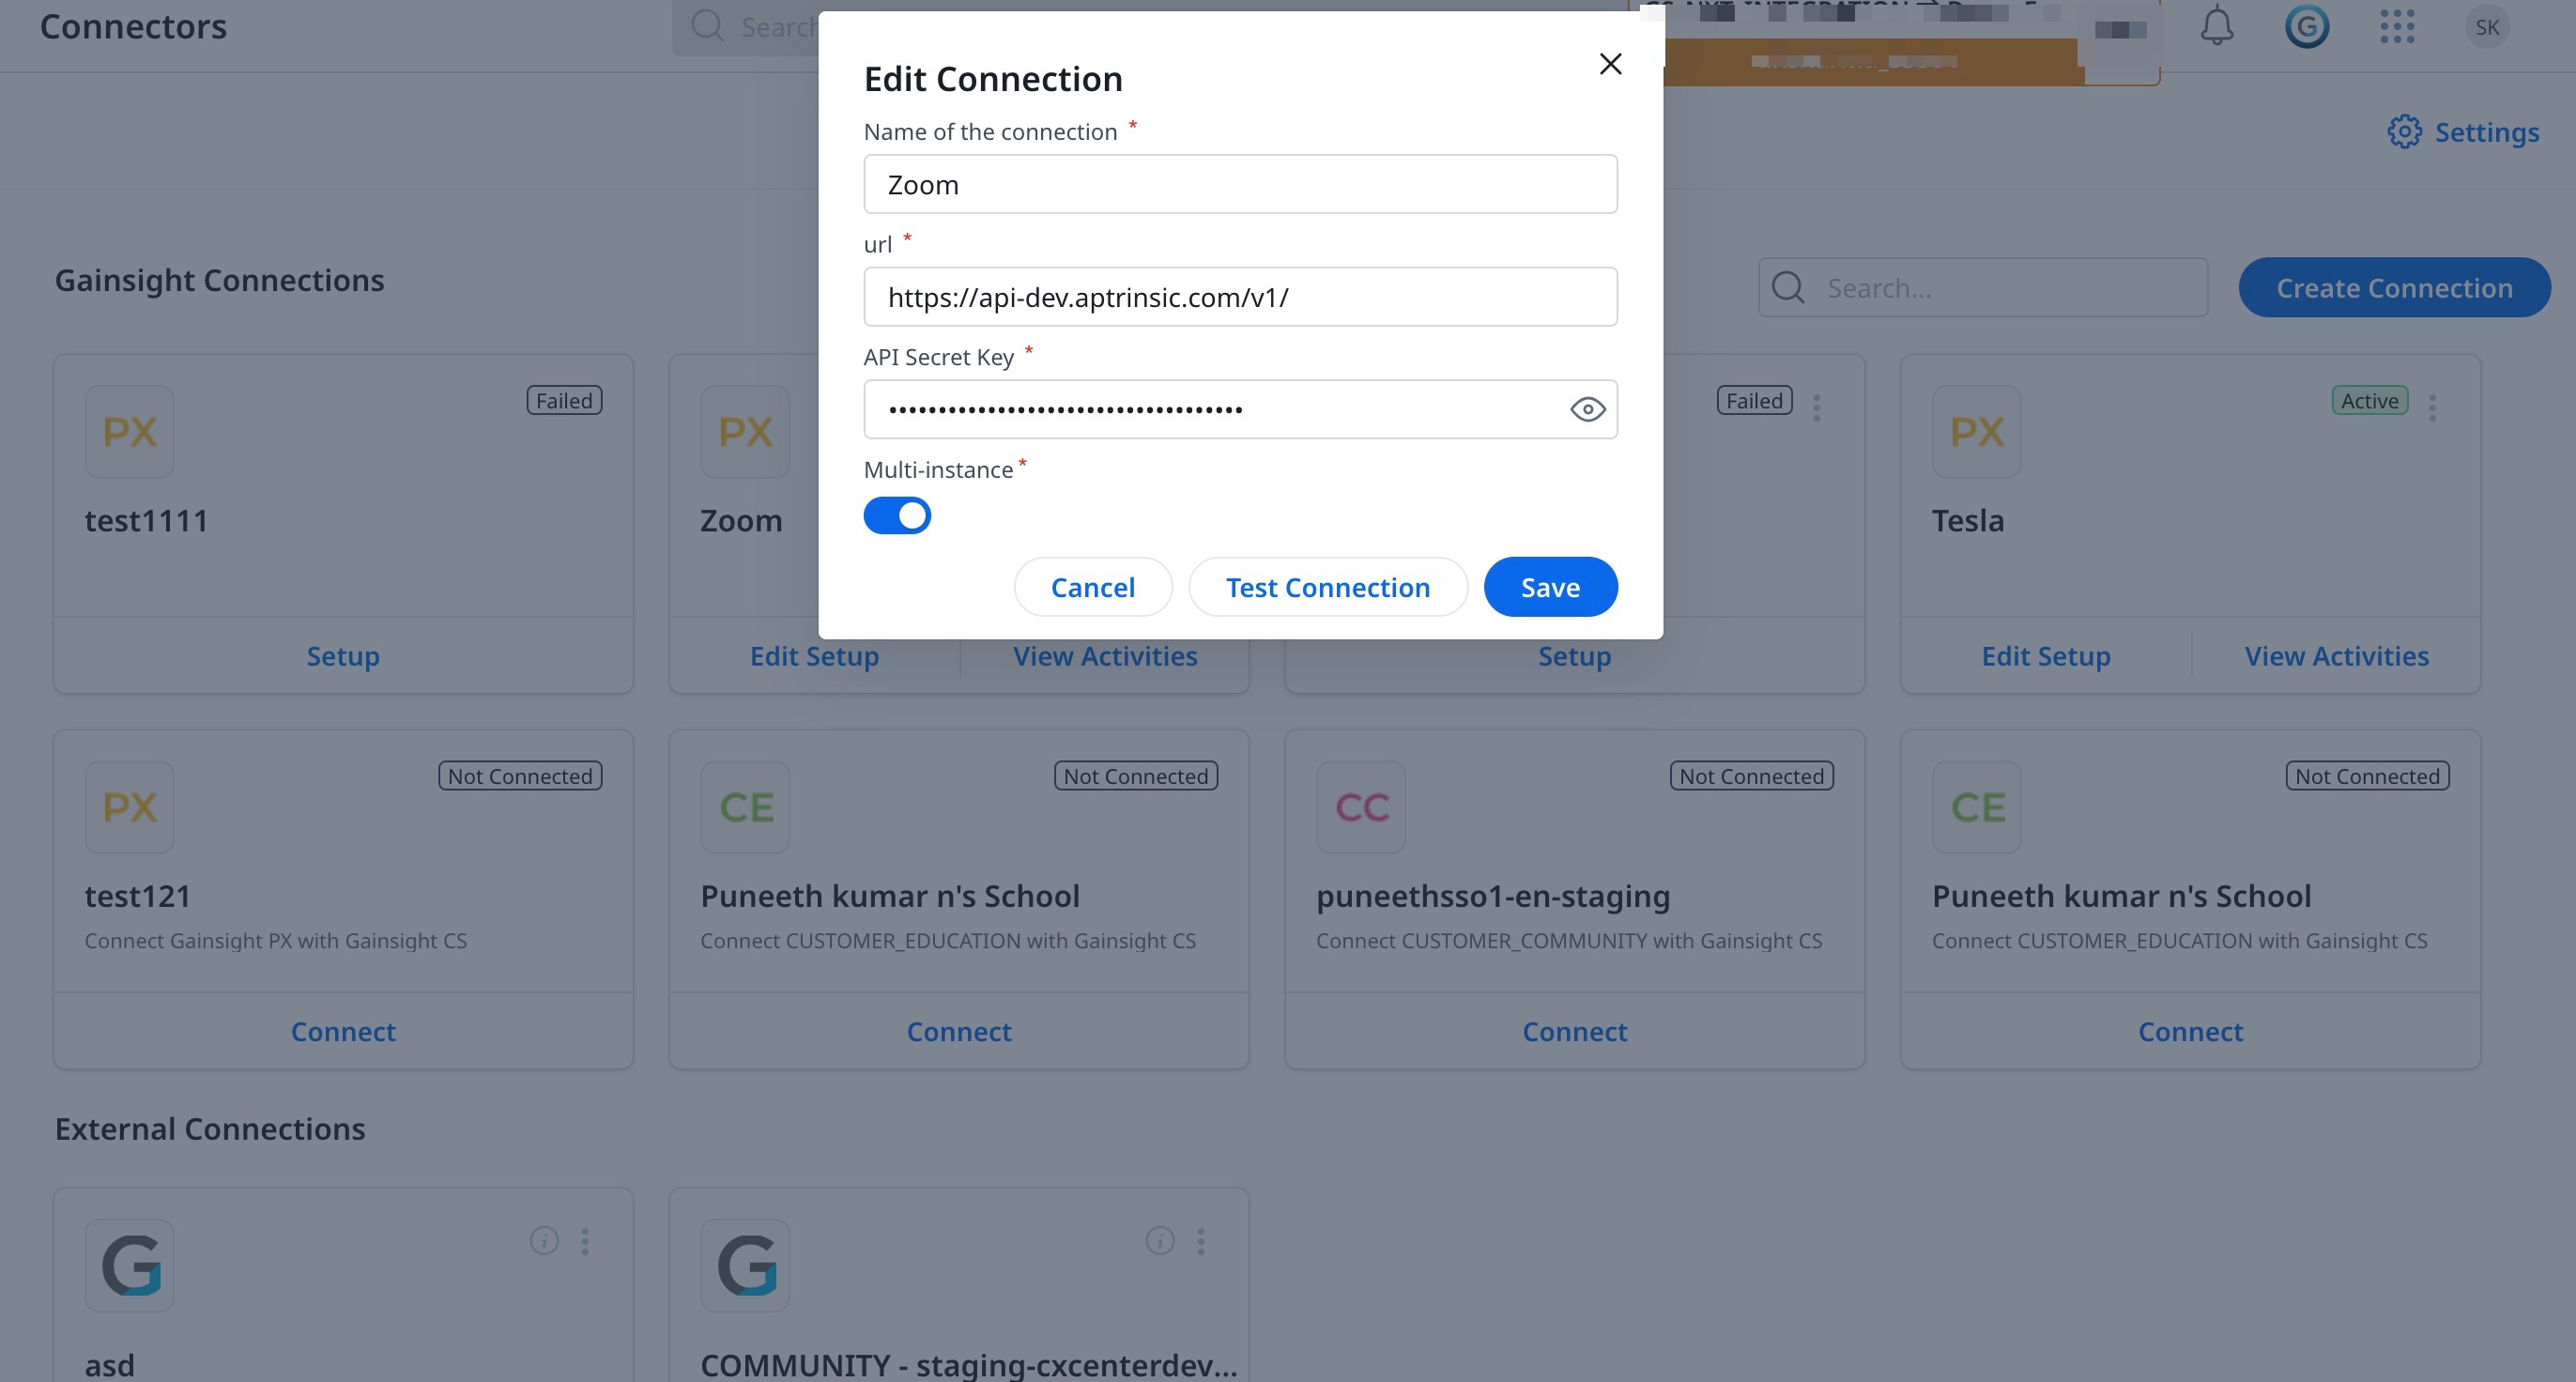
Note: In case the connection does not get established, check the URL and API Secret Key and try again.
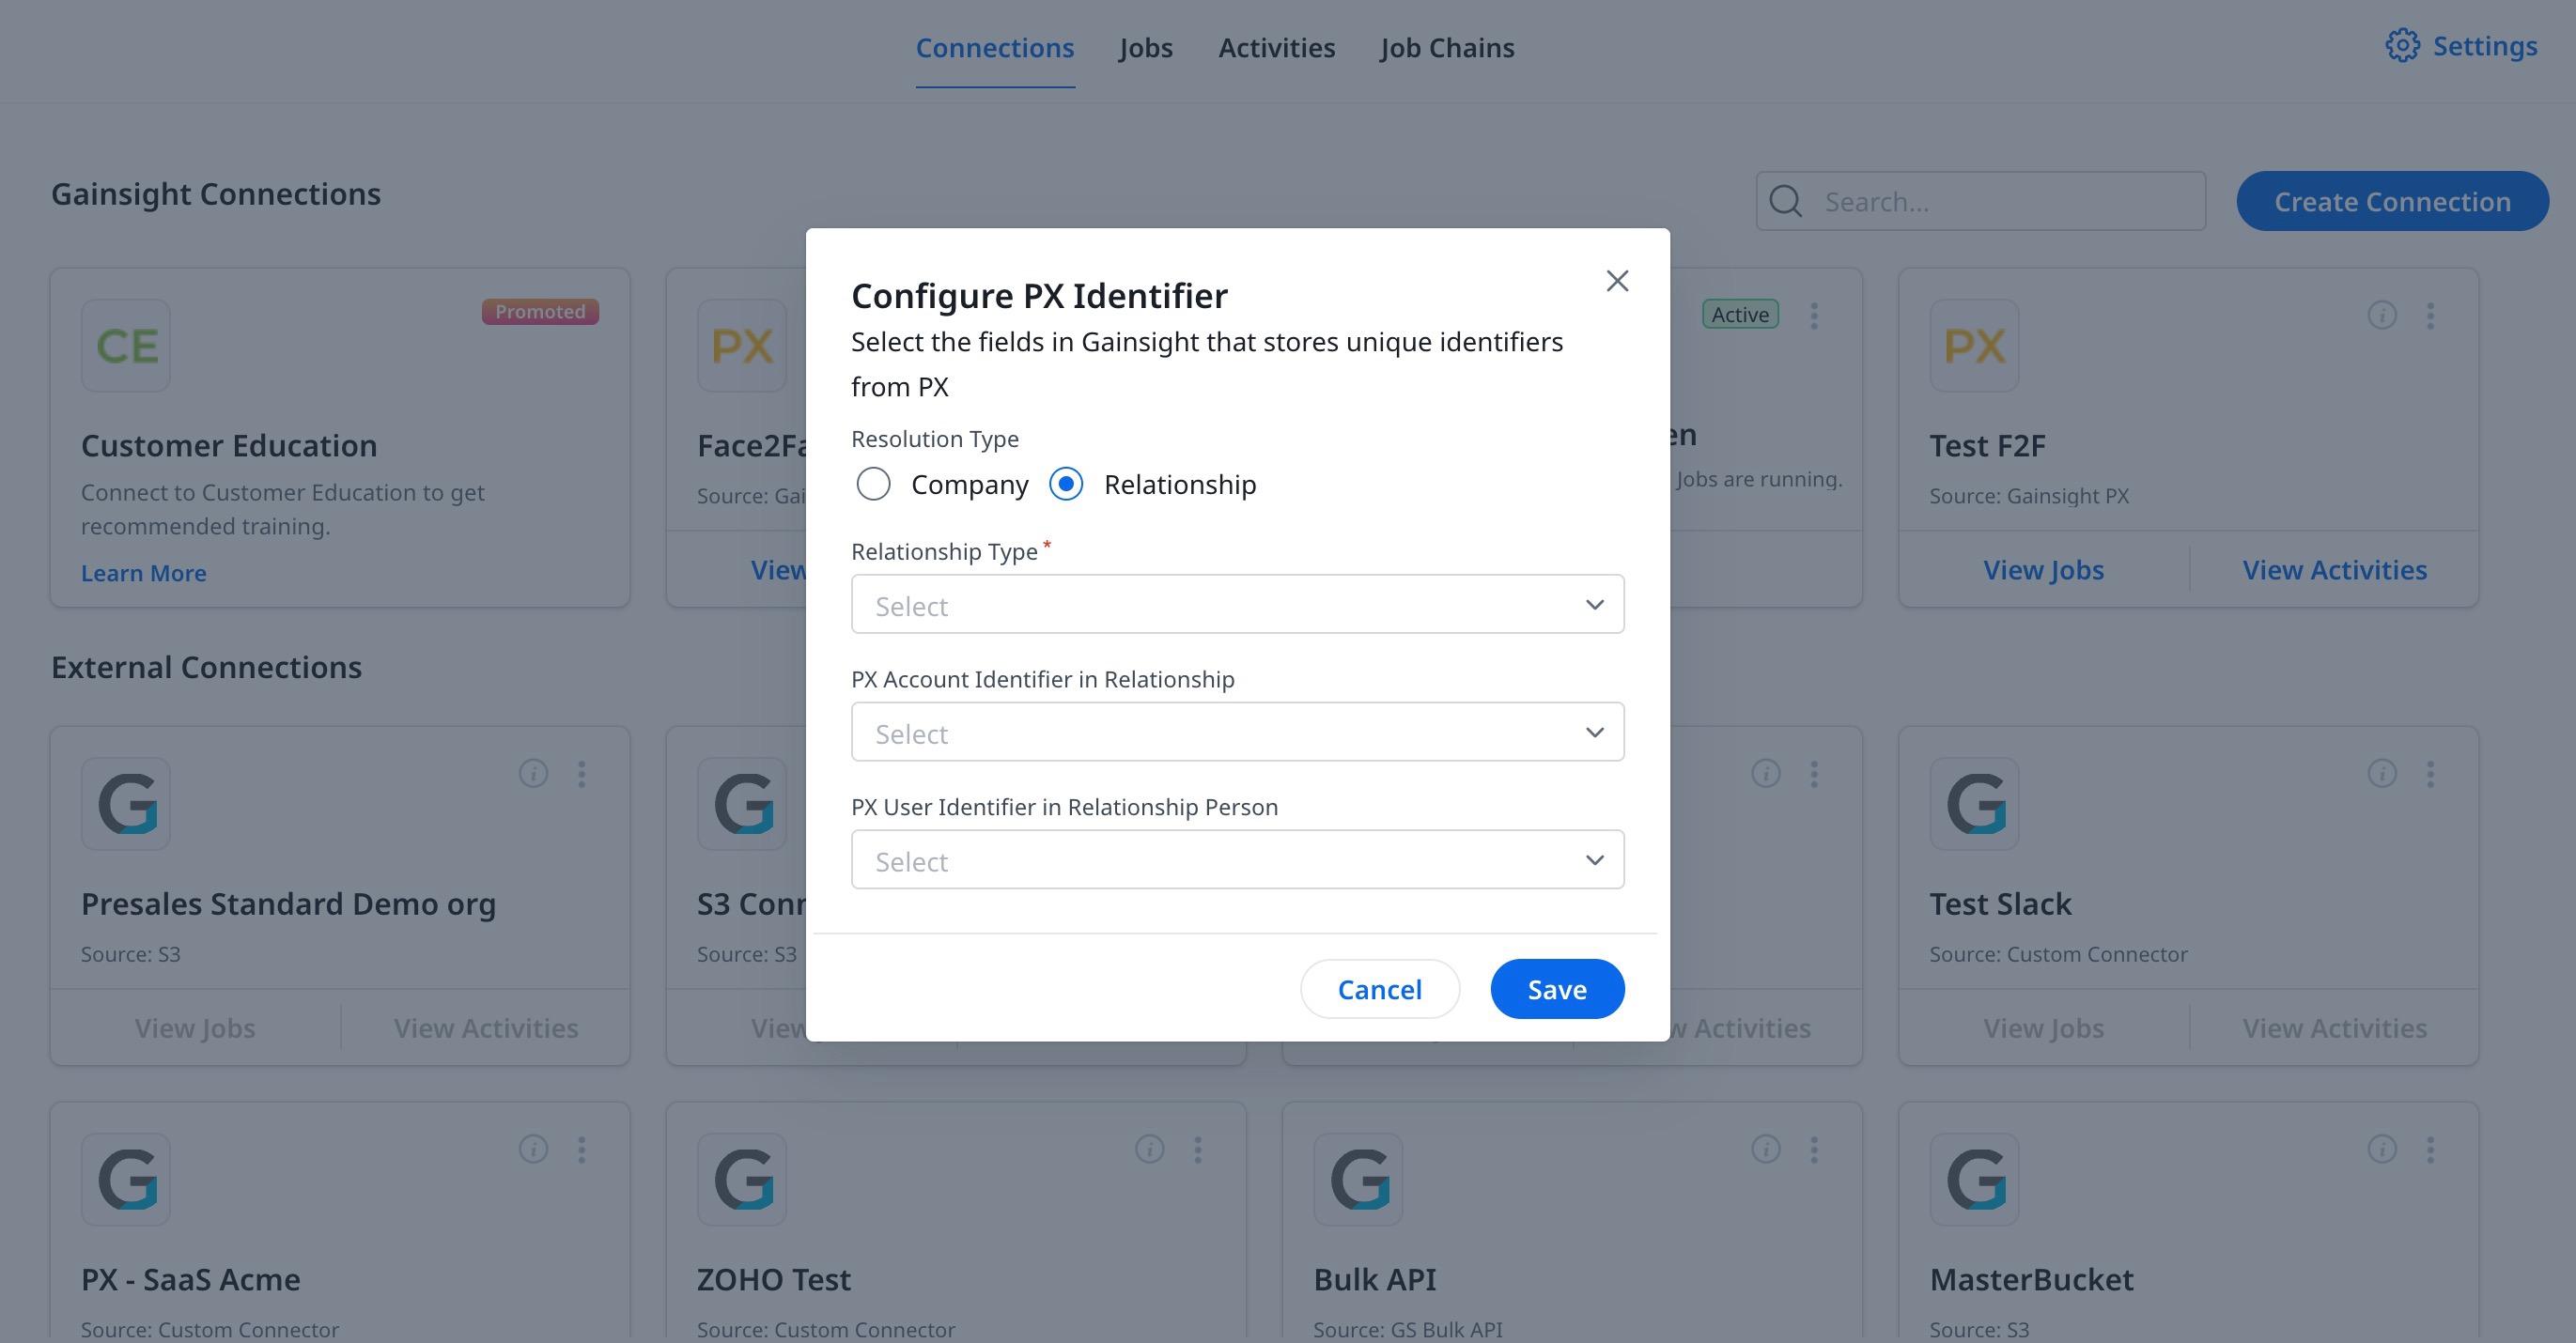
Configure PX Identifier
You can select the fields in Gainsight that store unique identifiers of records coming from PX. You can select identifiers based on Company or Relationship Model.
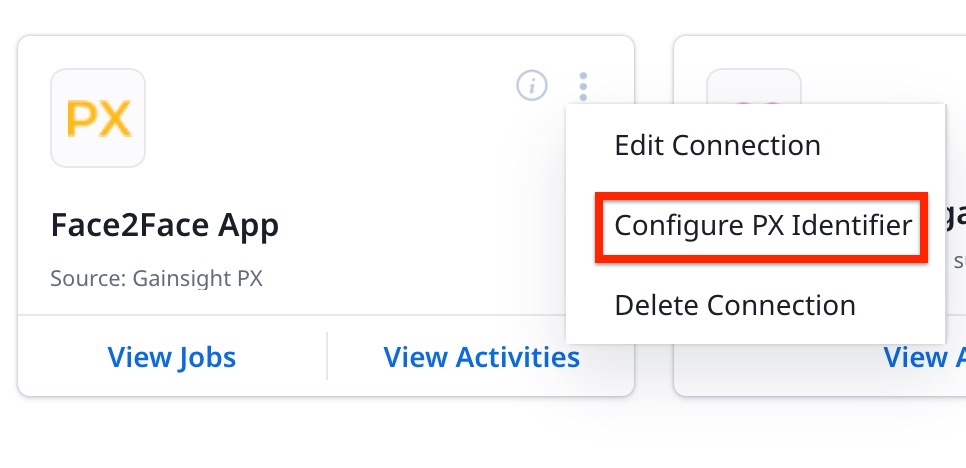
To configure the identifier:
- Click the three vertical dots menu.
- Select Configure PX Identifier. The Configure PX Identifier dialog appears.
- Select Resolution Type:
- Company: Select this option if your Gainsight CS model is based on Company.
- PX Account Identifier in Company: Select the field within the Company object in Gainsight CS that holds the PX account identifier.
- PX User Identifier in Company Person: Select the appropriate field from the Company Person object that contains the PX person identifier.
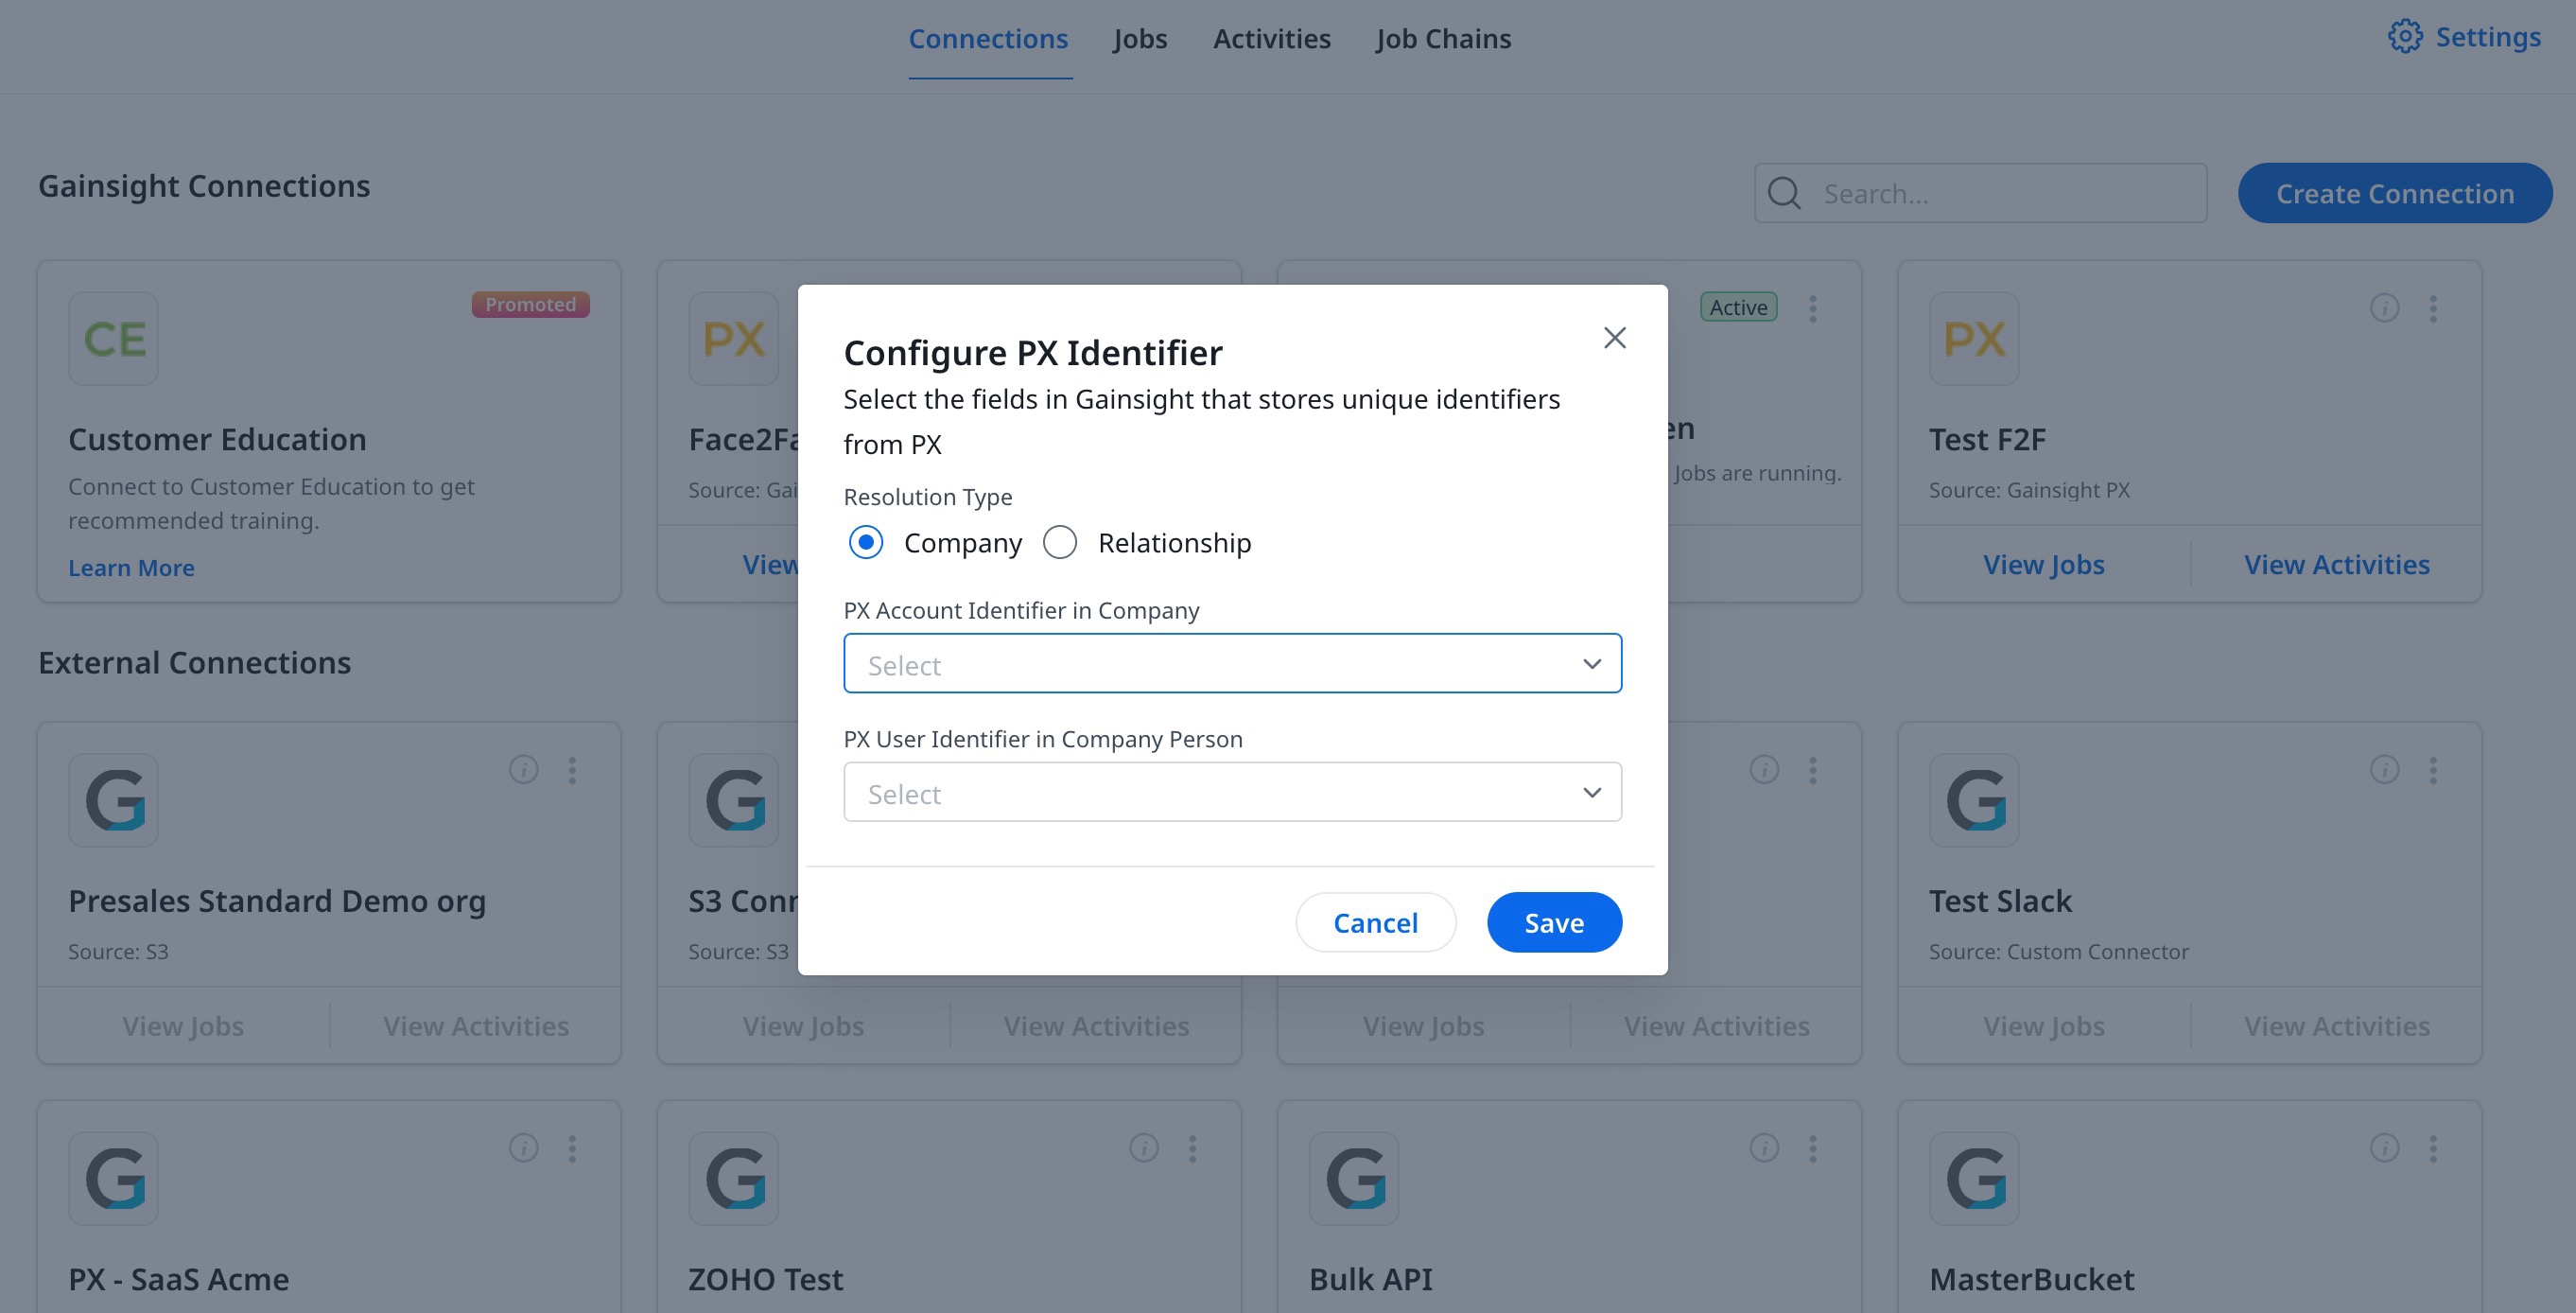
- Relationship: Select this option if your Gainsight CS model is based on Relationship:
- Relationship Type: Select the type of relationship.
- PX Account Identifier in Relationship: Select the field within the Relationship object that holds the PX account identifier.
- PX User Identifier in Relationship Person: Select the field from the Relationship Person object that stores the PX contact identifier.
- Company: Select this option if your Gainsight CS model is based on Company.
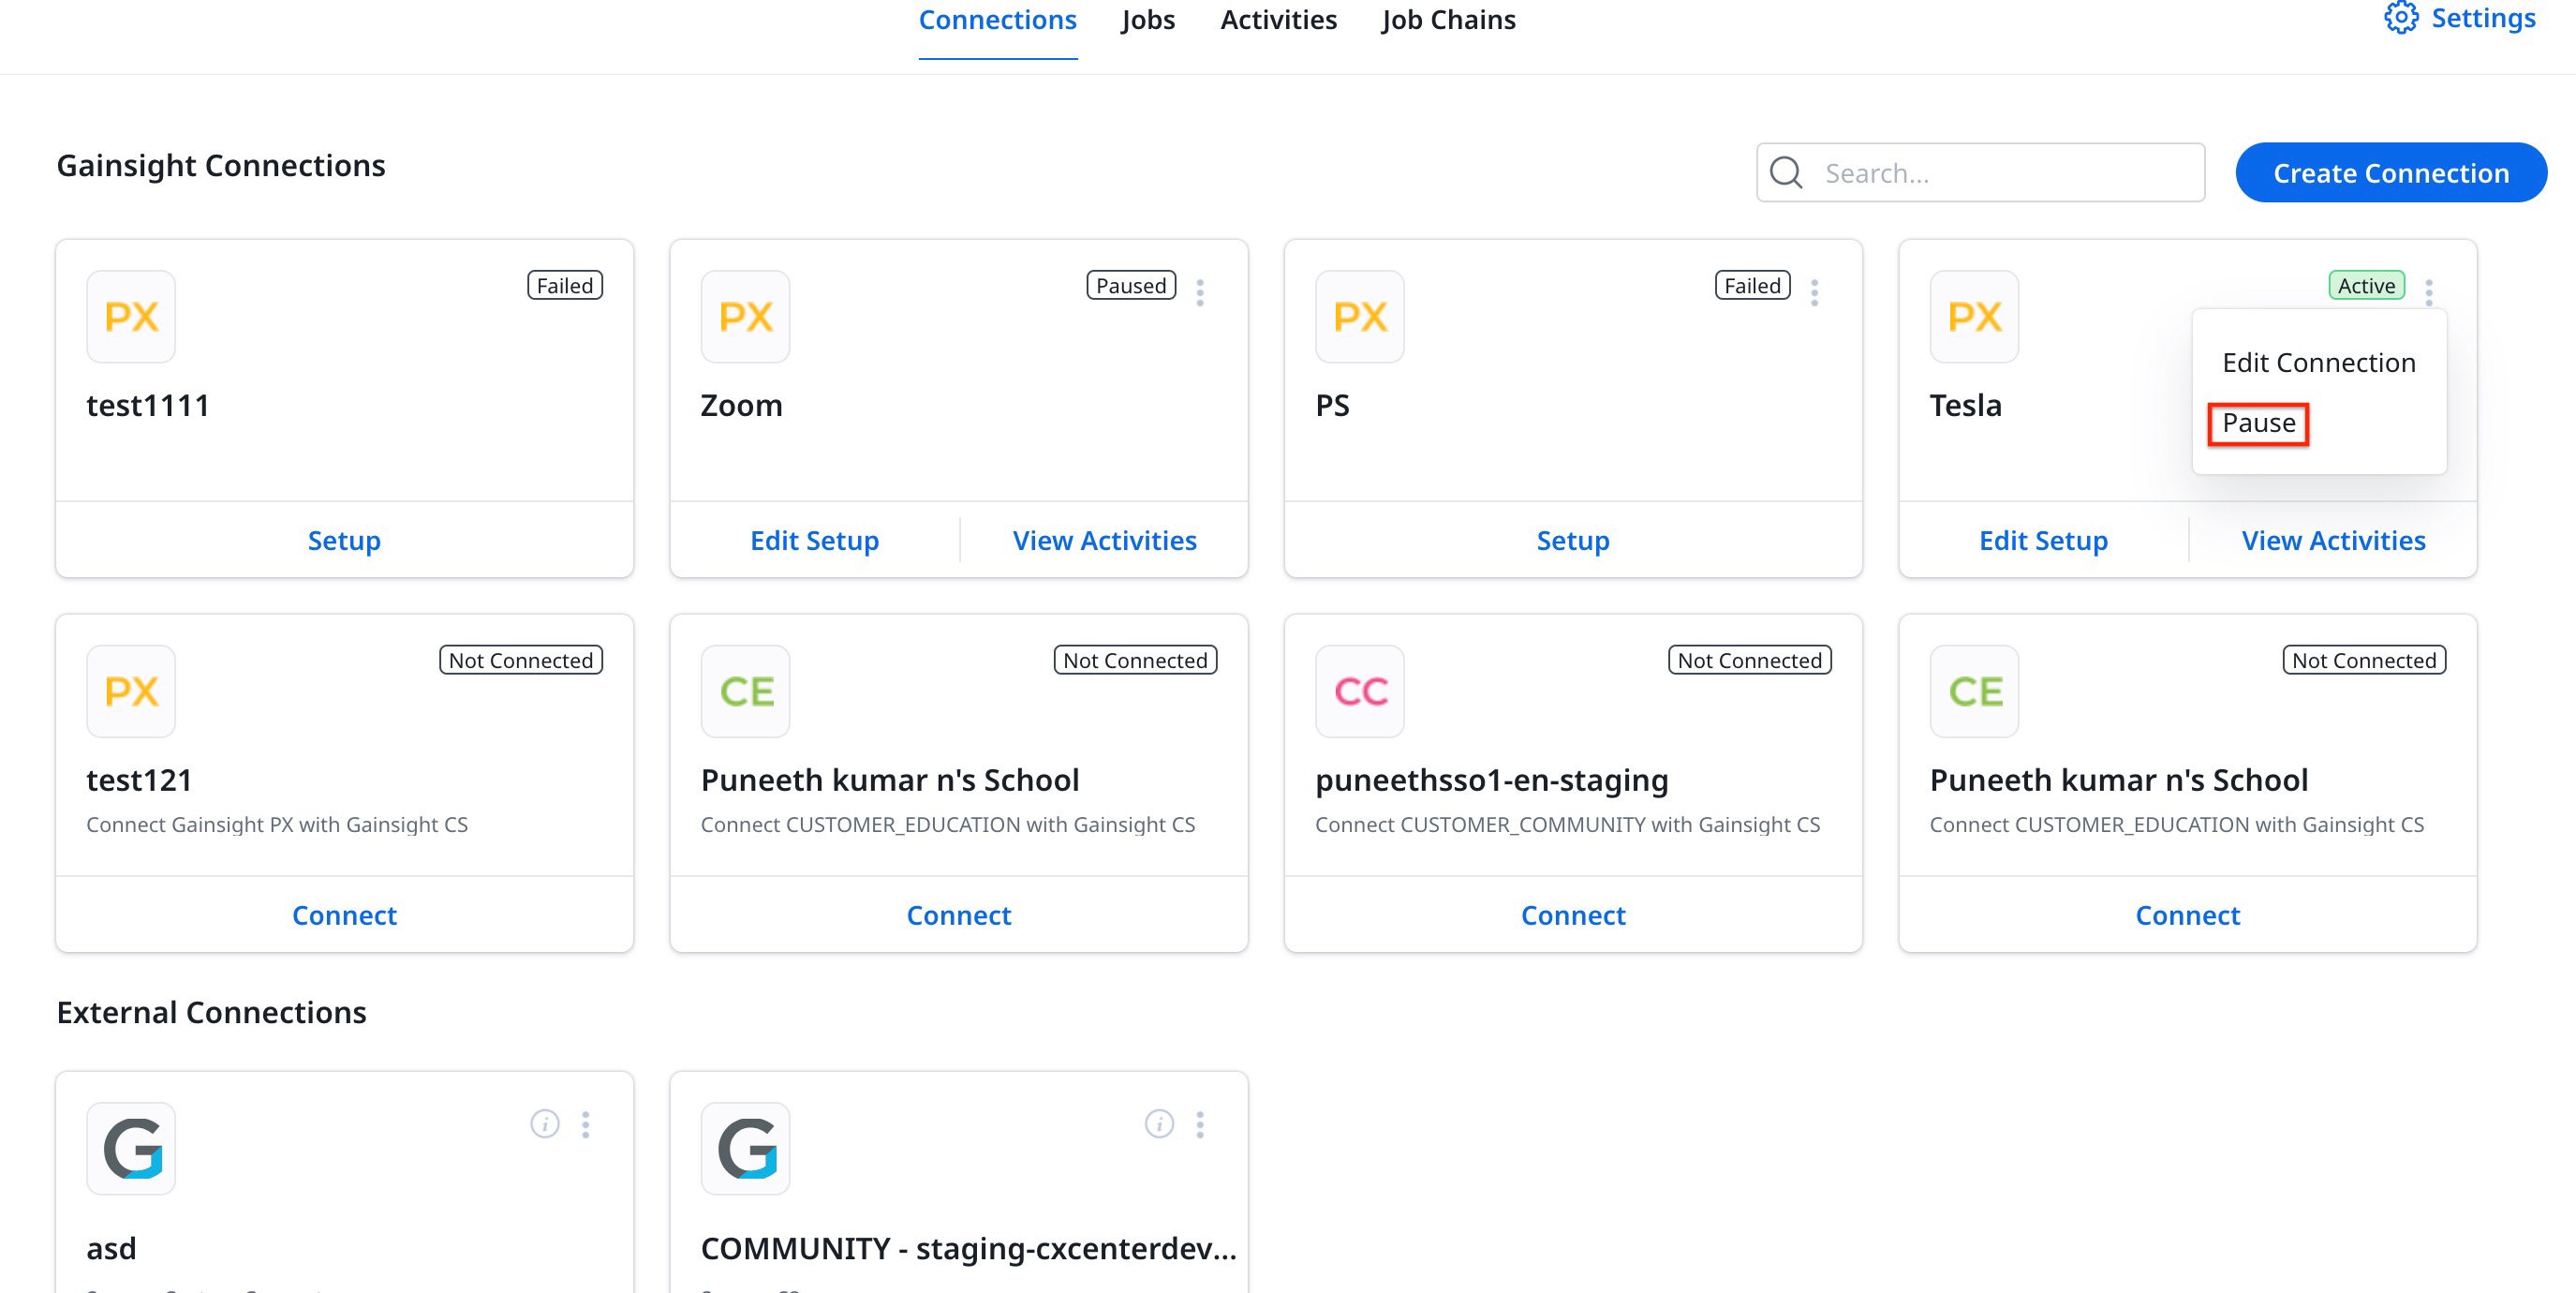
Pause, Resume, or Deactivate Connection
You can pause, resume, or deactivate a connection when required. To do this:
- Click the three vertical dots menu.
- Select either of the options available:
- Pause: To pause current running jobs and data flow.
- Resume: To resume the jobs and data flow of a paused connection.
- Deactivate: To deactivate the connection.
Note: In case of a manually created connection, deactivation will delete the connection from the Gainsight instance.