Create User Group
Gainsight NXT
This article explains how admins can create and edit User Groups in User Management.
Overview
The User Group feature in Gainsight enables admins to create new user groups and manage the existing ones. Admins can create a user group and add users using a filter criteria, or select each user manually.
Note: Admins can edit only those user groups that are created using the Static membership.
Example Business Use Case:
User Group helps admins to distribute the CTAs amongst the CSMs equally within a user group.
IMPORTANT: User Groups in User Management are only used for pooled work assignment.
Prerequisites
- Ensure that the users exist in Gainsight, to add users to a User Group.
Create User Group
To create a User Group:
-
Navigate to Administration > Users and Permissions > User Management
-
Click User Groups tab.
-
Click Create User Group.
-
In the Create User Group page, complete the following steps:
-
In the Basic Information tab, provide the following details:
- In the User Group Name field, enter the name of the group.
- (Optional) In the Description field, provide a brief description.
- Select the User Pool checkbox to make it a default user group when admin or CSM create a CTA.
-
IMPORTANT: This is a permanent action and cannot be undone.
- Click Next. The Select User Group Members page appears.

- In the Select User Group Members tab, add members to the user group using one of the following methods:
-
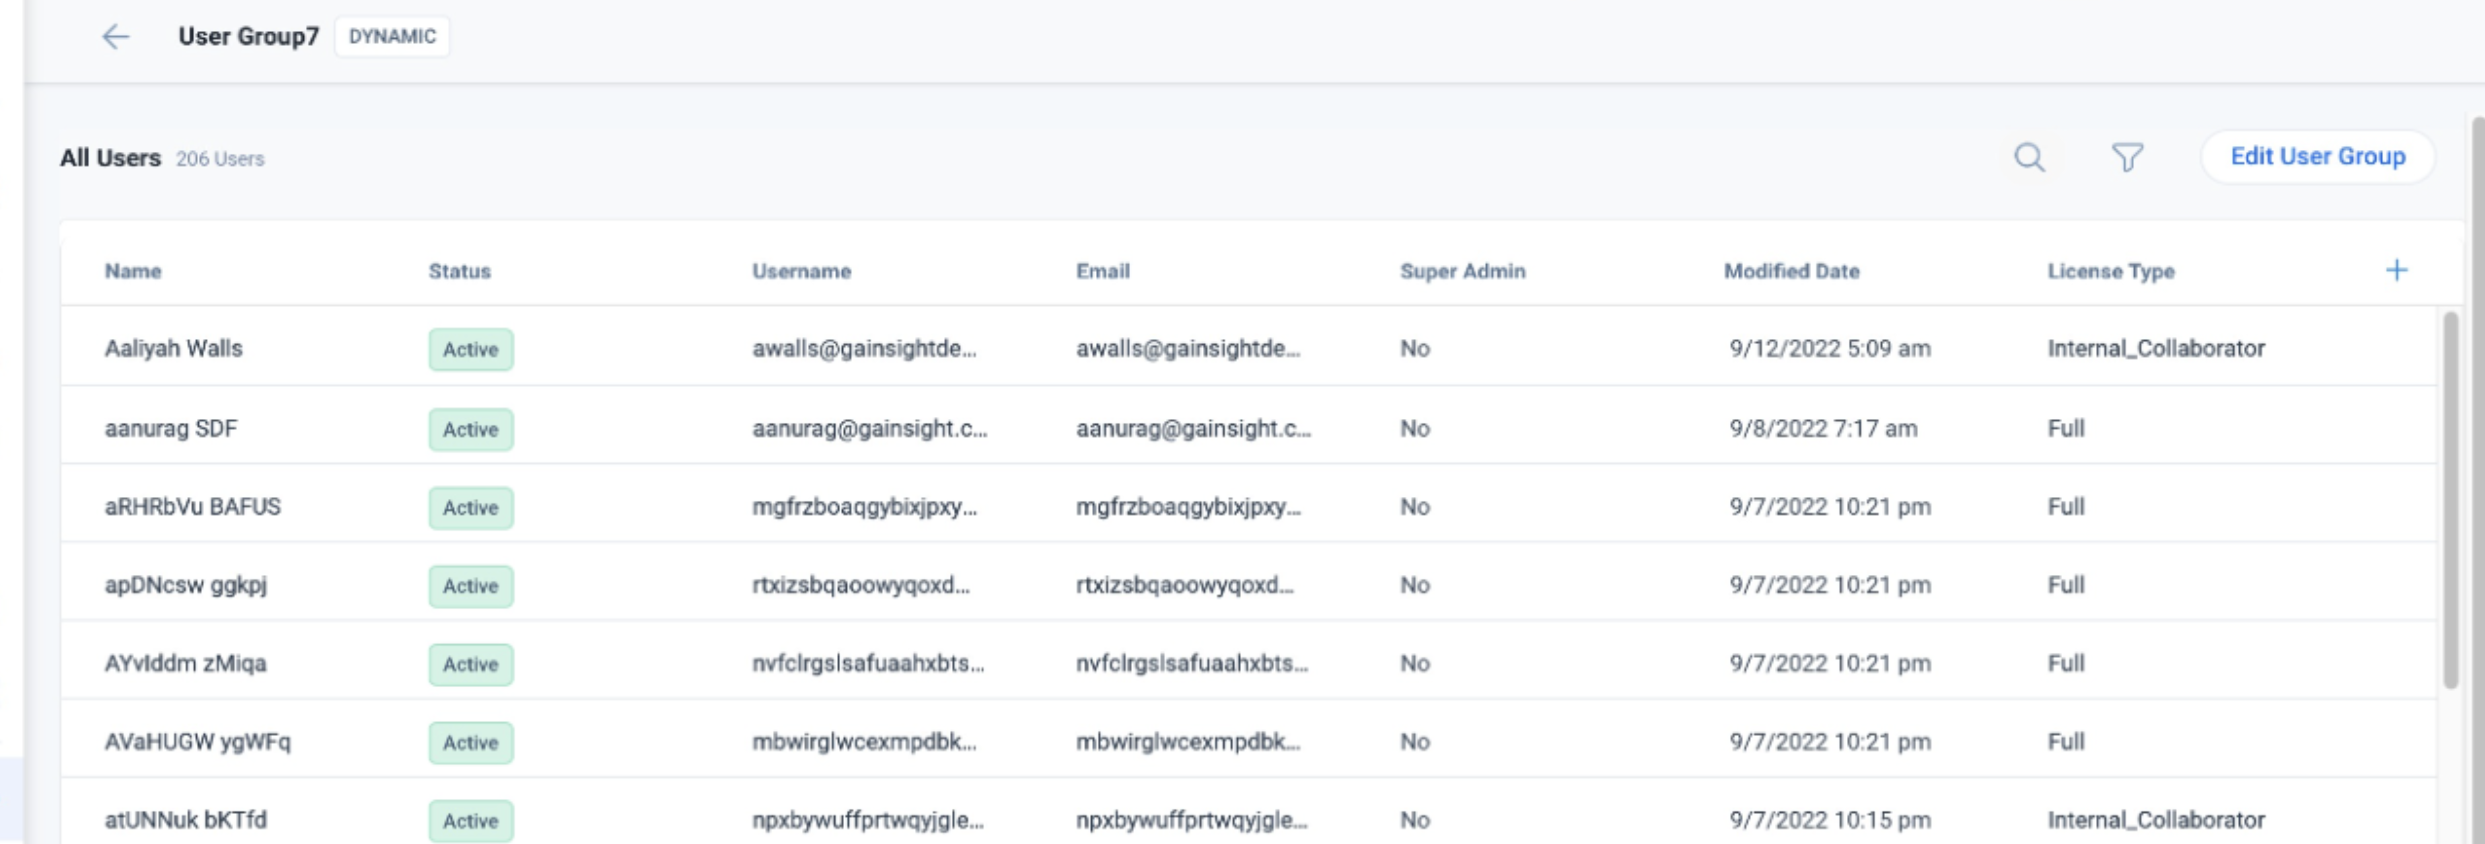
Dynamic: Admins can configure a Group Criteria to fetch a cohort of users.
- Select the Membership Type as Dynamic.
- In the Group Criteria section, click Add Filter.
- Configure the filter conditions.
- Click Fetch Members to view the list of users in the Preview Members section.
Note: The fetched cohort of the user list cannot be edited.
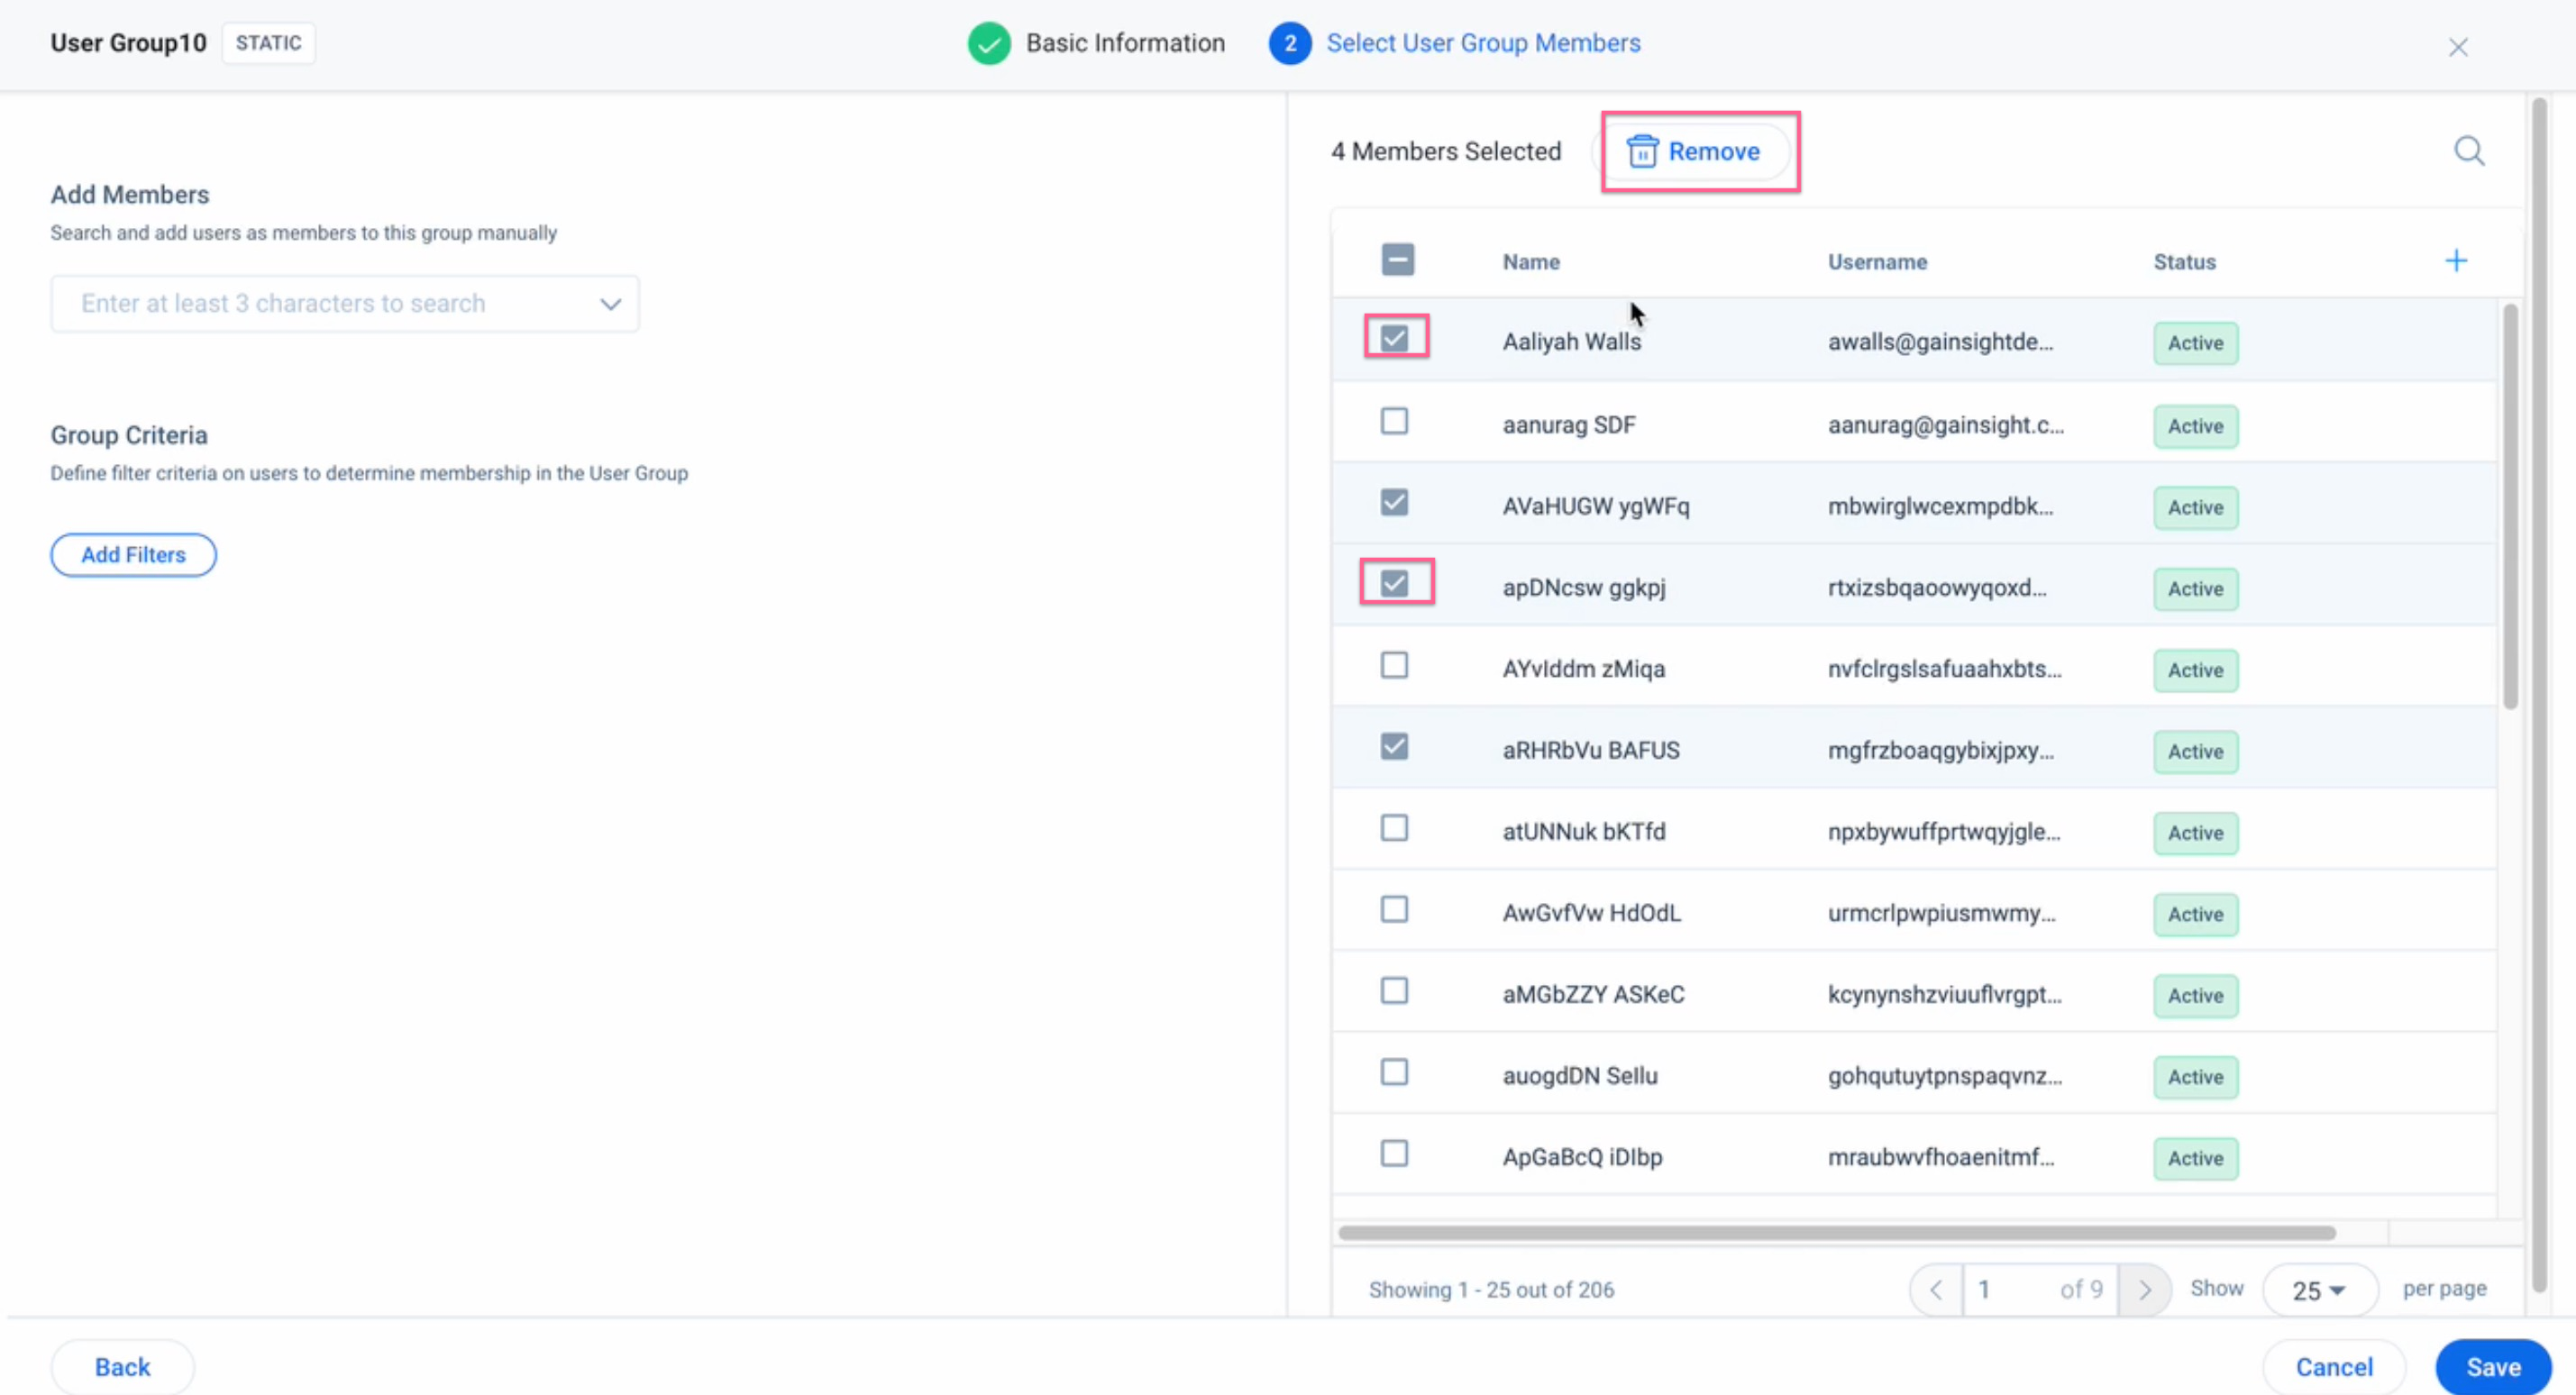
- Static: Admins can add users manually, or configure a Group Criteria to fetch a cohort of users.
- Select the Membership Type as Static.
- In the Add Members section, search for the users by typing in at-least three characters of the username.
- Select the required users from the suggestions. The user is added to the Preview Members section.
- (Optional) Add users in bulk using Group Criteria.
5. Click Create. The user group is created.
View User Group
To view user group:
- Navigate to Administration > Users and Permissions > User Management
- Click User Group tab.
- Click the three-vertical dots menu icon of the user group. The View Group and Edit Group options appear.
- Select View Group.
Note: Click Edit User Group to navigate to the user group edit page.
Edit User Group
You can edit the following details using the Edit User Group options:
-
Modify Basic Information: Modify basic information of a user group.
- Modify Group Criteria: Modify group criteria of a user group with Dynamic Membership Type.
-
Remove Members: Remove members from a user group with Static Membership Type.
For more information, refer to the Remove Users from a User Group section.
Remove Users from a User Group
Admins can remove users from a static user group.
To remove members from the user group:
- Navigate to Administration > Users and Permissions > User Management
- Click User Groups tab.
- Click the three vertical dots menu icon of a user group with Static Membership Type.
- Click Edit Group. The Basic Information page appears.
- Click Next. The Select User Group Members page appears.
- From the Preview Members section.
- Select the checkbox beside each user that is to be removed from the user group.
- Click Remove. The Remove Members confirmation dialog box appears.
- Click Confirm. The selected members are removed from the Preview Members list.
- Click Save. The selected members are removed from the user group.
Assign CTAs to User Groups
The CTAs can be assigned to User Groups using the Mass Edit feature. The CTAs are distributed equally among the CSMs that are part of the selected User Group.
To reassign ownership to User Groups:
- Navigate to Administration > Mass Edit.
- Select Call To Action from the source object dropdown list.
- Filter the CTAs to edit as follows:
- In the Show me section, click the plus icon to add appropriate show fields. For example, Call to Action Name and Assignee Name.
- In the By field section, click the plus icon to add appropriate by fields, if required.
- Click the Filter icon to add the appropriate filters. For example, select Assignee and assign it a value.
- Click RUN. The list of CTAs appears.
- Click +ACTION in the Apply Actions section.
- Select Reassign ownership.
- In the Reassign ownership to field, search for the User Pool and select from the list of suggestions.
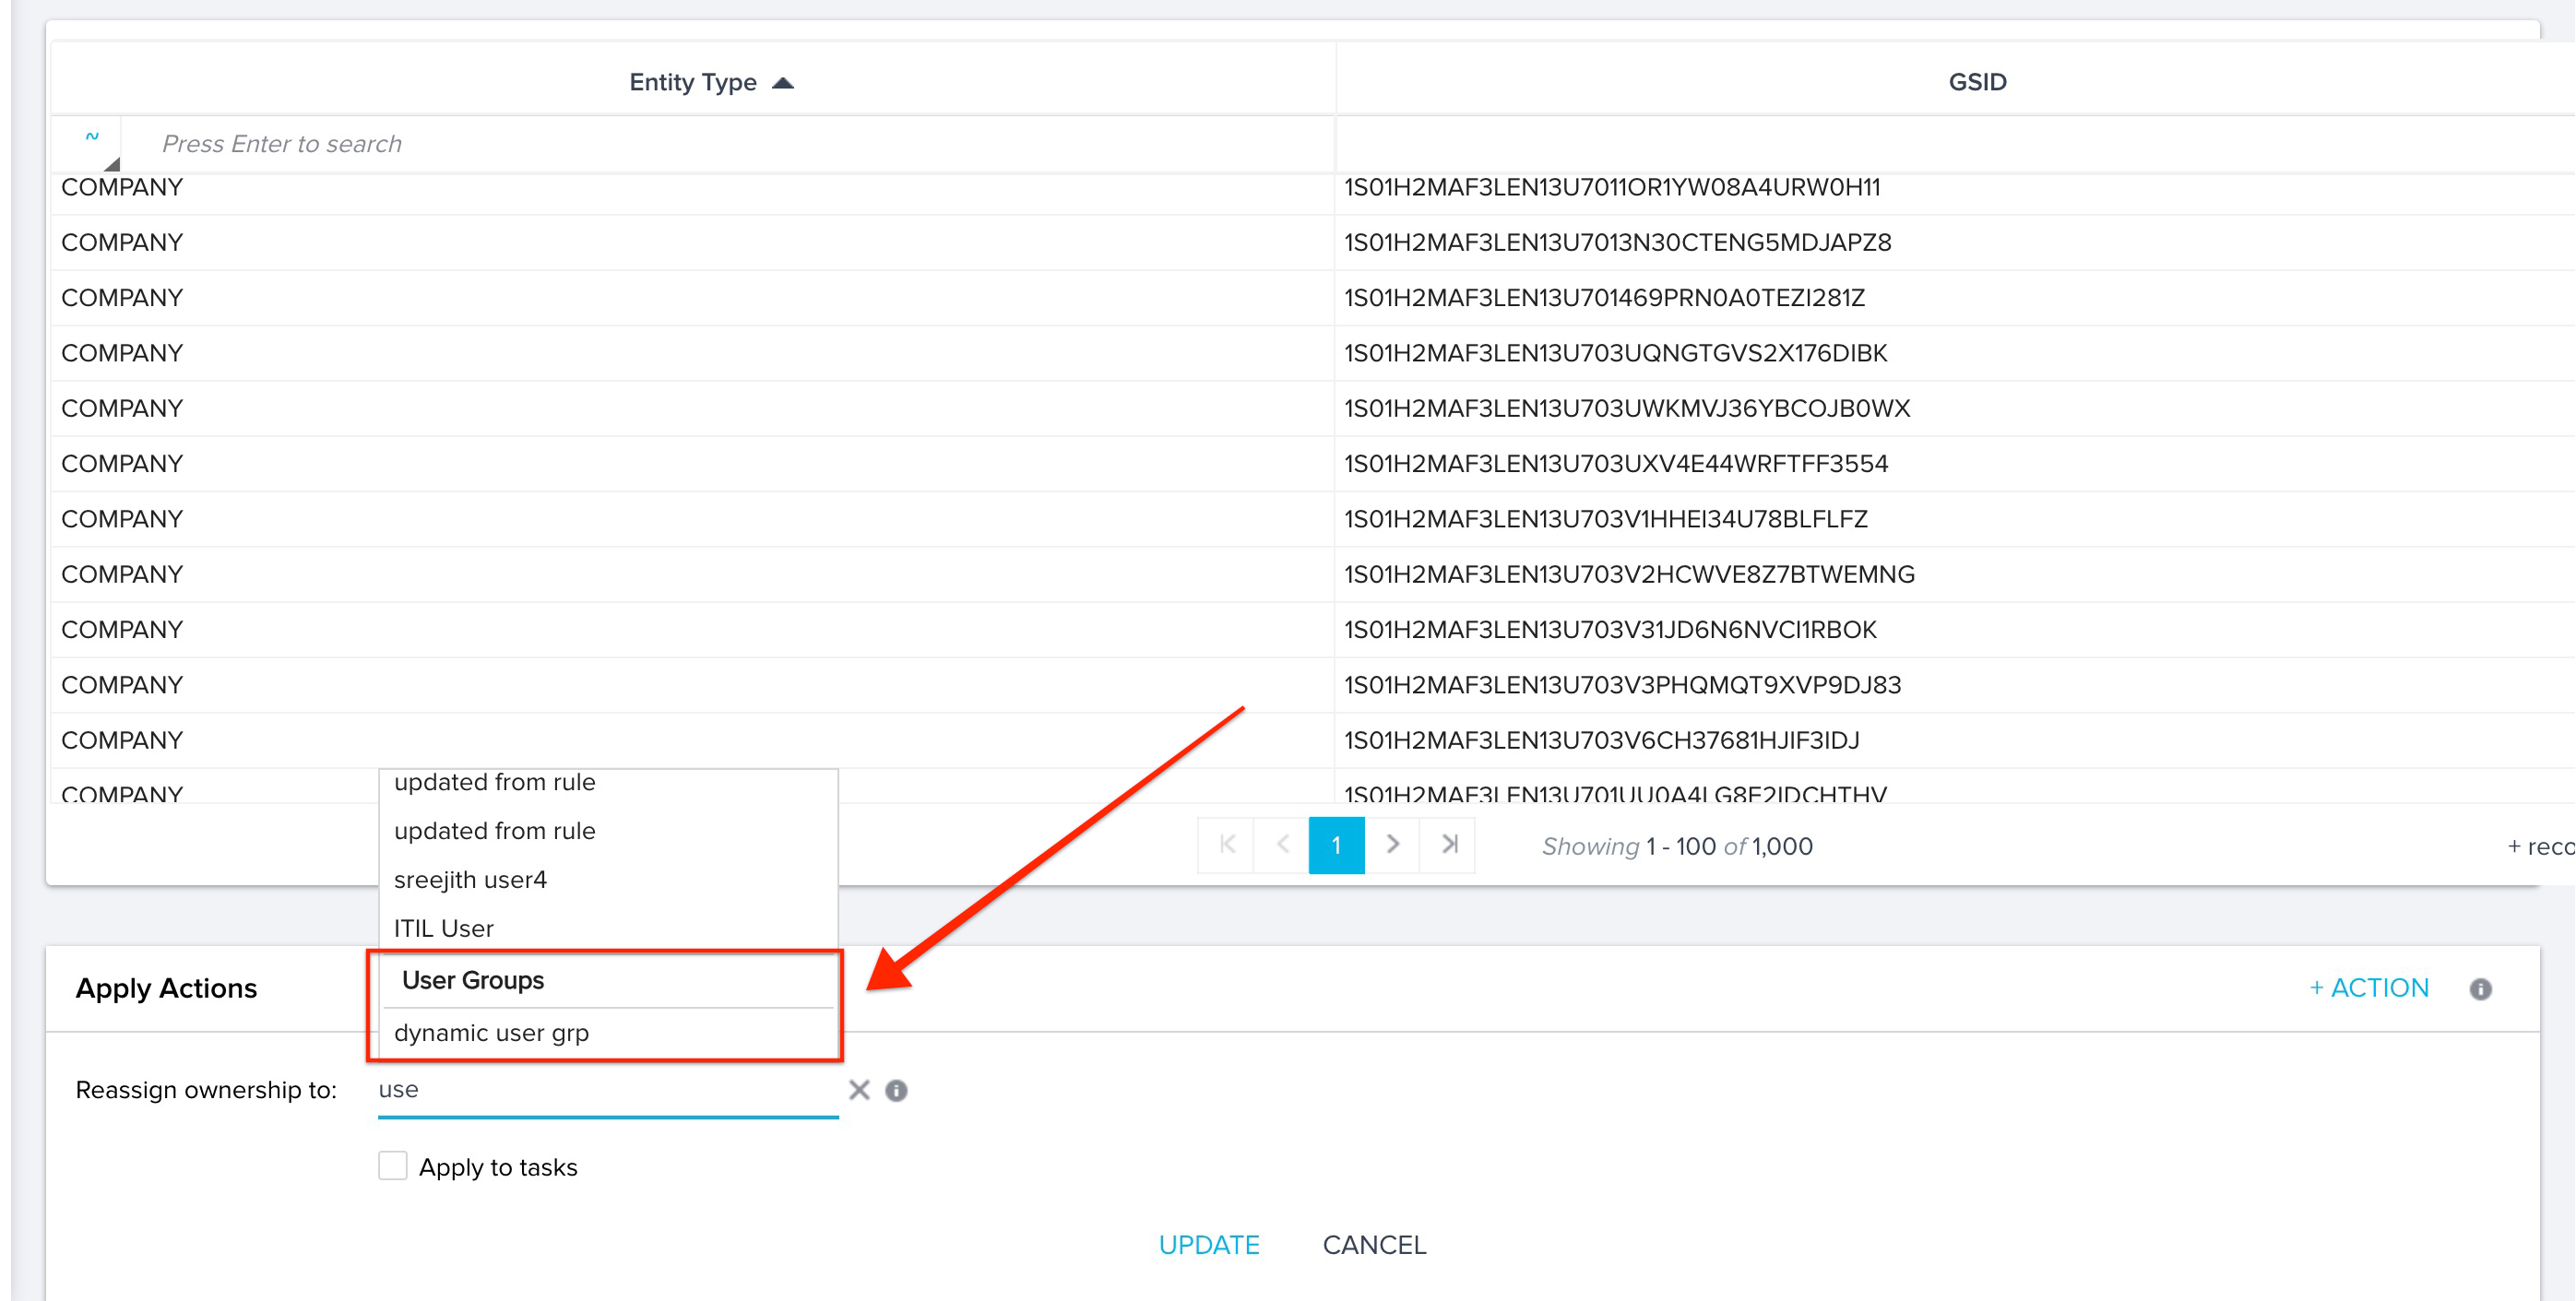
- (Optional) Select the Apply to tasks checkbox to change the ownership of all tasks under the CTA.
- Click UPDATE.
- Select YES in the confirmation box. The ownership is reassigned to the selected User Pool.
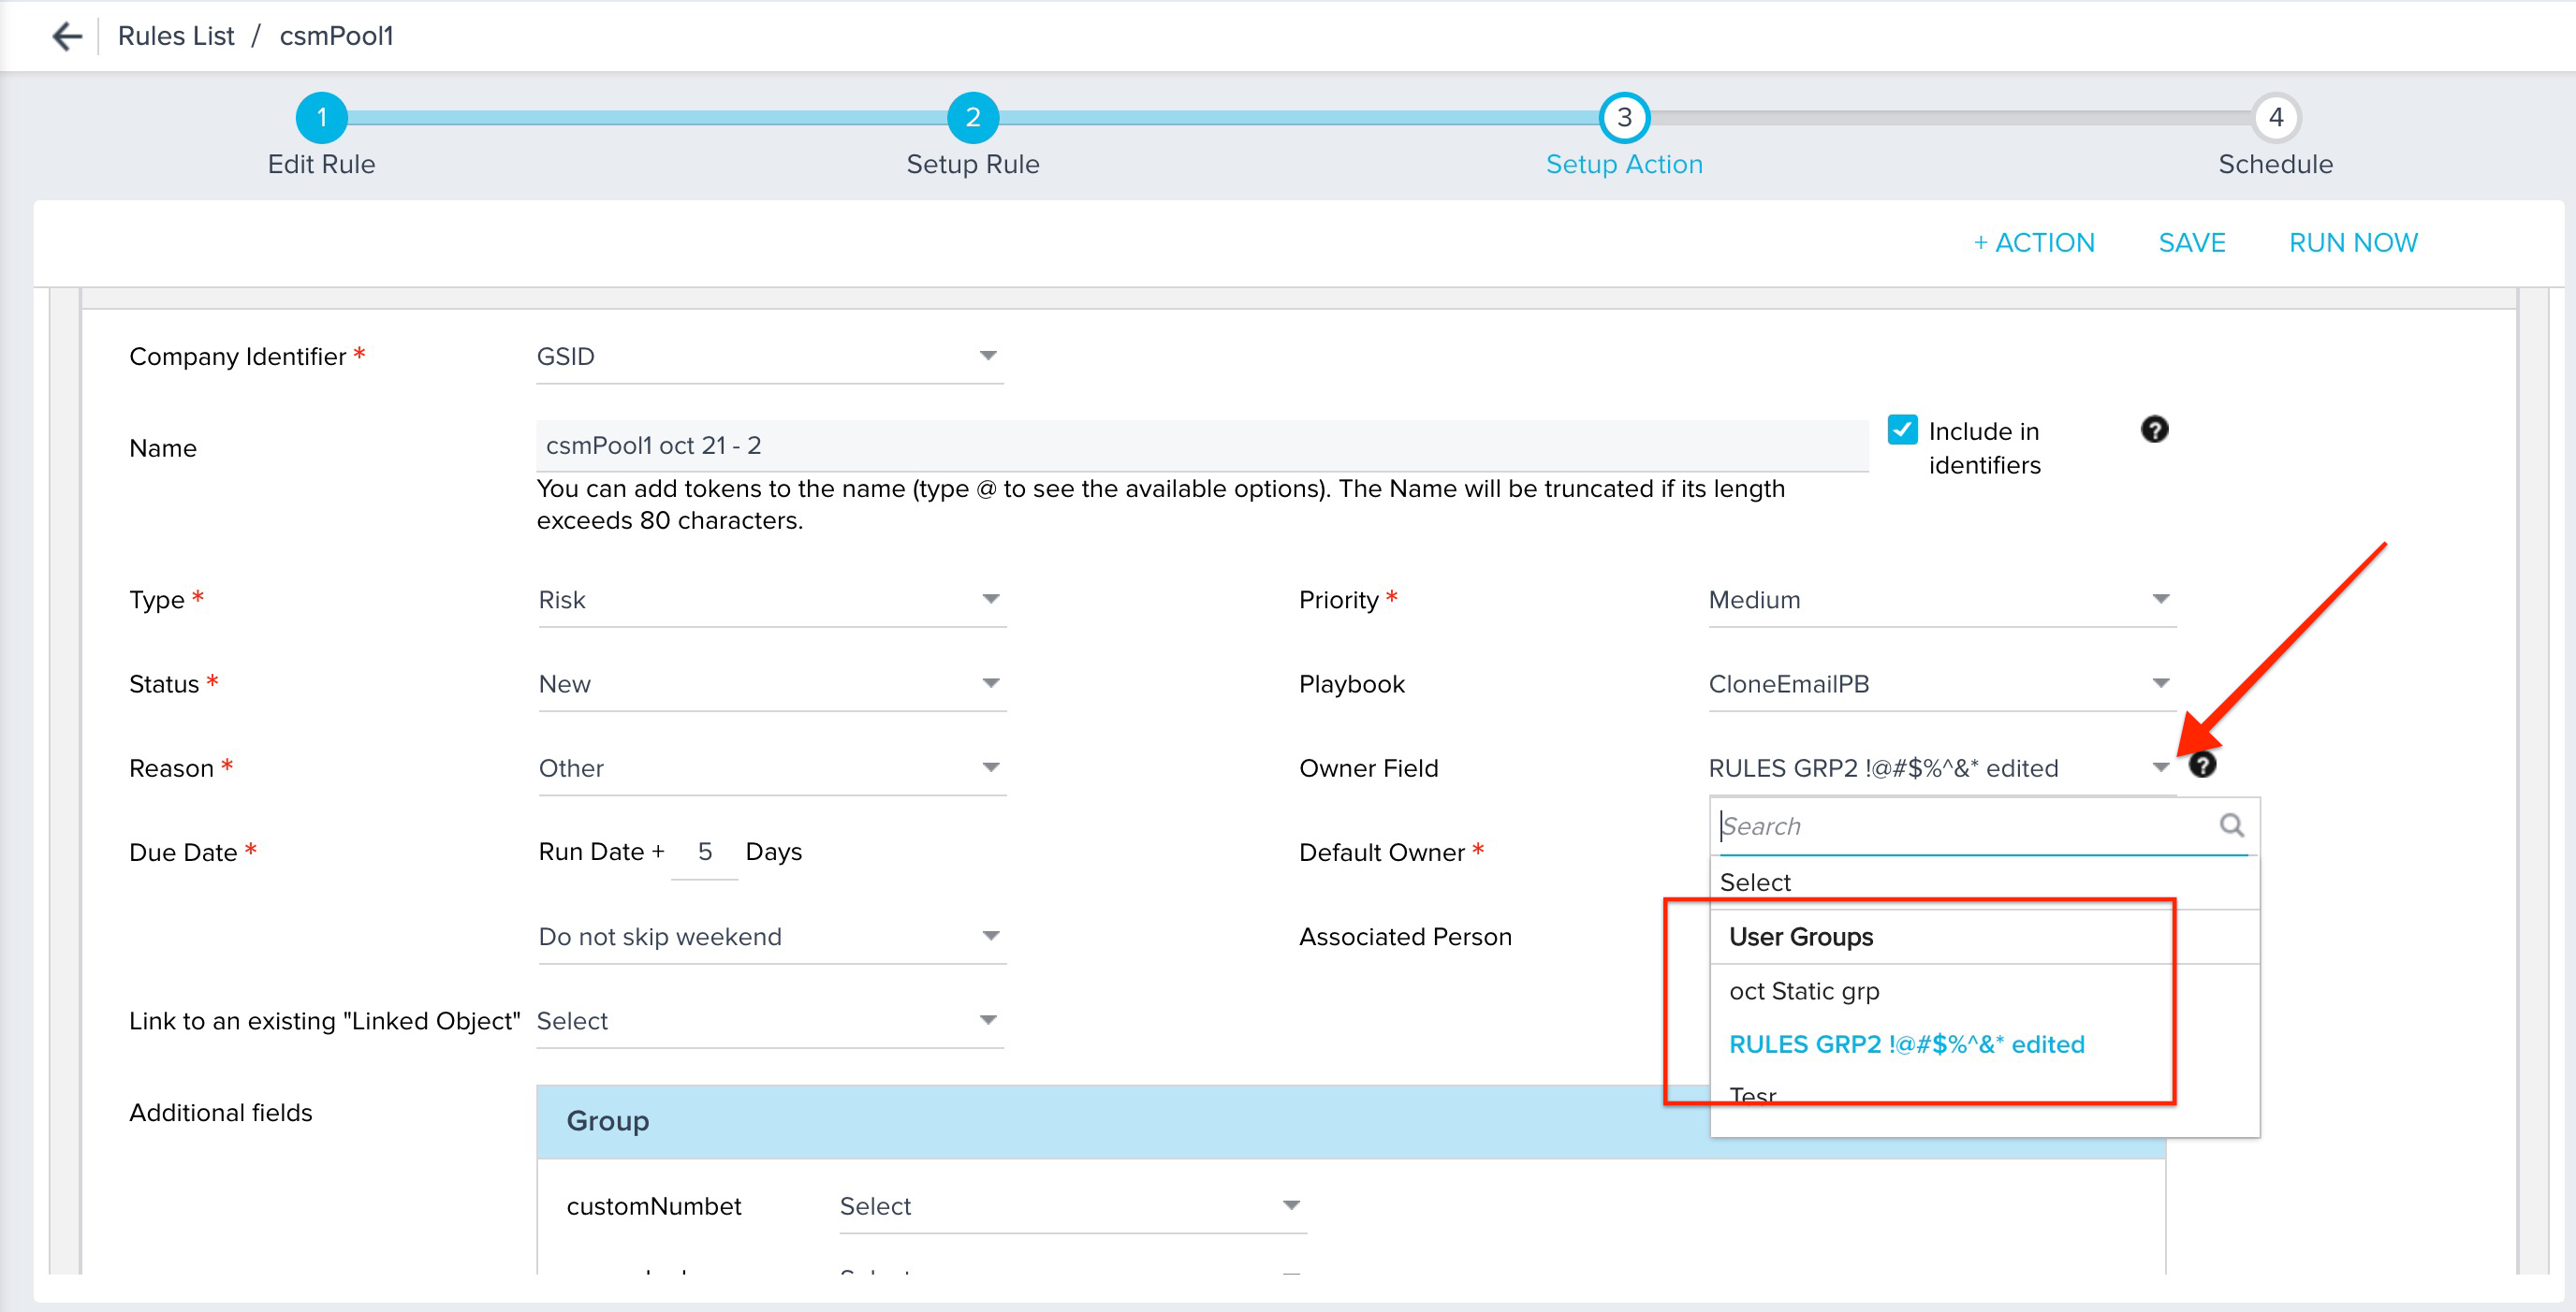
User Groups in Rules Engine
You can assign the ownership of CTA to User Groups while setting up a new rule or editing an existing Rule from Rules Engine.Once the rule is executed, the CTAs are distributed equally amongst the CSMs that are part of the selected User group.
IMPORTANT: Admins cannot assign Default Owners for CTAs whose ownership has been assigned to a User Group.